
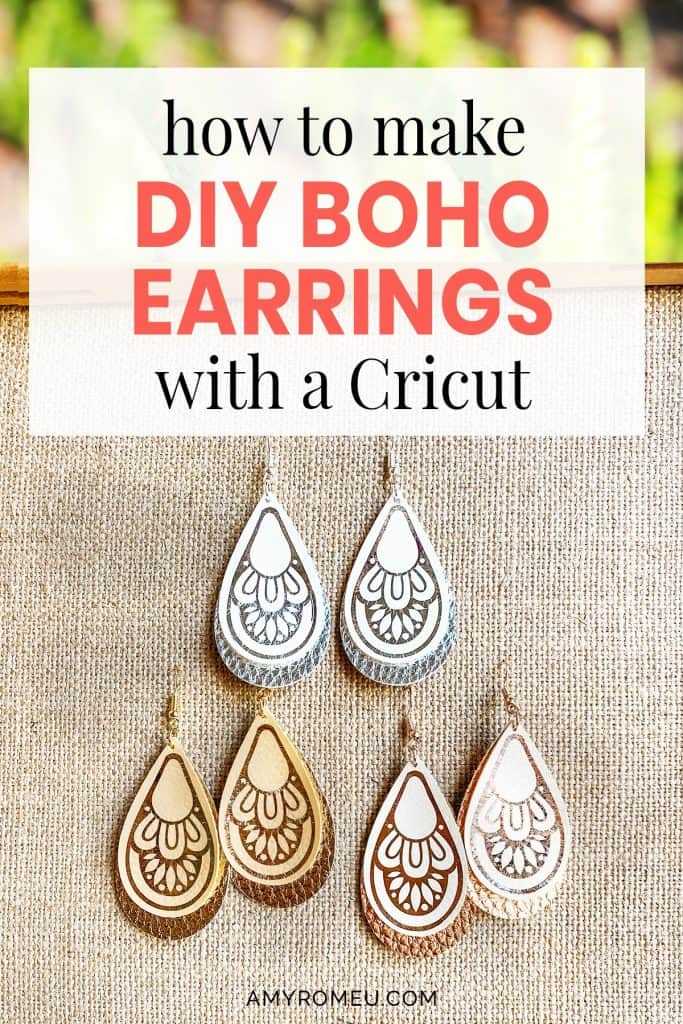
DIY Cricut Boho Faux Leather Teardrop Earrings
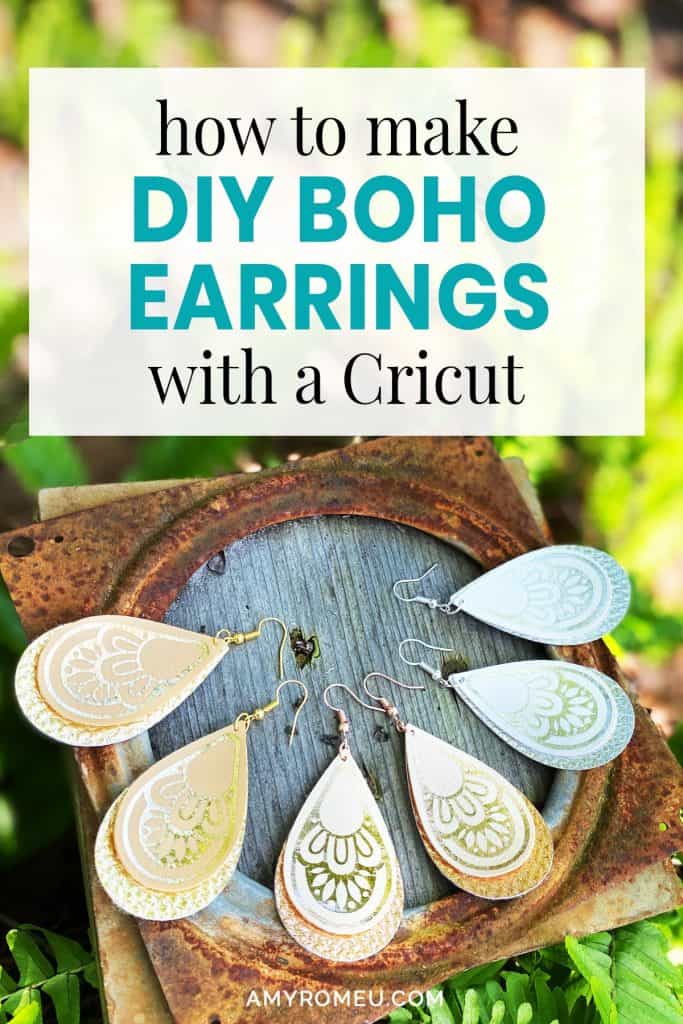
How to Make Boho Faux Leather Teardrop Earrings with a Cricut
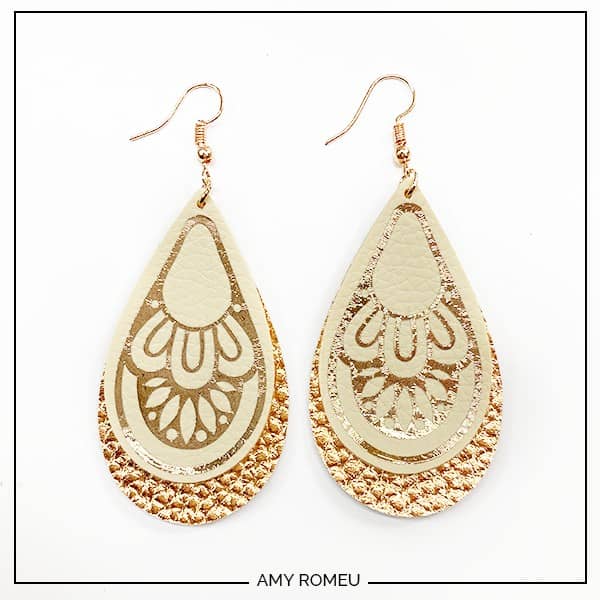
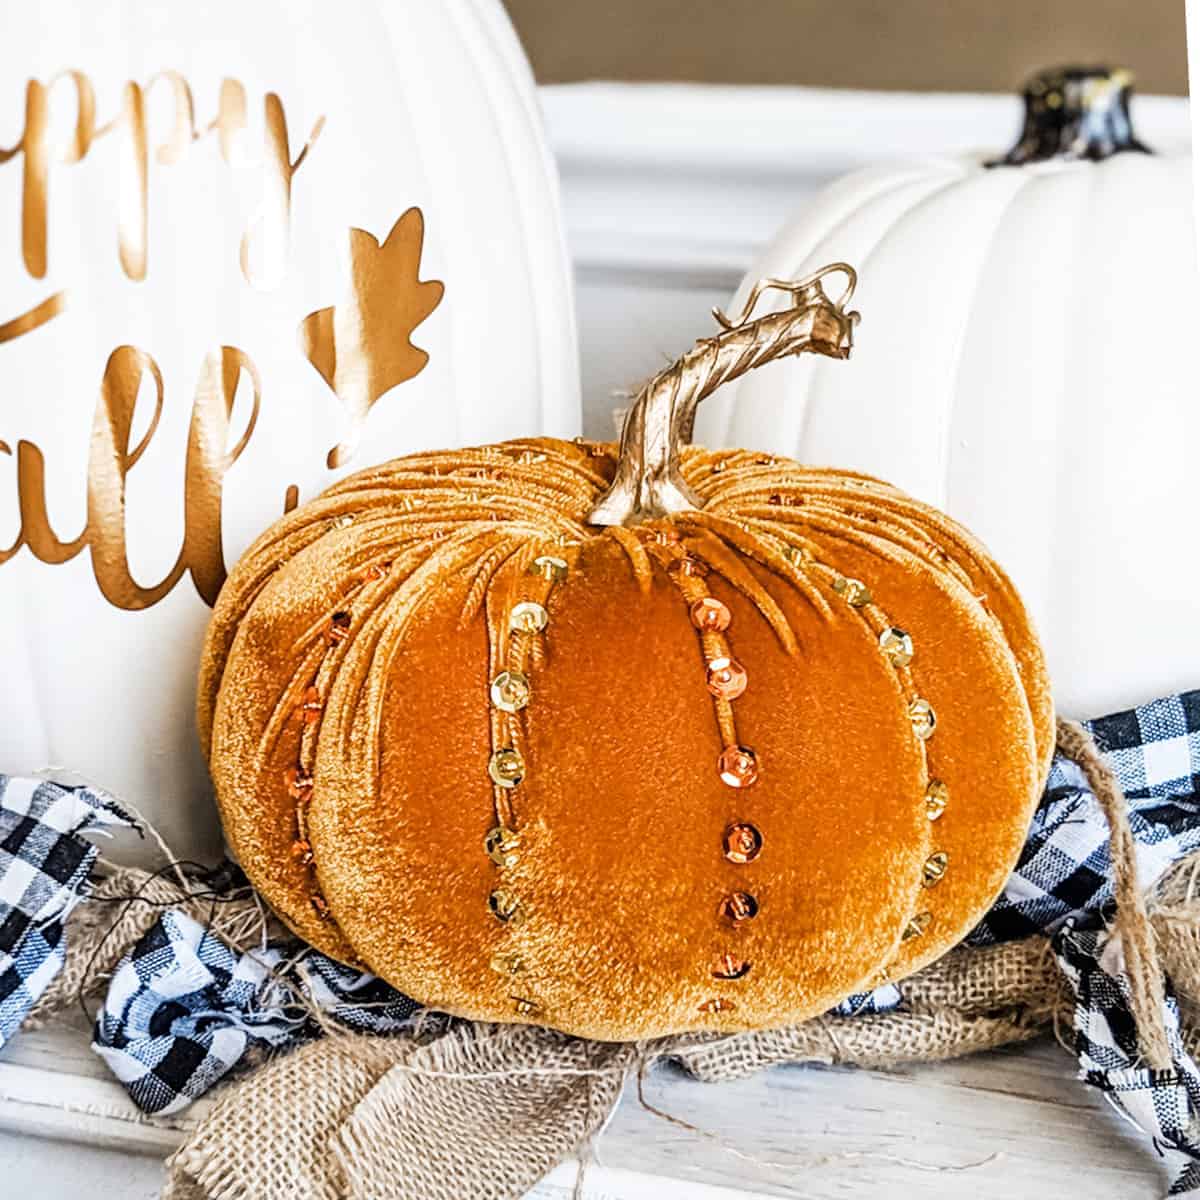
The weather is getting downright gorgeous here in Florida. If the weather isn’t looking almost summery where you are, I hope it will be soon! This weekend is Mother’s Day, and we are planning to spend the day in the pool and then have a family barbecue on the patio afterwards. I wanted to make some summery earrings with my Cricut for the occasion, so I designed these boho style faux leather and foil iron on teardrops earrings. I have to say, I love the pattern, and how it pops off the neutral faux leather! If you want to learn how to make these Boho Faux Leather Teardrop Earrings with a Cricut, I’m going to show you how in this post!
If you haven’t made faux leather earrings with your Cricut yet, this tutorial is a great beginner project. You can make these boho teardrop faux leather earrings with the Cricut Maker, an Explore Air 2 or even the new Cricut Joy! (See my post below about a few small modifications to make when making faux leather earrings with a Cricut Joy.)
To see my post about how to make faux leather earrings with the Cricut Joy, click here!
In this tutorial, I’ll give you my step by step instructions and tell you exactly what materials I used to make this project.
Also, I love to share my designs, so I’ll give you my SVG cut file for these boho teardrop earrings FREE so you can get started making your own boho faux leather teardrop earrings right away!
You can download my SVG file for this project at the bottom of this post.
Ready? Let’s get started!
Want to see all of my Cricut earring & jewelry tutorials? CLICK HERE
This page contains some affiliate links (which means if you make a purchase after clicking a link, I will earn a small commission at no additional cost to you). Read my full disclosure policy here.
DIY Cricut Boho Faux Leather Teardrop Earrings – Materials List
- A vinyl cutting machine. I have the Cricut Maker, which you can get at Amazon here or at Cricut.com. You can also use the Cricut Explore Air 2 or even the new Cricut Joy!
- Solid faux leather in the colors of your choice. I used the neutral colors from this assortment package from Amazon here.
- Metallic faux leather (optional). I used some to add some sparkle to other earrings we made from this pattern. The package I bought from Amazon has an assortment of pebbled metallic colors and can be seen here. I was surprised at how well this faux leather cuts, so I wanted another project to use it in! Don’t worry, if this isn’t your thing, you can use any faux leather you want. You can also cut both layers in this earring from the solid faux leather.
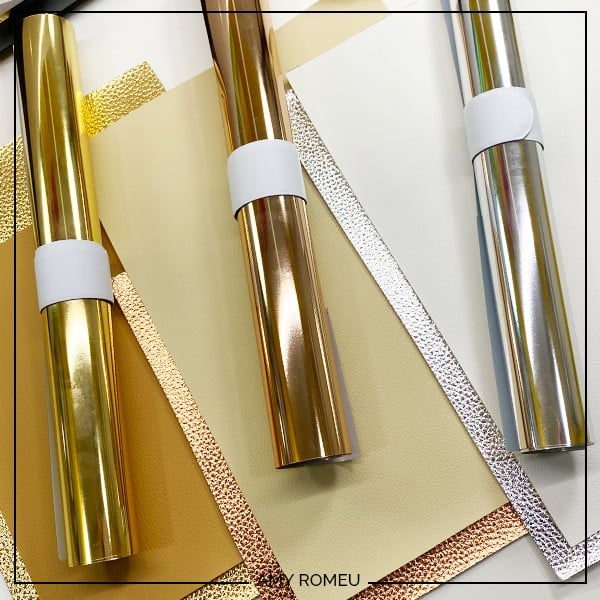
- Cricut Foil Iron-On in your choice of colors. I used Cricut Foil Iron-On from the Cricut website here. You can also get Cricut Foil-Iron On on Amazon. Rose Gold, Light Gold, and Chrome are the colors I used for these earrings.
- Cricut Strong Grip (Purple) Cutting Mat. You can buy these on Amazon here, or at Michael’s here. They are also available at Hobby Lobby, Joann’s, and Walmart.
- Cricut Standard Grip (Green) Cutting Mat. You’ll use the green mat for cutting the foil iron on. You probably already have one from when you bought your Cricut machine, but if you need a new one, they are available on Amazon here or at any craft store.
- Blue painters tape. This will help keep your faux leather and glitter sheets in place on your mat. You can get it at any hardware store and most big box or grocery stores. Amazon also has it here.
- A weeding tool. I use the weeding tool that came with my Cricut tool set from Amazon here.
- A Cricut Easy Press or a Cricut Easy Press Mini (what I use). I bought my Easy Press Mini from Amazon here. (For this project, I don’t recommend using a traditional heat press unless you are very experienced at controlling the pressure. Too much pressure on these keychains can damage the faux leather pebbled texture. Instead of a traditional heat press, I’d suggest using a home iron as an alternative.)
- If you will be using the Easy Press Mini like I do, you’ll need an EasyPress Mat to safely press your items on. I use the 8×10 size, which you can see on Amazon here.
- A small hole punch (if you plan to punch holes in your earrings after you cut the shapes instead of having the Cricut cut them). This is my go-to hole punch for making Cricut earrings from Amazon here. It’s called a “paper punch,” but I use it to punch earring holes in all kinds of faux leather with ease.
- Earring hooks – I used earring hooks from this assortment of earring hooks in different finishes these from Amazon here. Hobby Lobby, Michael’s, and other craft stores, as well as your local bead store, will have lots of earring hooks as well.
- Small jump rings – I used this assortment of 6mm size jump rings in different metal finishes from Amazon here. Again, your local craft store or bead store will have plenty of jump rings to choose from if you want to pick some up in person. I recommend using 6mm or 5mm jump rings for these earrings.
- Two pairs of flat nose pliers – My favorites are Wubbers brand in the “Baby” size. You can see the Baby Wubbers Chain Nose Piers on the left on Amazon here, and the Baby Wubbers Flat Nose Pliers on the right on Amazon here.
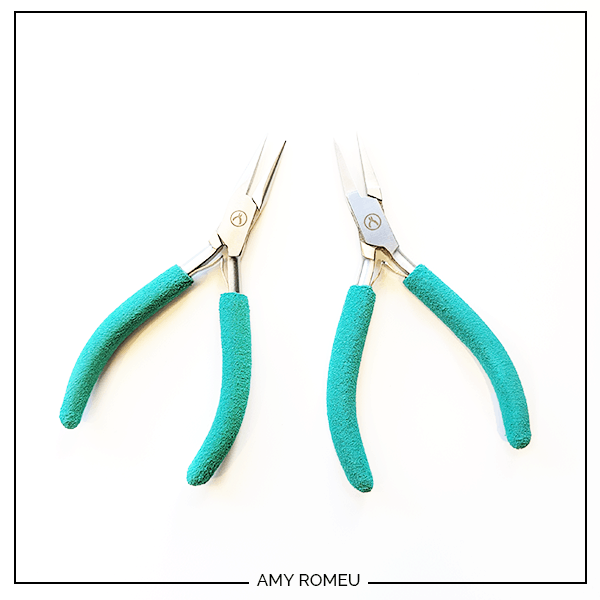
Note: Be sure to check out my post Beginner’s Guide To Jewelry Making Tools for all the information you need to know about buying and using jewelry making tools.
PROJECT INSTRUCTIONS
STEP 1 – DOWNLOAD THE SVG CUT FILE
Download the SVG cut file for these boho teardrop earrings from my Resource Library. It’s Design #130. You can get the password to my library via a link at the bottom of this post.
Save the zipped folder that downloads to your computer. Then unzip the folder to access the folder’s contents. You’ll need to unzip or extract the files FIRST so you can upload the cutting file to Cricut Design Space.
STEP 2 – UPLOAD THE SVG FILE TO CRICUT DESIGN SPACE
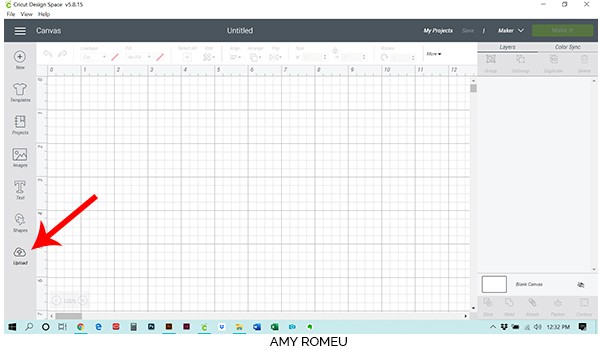
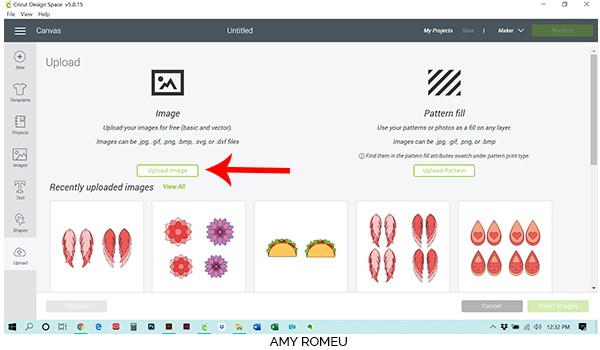
When you open Cricut Design Space, click on NEW PROJECT to get started. Then click on UPLOAD from the left hand side menu.
Click on the UPLOAD IMAGE button, then click BROWSE to locate where your unzipped SVG files are saved on your computer.
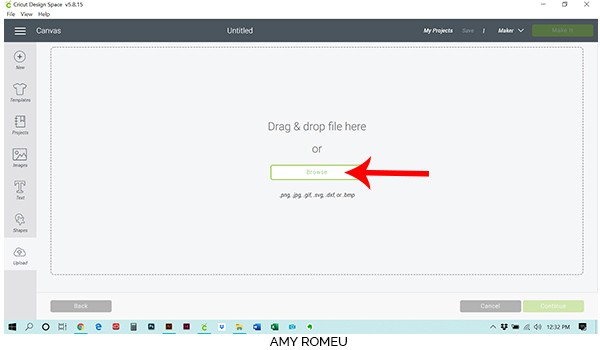
Double click on the SVG file to bring it into the upload screen in Design Space. If you get an error message that says “unsupported file type,” you may have clicked on the wrong file, or your SVG file is still zipped.
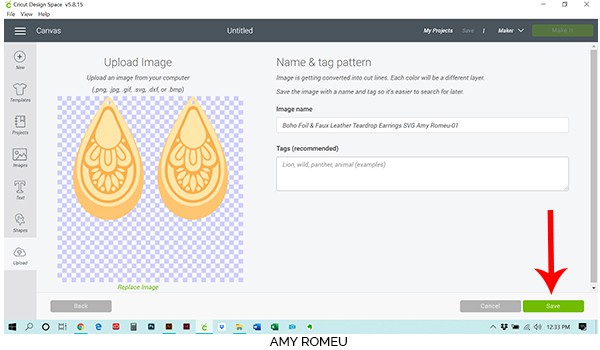
You’ll see a preview of the boho teardrop earring shapes for this project.
Hit the green SAVE button.
After you’ve selected your file to upload, you’ll see it as the first item in your “recently uploaded images” row.

Click on the boho teardrop earring shapes so they are surrounded by a green box. Then click the green INSERT IMAGES button.
STEP 3 – PREPARE SVG FOR CUTTING
This brings the shapes you’ll cut for the earrings into Cricut Design Space. Drag your artwork to the upper left corner of your mat. It isn’t necessary to resize your earrings, but you can if you want to. You can resize them by clicking and dragging on the arrows in the bottom right corner. I wouldn’t recommend making them much smaller, though, or the foil iron on design will be too hard to weed.
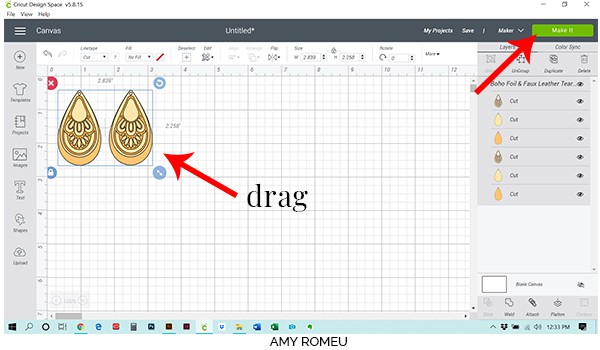
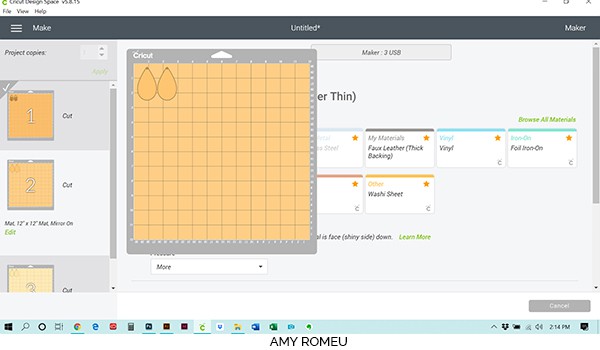
Click the green MAKE IT button.
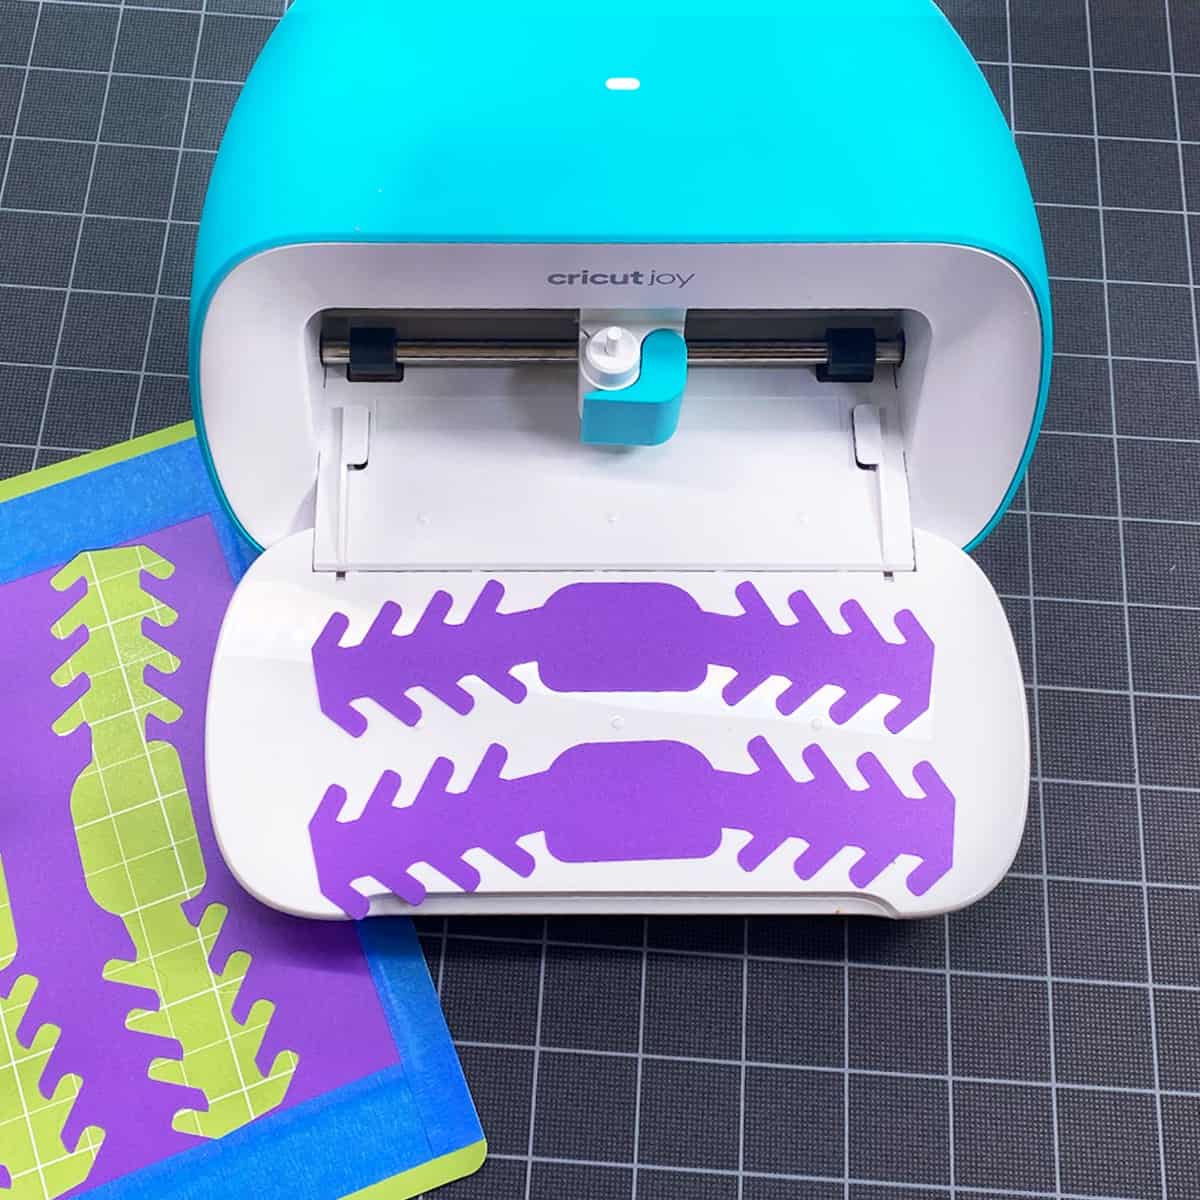
The mat preview screens will load. The Cricut will cut each material on its own mat – I’m using foil iron on and two colors of faux leather, so three mats in total will cut.
We can see in the mat preview on the left that the first mat that will cut is the foil iron-on layer (if this is different for you in your mat preview, skip ahead to cutting the faux leather layers first).
Make a note of this size you need to cut your foil iron on so the shapes will cut out completely. I like to add about a half inch to the measurement to be safe, so I’ll cut a piece of foil iron-on from the roll that’s about 2.5″ square.
Toggle the green MIRROR button to ON so the shapes will cut in reverse. The faux leather cuts face down so it’s important to mirror the cut.
Before continuing, I like to click on every mat in the preview on the left and toggle every green MIRROR button on, so I don’t forget to do it later.
Press the green CONTINUE button.
STEP 4 – CHOOSE YOUR MATERIAL
Now you’ll select your material.
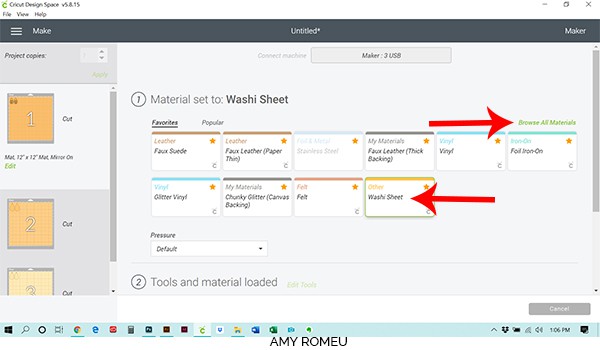
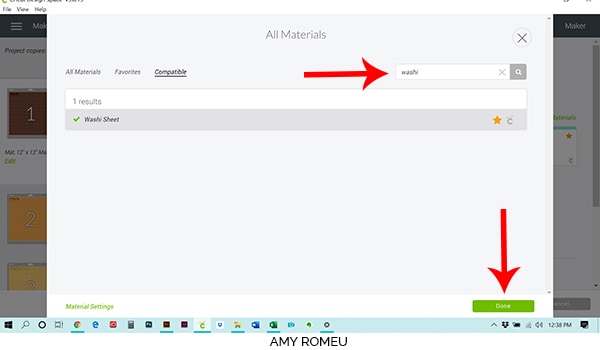
This design will cut some tiny shapes from the foil iron-on, so I like to use the Washi Tape setting (instead of Vinyl) for intricate cuts. If you don’t already have the Washi Tape material setting in your Favorites, click on Browse All Materials, search for Washi Tape, and then click on it to select it.
After you’ve selected Washi Tape as your material, you are ready prepare your mat and make the cut.
STEP 5 – PREPARE MAT FOR CUTTING
Cut your foil iron-on in a small piece the size that you noted in the mat preview screen earlier.
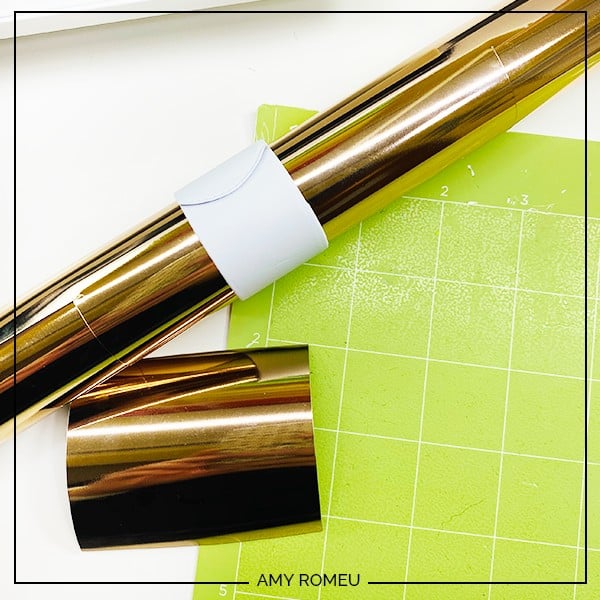
Note: If you’re wondering what the white band around my Foil Iron-On roll is, it’s a white slap bracelet! They are great for keeping my vinyl rolls neatly wound. You can get slap bracelets in lots of colors, but I prefer the all white slap bracelets from Amazon here.
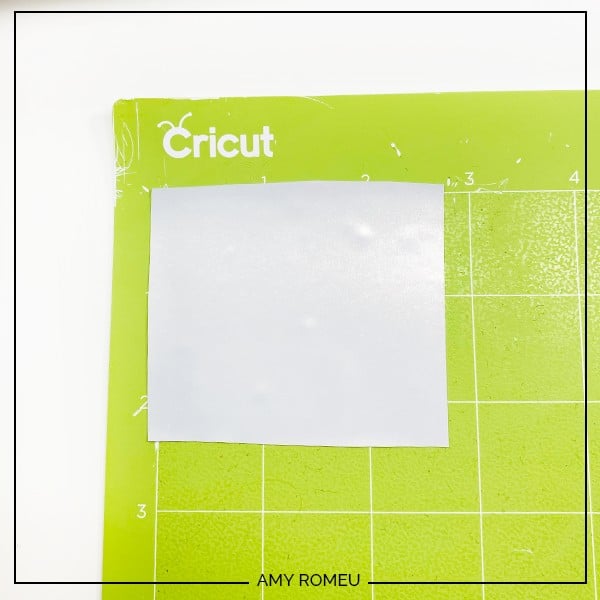
Place it shiny side down on your green cutting mat, in the same location on the mat as shown in the mat preview (top left corner for this project). Press it down firmly all over.
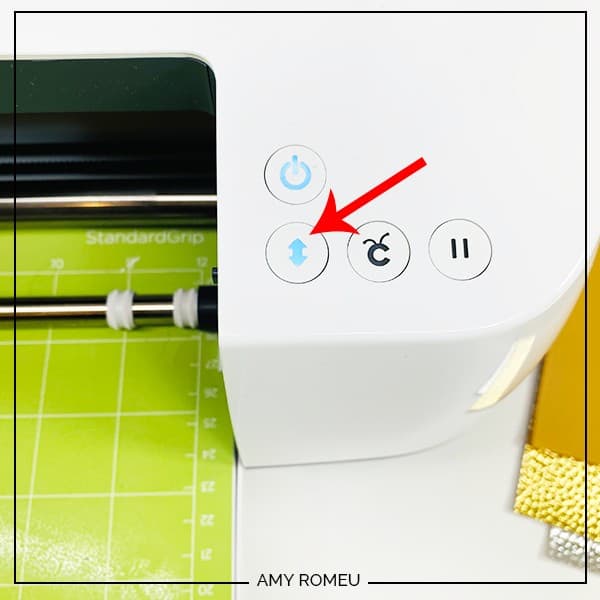
Load the mat into the Cricut by lining the mat between the mat guides and then pressing the double arrows button. If the mat doesn’t go in straight, or one side isn’t under the guides, press the double arrows button again to unload the mat. (Confession: that’s what I did the first time I used my Cricut!)
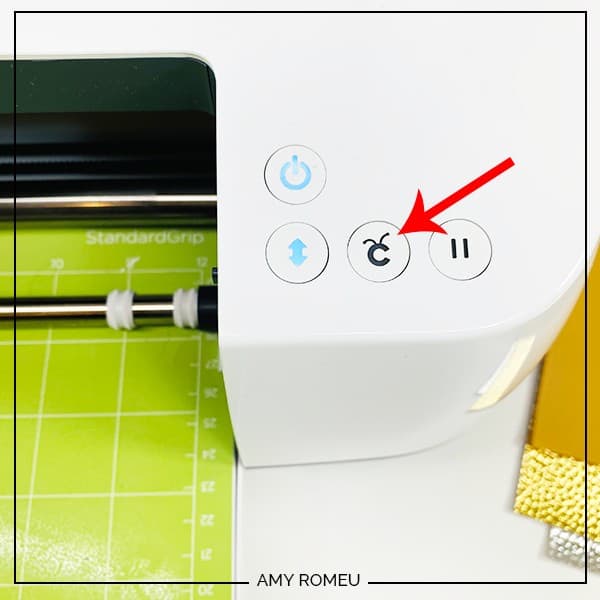
The “C” Cricut button will start to flash, indicating the machine is ready to cut. Press the C button to begin the cut.
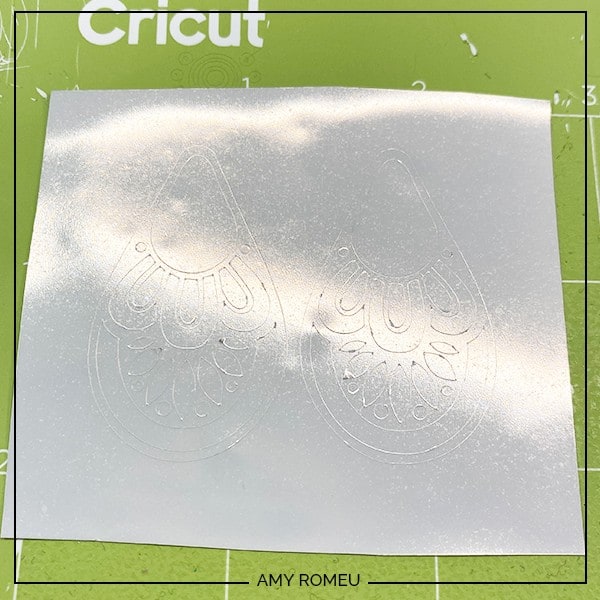
When the cut is finished, click the double arrow button again to unload the mat. You’ll see the design cut into the back on the foil.
Peel the mat away slowly from the cut foil square. This will keep the foil from wrinkling, which will happen if you curl and peel the foil off of the mat instead. Make sure you are peeling up the foil iron-on and the clear backing – the clear transfer sheet needs to stay attached to the foil until the next step.
STEP 6 – WEED FOIL IRON ON
Using your weeding tool, begin removing the excess foil cut outs from the design. Refer to the photo of the finished earrings if necessary to be sure you are removing the right parts!
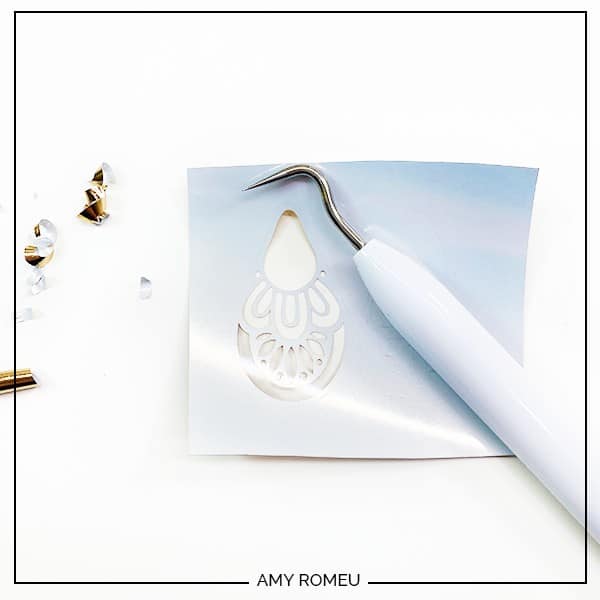
Weed both earring shapes and the surrounding excess foil.
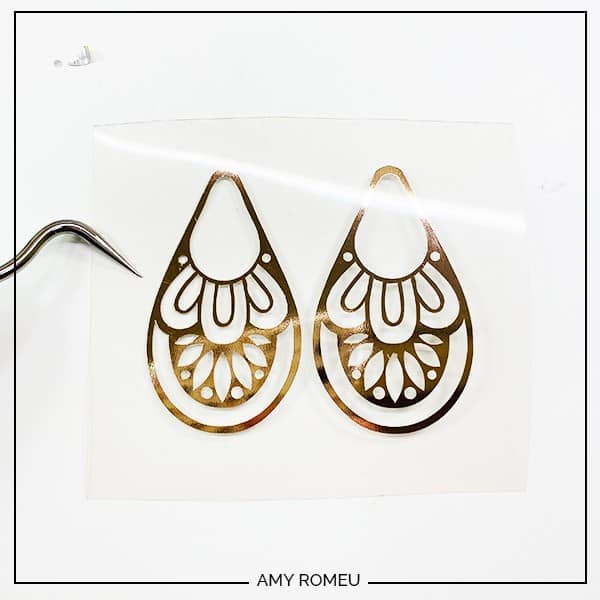
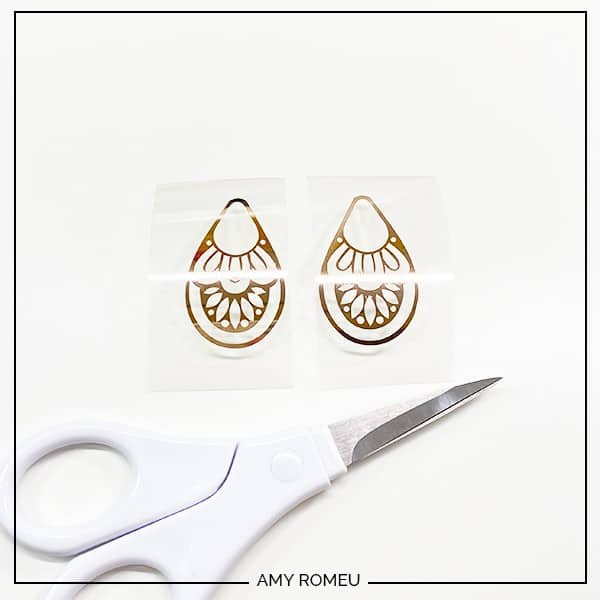
Cut the transfer tape down the middle so you can handle each earring shape one at a time. Set them aside.
STEP 7 – CHOOSE FAUX LEATHER MATERIAL SETTINGS
The next mat that will cut is one of the faux leather layers. In this project, I’ll be cutting the larger, back earring layer first. Hover over the mat preview screen and note the size of faux leather you’ll need to cut these shapes from. Remember to add about a half inch to the measurements so you have some wiggle room.
It’s important to cut a smaller faux leather shape to place on the mat, instead of placing a large sheet of faux leather down. Larger pieces tend to shift while cutting, even when they are taped down, which we will do when we prepare the mat for cutting.
There are lots of settings that work for cutting faux leather on the Cricut, but my go-to material setting is Faux Leather (Paper Thin). Even thought this material isn’t “paper thin,” this setting makes an automatic double cut and I find that it works really well for most materials.
(If you’re using a Cricut Explore Air 2, turn your dial to “Custom” so you can choose the setting recommended below.)
If you have Faux Leather (Paper Thin) already in your Favorites, go ahead and select it now. If not, click on Browse All Materials and search for it. Once you find Faux Leather (Paper Thin), click on to select it and bring it to this screen. Then you can choose it at your material.
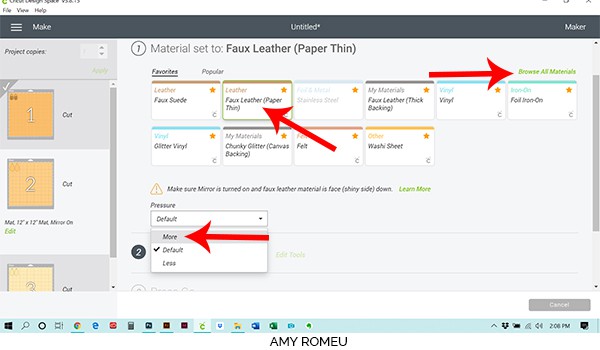
You can choose to increase or decrease the cutting pressure from the dropdown menu below the material settings if you choose. This really depends on how your machine cuts. For this project, I changed the pressure setting to MORE. You can test how your machine cuts and adjust as needed.
Finally, double check in the mat preview that this mat is mirrored. If not, click Edit in the mat preview and toggle the MIRROR toggle on.
After you’ve selected your material and pressure setting, it’s time to prepare your first mat for cutting.
STEP 8 – PREPARE FAUX LEATHER MATS FOR CUTTING
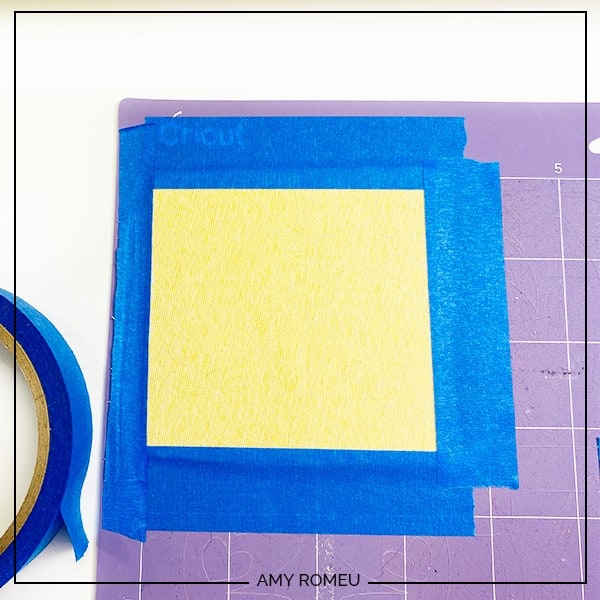
Cut the faux leather you’ll be using as the back layer (metallic leather in this project) to the size you noted earlier.
You’ll need to place your material face down in the same location on a nice and sticky purple mat as the shapes were shown in the mat preview. (If you are using a Cricut Joy to cut faux leather, you’ll need to use the Green Joy-sized mat instead of purple. Follow the next step carefully and use blue painter’s tape to secure your material to your mat.)
Tape down the faux leather to the mat on all sides with pieces of blue painter’s tape, like this:
You’re ready to cut! Load your mat into your Cricut by pressing the load button with the arrows. Press the flashing C button on your Cricut and it will begin to cut.
When the Cricut has finished cutting, use your fingernail or a sharp tool to see if the shapes cut all the way out of the material. If they didn’t, you can repeat the cut again by pressing the C button, as long as you haven’t unloaded the mat yet.
Once you are happy with your cuts, press the double arrow button to unload your mat.
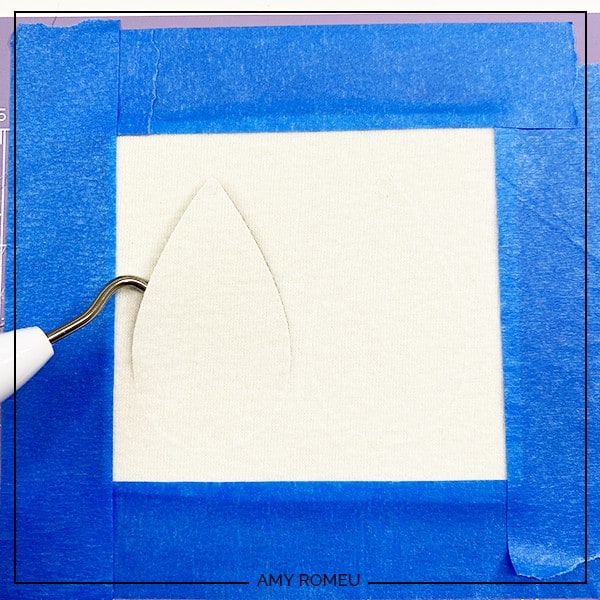
Use your weeding tool to remove the cut teardrop shapes from the mat. Remove the tape carefully and save it for another use. I always get a few uses out of my pieces of blue painter’s tape. 🙂
Use your weeding tool or another sharp object to clear out the earring holes. If they don’t come out cleanly and the hole is hanging on by a small piece, use small scissors to cut the hole away from the earring.
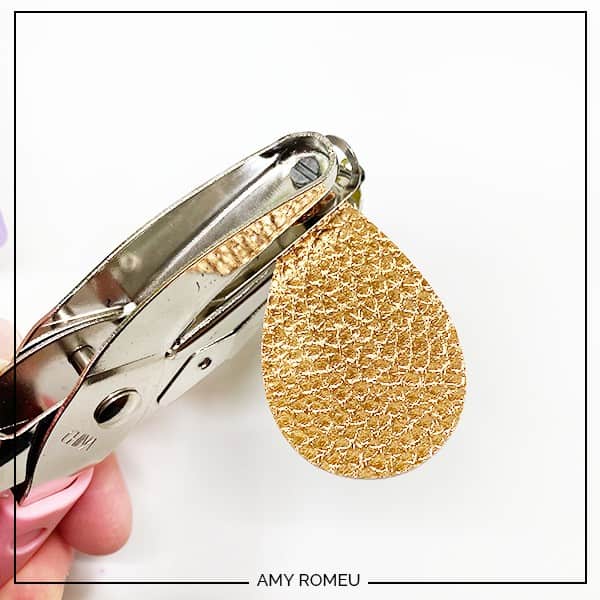
If the hole didn’t cut well at all, don’t worry! You’ll use the partial hole as a guide and punch the hole manually, with either a sharp tool or a hold punch.
This is my go-to hole punch for making Cricut earrings, from Amazon here.
When your shapes are cut, set them aside.
Time to make the second faux leather cut. Refer to the next mat preview to determine what size material to cut, and cut your material to size.
Place the faux leather face down in the same position as shown in the mat preview. Tape all around the sides with blue painter’s tape. Confirm your material selection is Faux Leather (Paper Thin) and confirm your mat is mirrored.
This mat is ready to cut. Press the green CONTINUE button.
Select Faux Leather (Paper Thin) as the material again. Load the mat into the Cricut and begin the cut. Unload the mat when the cut is complete, and remove the second set of teardrops from the mat. Clear the earring holes, and punch holes manually if needed.
STEP 9 – PRESS THE FOIL IRON ON
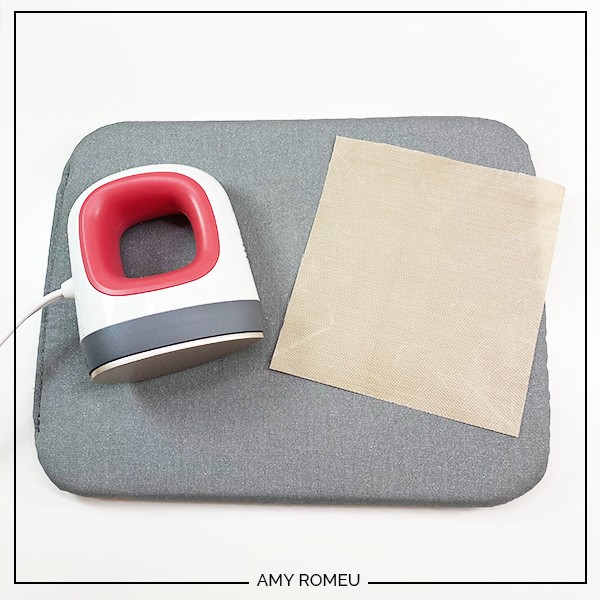
To press the foil iron-on, you’ll need a small heat press like an Easy Press or an Easy Press Mini, a pressing pad, and a teflon sheet or piece of parchment paper.
Line up the foil design on the smaller teardrop shape. I press one earring at a time.
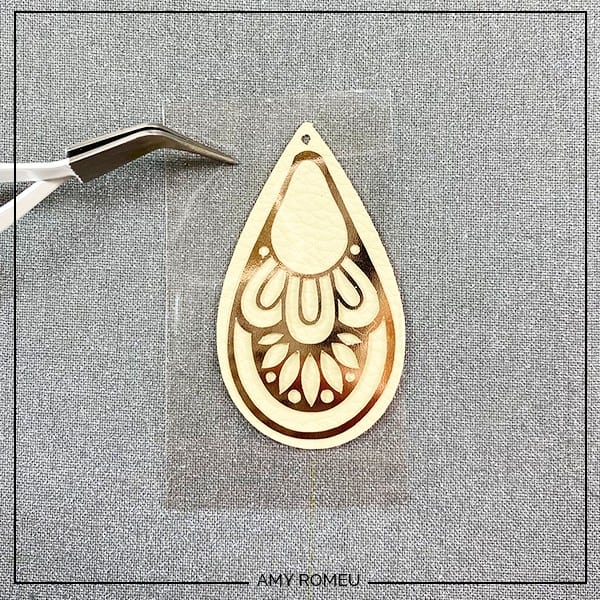
Cover the earring and foil carefully with the teflon cover sheet or parchment paper, and press gently, using the manufacturer’s directions for time and temperature.
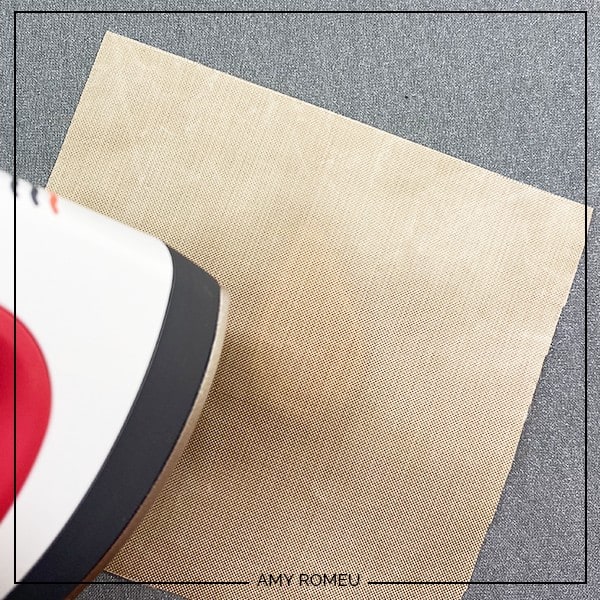
I use an Easy Press Mini, and I use the lowest setting. I move the Mini around for about 10 seconds, using firm but not hard pressure.
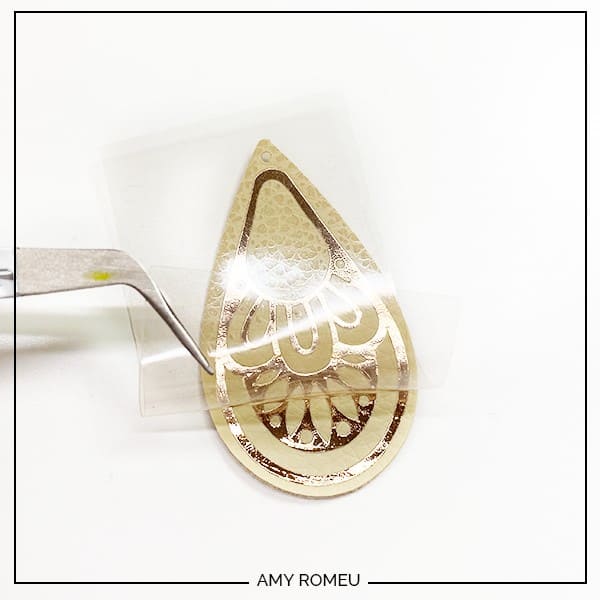
Peel the transfer tape away from the earring while keeping the earring as flat as possible. This prevents wrinkling of the foil.
Repeat for the other earring.
STEP 10 – ATTACH EARRING HOOKS
Now it’s time to assemble your earrings!
You’ll need small jump rings, earring hooks, and two pairs of flat nose pliers.

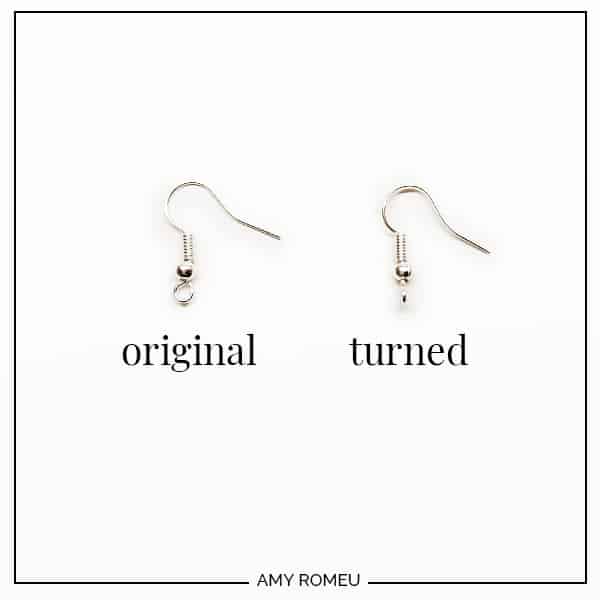
To connect the earring hooks, you’ll first need to turn the bottom loop on the fishhook sideways so your earrings will hang correctly. See the example image below to see how the orientation of the earring hook has to change so your earrings will hang straight.
NOTE: If you’re wondering why the photos below are in silver finish and these teardrop earrings use rose gold findings – remember the times we are living in now, in the spring of 2020. This girl hasn’t had her nails done in almost 2 months. Yikes! So we are going to the blog archive for some more attractive close up pics. 🙂
To see more about this, visit my post about how to make faux leather earrings hang straight here.
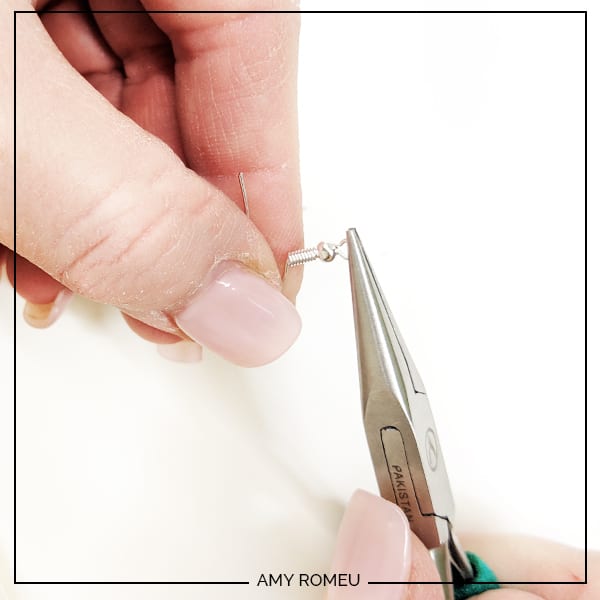
You’ll do this using one pair of flat nose pliers. While holding the hook firmly between two fingers, grip the entire earring loop between the pliers and twist your wrist until the loop is perpendicular to the earring post. Repeat with the second earring hook.
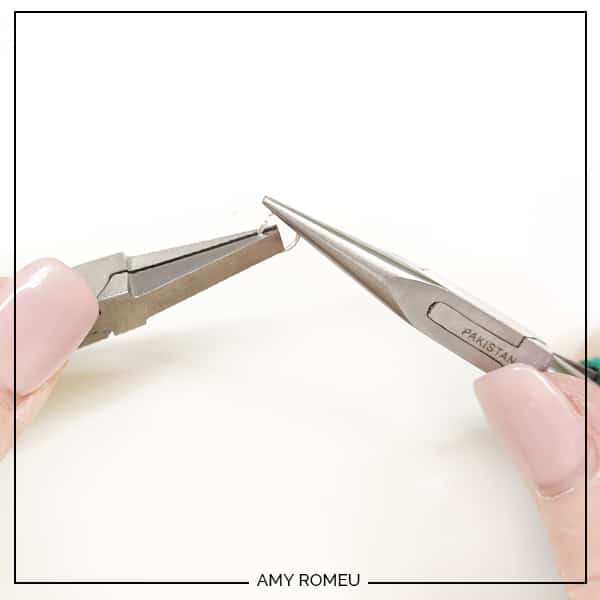
Once your earring hooks are turned, use your two pliers to open your jump rings, as shown below. It’s important to open them without distorting the original circle shape of the jump ring. You can do this by twisting only one wrist forward to open the jump ring like a door. To close the jump ring, you reverse the wrist movement to close the jump ring again.
Once your jump ring is open and you’ve twisted the loop at the bottom of the earring hook, loop the jump ring through the top hearts in the earring shapes, add the earring hook, and close the jump ring again.
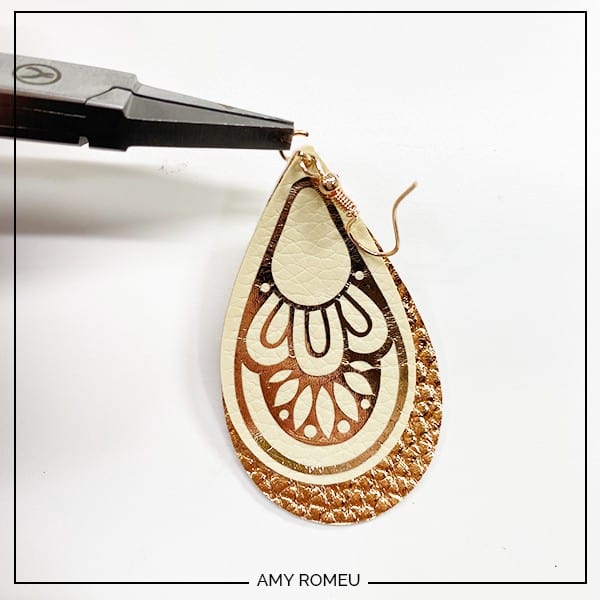
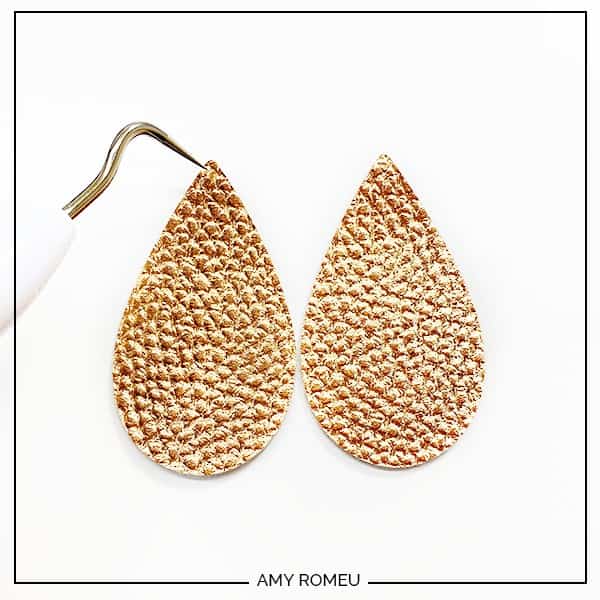
Repeat with the second earring. That’s it! Aren’t these boho faux leather teardrop earrings pretty?
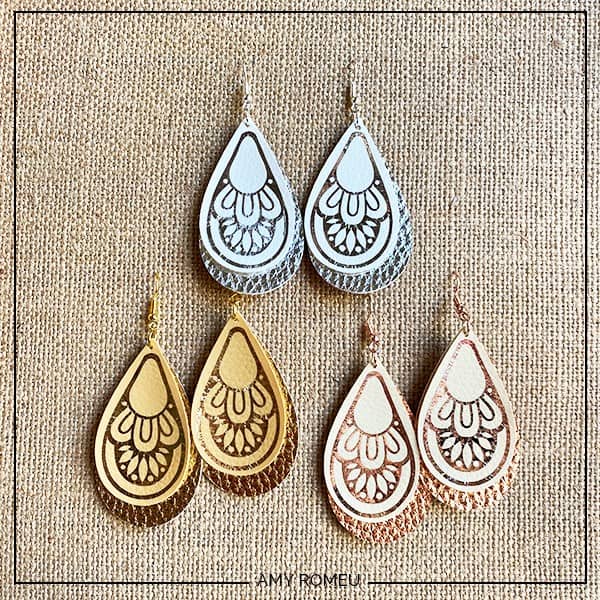
Are you going to make some boho faux leather teardrop earrings with your Cricut? I hope you do. I made three different pairs, and I can’t decide which one I like best!
If you do make this project, I would love to see your earrings! Please share a photo of them in the comments, or tag me on instagram: @amyromeucreates
Want to see all of my Cricut earring & jewelry tutorials? CLICK HERE
Until next time… and happy creating!

WANT THE FREE SVG FILE SO YOU MAKE THESE BOHO FAUX LEATHER TEARDROP EARRINGS YOURSELF?
GET IT FROM OUR RESOURCE LIBRARY! YOU’LL RECEIVE THE PASSWORD FOR THE RESOURCE LIBRARY INSTANTLY AFTER FILLING OUT THE FORM BELOW!
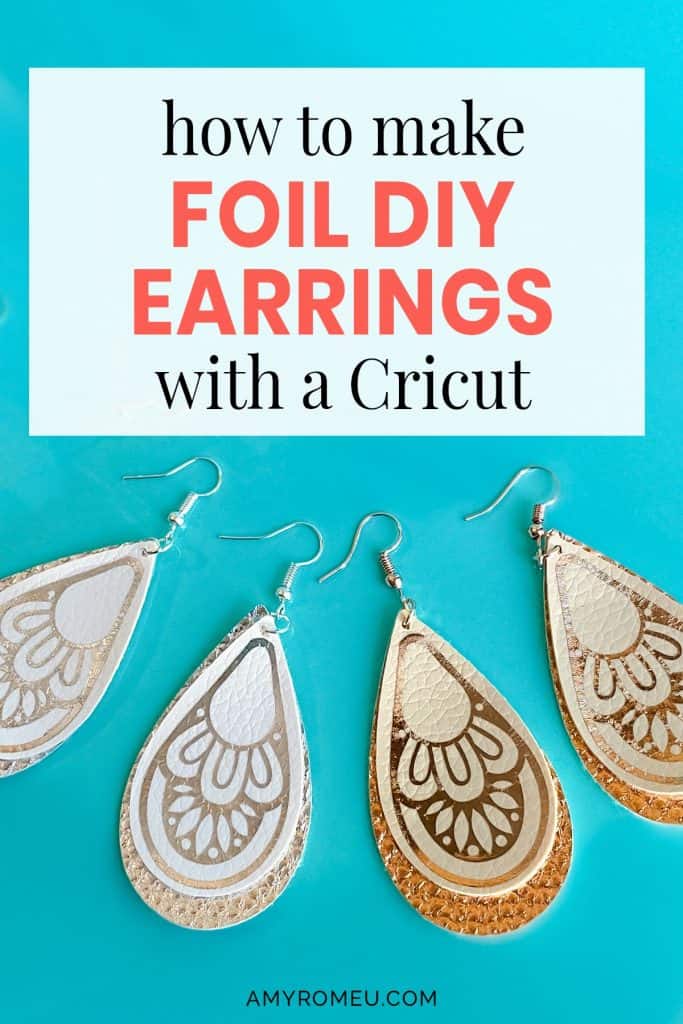
Want to remember this? Post this DIY CRICUT BOHO FAUX LEATHER EARRING project to your favorite Pinterest board!


LOVE these earrings! Thank you for the great tutorial.
Thank you so much, Jamie! I’m glad you like them. Amy
Amy I am writing to you because you seem to be the expert on Faux Leather Earrings. I have spent a small fortune on Faux Leather to make earrings. I have bought the Faux from different Etsy shops. Some are thicker then the other. I have used a brand new mat, new blade, changed settings a few times. Still I have problems. Some times the leather will move and my cuts are screwed up. (Ruined some beautiful glitter Faux). I have cut the leather upside down and mirrored my project, used painters tape to hold it. I have put the leather right side up and still same problem. This time it did not cut all the way through. I am getting frustrated with myself and my Cricut. Help me please! What am I doing wrong? I know this is long and probably shouldn’t been done here but I am desperate for help!
Hi, Judi! I’m sorry you are frustrated. I have some ideas and questions for you – I just sent you an email. Don’t worry, we will get it figured out! I’m happy to help. Talk to you soon. Amy
Hi! Love these earrings, but the only format I received is DXF which won’t work for me. Can you please help?
Hi, Katie! There is an SVG inside the download folder. It may look like a Chrome icon inside the download folder. That’s the SVG. Can you check again, or download the folder again? Thank you.
These are so cute! I can’t wait to make some!!! Thank you! ❤
These earrings are super cute! I have looked for the place to click to get the svg but I cannot find it.
Hi, Kathryn! Thanks for your message. The Boho teardrops are Design # 130 in my library. Thank you. Amy
How do you keep faux leather earrings flat? Mine always seem to want to curl up on the ends.
Hi, Joni!
Thanks for your question. It’s a good one!
You can put something on the back of the faux leather to make them thicker and sturdier. That will help. I have a YouTube video on four different ways to put a back on faux leather earrings that will help:
https://youtu.be/Q1IK6EfA6c8
Another thing to try is pressing the faux leather on low heat for a few seconds with a Cricut EasyPress Mini, EasyPress, or iron. Be sure to use a cover sheet. Just a few seconds of low heat is all you need. Then press the faux leather shapes under something heavy like a book so they cool flat.
Thanks again for your comment!
Amy