
How to Cut Ear Savers with the Cricut Joy
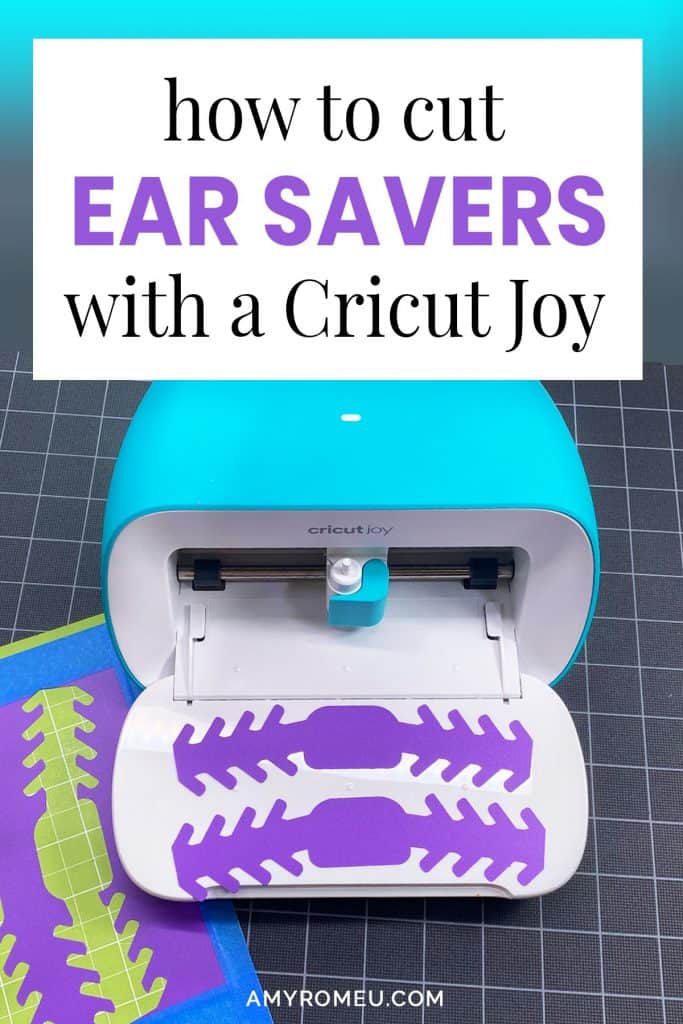
How to Cut Ear Savers With a Cricut Joy
If you’ve been following my blog for a while, you know this project is a little different for me – specifically because it’s not a jewelry project! But when my blogging friend Emily Minor of MinorDIY.com asked me to test cut her ear saver pattern using the new Cricut Joy, I was happy to do it – and I want to share the process with you, too, in this quick tutorial.
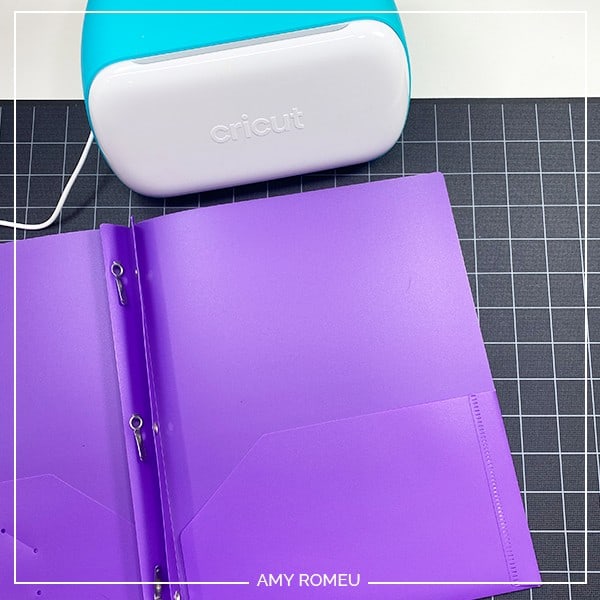
But first, if you’re wondering what an ear saver is – it’s a genius little hack for medical professionals and essential workers (and really anyone who has to wear a face mask all day). It’s a plastic shape with notches that people can wear on the back of their head to hook the mask loops onto instead of their ears.
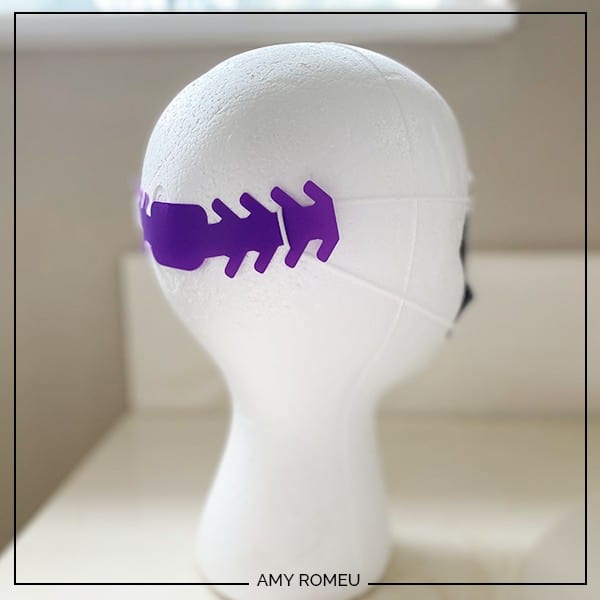
This little plastic shape is helping SO MANY people wear masks all day comfortably without hurting their ears – hence the name “ear saver.”
In March of this year, Emily realized many crafters wanted to cut these ear savers using their Cricut and Silhouette cutting machines, but they didn’t have a good ear saver SVG cut file. They needed an ear saver cut file that was both easy to cut with a cutting machine, and one that was optimized to cut quickly and efficiently.
Emily created her own version of an ear saver cut file, and the response has been overwhelming! Literally thousands of people around the world have now used her cut file to mass produce ear savers to donate to hospitals, nursing homes, and other essential businesses. Talk about crafting with a purpose!
Emily has heard from SO MANY crafters about how much this ear saver project has meant to them – and many of them have had questions, too. One question she receives often is: can you cut ear savers with a Cricut Joy? So she asked me if I could help her answer that question for her readers and document cutting her file with my Cricut Joy (well, it’s really my daughter’s Joy, but she let me borrow it for this project).
If you want to see how I used the Cricut Joy to make faux leather earrings, which is the type of project I usually make with a Cricut, you can read that post here.
It’s been inspiring to me as a crafter see the impact of Emily’s craft project on so many people worldwide. I’m happy to play a very small part in her mission by sharing how you can use a Cricut Joy to make ear savers, too. If you want to give this project a try using your Cricut Joy, Emily has graciously shared her cut file with me and given me permission to share it with you in “Cricut Joy-size.” You can cut two ear savers at a time on a Cricut Joy. You’ll find out how to download the Joy sized ear savers SVG file at the bottom of this post.
Two important notes: this file is property of Emily Minor from MinorDIY. She asks that you please don’t SELL the ear savers you create. If cost is an issue, you can always ask for donations to cover the cost of your materials. Also, you may not SELL this ear saver SVG cut file for any reason. Thank you in advance for respecting her work!
Ready? Let’s get started!
This page contains some affiliate links (which means if you make a purchase after clicking a link, I will earn a small commission at no additional cost to you). Read my full disclosure policy here.
HOW TO CUT EAR SAVERS WITH A CRICUT JOY – Materials List
- For this project, you’ll need a Cricut Joy cutting machine. The Cricut Joy is available on Amazon, here. You can also make these ear savers with the Cricut Maker, available at Amazon here, or with the Cricut Explore Air 2.
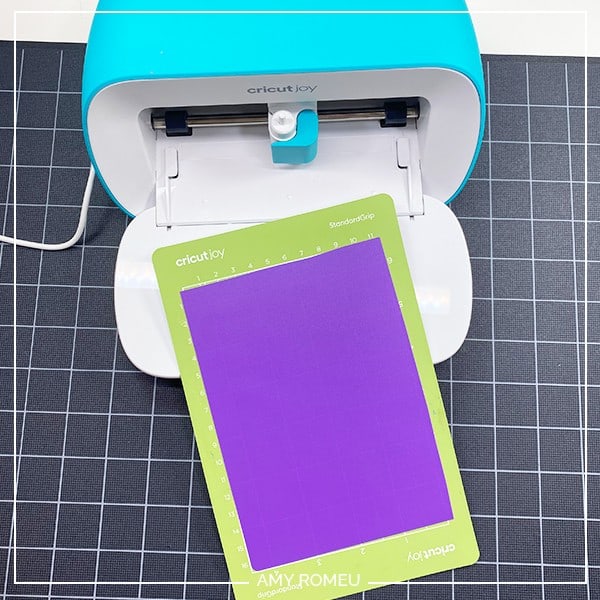
- A Cricut Joy Green Standard Grip Cutting Mat. You’ll get the green mat with the purchase of your Cricut Joy, but you can but extra Joy-sized mats separately on Amazon here.
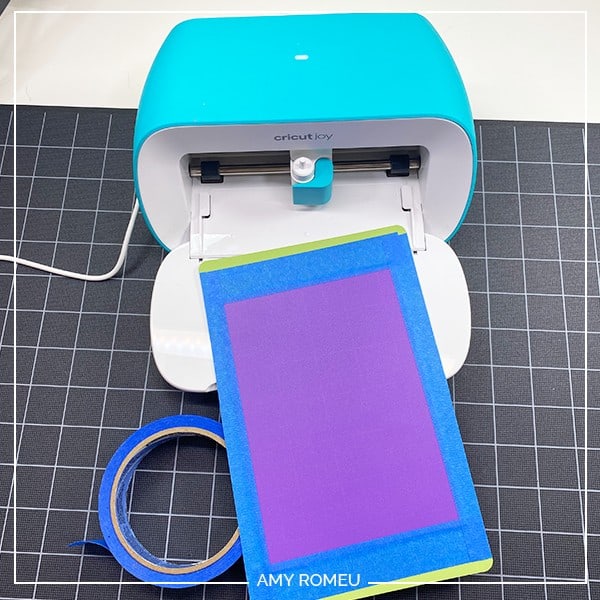
- Blue painters tape. You’ll use to to tape your plastic to the green Cricut Joy cutting mat. You can get it at any hardware store and most big box or grocery stores. Amazon also has it here.
- A plastic folder or other plastic sheet material. I used a plastic, two prong school folder for my test cut, from Amazon here.
Visit Emily’s ear saver post on her blog here to read about many other plastic materials people have used, including placemats and plastic cutting boards.
PROJECT INSTRUCTIONS
STEP 1 – Download Free SVG
Download the free SVG ear saver file from my Resource Library. The link to get the password is at the bottom of this post.
Save the zipped folder that downloads to your computer. You’ll need to unzip or extract the files FIRST so you can upload the cutting file to Cricut Design Space.
STEP 2 – Upload SVG To Design Space
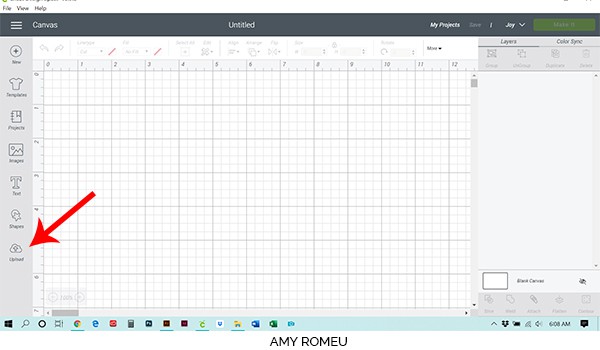
After you’ve unzipped the folder and made a note of the file location, open Cricut Design Space and click on NEW PROJECT to get started.
Then click on UPLOAD from the left hand side menu.
Click on the UPLOAD IMAGE button, then click BROWSE to locate your file.
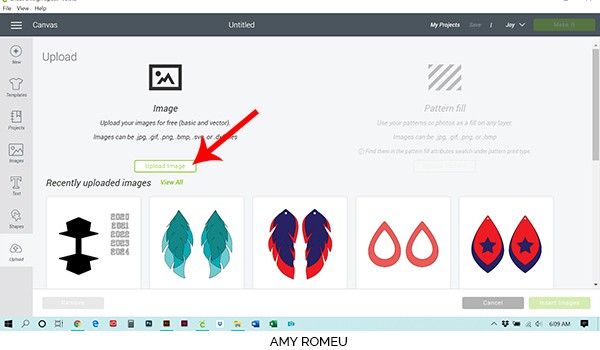
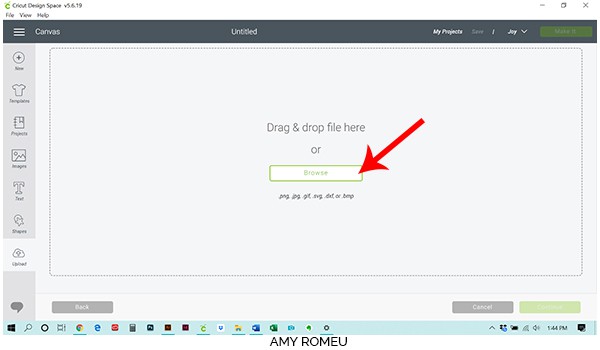
Navigate to where you’ve saved the already unzipped SVG file for this project. Double click on the SVG file to bring it into the upload screen in Design Space.
If you get an error message that says “unsupported file type,” you may have clicked on the wrong file, or your SVG file is still zipped.
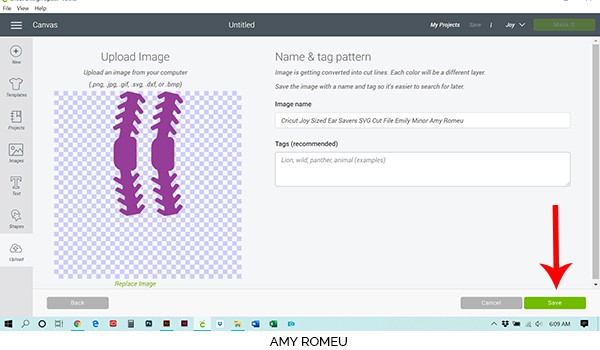
You’ll see a preview of the ear savers for this project. Hit the green SAVE button.
You should see the ear saver shapes as the first item in your “recently uploaded designs” row.
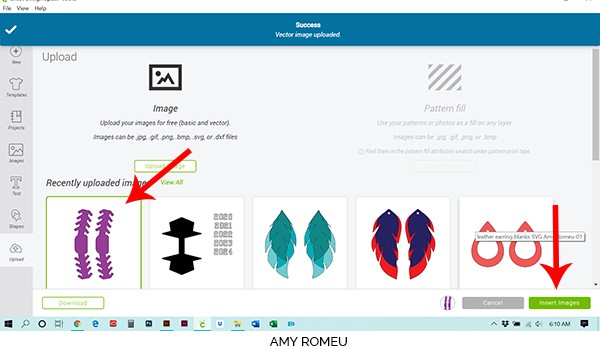
Click on it so it is outlined in green. Then click on the green INSERT IMAGES button in the bottom right corner.
STEP 3 – Prep SVG For Cutting
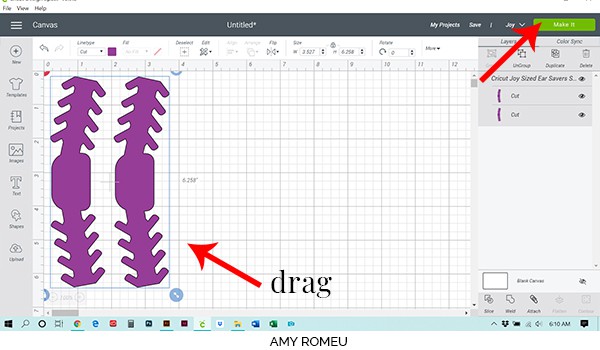
This brings the ear savers shapes into Cricut Design Space, formatted specifically for the smaller sized Cricut Joy mat.
First drag the ear savers up to the top most left corner of the screen. You’ll be placing your material to cut on your mats in the upper left hand corner.
Make sure the Cricut Joy is your chosen machine in the upper right hand corner of your screen (next to the green MAKE IT button). If not, select the Joy as your machine before moving on to the next screen. Then click MAKE IT.
Now you’ll tell the Cricut Joy how you want to cut your ear saver material – on a mat, without a mat, or if you’ll be choosing these selections separately. Choose ON MAT.
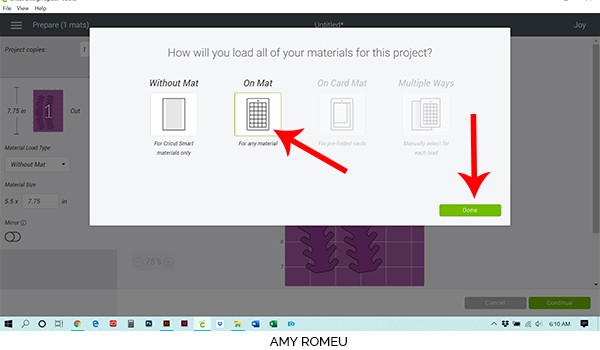
On the next screen, the Mat Preview screen, confirm your Material Load Type is “On-Mat.” It isn’t necessary to MIRROR your designs for this project.
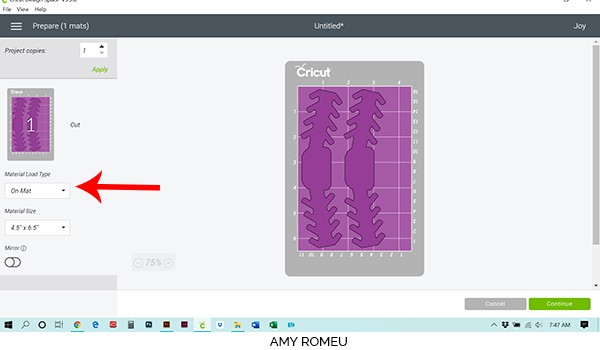
Then click on each of your ear saver shapes and drag them so they are both centered on the mat. This will give you more room to tape around the edges of the plastic.
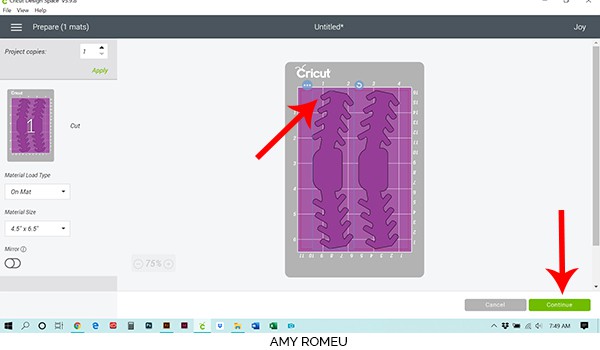
Once you’ve chosen the cutting type and mirrored each mat, click the green CONTINUE button.
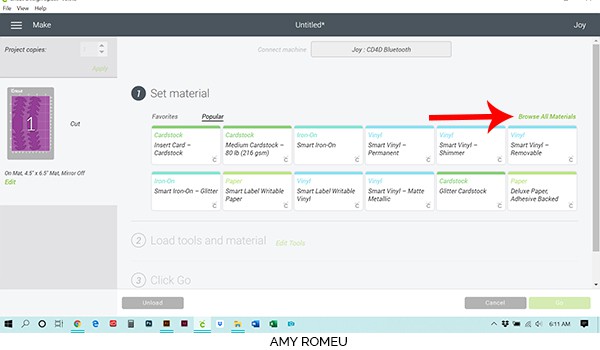
STEP 4 – Material Selection & Custom Settings
Next we need to choose the material for each mat. Emily recommends in this post creating a custom material setting, so that’s what I did.
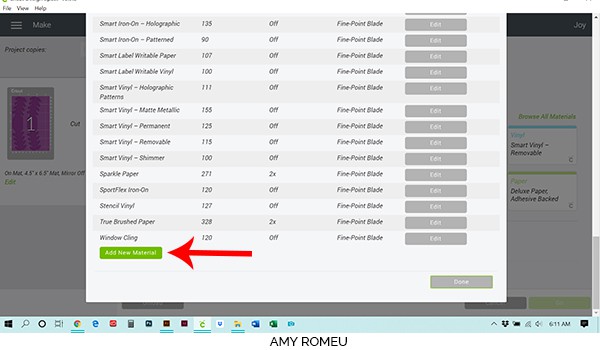
On the Materials screen, click on BROWSE ALL MATERIALS on the right.
Then click on MATERIAL SETTINGS.

Then scroll to the bottom of the page and click the green ADD NEW MATERIAL button.
Type your name for your new custom material in the box. I went with “Plastic for Ear Savers.” Then click SAVE.
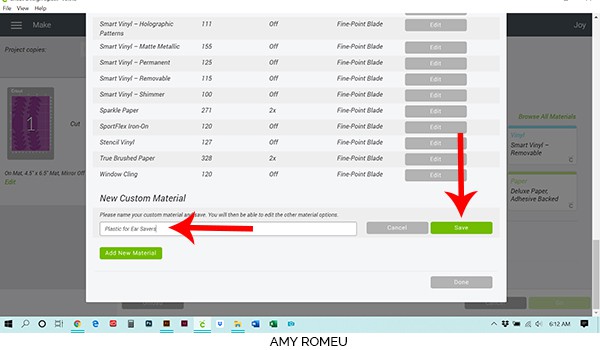
You’ll be prompted to make your custom material settings. I recommend changing the cut repeat from off to 2X and the pressure slider to 350, as shown below. Click SAVE.

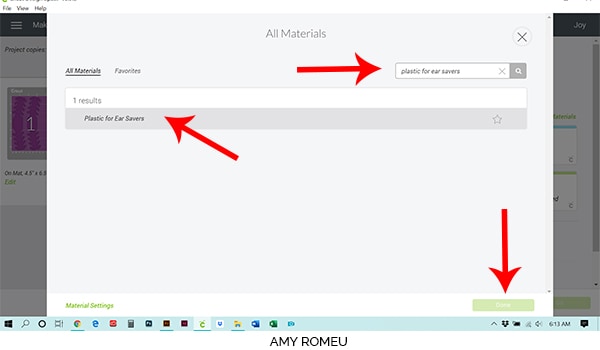
Then click on BROWSE ALL MATERIALS again, and type in your new custom material name. Click on it to select it and click DONE.
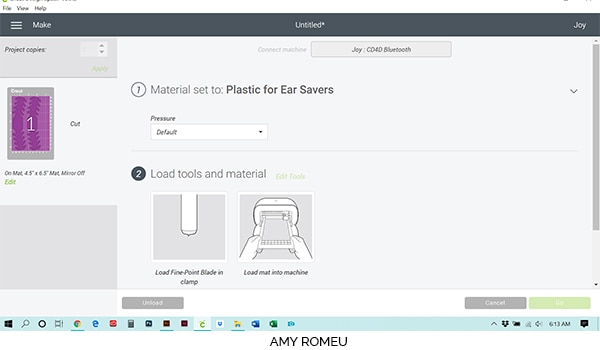
The next step is to load your material on the mat. We’ll do that in the next step. Once the mat is loaded, you’ll be able to press the green GO button, but not yet!
STEP 5 – Prepare Mats For Cutting
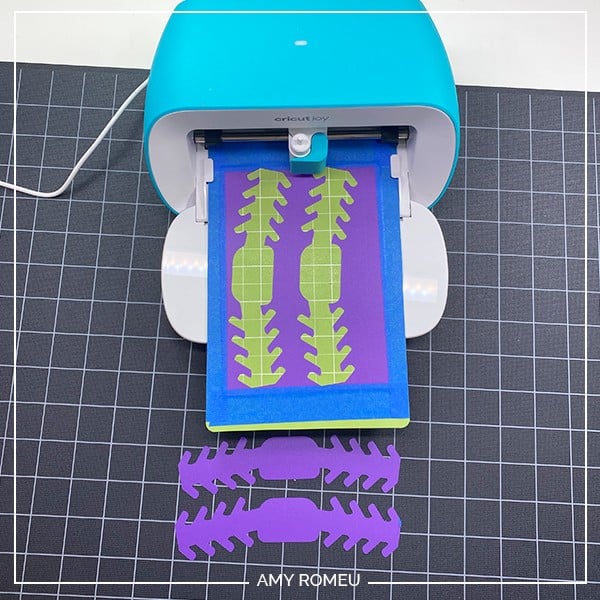
Gather your materials for this next step. You’ll need your Cricut Joy small green mat, your plastic folder, and some blue painter’s tape.
Cut a piece from your plastic folder that’s 4.5 inches wide by 6.5 inches tall. Press it down firmly to your mat. Then tape the plastic down all the way around with blue painter’s tape.
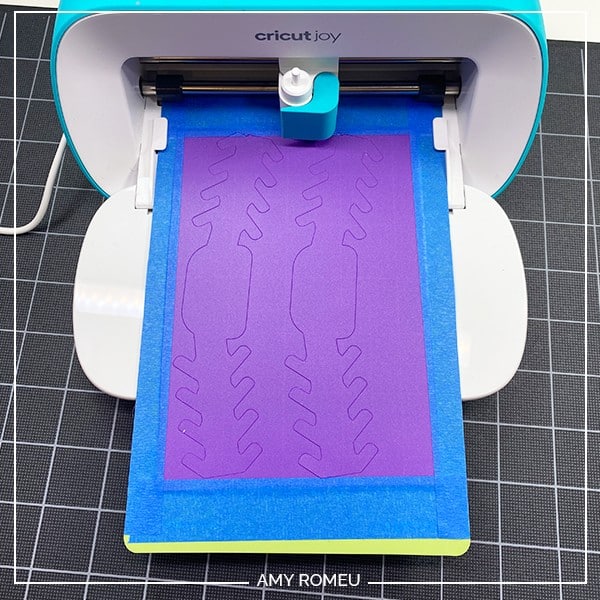
Your mat is ready to cut!
Load your mat into the Cricut Joy. Then press the GO button in Cricut Design Space, and your machine will start cutting.
Remember this is a 2x cut, which may or may not be enough to cut your plastic all the way through. When the first set of double cuts is complete, Cricut Design Space will ask you if you want to recut, or unload the mat. Check the edges of your ear saver shapes to see if they need more cutting, and if they do, just select recut.
For my test cut, I needed to repeat the cut two more times, which was essentially a 6x cut. I think the shapes were ready after the 5th cut, but I didn’t want to stop the cut so I let it keep running. Your material may cut in less passes, or more, you’ll just have to test it out!
Emily’s ear saver file is very well designed, with a minimal amount of cutting points (“nodes” in design-speak). This allows the Cricut Joy to cut the file quickly and smoothly, even with multiple passes.
That being said – if these cut settings don’t work for you, please be sure to visit Emily’s ear savers post where she shares all of the her latest ear saver material options, cut settings, recommendations and results.
When the Cricut Joy is finished cutting, it will prompt you to unload the mat. Remove your ear saver shapes. They should pop easily out of the plastic sheet.
Are you going to try this project? If you do, please post a comment and let me know if you liked cutting ear savers with the Cricut Joy!
If you want more information about cutting ear savers from different materials, or with other Cricut or Silhouette machines, Emily is compiling and updating this post with all of the available ear saver information she’s gathered to date. She also has more great ear saver designs on her blog, for adults and kids, so be sure to check our her blog at MinorDiy.com.
Until next time… and happy creating!

Want the FREE SVG file you so you cut these EAR SAVERS with a CRICUT JOY yourself?
Get it from my Resource Library! You’ll receive the password for the Resource Library instantly after filling out the form below!
Want to remember this? Post this CRICUT JOY EAR SAVERS project to your favorite Pinterest board!
can the cricut joy also cut laminating film?
Hi, Lia! I’m not sure. I haven’t tried it, but I imagine it would! You may need multiple passes to cut it completely. To repeat the cut again, just hit the button to recut instead of unload when the cut is complete.
Hello Amy I have just brought my first cricut.. joy ,made a few cards so far loving it.
I live in Australia ..Victoria. We now must wear marks all the time outside. My son drives an ambulance an wear the marks up to 12 hours a day. I found your free ear saver an was so happy but I can not find the download in your library. Have you withdrawn it? Or am I looking in the wrong place?
I would love to makes this for him and his colleagues if I could thank you for answering take care .Karen Clifton
Hi, Karen. Thank you for your message. The ear savers file is still in my library. Please scroll down and you you will see it, or you can search the page for the words “ear saver” and you’ll see it that way. Thank you.
Best regards,
Amy
Terrific article
Thank you so much, Tarsha!