
How to Make Faux Leather Earrings Hang Straight
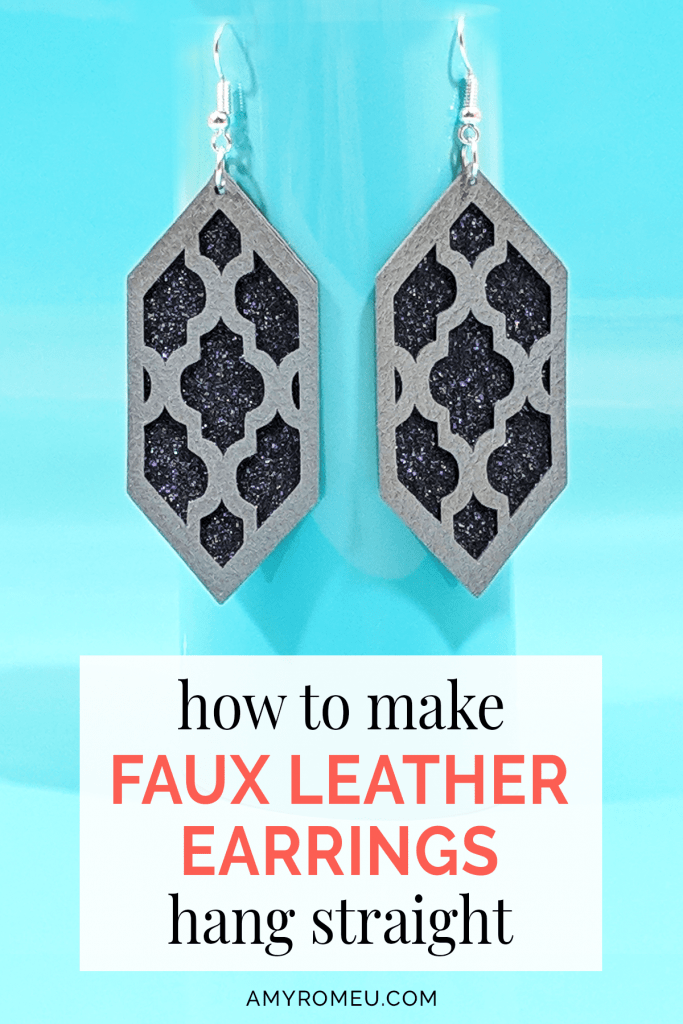
Have you tried making faux leather earrings with your Cricut or Silhouette yet? If so, were so you excited to successfully cut the earring shapes, only to get stuck on the part where you attach the earring hooks? Did your heart sink when your lovely faux leather dangles hung sideways? I’ve been there. It’s frustrating, right? If you want to learn how to make your faux leather earrings hang straight, you’re in the right place!
The good news is it’s quick and easy to learn how to connect your earring hooks to your new faux leather earrings so the earrings hang beautifully. Let me show you how!
Once you master this very simple technique, you’ll be churning out gorgeous faux leather earrings in no time!
So let’s get on to the good stuff… let me tell you exactly how to correctly connect the faux leather earrings shapes you’ve cut with your Cricut or Silhouette to a pair of earring hooks.
First, you’ll need a few basic jewelry making tools and findings (jewelry making parts), so let’s go over that first!
If you’d rather watch a video on how to make faux leather earrings, hang straight, click on the video below:
This page contains some affiliate links (which means if you make a purchase after clicking a link, I will earn a small commission at no additional cost to you). Read my full disclosure policy here.
Supplies List
- Earring hooks – I used earring hooks from this assortment of earring hooks in different finishes these from Amazon here. Hobby Lobby, Michael’s, and other craft stores, as well as your local bead store, will have lots of earring hooks as well.
- Small jump rings – I used this assortment of 6mm size jump rings in different metal finishes from Amazon here. Again, your local craft store or bead store will have plenty of jump rings to choose from if you want to pick some up in person. You could use 5mm size or even 4mm size if that’s what you have, but I wouldn’t go any smaller than 4mm or larger than 6mm for faux leather earrings.
- Two pairs of flat nose pliers – I’m using one pair of wide nose pliers and one pair of needle nose pliers here, but you can use any two flat nose pliers you have in your jewelry making tool box. My favorites are Wubbers brand in the “Baby” size. You can see the Baby Wubbers Chain Nose Piers on the left on Amazon here, and the Baby Wubbers Flat Nose Pliers on the right on Amazon here.
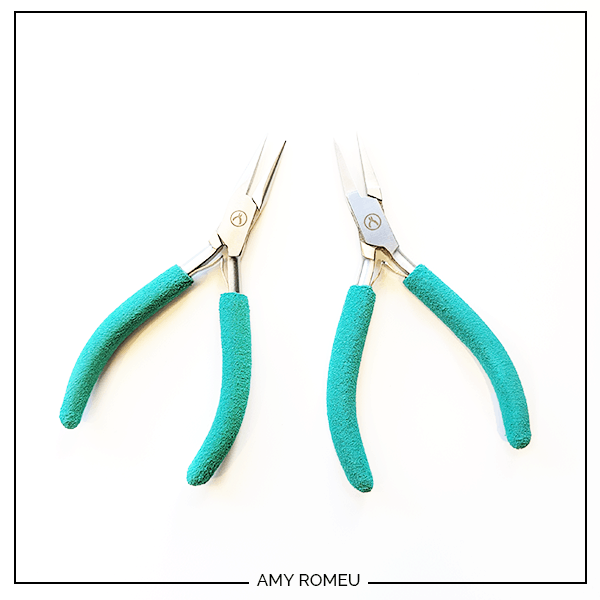
Your local craft store will have a variety of pliers to choose from in the bead and jewelry making aisle, too.
If you want more information about what to look for when buying jewelry pliers, be sure to check out my post Beginner’s Guide To Jewelry Making Tools for all the information you need to know about buying and using jewelry making tools.
OPTIONAL SUPPLIES
- A small hole punch (if you plan to punch holes in your earrings after you cut the shapes instead of having the Cricut cut them). This is my go-to hole punch for making Cricut earrings from Amazon here.
Why Do We Need To Use Jump Rings?
Good question. Why do we need jump rings at all, when a standard earring hook has a loop that can easily be opened so the faux leather shapes can slide on?
It’s true that you can make your faux leather earrings this way, by directly hanging the faux leather shapes from the loop at the bottom of the earring hook.
But there are two reasons why you don’t want to do that, and it’s best to take the extra time to use jump rings as a connector instead.
The first reason is using jump rings makes your earrings look professionally finished.
The second reason is the jump rings allow the faux leather shapes – or any other dangle or charm, really – to hang nicely from the earring and be able to move freely.
For example, this earring below has the hook connected directly to the earring shape (o jump ring). It technically works, but the small hook doesn’t allow the earring shape a lot of room to move naturally as the wearer moves around. The result is a stiff earring.
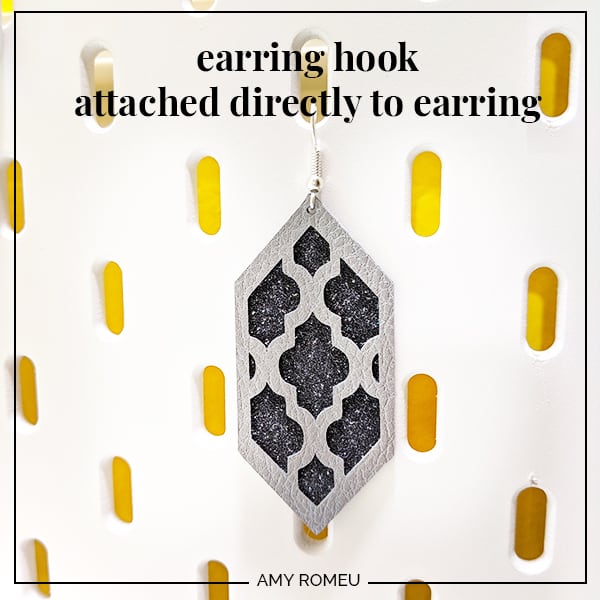
No one likes to wear stiff earrings, and using a jump ring as a connector between the faux leather shapes and the earring hook eliminates that problem.
So now that we’ve established it’s important to use jump rings, you may notice the dilemma already.
Without a jump ring, the faux leather shapes can hook onto the loop at the bottom of the earring hook and hang correctly – facing forward. However, if you try to connect the same earring shapes and the earring hook using a jump ring, your earrings will twist and face sideways, like this:
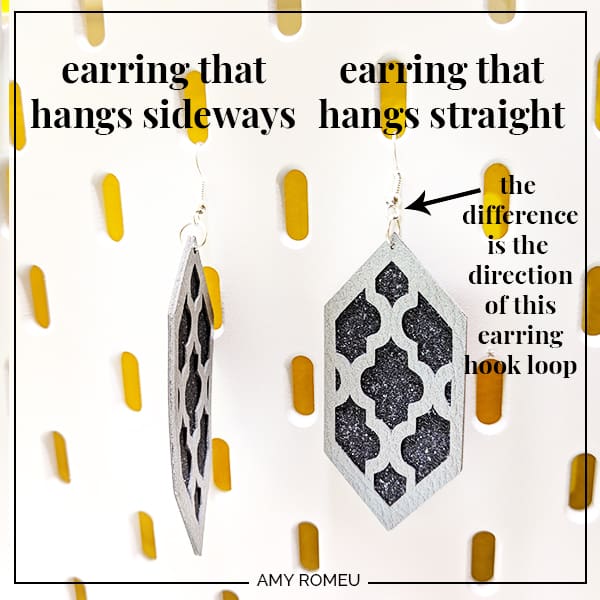
Maybe this is exactly the problem you’ve had when attaching earring hooks with jump rings. But no worries, this is easily fixed!
STEP 1
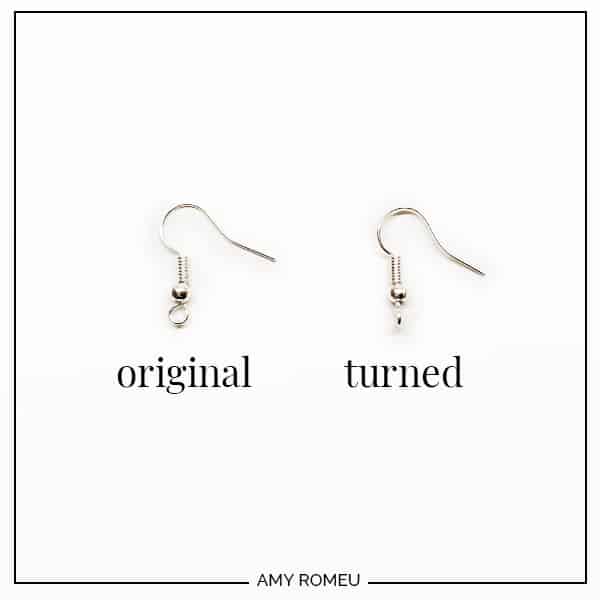
The solution to this problem is to turn the earring hook loop sideways before connecting it to the faux leather shapes with a jump ring. Here is what I mean when I say to turn the earring hook sideways:
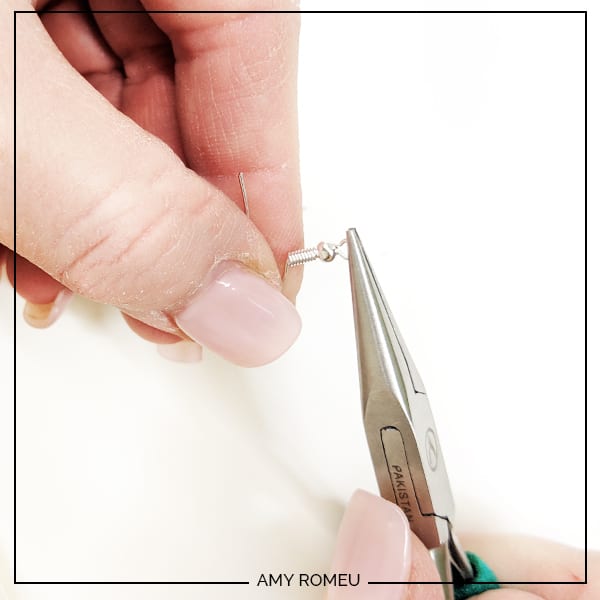
You’ll do this using one pair of flat nose pliers. While holding the hook firmly between two fingers, grip the entire earring loop between the pliers and twist your wrist until the loop is perpendicular to the earring post. Repeat with the second earring hook.
Now your earring hooks are ready for jump rings and dangles. Let’s do that next.
STEP 2
You’ll need your earring hooks, your small jump rings, and two pair of flat nose pliers for this step.
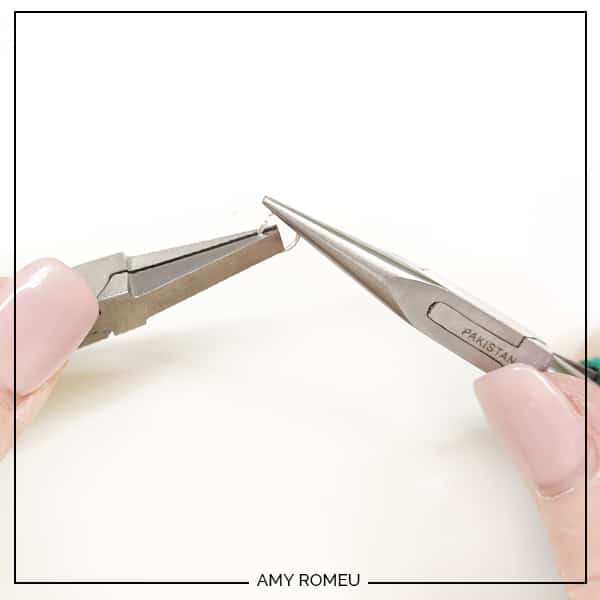
First, you’ll need to open your small jump ring to slide the faux leather earring shape(s) and the earring hook on. Hold one pair of flat nose pliers in each hand and grip each side of the jump ring, making sure the opening in the jump ring is facing up (the twelve o’clock position). Be sure you have a firm grip!
Rotate one wrist forwards or backwards, so the circle creates an opening but doesn’t bend out of it’s circle shape. It doesn’t matter which wrist rotates or in which direction, just whatever is comfortable for you.
Imagine you are opening or closing a door. When you open a door, the door moves away from the door opening, but it doesn’t move out of position or lose it’s shape as a rectangle. This allows the door to swing right back into place when you close it. A jump ring works the same way – one half of the jump ring just moves away from the opening while maintaining it’s shape as a perfect circle.
This part does take practice! I know it can be frustrating. But it is a key skill in jewelry making, and once you master it, you’ll be able to make all kind of jewelry quickly and easily. So don’t give up!
STEP 3
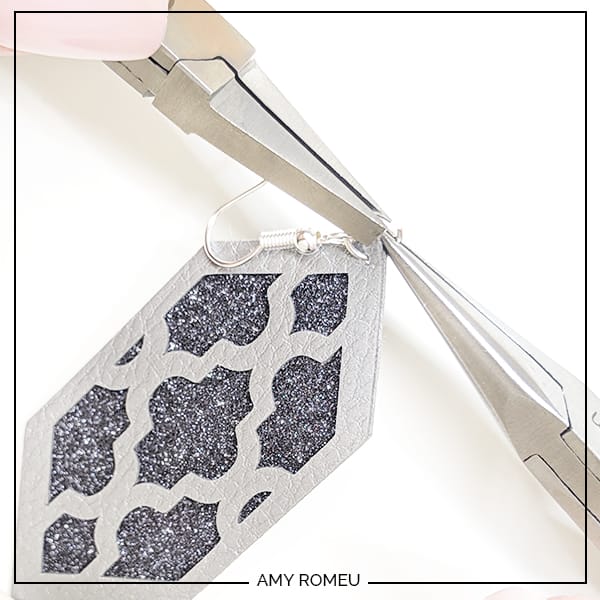
Now that your jump ring is open, I like to keep my grip on it with one of the pairs of pliers so it’s easier to hold onto the jump ring. With your other hand, slide your faux leather earring shape or shapes onto your jump ring.
Then slide your earring hook onto the jump ring. Pay attention to which side is the front of your earring and which direction the hook faces as you do this.

STEP 4
Using the two pliers again, twist one set of pliers the opposite direction you used to open the jump ring initially so the ends of the ring meet up again. You don’t want any gap or space in your jump ring!
If the jump ring ends don’t meet up and close up any gap, use your two pliers to wriggle the ends of the ring closed. You may have to repeat the motion of twisting one wrist away and then back again.
This may take some practice if you aren’t familiar with opening and closing jump rings! That’s ok. The goal is the have the two ends of the ring meet without any gap, which maintaining the circle shape of the jump ring.
Repeat with the other earring. That’s it!
Your faux leather earrings made with your Cricut or Silhouette are finished professionally and hang straight!
Again, learning to open and close jump rings takes patience, and practice! But it’s the best way to finish your faux leather earrings in a professional way, one that allows maximum natural movement for your earring creations!
If you are interested in learning how I made these exact earrings with my Cricut, check out my step by step tutorial (including a supplies list, my cut settings, and the SVG cut file) on my blog here.
If you want to see all of my Cricut Jewelry tutorials, click here.
Until next time… and happy creating!

Want the FREE SVG file you so you make these CRICUT FAUX LEATHER & IRON ON FOIL EARRINGS yourself?
Get it from our Resource Library! You’ll receive the password for the Resource Library instantly after filling out the form below!
Want to remember this? Post this HOW TO MAKE FAUX LEATHER EARRINGS HANG STRAIGHT tutorial to your favorite Pinterest board!
Hello, I tried doing it like in the picture, but the earring wire breaks when I twist it. I even tried doing it again to make sure I didn’t have a defective earring wire but it did the same thing.
Hi, Liz! I’m sorry you are having trouble with this technique.
A few things to try: first, be sure your earring hooks are good quality. Some hooks from Amazon, etc. are very thin and can break easily. If your earring hook is made from sturdy wire, it won’t break with this slight 90 degree twist.
Second, be sure you are holding the hook part firmly with your fingers before you try to twist the bottom loop. I try to hold as much of the hook as possible between my fingers to add stability as I use the pliers to gently twist the loop. Keeping the hook part very stable and protected helps only the loop at the bottom turn. This maintains the integrity and strength of the earring wire.
I hope those tips help! Let me know! Thank you. Amy
Hi Amy! I’ve purchased a few of your templates on Etsy, and love them. I have a couple questions that I’m hoping you can offer guidance on. 1) Most of the faux leather I have has a felt like backside. The instructions on the cricut say to put the faux leather shiny side down. Some pieces are flimsier than others and the cricut doesn’t cut all the way through. I’m using a fine point blade. Should I change blades? 2) Any suggestions on how to make some of that flimsier faux leather stuff? Maybe painting the backs? Thank you!
Hi, Hanna! Thanks for your message. I do have suggestions for cutting felt backed faux leather. This post has my 17 best tips and tricks for cutting faux leather and I think they will really help: https://amyromeu.com/best-tips-tricks-secrets-cut-faux-leather-cricut/
I also recently made a video about 4 different ways to put a back on faux leather earrings! You can check it out here: https://www.youtube.com/watch?v=Q1IK6EfA6c8&t=3s
Please let me know if you have any additional questions after checking out these resources, I’m happy to help.
Thank you.
Best regards,
Amy
Also, can you share the jump rings you use? The link went to hooks. The hooks and rings I have are not very good quality! Thanks.
Hi, Hanna! Thanks for your message. I corrected the link to the jump rings I used for this project. I recommend using 6mm or 5mm size jump rings.
You are awesome! I could not figure out why my earrings were not facing forward. Thanks for the video!
Can you put heat bond on the back of faux leather to bond to the front of a different faux leather?
Hi, Cynthia!
Yes, you can! I have a video about four different ways to put a back on faux leather earrings that you may find helpful: https://youtu.be/Q1IK6EfA6c8
Thank you!
Amy