Easy DIY Cricut Joy Earrings – Summer Starfish
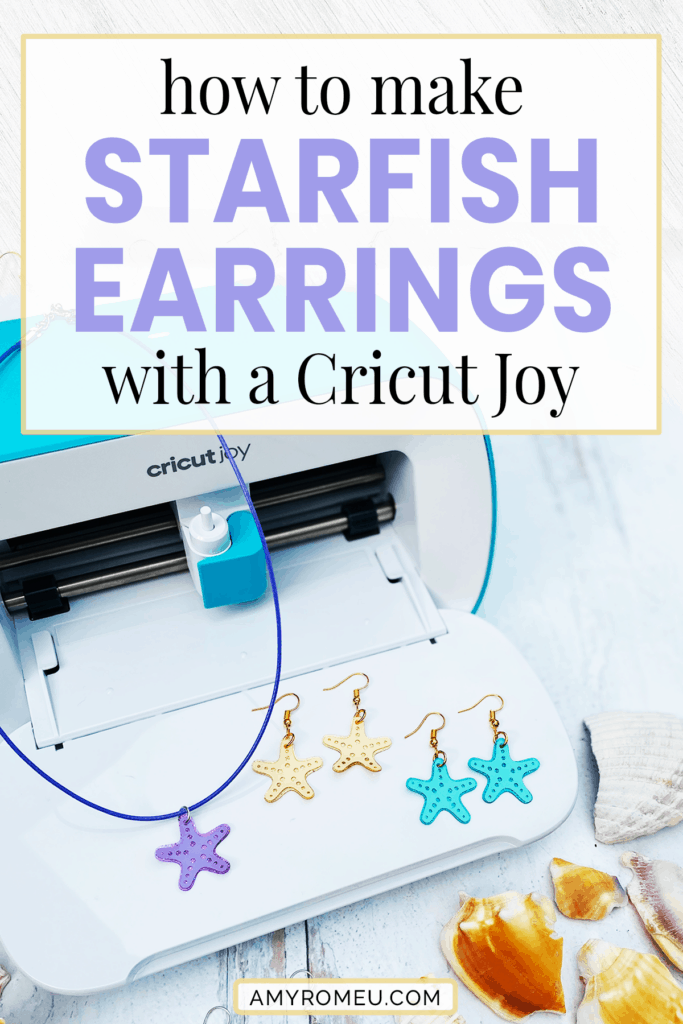
How to Make Earrings with the Cricut Joy
You know I love to make earrings in my studio with my Cricut Maker and my Cricut Explore Air 2… but I still get asked all the time: can you make earrings with Cricut Joy? The answer is YES, absolutely you can! To see my other posts about how to make earrings with a Cricut Joy, click here and here and here.
This summer we’ve been traveling a lot as a family, and while I love being on vacation, I’ve missed crafting, too! For our recent beach trip, I decided to take my Cricut Joy with me to make earrings on the go! I can’t wait to show you how fun and easy it is it make earrings your next Cricut Joy project!
Not into earrings? No worries! I’ll show you how to make these earrings into fun charm necklaces, too.
For this project, I’m going to use holographic jelly sheets, which cut like faux leather, and then apply vinyl on top. I’ll use Cricut Joy Removable Smart Vinyl because I love the colors in this particular pack I have on hand, but you can also use permanent vinyl, or even heat transfer vinyl with a Cricut Easy Press Mini. You can also use faux leather instead of jelly sheets for the bottom layer. (To see how to apply heat transfer vinyl to jelly sheets or faux leather, follow along with this tutorial here).
By the way, you don’t need to have a Cricut Joy to make these summery starfish earrings. I’m making these earrings with the Fine Point Blade, the standard blade in the Joy which also comes with both the Cricut Explore family of machines and the Cricut Maker or the Cricut Maker 3. I’ll give you my SVG cut file for these beachy starfish earrings FREE so you can test out how to make earrings with a Cricut Joy for yourself. You’ll find out how to download my free SVG file for this project at the bottom of this post.
Want to see all of my Cricut earring & jewelry tutorials? CLICK HERE
Ready? Let’s get started!
This page contains some affiliate links (which means if you make a purchase after clicking a link, I will earn a small commission at no additional cost to you). Read my full disclosure policy here.
CRICUT JOY FAUX LEATHER EARRINGS – Materials List
- A Cricut Joy cutting machine (or another cutting machine of your choice. The Cricut Joy is available on Amazon here or the Cricut website here.
- You can also make these earrings with the Cricut Maker family or the Explore family of cutting machines:
- The Cricut Maker 3 is available on Amazon here or the Cricut website here.
- The Cricut Maker is available on Amazon here or the Cricut website here.
- The Cricut Explore 3 is available on Amazon here or the Cricut website here.
- The Cricut Explore Air 2 is available on Amazon here or the Cricut website here.
- You can also make these earrings with the Cricut Maker family or the Explore family of cutting machines:
- Cricut Joy Green Standard Grip Cutting Mat. A green mat comes with the purchase of the Cricut Joy. You can but extra Joy-sized mats separately on Amazon here. I usually use a Strong Grip purple mat when cutting materials like faux leather, but at this time there isn’t a purple (strong grip) Cricut mat that’s Joy sized. The green mat works perfectly for this project.
- Blue painters tape. Used to get the jelly sheets (or faux leather) to stick well to the green Joy cutting mat if your mat isn’t new or very sticky anymore. You can get it at any hardware store and most big box or grocery stores. Amazon also has it here.
- Holographic Jelly Sheets. I used this assortment from Amazon here, but I also love this pack of jelly sheets from Amazon here, and this pack, also from Amazon. If you don’t want to use jelly sheets, you can also use any faux leather you have on hand.
- Cricut Joy Smart Vinyl in the colors of your choice. I used the Hydrangeas Samper of Removable Smart Vinyl, available on the Cricut website here. You could also use this Permanent Vinyl sampler from Cricut called “Beachside,” available on Amazon here. (NOTE: If you don’t have Smart Vinyl, you can use any other permanent vinyl and just place it right on the green mat. Follow the directions for cutting on a mat in that case.)
- A small hole punch (if you plan to punch holes in your earrings after you cut the shapes instead of having the Cricut cut them). This is my go-to hole punch for making Cricut earrings from Amazon here.
- Earring hooks – I used earring hooks from this assortment of earring hooks in different finishes these from Amazon here. Hobby Lobby, Michael’s, and other craft stores, as well as your local bead store, will have lots of earring hooks as well.
- Necklace Cords (if you don’t want to make earrings) – I used waxed cords in assorted colors from this package on Amazon here.
- Small jump rings – I used this assortment of 6mm size jump rings in different metal finishes from Amazon here. Again, your local craft store or bead store will have plenty of jump rings to choose from if you want to pick some up in person. You could use 5mm size if that’s what you have, but I wouldn’t go any smaller than 4mm or larger than 6mm for earrings.
- Two pairs of flat nose pliers – I’m using one pair of wide nose pliers and one pair of needle nose pliers here, but you can use any two flat nose pliers you have in your jewelry making tool box .My favorites are Wubbers brand in the “Baby” size. You can see the Baby Wubbers Chain Nose Pliers on the left on Amazon here, and the Baby Wubbers Flat Nose Pliers on the right on Amazon here.
Note: Be sure to check out my post Beginner’s Guide To Jewelry Making Tools for all the information you need to know about buying and using jewelry making tools.
PROJECT INSTRUCTIONS
STEP 1 – Download Free SVG
It’s Design #181 in my FREE Resource Library! You’ll receive the password for the Resource Library instantly after filling out the form below!
Save the zipped folder that downloads to your computer. You’ll need to unzip or extract the files FIRST so you can upload the cutting file to Cricut Design Space.
STEP 2 – Upload SVG To Design Space
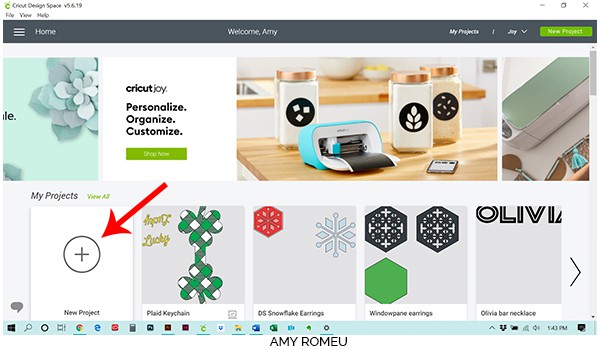
After you’ve unzipped the folder and made a note of the file location, open Cricut Design Space and click on NEW PROJECT to get started.
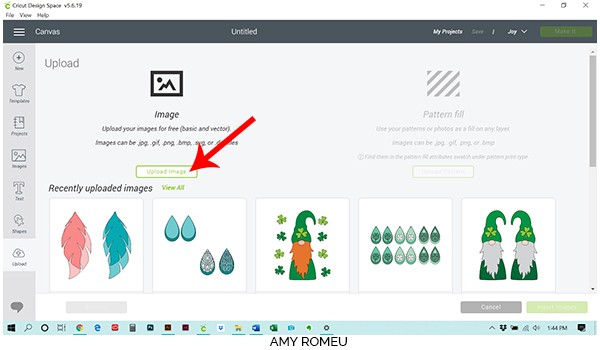
Then click on UPLOAD from the left hand side menu.

Click on the UPLOAD IMAGE button, then click BROWSE to locate your file.
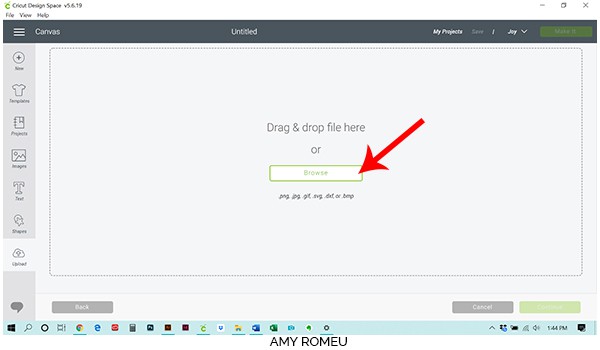
Navigate to where you’ve saved the already unzipped SVG file for this project. Double click on the SVG file to bring it into the upload screen in Design Space.
If you get an error message that says “unsupported file type,” you may have clicked on the wrong file, or your SVG file is still zipped.
You’ll see a preview of the starfish earring shapes for this project. Hit the green SAVE button.
After you’ve selected your file to upload, you’ll see it as the first item in your “recently uploaded designs” row.
Click on it so it is outlined in green. Then click on the green INSERT IMAGES button in the bottom right corner.
STEP 3 – Prep SVG For Cutting
This brings the starfish earring shapes into Cricut Design Space. The file should import at 2.087″ wide and .967″ tall. If it doesn’t (which happens sometimes depending on your device), use the size box on the top menu bar to enter the measurements above and resize your design. Be sure the lock above the size width and height boxes is “locked” so your design will resize proportionately.
If you’ll be using the Cricut Joy to make these earrings like I am, be sure the Joy is your selected machine (next to the Make It button) before pressing MAKE IT.
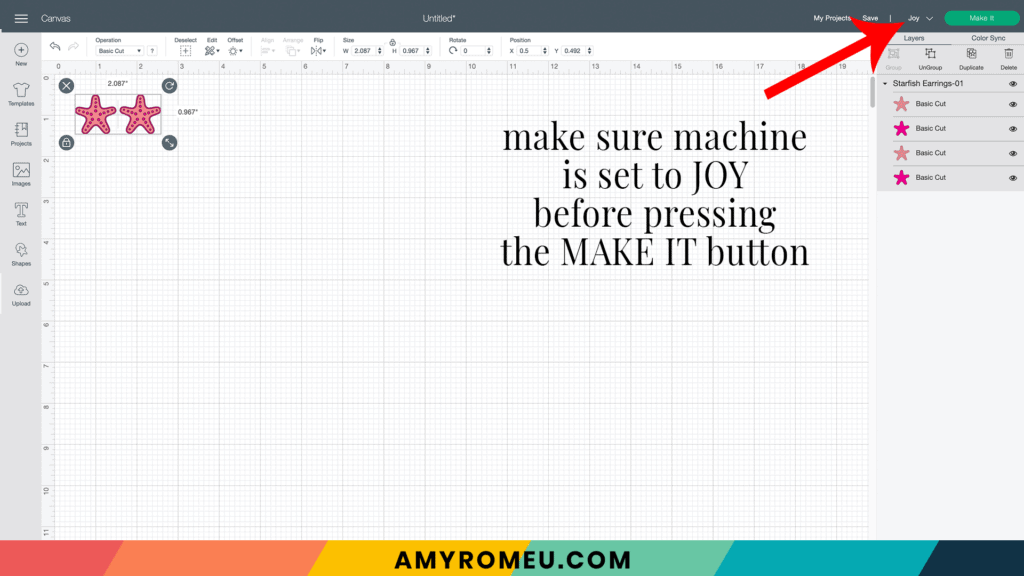
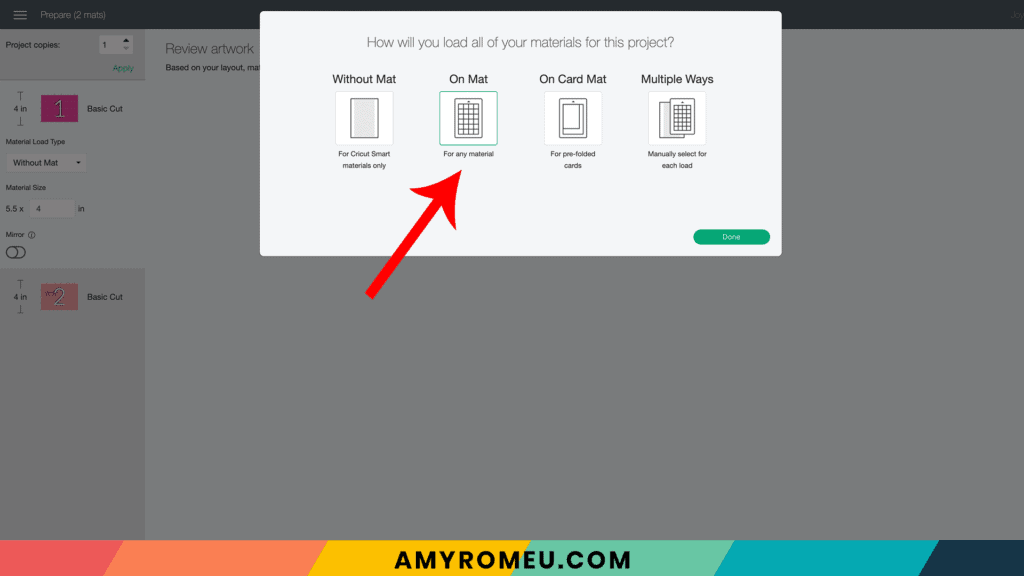
I cut the holographic jelly sheet first using the Joy sized mat. Select On Mat on the next screen and then click DONE.
Look at the mat preview to see how large of a piece of jelly sheet (or faux leather) to cut so the shapes cut completely. I cut a piece about 1.5 inches tall and 2.5 inches wide.
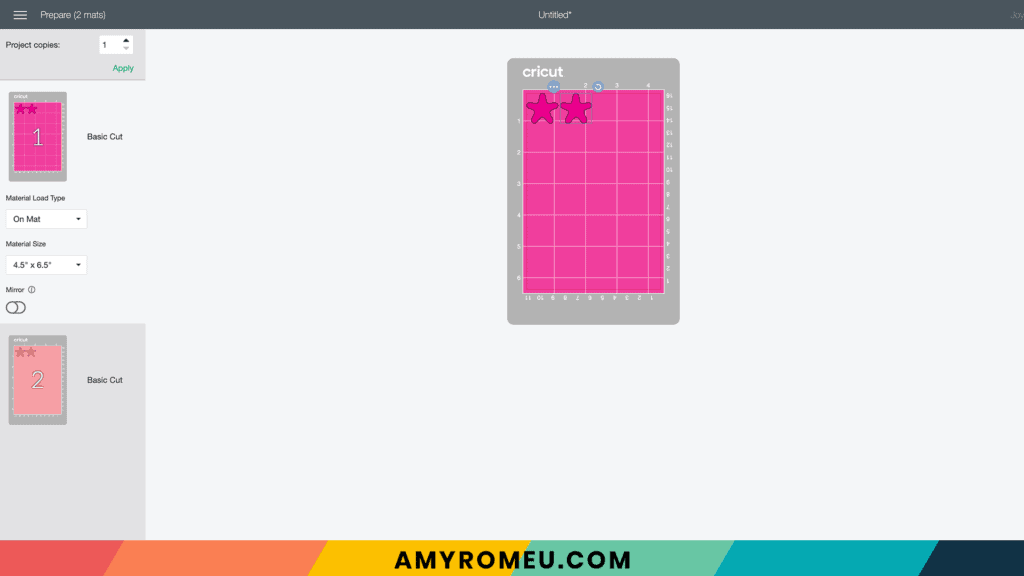
Click the green CONTINUE button.
STEP 4 – Material Selection & Custom Settings
I will use the Faux Leather (Paper Thin) cut setting for the jelly sheet, but you can also use it if you are cutting faux leather.
On the Materials screen, click on BROWSE ALL MATERIALS on the right.
On the next screen, type “faux leather” in the search box.
NOTE: If you type “faux leather” and get no results, it’s because you’ve selected “no cutting mat” on the previous screen. The Cricut Joy knows it can only cut faux leather on a mat so you won’t get the off mat material options. In that case, go back to the mat preview and double check the mat cut selection for the mat you are trying to cut.
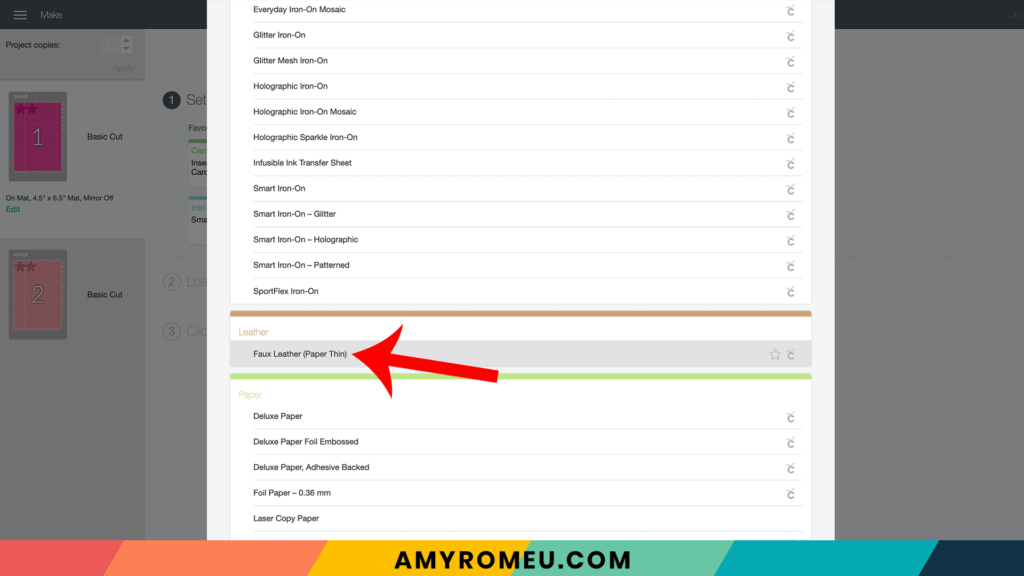
Once you’ve typed Faux Leather, it should pop up on the screen as Faux Leather (Paper Thin).
Click on Faux Leather (Paper Thin) to select it as your material. Then click the green DONE button.
You’ll come back to your mat preview screen. On a desktop, you can hover your mouse over the small mat on the left hand side to see a larger preview. Take note of the size of material you need to cut these shapes on this mat. For the starfish earrings, we need a piece of material about 2.5 inches wide and 1.5 inches tall.
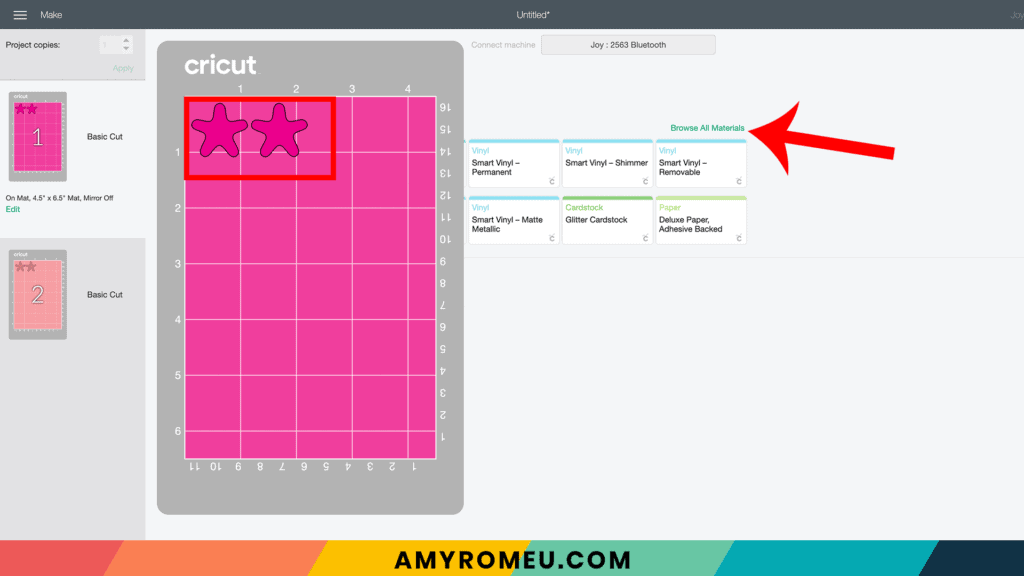
Select “MORE” as the cutting pressure.
STEP 5 – Cut the Mats
Place your cut piece of jelly sheet (or faux leather) in the top left corner of your Cricut mat. If your mat is new and sticky, you probably won’t need to tape it down. You can tape down all sides with blue painter’s tape if necessary.
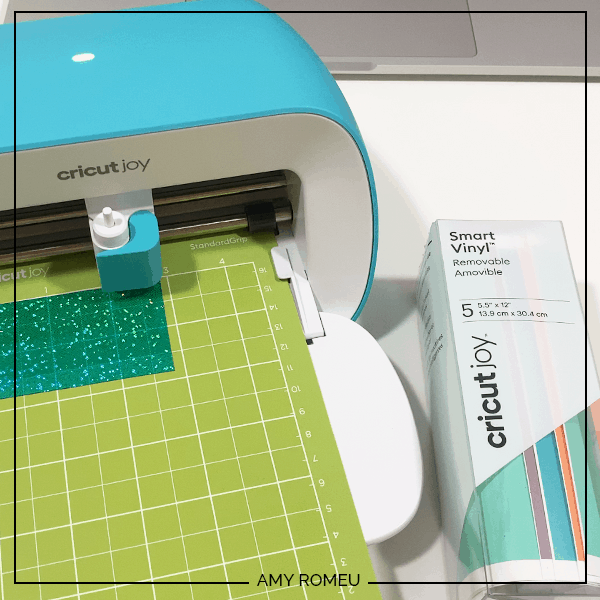
Load your mat into the Cricut Joy. Then press the GO button, and your machine will start cutting.
When the Joy is finished cutting, it will prompt you to either unload the mat OR rerun the cut. I like to repeat the cut TWO more times before unloading the mat. If you aren’t using the Joy, you can press the C button again on the Maker or the Explore Air 2 to repeat the cut, as long as you haven’t unloaded the mat yet.
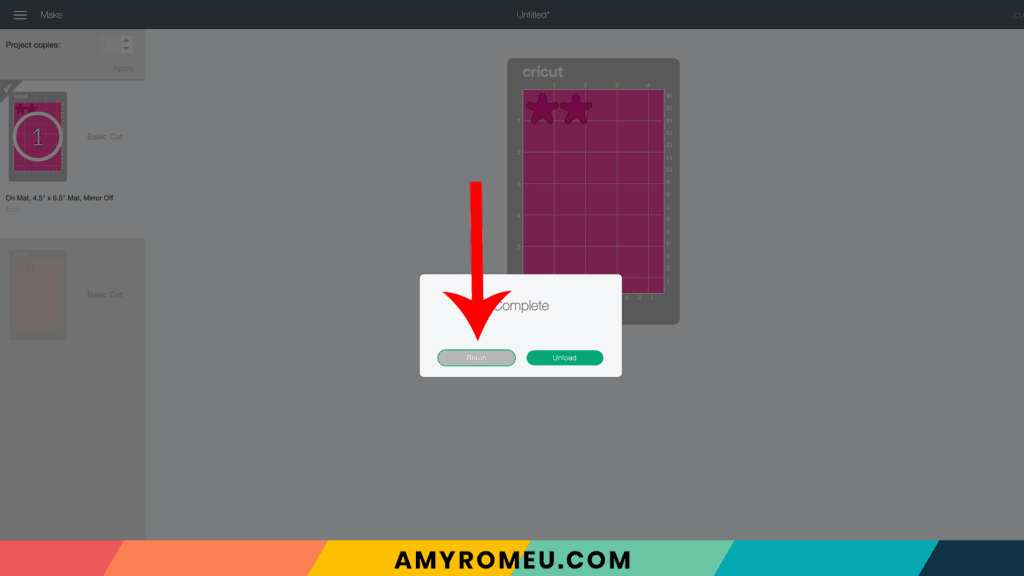
Remove your earring shapes.
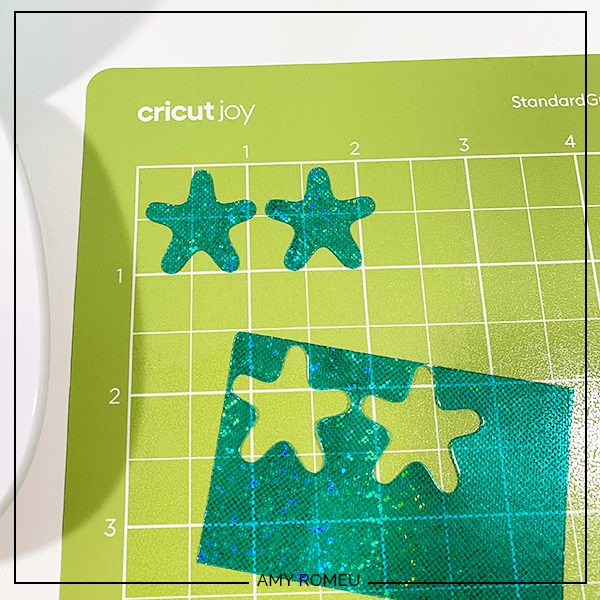
Cut the next mat from the vinyl of your choice. I used Cricut Joy Removable Smart Vinyl, but you can use Permanent Vinyl, Glitter Vinyl, or Heat Transfer Vinyl, whatever you choose.
Make the mat selection again depending on whether you are using Smart Vinyl (cuts without a mat) or not (regular vinyl will cut on a mat). Also make the material selection that corresponds to your chosen material.
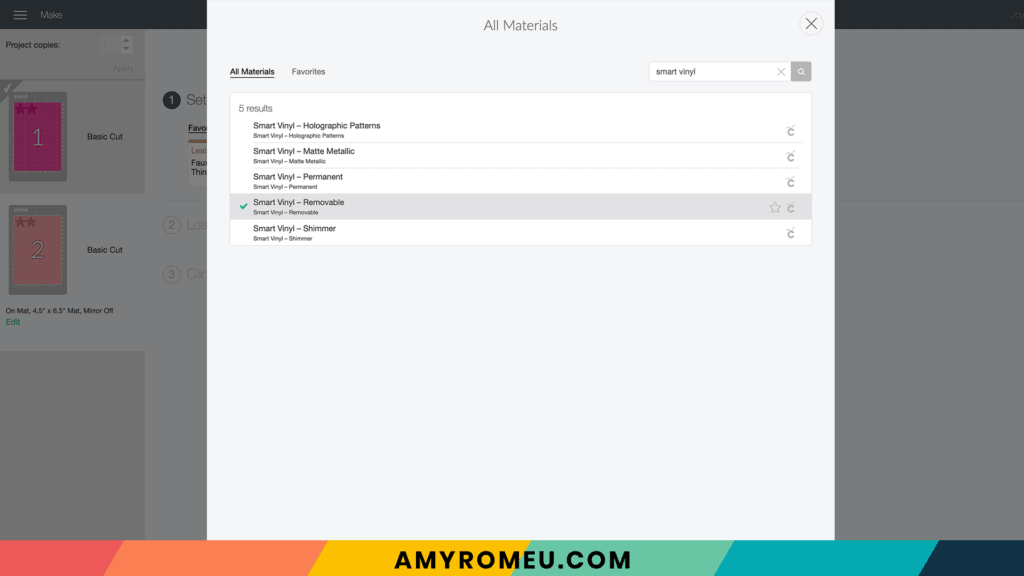
Load your Smart Vinyl into the Joy (or the prepared green mat with vinyl on it, face down) into the machine and cut.
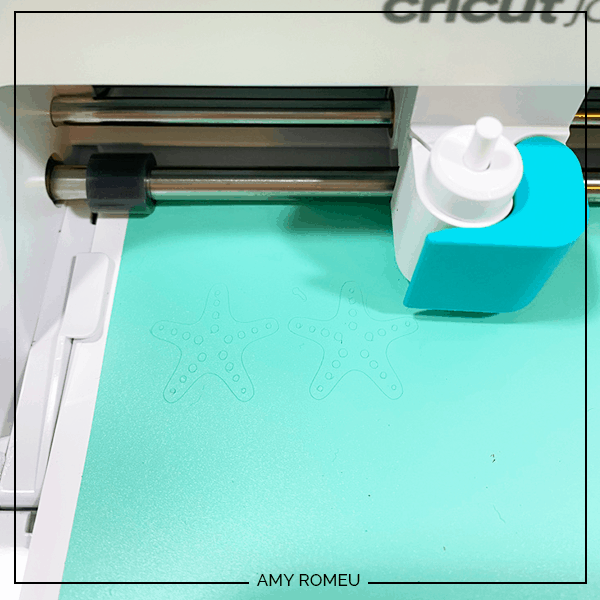
When the Cricut Joy is finished cutting, Design Space will prompt you to unload your mat. Weed away the little circles inside the starfish first, and then the excess vinyl around the starfish. Cut the starfish apart.
If you are using permanent vinyl or removable vinyl, you’ll need some transfer tape. I used the Cricut Joy sized transfer tape. Cut a small piece of it and layer it on top of one vinyl starfish. Use your brayer to press it down well.
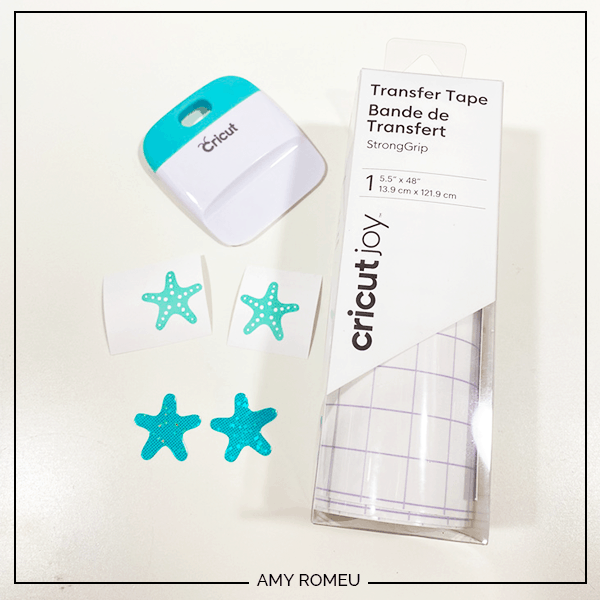
Place the transfer tape covered vinyl star over the jelly sheet and rub down well with the brayer.
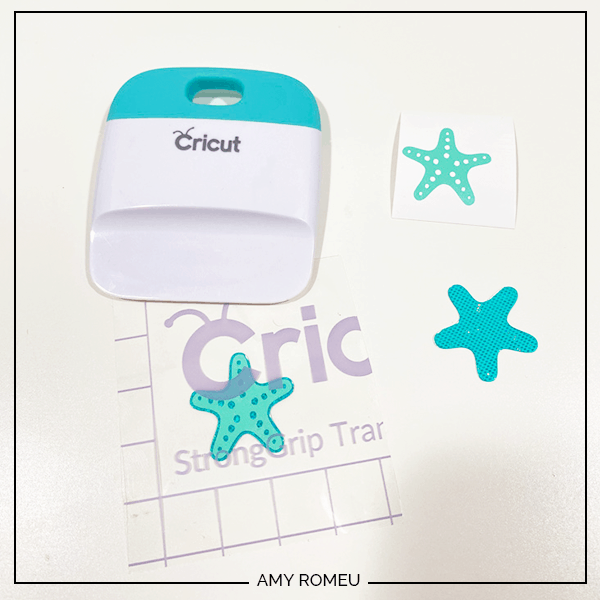
Carefully peel away the transfer tape to reveal the layered starfish earring.
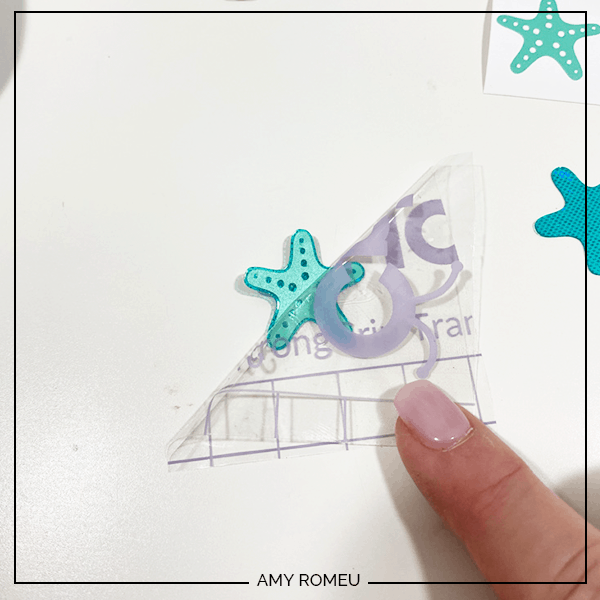
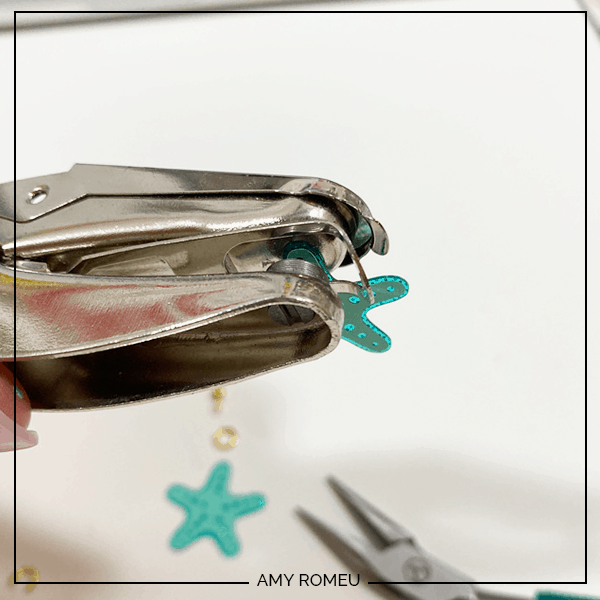
Repeat with the other earring. Then using a 1/16″ paper punch like this one to punch holes in the top of each earring.
STEP 6 – Attach Jump Rings & Earring Hooks
Now it’s time to assemble the earrings. You’ll need small jump rings, earring hooks, and two pairs of flat nose pliers.
First you need to turn the bottom loop on the fishhook sideways so your earring will hang correctly. See the image below to see how the orientation of the earring hook has to change so your earrings will hang correctly.

You’ll do this using one pair of flat nose pliers. While holding the hook firmly between two fingers, grip the entire earring loop between the pliers and twist your wrist until the loop is perpendicular to the earring post. Repeat with the second earring hook.
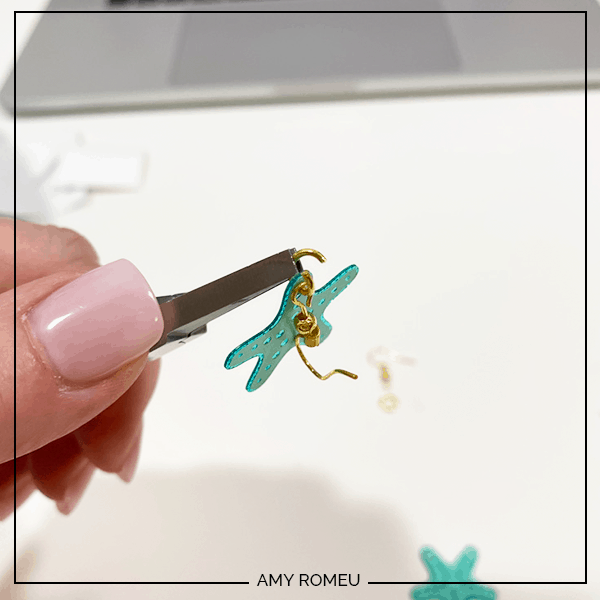
Now you’ll need to open your small jump ring to slide the faux leather earring shapes and the earring hook on. Using two pliers, grip each side of the jump ring, making sure the opening in the jump ring is facing up (the twelve o’clock position).
Rotate one wrist forwards or backwards, so the circle creates an opening but doesn’t bend out of it’s circle shape.
Slide your faux leather earring shapes in size order onto your jump ring, then slide your earring hook onto the jump ring.
Pay attention to which side is the front of your earring as you do this. Double check your shapes and hook are all facing the right direction.
Then use your two pliers to close the jump ring again using a wrist twist in the opposite direction. It takes a little practice, but once you get it, you’ll be able to open and close jump rings quickly and easily.
Repeat with the other earring. That’s it!
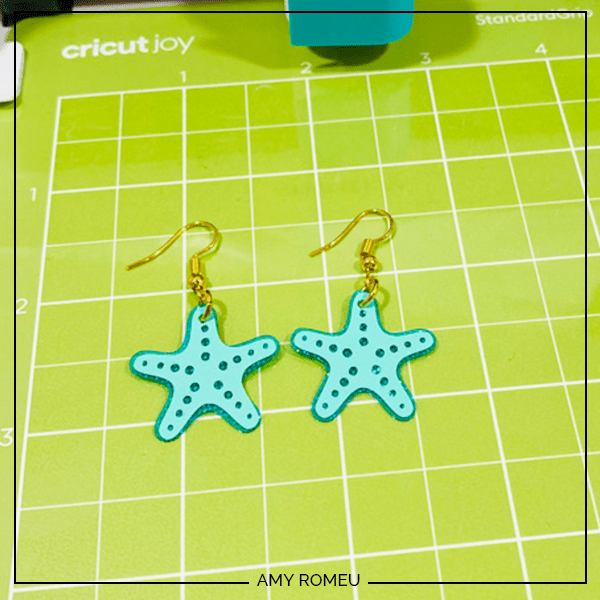
If you don’t want to make earrings, just attach the starfish to a waxed cord like these from Amazon with a jump ring.
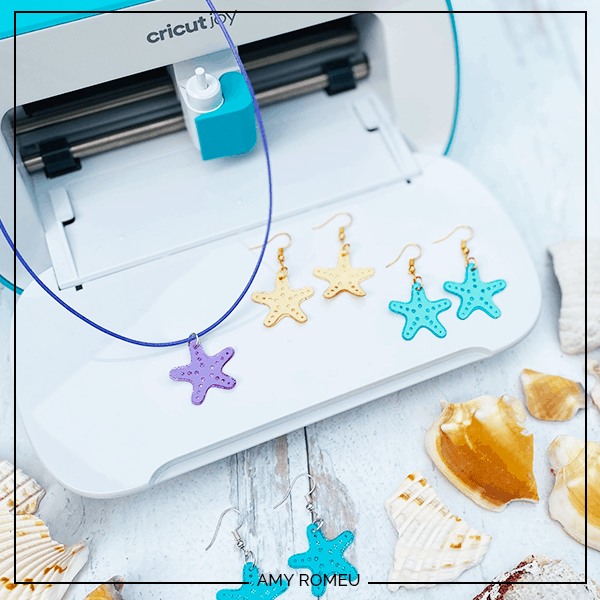
Are you going to try this project? If you do, please post a comment and attach a photo of your finished starfish earrings or necklaces and let me know if you liked making earrings with the Cricut Joy!
If you liked this project and want to see all of my Cricut Jewelry tutorials, click here.
Until next time… and happy creating!

Want the FREE SVG file you so you make these CRICUT JOY EARRINGS yourself?
It’s Design #181 in my FREE Resource Library! You’ll receive the password for the Resource Library instantly after filling out the form below!
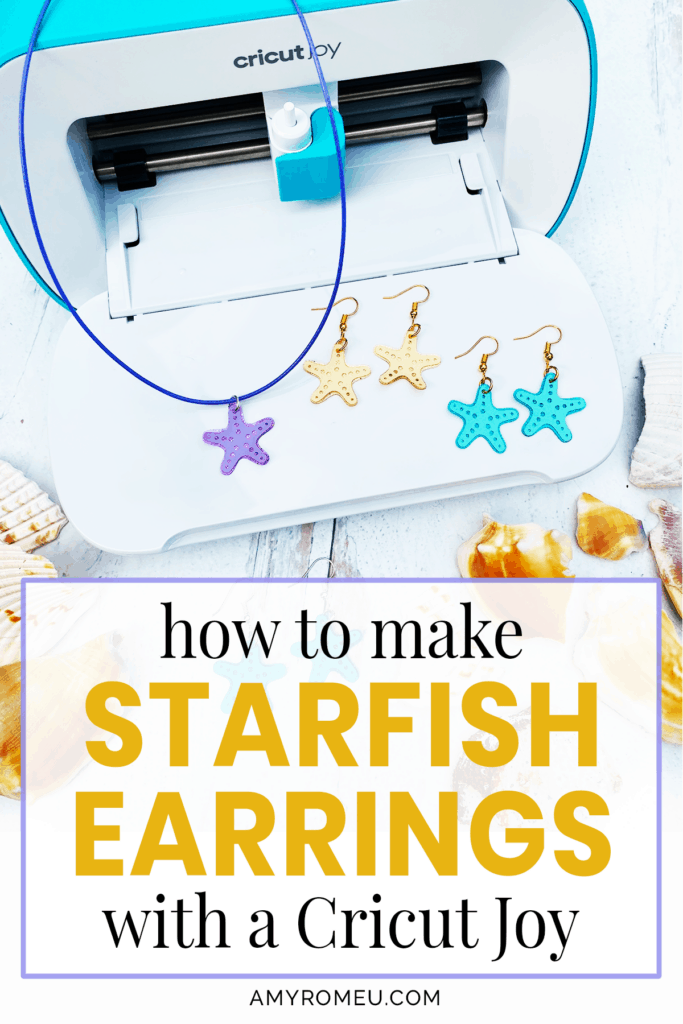
Want to remember this? Post this CRICUT JOY EARRINGS project to your favorite Pinterest board!

These earrings are so cute! When I click on the SVG file it contains the file for the key fob.
Hi, Lori! Thank you so much for your message. I’ve figured out the issue and corrected it. Would you please refresh your browser on my library page a few times and try again? Thank you again for letting me know. 🙂
Amy
Works! Thank you🙂
Yay! Thanks! 🙂
Me and my friend tried making the starfish earrings and we could not get the circuit maker or the joy to cut through the jelly sheets
We tried and tried
Hi, Mary! I’m sorry you had trouble with this project. The jelly sheets I used for the tutorial cut easily with a few passes. Can you tell me what jelly sheets you used? Thanks!
These earrings are so fun! Can’t wait to make them!!
Thanks Amy
Thank you so much, Trudy!