
DIY Cricut Joy Gingerbread Man Earrings

DIY Cricut Joy Gingerbread Man Earrings
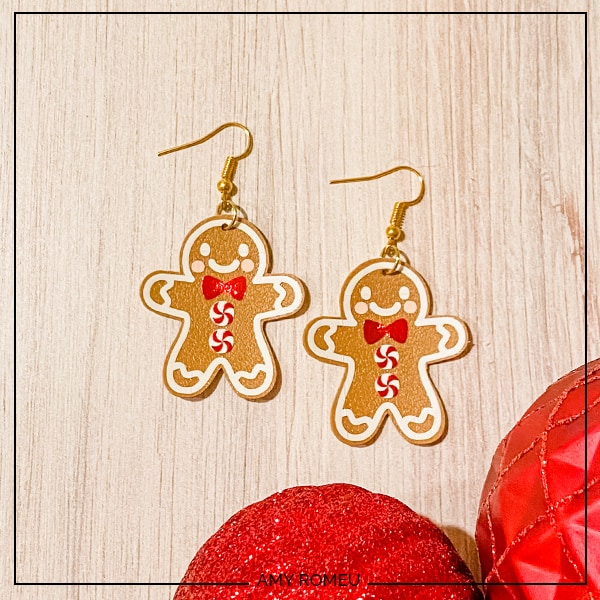
The weather is cooling down here in Florida, finally. When that happens, I immediately start mentally planning for the holidays… and what earrings I’m going to wear! If you’ve been following my blog for any length of time, you know I’m a Cricut earring fanatic. So naturally I wanted to see if I could design some gingerbread man earrings made from faux leather and heat transfer vinyl. I’m think they came out really cute, and I’m excited to share my newest holiday earring design with you. So if you want to learn exactly how to make these cute gingerbread man earrings with a Cricut, I’m going to show you step by step in this tutorial.
I’ll be using my Cricut Joy for this project, but you can also use a Cricut Explore Air 2, or a Cricut Maker. Cricut Explore Air 2 users will turn their dial to custom before choosing the faux leather cut setting that I will use in this tutorial.
Finally, I love to share my designs, so I’ll give you my SVG cut file for these gingerbread man earrings FREE so you can get started making your own DIY gingerbread man earrings with a Cricut right away!
If you’d rather watch a video for this project, click below:
Ready? Let’s get started!
Want to see all of my Cricut earring & jewelry tutorials? CLICK HERE
This post contains some affiliate links (which means if you make a purchase after clicking a link, I will earn a small commission at no additional cost to you). Read my full disclosure policy here.
DIY Cricut Gingerbread Man Earrings – Materials List
- Cricut Joy, Cricut Maker, Cricut Maker 3, Cricut Explore 3 or Cricut Explore Air 2
- Cricut Joy Green Standard Grip Cutting Mat (comes with Cricut Joy)
- Cricut Purple Strong Grip Cutting Mat (if using the Maker or Explore machines)
- Cricut Green Standard Grip Cutting Mat (if using the Maker or Explore machines)
- Cricut Easy Press Mini or small Easy Press
- Cricut EasyPress Mat
- Teflon Cover Sheet or Parchment Paper
- Faux Leather (Brown) – I used this faux leather in the color “Latte” from one of my favorite Etsy sellers here.
- Cricut Foil Iron-On or Siser Glitter HTV in the color of your choice for the bowtie and peppermint swirl buttons. I used Red for both.
- Cricut Everyday Iron-On (White)
- Siser EasyWeed Vinyl in Light Pink (for the cheeks)
- Cricut Weeding Tool Set
- Blue Painter’s Tape (I like 3/4″ size but 1″ works, too)
- Art Glitter Glue with Ultra-Fine Metal Tip or Bearly There Glue with the Precision Tip
- 1/16″ Hole Punch (or this 1/16″ Hole Punch)
- Baby Wubbers Chain Nose Jeweler’s Pliers (or any small flat nose pliers you have with smooth jaws)
- Baby Wubbers Flat Nose Jeweler’s Pliers (or any small flat nose pliers you have with smooth jaws)
- Earrings Hooks
- Jump Rings
- Design #149 from my Free Resource Library. You can get the password by filling the form below.
NOTE: This design is for PERSONAL USE ONLY. If you’d like to sell earrings made from my Gingerbread Man Earrings SVG template, you may purchase a Commercial Use License from my shop here.
PROJECT INSTRUCTIONS
STEP 1 – Download the SVG Cut File
Download the SVG cut file for the gingerbread man earring shapes from my Resource Library. It’s Design #149. You can get the password to my library by filling out the form above.
Save the zipped folder that downloads to your computer. Then unzip the folder to access the folder’s contents. You’ll need to unzip or extract the files FIRST so you can upload the cutting file to Cricut Design Space.
STEP 2 – Upload the SVG File to Cricut Design Space
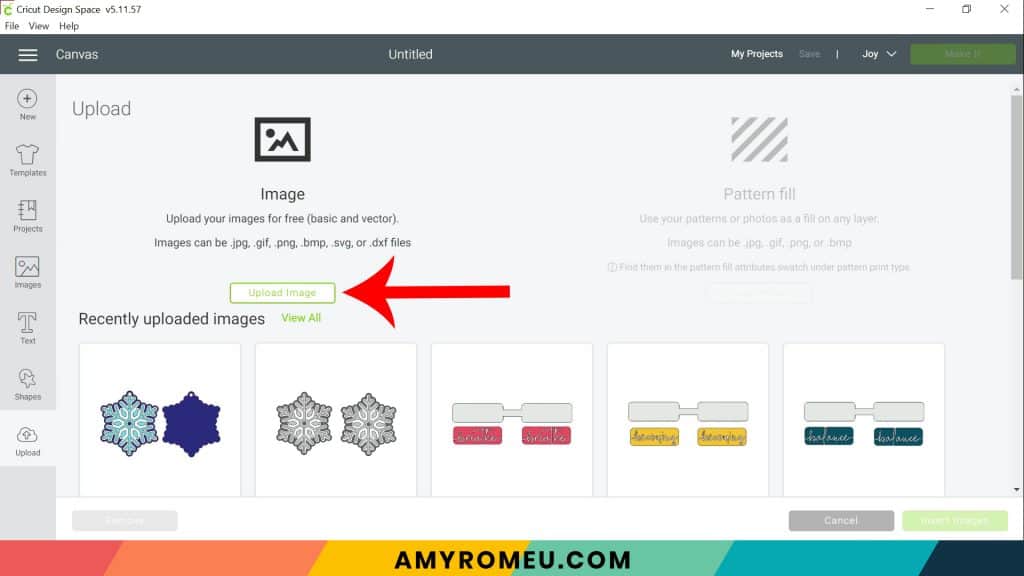
When you open Cricut Design Space, click on NEW PROJECT to get started. Then click on UPLOAD from the left hand side menu.

Click on the UPLOAD IMAGE button, then click BROWSE to locate where your unzipped SVG files are saved on your computer.
Double click on the gingerbread man earring SVG file you downloaded from my Resource Library to bring it into the upload screen in Design Space. If you get an error message that says “unsupported file type,” you may have clicked on the wrong file, or your SVG file is still zipped.
You’ll see a preview of the gingerbread man earring shapes for this project.
NOTE: You may have noticed this design doesn’t have pre-cut earring holes. That’s because for these kinds of layered projects, I prefer to make the earring holes with a hole punch after I cut and press the earrings together. I’ll show you what I mean when we get to that step!
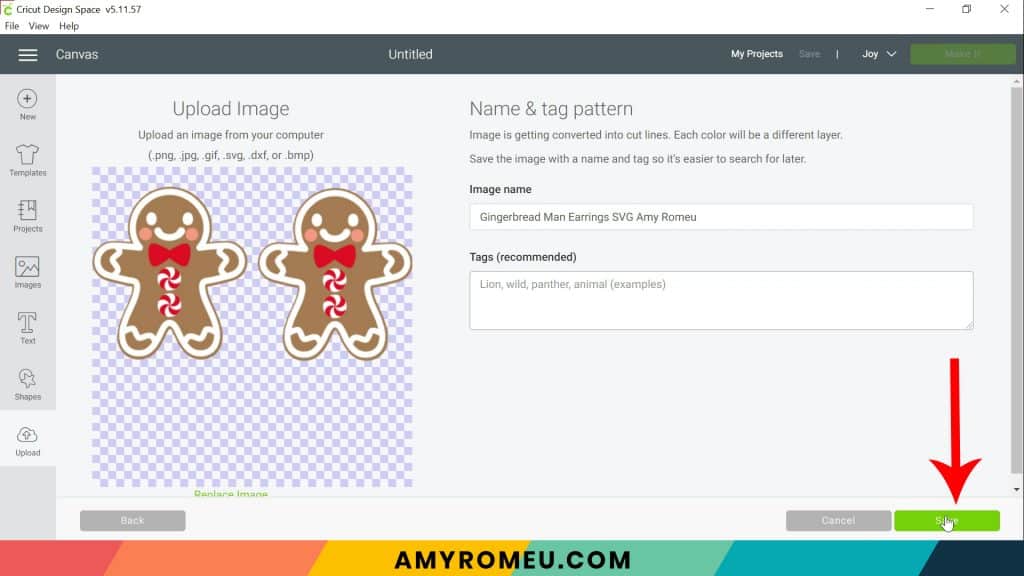
Hit the green SAVE button.
After you’ve selected your file to upload, you’ll see it as the first item in your “recently uploaded images” row.

Click on the gingerbread man earring shapes so they are surrounded by a green box. Then click the green INSERT IMAGES button.
This brings the shapes you’ll cut for the earrings into Cricut Design Space. Drag your artwork to the upper left corner of your mat. I don’t recommend resizing these earrings any smaller, but you can size them a little larger if you want to. You can resize them by clicking and dragging on the arrows in the bottom right corner, or by selecting both earring shapes and changing the height in the SIZE box at the top of the canvas.
NOTE: If you want to use another color for the bowtie and candy buttons, you can change the color by clicking on the red layers in the layer preview and then selecting a different color from the Fill dropdown menu.
IMPORTANT: If you are using the Cricut Joy to make your earrings like I am, be sure the Joy is connected and is your selected machine (if you have more that one) before continuing.
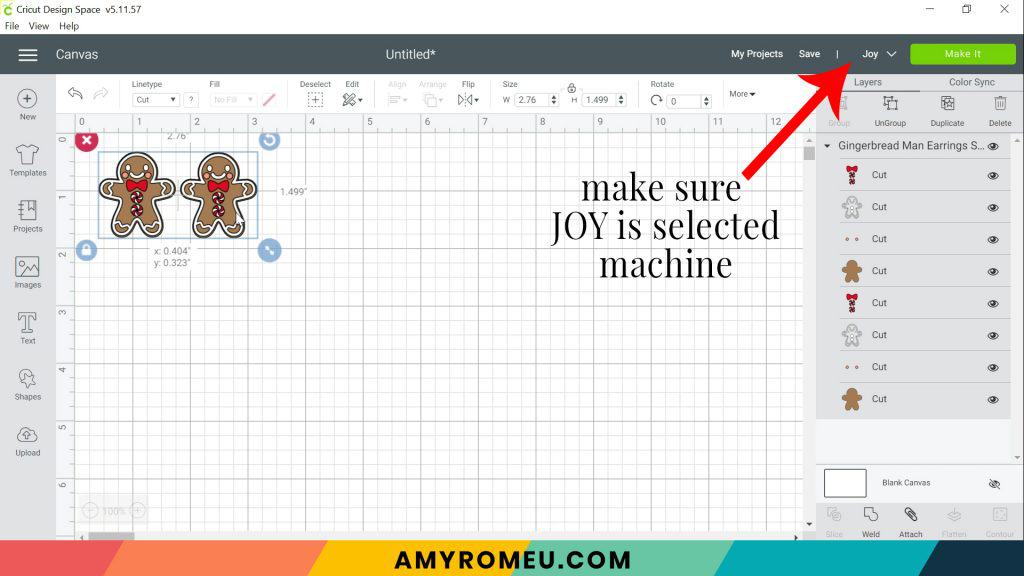
Once you’ve adjusted the size of your earrings (if desired) and confirmed the Joy is connected to Cricut Design Space, click the green MAKE IT button.
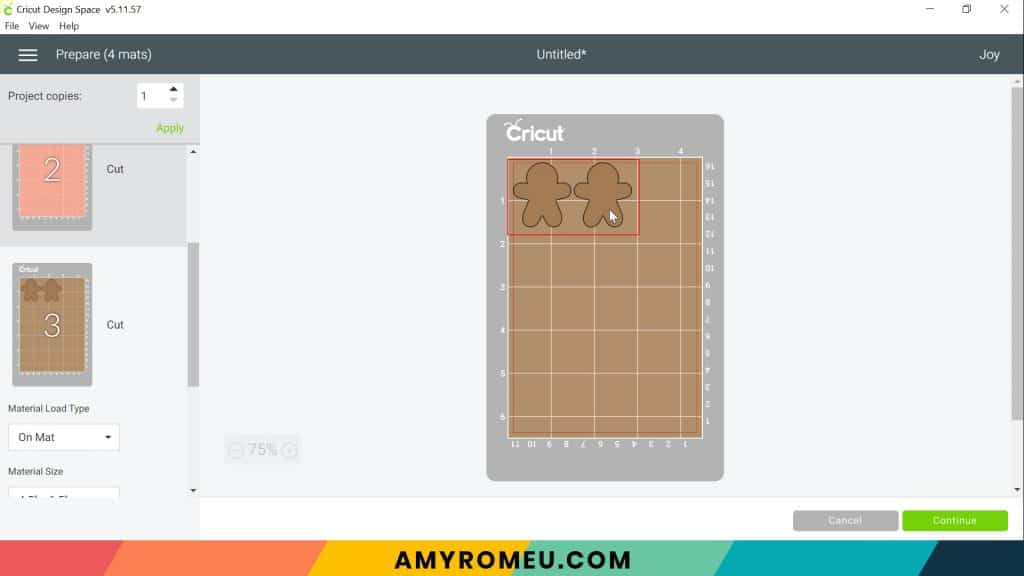
STEP 3 – Mat Preview
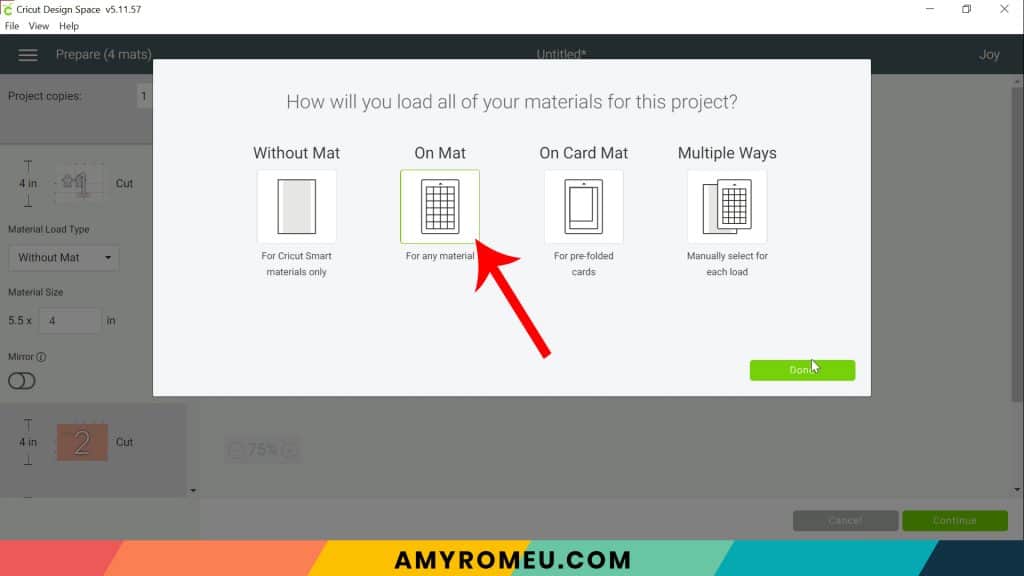
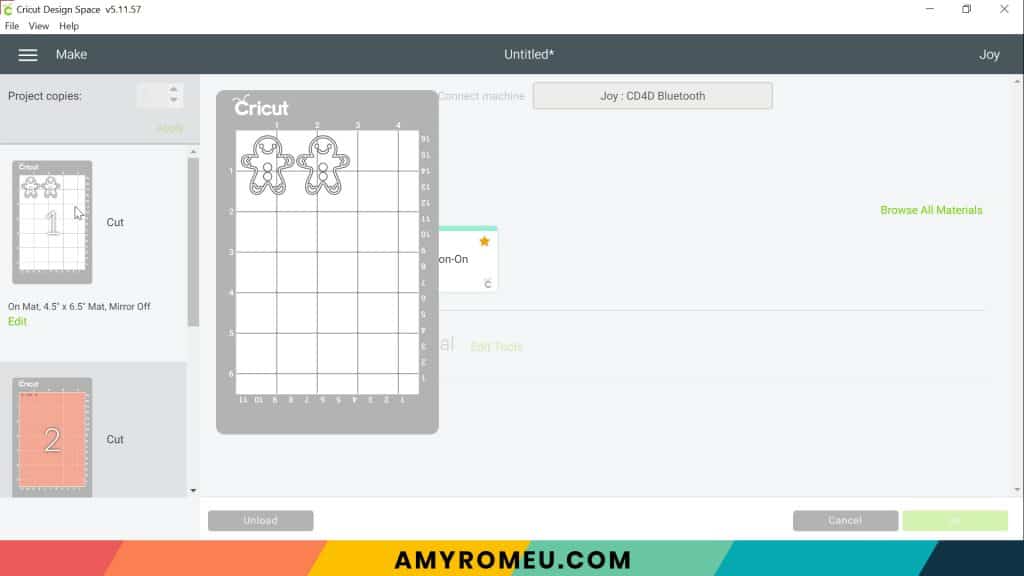
If you’re using the Cricut Joy, the mat preview screens will load, but you’ll be prompted to choose how you will load the materials for this project. Click on “On Mat” and then “Done.” (If you are using the Maker or the Explore Air 2, you’ll only see the mat previews).
Cricut Design Space automatically separates the different layers onto different mats for you. It isn’t necessary to mirror any of the mats in this project.
Scroll down to the brown mat. I always like to cut the faux leather layer first. Make a note of what size faux leather you’ll need to place on the mat for the earring shapes to cut completely. I’ve outlined the shape I need to cut in red in the photo below – it’s a piece of faux leather about 3 inches wide and 2 inches tall.
Hit the CONTINUE button.
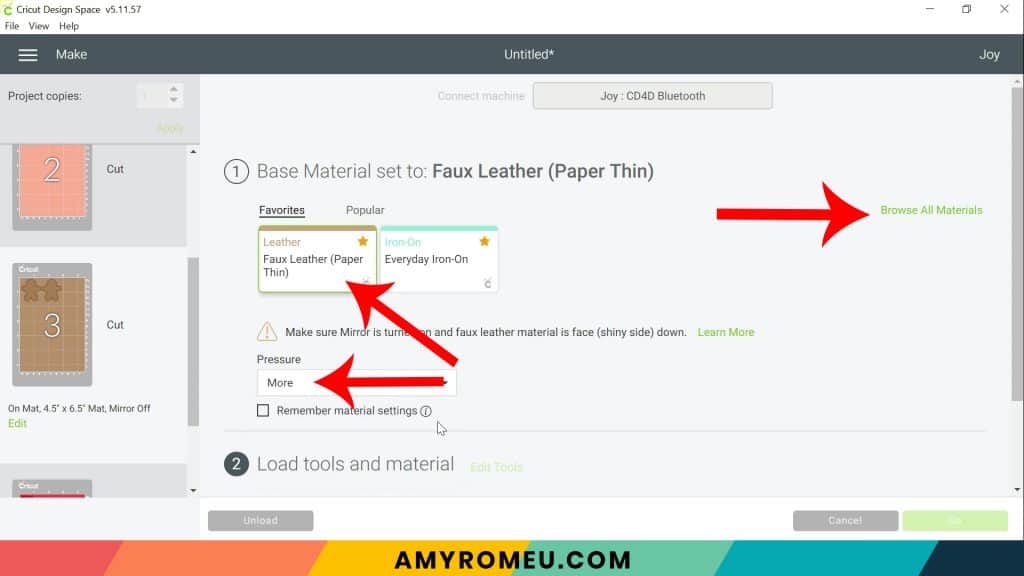
STEP 4 – Make Material Selection
Now you’ll make your material selection for this cut.
NOTE: If you are using the Explore Air 2, set your dial to Custom before continuing.
I already have my preferred material selection – Faux Leather (Paper Thin) – saved as a favorite material in Cricut Design Space as seen below.
If you do, too, click on Faux Leather (Paper Thin) now.
If you don’t, click on “Browse All Materials” to search for this setting. Type “faux leather” in the search bar and click on the magnifying glass.
NOTE: If you are using the Cricut Joy and you don’t see Faux Leather (Paper Thin) as an option, you probably didn’t select “On Mat” as your material loading method in the previous step. The Joy is smart and knows it can only cut faux leather on a mat.)
After you’ve chosen the material type, choose MORE from the pressure drop down menu below. This will help you get nice, clean faux leather cuts.
Once you’ve made the material selection, it’s time to prepare the faux leather for cutting.
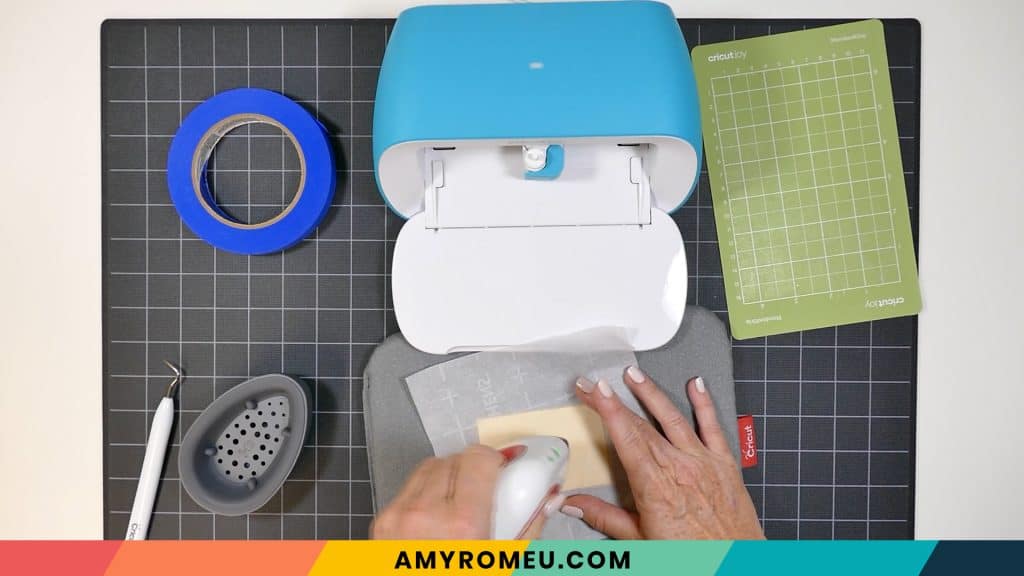
STEP 5 – Apply Backing to Faux Leather Before Cutting
For this project, I’ve added a backing of foil iron-on to the earrings. This gives the faux leather some structure and keeps the gingerbread man earrings from curling. It also adds some shine and gives your earrings a professional look, but it isn’t necessary! You can skip this step if you’d like to.
To do this, I like to press a piece of foil iron-on to the back of the piece of faux leather before I cut the gingerbread man shapes with the Cricut.
Cut a piece of foil iron on just slightly smaller than the faux leather piece.

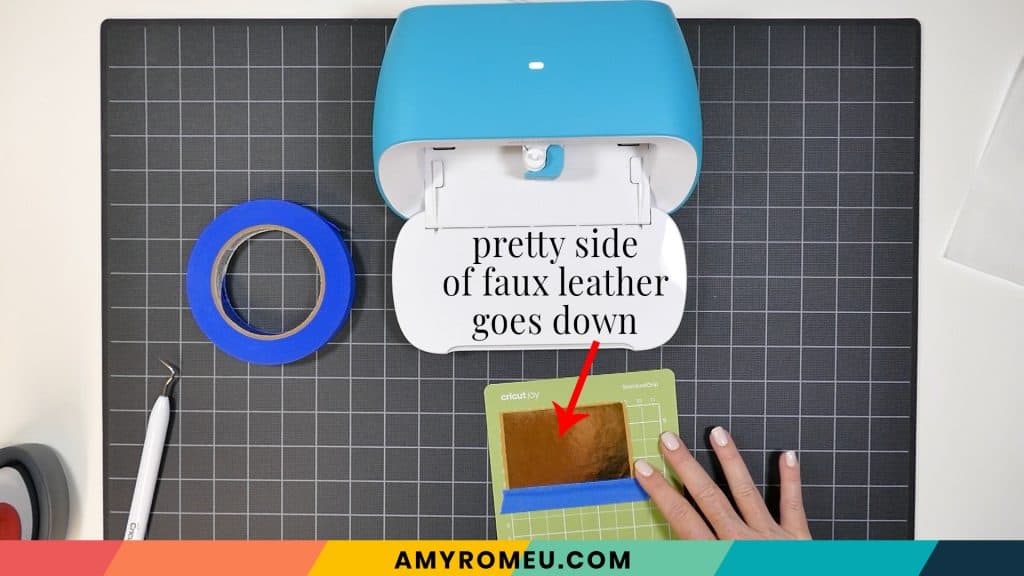
Place the foil piece on back of the faux leather. The shiny transfer tape and the pretty side of the faux leather should both be facing out.
Place the faux leather and foil on a pressing pad or a towel. Cover with a piece of teflon sheet or parchment paper. Use an Easy Press or an Easy Press Mini to press the foil onto the back of the faux leather. I use an Easy Press Mini on the lowest setting and keep the Mini moving at all times, like ironing, for about 10-15 seconds.
The foil iron-on will be hot! Keeping the piece of material flat on your work surface, carefully peel away the clear transfer sheet. This will keep your foil iron-on as wrinkle free as possible.
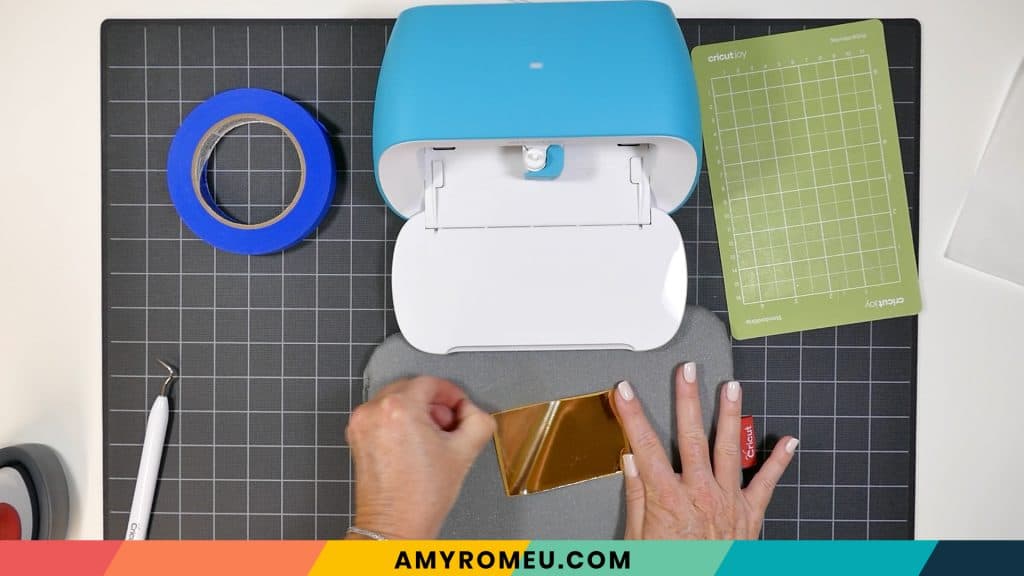
Now your faux leather is ready to cut!
STEP 6 – Prepare Faux Leather Mat for Cutting
Place the faux leather pretty side down (foil iron-on side up) on the green Joy sized mat in the same location shown in the Cricut Design Space preview. (If you’re using a Cricut Maker or an Explore Air 2, use the Purple Strong Grip mat instead.)
Now tape all around the faux leather with blue painter’s tape. Press the material down to your mat firmly with your hands.
Load the prepared mat into the Cricut Joy by lining the mat between the mat guides. The Joy will pull the mat in and start to cut.
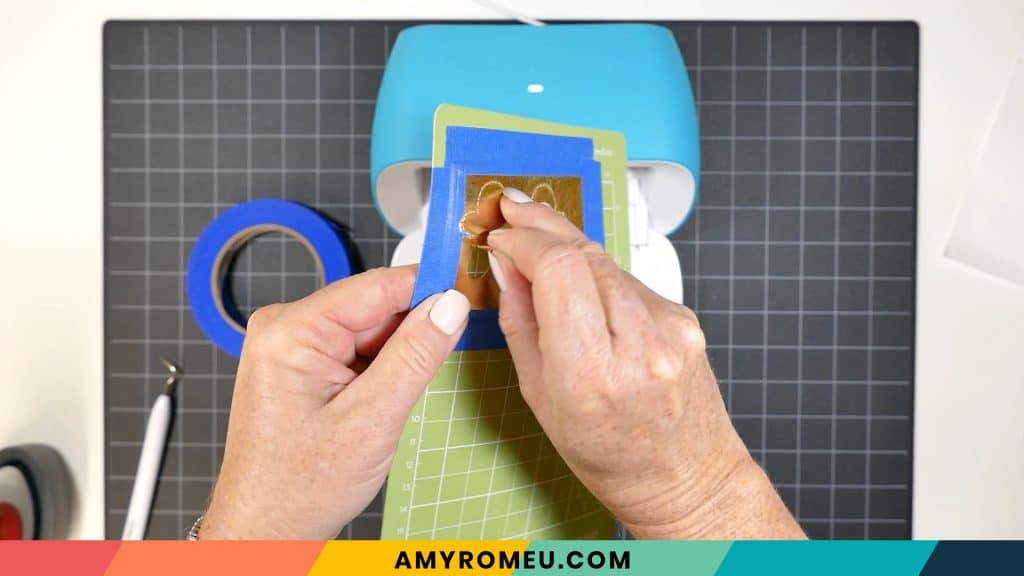
After the Joy has finished cutting, Cricut Design Space will ask if you want to unload the mat or recut. Before you decide, use a sharp tool to lift a corner of the gingerbread man to see if the cut went all the way through. If the cut didn’t go all the way through, select Recut in Design Space to repeat the cut again.
If you are using a Cricut Maker or a Cricut Explore Air 2, you’ll load the mat by clicking the double arrows button. The “C” button will start to flash, indicating the machine is ready to cut. Press the C button to begin the cut. When the cut is finished, BEFORE unloading the mat, check the cut. If it’s complete, unload the mat. If you want to cut again, press the C button again to repeat the cut.
Lift your cut shapes off the mat and set them aside.
STEP 7 – Cut the Foil Iron-On and HTV Mats
Now to cut all the heat transfer vinyl mats. Hover over the first mat in the mat preview and determine what size HTV you need to cut from. Cut a piece of heat transfer vinyl slightly larger than the size you noted and place the vinyl shiny side down on your mat. I cut the white HTV layer using the Everyday Iron-On setting.
If you’re using a Maker or an Explore Air 2, choose VINYL or WASHI SHEET as the material setting and leave the Pressure menu at Default.
Place the white HTV on the Joy cutting mat (or a standard grip cutting mat for the Maker or Explore Air 2). Load the mat into the Cricut and begin the cut.
When the cut is complete, remove the vinyl and use a sharp weeding tool to weed away the excess vinyl.
Repeat the steps above with each of the different HTV mats. Use the recommended material settings based on type of vinyl you are cutting (Cricut Explore Air 2 users may need to turn the dial to custom to access some settings).
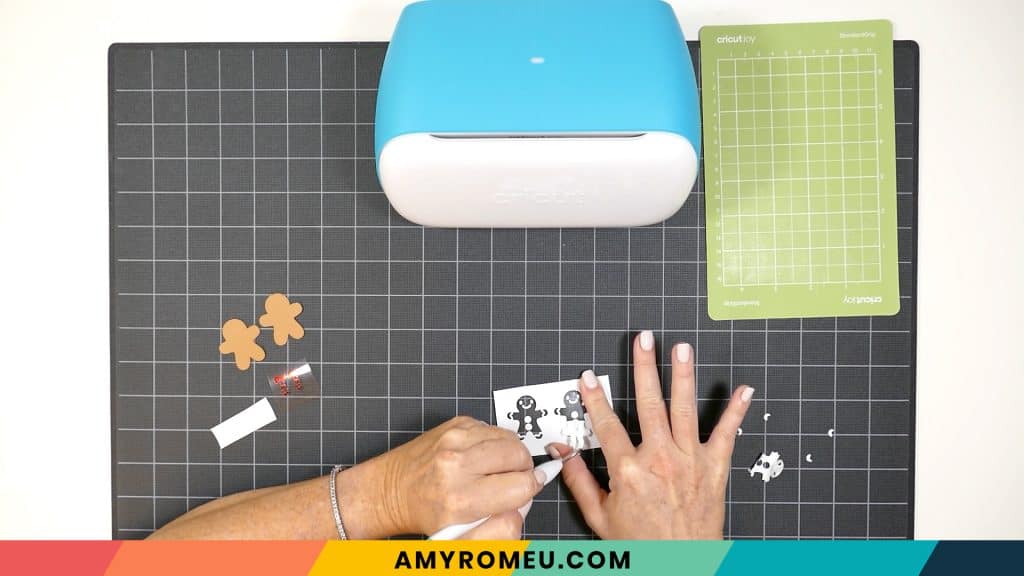
Continue until all the mats are cut and weeded.
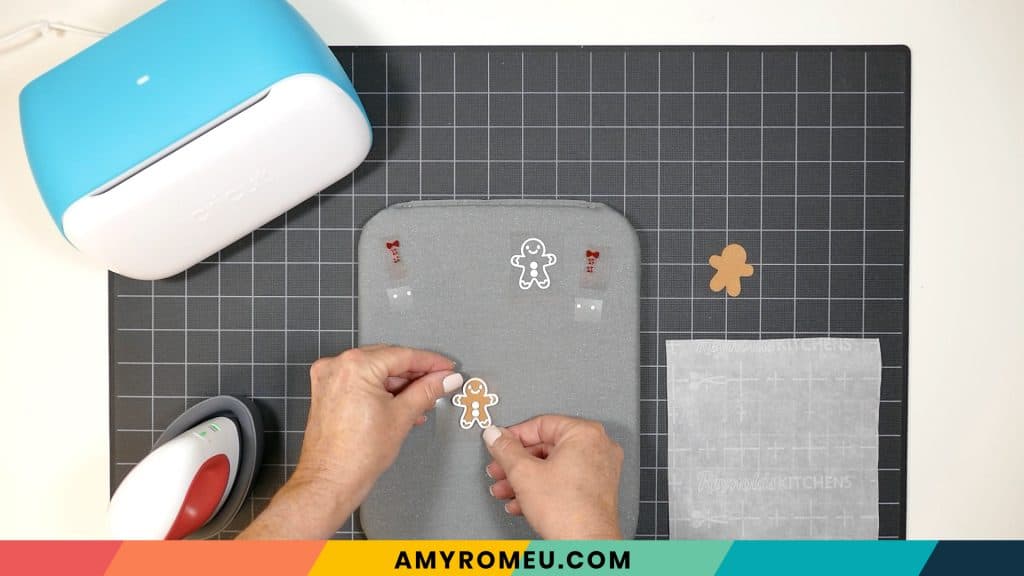
STEP 8 – Press the Gingerbread Man Earring Layers
To press the vinyl layers on the faux leather gingerbread men earrings, you can use a Cricut Easy Press Mini or a Cricut Easy Press. You could even use a home iron! I don’t recommend using a traditional, clamshell or swing away heat press because too much pressure can flatten the faux leather.
I used the Easy Press Mini on the lowest setting. Place the faux leather shape on a heat pressing pad or a towel. If you are using a Cricut Easy Press, set the temperature to about 275 degrees. Place the white “icing” outline on top of the gingerbread man and line it up carefully. Then cover both layers with a piece of teflon paper or parchment paper.
Press down using firm pressure (but don’t overdo it!) for 7-10 seconds. Remove the cover sheet and then carefully peel back the clear HTV cover sheet so the vinyl stays on the faux leather. If the vinyl starts to lift up, replace the cover sheet carefully and press some more.
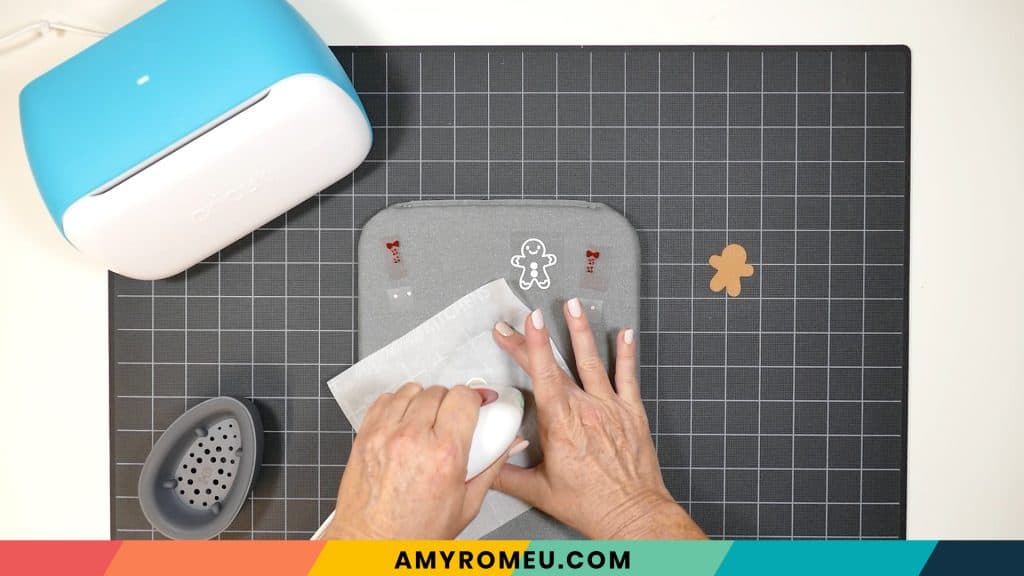
Then press on the pink cheeks layer. Don’t forget to cover with a teflon sheet or parchment paper each time! Finally, press the bow tie and candy buttons.
Repeat for both earrings and set aside.
STEP 9 – Punch the Earring Holes
Even though the Cricut often cuts earring holes well, I prefer to punch them with a small hole punch.
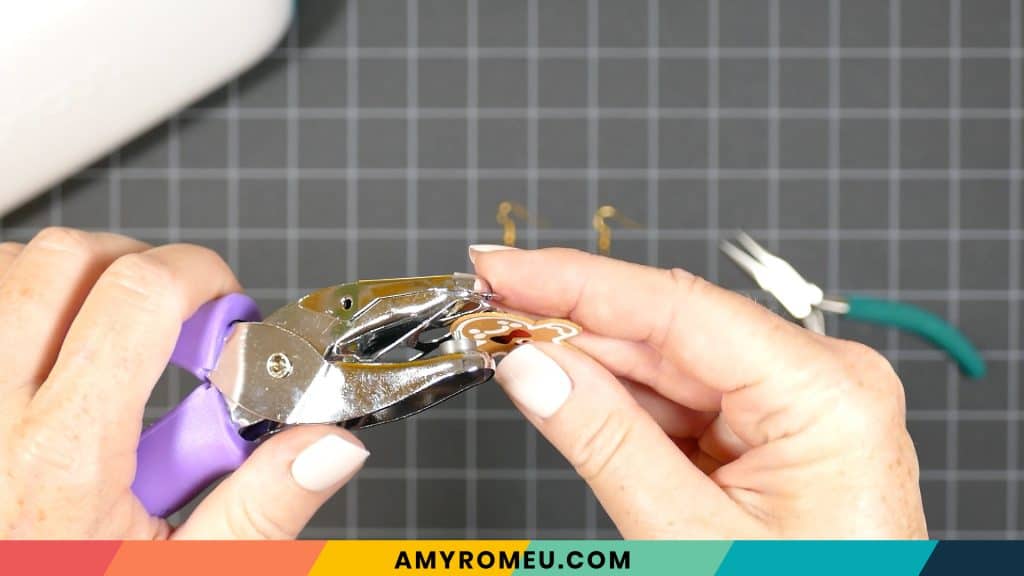
Punch a hole at the top of the first earring. Then layer the first earring over the second and use the first punched hole as a guide to punch the second hole.
Once both of the earring holes are punched, it’s time to attach the earring hooks.
STEP 10 – Attach the Earring Hooks
Now it’s time to assemble your earrings!
You’ll use fishhook ear wires and 5 or 6mm jump rings.
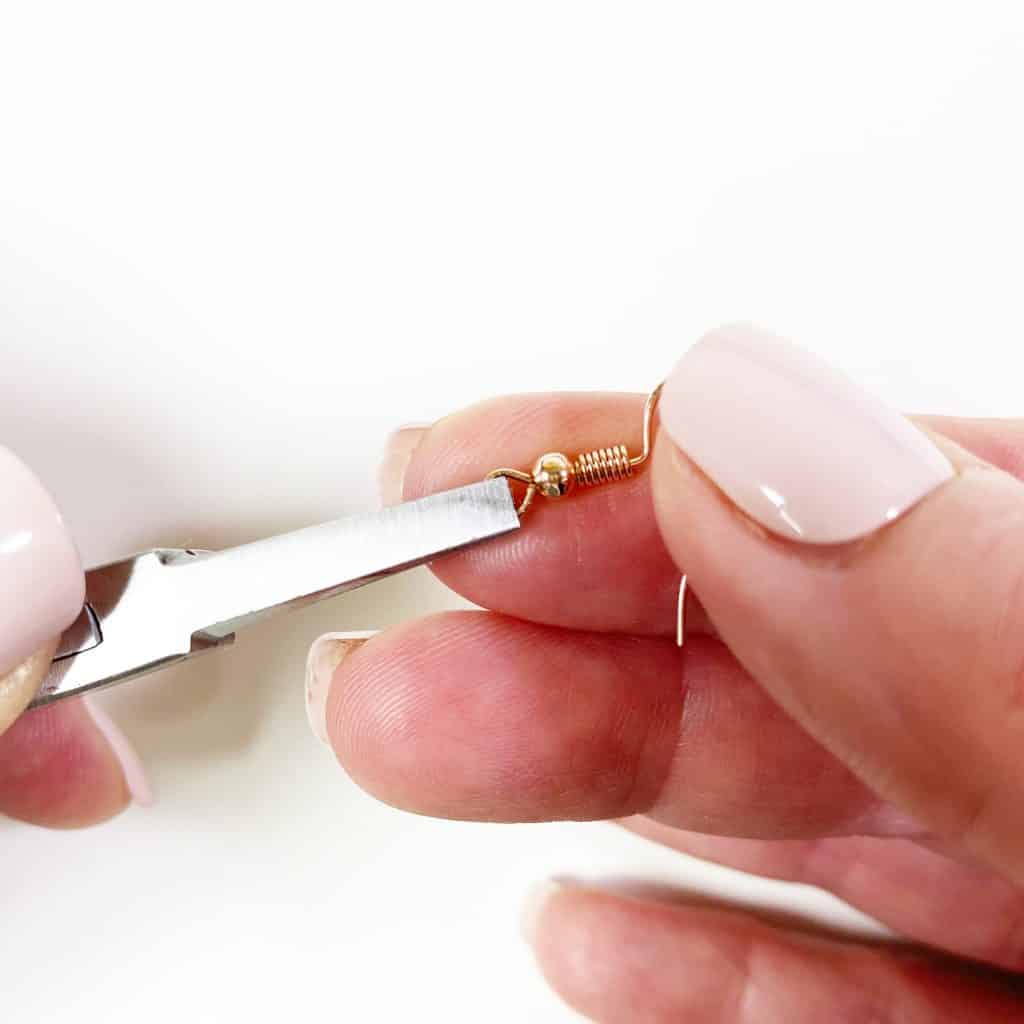
Before you connect the earring hooks, first you’ll need to turn the bottom loop on the fishhook sideways so your earrings will hang correctly. See the example image below to see how the orientation of the earring hook has to change so your earrings will hang straight.
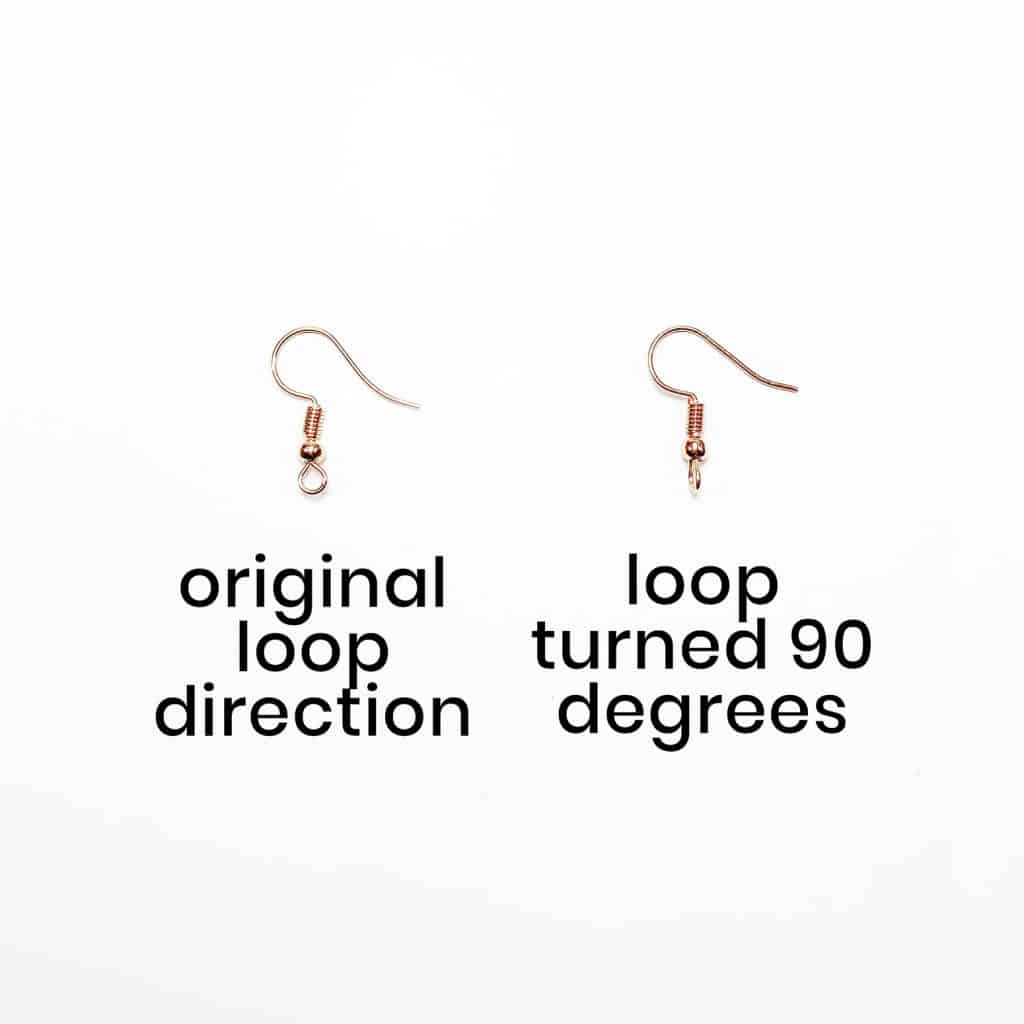
To see more about this, visit my post about how to make faux leather earrings hang straight here. Or watch my YouTube video here.
You’ll do this using one pair of flat nose pliers. While holding the hook firmly between two fingers, grip the entire earring loop between the pliers and twist your wrist until the loop is perpendicular to the earring post. Repeat with the second earring hook.
Once your earring hooks are turned, use your two pliers to open your jump rings, as shown below. It’s important to open them without distorting the original circle shape of the jump ring. You can do this by twisting only one wrist forward to open the jump ring like a door.
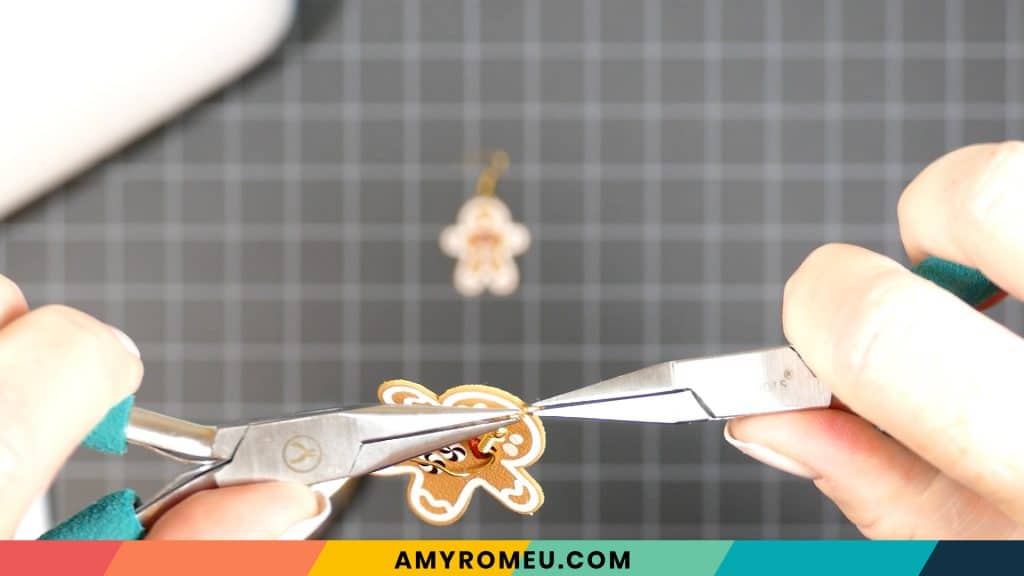
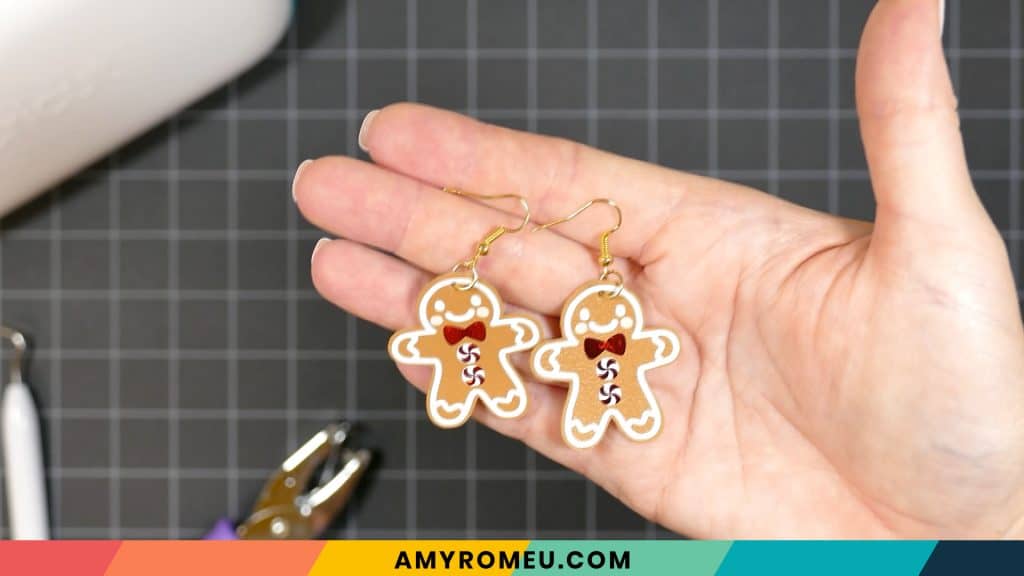
Use the two pliers again to close the jump ring by simply reversing the wrist movement. Now repeat the above steps with the second earring. That’s it! Aren’t these gingerbread man earrings adorable?
If you do make this project, I would love to see your gingerbread man earrings! Please share a photo of them in the comments, or tag me on Instagram: @amyromeucrafts
Want to see all of my Cricut earring & jewelry tutorials? CLICK HERE
Until next time… and happy creating!
WANT THE FREE SVG FILE SO YOU MAKE THESE GINGERBREAD MAN EARRINGS YOURSELF?
IT’S DESIGN #149 IN MY RESOURCE LIBRARY! YOU’LL RECEIVE THE PASSWORD FOR THE RESOURCE LIBRARY INSTANTLY AFTER FILLING OUT THE FORM BELOW!
NOTE: This design is for PERSONAL USE ONLY. If you’d like to sell earrings made from my Gingerbread Man Earrings SVG template, you may purchase a Commercial Use License from my shop here.
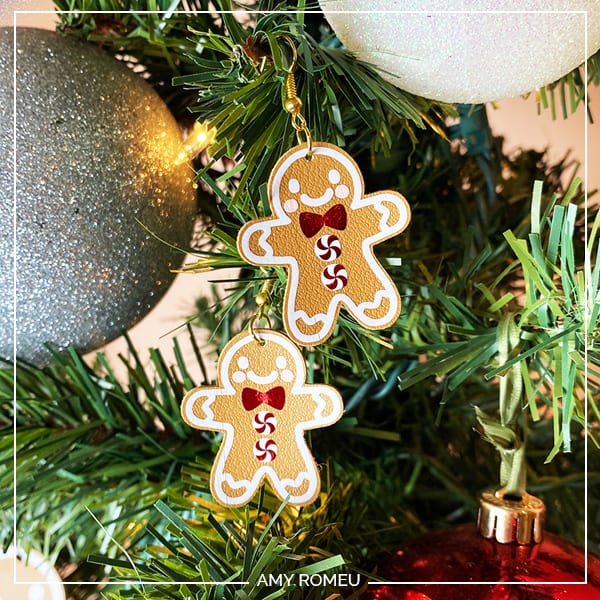
Want to remember this? Post this DIY GINGERBREAD MAN EARRINGS project to your favorite Pinterest board!


Hi Amy,
I love the faux leather gingerbread men earrings, I tried cutting them out and cut them 5 or 6 times to no avail. They would just not cut through the faux leather and the HTV foil at all. Please tell me what else I can do.
Thank you,
Debbie
Hi, Debbie. Can you tell me more so I can help you troubleshoot? What machine are you using? What faux leather, and is is very thick? Did you follow all the steps in the tutorial, like trimming the material to size, taping it down to the mat, using the faux leather paper thin setting with more pressure, and repeating the cut if necessary? Please let me know so I can assist you. Thank you. Amy
Its great as your other posts :D, regards for posting.
Thank you so much! 🙂
Amy, I did it!!! I made my first pair of earrings! I had to try the gingerbread because my name and all…
Thanks so much!
Yay, Jinger! I’m so excited for you! p.s. Tomorrow’s project will be for you too, then! 🙂
You’re right, these are perfect tags for me! Thank you again Amy
My pleasure, Jinger! 🙂
I can’t find the download button.
Hi, Shronda. Are you looking for the file inside the Resource Library? If so, inside the library, there are design numbers and words. You can click on the blue words under the design number. That’s the link. Click there and the file folder will automatically download to your device. I hope that helps!
What type of iron foil do you recommend to use as backing? I am new to Cricut and just wanting to make sure I get the correct type/brand.
Hi, Melissa! I link to all of the exact materials I use in each of my tutorials for your convenience, so you’ll want to check the tutorial for the specific project for the materials. But generally speaking I use Cricut brand Foil Iron-On when I use foil on the back of earrings. You can use solid HTV though, or any iron on you want. I hope that helps! Thank you. Amy
Hello! Can you permanent adhesive vinyl or does it have to be HTV? Thank you!
Hi, Jodie! Yes, you can use permanent vinyl instead if you prefer!