
How to Make Christmas Tree Earrings and Holiday Wreath Earrings with a Cricut

The holiday season is here, and there’s nothing more fun than festive earrings to wear to holiday parties and family gatherings! The holidays are a great time to dress with a little extra sparkle and shine.
That’s what I had in mind when I designed these Christmas Tree Earrings and Holiday Wreath Earrings using rhinestones and my Cricut.
Making earrings with your Cricut may sound tricky to do, but if you’re wondering how to make earrings with a Cricut, but these earrings are actually very simple to put make. You can cut the faux leather for these earrings with a Cricut Maker or Maker 3, or Cricut Explore Air 2 or Explore 3, or even the Cricut Joy!
I’ll also share my original design SVG earring templates with you for free so you can try making these Cricut holiday earrings yourself.
If you’d rather watch a video for this project, click below:
So if you’re ready to try making these rhinestone holiday earrings with a Cricut, let’s get started!
This page contains some affiliate links (which means if you make a purchase after clicking a link, I will earn a small commission at no additional cost to you). Read my full disclosure policy here.
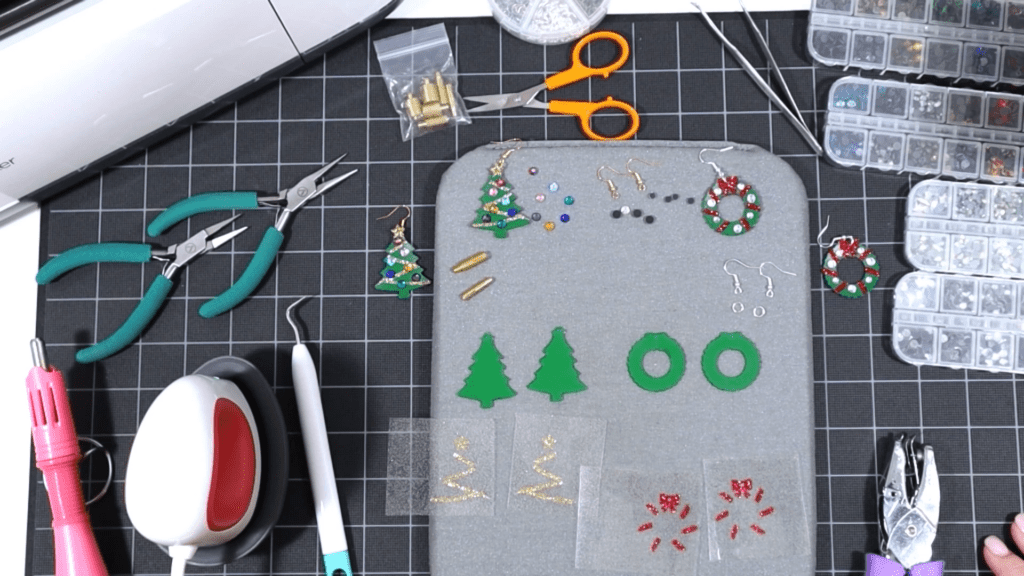
CRICUT CHRISTMAS TREE EARRINGS & HOLIDAY WREATH RHINESTONE EARRINGS MATERIALS LIST
- A Cricut cutting machine (or another cutting machine of your choice). I used the Cricut Maker, but you can use the Cricut Maker 3, the Explore Air 2 or Explore 3, or the Cricut Joy.
- The Cricut Maker 3 is available on Amazon here or the Cricut website here.
- The Cricut Maker is available on Amazon here or the Cricut website here.
- The Cricut Explore 3 is available on Amazon here or the Cricut website here.
- The Cricut Explore Air 2 is available on Amazon here or the Cricut website here.
- The Cricut Joy is available on Amazon here or the Cricut website here.
- Green Faux Leather like this one, or this assortment, or this one in the color Kelly from my favorite Etsy shop
- Glitter Heat Transfer Vinyl in Old Gold and Red
- Cricut Iron-On Foil for earring back (optional)
- HotFix Rhinestone Kit or this one or this one
- Purple Cutting Mat
- Green Cutting Mat
- Weeding Tools
- Cricut Easy Press Mini
- Cricut Easy Press Mat (8×10 size)
- Earring Hole Punch
- Earring Hooks (Gold and Silver)
- Jump Rings, Gold
- Jump Rings, Silver
- Flat Nose Pliers
- Wide Flat Nose Pliers
- Teflon Cover Sheet or Parchment Paper.
- Design #190 from my free Resource Library. You can get the password by filling out the form below or at the bottom of this post.
NOTE: This design is for PERSONAL USE ONLY. If you’d like to sell earrings made from my Christmas Tree Earrings or Holiday Wreath Earrings SVG templates, you may purchase a Commercial Use License from my shop here and here.
How to Make Christmas Tree & Holiday Wreath Rhinestone Earrings
STEP 1 – Get the Free Christmas Tree & Holiday Wreath Earring SVG Templates
Download the free Christmas Tree & Holiday Wreath earring template (Design #190) from my free resource library. You can get the password by filling out the form above.
STEP 2 – Upload The Christmas Tree & Holiday Wreath Earring Templates to Cricut Design Space
Save the zipped folder that downloads to your computer. You’ll need to unzip or extract the files FIRST so you can upload them to Cricut Design Space.
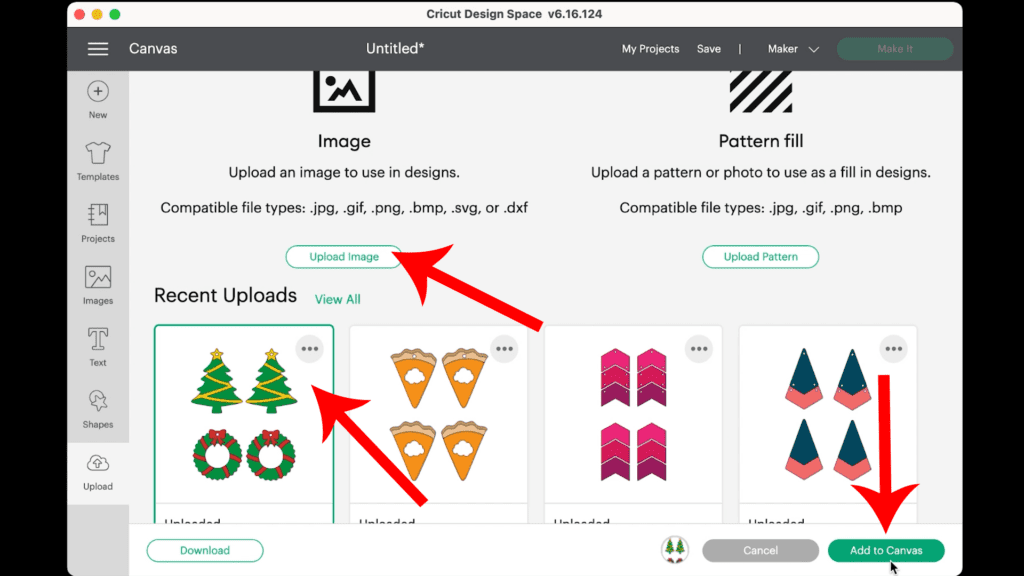
Click on Upload Image to browse to where your unzipped SVG file is located on your device.
Click on the file. You’ll see a preview of it and then it will appear in your Recent Uploads row.
Click on the SVG in the Recent Uploads row and then Add to Canvas to bring it into your canvas in Design Space.
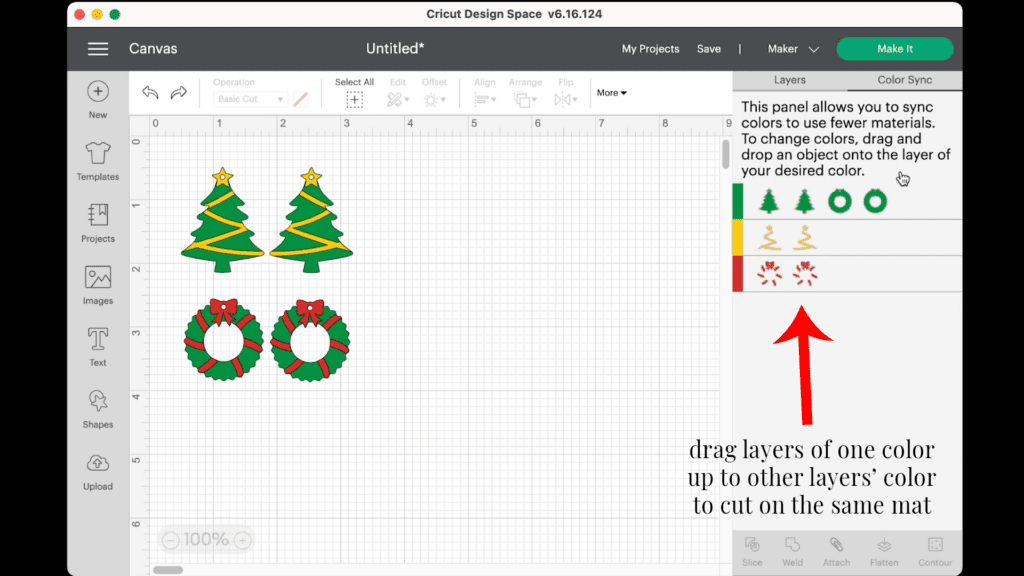
After you’ve uploaded the Christmas Tree & Holiday Wreath earrings SVG file onto the canvas, you will see in the Layers panel that this design has three different colored layers.
The green will cut from green faux leather and the red and gold will cut from glitter heat transfer vinyl.

Since both the yellow and red layers will cut from the same material using the same material setting, you can save time by cutting them on the same mat.
To do that, click on the Color Sync tab at the top of the layers panel on the right hand side. Drag the shapes from the red layer layer to the yellow layer so all four shapes are now the same color.
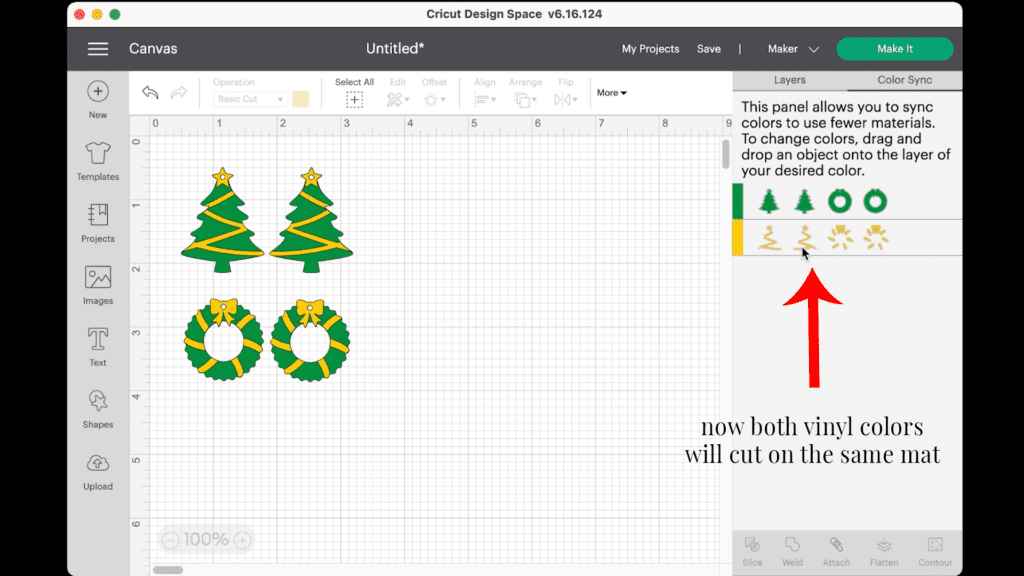
Your mat should look like this.
Even though the wreath’s garland and bow is now yellow, you can still cut it from red heat transfer vinyl (or any color you want). I’ll show you how in a later step.
It isn’t necessary to resize these earrings.
Click on the green “Make It” button.
STEP 3 – Preparing Mats to Cut
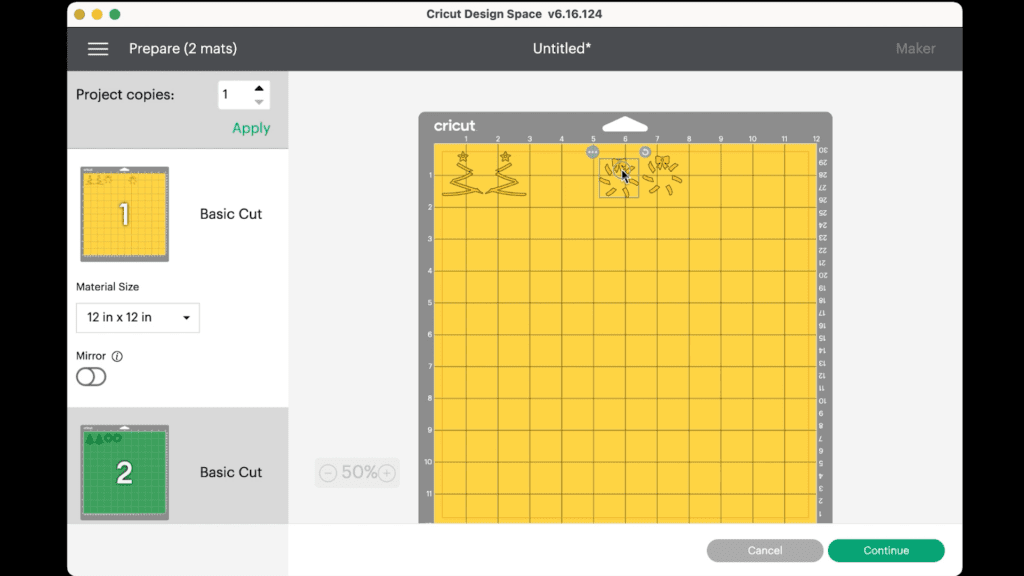
The mat preview screen will show both cutting mats separated by color on the left hand side. It is not necessary to mirror the mats for this project.
I will cut the green faux leather mat first.
Click on the green mat and make a note of the size material the shapes will need to cut from (in this case, about 2.5 inches tall and about 6.5 inches wide).
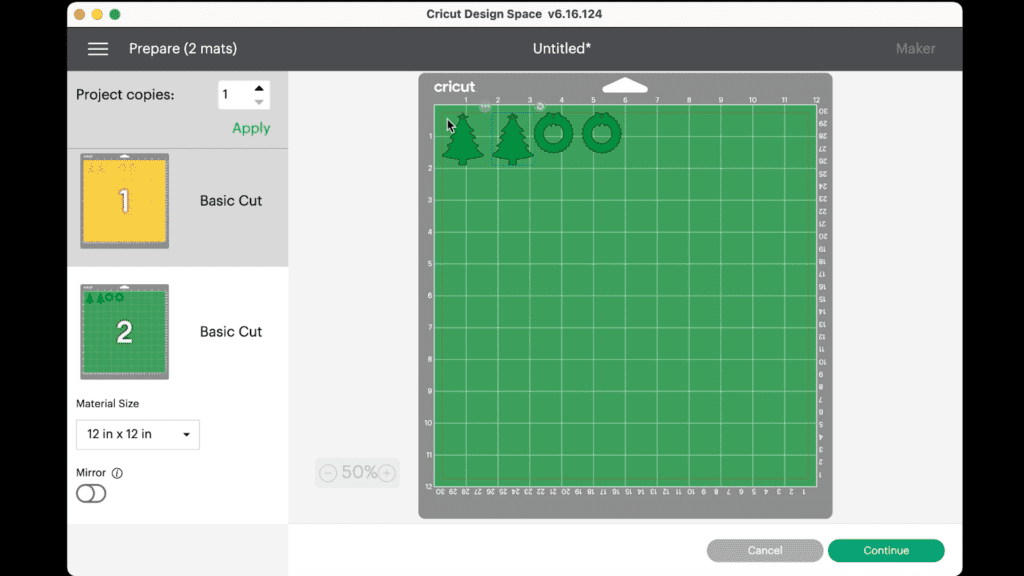
Click the “Continue” button.
Note: Cricut Explore Air 2 users will need to turn the dial to “Custom” before choosing Faux Leather (Paper Thin). Cricut Joy users can also cut faux leather! I have a tutorial on How to Make Earrings with the Cricut Joy with more specific instructions for Joy users.
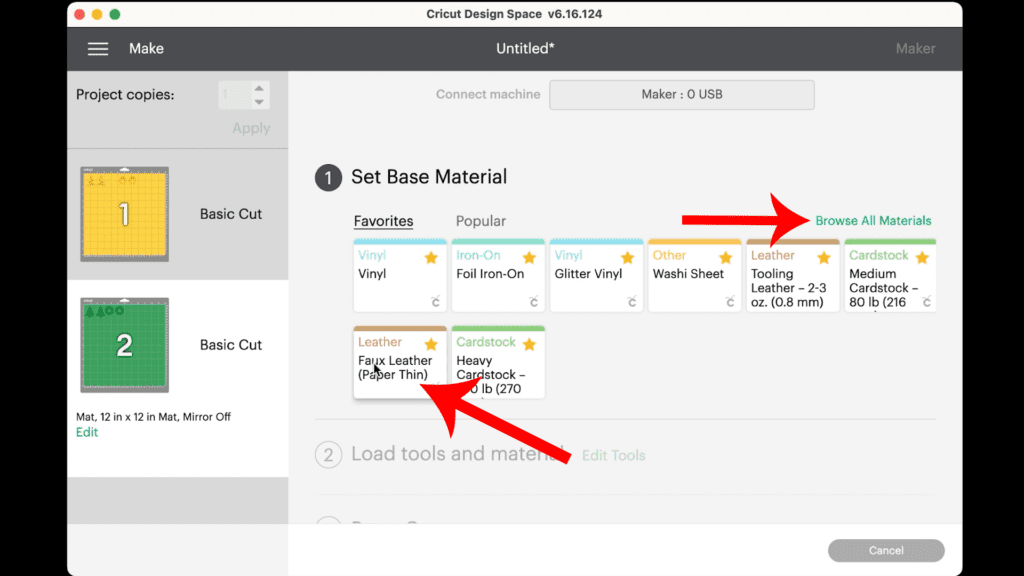
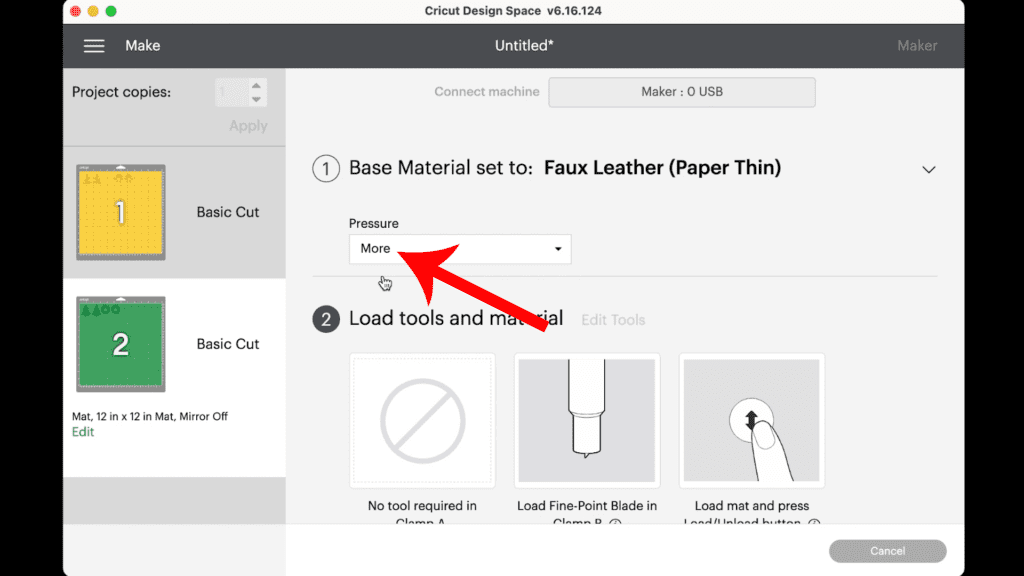
On the Material Selection screen, choose Faux Leather (Paper Thin) as the material setting. If you don’t have this material setting as a favorite, click “Browse All Materials” to search for it and select it. Then select “More” from the Pressure dropdown menu.
Now we are ready to cut the faux leather mat. But before we do, I’m going to add a backing to the faux leather first. This is an optional step, but one I recommend.
STEP 4 – Put a Back on the Faux Leather Before Cutting (Optional)
I put foil iron-on on the back of the faux leather before cutting. This is a great technique to put a back on faux leather earrings.
Putting a back on faux leather earrings helps to add some structure to the earrings so they don’t curl. It also makes the earrings look more finished and professional.
To do this, trim a piece of heat transfer vinyl or foil iron-on to the same size as the piece of faux leather you noted in the mat preview screen.
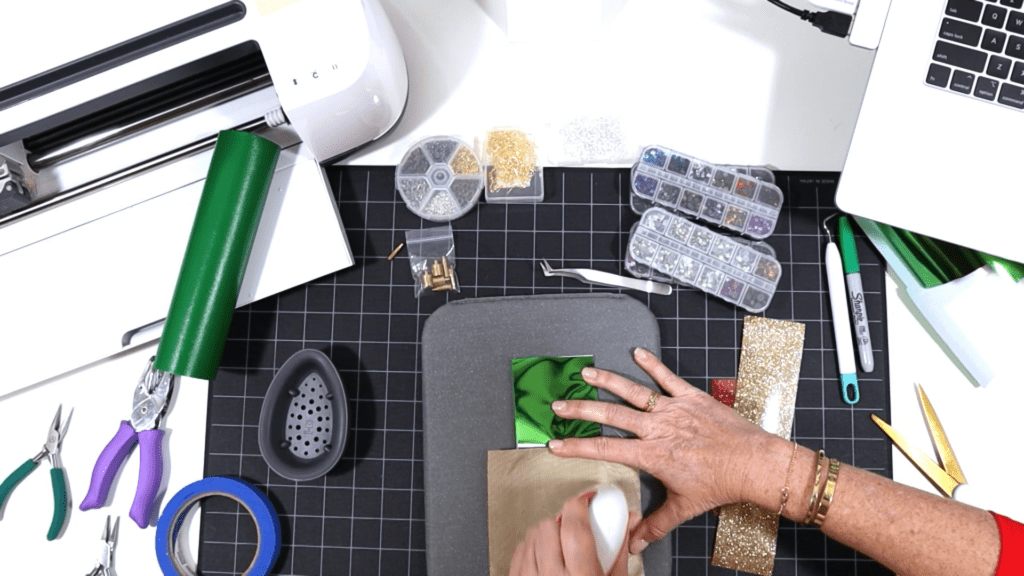
Press the foil iron-on and the faux leather back to back. Place the faux leather pretty side down on a heat pressing pad.

Pre-heat a Cricut EasyPress Mini on the LOW setting. If you are using a regular EasyPress, set it to 275 degrees.
Cover the foil iron-on with a piece of Teflon sheet or parchment paper. Press for 7-10 seconds.
Remove the cover sheet and, which keeping the faux leather flat, peel away the clear cover sheet from the foil iron-on.
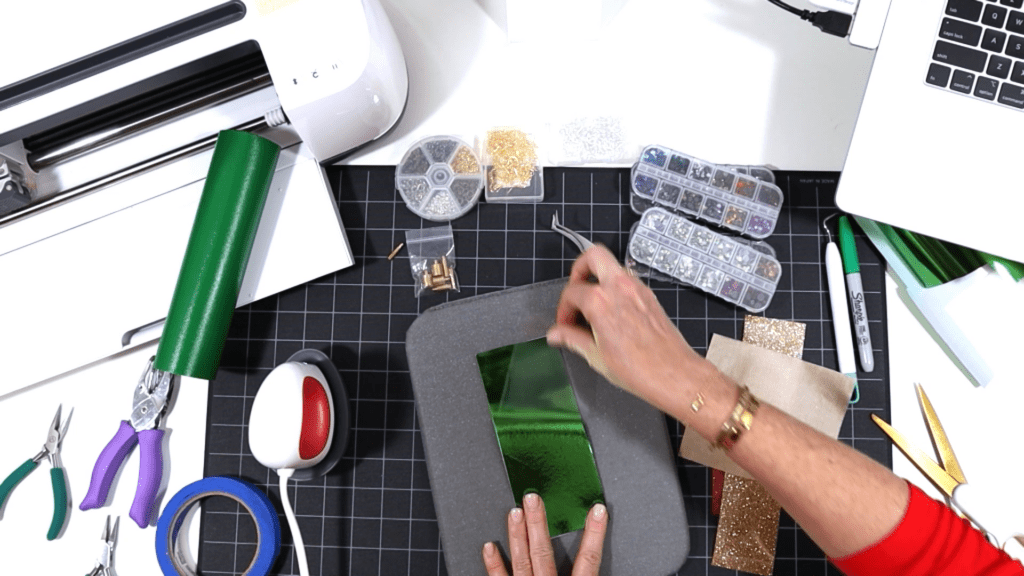
Replace the Teflon sheet or parchment paper and press for a few more seconds.
Now the faux leather is ready to cut.
STEP 5 – Cut the Faux Leather Mat
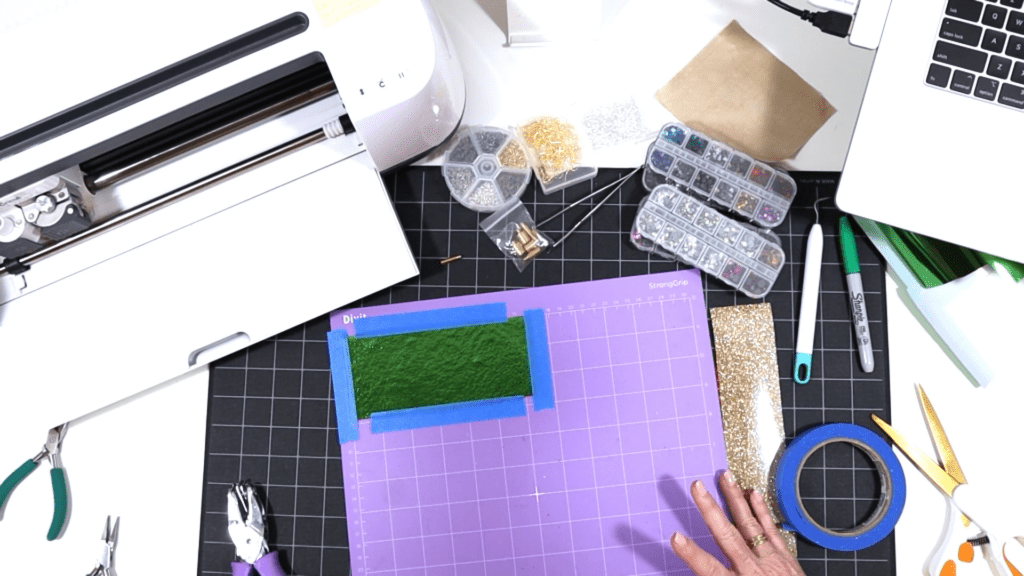
Place the trimmed piece of green faux leather “pretty side” down on a purple mat (foil iron-on side up if you added a backing in the earlier step.
Press the faux leather down all over with your fingers. Then tape the faux leather down on all sides with blue painter’s tape.
Make sure the Cricut’s star wheels are off to the side before starting the cut so they don’t leave indentations in the faux leather.
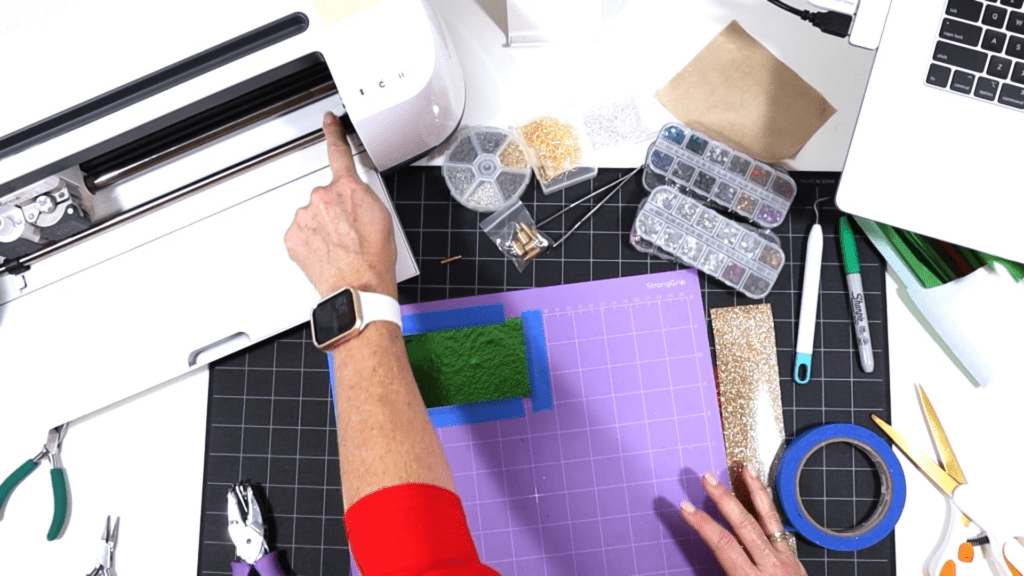
Load the mat into the Cricut by pressing the double arrows button. Press the C button to begin the cut.
After the cut is complete and before unloading the mat, use a weeding tool to carefully lift the edge of the faux leather shape to see if the cut was complete.
If not, press the C button again to repeat the cut.

Unload the mat and remove the faux leather tree and wreath earring shapes. You can trim any stray fuzz from the faux leather backing with small curved scissors.
If desired, you can re-press the foiled earring back to smooth out any wrinkles that were made while the blade was cutting. Remember to cover the faux leather pieces with a cover sheet before pressing.
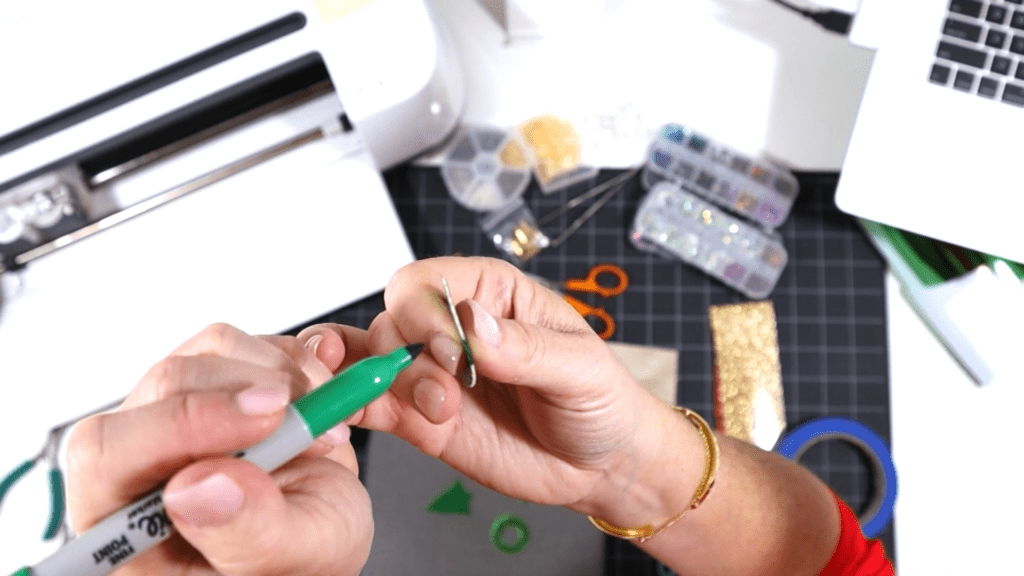
You can also color the white edge of the faux leather with a color coordinated Sharpie marker.
STEP 6 – Cut Glitter Heat Transfer Vinyl Shapes
Return to Cricut Design Space to cut the red and gold glitter heat transfer vinyl.
I like to use the Glitter Vinyl setting with “Default” pressure and then repeat the cut once if necessary.

Refer to the mat preview screen to see where the two designs will cut.
Place the glitter heat transfer vinyl pieces shiny side down on a green standard grip cutting mat. Place them in the same locations as show in the mat preview screen.

Load the green mat into the Cricut and press the C button to begin the cut. When the cut is complete, repeat the cut if necessary by pressing the C button again (before unloading the mat).
Most heat transfer vinyl won’t need a repeated cut, but I like to cut the Siser Glitter HTV I’m using twice. It’s very thick.
Weed away the excess heat transfer vinyl and cut the tree garlands and wreath ribbons apart.

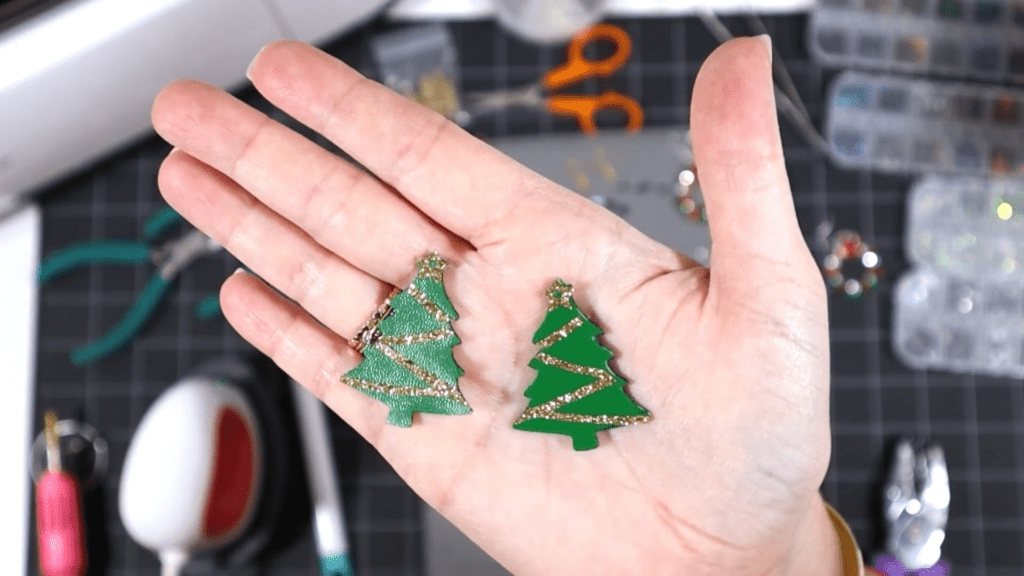
STEP 7 – Press the Glitter Vinyl on the Faux Leather
Lay your faux leather and vinyl shapes on a heat pressing pad.
Layer the vinyl pieces over the faux leather shapes. Cover with a Teflon sheet or cover sheet and press with an EasyPress Mini on the LOW setting. You can also use a regular EasyPress set to about 275 degrees.
You can even use a home iron. Start at a low setting and see how it goes. Make sure the iron doesn’t give off any steam.

Repeat with the wreath ribbons.
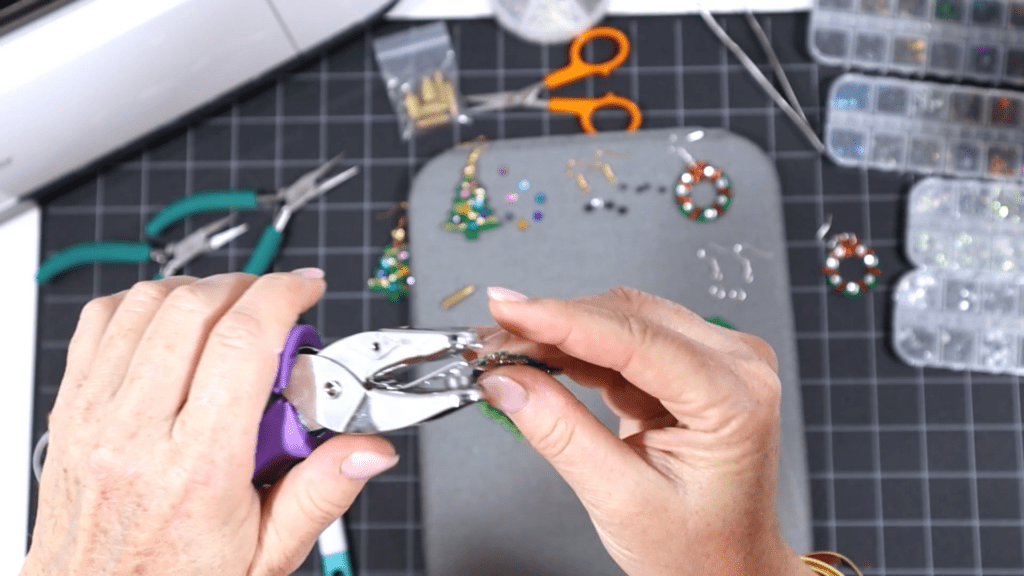
If the Cricut didn’t cut the earring holes all the way through, use a 1/16″ hole punch to punch the earring holes.
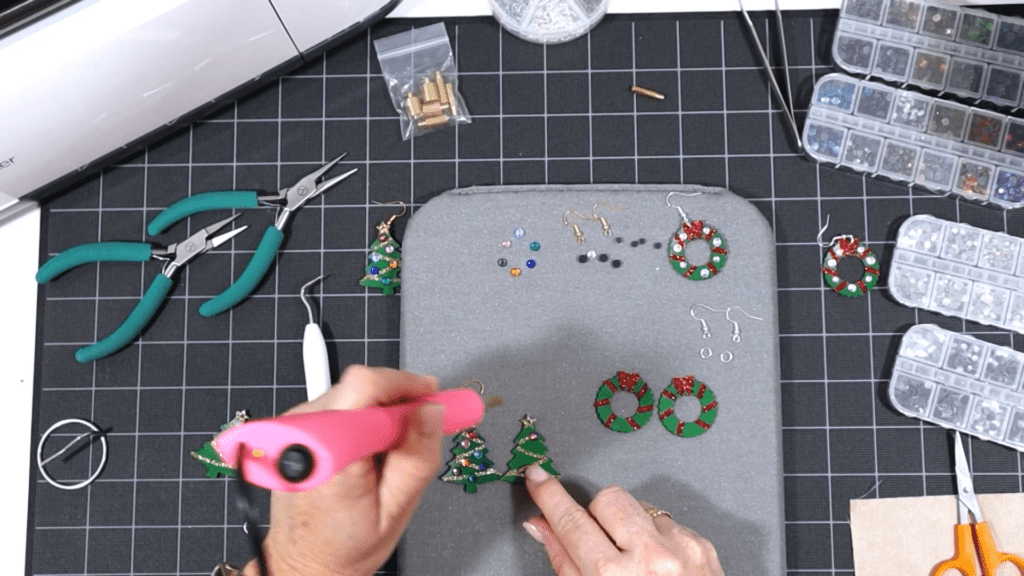
STEP 8 – Press The HotFix Rhinestones to the Earrings
I’m using HotFix rhinestones and a HotFix rhinestone applicator to press the rhinestones to the faux leather. If you don’t want to use HotFix stones, you can use regular flat back rhinestones and a craft glue like E6000.
If you are using a HotFix Applicator Tool, locate the tip that corresponds to the size stones you’ll be using. The rhinestone dome should fit perfectly in the concave shape at the edge of the tip.
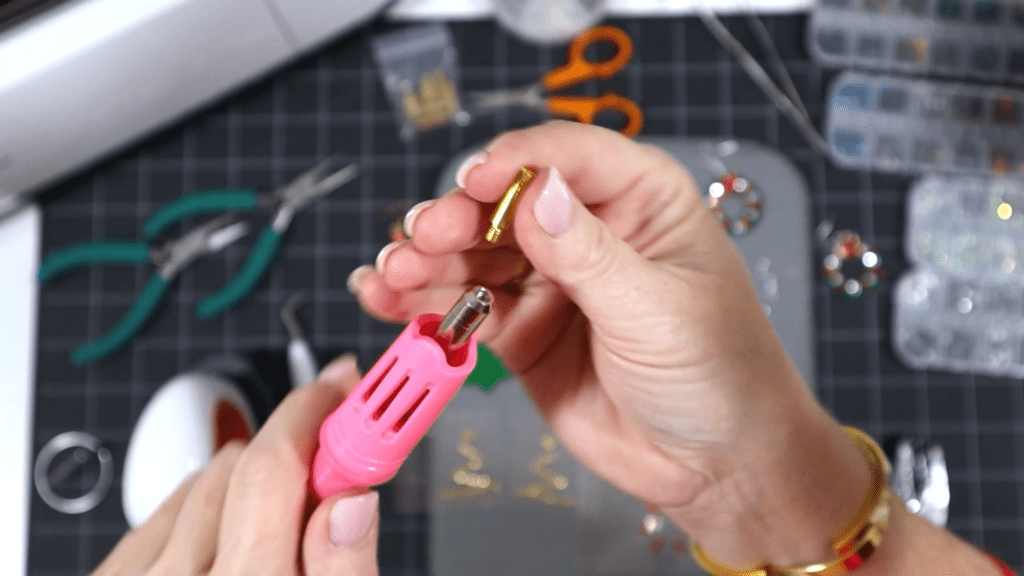
Screw the tip into the applicator tool. Turn on the applicator tool and carefully place it somewhere on your work area where the tip won’t touch anything.
The kit I bought came with a small stand to hold the applicator tool up off the table.
Don’t touch the tip of the applicator tool, it will be HOT!

Lay out the faux leather tree and wreath on a heat pressing pad to protect your work surface.
Place the first rhinestone in position on the tree. Refer to the photos of the finished earrings above if you’re not sure where to place the rhinestones.
Holding the applicator tool completely vertical, lower the hot tip squarely on to the top of the rhinestone. This will transfer heat through the stone and melt the glue underneath.
Hold the applicator tool in place for about 5 seconds.
Check to be sure the rhinestone is glued in place.
Repeat with the other stones, and then on the other earring.
Check that all of the rhinestones are secure, and press one more time if any of them feel a little loose.
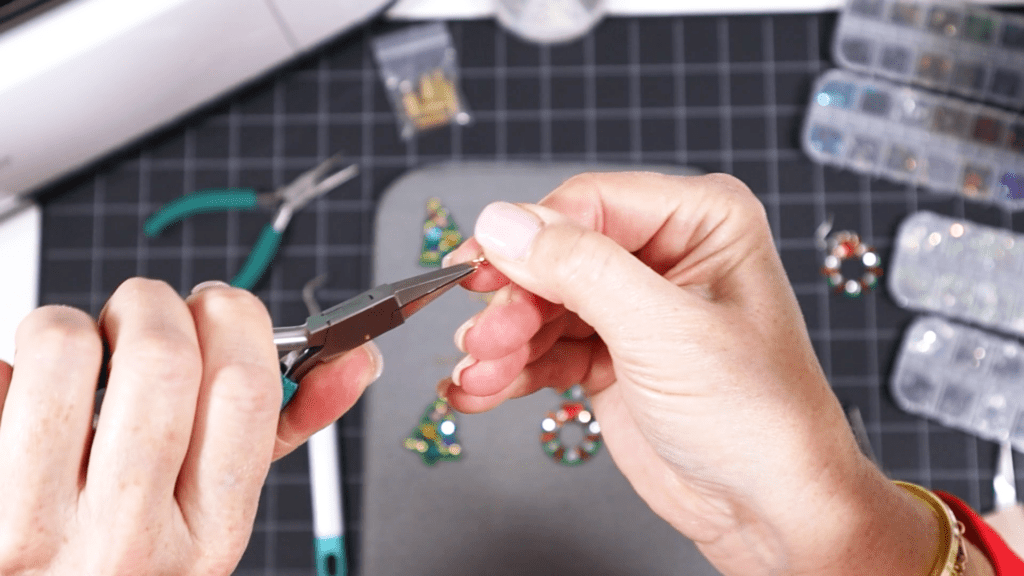
STEP 9 – Attach the Earring Hooks
Now it’s time to assemble your earrings!
You’ll need small jump rings, earring hooks, and two pairs of flat nose pliers.
To connect the earring hooks to the sunflower earrings, you’ll first need to turn the bottom loop on the fishhook sideways so your earrings will hang correctly.
You’ll do this using one pair of flat nose pliers. While holding the hook firmly between two fingers, grip the entire earring loop between the pliers. Then twist your wrist 90 degrees.

Repeat with the second earring hook.
Check out my post on how to make faux leather earrings hang straight for step by step directions and photos.
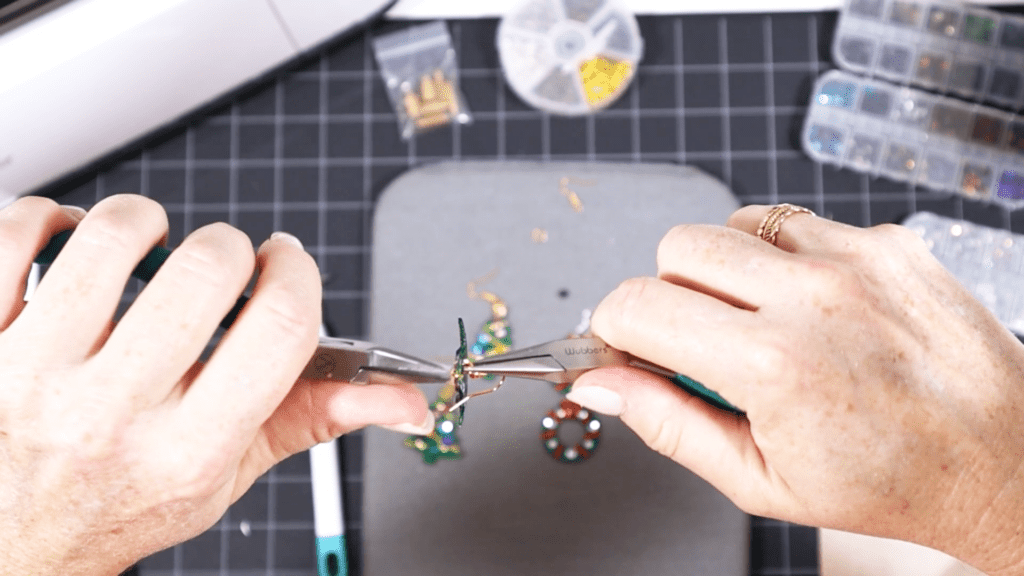
Now use flat nose pliers to open the jump ring. I like to use two pliers, one in each hand. Grip each side of the jump ring with a pair of pliers, making sure the opening in the jump ring is facing up (the twelve o’clock position).
Rotate one wrist forwards or backwards, so the jump ring creates an opening but doesn’t bend out of it’s circle shape.
When the jump ring is open, slide the tree or wreath earring onto the jump ring. Then slide the earring hook onto the jump ring and close the jump ring again.
Pay attention to which side is the front of your earring as you do this to be sure your earring and hook are both facing the right direction.
Repeat with the wreath earrings.
That’s it! The Christmas Tree and Holiday Wreath Rhinestone earrings are finished!
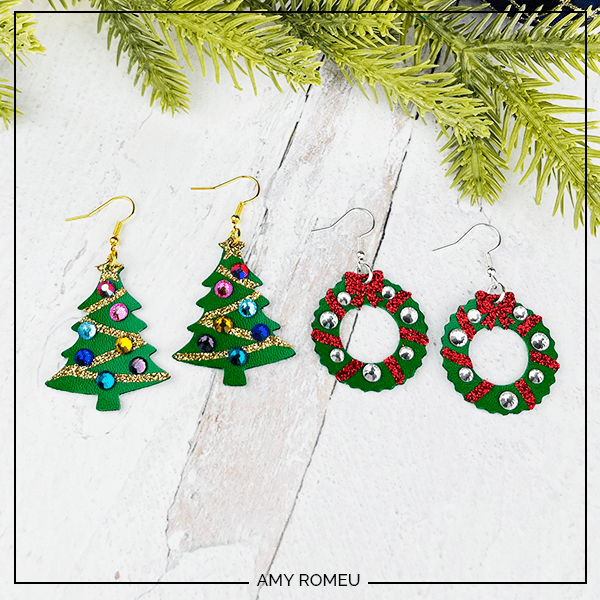
Aren’t these rhinestone holiday earrings pretty? If you do make this project, I would love to see your finished earrings. Please share a photo of them in the comments, or tag me on Instagram: @amyromeucrafts
Want to see all of my Cricut earring & jewelry tutorials? CLICK HERE

WANT THE SVG FILES SO YOU MAKE THESE CRICUT CHRISTMAS TREE & HOLIDAY WREATH EARRINGS YOURSELF?
It’s Design #190 in my FREE Resource Library. Get instant access by filling out the form below!
NOTE: This design is for PERSONAL USE ONLY. If you’d like to sell earrings made from my Christmas Tree Earrings or Holiday Wreath Earrings SVG templates, you may purchase a Commercial Use License from my shop here and here.
Want to remember this? Post this CRICUT CHRISTMAS TREE & HOLIDAY WREATH EARRINGS project to your favorite Pinterest board!

Are the holiday earring designs #190 SVG files still available for free in your library? I cannot find a link to download them, just the link to the tutorials.
Hi, Joyce! Yes, they are there. Your browser is showing you an old version of the page. This happens sometimes if you’ve been in my library recently. Please refresh your browser a few times, try from a different device or browser, or clear your cache and cookies. Thank you!