
Best Tips, Tricks & Secrets to Cutting Faux Leather with a Cricut
Best Tips, Tricks & Secrets to Cutting Faux Leather with a Cricut
Do you want to get in on the Cricut faux leather earring making craze, but you don’t know where to start? Or maybe you’ve tried cutting faux leather with your Cricut and you haven’t had success. Well, I can relate. When I started cutting faux leather earrings with my Cricut, it took a lot of trial and error to get my earrings to cut right. But now that I have developed some simple tips and tricks, my earrings cut perfectly with my Cricut every time. So In this post, I’ll share with you my Best Tips, Tricks & Secrets to Cutting Faux Leather with a Cricut so you can start cutting faux leather with your Cricut like an expert.
You may be wondering if these tips apply to the Cricut Maker, the Cricut Explore Air 2, or the Cricut Joy. The answer is, you can cut faux leather perfectly with all three of these machines, using the tips below! (Told ya they were the best tips, tricks, and secrets to cutting faux leather with a Cricut!)
I’ll also give you one of my most popular earring SVG cut file templates free so you can practice cutting faux leather earrings with your Cricut, too! It’s design #139 in my Free Resource Library. You’ll find out how to grab that freebie near the bottom of this post.
If you’d rather watch a video with my top 10 Tips, Tricks, and Secrets to Cutting Faux Leather with a Cricut, click on the video below:
Ready to learn all of my best tips, tricks, and hacks to cutting faux leather with a Cricut? Let’s get started!
This post contains some affiliate links (which means if you make a purchase after clicking a link, I will earn a small commission at no additional cost to you). Read my full disclosure policy here.
Tip #1 – Start with a Good Earring Template Design
This is the first place to start to get a great faux leather cut. If the design you want to cut is too complicated, intricate, or has teeny, tiny cuts, the cut isn’t going to work, no matter what mat, blade, or material setting you choose.
If you are buying an earring SVG cut file and the design looks complicated or intricate, look for a sample photo that shows the earrings cut out in real life, not just a digital image.
I design my own SVG cut files, and I test every design to be sure it will cut well. I want everyone who uses one of my original earring templates to have a great cutting experience! If you want to check out my earring template designs, click here to visit my store and click here to visit my Etsy shop.

You can also grab a FREE teardrop shape earring SVG file right now from my Resource Library! It’s Design #139. Get the password sent to you instantly by filling out this form:
Tip #2 – Choose the Best Faux Leather for the Design
If you are going to attempt cutting a very intricate design, I recommend using Cricut brand faux leather, available on Amazon here, and most craft stores that sell Cricut products. It is thinner than most faux leathers, but in my experience it cuts intricate cuts better than any other faux leather.
Are there lots of other fun, printed faux leathers out there to try? Yes! And you can try them all, but I recommend starting with Cricut brand faux leather first. That way you can work out the kinks of cutting faux leather with a Cricut before moving on to different faux leathers.
To solve the problem of Cricut brand faux leather being a little thin, you can make your earring multi-layer, or you can back the earring with another layer of Cricut brand faux leather to make the earring thicker. To see four different ways to put a backing on Faux Leather Earrings, check out this YouTube video:
If you fall in love with a thicker faux leather that has a soft felt like backing, remember it will cut better when you use a less complex design or a simpler shape. Hobby Lobby faux leather ribbon is also known to be trickier to cut so I like to use simpler shapes to cut with that material, too.
So be smart about matching your material to your design for optimal cuts.
Another option is to choose a layered design that has a simple faux leather shape and features a more intricate design on top cut from heat transfer vinyl, foil, or glitter iron on. An example is my design here:
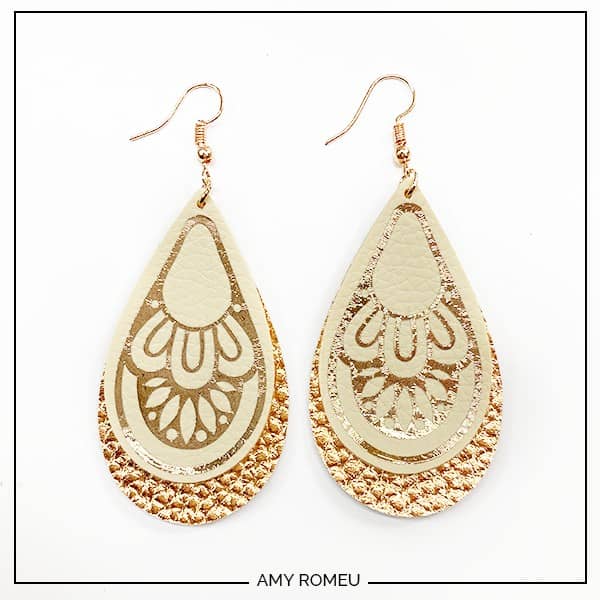
The bottom two layers are simple teardrop faux leather shapes. The top design is cut from Cricut foil iron on. If you want to read my complete tutorial for this project and get the SVG cut file, click here to read my Cricut Bohemian Teardrop Faux Leather Earring tutorial.
Tip #3 – Forget About Changing the Blade!
This tip is key! I am asked ALL THE TIME what Cricut blade I use to cut faux leather, and my readers and viewers and surprised to learn I use the standard fine point blade that comes with the Cricut Maker, the Cricut Explore Air 2, and the Cricut Joy.
The blade isn’t what makes for good faux leather cuts, everything else is! So rest assured you can make great faux leather earrings with any of the Cricut machines using the standard fine point blade, and lets keep going with the tips and tricks.
Tip #4 – Cut One or Two Pair of Earrings at a Time
You’re not going to like this tip – you want to bust out 12 pairs of earrings with one cutting mat – I get it! But if you want to get perfect cuts every time, it’s best to cut only one or two pairs of earring shapes at a time. If you’re new to Cricut earring making, I would strongly recommend you start with just ONE pair at a time.
So WHY would you cut one pair at a time, when you could squeeze so many more shapes onto one 12×12 cutting mat? I’ll explain more in the next tip.
Tip #5 – Trim Faux Leather to Size
I know it’s tempting to place your entire sheet of faux leather on your mat to cut, but it’s best if you cut out a smaller piece instead. Why?
The first reason is, the larger the piece of faux leather is that you are trying to cut, the less it will stick. Larger surface area means more movement.
The second reason is, every time the cutting blade moves through the faux leather, the material has an opportunity to move and shift. More cuts on a piece of faux leather means a lot more chances for the material to move and lift from the mat, which you don’t want!
The third reason is – you’ll be taping down your faux leather on all sides, and a smaller area will benefit much more from the added strength from the tape much more than a very large piece.
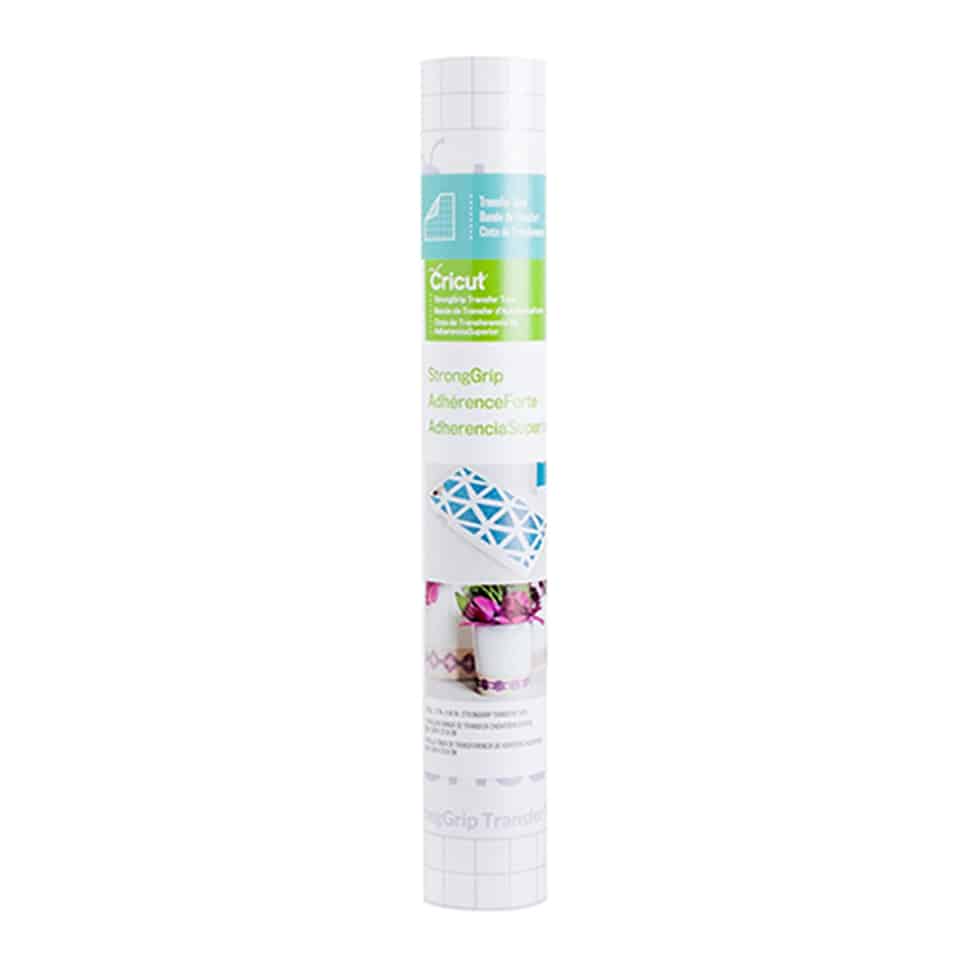
Tip #6 – Use a Sticky Purple Strong Grip Cutting Mat
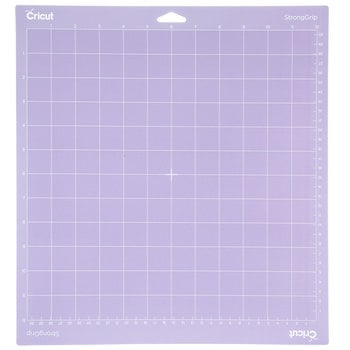
The Cricut purple strong grip cutting mat, designed for cutting faux leather and other thicker materials, is available on Amazon here.
Yep, I know this is a pretty basic tip, but it’s an important thing to mention. I see people posting in Facebook groups all the time who are having problems cutting faux leather with a Cricut, and often times they are using the green standard grip mat.
Can you use a green cutting mat to cut faux leather? Sure you can. But you won’t get the same quality of cuts you can when you use a purple strong grip mat (along with my other tips and tricks).
The Cricut purple strong grip mat is designed to be extra sticky to hold the faux leather in place while the Cricut cuts. If you want to cut faux leather often, it’s best to invest in the right tools for the job. So get a Cricut purple strong grip cutting mat to make your life much easier!
(The exception to using a purple mat is when you are cutting faux leather with a Cricut Joy, because there is no Joy sized purple mat. See my posts about cutting faux leather with the Cricut Joy here and here for exactly how to cut faux leather on a green mat successfully with the Cricut Joy.)
Tip #7 – Move Faux Leather Around on the Mat
So now you’ve got the purple strong grip mat! Great! But there are a few things to keep in mind before you start cutting to make sure your mat stays sticky.
I know most Cricut crafters default to cutting materials from the top left corner of the mat, but for cutting faux leather with a Cricut, you’ll want to get into the habit of moving your material around and cutting from other places on the mat. This will keep your mat from losing a lot of stickiness in just one place.
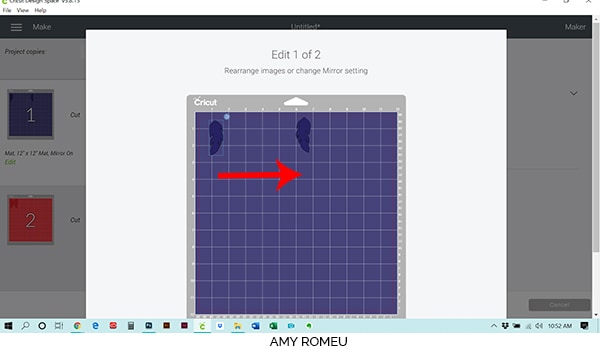
If you aren’t sure how to do this, here’s how. After you’ve finalized your design on your canvas in Cricut Design Space and pressed the green MAKE IT button, you’ll see your shapes are automatically placed at the top left corner of the mat in the mat preview.
Click on the EDIT link under the mat in the mat preview screen. Then you can drag your cut shapes to another location on your mat prior to cutting.
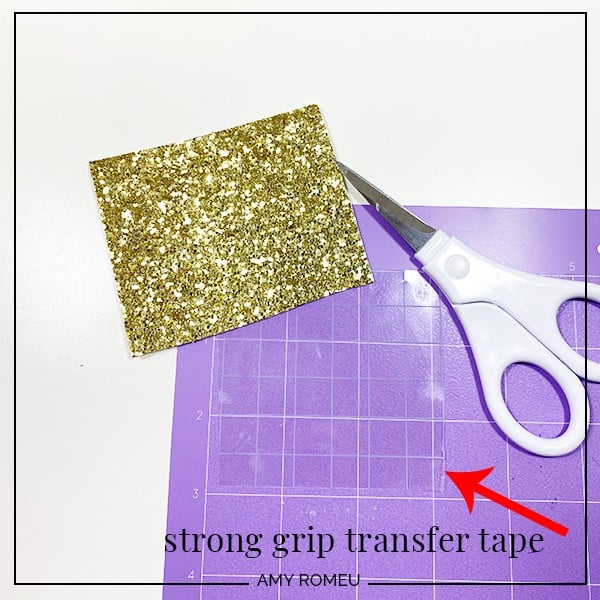
Tip #8 – Strong Grip Transfer Tape is Your Friend
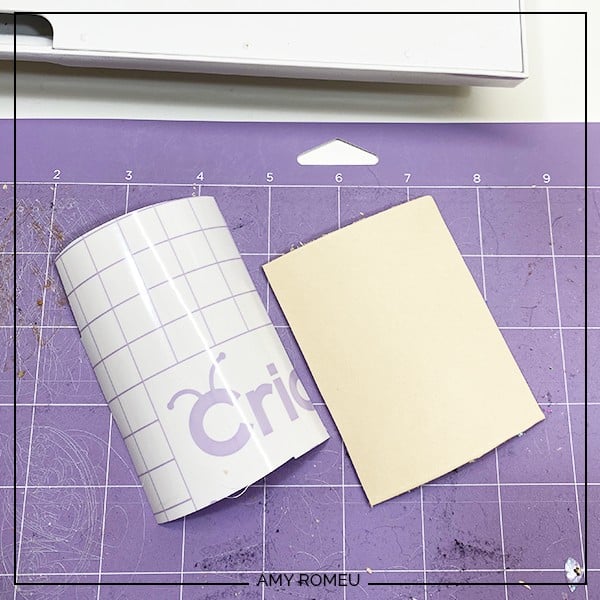
If your purple cutting mat is getting lots of use and you are running out of very sticky spots (like my well loved mat shown below), you can use this little trick to help your faux leather stick better to the mat surface again.
Cut a piece of Cricut brand strong grip transfer tape (available on Amazon here)
Place it on your purple cutting mat STICKY SIDE UP where your earring shapes will cut. The strong grip transfer tape will hold your faux leather firmly on your mat.
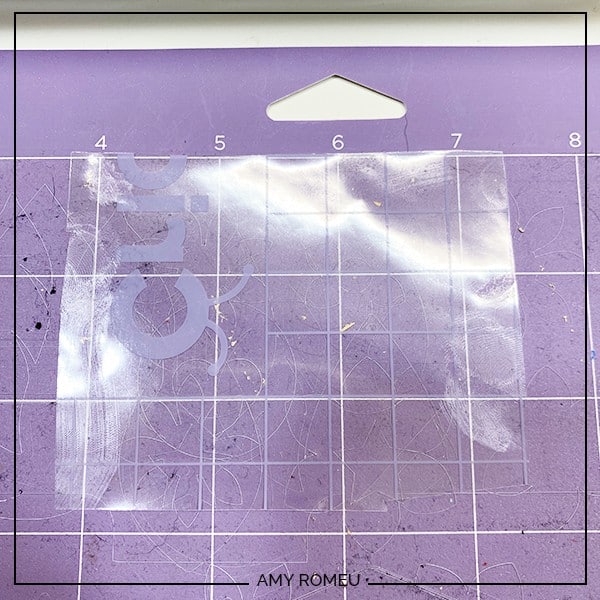

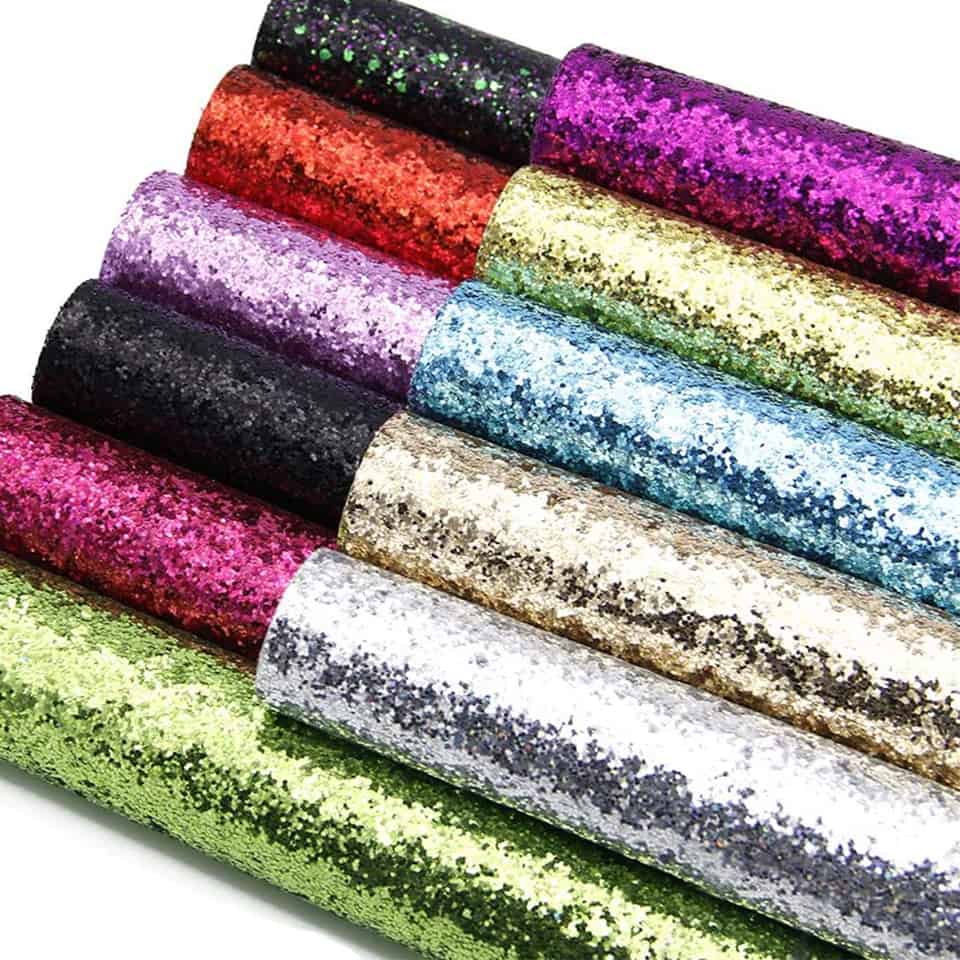
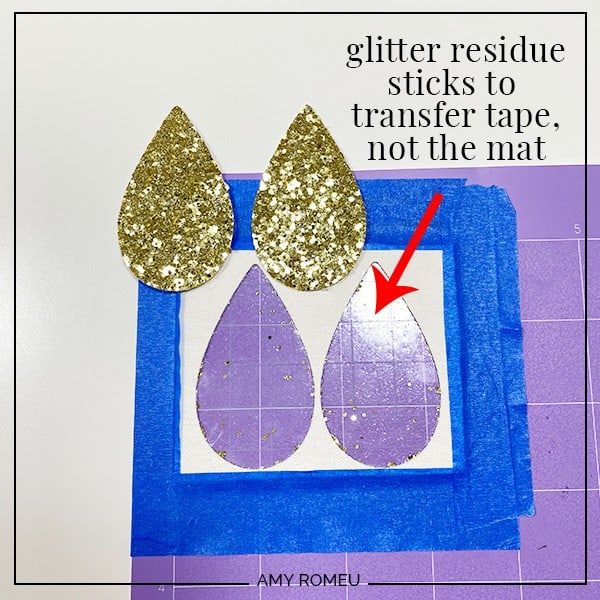
Tip #9 – Protect your Mat From Glitter and Other Messy Materials
So now that you’ve got your purple sticky mat and you’re rotating the placement of materials to protect the stickiness, there’s something else to do to ensure your mat will stay sticky for as long as possible. You’ll want to protect it from materials that will leave residue, fuzz, or glitter behind on the mat (like faux leather glitter sheets, below).
You can do this easily with the same Cricut brand strong grip transfer tape . Just place a piece sticky side up on your purple mat before placing any potentially messy faux leather on your mat.
Tip #10 – Place Faux Leather Pretty Side Down
For the best cuts, place your faux leather material pretty side down before you cut. Why? Because it will stick to the mat better.
Most faux leathers have a top surface that grips the sticky mat better than the soft, felt like backing will. So place your material face down for the best stick. If your material is messy, like faux glitter, remember to put strong grip transfer tape down first to protect your mat.
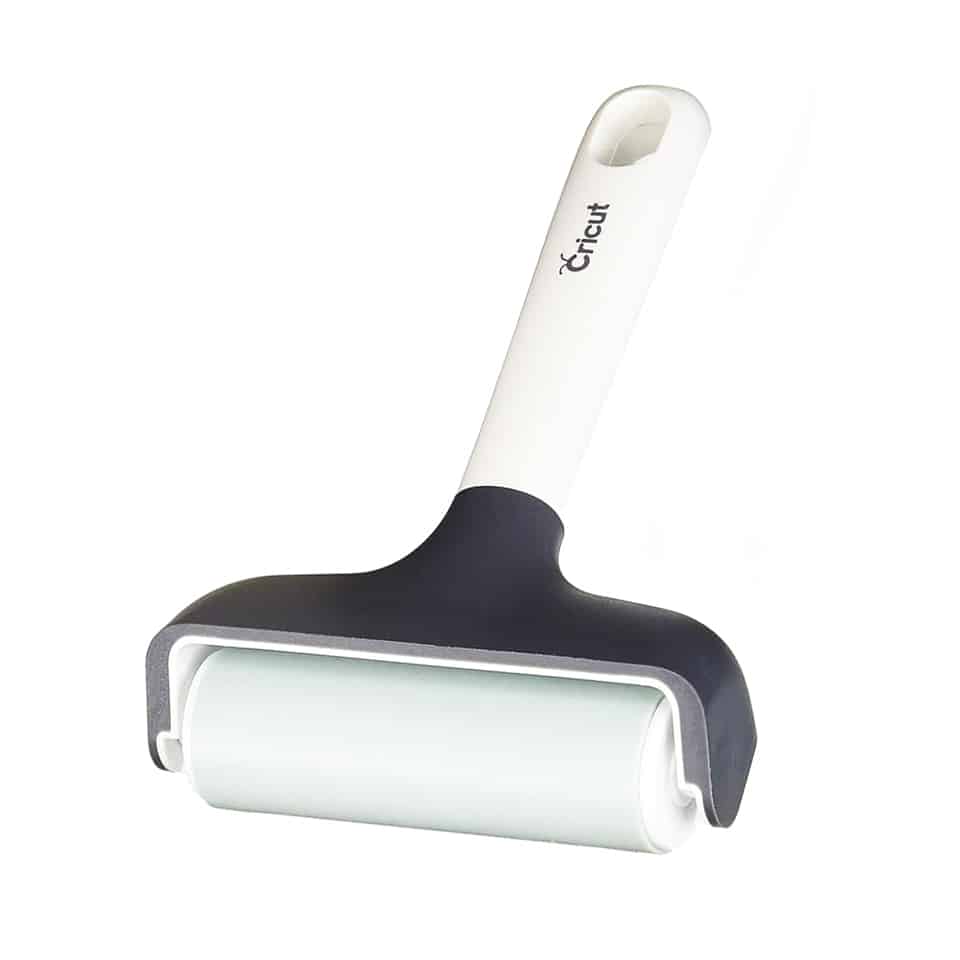
Tip #11 – Press Faux Leather Down with a Brayer or Scraper
Once your smaller piece of faux leather material is placed on a purple strong grip cutting mat, there are still a few more things you need to do to make sure the faux leather stays put.
Roll or rub all over the back surface of your faux leather (because the pretty side is down, remember?) to help every inch of it stick to the mat.
You can do this with a brayer (available on Amazon here)
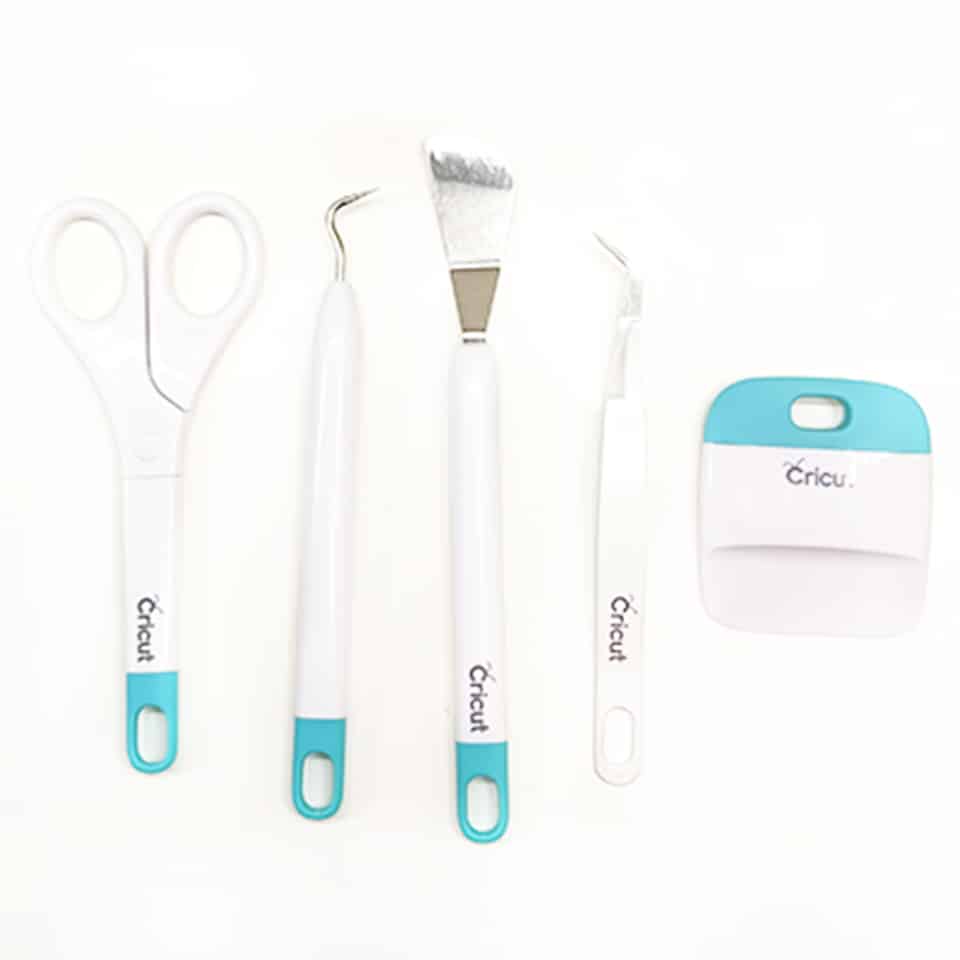
Or you can use the scraper that comes in the basic Cricut tool set (from Amazon, here). You could even use an old credit card.
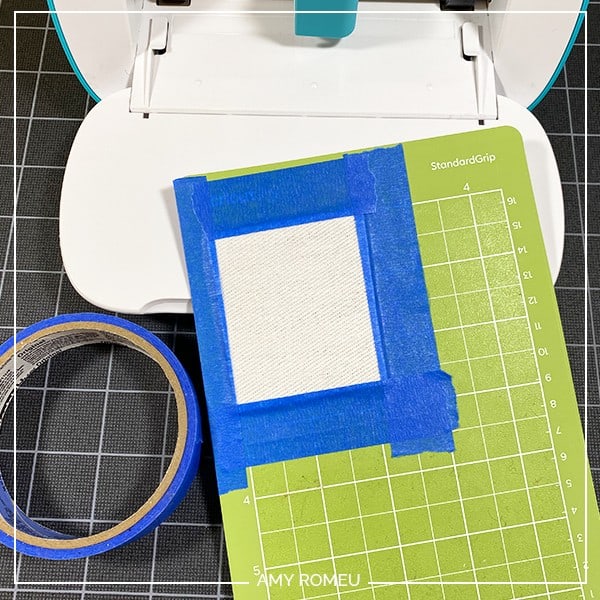
Tip #12 – Tape All Around Faux Leather with Blue Tape
Of all of my tips, tricks, and secrets to cutting faux leather with a Cricut, this is the best one. You need to tape down the edges of your faux leather to your mat on all sides with blue painter’s tape. You know, the hardware store kind? (It’s also available on Amazon here.) This helps to keep your material from shifting on your cutting mat.
This is especially important when cutting faux leather using a Cricut Joy, since the Joy doesn’t have a purple strong grip cutting mat (as seen below).
Is using blue painter’s tape overkill? Maybe. But I’ve found it to be a very effective way to keep faux leather from shifting on the mat, especially when the faux leather has been trimmed to size.
Blue painter’s tape can also be used more than once. Just remove the tape pieces carefully after cutting. Place them somewhere they will be flat and dry until you are ready to use them again.
If you don’t have blue painter’s tape, you can use Washi Tape instead (you know, the scrapbooking kind). I don’t recommend Scotch Tape or Masking Tape or Duct Tape because they can damage your mat and/or leave a residue.
Tip #13 – Move Star Wheels Out of the Way
Now that your mat is prepped, be sure that your Cricut’s white star wheels are moved out of the way and off to the sides. What the heck is a star wheel, you ask? Here is a photo:
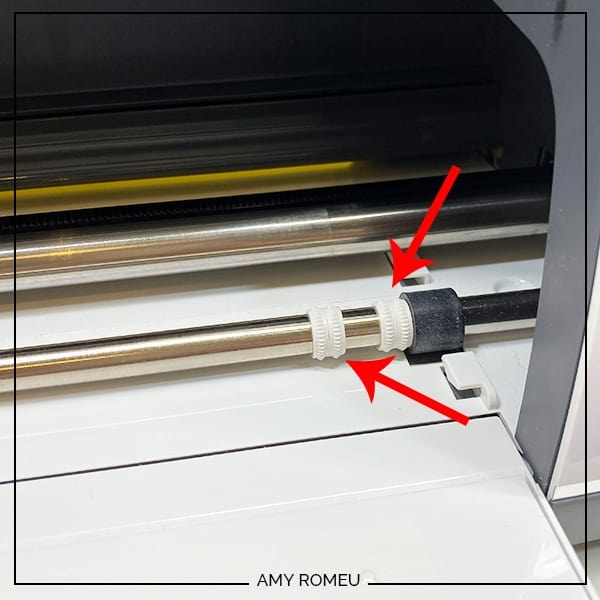
Star wheels are only on the Cricut Maker and the Cricut Explore Air 2 (not the Cricut Joy). Their purpose is to grip paper or cardstock or fabric to feed it into the Cricut better as the machine cuts.
However, the star wheels can leave an imprint in your faux leather surface and pull and drag faux leather cut shapes off of the mat while cutting. So you’ll want to gently push them to the sides of the cutting bar so they are out of the way before you cut.
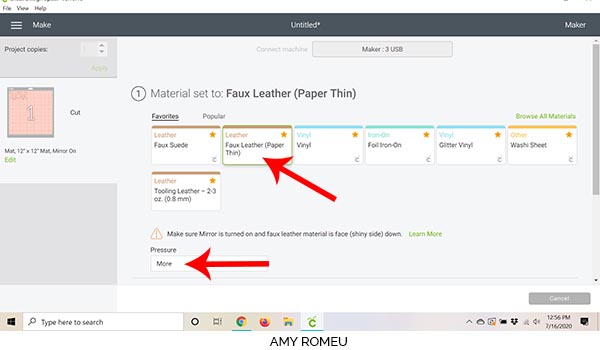
Tip #14 – Use the Faux Leather (Paper Thin) Material Setting
Wait a minute. You may be thinking: Huh? But there are so many faux leathers! And most if it isn’t paper thin! And I’ve heard to use Felt, or Denim, or many other material settings!
Choosing the best material setting for cutting faux leather with a Cricut is another topic that stumps beginning Cricut earring makers. But it doesn’t have to! I have cut 1000+ faux leather shapes with my Cricut, and I use the same material setting every time. Let me tell you exactly what I do.
Yes, its true, there are many settings that can work for cutting faux leather with a Cricut, but I choose the Faux Leather (Paper Thin) setting ever time. Even though most faux leathers are not paper thin, this material setting is an automatic double cut. Double cutting faux leather works great on the first pass most of the time. So keep it simple and go with Faux Leather (Paper Thin).
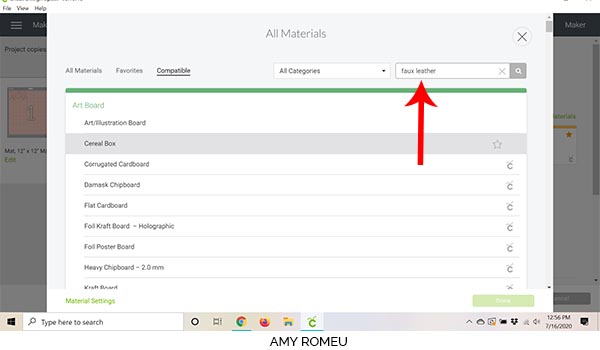
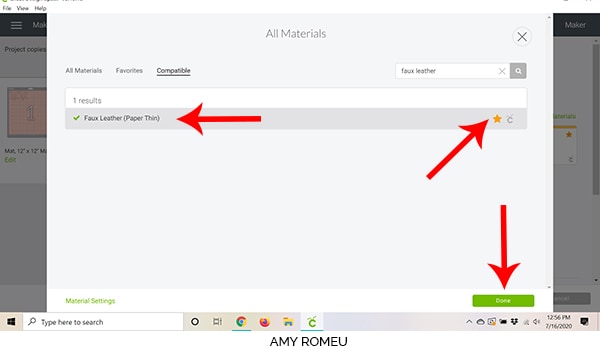
How to Select Faux Leather (Paper Thin)
With a Cricut Maker – From the Material Selection screen, click on Browse All Materials. Then type Faux Leather. Faux Leather (Paper Thin) will appear. Click on it to select it.

With a Cricut Explore Air 2– Turn the dial to Custom. From the Material Selection screen, click on Browse All Materials. Then type Faux Leather. Faux Leather (Paper Thin) will appear. Click on it to select it.
With a Cricut Joy – Make sure the Cricut Joy is your selected machine first. When Cricut Design Space asks how you will load the mat for this project, choose On Mat. Then from the Material Selection screen, click on Browse All Materials. Then type Faux Leather. Faux Leather (Paper Thin) will appear. Click on it to select it. (If you don’t see Faux Leather as an option, that means you didn’t select “ON MAT” as the loading method. The Cricut Joy knows it can only cut faux leather on a mat.)
Tip #15 – Use the “More” Pressure Setting
For a little extra boost, I always choose “More” pressure from the drop down pressure setting menu. This helps ensure the Cricut cuts the faux leather all the way through. The “More” pressure setting is available with all three Cricut machines – the Maker, the Explore Air 2, and the Joy.
Tip #16 – Check Cut and Repeat if Necessary
As I said in the previous tip, the Faux Leather (Paper Thin) setting cuts most faux leathers on one pass, because it is an automatic double cut. BUT I always check after the cut finishes (and BEFORE I unload the mat) to be sure the cut went all the way through. I use a small weeding tool or my fingernail to carefully pull up one edge from the mat:
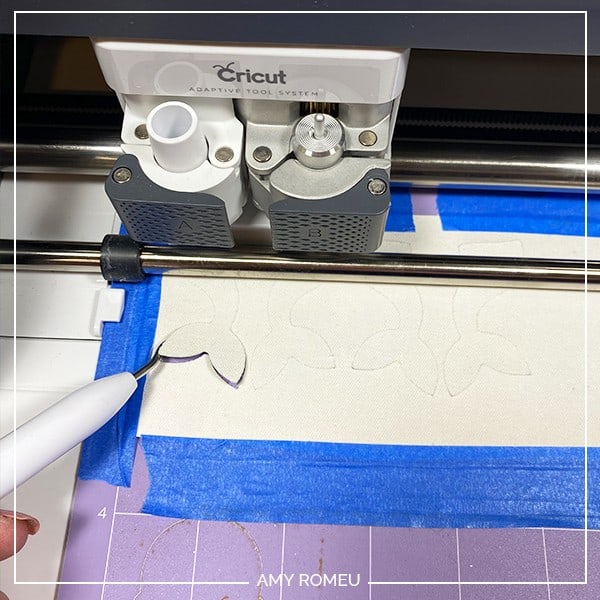
If the faux leather is cut all the way through, that’s great! Hit the double arrow button to unload your mat.
If not, make sure your faux leather is still pressed firmly to the mat and then hit the C button to repeat the cut again. Then check the cut again. You can repeat this process as many times as necessary as long as you don’t unload the cutting mat!

On the Cricut Joy… there is no C button to press. Cricut Design Space will display a prompt after the cut is complete which asks if you want to recut or unload the mat. Again, you can recut the mat as many times as you want as long as you haven’t unloaded the mat.
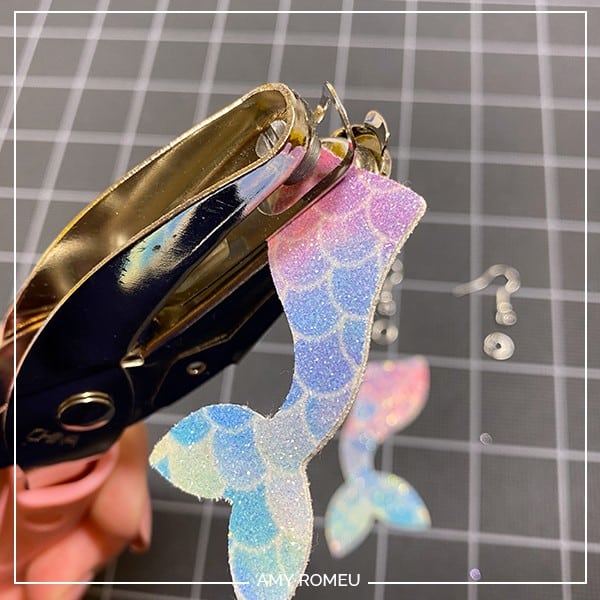
Tip #17 – Punch Holes After the Earrings Cut
Another question I get a lot is about how to make earring holes – with the Cricut, or not?
The short answer is – the Cricut can cut the holes, and often it does a great job! But sometimes it doesn’t, and I don’t want to worry about it every time I make earirngs.
So most of the time I just punch the hole manually with a hole punch. I love using a hole punch like this hole punch from Amazon here.
So don’t stress about the earring hole, just punch it!
So I hope you found these tips, tricks and secrets to cutting faux leather earrings with a Cricut helpful!
As promised, I have a free earring SVG cut file for you so you can practice cutting faux leather earrings with your Cricut:

You can grab it for free by filling out a form at the bottom of this post!
Cricut Earrings 101 Special Offer!
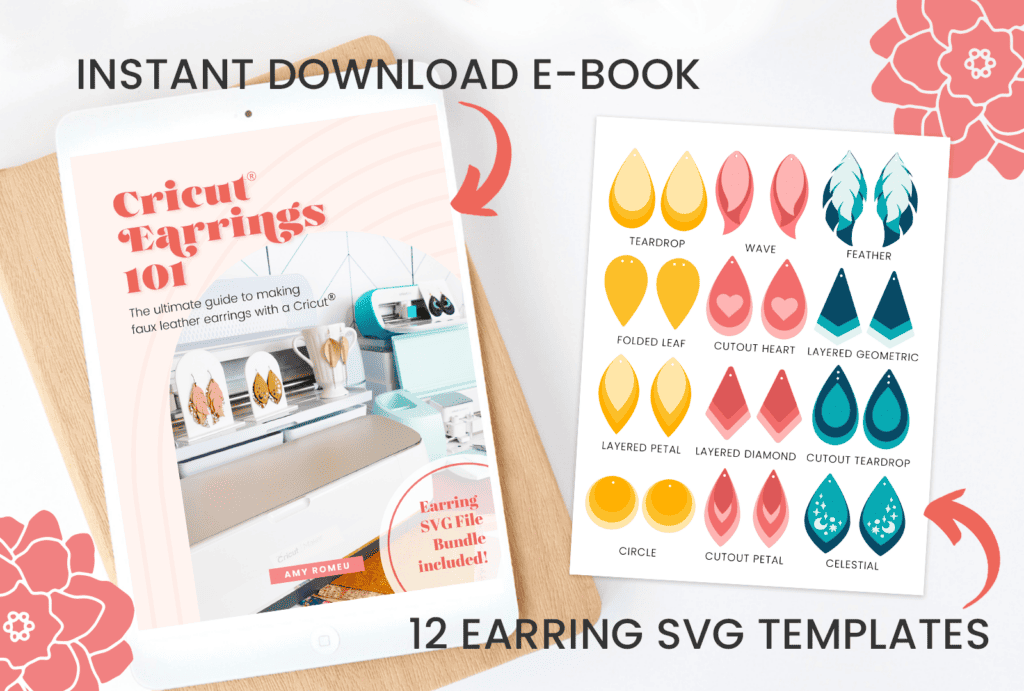
If this information has inspired you to try making earrings with your Cricut, you’ll want to check out my Cricut Earrings 101 Workbook & SVG Bundle.
This 52 page, instant download workbook has all the information you need to get started making earrings with your Cricut. It also includes step by step tutorials and 12 of my best selling earring cut file templates, so you can get started making earrings right away.
If you want to learn more about Cricut Earrings 101, click here or on the image below!
Want to see all of my Cricut earring & jewelry tutorials? CLICK HERE
Please share your earring creations with me! Tag me on Instagram @amyromeucrafts.
Until next time… and happy crafting!

You briefly mentioned the back of the faux leather and said you would talk about this later. I am in the process of using faux leather to make a necklace and I was wondering if you treat the back side so it is smoother (for lack of a better word) against clothing so is will move freely?
Hi, Tracey! Thanks for your comment! I’ve updated the post with a link to a YouTube video on four different ways to put a backing on faux leather if you wanted to. Here’s a link to the video: https://youtu.be/Q1IK6EfA6c8
I recently made a fall leaf necklace, and I put a foil iron on backing on all the leaves. It’s a great way to not only make the material smoother against clothing, but it also adds some stiffness to the pieces. It also makes the finished jewelry piece look more professional.
Thanks again for your comment!
Amy
This is just the information I needed! Thank You so much! I am now not wasting materials: 😉
Excellent tips . I’m new to Cricut and tearing my hair out and wasting faux leather. Now I use your tips and tricks . Thank you
Enza
Is there a way to fix an earring that the hole has ripped on?
Hi, Dawn! Not that I know of, sorry!
Hi Amy, thank you for all of the help you are giving! I was wondering if you have any tips and tricks regarding efficiency while cutting faux leather. I feel like I spend so much time trying to get the pieces stuck to the mat, taping them down, scraping the mat etc, that I can’t get much done at all in one sitting. Do I just need to get used to that? Or are there better ways to go about it?
Thanks!
Hi, Stacey! Thanks for your comment. If you’re comfortable with how your machine cuts, I would suggest cutting a few shapes at one time. Not so many that your material starts to lift, but enough so that you aren’t making one pair at a time. It will take some experimenting to figure out how many clean cuts you can get. 🙂 Thanks again for your note!
Hello Amy. I am brand new to the earring making world. I truly appreciate your YouTube channel and the in-depth instructions that you give. I am wondering where to buy the Faux Leather as there are a million places to go…will the Cricut cut the Chunky Glitter style and where do I find leopard print? I know all these materials are not the same and I don’t want to end up spending money on products that will sit in a box, never to be used. Happy New Year, Diana
Hi, Diana! Thanks for your comment.
Yes, the Cricut will cut chunky glitter. 🙂 I have a YouTube video on how to I cut chunky glitter successfully. Here’s the link: https://youtu.be/svA0qoGptYU
I’m asked a lot about the best places to buy faux leather, so I’ve put together a blog post with my favorite sources here: https://amyromeu.com/best-places-buy-faux-leather-cricut-earrings/
I hope that helps! Please let me know if you have any other questions. I’m always happy to help.
Thank you.
Amy
Wow Amy! Every one of these hints are a hit! I have been struggling all weekend to figure out the fabric backed vinyl and to get it stay! Cut! and keep the glitter off my mat all at the same time! Unfortunately a bit late for the glitter and I ruined a couple sheets of material! But no more!! Thanks!!
Lizbet
I’m so glad you found these tips helpful, Lizbet! That makes me so happy to hear. 🙂
Amy
So glad to find a comprehensive set of instructions / advice for a very specialized project.
Do you need to mirror the object in making the earrings since we’re put the shiny side down?
Hi, Fern! Great question. The short answer is yes, you will mirror each mat in Design Space that will cut face down. However, most of my earring designs are already made as mirrored images of each other, or many designs are symmetrical shapes themselves without a left or right (like the teardrop), so mirroring isn’t necessary. I know that’s confusing to read, but when you start making earrings you’ll see what I mean. 🙂