
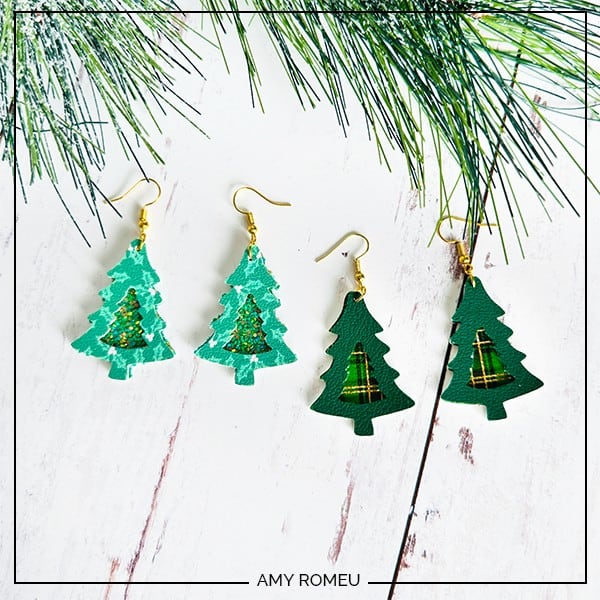
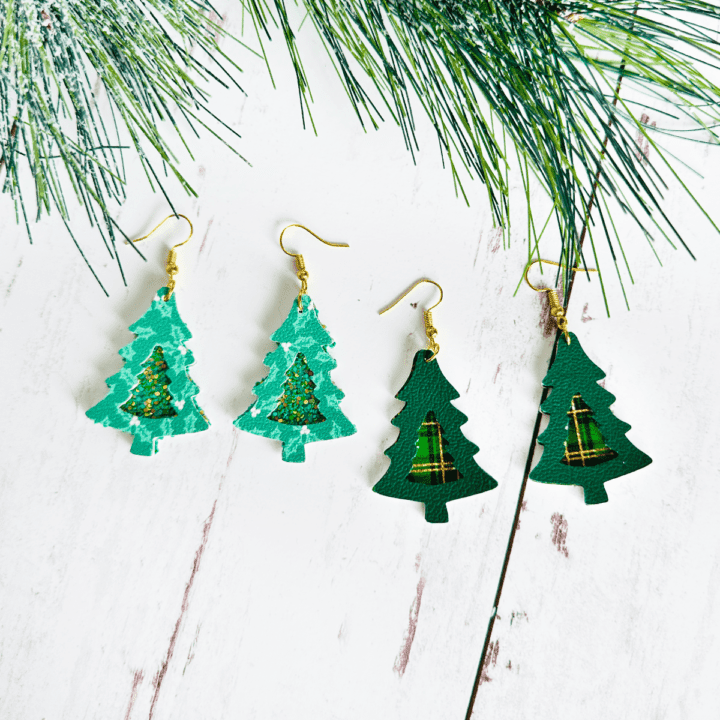
Faux Leather Cricut Cutout Christmas Tree Earrings

Sometime simple holiday earrings are best, and that was my goal when I designed these Faux Leather Cutout Christmas Tree Earrings. They are so easy to make with just faux leather and a Cricut! You can make them with a Cricut Maker, Maker 3, Explore Air 2 or Explore 3, or even the Cricut Joy.
This SVG is included in my Christmas Earrings Event SVG Bundle – you can learn more and get it here.
I also have the earring SVG template for sale individually in my shop – the link is in the Materials section below.
So if you’re ready to try making these Faux Leather Cutout Christmas Tree Earrings with a Cricut, let’s get started!
This page contains some affiliate links (which means if you make a purchase after clicking a link, I will earn a small commission at no additional cost to you). Read my full disclosure policy here.
CRICUT CUTOUT CHRISTMAS TREE EARRINGS MATERIALS LIST
- Solid Green Faux Leather and Green Christmas Plaid Faux Leather
- Holly Printed Faux Leather and Green Chunky Glitter Faux Leather from this 3 pc set
- This SVG is part of my 25 Days of Cricut Christmas Earrings Event. To see all of the earring designs included in this event, click here.
- Get the earring template from my shop here. If you’d like to sell earrings made from my earrings SVG template, there are commercial use license options available at this link, too.
- Cricut machine of your choice: Cricut Maker 3, Cricut Maker, Cricut Explore 3, Cricut Explore Air 2, or the Cricut Joy
- Purple “Strong Grip” cutting mat
- Blue Painter’s Tape
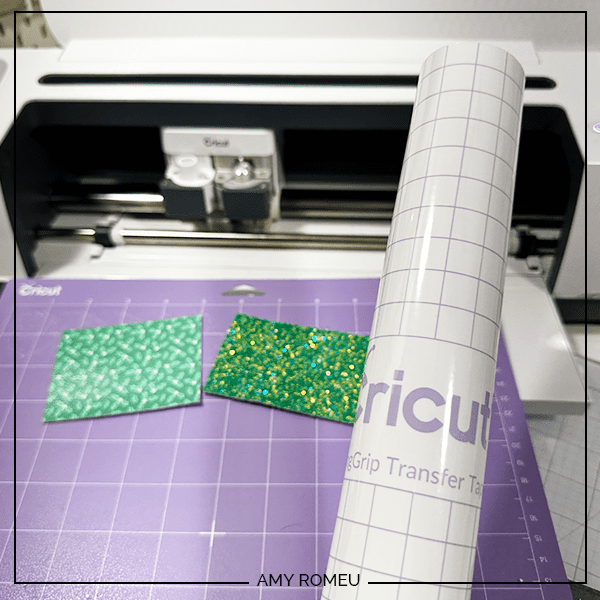
- Cricut “Strong Grip” Transfer Tape (to protect mat when cutting chunky glitter faux leather)
- Cricut Weeding Tool (I use the one from this basic tool set)
- 1/16″ Hole Punch
- Jewelry Pliers – Needle Nose and Wide Flat Nose
- Earring hooks in Silver finish and Gold finish
- 6mm Jump Rings in Silver finish and Gold finish
How to Make Faux Leather Connected Christmas Tree Earrings with a Cricut
For a printable version of the text portion of project instructions, click here.
STEP 1 – Get the Earrings SVG Template
You can get the Cutout Christmas Tree Earrings SVG template included in the 25 Days of Cricut Christmas Earrings Event Bundle here or from my shop here. You’ll receive an order confirmation email with a link to download the SVG after purchasing.
Save the zipped folder that downloads to your computer. You’ll need to unzip or extract the folder FIRST so you can upload the Cutout Christmas Tree Earrings SVG file to Cricut Design Space.
STEP 2 – Upload The Earrings SVG Template to Cricut Design Space
Click on Upload Image, then browse to where your unzipped file SVG is located on your device.
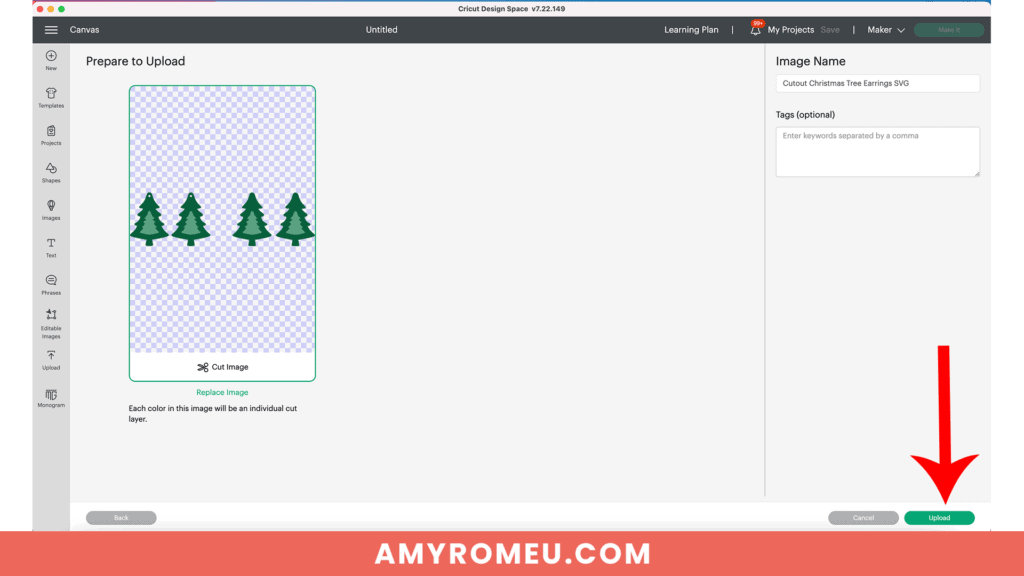
Click on it to upload it to Design Space. You’ll see a preview of the Cutout Christmas Tree Earrings SVG on the screen. Click the UPLOAD button.
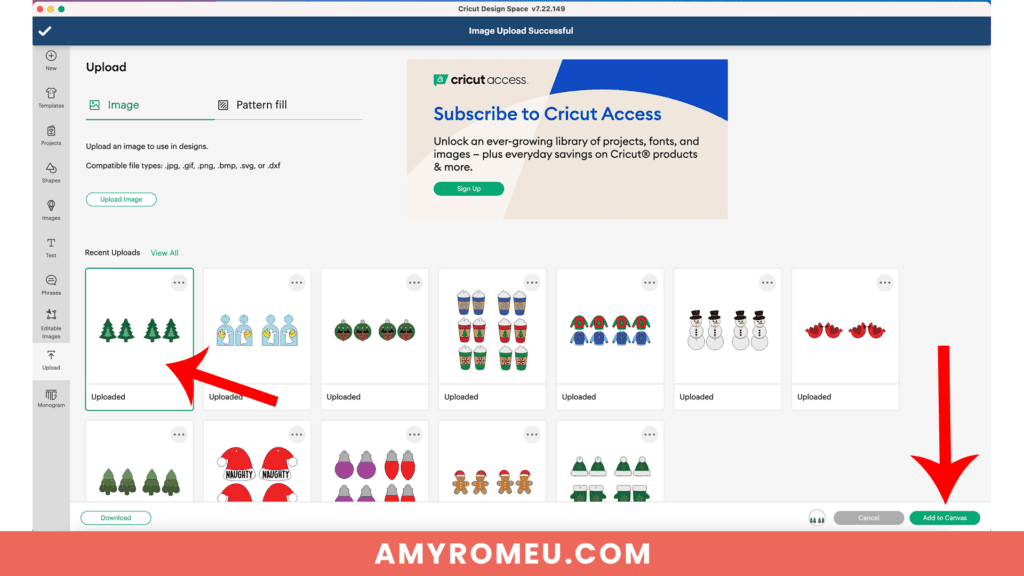
Then select the SVG from your Recent Uploads row and click Add to Canvas.
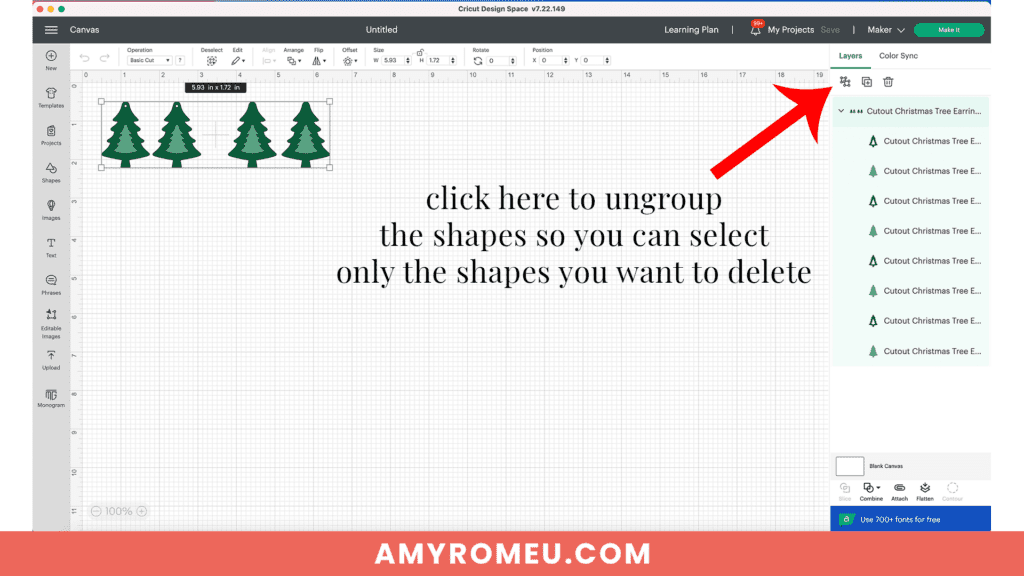
There will be two versions of each of the earring SVGs – one with pre-cut holes and one without.
For this project, I recommend using the “with holes” version since the earring shapes are layered together. For the earrings to sit nicely together when layered, you need the holes in the same spot on each earring. Even if the Cricut doesn’t cut the holes all the way through, it will make a mark so you know where to finish making the hole with a 1/16″ hole punch or sharp object.
Use the “no holes” version if you are resizing the design or you plan to punch all the holes manually with a hole punch.
Once you’ve decided which version you want to use, delete the other pair of earrings. You will need to ungroup both versions from each other first before you can delete.
Your canvas in Design Space should now look like this.
Since both layers in this project will cut from faux leather, we can save time by having the Cricut cut both layers on the same cutting mat. If you aren’t interested in trying this trick, you can just proceed to pressing the Make It button and cutting each mat individually.
But if you want to save some time, we can change the shapes to the same color so we can cut both tree shapes from different faux leathers on the same mat.
There are two ways to do this. The first is to draw a box around all the shapes and then choose a color from the Color Picker.
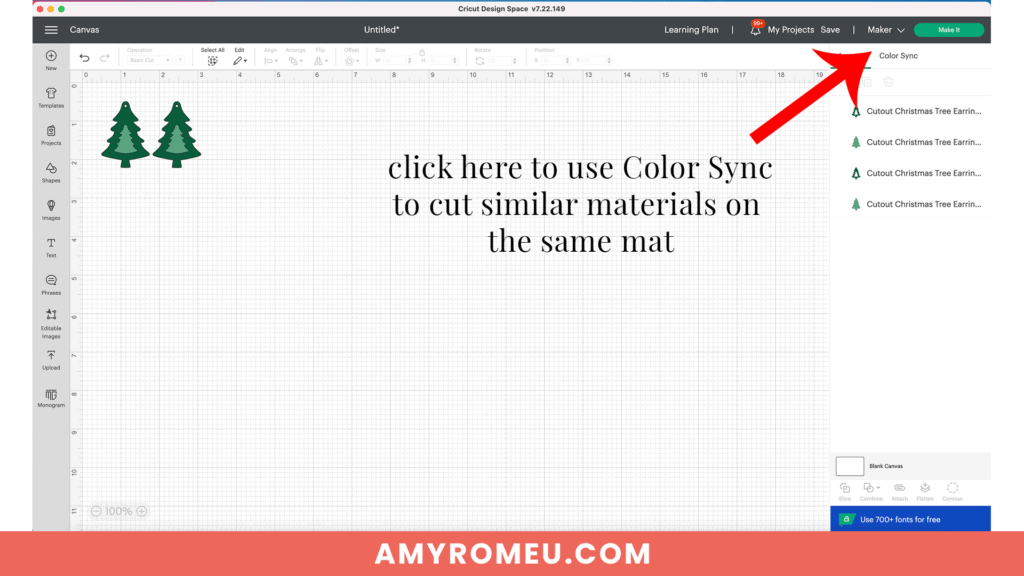
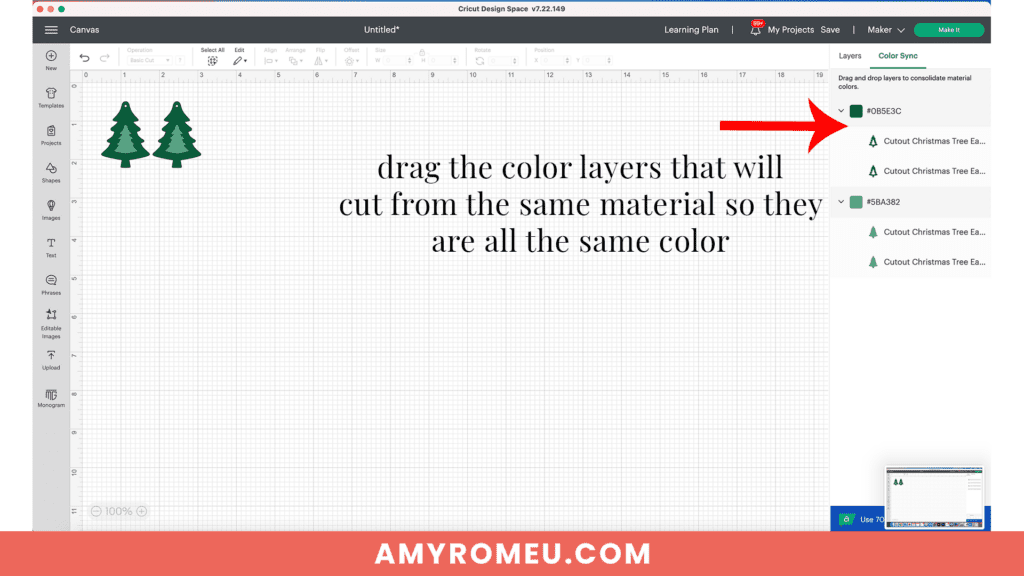
The second way is to use the Color Sync feature (at the top of the right side of the layers panel). Click on Color Sync and you’ll see the layers on the canvas separated by their unique color codes.
Click on one of the layers and drag it up to another colored layer set. This will change the color of the layer you dragged to the same color. Repeat with all the layers until they are all the same color.
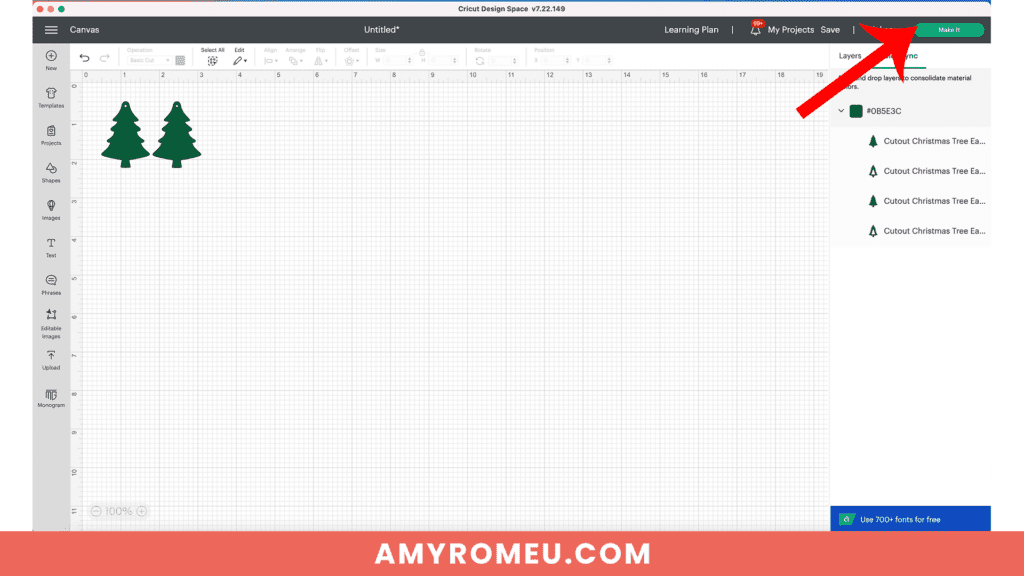
When all the shapes on your canvas are the same color, click the green “Make It” button.
STEP 3 – Prepare to Cut Earring Shapes in Cricut Design Space
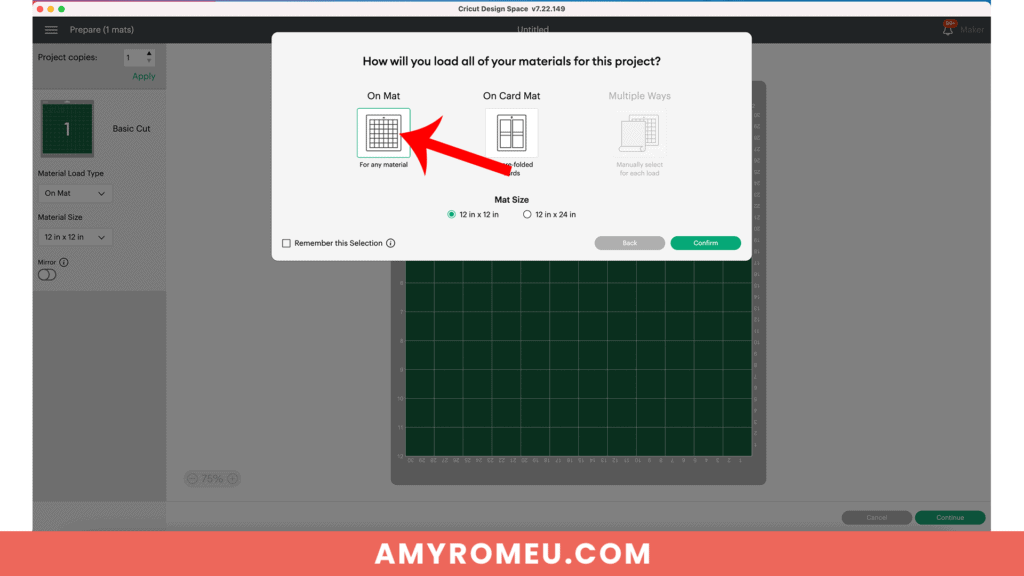
When Design Space prompts you to choose how you will load your materials for this project, choose “On Mat.” Then click the green CONTINUE button.
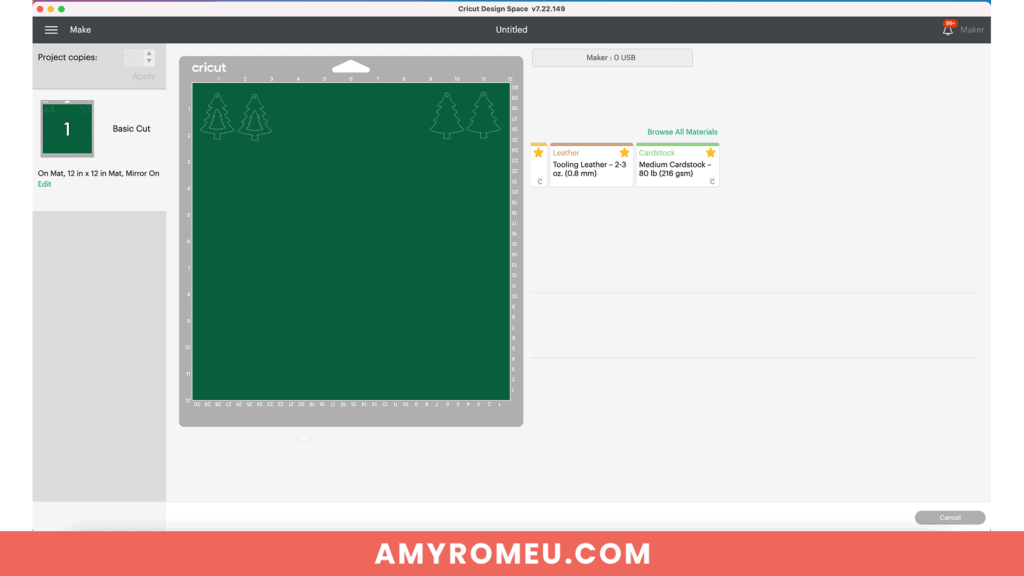
If you use the Color Sync technique from the previous step, the mat preview screen will show both tree shapes on one cutting mat.
First, toggle the MIRROR button to ON for both mats in the project. This is because faux leather cuts face down.
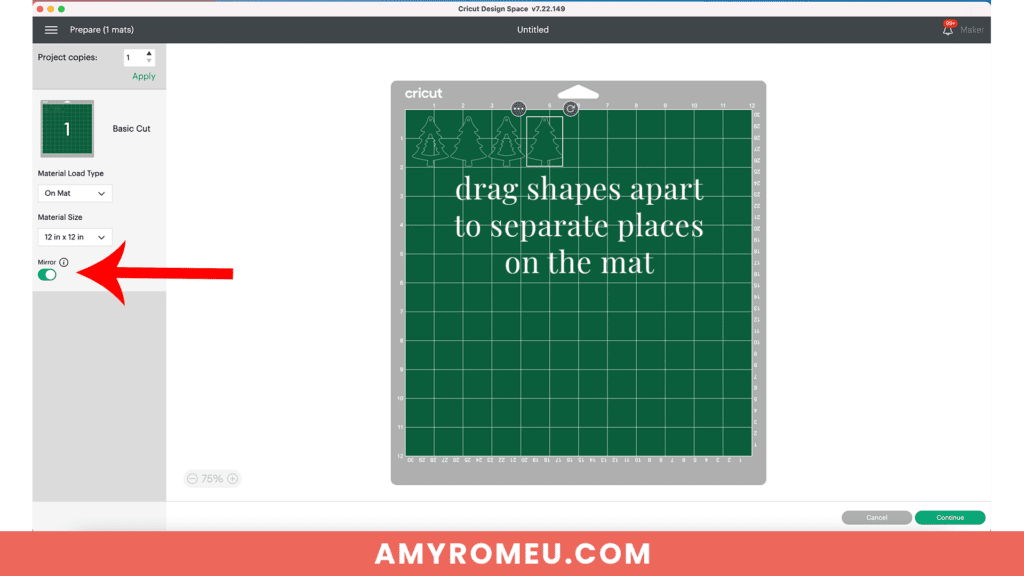
Then click and drag the shapes apart from each other and onto distinctly separate parts of the mat. This will allow you room to place the two different pieces of faux leather and have room to tape around each one.
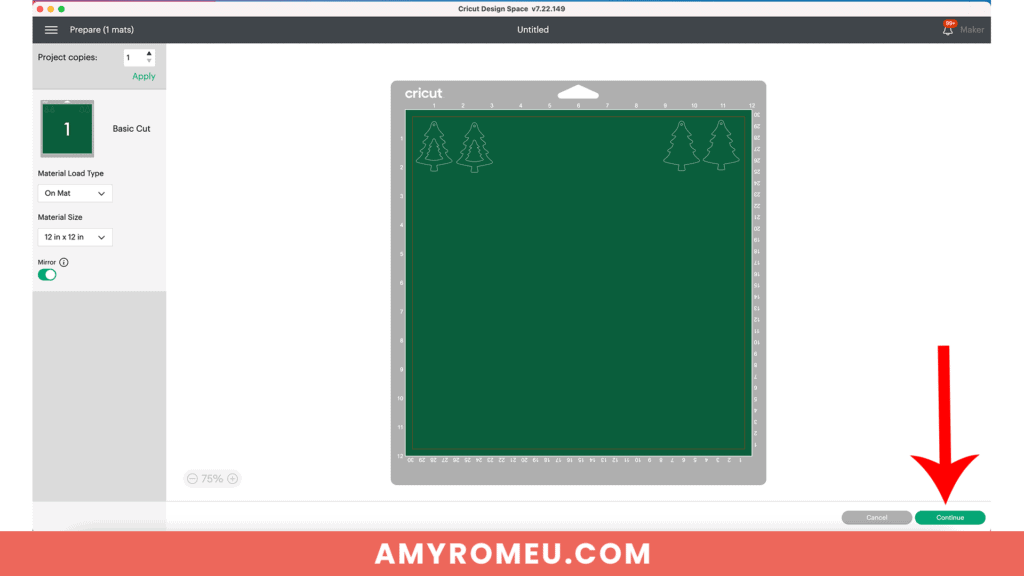
Click the green CONTINUE button to make the material selection.
STEP 4 – Make Material Selection
Note for Explore Air 2 users: Cricut Explore Air 2 users will need to turn the dial to “Custom” before choosing Faux Leather (Paper Thin).
Note for Cricut Joy users: Cricut Joy users should check out my tutorial on How to Make Earrings with the Cricut Joy with more specific instructions for Joy users.
On the Material Selection screen, choose Faux Leather (Paper Thin) as the material setting. If you don’t have this material setting as a favorite, click “Browse All Materials” to search for it and select it.
TIP: I’ll be cutting these earrings from smooth faux leather AND chunky glitter faux leather. The Faux Leather (Paper Thin) setting is the one I’ll use for both materials. The trick to getting the thicker chunky glitter faux leather to cut all the way through is to repeat the cut. I’ll show you how in the next step.
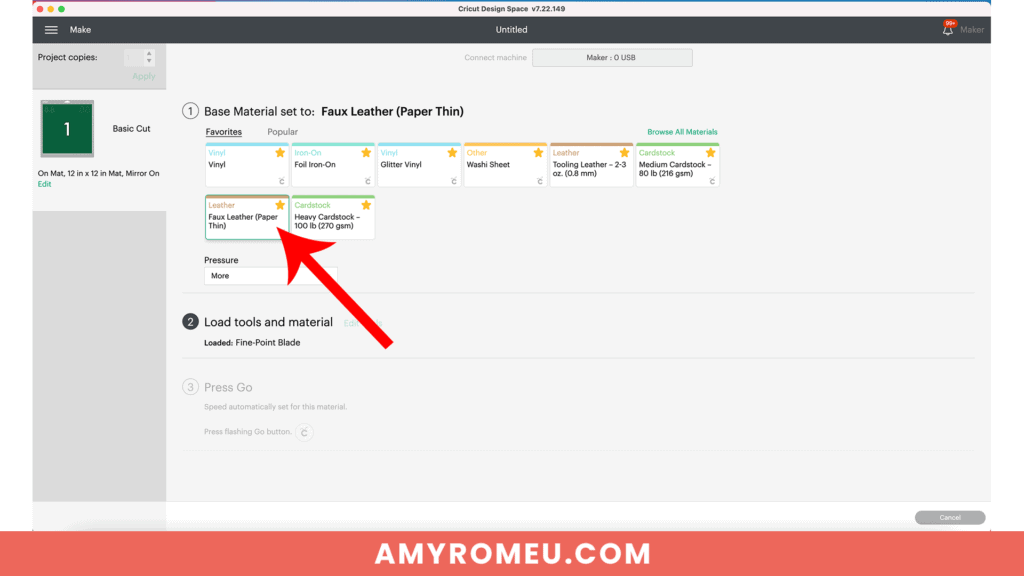
Then select “More” from the Pressure dropdown menu.
Now it’s time to prepare the faux leather mat to cut.
STEP 5 – Cut the Faux Leather Mat
NOTE: I didn’t put a backing on these faux leather earrings in this tutorial to keep it as short as possible. But I do have a post here and a YouTube video here that demonstrate four ways to put a back on faux leather earrings if you want to learn more.
I’m using printed smooth and chunky glitter faux leather, but you can use the faux leathers of your choice.
Cut two pieces of faux leather just slightly larger than the sizes shown in the mat preview screen. You can use your mouse and hover over the mat preview on the left hand side to remind yourself of the placement for the different shapes that will cut.
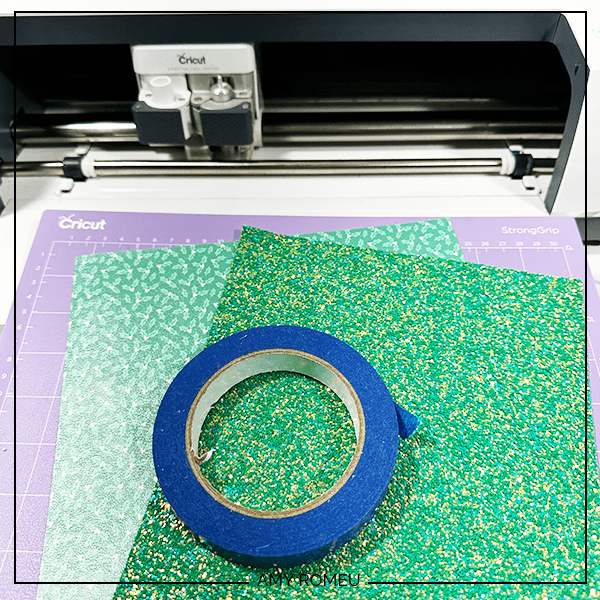
Since we are using chunky glitter faux leather for one of the earring layers, we are going to take an extra step before placing the materials down on the purple mat.
The chunky glitter will cut face down, so I use strong grip transfer tape – placed sticky side UP – on my purple mats to protect them from glitter residue when cutting.
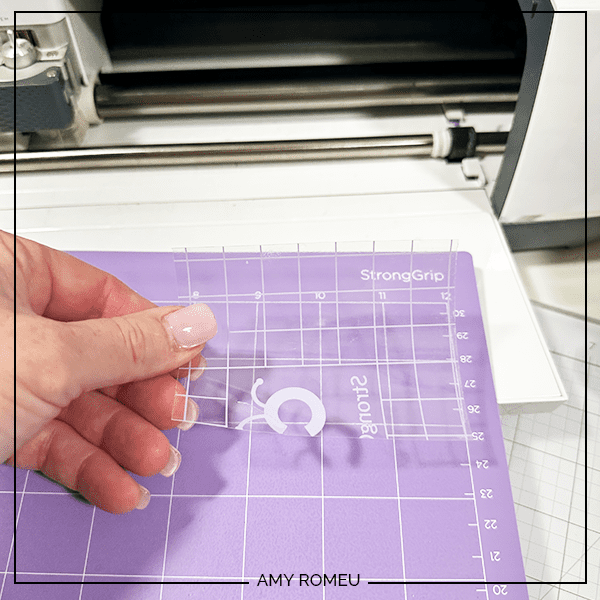
Trim a piece of Cricut Strong Grip Transfer tape to a size slightly larger than the chunky glitter faux leather piece.
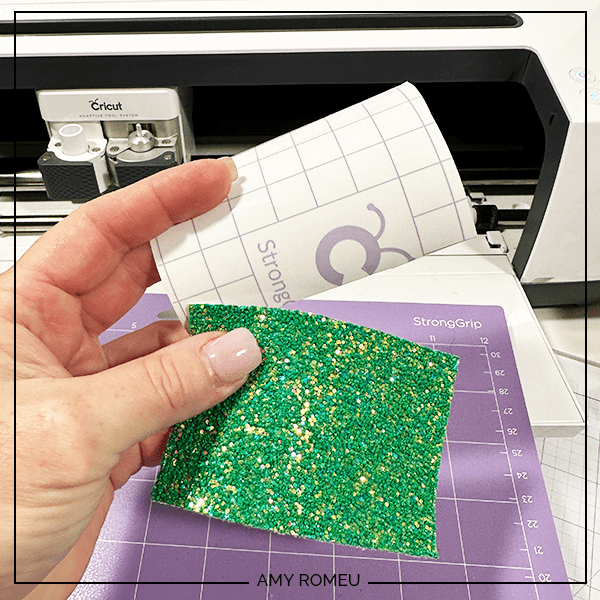
Peel away the transfer tape backing and place the transfer tape STICKY SIDE UP on the purple mat in the location the chunky glitter faux leather is going to cut.
Then place the glitter faux leather glitter side down on the transfer tape and press all over with your fingers.
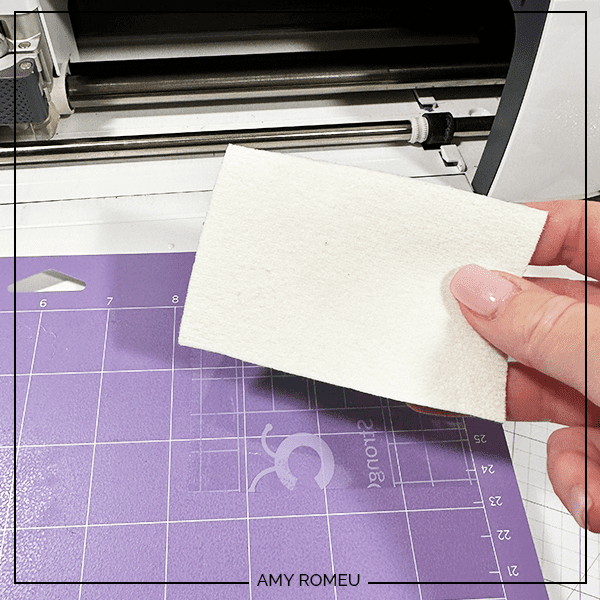
Place the smooth faux leather pretty side down on the other area of the mat. Tape the faux leathers down on all sides with blue painter’s tape.
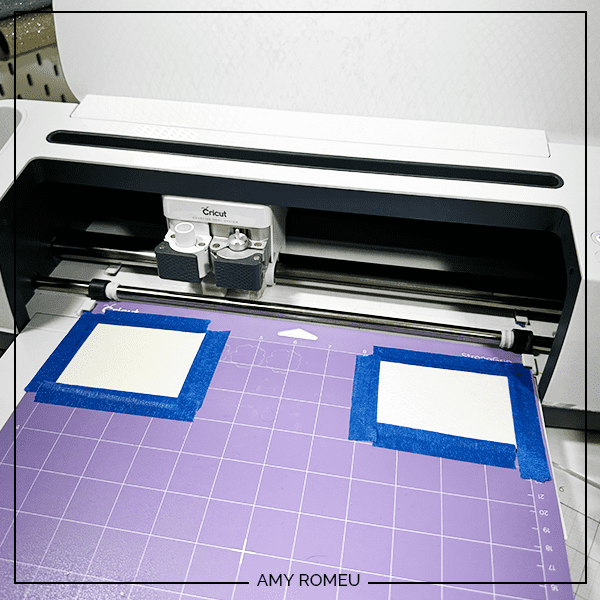
Make sure the white “star wheels” on the roller bar are pushed off to the side so the wheels don’t make indentations in your material.
Load the mat into the Cricut by lining up the mat with the guides and pressing the double arrows button. The machine will pull the mat into the machine.
Press the C button to begin the cut.
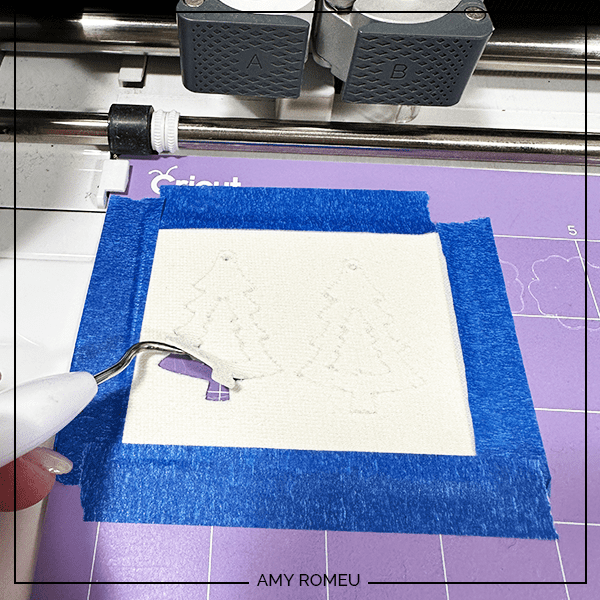
After the cut is complete and before unloading the mat, use a weeding tool to carefully lift the edge of the faux leather shape to see if the cut was complete.
It’s quite likely the smooth faux leather will have cut all the way through, but the glitter faux leather did not. I repeated the cut three times for this chunky glitter before it cut all the way through.
To repeat the cut, BEFORE unloading the mat, press the C button again. On the Cricut Joy, the option to rerun the cut will be on the screen in Cricut Design Space.
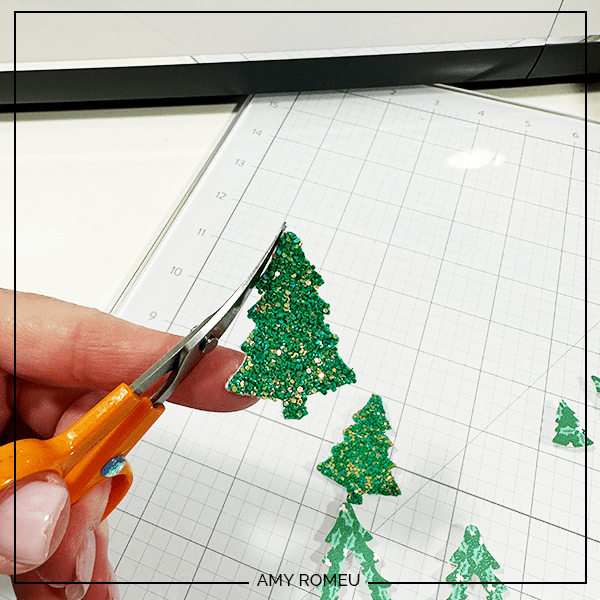
When the shapes have cut all the way through, unload the mat and remove the earring shapes. You can trim any stray fuzz or the hole with small curved scissors.
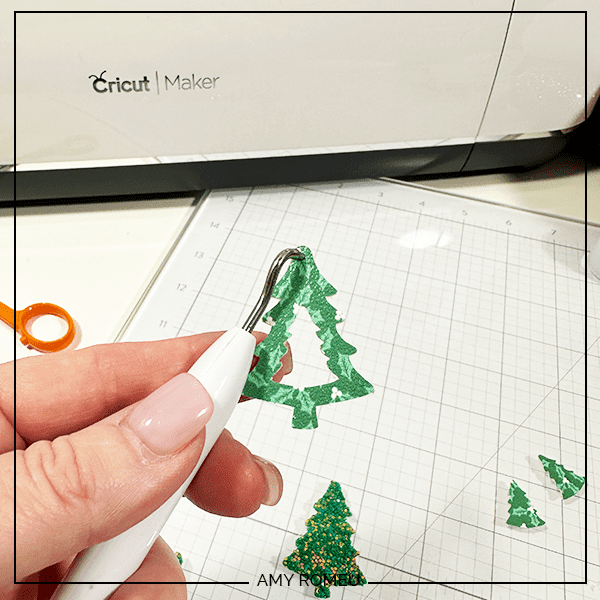
Use a sharp weeding tool to poke through the earring holes.
If you want to color the white edges of the faux leather to match the color of the front of the material, you can use a color coordinated Sharpie marker to color the edges.
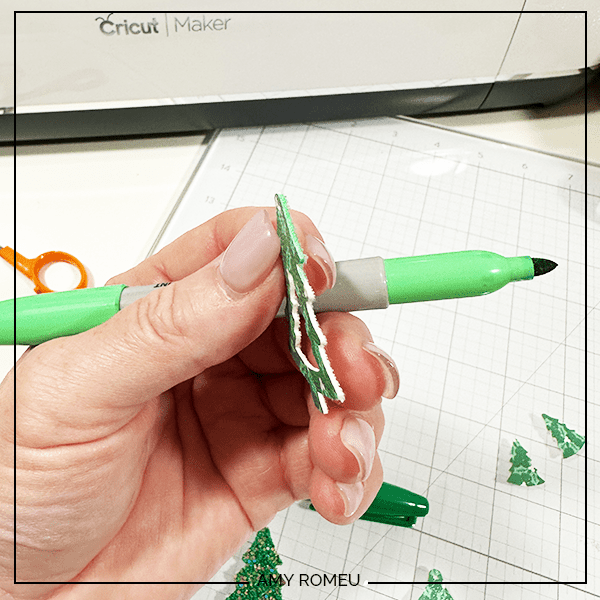
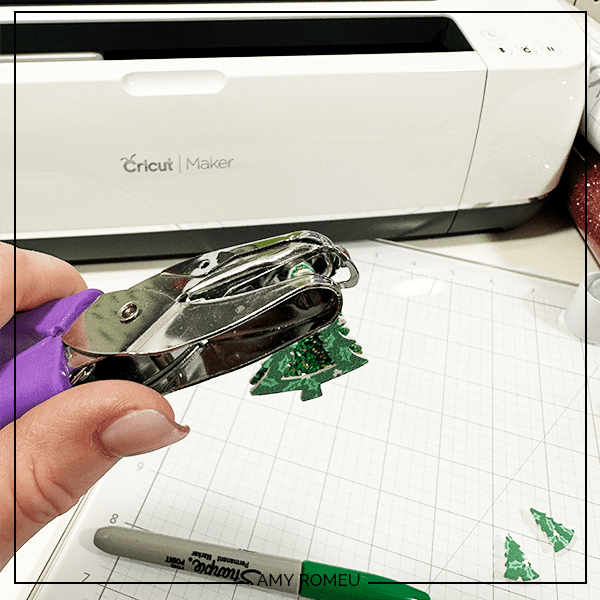
If they didn’t cut completely, use a 1/16″ hole punch to punch the earring holes. If you use a hole punch for a layered earring design like this one, it’s important to layer the earring shapes and line them up before punching the holes so the earrings lay nicely together.
STEP 6 – Attach the Jump Rings and Earring Hooks
Now it’s time to and add the earrings hooks.
You’ll need 2 jump rings, earring hooks, and two pairs of flat nose pliers. I used 6mm jump rings.
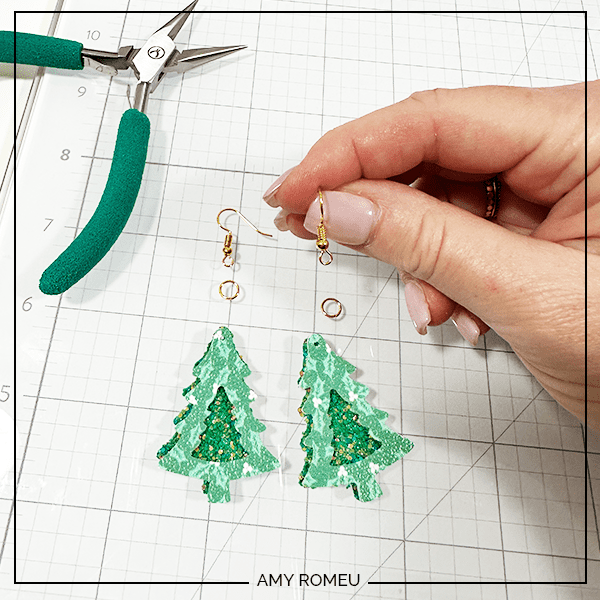
I like to twist the bottom loop of the earring hook 90 degrees first so the faux leather earrings hang straight.
For more details and step by step instructions on how to do that, you can watch my YouTube video here.
Then use the two pliers to open the jump rings and connect the faux leather earring shapes to each other, and then to the earring hooks. Close the jump rings tightly to keep the earrings secure.

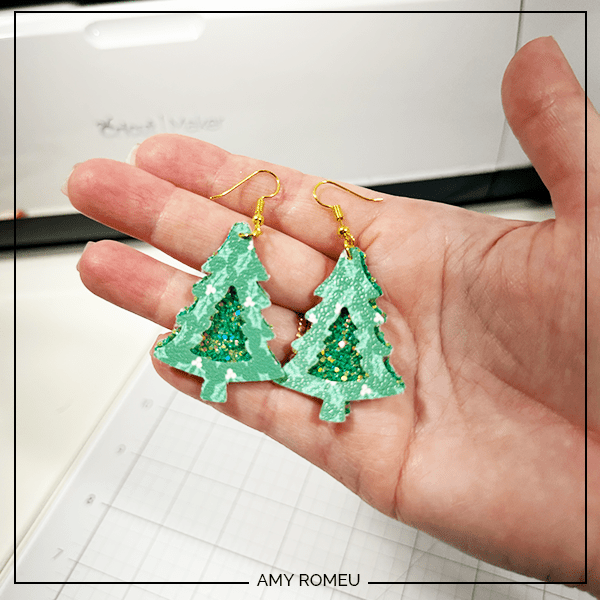
That’s it! Your Cutout Christmas Tree Earrings made with faux leather and a Cricut are complete! Here’s another pair I made with solid dark green and plaid printed faux leather.
If you made these earrings, I would love to see them! Please share them in my Free Cricut Crafting Facebook group, Get Crafty with Amy Romeu. You can request to join here.
Printable Instructions
Cricut Cutout Christmas Tree Faux Leather Earrings
Materials
- See blog post for materials & links.
Tools
- See blog post for tools & links.
Instructions
- Download and unzip the earring SVG folder. Upload the SVG file to Cricut Design Space.
- On the canvas you will see two versions of the earring SVG - one with pre-cut earring holes and one without. I recommend using the "with holes" version for this project since the two earring layers need the holes in the same location. If you are resizing the earrings or you know you want to punch the holes manually with a hole punch, use the "without holes" version.
- Once you've decided which version you will cut, delete the other earring pair. You will need to UNGROUP the shapes before you can delete individual shapes or layers.
- Both layers for these earrings will cut from faux leather. If you want the layers to cut on the same faux leather mat, make them both the same color. There are two ways to do this. Either select both layers and choose one color using the Color Picker, or click on Color Sync and drag one layer to the other layer's color. Once that's done, click the MAKE IT button.
- When Design Space asks how you will load the materials for this project, select ON MAT.
- In the mat preview screen, toggle the mirror button to ON. The drag the two pairs of shapes apart from each other to different places on the mat. Click CONTINUE.
- Choose Faux Leather (Paper Thin) as the material setting. If you don't have this setting selected, click "Browse All Materials" and search for it. (On the Explore Air 2, turn your dial to Custom so you can see the Faux Leather material choice.) Then choose "more" from the Pressure drop down menu. If you are using chunky glitter faux leather like I am, you'll still use the Faux Leather (Paper Thin) setting, but you will need to repeat the cut two or three times to get a complete cut.
- Trim both pieces of faux leather to the size you noted in the mat preview screen. Hover over the mat preview image if you need a reminder of what sizes you need to cut and where to place them.
- Place any smooth pieces of faux leather "pretty" side down on a sticky purple strong grip mat. Tape the faux leather down on all sides with blue painter's tape.
- If you are using chunky glitter faux leather, place a piece of strong grip transfer tape STICKY SIDE UP on your mat in the location you'll be putting the glitter faux leather. This will protect your mat from loose glitter residue sticking on your mat permanently.
- Then place the chunky glitter faux leather glitter side down onto the transfer tape. Press the material down firmly with your hands. Tape down on all sides with blue painters tape.
- Load the mat into the Cricut and press the C button to begin the cut. When the cut is complete, BEFORE unloading the mat, use a sharp object like a weeding tool to lift up the corner of a cut to see if it went all the way through. It's likely the smooth faux leather will be good after the first cut, but glitter will need two or three cuts in total. Repeat the cut by pressing the C button again. On a Joy, you'll repeat the cut by clicking on "Rerun" on the screen in Design Space.
- Remove the cut shapes from the mat. Poke through the earring holes with a sharp weeding tool. Use a 1/16" hole punch to finish some of the holes if necessary - be sure to layer both earring pieces together and line them up neatly before punching holes with a hole punch. This will ensure the holes line up so the trees will line up when connected with a jump ring.
- Trim away any fuzz with small sharp scissors. Color the edges of the faux leather if desired with a color coordinated Sharpie marker.
- If you are using traditional shepherds earring hooks, turn the earring hooks 90 degrees with pliers first so the earrings hang straight.
- Connect the earring shapes to the earring hooks using 6mm jump rings.
Want to remember this? Post this CRICUT FAUX LEATHER CUTOUT CHRISTMAS TREE EARRINGS project to your favorite Pinterest board!
Very cute.
Thank you, Geraldine! I’m glad you like these!
Amy
Hi Amy, I’m having problems opening the referenced links on my computer. Can you email me as to where I can find the faux leather you’ve been using in this earring series? I would greatly appreciate it.
Hi, Karen! Thanks for your message. I’m sorry you are having trouble opening the links. Are you visiting the Supplies page here?
https://amyromeu.com/supplies-25-days-cricut-christmas-earrings-event/
What happens when you click on the links?
Unfortunately, most of these links are Amazon affiliate links, and it’s against their terms of service for me to share links anywhere that’s not publicly accessible, like inside of an email, a course, or a private Facebook group. I’m sorry.
I would recommend restarting your device or trying from a different device. When you click on the links, they should immediately open up in either Amazon or Etsy.
Thank you!
Amy
I would like to make 4 pairs for my girlfriends, I tried cutting all 8 out at the same time (the first tree earring version) and the faux vinyl shifted all over and messed up the cuts. Do you cut just enough leather for one pair at a time? or is there a way to keep a larger piece of faux vinyl in place?
I love all of these designs so far, thank you!
Hi, Cally! Thanks for your comment! I recommend cutting one or two pairs at a time to minimize the issues you mentioned. Are you trimming the faux leather down to a size just slightly larger than the shapes that need to cut? Are you taping down on all sides with blue painters tape? These two steps really help get good cuts when the material is smaller and taped down well. Let me know if that helps! Thank you. Amy
So cute!!
I am taping down all the edges, but the piece of faux leather is probably too big to be really secure. I’ll try cutting one or two pair at a time. Thanks!
I like these earrings; I made two pairs. Thank you.