
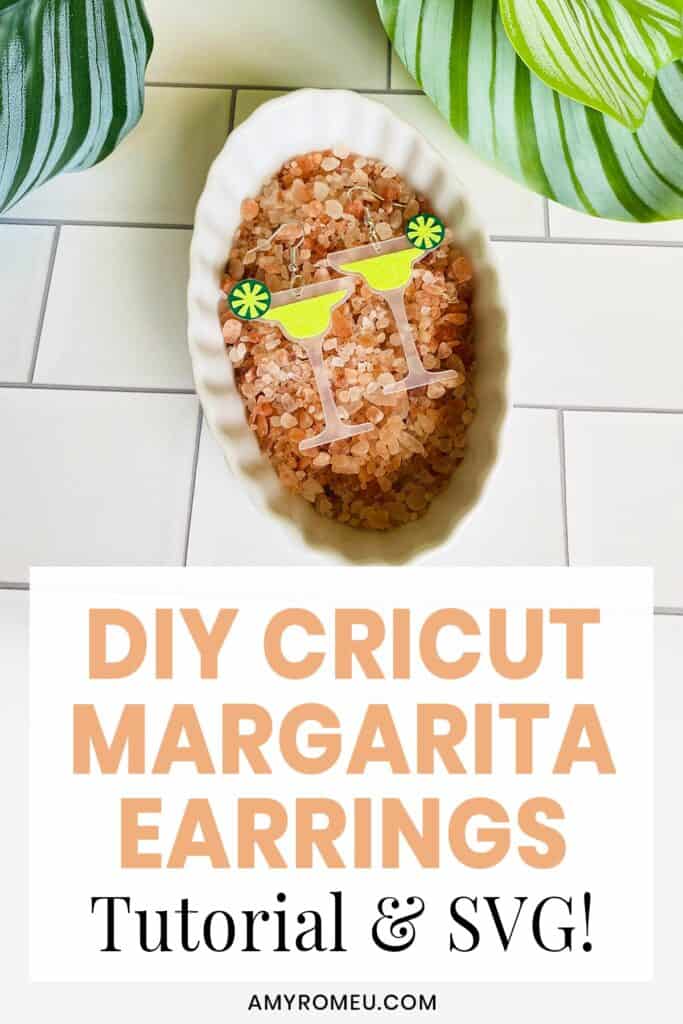
How to Make Margarita Earrings
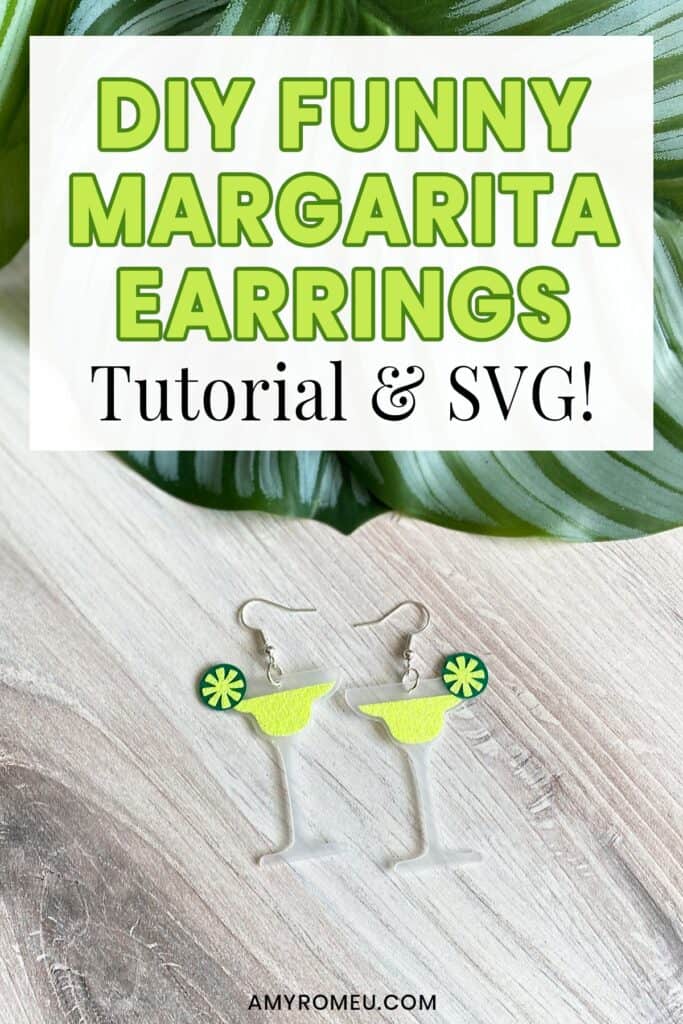
How to Make Funny Margarita Earrings with a Cricut
Margaritas are one of my favorite tropical drinks, so to celebrate, I created these funny margarita earrings with my Cricut.
To make them, I designed my own Margarita Earrings SVG earring template. I’m adding it to my blog’s FREE resource library for you so you can make some Funny Margarita Earrings, too!
To download my original SVG earring template for this project, visit the Materials list below.
You can make these Margarita Earrings with the Cricut Maker or the Explore Air 2 because both of these machines can use the Deep Point Blade to cut the plastic margarita “glass” shape. If you don’t have a deep point blade, or don’t want to cut these from plastic, you can cut them from faux leather instead using the Maker, the Explore Air 2, or the Cricut Joy.
In this tutorial, I’ll give you my step by step instructions and tell you exactly what materials I used to make this project.
Ready? Let’s get started!
This post contains some affiliate links (which means if you make a purchase after clicking a link, I will earn a small commission at no additional cost to you). Read my full disclosure policy here.
DIY Funny Margarita Earrings – Materials List
- The SVG file template for these Margarita earrings. It’s Design #168 in my Free SVG Library. You can get the password to my library instantly by filling out the form below, or at the bottom of this post.
Want instant access to my Free Resource Library full of SVG files?
Just Enter your name and email Below!
By signing up, you’ll get instant access to my FREE SVG Library with hundreds of crafting SVG templates! You’ll also get my weekly newsletter full of crafting ideas, tutorials, and inspiration! Unsubscribe anytime.
- A vinyl cutting machine. I have made these earrings with both my Cricut Maker, which you can get at Amazon here or at Cricut.com, and my Cricut Explore Air 2. (You’ll just need the Deep Point Blade (below) if you’ll be using the plastic cutting mat as I do.)
- Deep Point Blade. This is the blade that comes in a black housing. It’s compatible with the Maker or the Explore Air 2. Click here to see it on Amazon.
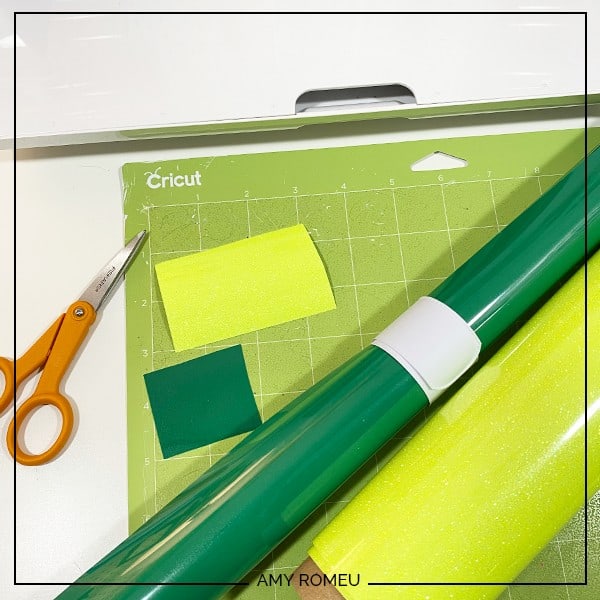
- Flexible Plastic Cutting Mats. These are matte clear plastic and will be the “glass” base for these margarita earrings. I bought these on Amazon. They are a nice stiff plastic that will form a firm earring base, but you could use any other stiff plastic you like, such as a plastic pronged folder or a take out food container. You could also try using a very flat part of a milk carton.
NOTE: If you don’t want to use plastic, you can absolutely use white faux leather instead! I recommend this smooth white faux leather from Amazon here. If you use faux leather, you won’t need the Deep Point Blade. You can use the standard Fine Point Blade and follow the instructions I feature for cutting faux leather with a Maker here, an Explore Air 2 here, or a Cricut Joy here.
- Heat Transfer Vinyl. I used Siser Glitter in Neon Yellow (on Amazon here) and Siser Easyweed in Green (on Amazon here).
NOTE: If you don’t want to use heat transfer vinyl, you can certainly use permanent vinyl! If you use permanent vinyl, you’ll need transfer tape to lift the cut vinyl off the backing and place it onto the plastic earring base.
- Cricut Strong Grip (Purple) Cutting Mat. You can buy these on Amazon here.
- Cricut Standard Grip (Green) Cutting Mat. Available on Amazon here.
- Blue painter’s tape. This will help keep your faux leather in place on your mat. You can get it at any hardware store and most big box or grocery stores. Amazon also has it here.
- A weeding tool. I use the weeding tool that came with my Cricut tool set from Amazon here.
- Cricut EasyPress Mat. I like the 8×10 size for making earrings.
- A small hole punch (for punching earring holes in the faux leather). This is my go-to hole punch for making Cricut earrings from Amazon here.
- Earring hooks – I used these silver toned shepherd’s earring hooks from Amazon.
- Small jump rings – I used the silver toned jump rings from this assortment of 6mm size jump rings in different metal finishes from Amazon here. You could also use 5mm size jump rings.
- Two pairs of flat nose pliers – My favorites are Wubbers brand in the “Baby” size. My everyday use pliers are the Baby Wubbers Chain Nose Pliers and the Baby Wubbers Flat Nose Pliers.
IMPORTANT NOTE: My free Margarita Earrings SVG is for PERSONAL USE ONLY. If you want to sell earrings made from my Margarita Earrings SVG file, purchase the commercial use license version of this design here in my shop.
Margarita Earrings – PROJECT INSTRUCTIONS
STEP 1 – Download the SVG Cut Files
Download my free Margarita Earrings SVG file (#168) from my Free Resource Library. Save the zipped folder that downloads to your computer. Then unzip the folder to access the folder’s contents. You’ll need to unzip or extract the files FIRST so you can upload the cutting file to Cricut Design Space.
STEP 2 – Upload the SVG File to Cricut Design Space
If you need help uploading a file to Cricut Design Space, click here.
When your earring shapes are on your canvas, will see each layer that will cut – (1) light grey “margarita glass” layer that will cut from the plastic cutting mat (2) the lime rind that will cut from solid colored heat transfer vinyl (3) the sparkly lime green margarita “drink” and lime wedges that will cut from glitter heat transfer vinyl.
The earrings are already sized to be about 1.9 inches tall. You can size them a little smaller if you’d like, but keep in mind that will make the details harder to weed.
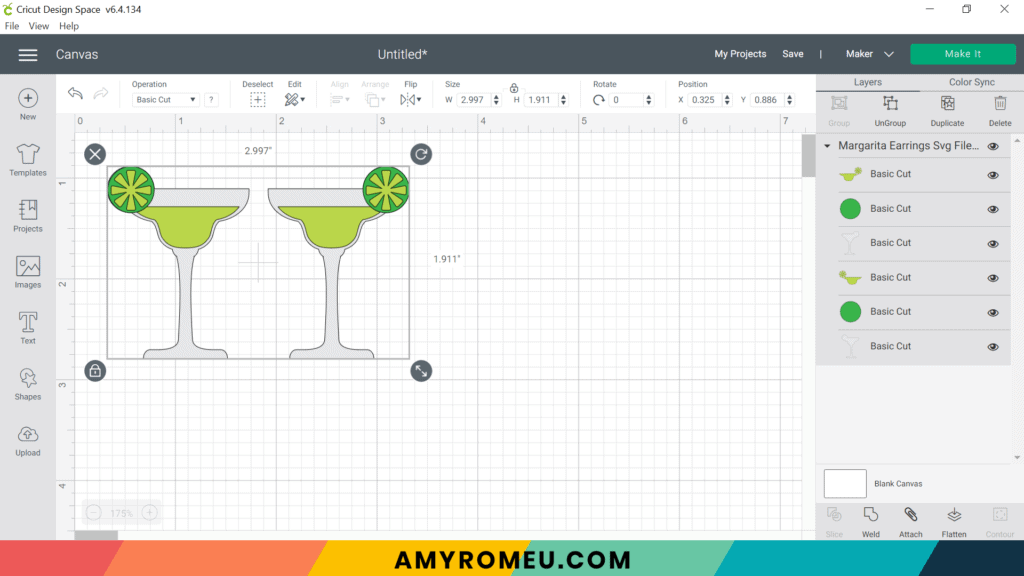
You’ll notice this design doesn’t have pre-cut earring holes. That’s because I’ll be punching the holes using a hole punch later.
Click the green MAKE IT button.
STEP 3 – Preparing to Cut the Plastic Mat Layer
The mat preview screens will load. The Cricut will cut one plastic layer and two heat transfer vinyl layers, all on separate mats. It’s not necessary to mirror the mats for these project.
Click on each mat in the mat preview on the left and make a note of this size material you’ll need to cut the Margarita earring shapes cut out completely. For example, in the plastic cutting board mat preview below, the size material to cut is about 3.5 inches wide and 2.5 inches tall.
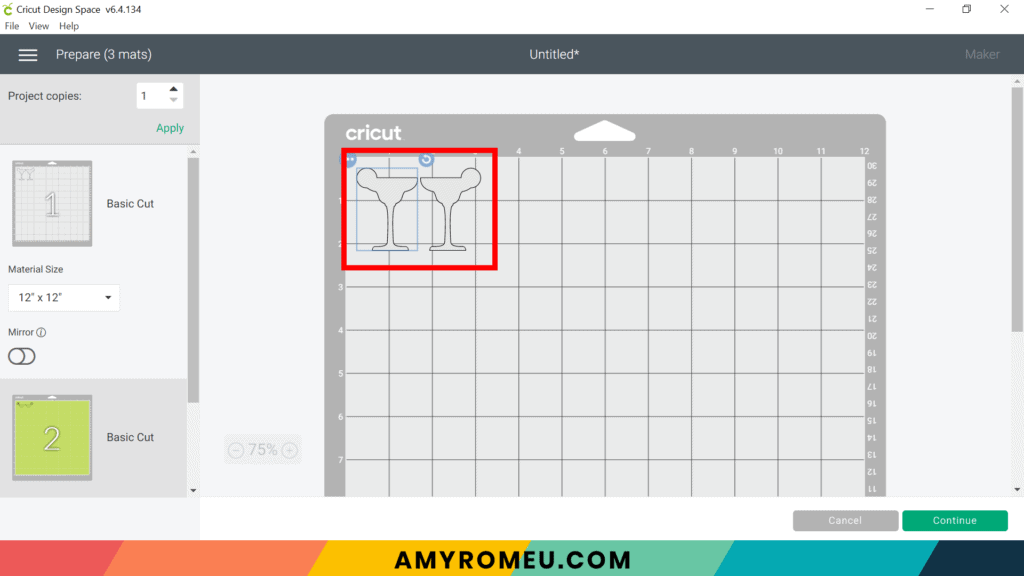
Cut a piece of plastic to size and press the green CONTINUE button.
STEP 4 – Make Custom Material Setting
For this material, I created a custom material setting. Let me show you how I did that.
Note: If you’re using a Cricut Explore Air 2, turn your dial to “Custom” so you can choose the custom material setting you create.
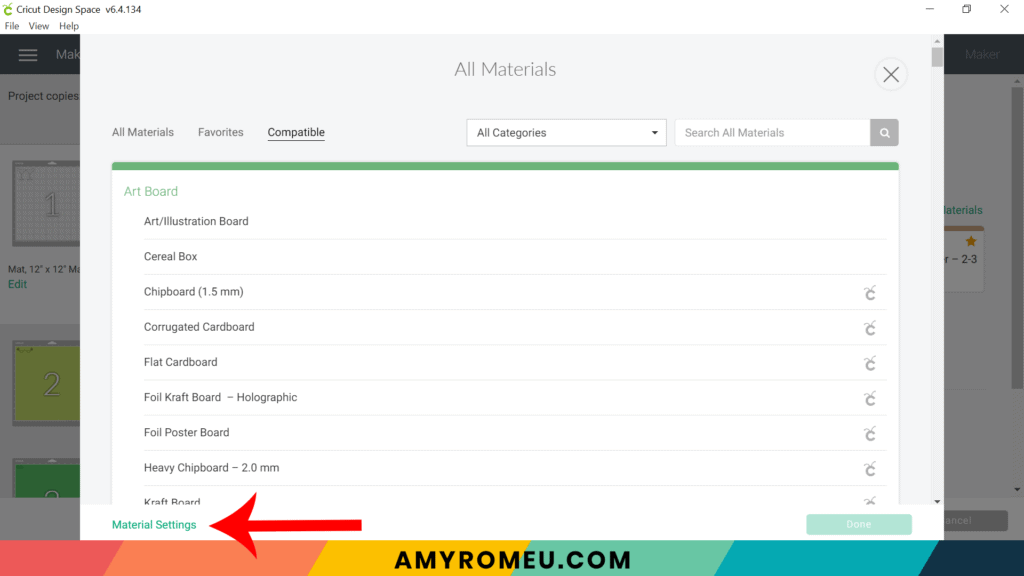
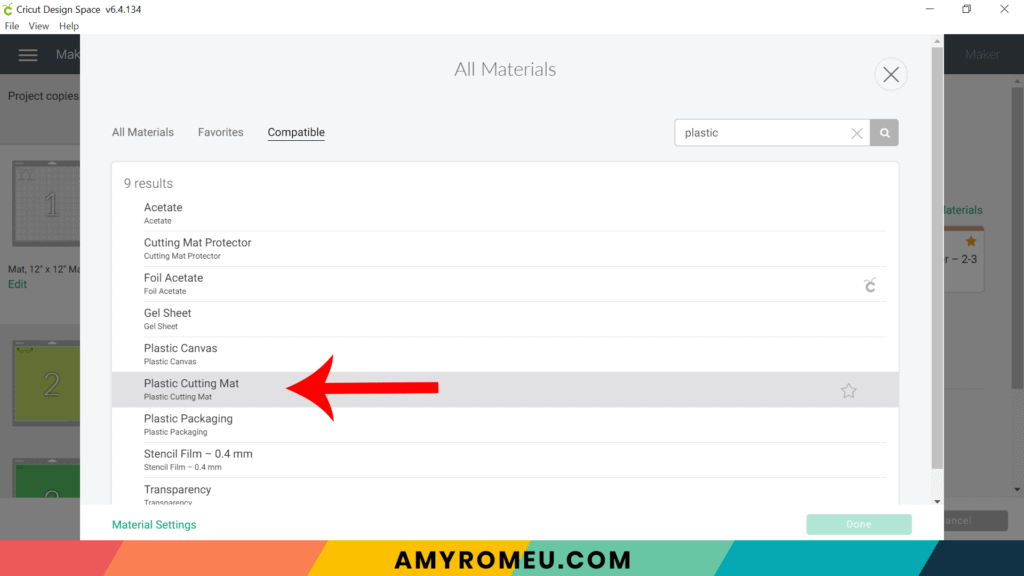
Click on BROWSE ALL MATERIALS.
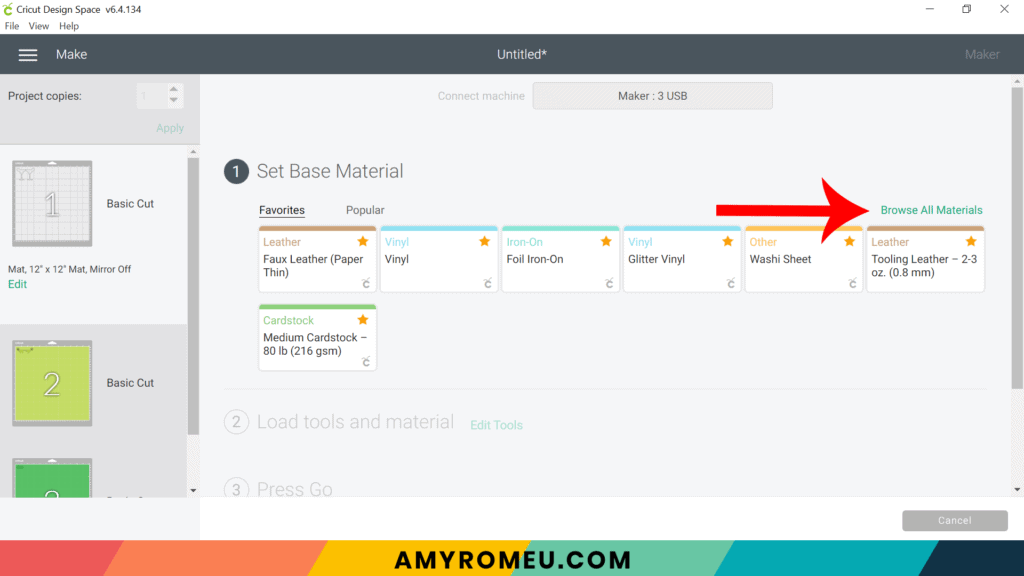
Click MATERIAL SETTINGS at the bottom of the screen.
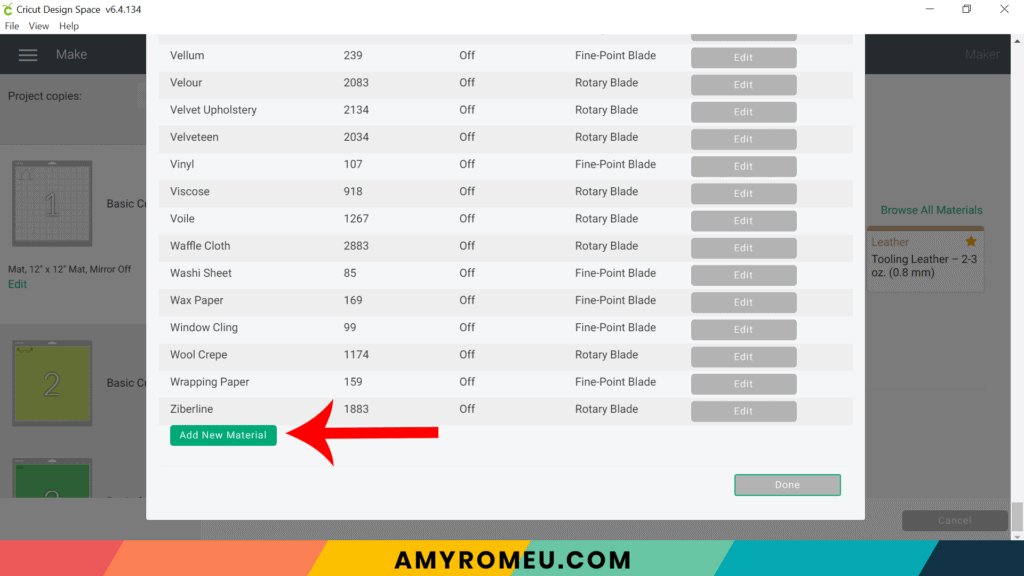
Then click on ADD NEW MATERIAL.
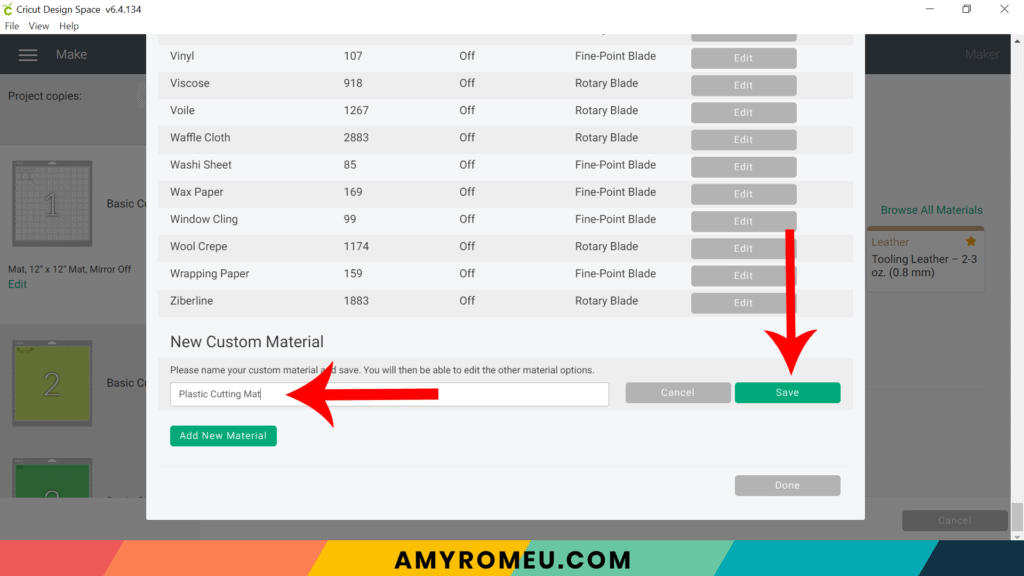
Give your new material a name. I named mine Plastic Cutting Mat. Then click SAVE.
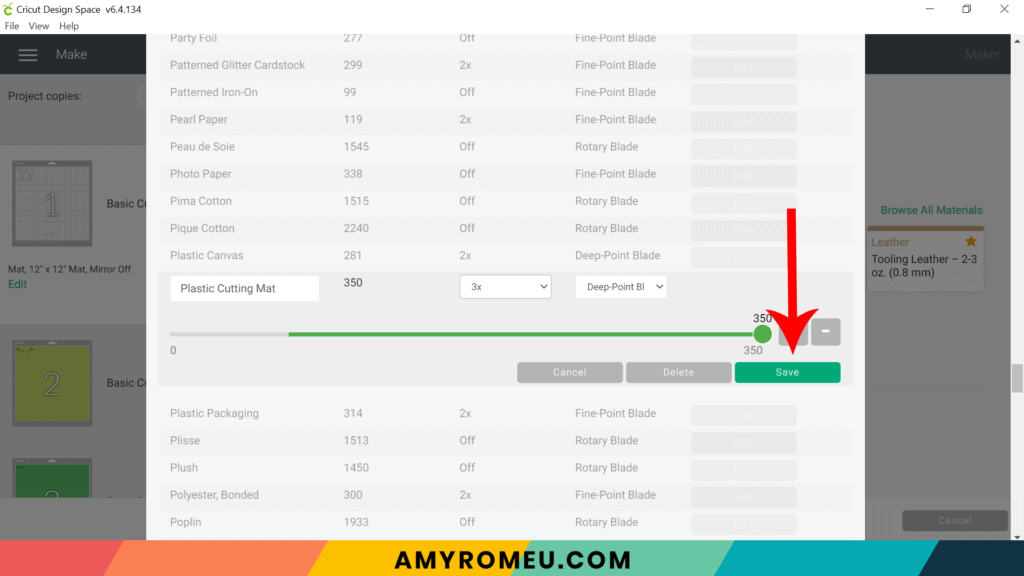
Select the following parameters: 350 as the pressure (use the slider bar), 3X as the repeat, and the Deep Point Blade. Click SAVE.
Using the search bar, type in the name of your new setting and select it. Remember, if you are using the Explore Air 2, your dial must be turned to CUSTOM.
Then choose MORE pressure from the dropdown menu. This is important!
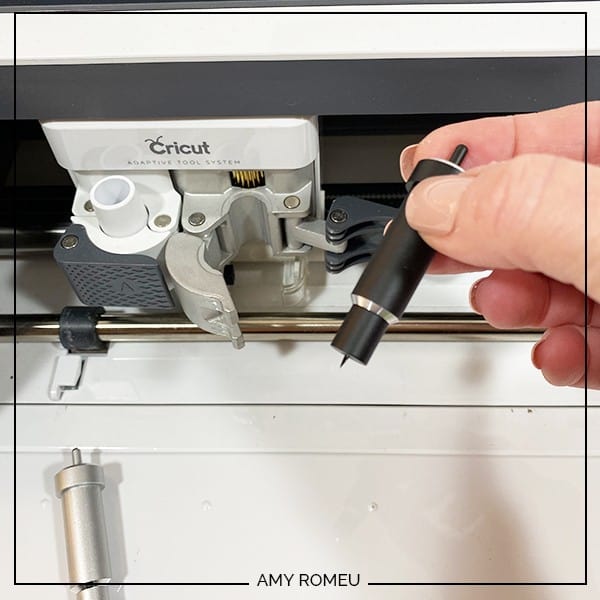
STEP 5 – Insert the Deep Point Blade
You will be prompted to load the Deep Point Blade into clamp B. Do that now.
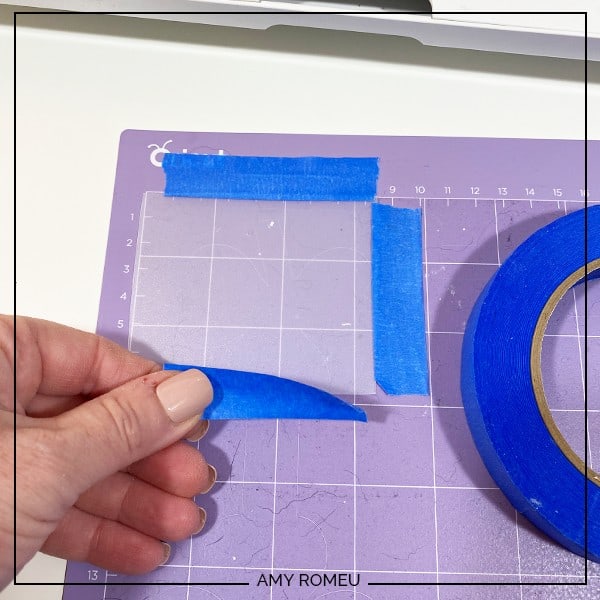
STEP 6 – Cut Plastic Mat
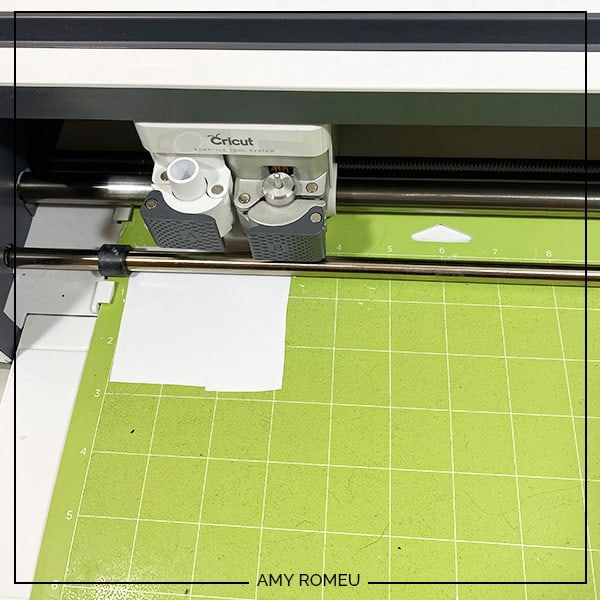
Place your cut piece of plastic down in the top left corner of a sticky purple cutting mat. Tape all around the plastic with blue painter’s tape. Press the material down to your mat firmly with your hands.
Make sure the white star wheels on the roller bar are moved off to the side. Then load the prepared mat into the Cricut by pressing the double arrows button.
The “C” Cricut button will start to flash. Press the C button to begin the cut.
This is a 3x cut, which means the Cricut will repeat the cut 3 times. However, we will need to repeat the cut multiple times.
To do that, wait for the cut to finish. BEFORE you unload the mat, hit the C button again to repeat the 3x cut. I needed to repeat the cut three more times, making for a total of 12 cuts. This is a simple pattern, however, and cuts quickly.
Repeat the cut as many times as you need to, checking a corner of the margarita glass shape after each triple cut (without unloading the mat) to see if the cut is going through.
NOTE: If you repeat the cut several times and it doesn’t go through, you may not have selected MORE pressure from the material setting screen. With Default pressure, you may need to repeat the cut 6-8 times.
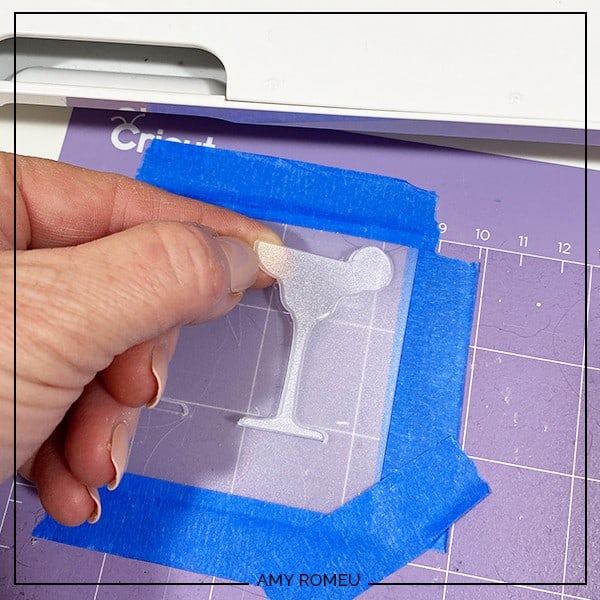
When the cuts are complete, press the double arrow button to unload the mat and remove the shapes. Use a small nail file to sand away any rough edges.
STEP 7 – Cut Vinyl Mats
Return to Cricut Design Space to start cutting the heat transfer vinyl mats in the order shown on the mat preview screen. Trim your vinyl to the sizes shown in the mat previews.
Place the vinyl shiny side down on a green cutting mat. I use the Vinyl or Washi Sheet setting with MORE pressure to cut regular heat transfer vinyl, and Glitter Vinyl with MORE pressure for the glitter vinyl.
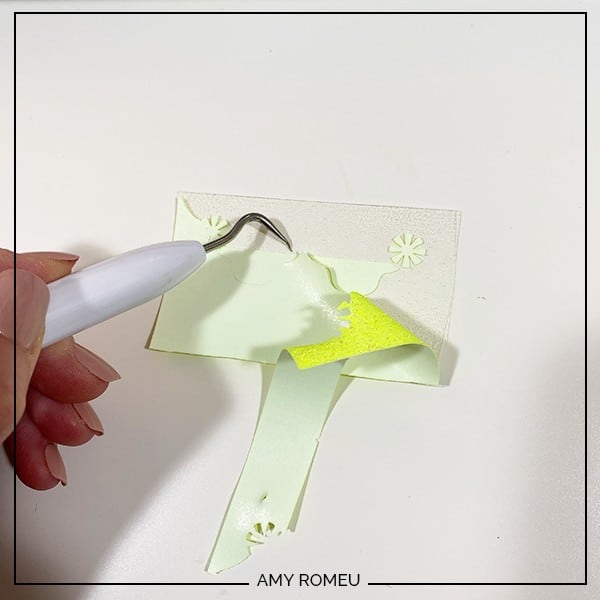
Cut each vinyl mat using the appropriate cut setting and weed to remove the excess vinyl.
STEP 8 – Press the Vinyl onto the Plastic Margarita Glass
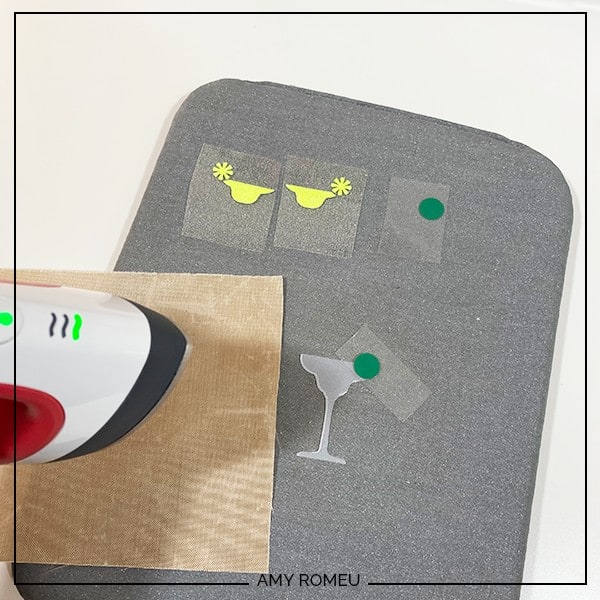
Using an Easy Press Mini (on the lowest temperature setting) or an Easy Press (set to about 275 degrees), you will press the vinyl layers one at a time onto the plastic margarita glass shapes. This low temperature doesn’t burn or melt the plastic, but it does take a little patience and time to get the heat transfer vinyl to stick to the plastic.
NOTE: If you used permanent vinyl, skip the heat press part and just layer the permanent vinyl onto the plastic earring base – first the lime rind layer, then the margarita and lime wedges layer.
Line up the first vinyl layer (the green lime rind) and then cover your earring shape with a cover sheet (teflon sheet or parchment paper) before pressing.
Press for about 5 seconds and then check to see if the vinyl has adhered. It probably hasn’t, so press again in 5 second bursts until you can cleanly peel off the vinyl cover sheet.
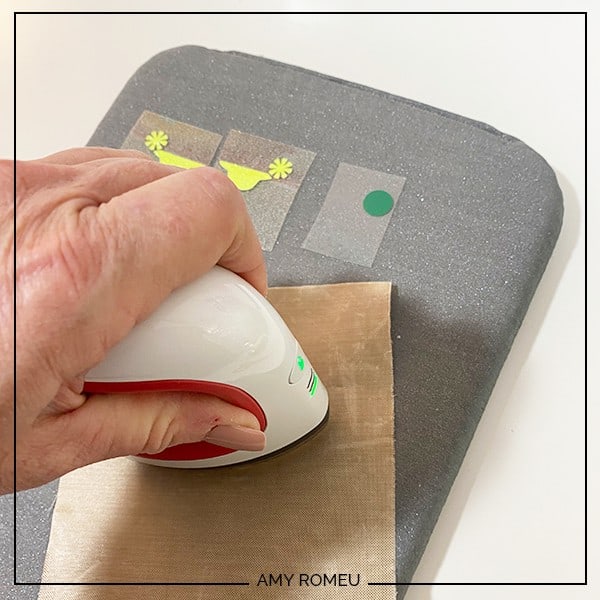
It took me two 5-7 second presses for the vinyl to stick to the plastic. You may notice the matte clear finish of the plastic gets cloudy after the press. Don’t worry, it’s temporary and will clear up when the plastic cools.
Layer the next vinyl layer on top and repeat the pressing.
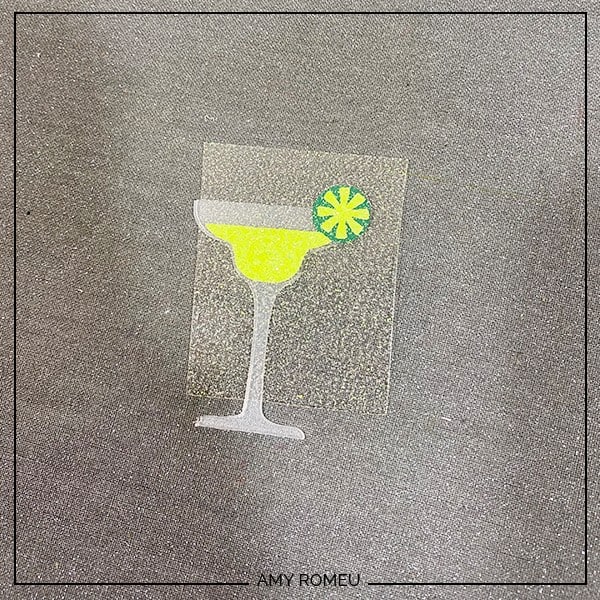
Remove the carrier sheet and repeat with the other earring.
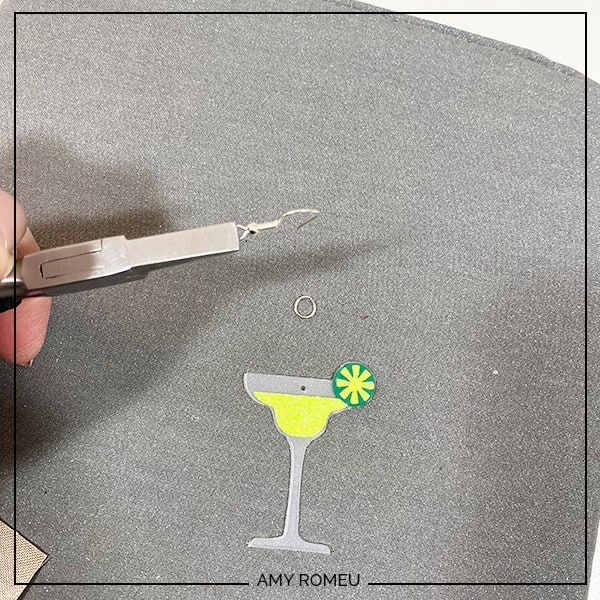
STEP 9 – Punch the Earring Holes
I’ll use a 1/16″ hole punch to punch the earring holes in the Margarita earrings.
There are two 1/16″ punches I use regularly: this hole punch and this hole punch. They both punched cleanly through the plastic cutting mat.
Punch the hole in the top of one earring, making sure the hole isn’t too close to the edge. Then use that earring as a guide to punch a matching hole in the other earring.
Almost done! Now it’s time to attach the earring hooks.
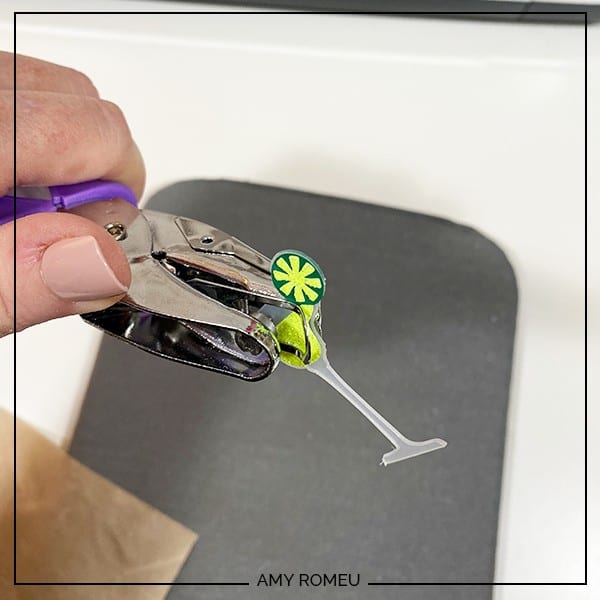
STEP 10 – Attach the Earring Hooks
To attach the earring hooks, you’ll need small jump rings, earring hooks, and two pairs of flat nose pliers.
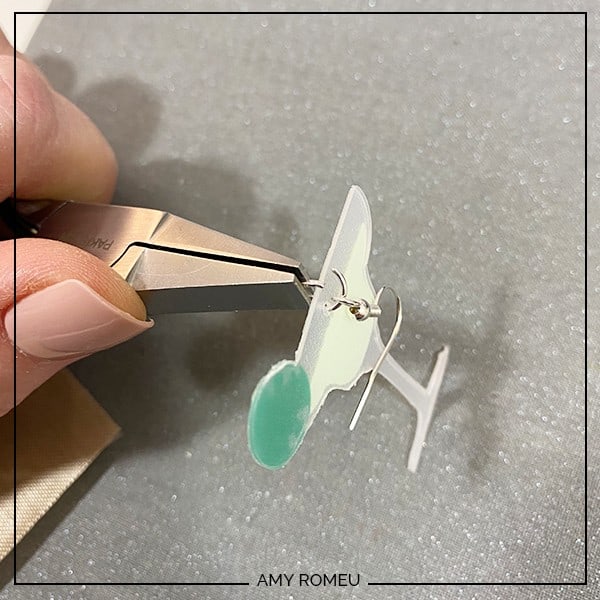
To connect the earring hooks, you’ll first need to turn the bottom loop on the fishhook sideways so your earrings will hang correctly.
Grip the earring hook between your thumb and forefinger with one hand, and use flat nose pliers to grip the bottom earring hook loop. Twist the wrist holding the pliers firmly so the loop turns 90 degrees.
For more information on this technique, check out my post about how to make faux leather earrings hang straight here.
Once your earring hooks are turned, use flat nose pliers to open a jump ring. Then slide the margarita earring on, and then the earring hook. Carefully close the jump ring again.
Repeat with the second earring. That’s it! How cute are these?

If you do make this project, I would love to see your Margarita Earrings! Please share a photo of them in the comments, or tag me on Instagram: @amyromeucrafts
Please note: My free Margarita Earrings SVG is for PERSONAL USE ONLY. If you want to sell earrings made from my Margarita Earrings SVG file, please purchase the commercial use license version of this design here. Thank you.
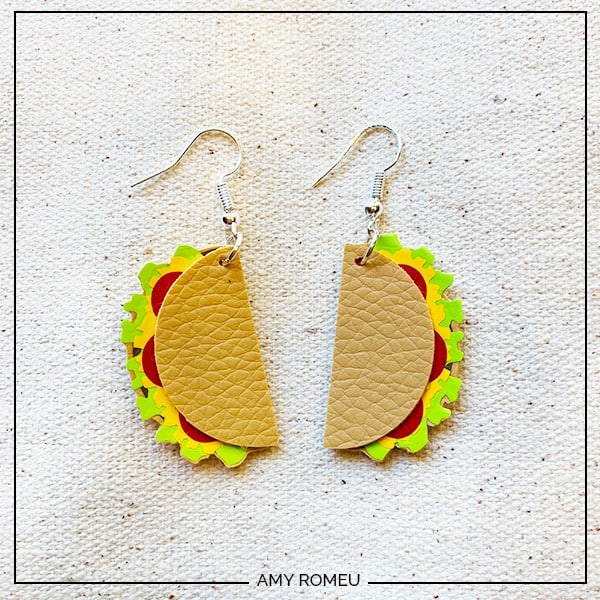
Wouldn’t these Taco Earrings go great with margaritas? If you want to grab my original taco earrings SVG, it’s here in my shop.
Want to see all of my Cricut earring & jewelry tutorials? CLICK HERE

WANT THE SVG FILE SO YOU MAKE THESE MARGARITA EARRINGS YOURSELF?
You can get it from my FREE Resource Library by filling out the form below!
Want to remember this? Post this MARGARITA EARRINGS project to your favorite Pinterest board!
these are adorable! Thank you for sharing them. I was guessing they were made from the shrinky dink material 🙂
Hi, Andi! Good guess, but no! 🙂 Thanks for your comment.
Can you use clear acetate for the base? I have everything else to make these and can’t wait to make and wear these!
Love, love, love these. You always come up with such cute ideas. Wish I was that creative. I used the chopping mats from $ Tree. Had that on hand and could hardly wait to make the,. Thanks for sharing. (I took a picture to share, but can not figure out how to upload it.)
I love these and will be making for Cinco deMayo for sure!
I love this design! Thanks for all of your creative ideas. These are perfect for a fun party.