
Before You Upload
When you download an SVG file from my Resource Library, or from Etsy, or somewhere else, most often it will be a ZIPPED folder.
Save the zipped folder that downloads to your computer.
You’ll need to unzip or extract the files FIRST before you can upload the cutting file to Cricut Design Space. Make a note of the file location after you unzip it so you can find it in the next step.
Upload SVG to Cricut Design Space
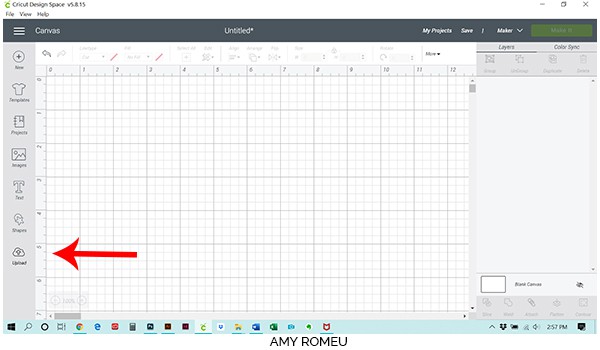
When you open Cricut Design Space, click on NEW PROJECT to get started. Then click on UPLOAD from the left hand side menu.
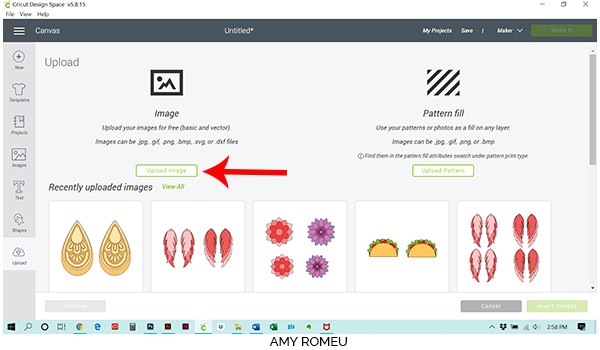
Click on the UPLOAD IMAGE button, then click BROWSE to locate where your downloaded folder is saved.
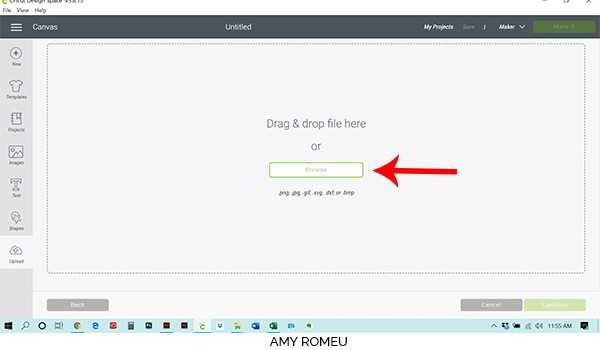
Navigate to where you’ve saved the already unzipped SVG file you want to upload. Double click on the SVG file into the upload screen in Design Space. It may look like a colorful Chrome circle.

If you get an error saying “file type not supported,” that usually means your folder that contains the SVG file is not unzipped, or you are trying to upload the wrong file.
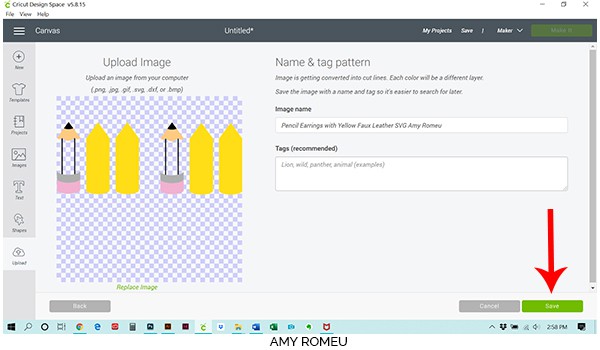
You’ll see a preview of the SVG cut file shapes. Hit the green SAVE button.
After you’ve selected your file to upload, you’ll see it as the first item in your “recently uploaded designs” row.
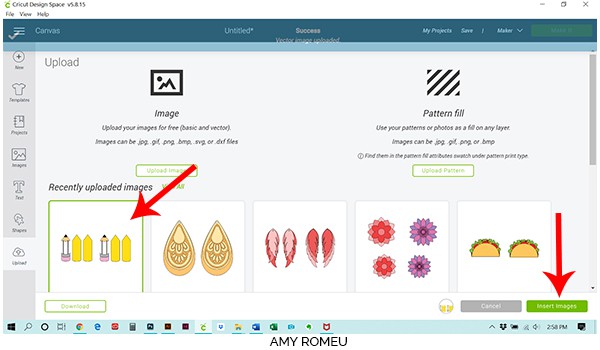
Click on it so it is outlined in green. Then click on the green INSERT IMAGES button in the bottom right corner.
This brings the SVG cut file shapes into Cricut Design Space. You’re all set!