
How to Make Toilet Paper Earrings with a Cricut
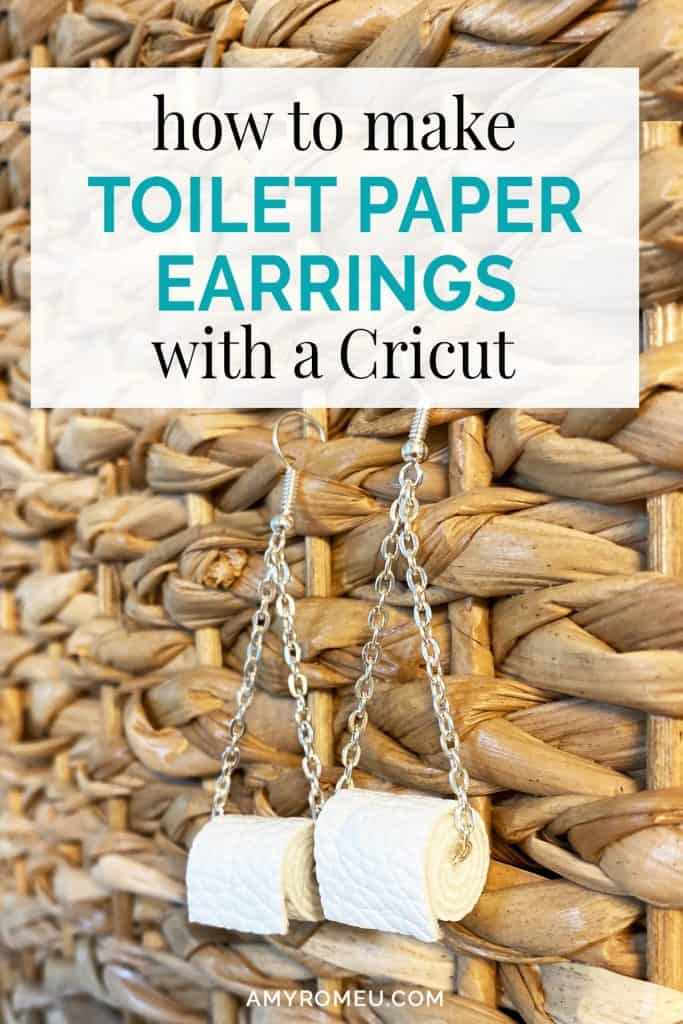
How to Make Toilet Paper Earrings with a Cricut
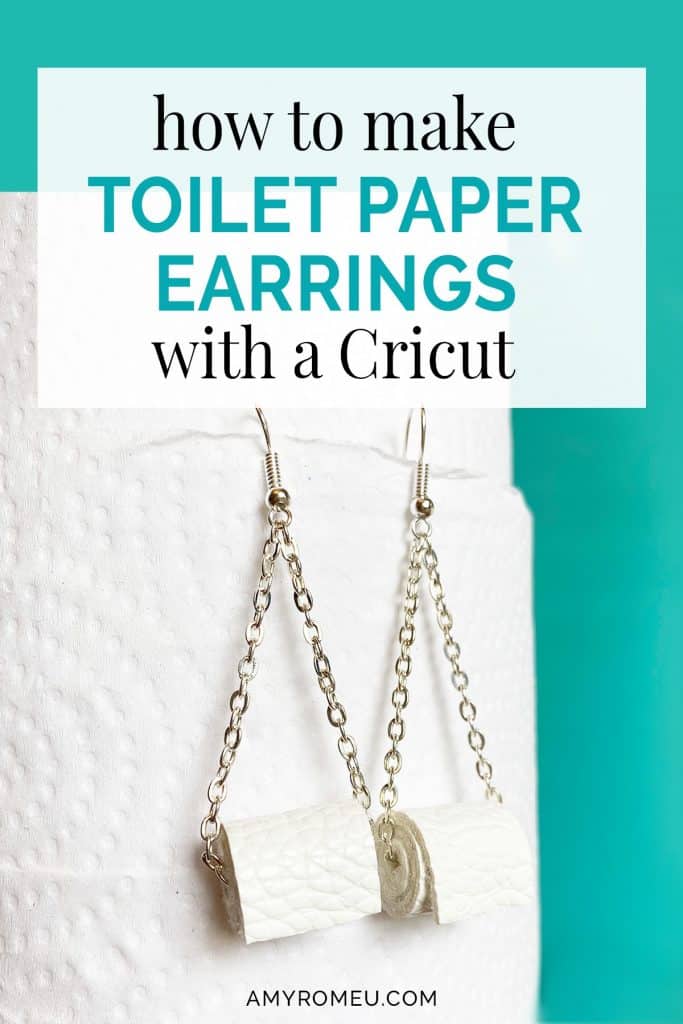
Well, these are some weird times, aren’t they? If you’re reading this in the Spring of 2020, you totally know what I’m talking about. How have you been coping with everything that’s been happening? I don’t know about you, but I feel like all we do is watch the news and go to the grocery store in search of toilet paper and hand sanitizer. I’ve been getting very antsy, so I’ve been crafting a lot to try and relax and stay calm. Today I wanted to make something fun and creative as my daily relaxation, so I whipped up these cute toilet paper earrings with my Cricut.
They are made from just a few materials, so they are perfect for crafting while quarantined. I checked on Amazon and the materials are still available via Prime, so that’s another plus!
I cut the material for these cute earrings with the standard fine fine point blade, so you can make these earrings with the Cricut Maker, the Cricut Explore Air 2, or even the Cricut Joy! (Oh, did you know you can make faux leather earrings with the Joy? You can! Check out my post here to learn how to make earrings with the Cricut Joy.)
If you want to make these fun earrings yourself, please follow along with my tutorial below and I’ll show you exactly how I made them. I’ll also give you my SVG cut file for these earrings FREE so you can make these earrings for yourself if you’d like! You’ll find out how to download my free SVG file for this project at the bottom of this post.
Want to see all of my Cricut earring & jewelry tutorials? CLICK HERE
This page contains some affiliate links (which means if you make a purchase after clicking a link, I will earn a small commission at no additional cost to you). Read my full disclosure policy here.
CRICUT TOILET PAPER EARRINGS – Materials List
- A Cricut cutting machine (or another cutting machine of your choice. I have a Cricut Maker, available at Amazon here, but you can also make these with the Cricut Explore Air 2 or the Cricut Joy.
- White faux leather. I’m using this White pebbled faux leather from Amazon here. It’s available in rolls here or sheets here so you can get whichever kind you prefer. You can also use this smooth white faux leather from Amazon here.
- Blue painters tape. You’ll use it to tape your faux leather to your cutting mat. You can get it at any hardware store and most big box stores. Even my grocery store has it. Amazon also has it here.
- Chain – you can use any chain you have in your craft stash (which is what I did), or even reuse a broken necklace. If I had to buy a new spool of chain for this project, this is the chain I would get from Amazon.
- Glue – you’ll want a fast drying glue for this project. I used Quick Hold glue, but you could also use E6000. This pack from Amazon has both glues in it. If you don’t have a quick drying glue, you can also use fabric glue, it will just take a little longer to dry.
- Earring hooks – I used earring hooks from this assortment of earring hooks in different finishes these from Amazon here. Hobby Lobby, Michael’s, and other craft stores, as well as your local bead store, will have lots of earring hooks as well.
- Wire Cutters and Needle Nose Pliers. You may already have these in your jewelry making arsenal, or you can use your household cutters and pliers from the garage in a pinch. We want this project to be easy to do, so don’t stress about the pliers!
PROJECT INSTRUCTIONS
STEP 1 – DOWNLOAD FREE SVG
Download the free SVG cutting file for these earring shapes from my free Resource Library. The link to get the password is at the bottom of this post.
Save the zipped folder that downloads to your computer. You’ll need to locate your zipped file after you save it so remember where you are downloading it to! You’ll have to unzip or extract the files FIRST before you can upload the cutting file to Cricut Design Space. Make a note of the file location after you unzip it so you can find it in the next step.
STEP 2 – UPLOAD SVG TO DESIGN SPACE
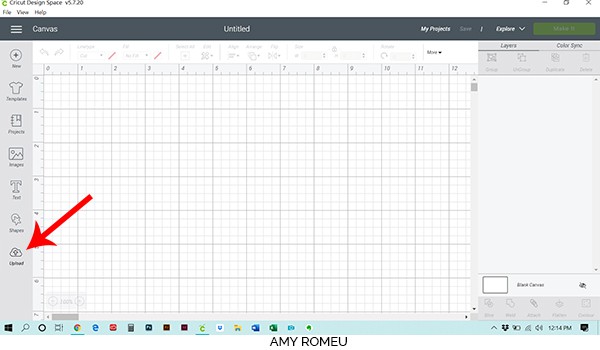
After you’ve unzipped the folder and made a note of the file location, open Cricut Design Space and click on NEW PROJECT to get started. Then click on UPLOAD from the left hand side menu.
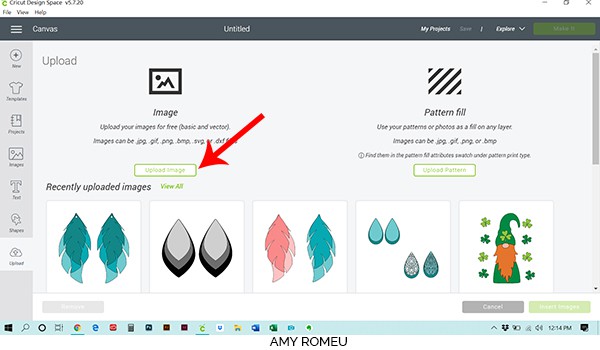
Click on the UPLOAD IMAGE button, then click BROWSE to locate where your unzipped SVG files are saved on your computer.
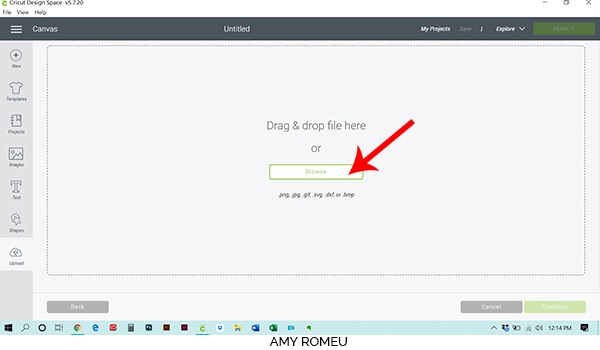
Double click on the SVG file to bring it into the upload screen in Design Space. (If you get an error message that says “unsupported file type,” you may have clicked on the wrong file, or your SVG file is still zipped.)
You’ll see a preview of the shapes you’ll cut for these toilet paper earrings. The toilet paper is grey in the image so you can see it, but you’ll cut that shape out of white material when you actually make these toilet paper earrings.
Hit the green SAVE button.
After you’ve selected your file to upload, you’ll see it as the first item in your “recently uploaded designs” row.
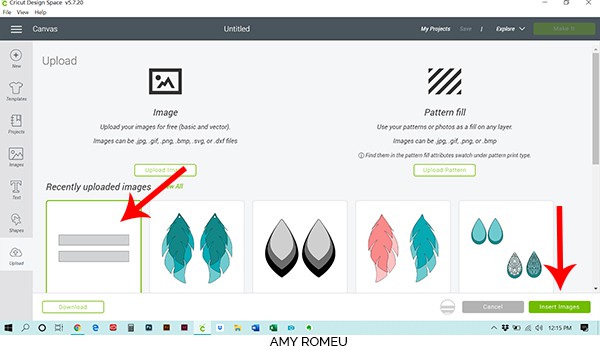
Click on it so it is outlined in green. Then click on the green INSERT IMAGES button in the bottom right corner.
STEP 3 – PREPARE SVG FOR CUTTING
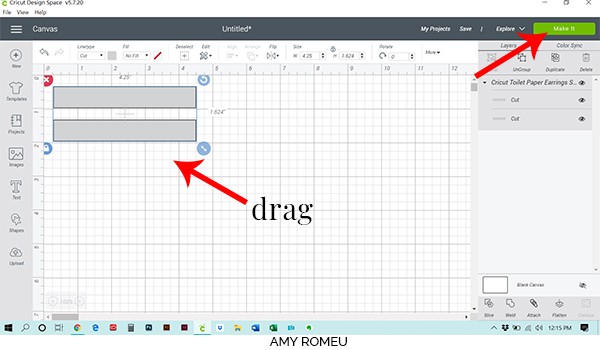
This brings the shapes you’ll cut for the toilet paper earrings into Cricut Design Space. Drag your artwork to the upper left corner of your mat. I’ve measured the shapes perfectly for these cute little earrings, so you don’t need to resize the shapes at all.
Now your toilet paper shapes are ready to cut! Isn’t this project easy so far?
Click on the green MAKE IT button in the top right hand corner.
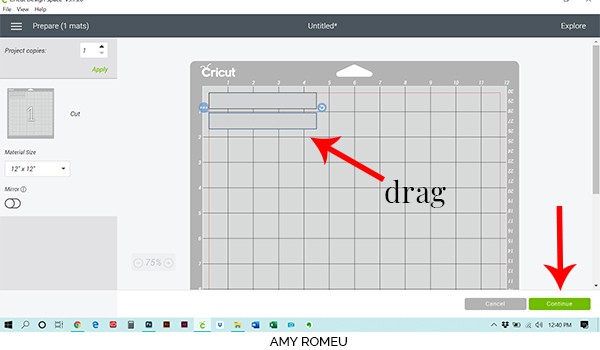
When your mat preview screen comes up, you’ll see Cricut Design Space has automatically placed the two shapes next to each other, creating a very long row of cuts, as shown below. This layout isn’t ideal for cutting faux leather, so we are going to make a slightly adjustment before cutting.
Click on the second shape and you’ll see blue movement icons pop up. Drag the second rectangle below the first rectangle. This way your faux leather will cut from a more optimal shape.

You don’t need to mirror the material like you normally do.
Before you leave this mat preview screen, make a note of the size of faux leather you need. In my screenshot above, you can see the shapes will cut from a shape that’s 2 inches tall and 5 inches wide. Then press the green CONTINUE button.
STEP 4 – PREPARE MAT FOR CUTTING
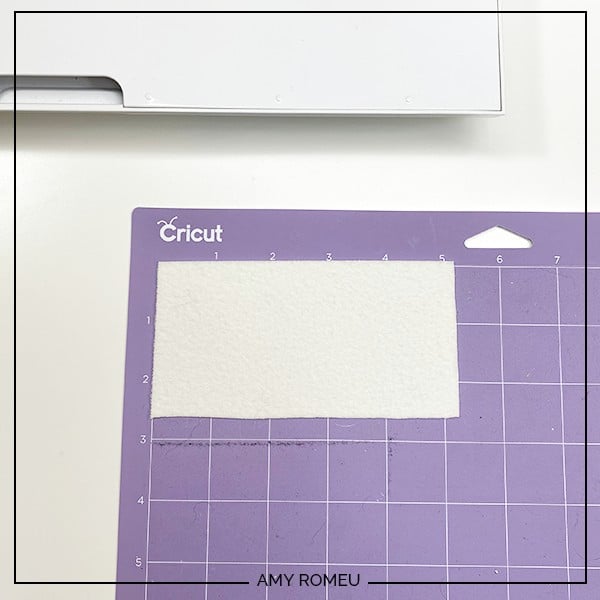
For this project, I cut a rectangle of white faux leather about a half inch larger on all sides than the shape I measured earlier. It’s always better to use a smaller piece of faux leather on your mat than a very large one – smaller pieces stick down better.
(If you are concerned about getting nice straight cuts, you can use a rotary cutter like I do. I love my Fiskars Rotary Cutter to cut my faux leather material to the exact size right on my mat – it’s are available on Amazon here. Just be sure not to press down too hard or you’ll damage your mat surface.)
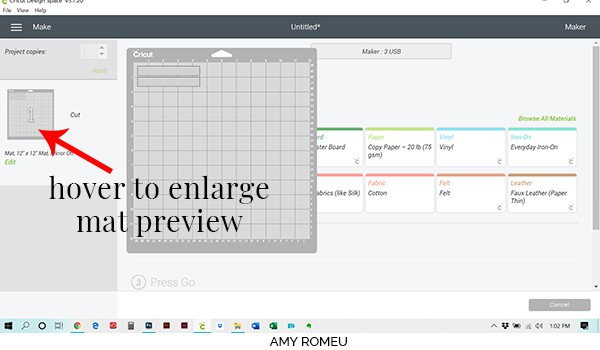
You’ll be placing the faux leather on your mat in the same position Cricut Design Space will cut your shapes from – you can hover over the mat preview on the left to doublecheck the correct placement.
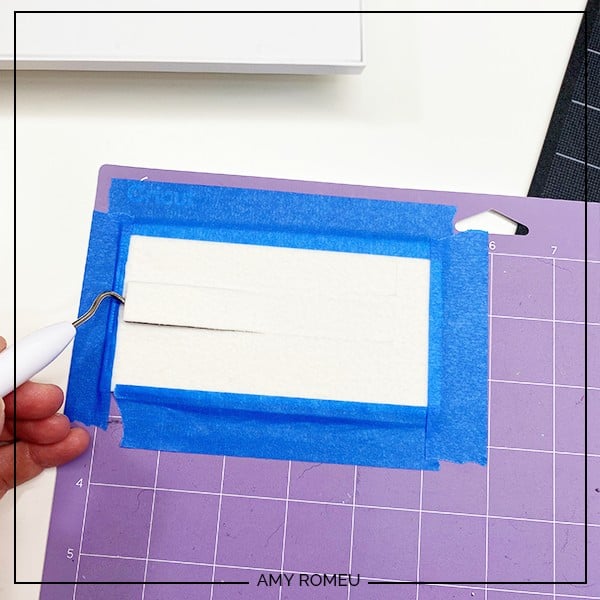
Place your faux leather pretty side down on your purple strong grip cutting mat and press down firmly. (If you are using a Cricut Joy, do the same process but on the green mat instead.)
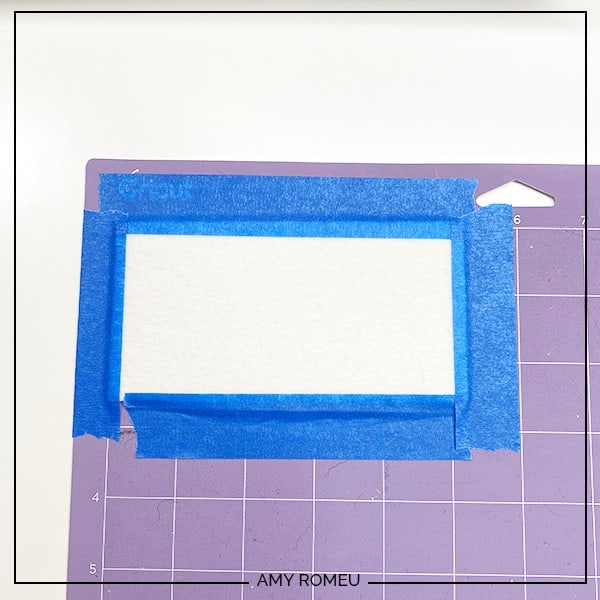
Then tape all around the material with blue painter’s tape, like this:
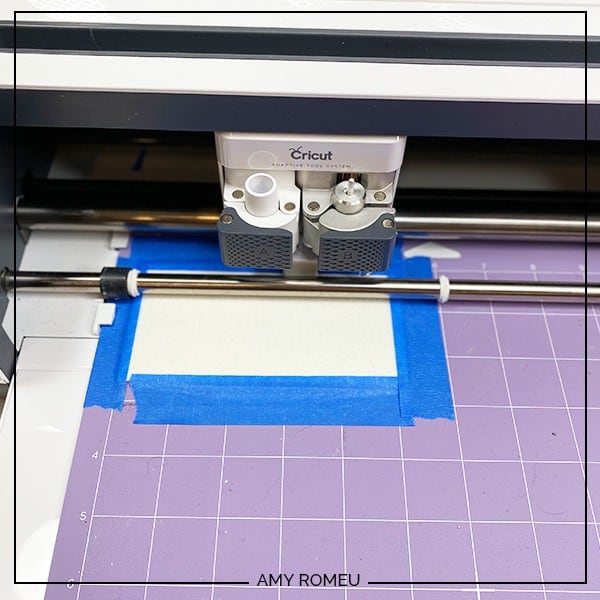
Load your mat into your Cricut by clicking on the flashing double arrow buttons.
STEP 5 – CHOOSE YOUR MATERIALS
Next we need to choose our material. I’ve cut faux leather using a variety of settings, and I’ve found there are so many different settings that work. However, I most often use the Faux Leather (Paper Thin) setting. Even though this material isn’t “paper thin,” this setting automatically cuts twice and I find it works very well as a general faux leather cutting setting.
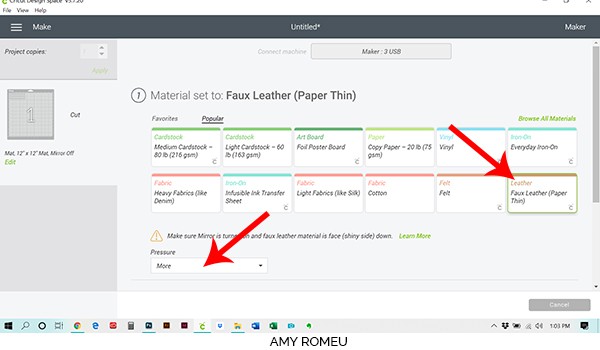
Select FAUX LEATHER (PAPER THIN) as your material on your Cricut.
If you are cutting on an Explore Air 2, you’ll need to turn your dial to Custom before you can choose faux leather.
If you are using a Cricut Joy and you don’t see Faux Leather as a material option, it means you didn’t chose to cut on a mat in the mat preview. You’ll have to go back and do that before Faux Leather will appear as an option.
If you don’t already have Faux Leather (Paper Thin) as a “favorite” material, click on Browse All Materials on the right hand side. Type “faux leather” in the search box, and click on it to select it as your material.
NOTE: To add materials to your “favorites,” just click on the yellow star next to the material name in the previous step.
For faux leather, I always change the pressure setting from DEFAULT to MORE. Your machine may be different, so test it out with a test cut if you’re not sure how your Cricut cuts faux leather.
That’s it. You’re ready to cut. Press the flashing C button on your Cricut and it will start to cut.
STEP 6 – ASSEMBLE THE EARRINGS
When your Cricut finishes cutting, hit the flashing arrows button to unload your mat. Remove your cut shapes from your cutting mat, either with your fingers, tweezers, or a weeding tool.
It’s time to assemble your materials. You’ll need the faux leather shapes, the bulk chain, earring hooks, flat nose pliers, wire cutters, and glue. You’ll also need small rubber bands, or some other way to temporarily hold the little toilet paper rolls in a circle shape while the glue dries.
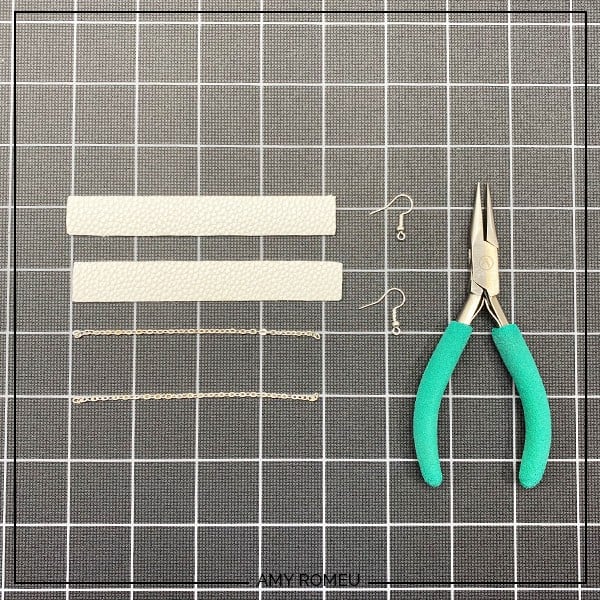
Use the wire cutters to cut two 4 inch long lengths of chain.
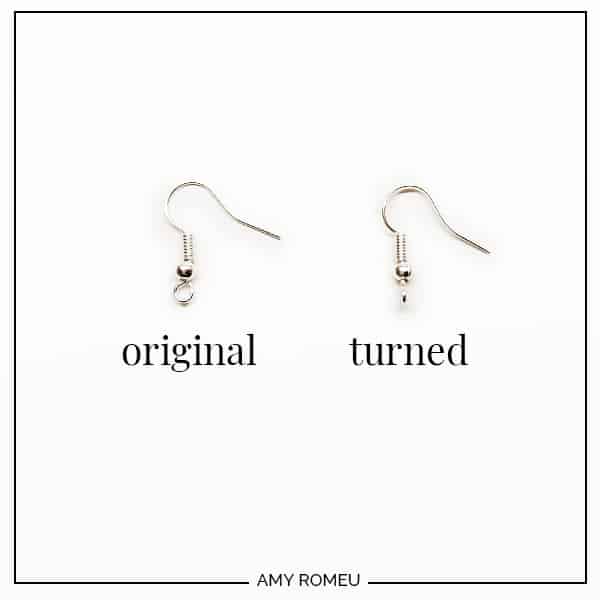
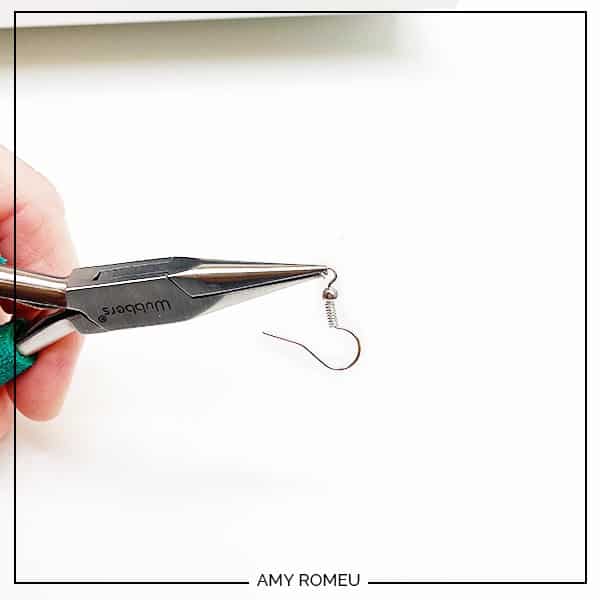
Also, use your flat nose pliers to twist the loops on the earring hooks 90 degrees, like this.
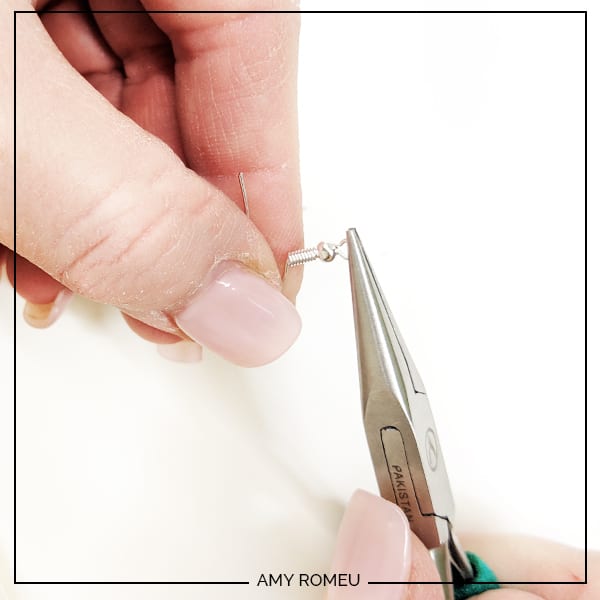
After you turn the loop 90 degrees, use your needle nose pliers to OPEN the earring loop slightly. You just need enough room to slide on the chain. Repeat with the other earring.
Time to glue! Lay down a piece of scrap paper to work on so you don’t get glue on your work surface. Then flip your faux leather over so the backing is facing up.
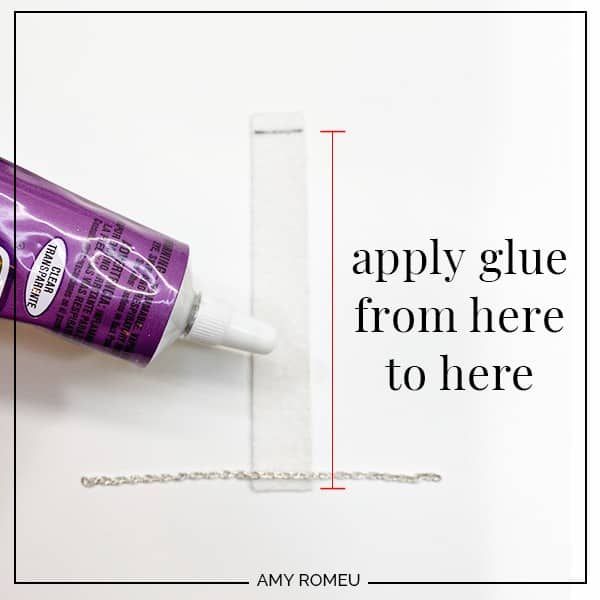
See the image below to know exactly where – and where not – to apply the glue. The Quick Hold glue I used dries fast, so you’ll have to work quickly. Make sure you have your rubber bands nearby!
You want the chain to be glued down also so apply glue all the way down to the bottom. Be sure not to glue above the pencil line I’ve drawn below. That will give your toilet paper earrings the little front paper flap.
After you apply the glue, be sure the chain is centered as shown. Then begin rolling the tiny toilet paper roll up with both thumbs and forefingers from the end with the chain. When the roll is completely rolled up, wrap a small rubber band around it to hold it as it dries, as shown. You don’t want the rubber band to be too tight, or it will leave indentations in your toilet paper rolls, um, I mean, your earrings.
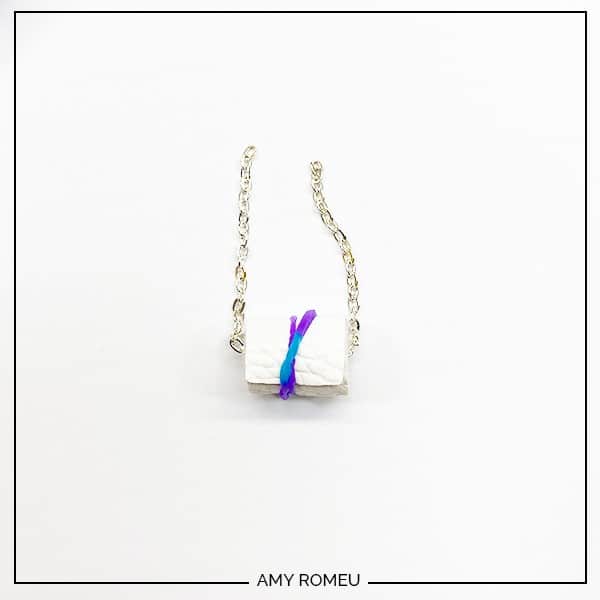
Repeat with the other earring. Check that the toilet paper is centered on the chain. If not, you’ll want to make any adjustments before the glue dries. Do that by pulling on the chain slightly in one direction or the other.
Let both earrings dry. Quick Hold glue dries enough in about 30 minutes. E6000 will take a little longer, and fabric glue should dry overnight.
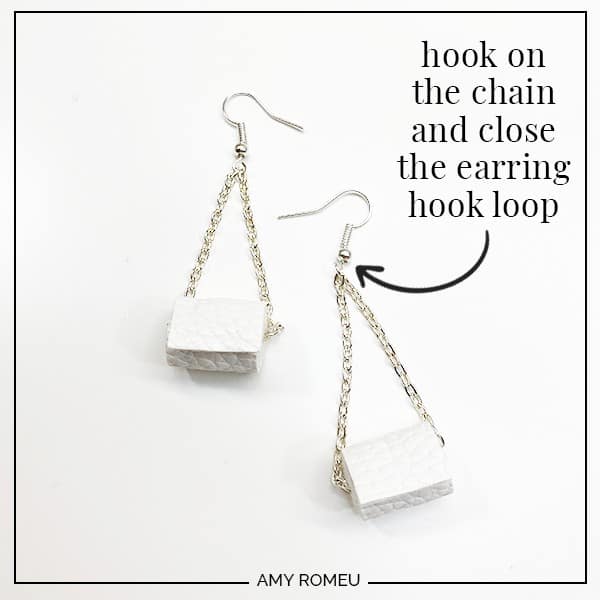
Remove the rubber bands. Now we need to put the chain on the earring hooks.
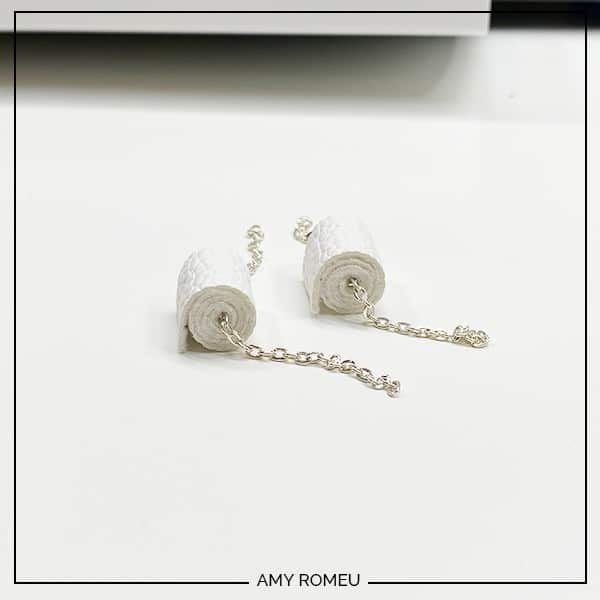
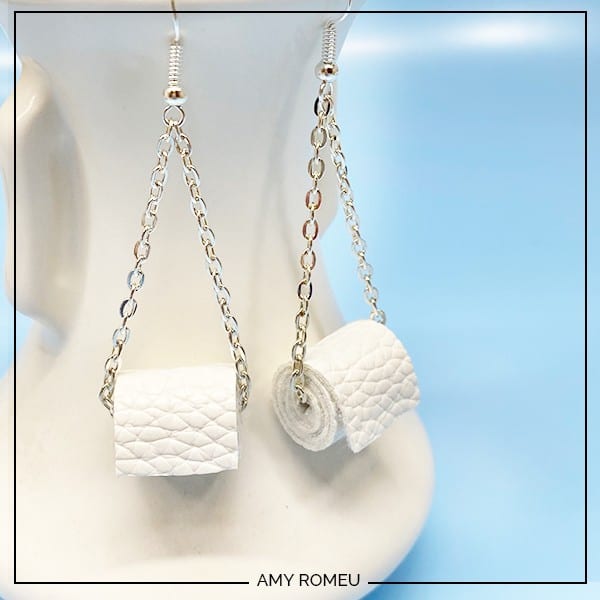
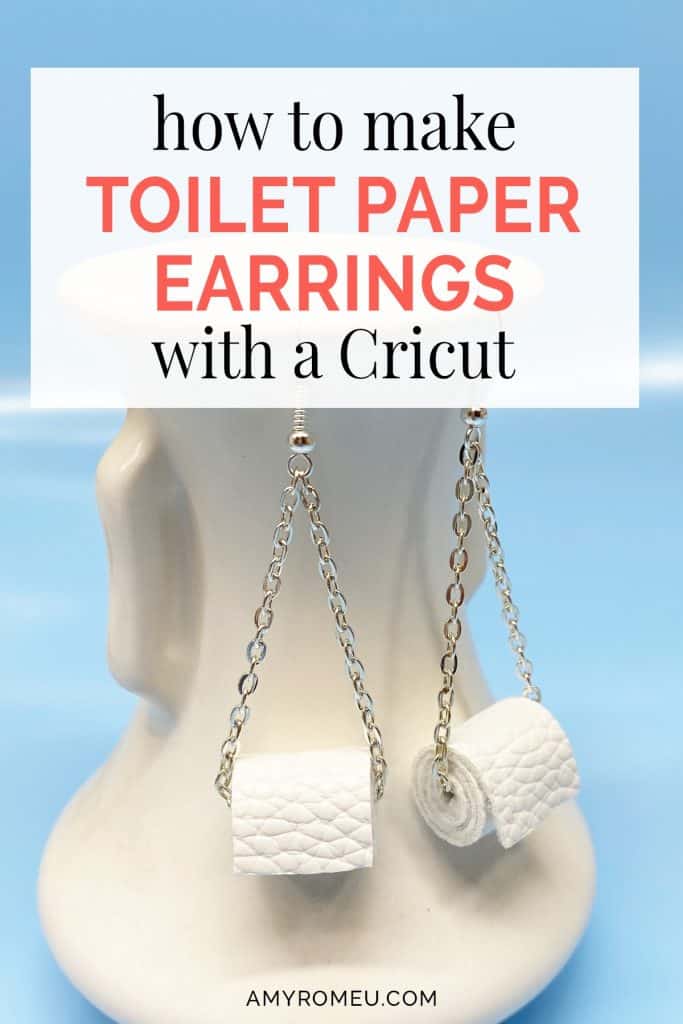
Pay attention to which direction your toilet paper roll is facing – this is debate in a lot of households, right? 🙂 You’ll want to check how your roll will hang on your earring before you attach the hook. I purposely made sure to glue the chain to the inside of the roll so the roll doesn’t twist around on the chain too much.
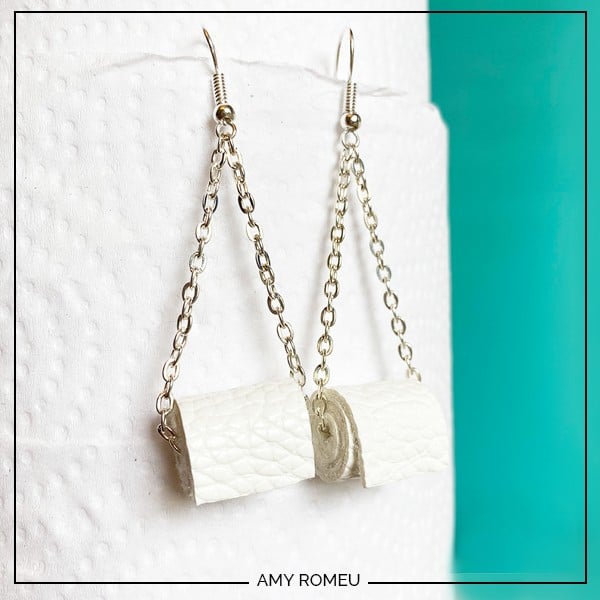
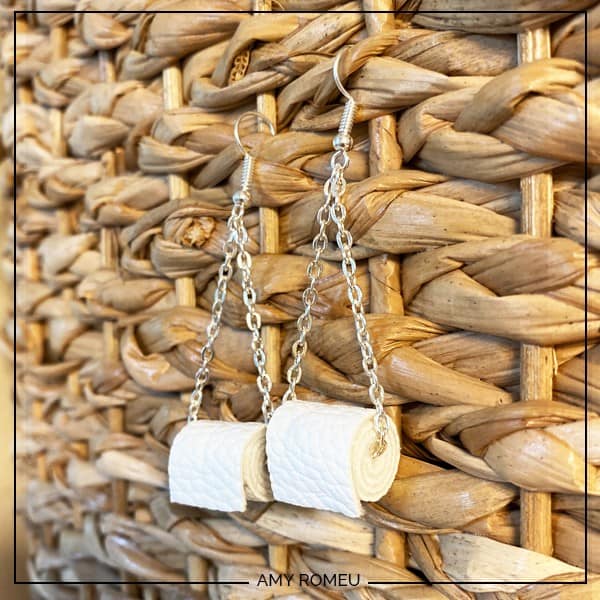
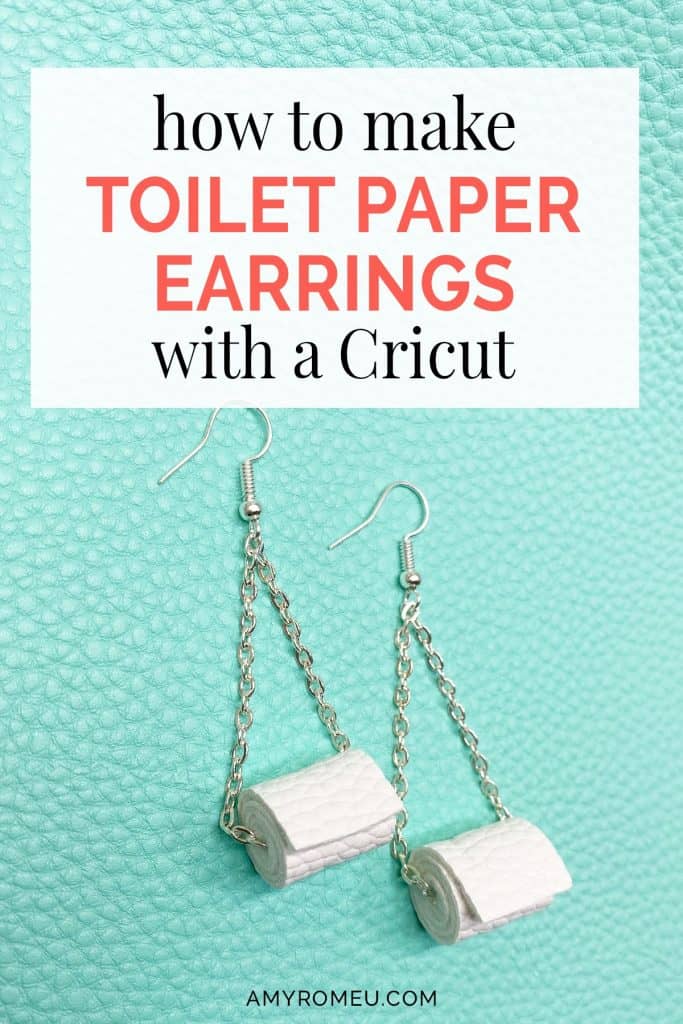
That’s it! How stinking cute is that?
Are you going to make these, or are they just too much? Let me know in the comments! Also let me know if I at least made you chuckle a little. We all could use a laugh!
Want to see all of my Cricut earring & jewelry tutorials? CLICK HERE
Until next time… and happy creating!

WANT THE FREE SVG FILE YOU SO YOU MAKE THESE FUNNY TOILET PAPER EARRINGS YOURSELF?
GET IT FROM OUR RESOURCE LIBRARY! YOU’LL RECEIVE THE PASSWORD FOR THE RESOURCE LIBRARY INSTANTLY AFTER FILLING OUT THE FORM BELOW!
WANT TO REMEMBER THIS? POST THIS TOILET PAPER EARRINGS PROJECT TO YOUR FAVORITE PINTEREST BOARD!
Oh yeah I plan on making these and I love that I do not need to go to store for any thing, since I have everything already. Laugh yes I did. Thanks for a bright spot in this dark world.
Hi, Judi! Thanks for your comment! I hope you do make them, and share a photo with me when you do! Amy