
Easy Holiday Earrings with Faux Leather and a Cricut
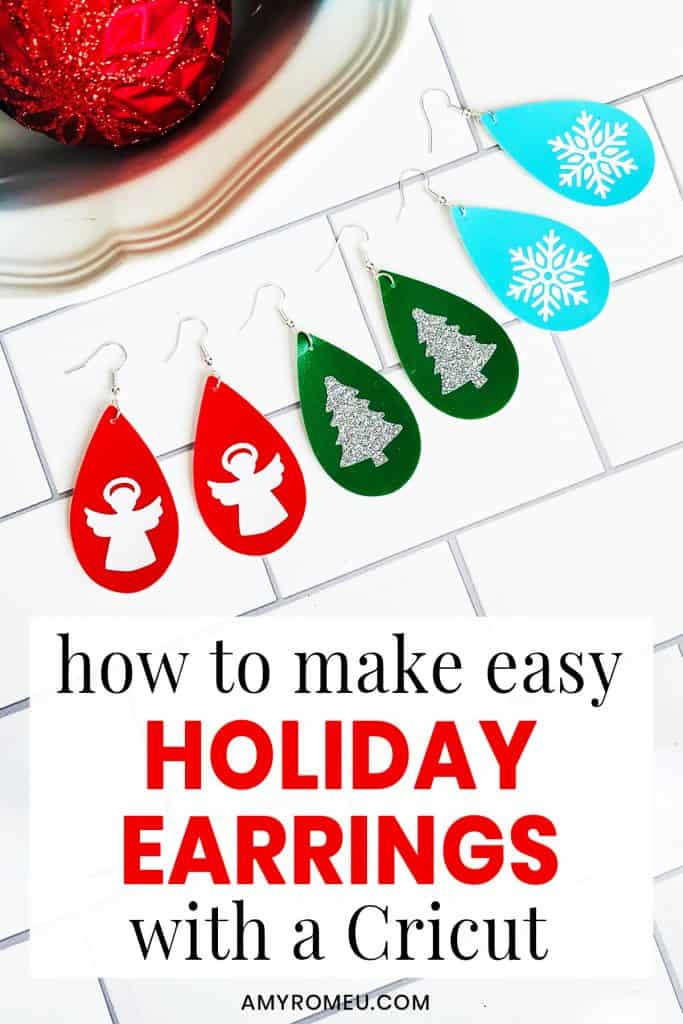
Easy Holiday Earrings with Faux Leather and a Cricut
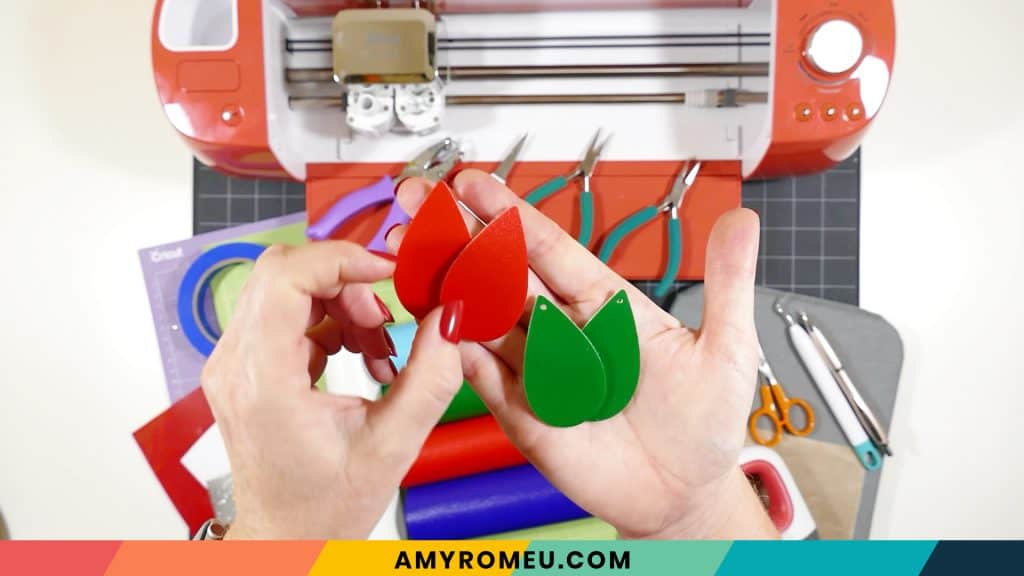
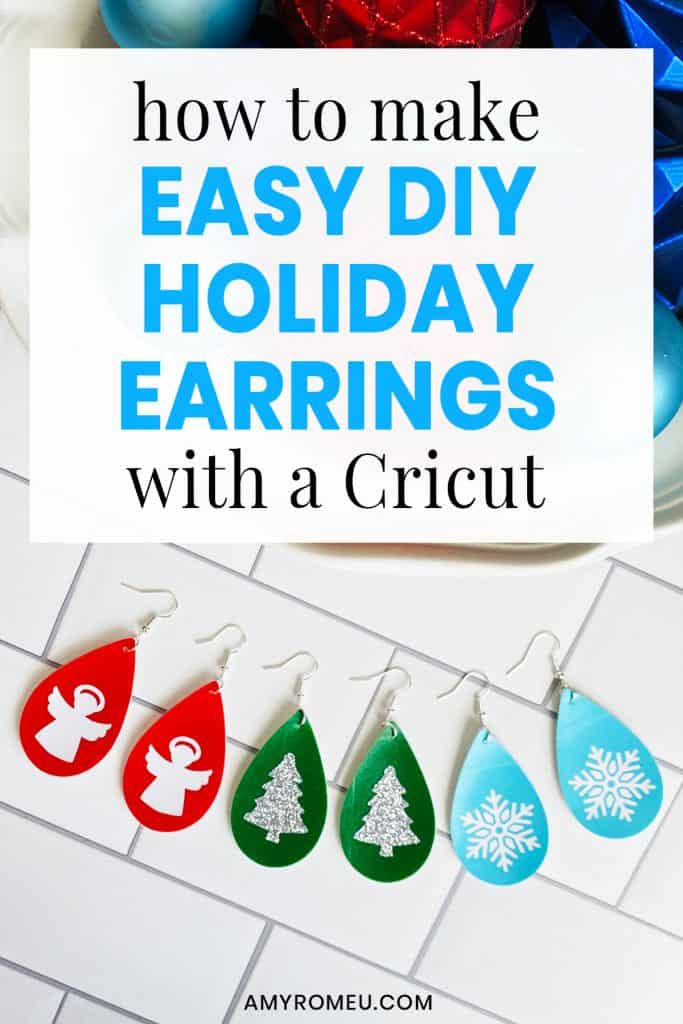
Do you love to wear special earrings during the holidays? I know I do! I’ve been making a lot of new holiday earring designs on my blog over the last few weeks! If you haven’t had a chance to see them, be sure to check out my Gnome Earrings, my Santa & Candy Cane Earrings, Penguin Earrings, and Snowman Earrings projects. But if you’re new to making faux leather earrings and want to start out with a quick and easy Cricut earrings project, then this post is for you!
Today I want to show you how to make easy holiday earrings with faux leather and a Cricut Explore Air 2. You can certainly make these designs with a Cricut Maker or even the Cricut Joy (read more about making earrings with the Joy in this post). But so many of my readers have the Explore Air 2 and they think they can’t cut faux leather with it! So I want to show you how you can make quick and easy holiday faux leather earrings with the Explore Air 2.
In this tutorial, I’ll give you my step by step instructions and tell you exactly what materials I used to make this project. I’ll also have the SVG earring templates for you in my Free Resource Library so you can make these earrings yourself. There will be a link to get the SVG in the Materials section of this tutorial.
If you’d rather watch a video tutorial, click on my Easy Cricut Holiday Earrings YouTube video below:
Ready? Let’s get started!
Want to see all of my Cricut earring & jewelry tutorials? CLICK HERE
This post contains some affiliate links (which means if you make a purchase after clicking a link, I will earn a small commission at no additional cost to you). Read my full disclosure policy here.
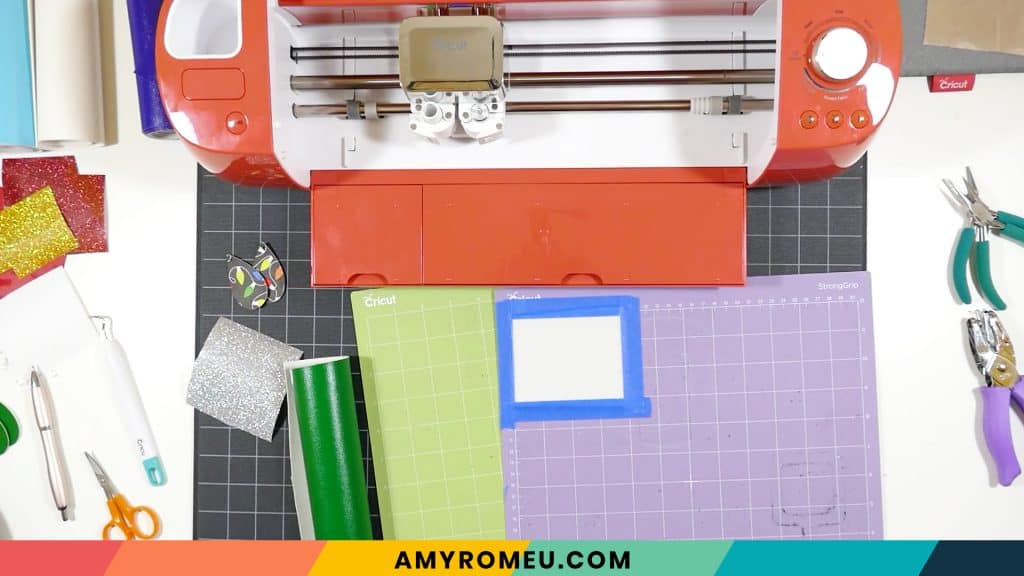
Easy Cricut Holiday Earrings – Materials List
- A vinyl cutting machine. I’ll be using the Cricut Explore Air 2, but you can also use a Cricut Maker, from Amazon here or at Cricut.com. You can even use the new Cricut Joy!
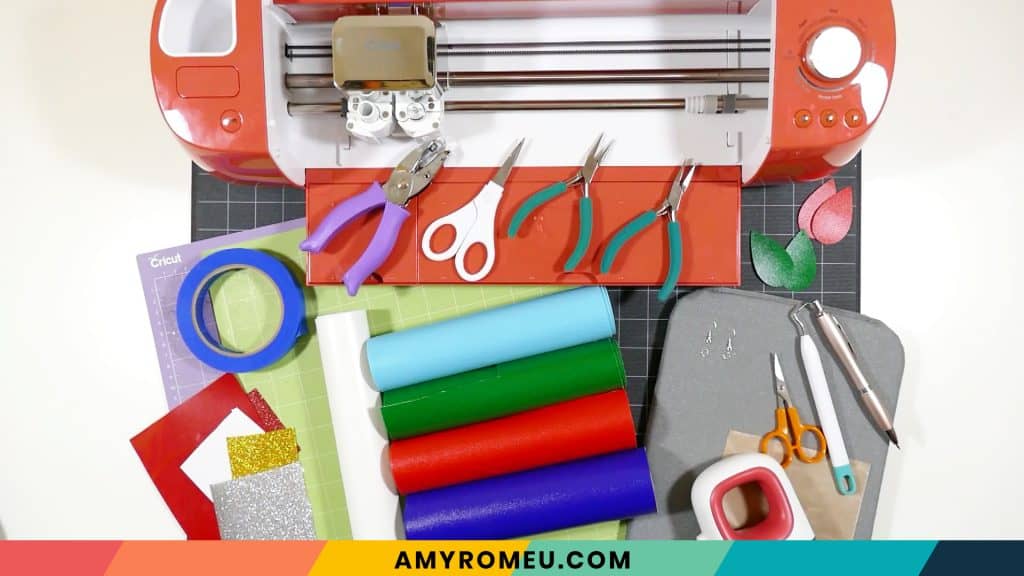
- Solid colored faux leather in assorted colors. I used this Smooth Faux Leather in Green from Amazon. This item comes in other colors, like the White, Red, Sky Blue and Royal Blue on my work table. You don’t have to use smooth faux leather, however, you can use pebbled.
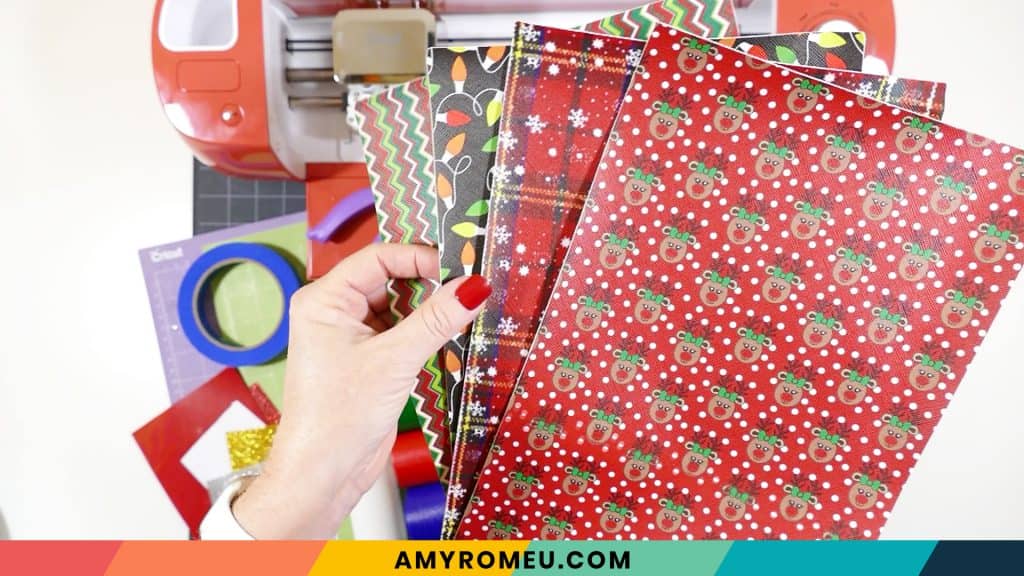
- Printed holiday faux leathers. I used the holiday bulb faux leather from this Christmas design assortment pack on Amazon. I also like this pack and this pack from Amazon. For even more great Amazon holiday assortment packs of faux leather, click here.
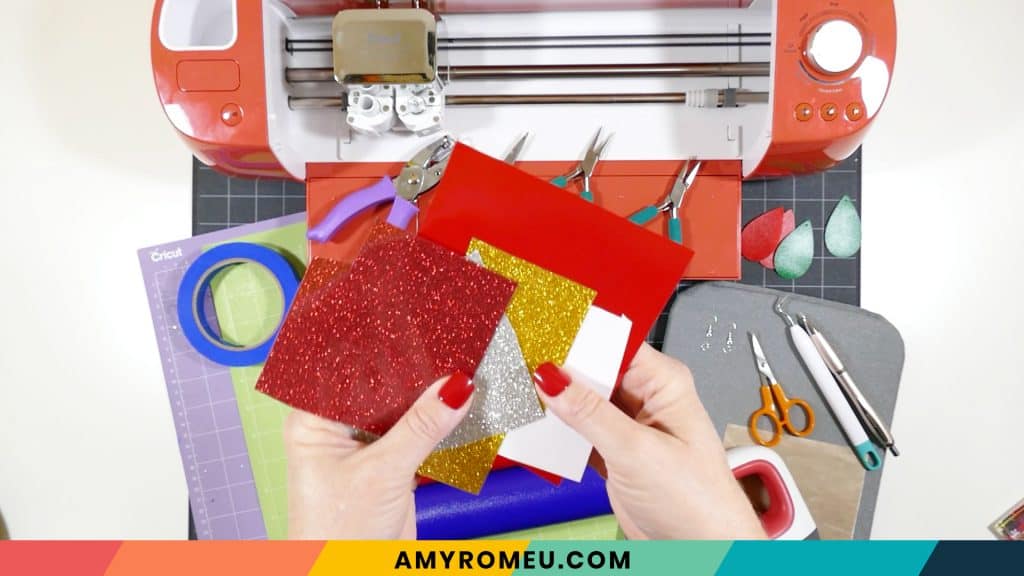
- Heat Transfer Vinyl in assorted colors. I used Siser Glitter in Silver, but you can use any colors or type of HTV you want (solid, foil iron-on, or glitter).
- Cricut Strong Grip (Purple) Cutting Mat. You can buy these on Amazon here.
- Cricut Standard Grip (Green) Cutting Mat. Available on Amazon here.
- Blue painter’s tape. This is regular hardware store painter’s tape, but you can also get it on Amazon here.
- A weeding tool. I use the weeding tool that came with my Cricut tool set from Amazon here.
- Cricut EasyPress Mat. I like the 8×10 size for making earrings.
- Small curved scissors – I love these curved scissors from Amazon.
- A small hole punch (for punching earring holes in the faux leather). This is my go-to hole punch for making Cricut earrings from Amazon here.
- Earring hooks – I used these silver toned shepherd’s earring hooks from Amazon.
- Small jump rings – I used the silver toned jump rings from this assortment of 6mm size jump rings in different metal finishes from Amazon here. You could also use 5mm size jump rings if necessary.
- Two pairs of flat nose pliers – My favorites are Wubbers brand in the “Baby” size. My everyday use pliers are the Baby Wubbers Chain Nose Pliers and the Baby Wubbers Flat Nose Pliers.
- The SVG file template for these Easy Holiday Earrings. It’s Design #160 in my free resource library. You can get the password to my library instantly by filling out the form below, or at the bottom of this post.
DIY Easy Holiday Earrings – PROJECT INSTRUCTIONS
STEP 1 – Download the SVG Cut Files
Download my free Easy Holiday Earrings SVG file (#160) from my Resource Library. (If you don’t have a password to the library, fill out the form above and it will be emailed to you instantly.)
Save the zipped folder that downloads to your computer. Then unzip the folder to access the folder’s contents. You’ll need to unzip or extract the files FIRST so you can upload the cutting file to Cricut Design Space.
STEP 2 – Upload the SVG File to Cricut Design Space
If you need help uploading a file to Cricut Design Space, click here, or watch the YouTube video for this project which has step-by-step file uploading directions.
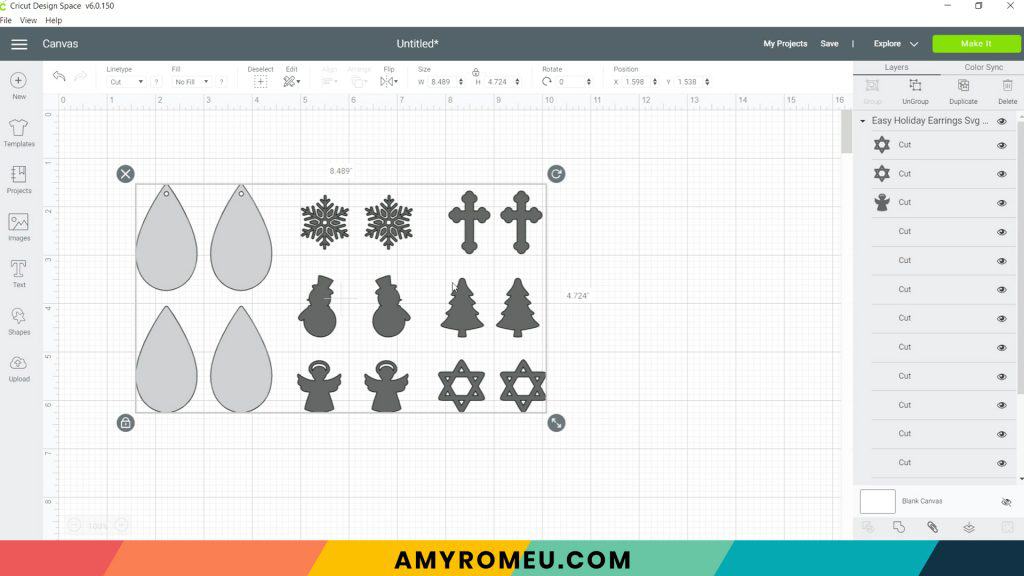
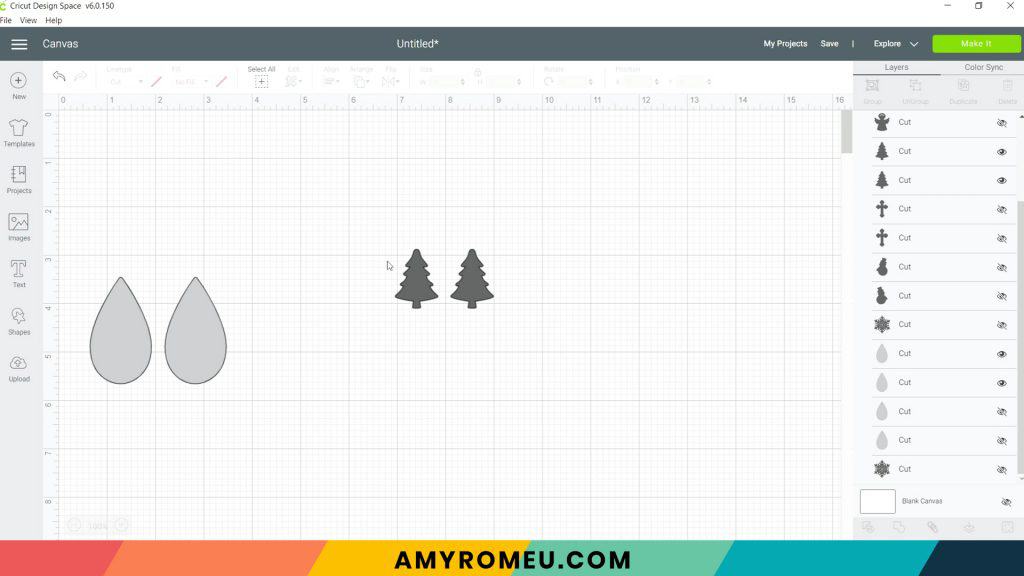
In the design files for this project, you’ll see there are two sets of teardrop earring shapes – one with pre-cut holes, and one without. If you use the pre-cut hole version, be aware that the hole may not always cut all the way through every time. That’s ok, it doesn’t mean you are doing anything wrong! In that case, you can trim the hole open with small scissors or you can use a hole punch to finish punching the hole.
If you use the teardrop without a pre-cut hole, you can make the hole with a hole punch.
I’ll demonstrate both methods in this tutorial.
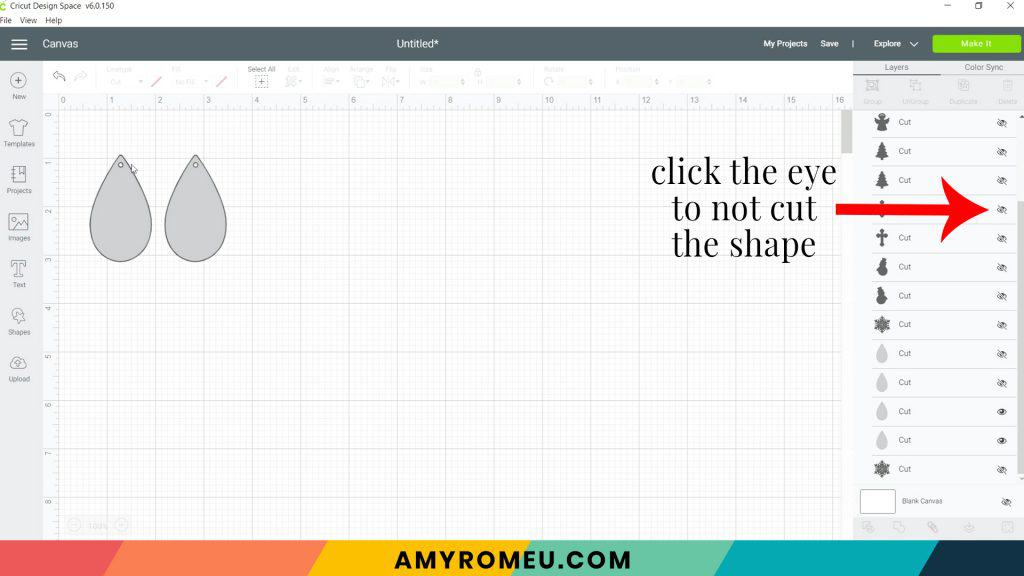
When the holiday earring shapes are on your canvas, choose if you want to cut the teardrops with the pre-cut holes or without. For the first example, I’m going to cut the pre-cut hole pair, and not any of the holiday designs yet. So click the eye next to all the layers you won’t be cutting to hide them. Then click MAKE IT.
It isn’t necessary to mirror these shapes on your mat. Make a note of what size material you’ll need to place on your mat to cut the shapes completely (see the red box I’ve drawn below on the mat for a visual).
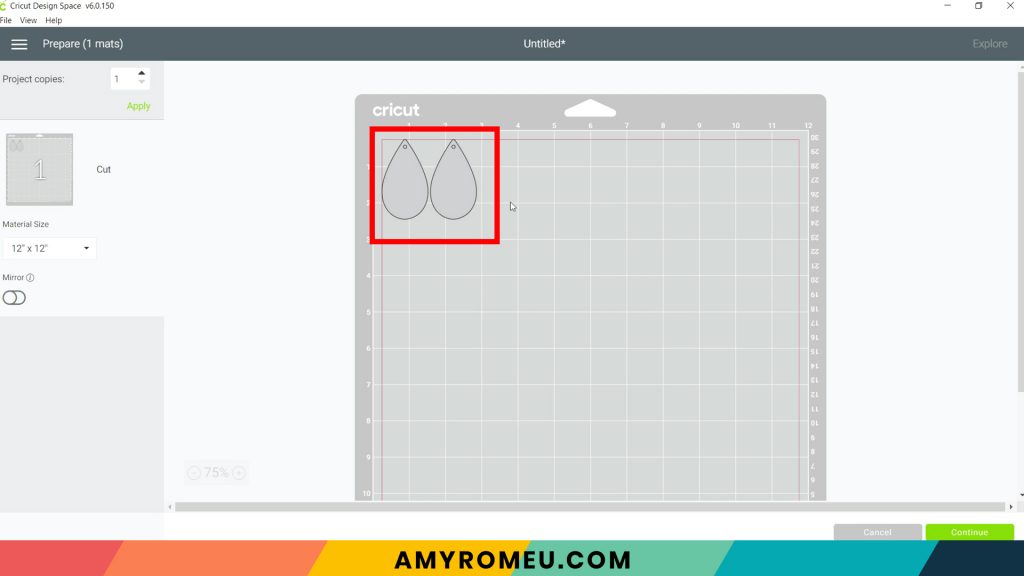
Click the green CONTINUE button.
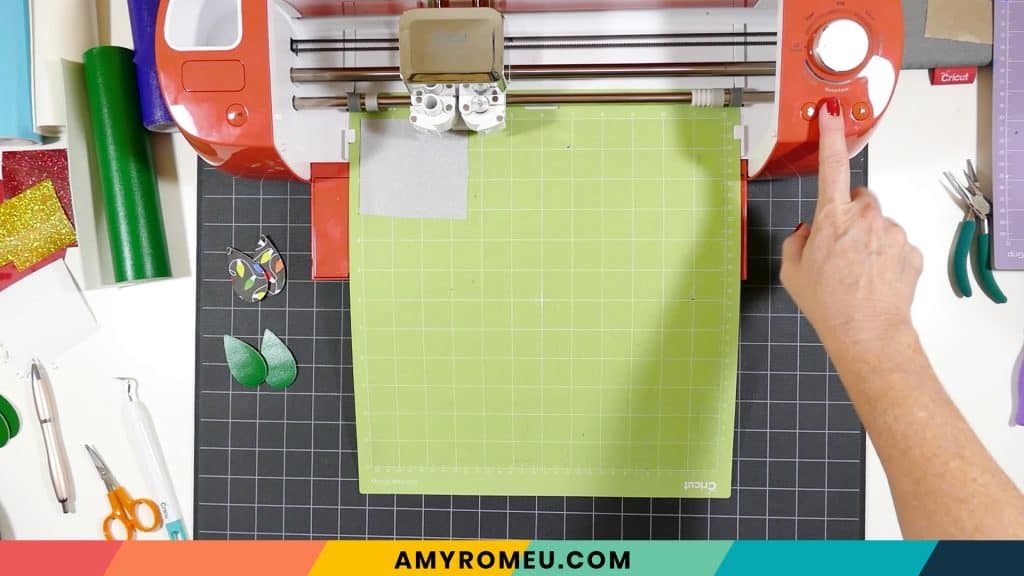
STEP 3 – Make Material Selection
Now you’ll select your material for the first mat.
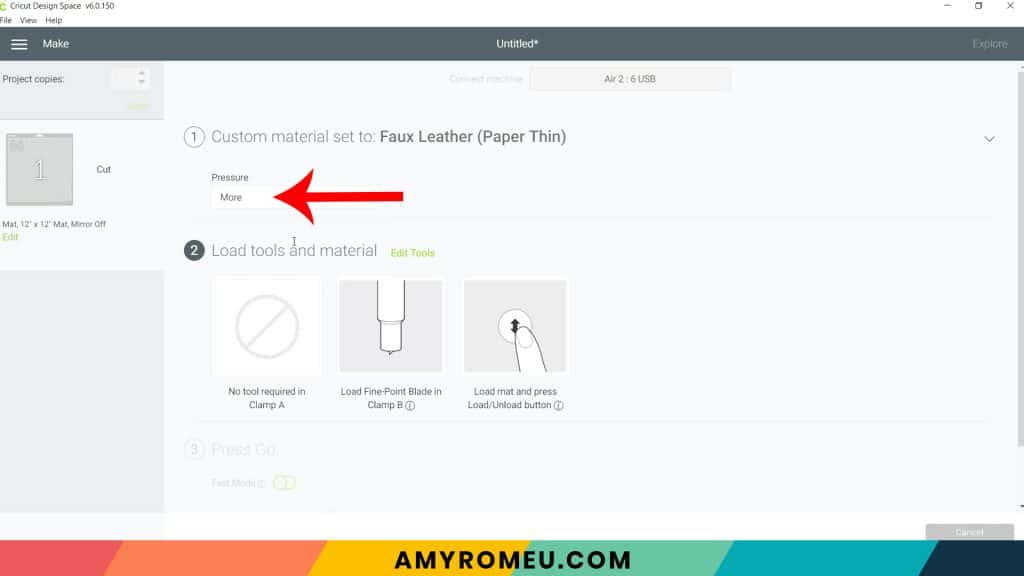
Note: If you’re using a Cricut Explore Air 2 like I am, turn your dial to “Custom” so you can choose the setting recommended below. If you’re using the Cricut Joy, set the machine to cut with a mat and then select the material setting below. You won’t have a purple cutting mat, but follow the directions below using the green mat. If you’re using a Cricut Maker, you’ll just make the material selection as shown.
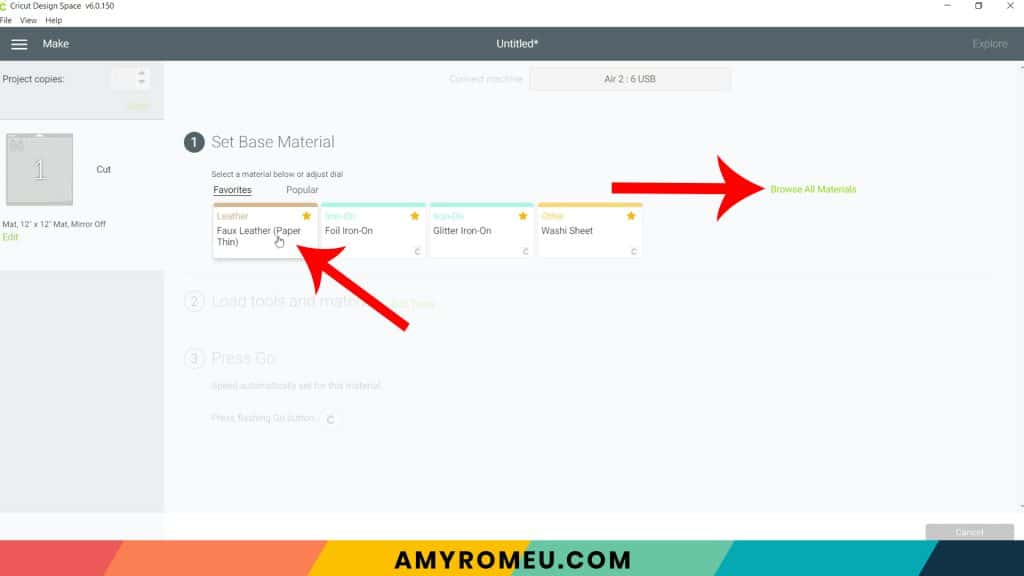
I already have Faux Leather (Paper Thin) saved as a favorite material in Cricut Design Space. If you do too, you can click on it to select it.
If not, click on Browse All Materials to search for it and select it.
Then select “More” from the pressure dropdown menu.
STEP 4 – Cutting the Earring Shapes
Now it’s time to prepare the faux leather mat for cutting.
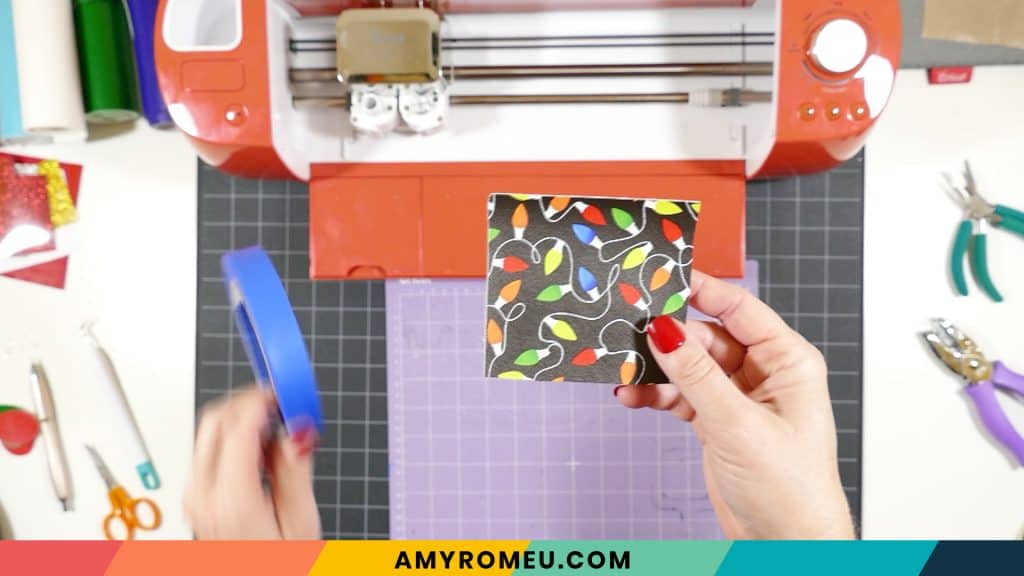
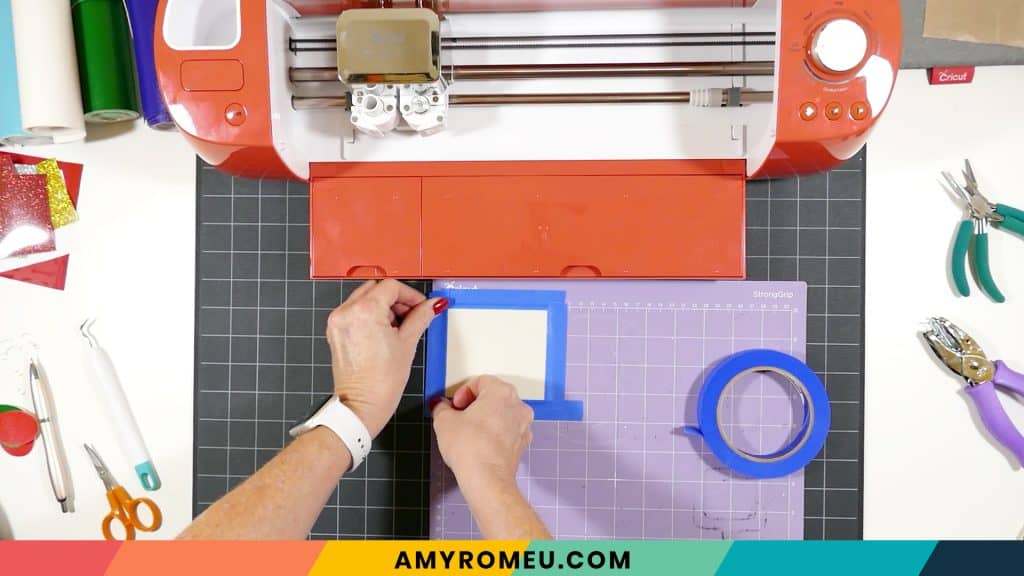
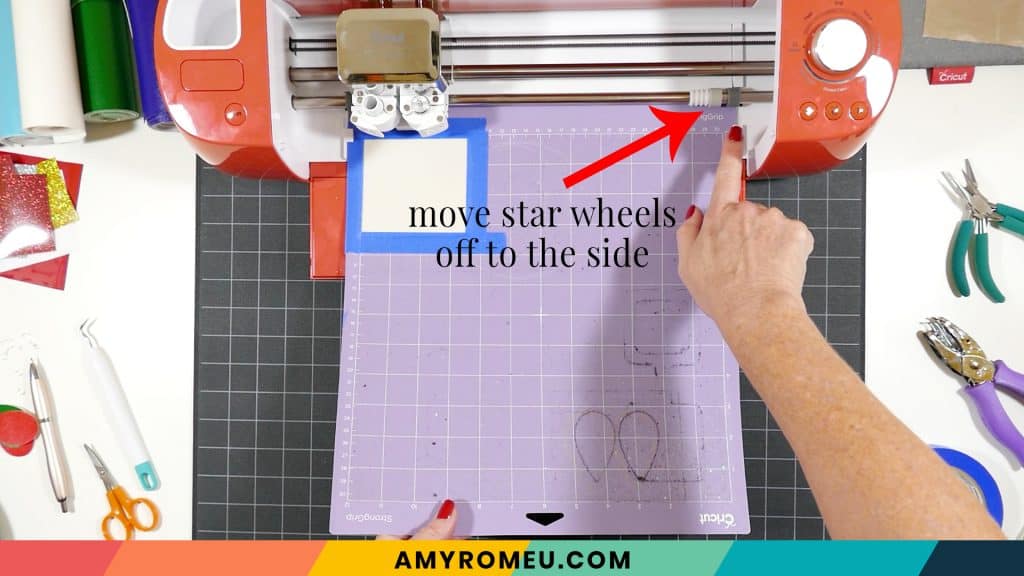
Cut a piece of faux leather to the size you noted in the mat preview screen. Place your cut piece of faux leather pretty side down in the top left corner of a sticky purple cutting mat.
Now tape all around the faux leather with blue painter’s tape. Press the material down to your mat firmly with your hands.
Load the prepared mat into the Cricut by lining the mat between the mat guides and then pressing the double arrows button. Be sure your white star wheels are moved out of the way so they don’t leave tracks on your faux leather!
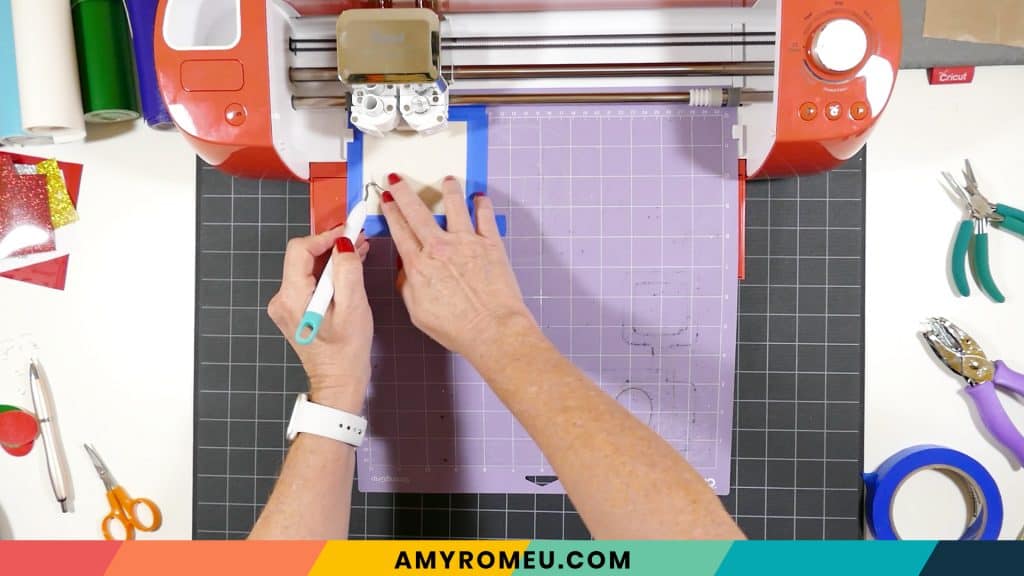
The “C” Cricut button will start to flash, indicating the machine is ready to cut. Press the C button to begin the cut.
When the cut is finished, but before you unload the mat, use a sharp tool like your weeding tool and carefully lift the edge of the earring shapes to see if they cut all the way through. If they did, then click the double arrow button to unload the mat. If not, press the C button to make the cut again.
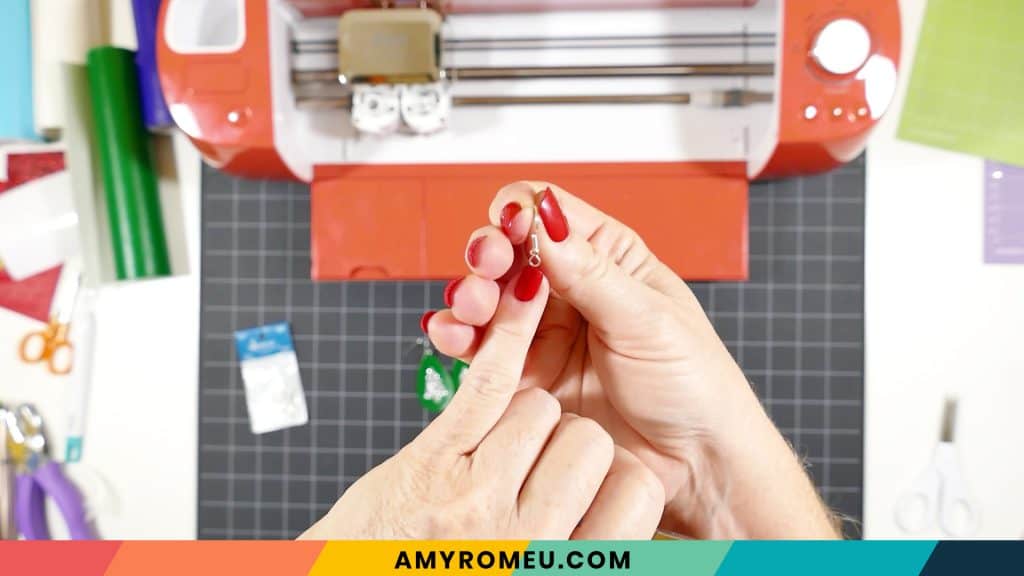
STEP 5 – Attach the Earring Hooks
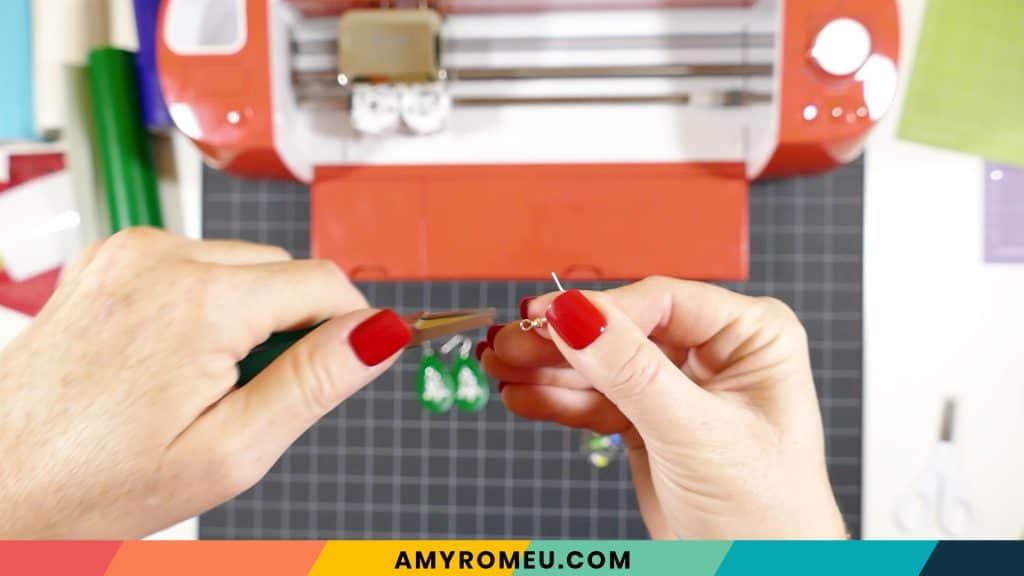
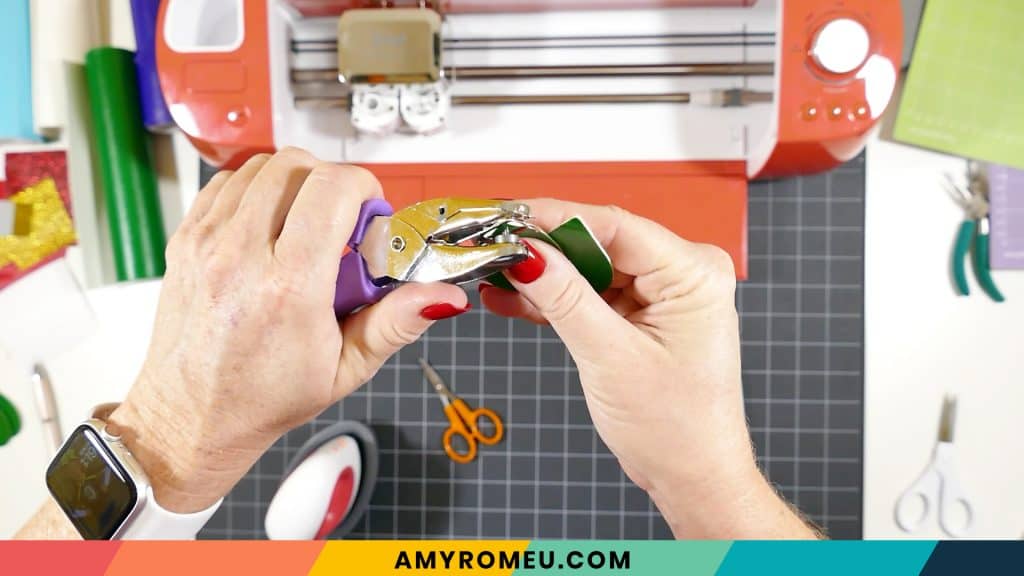
To attach the earring hooks, you’ll need small jump rings, earring hooks, and two pairs of flat nose pliers.
To connect the earring hooks, you’ll first need to turn the bottom loop on the fishhook earring 90 degrees so your earrings will hang correctly.
Grip the earring hook between your thumb and forefinger with one hand, and use flat nose pliers to grip the bottom earring hook loop. Twist the wrist holding the pliers firmly so the loop turns 90 degrees.
For more details on this technique, visit my post about how to make faux leather earrings hang straight here.
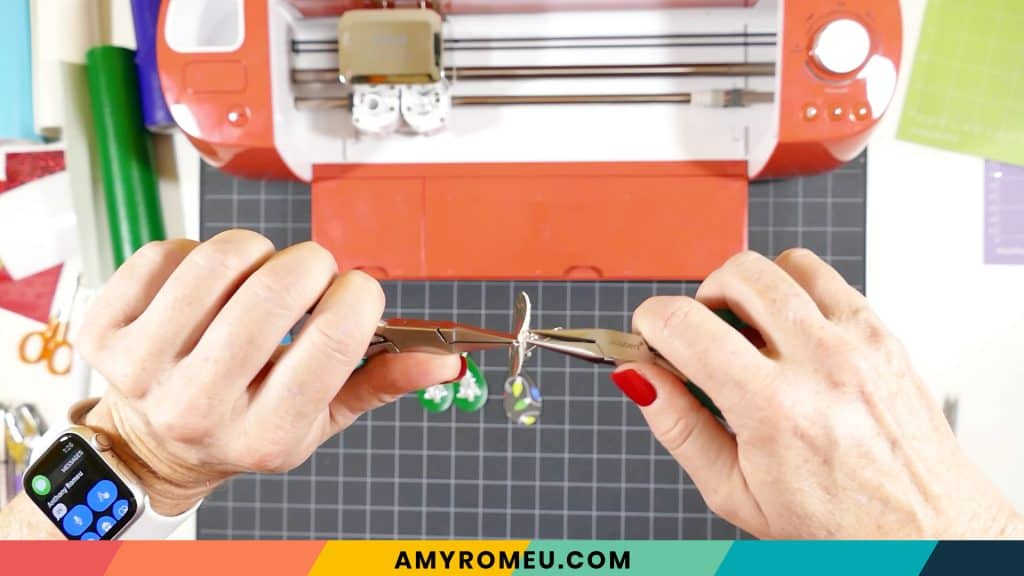
Once you’ve twisted both of the earring hook loops 90 degrees, use two pliers to grip each side of a 5mm or 6mm jump ring. Make sure the opening of the jump ring is facing up in the 12:00 position. Then twist one wrist to open the jump ring slightly.
With the jump ring open, slide on the faux leather teardrop, and then add the earring hook. Be sure the hook is facing in the right direction.
Then use the second pair of pliers again to grip both sides of the jump ring and twist the jump ring closed again.
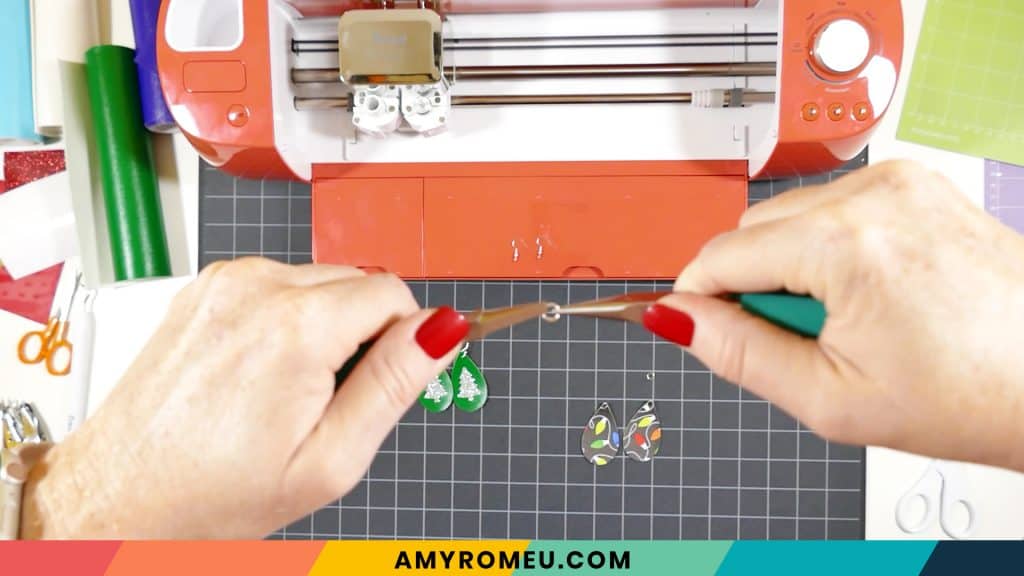
Repeat for the second earring. That’s it!
STEP 6 – Cut Heat Transfer Vinyl Mats
For the second pair of earrings, return to Cricut Design Space to cut the faux leather mat and the heat transfer vinyl mat.
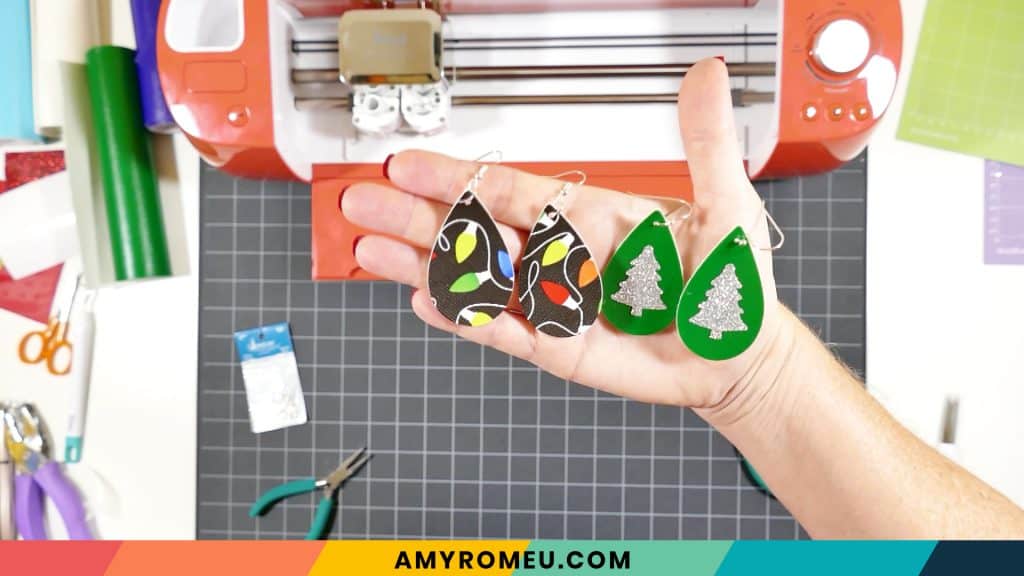
This time I’ll cut the earring shapes without the pre-cut holes, and the Christmas tree shapes. Hide all of the other layers.
Cut the faux leather layer in the same method as the first pair of earrings.
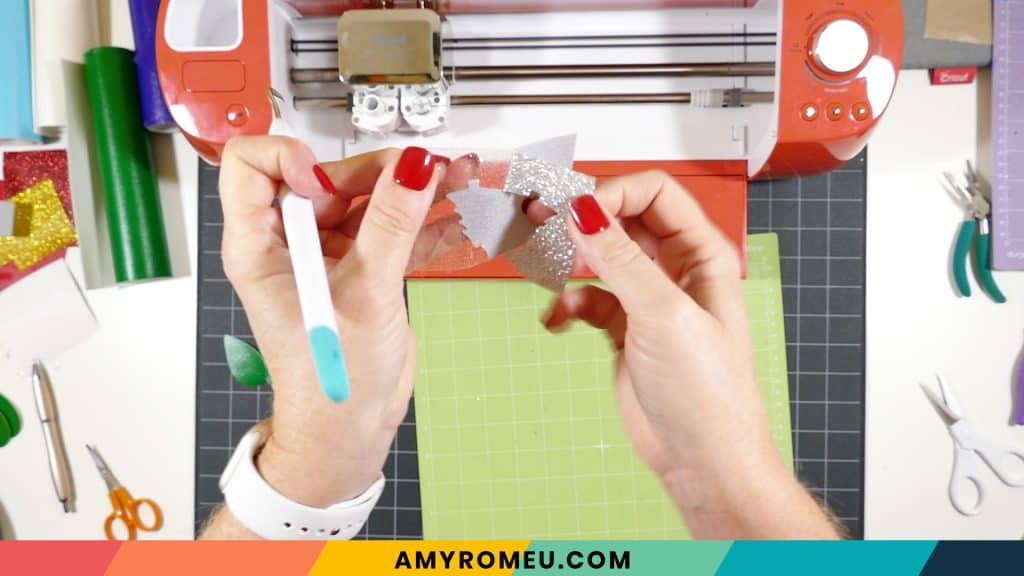
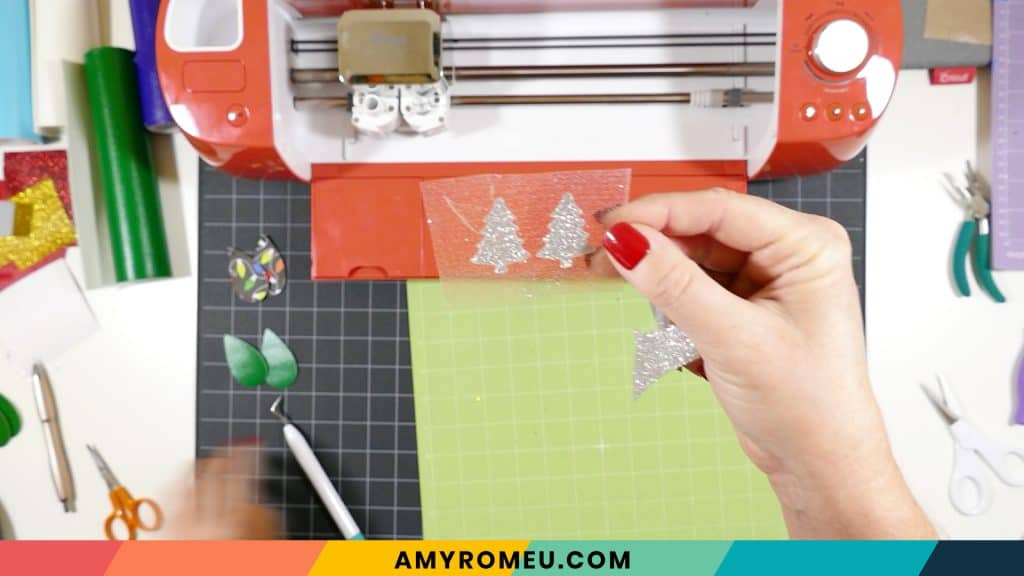
For the heat transfer vinyl mats, I’ll use the Glitter Vinyl setting to cut the silver glitter HTV. (I like to use the Washi Sheet setting for solid colors and Foil Iron-On for foil).
I use the Default pressure for all vinyl cuts (I usually repeat the cut for glitter vinyl, however – just press the C button again to repeat the cut).
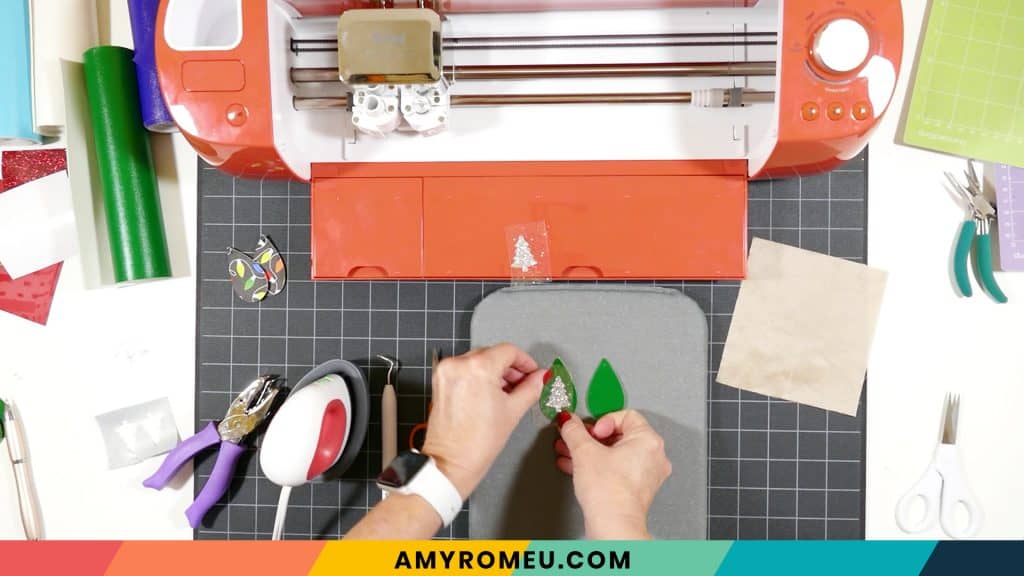
Weed away the excess glitter HTV from the trees and set aside.
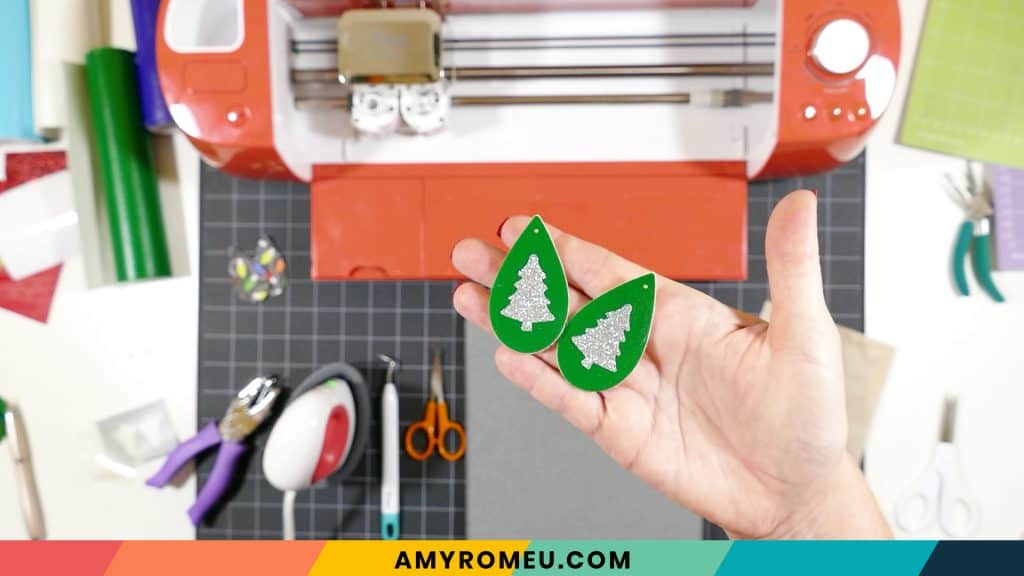
STEP 7 – Press the Vinyl onto the Faux Leather
Using an Easy Press Mini (on the lowest temperature setting) or an Easy Press (set to about 275 degrees), press the glitter tree shape onto the faux leather teardrop.
Cover with a cover sheet (teflon sheet or parchment paper) before pressing. Press this layer for 5-7 seconds, just long enough for the layer to adhere to the layer below.
Peel away the carrier sheet carefully. If the vinyl lifts up with the carrier sheet, lay the carrier sheet back down again and press more.
Then press the glitter vinyl tree onto the other earring.
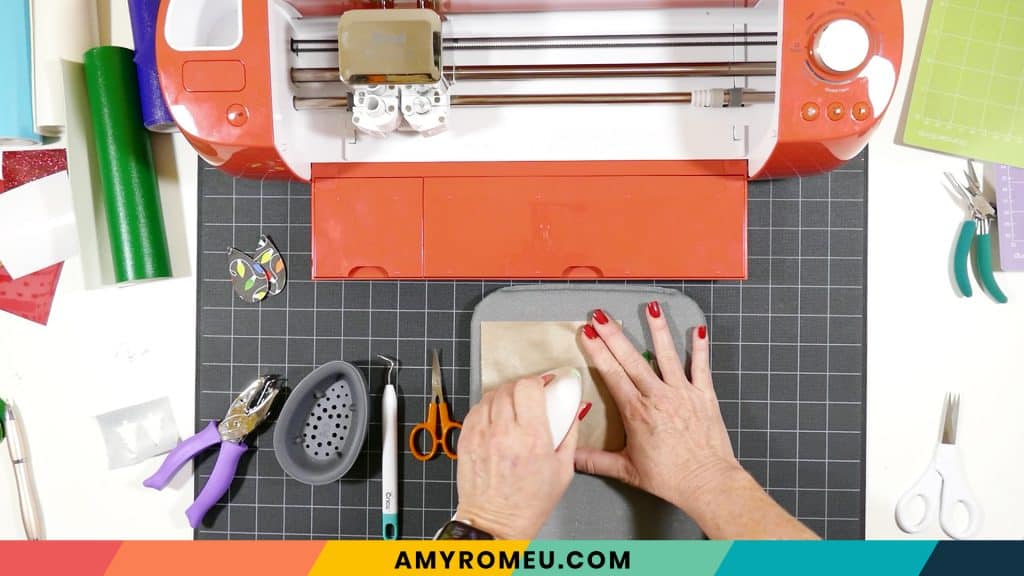
Let both earrings cool under something heavy for a few minutes to keep them flat.
STEP 8 – Punch the Earring Holes
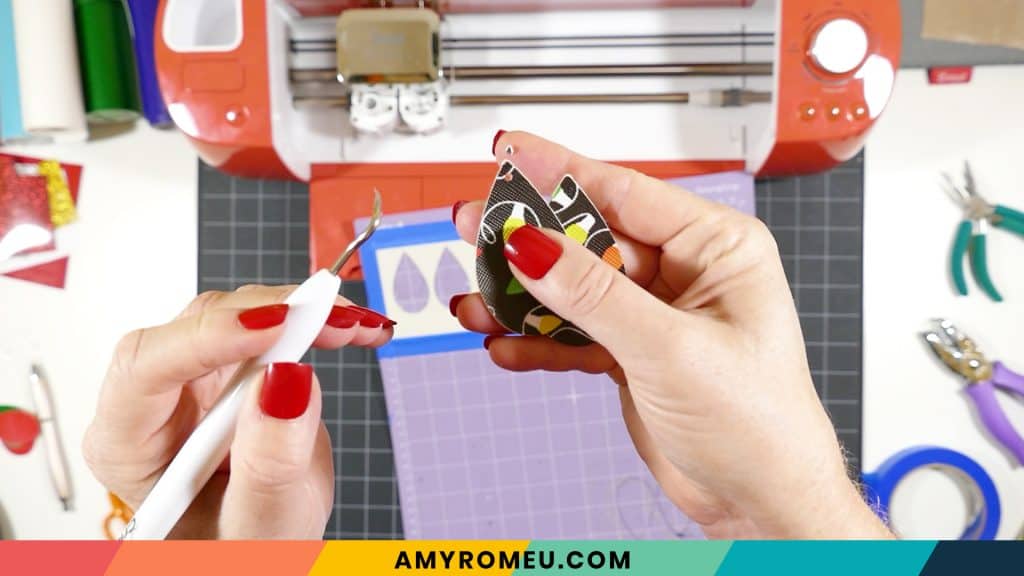
Use a 1/16″ hole punch to punch the earring holes. These are the two punches I use: this hole punch and this hole punch. They both punch through layers of faux leather very cleanly. If you don’t have a hole punch, you can use a sharp object to make the hole.
Punch the hole in the top of one earring, making sure the hole isn’t too close to the edge. Then use that earring as a guide to punch a matching hole in the other earring.
Now it’s time to attach the earring hooks to the second pair, repeating the process in Step 5.

If you do make this project, I would love to see your Easy Holiday Earrings! Please share a photo of them in the comments, or tag me on Instagram: @amyromeucreative
Want to see all of my Cricut earring & jewelry tutorials? CLICK HERE

WANT THE SVG FILE SO YOU MAKE THESE EASY HOLIDAY EARRINGS YOURSELF?
You can get it from my FREE Resource Library by filling out the form below!
Want to remember this? Post this EASY HOLIDAY EARRINGS project to your favorite Pinterest board!
Thank you, Amy, for the wonderful files you share with us! I have a question… how do you decide which earrings you back with foil vinyl?
Hi, Vicki! Thanks for your comment. I usually back earrings when the back of the earring color is a stark contrast to the front and I want to cover that up. Or when the faux leather is a little flexible and I want to add some stiffness. Sometimes I’ll add it just to add some interest and pop to the back. I know a lot of my readers who sell earrings like to add a back to make the earrings look more finished and professional, too.
I use a lot of foil on the back because it’s easier to see in my videos than if I used a matching color of solid colored vinyl (black HTV on the back of black faux leather, for example). But you can use foil, or glitter HTV, or solid, whatever you prefer! 🙂
Love these. Can’t wait to get a Cricut!
Hi Amy I enjoyed watching all the videos. It was the first thing I did every. Thank you for all your hard work and sharing with us.
I am having difficulty finding the svg files for day 9 earrings. Thanks. I have enjoyed your tutorials so much!
Hi, Susan!
Thanks for your message. The files are in my library, I promise! 🙂 Your browser is not showing you the live page. To fix this, try refreshing or reloading the page a few times. If that doesn’t work, clear your cache and then refresh again. You can also try from a different device or browser.
Thank you.
Amy
Thank you Amy. I have just cut the photo key chain and I love them. Thank you very much