
How to Make Penguin Earrings
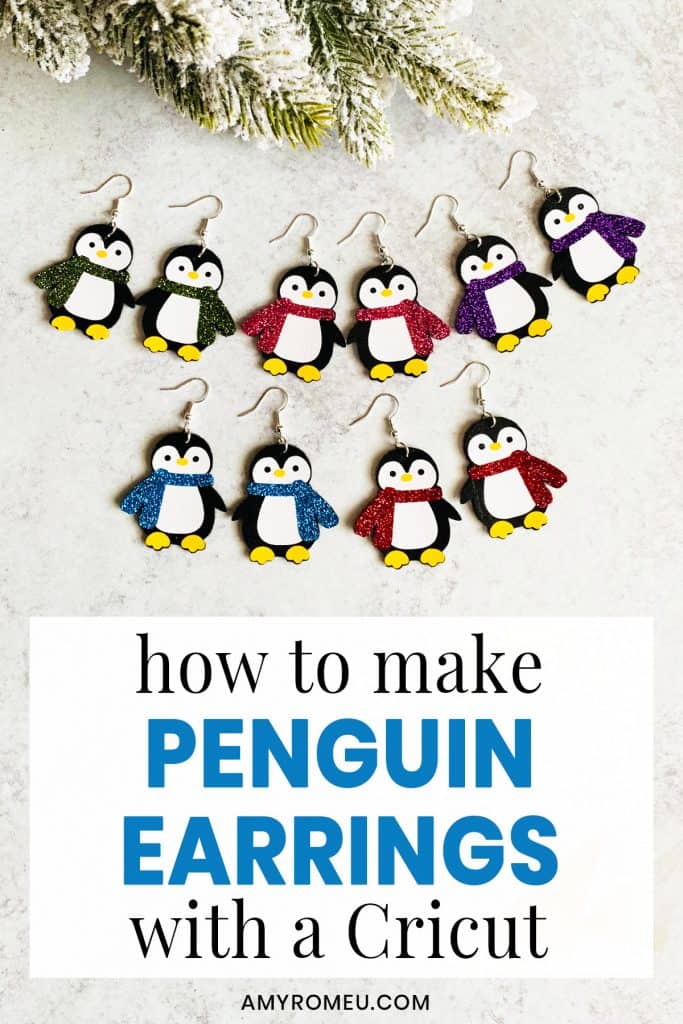
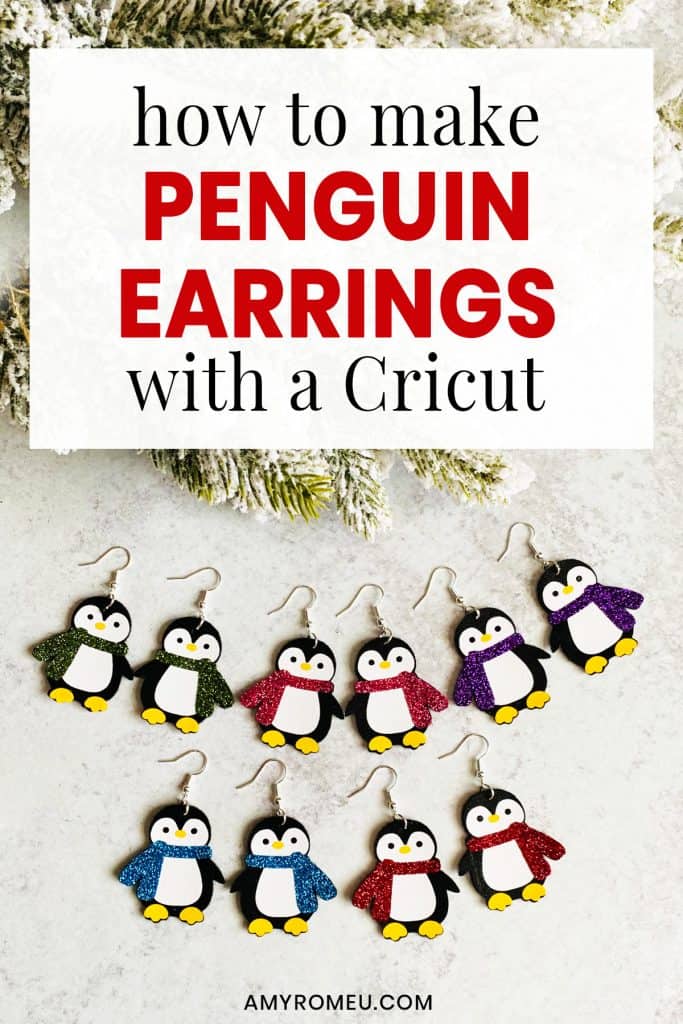
How to Make Penguin Earrings with a Cricut
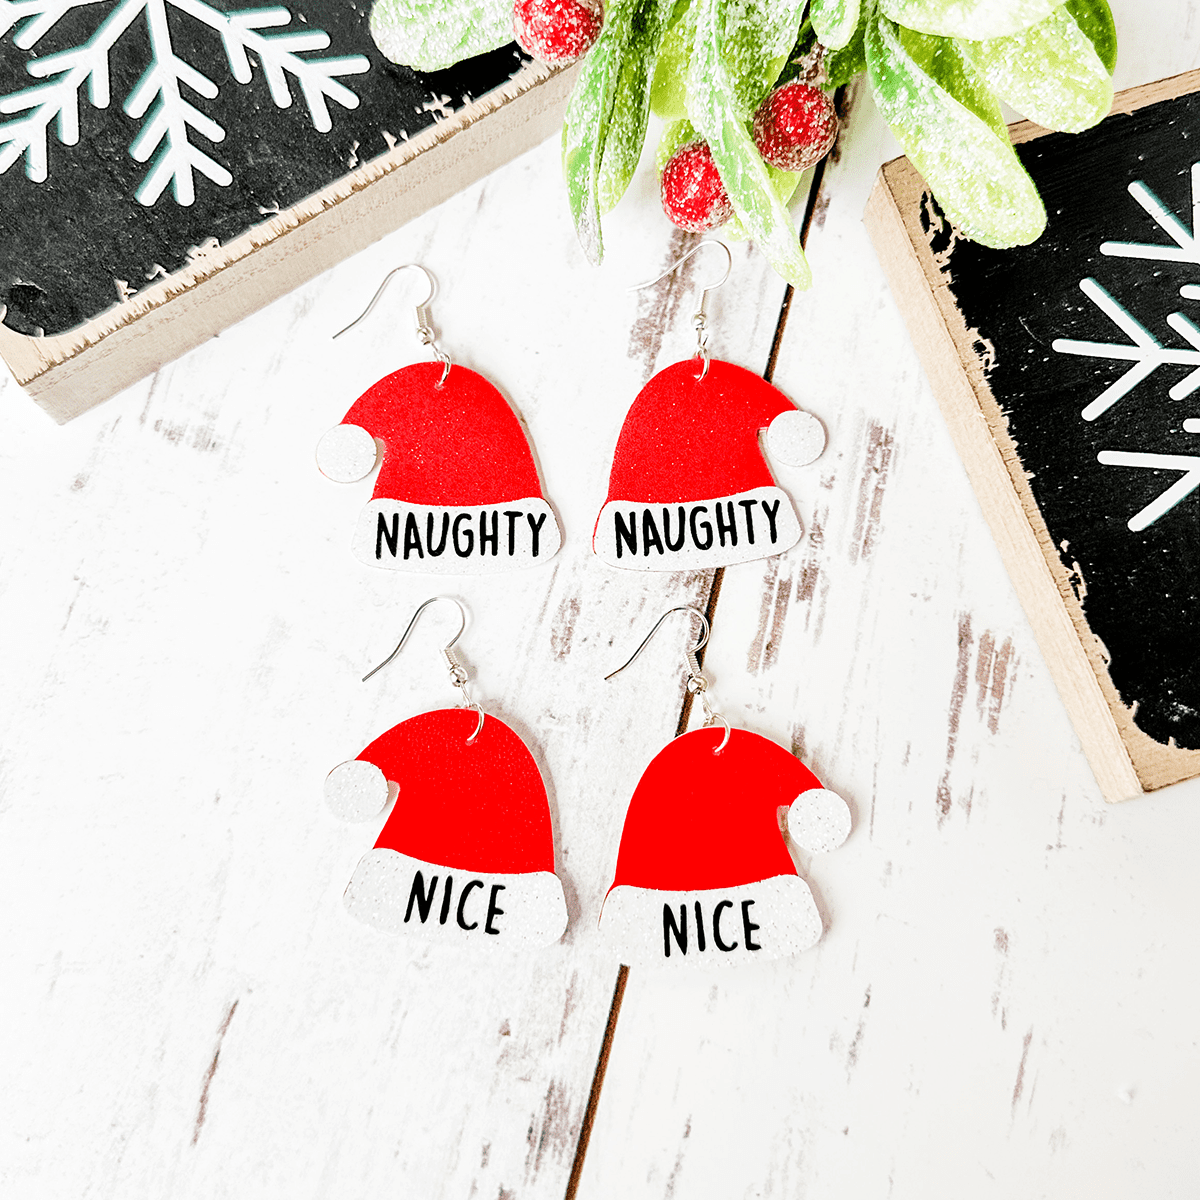
The holidays are around the corner, and I’m still crafting my heart out by designing lots of fun holiday earrings. If you’ve missed them, be sure to check out my Gnome Earrings, my Santa & Candy Cane Earrings, and my Snowman Earrings. I’ve asked my readers for more ideas, and I received so many requests for penguin earrings! So I’m fulfilling that request today with this DIY Penguin Earrings tutorial.
If you haven’t tried making earrings with your Cricut using faux leather and layered heat transfer vinyl, this is a great project to try. You can make these Penguin Earrings with the Cricut Maker, an Explore Air 2 or even the Cricut Joy! (If you plan to use the Cricut Joy, you’ll want to check out this post first.)
In this tutorial, I’ll give you my step by step instructions and tell you exactly what materials I used to make this project.
A link to download my original SVG file for this project is in the Materials list below.
If you’d rather watch a video tutorial, click on my Penguin Earrings YouTube video below:
Ready? Let’s get started!
Want to see all of my Cricut earring & jewelry tutorials? CLICK HERE
This post contains some affiliate links (which means if you make a purchase after clicking a link, I will earn a small commission at no additional cost to you). Read my full disclosure policy here.
Penguin Earrings – Materials List
- A vinyl cutting machine. I have the Cricut Maker, which you can get at Amazon here or at Cricut.com. You can also use the Cricut Explore Air 2 or even the new Cricut Joy!

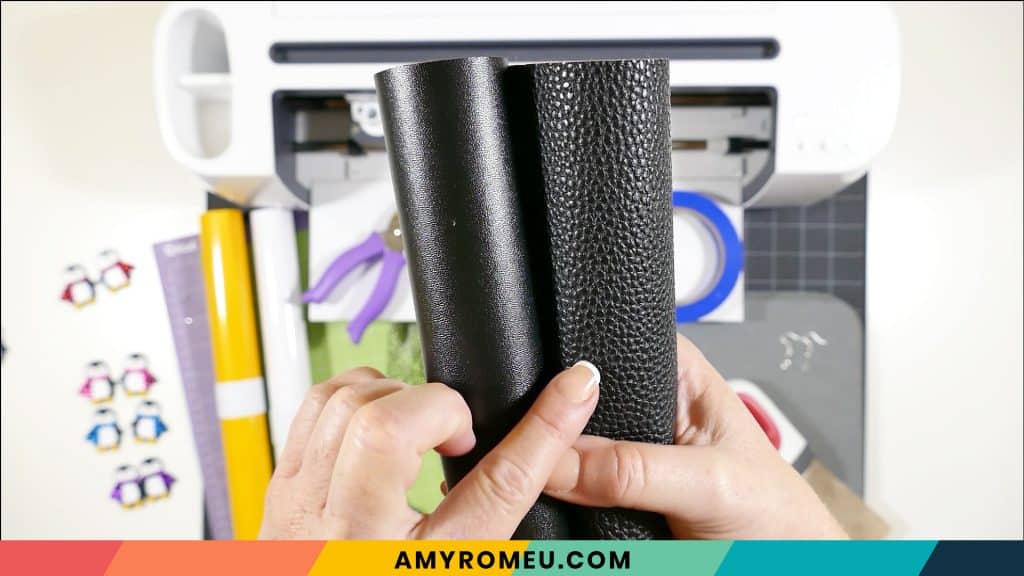
- Black Faux Leather. I used this smooth black faux leather and this pebbled black faux leather, both from Amazon. For this design, you can use either smooth or pebbled with great results.

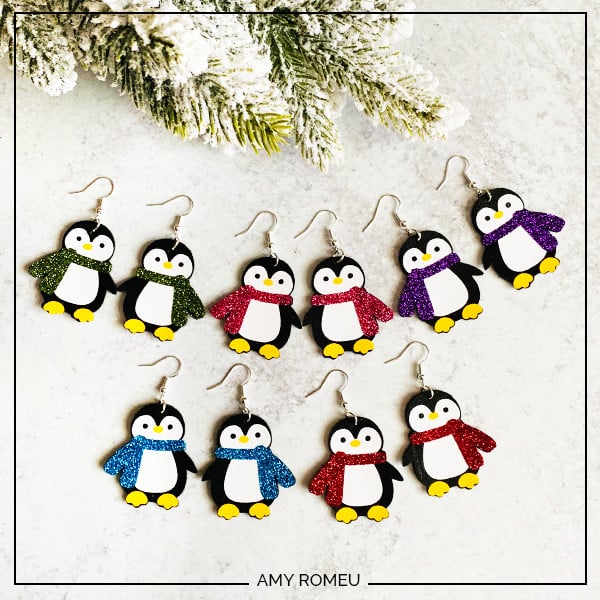
- Heat Transfer Vinyl in assorted colors. I used Siser Easyweed in White for the body, Siser Easyweed in Yellow for the beak and feet, and then Siser Glitter HTV in Green for the scarf. This is a great assortment pack of 12 different Siser Glitter colors that would be great for making penguins in different colors.
- Cricut Strong Grip (Purple) Cutting Mat. You can buy these on Amazon here.
- Cricut Standard Grip (Green) Cutting Mat. Available on Amazon here.
- Blue painter’s tape. This will help keep your faux leather in place on your mat. You can get it at any hardware store and most big box or grocery stores. Amazon also has it here.
- A weeding tool. I use the weeding tool that came with my Cricut tool set from Amazon here.
- Cricut EasyPress Mat. I like the 8×10 size for making earrings.
- Small curved scissors – I love these curved scissors from Amazon.
- A small hole punch (for punching earring holes in the faux leather). This is my go-to hole punch for making Cricut earrings from Amazon here.
- Earring hooks – I used these silver toned shepherd’s earring hooks from Amazon.
- Small jump rings – I used the silver toned jump rings from this assortment of 6mm size jump rings in different metal finishes from Amazon here. You could also use 5mm size jump rings if necessary.
- Two pairs of flat nose pliers – My favorites are Wubbers brand in the “Baby” size. My everyday use pliers are the Baby Wubbers Chain Nose Pliers and the Baby Wubbers Flat Nose Pliers.
- The SVG file template for these Penguin earrings. It’s Design #157 in my free resource library. You can get the password to my library instantly by filling out the form below, or at the bottom of this post.
NOTE: This design is for PERSONAL USE ONLY. If you’d like to sell earrings made from my Penguin Earrings SVG template, you may purchase a Commercial Use License from my shop here.
DIY Penguin Earrings – PROJECT INSTRUCTIONS
STEP 1 – Download the SVG Cut Files
Download my free Penguin Earrings SVG file (#157) from my Resource Library. (If you don’t have a password to the library, fill out the form above and it will be emailed to you instantly.)
Save the zipped folder that downloads to your computer. Then unzip the folder to access the folder’s contents. You’ll need to unzip or extract the files FIRST so you can upload the cutting file to Cricut Design Space.
STEP 2 – Upload the SVG File to Cricut Design Space
If you need help uploading a file to Cricut Design Space, click here, or watch the YouTube video for this project which has step-by-step file uploading directions.
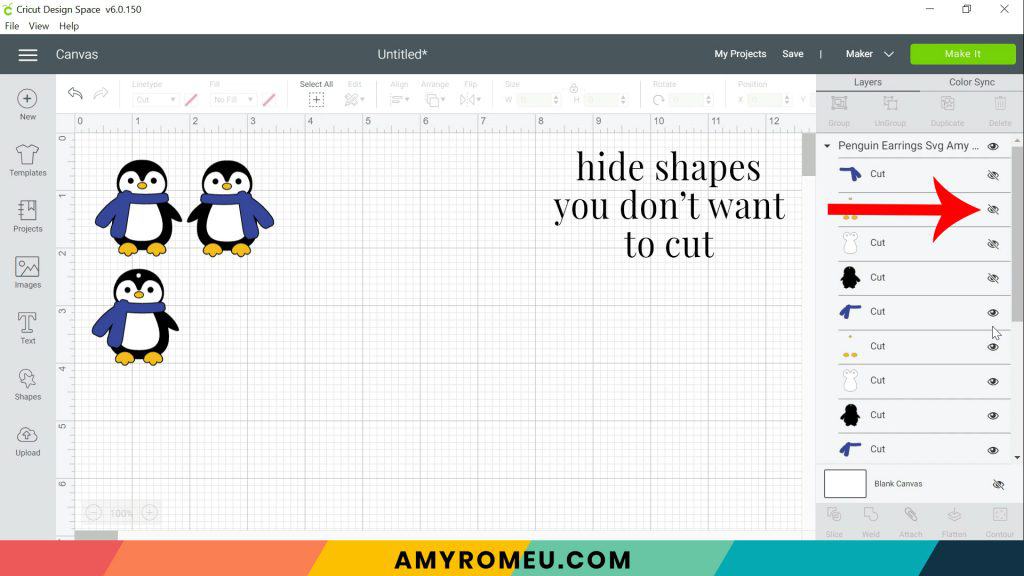
When the penguin earring shapes are on your canvas, choose if you want to cut the penguins with the pre-cut holes or without (if you’ll be making the holes yourself with a hole punch. Hide (or delete) the layers for the earrings you aren’t going to make now clicking on the eye next to the layers you want to hide.
I’ll be using a hole punch to make the holes in these penguin earrings after the layers are assembled, so I’ll hide the pre-cut earring hole pair.
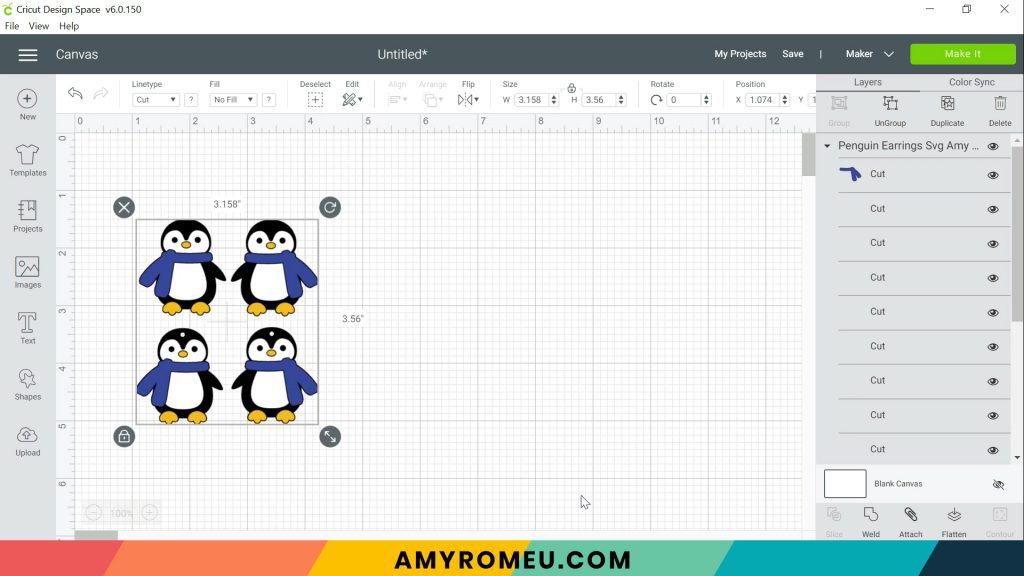
These earrings are already appropriately sized for earrings, but you can size them down slightly smaller if you’d like. Not too much or the nose will be too difficult to weed!
Click the green MAKE IT button.
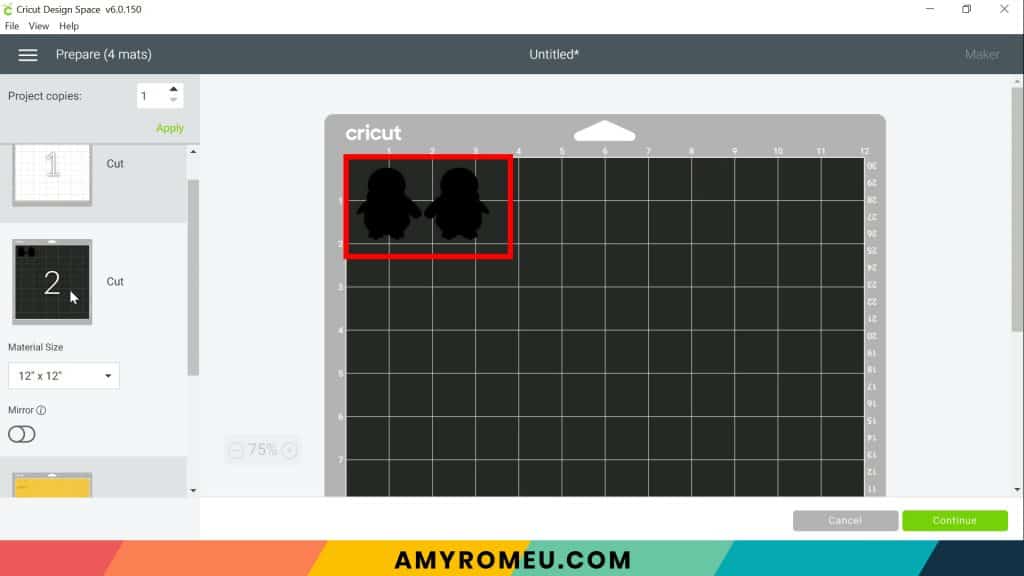
STEP 3 – Preview the Cutting Mats & Cut the Faux Leather To Size
The mat preview screens will load. The Cricut will cut one faux leather layer and 3 heat transfer vinyl layers (the body, the scarf, and the beak and feet), all on separate mats.
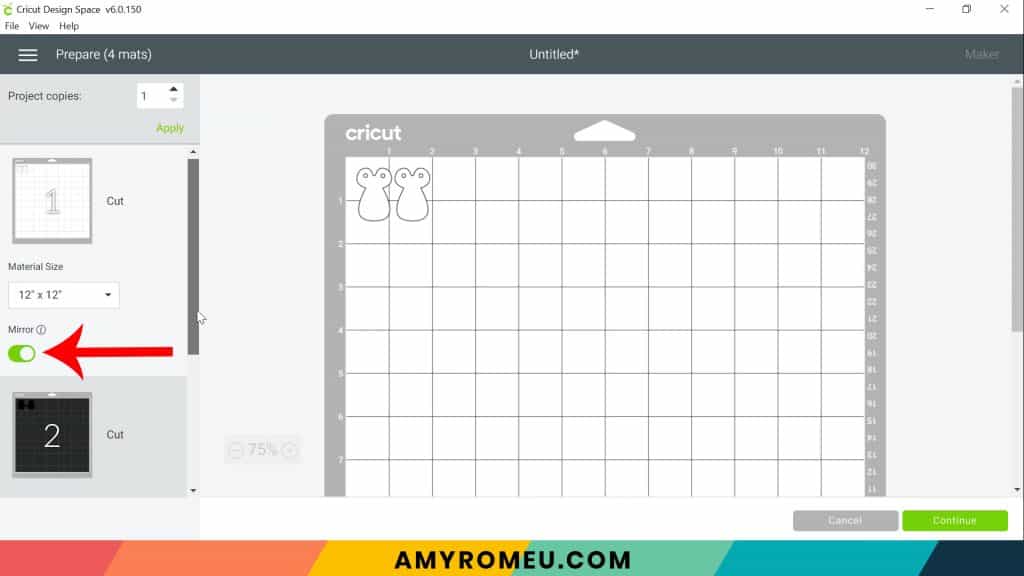
You don’t need to mirror the faux leather mat, but you will want to mirror the mats for the heat transfer vinyl mats.
Click on the black mat to see what size faux leather the penguins will cut from.
Then mirror each of the heat transfer vinyl mats in the mat preview on the left hand side. Press the green CONTINUE button.
STEP 4 – Make Material Selections
Now you’ll select your material for the first mat. I suggest cutting the faux leather mat first.
Note: If you’re using a Cricut Explore Air 2, turn your dial to “Custom” so you can choose the setting recommended below. If you’re using the Cricut Joy, set the machine to cut with a mat and then select the material setting below. You won’t have a purple cutting mat, but follow the directions below using the green mat.
I already have Faux Leather (Paper Thin) saved as a favorite material in Cricut Design Space like I do below, you can click on it to select it.
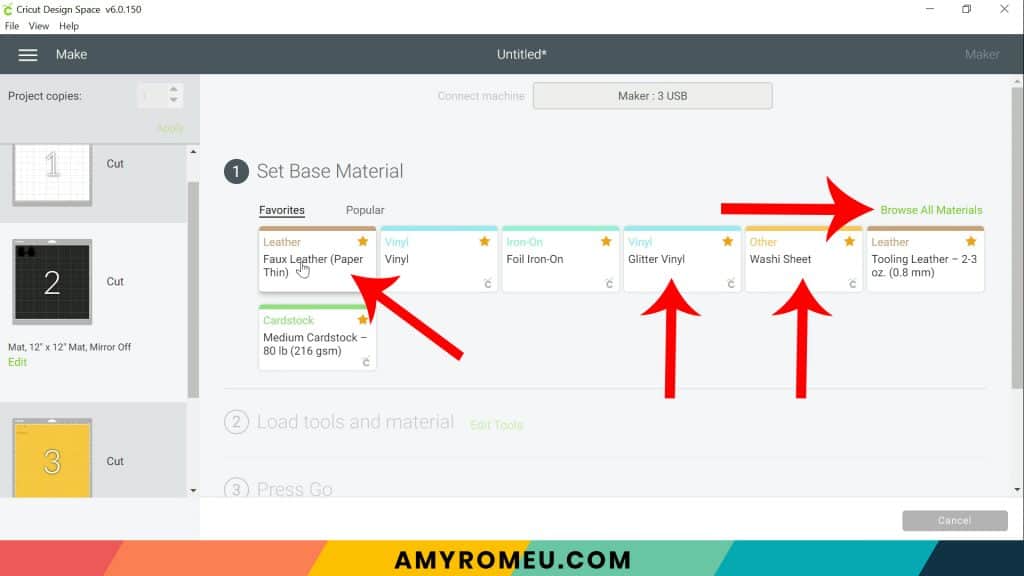
If not, click on “Browse All Materials” to search for this setting. Type “faux leather” in the search bar and click on the magnifying glass.
When Faux Leather (Paper Thin) appears, click on it to select it. Click on the yellow star on the right if you want to add this material setting to your “Favorites” so you can find it easily again in the future. Then click DONE.
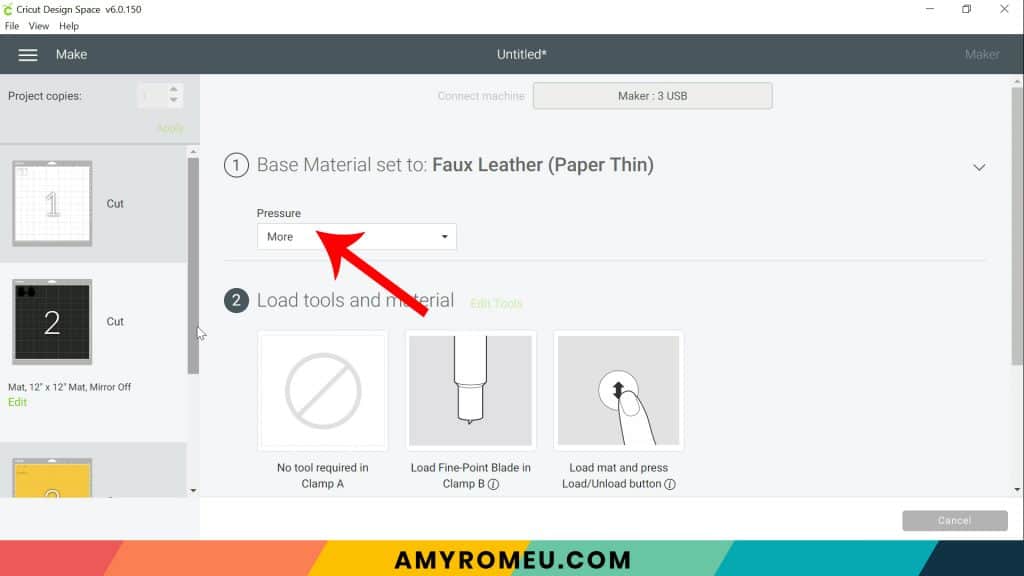
After you’ve selected Faux Leather (Paper Thin) as your material, choose MORE from the Pressure dropdown menu:
Now it’s time to prepare the faux leather mat for cutting.
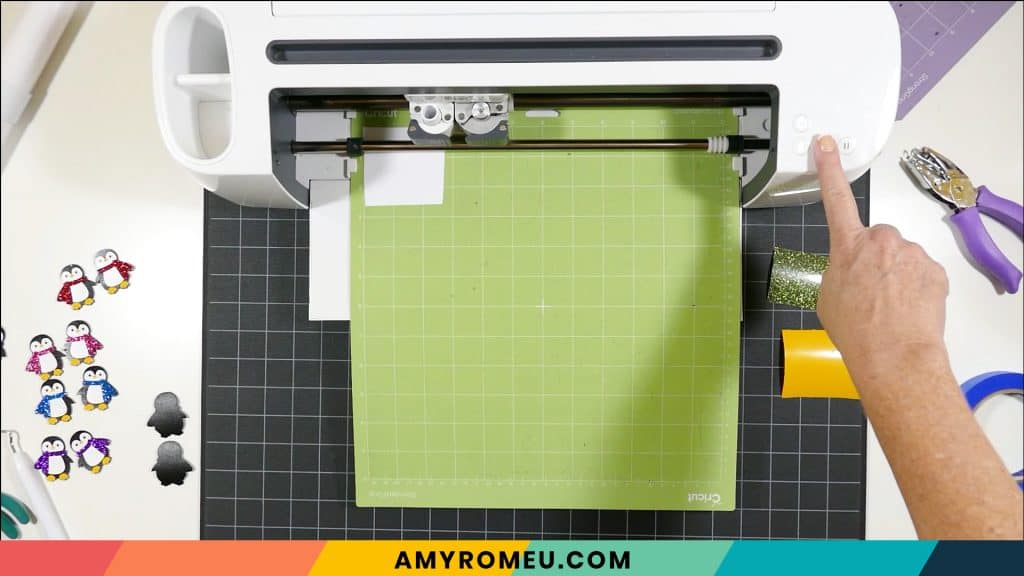
STEP 5 – Cut Faux Leather Mat
Cut a piece of black faux leather to the size you noted in the mat preview screen. Place your cut piece of faux leather pretty side down in the top left corner of a sticky purple cutting mat.
Now tape all around the faux leather with blue painter’s tape. Press the material down to your mat firmly with your hands.
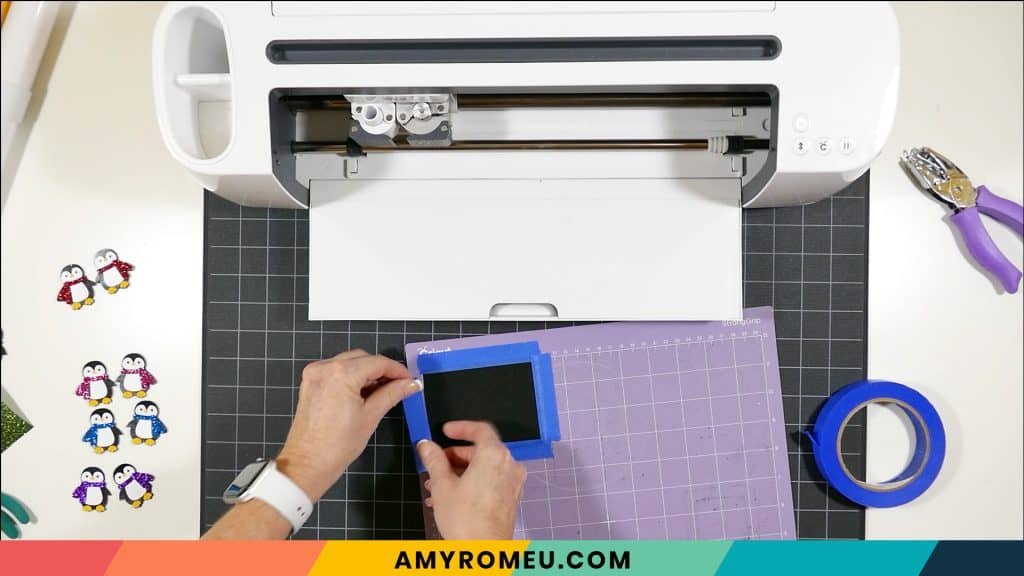
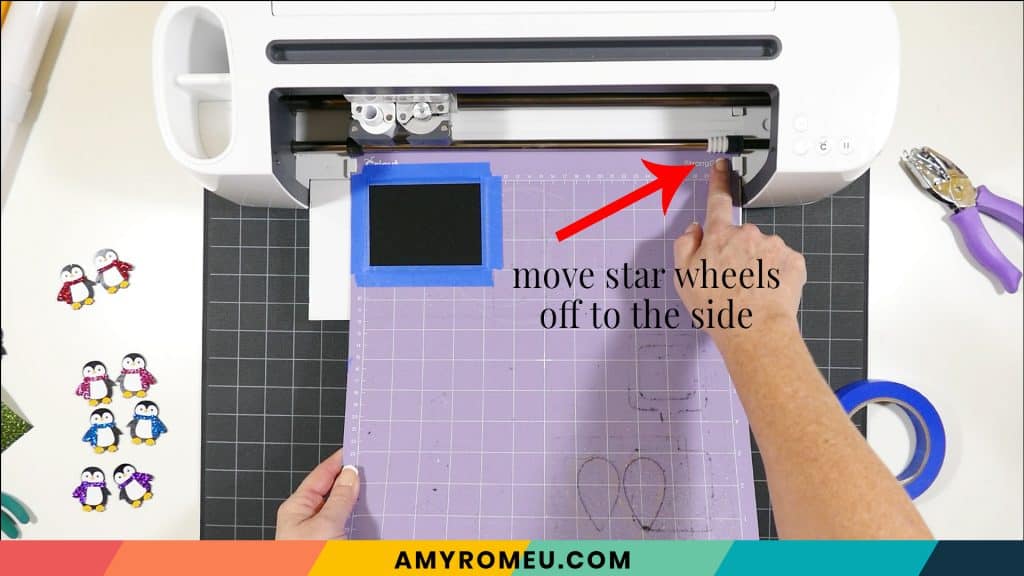
Load the prepared mat into the Cricut by lining the mat between the mat guides and then pressing the double arrows button. Be sure your white star wheels are moved out of the way so they don’t leave tracks on your faux leather!
The “C” Cricut button will start to flash, indicating the machine is ready to cut. Press the C button to begin the cut.
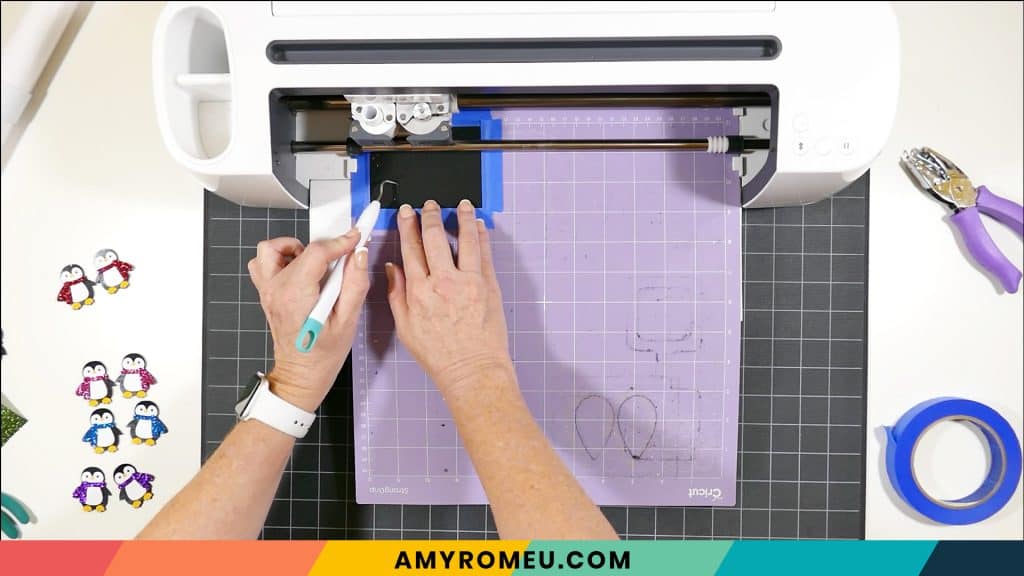
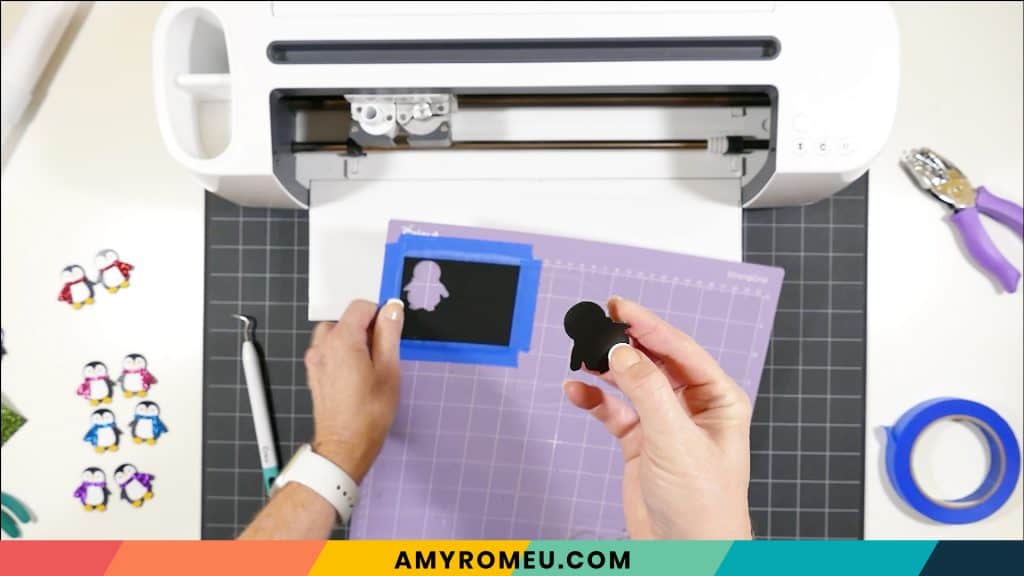
When the cut is finished, but before you unload the mat, use a sharp tool like your weeding tool and carefully lift the edge of the earring shapes to see if they cut all the way through. If they did, then click the double arrow button to unload the mat. If not, press the C button to make the cut again.
STEP 6 – Cut Heat Transfer Vinyl Mats
Return to Cricut Design Space to start cutting the heat transfer vinyl mats in the order shown on the mat preview screen.
For the heat transfer vinyl mats, I’ll use the Washi Sheet setting for the solid colors of vinyl (white and yellow) and Glitter Vinyl for the green glitter.
I use the Default pressure for all vinyl cuts (I usually repeat the cut for glitter vinyl, however – just press the C button again to repeat the cut).
Place the vinyl shiny side down on a green cutting mat. Cut each vinyl mat using the appropriate cut setting and weed to remove the excess vinyl.
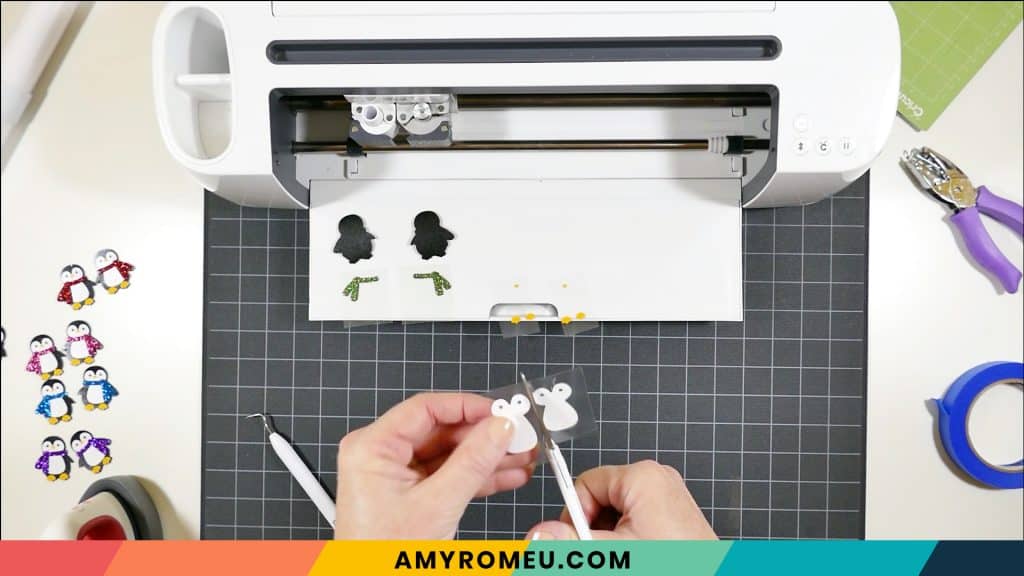
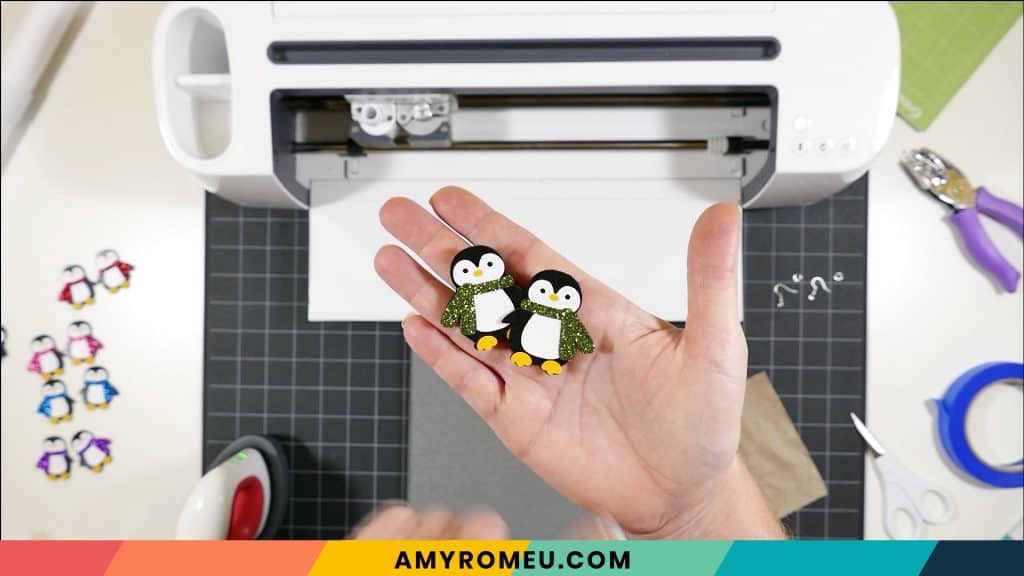
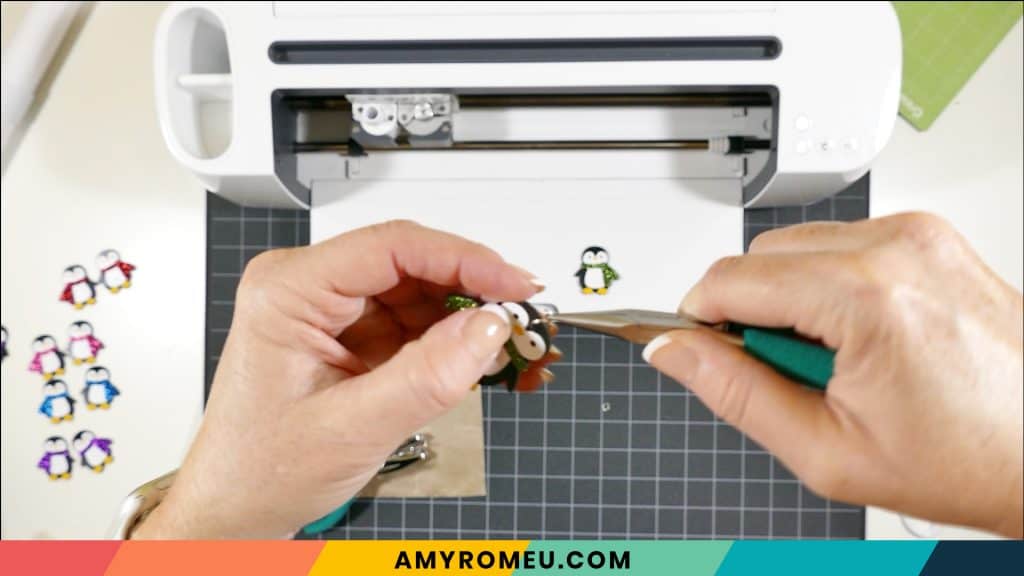
STEP 7 – Press the Vinyl onto the Faux Leather
Using an Easy Press Mini (on the lowest temperature setting) or an Easy Press (set to about 275 degrees), press the vinyl layers one at a time onto the penguin faux leather shape. Do the white body first, then the yellow beak and feet, and then the scarf.
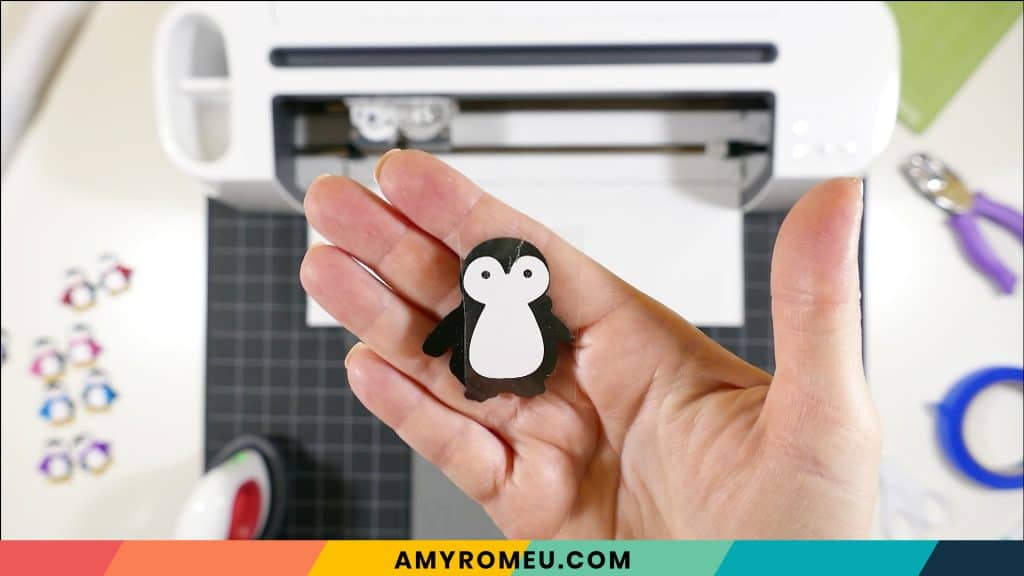
Cover with a cover sheet (teflon sheet or parchment paper) before pressing. Press this layer for 5-7 seconds, just long enough for the layer to adhere to the layer below.
Peel away the carrier sheet carefully. If the vinyl lifts up with the carrier sheet, lay the carrier sheet back down again and press more.
Repeat with the yellow layer, and then the scarf.
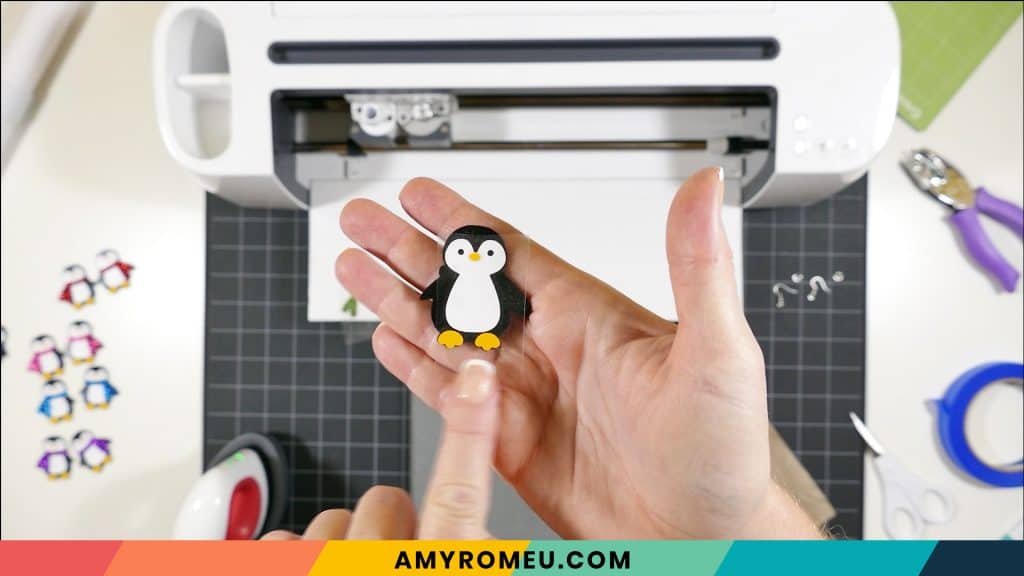
Then press the layers of vinyl onto the other earring.
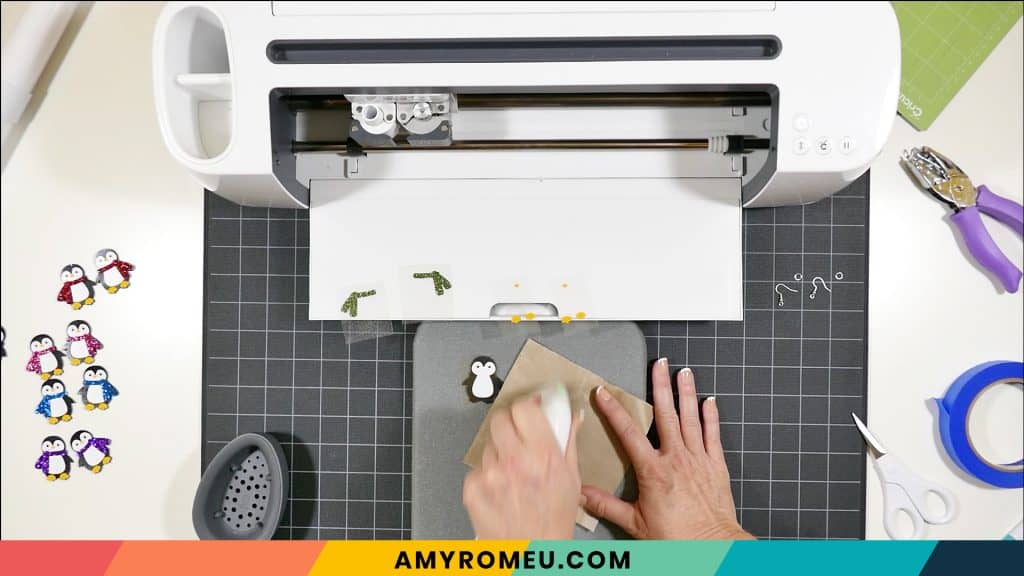
STEP 8 – Punch the Earring Holes
If you didn’t use the SVG with the pre-punched holes, use a 1/16″ hole punch to punch the earring holes. These are the two punches I use: this hole punch and this hole punch. They both punch through layers of faux leather very cleanly. If you don’t have a hole punch, you can use a sharp object to make the hole.
Punch the hole in the top of one earring, making sure the hole isn’t too close to the edge. Then use that earring as a guide to punch a matching hole in the other earring.
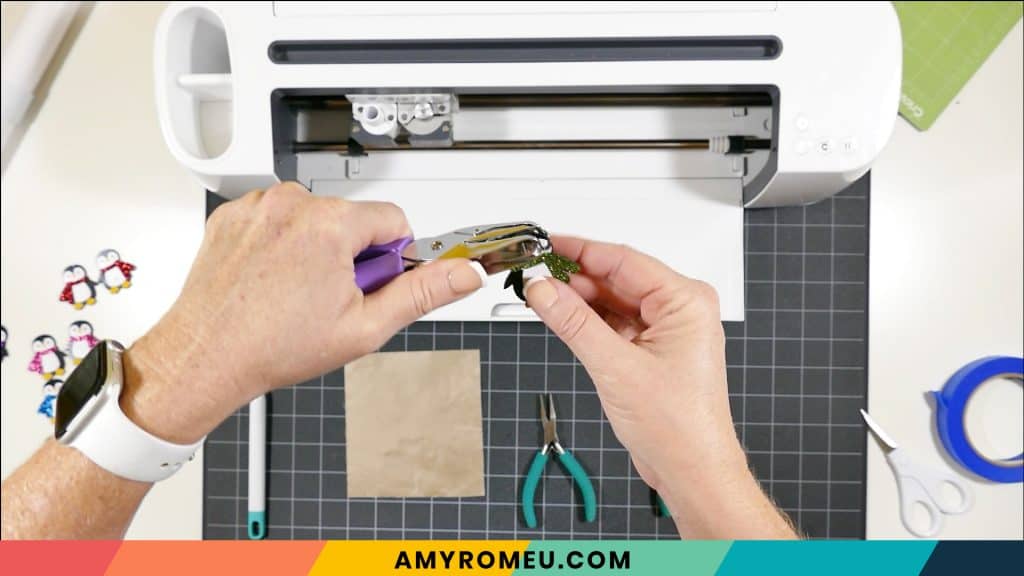
Now it’s time to attach the earring hooks.
STEP 9 – Attach the Earring Hooks
To attach the earring hooks, you’ll need small jump rings, earring hooks, and two pairs of flat nose pliers.
To connect the earring hooks, you’ll first need to turn the bottom loop on the fishhook earring 90 degrees so your earrings will hang correctly.
Grip the earring hook between your thumb and forefinger with one hand, and use flat nose pliers to grip the bottom earring hook loop. Twist the wrist holding the pliers firmly so the loop turns 90 degrees.
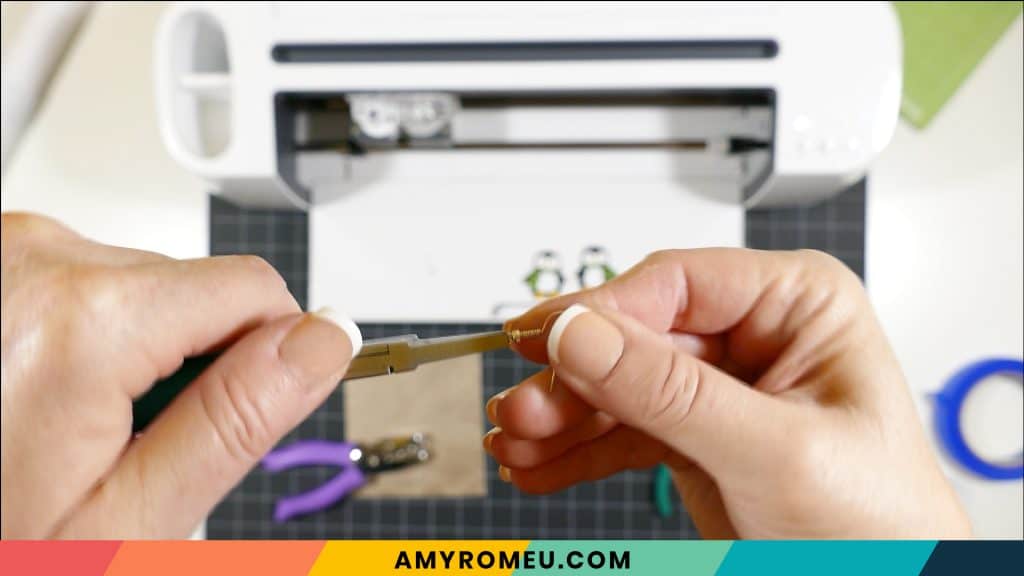
For more details on this technique, visit my post about how to make faux leather earrings hang straight here.
Once you’ve twisted both of the earring hook loops 90 degrees, use two pliers to grip each side of a 5mm or 6mm jump ring. Make sure the opening of the jump ring is facing up in the 12:00 position. Then twist one wrist to open the jump ring slightly.
With the jump ring open, slide on the faux leather earring, and then add the earring hook. Be sure the hook is facing in the right direction.
Then use the second pair of pliers again to grip both sides of the jump ring and twist the jump ring closed again.
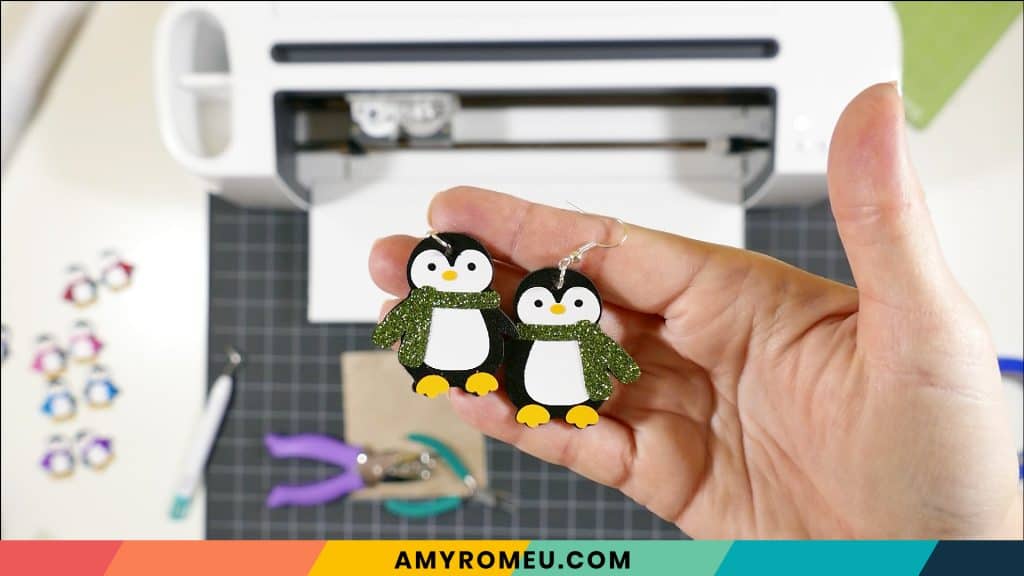
Repeat with the second earring. That’s it! Aren’t these penguin earrings cute?
If you do make this project, I would love to see your Penguin earrings! Please share a photo of them in the comments, or tag me on Instagram: @amyromeucreative
Want to see all of my Cricut earring & jewelry tutorials? CLICK HERE

WANT THE SVG FILE SO YOU MAKE THESE PENGUIN EARRINGS YOURSELF?
You can get it from my FREE Resource Library by filling out the form below!
NOTE: This design is for PERSONAL USE ONLY. If you’d like to sell earrings made from my Penguin Earrings SVG template, you may purchase a Commercial Use License from my shop here.
Want to remember this? Post this PENGUIN EARRINGS project to your favorite Pinterest board!
Oops, after watching your penguin video I posted this comment to the incorrect page…. sorry!
These are so adorable,
I can’t wait to make them!! Btw, I love your “Scientific Method” of placement, it’s very similar to mine!! 🥴
Thanks for another great instructional video Amy!!
Hi, Trudy! Thanks for your comment! 🙂
Thank you so much for the adorable patterns you have been sharing! I am so excited to make some of these!
Thanks, Deb! I’m so glad you are enjoying the 10 Days of Crafting!
I’ve been enjoying your tutorials and anxious to try, but I’m not sure where to buy the faux leather. I ordered a variety pack from Amazon and it didn’t look like great quality. S as my suggestions?
Thanks,Jen
Hi, Jen! Thanks for your comment. I link to all of the exact materials I use in each of my tutorials for your convenience, so you’ll want to check the tutorial for the specific project for the materials I use and recommend. I do buy a lot of faux leather on Amazon and for the most part I’m really pleased with it. I would say if you don’t love what you bought, return it and try again. There are so many cute faux leather shops on Etsy, too. I’ve linked to my favorites at the bottom of My Favorite Tools & Materials page on my blog: https://amyromeu.com/my-favorite-products/
Super cute. I will be making these for my grand daughters. Thank you
I’m so glad you like these, Christine! Thank you!
My mom loves penguins, I can’t wait to make these for her. Love your 10 Days of crafting. I’ve made almost all of your days projects. I’m a little behind. LOL
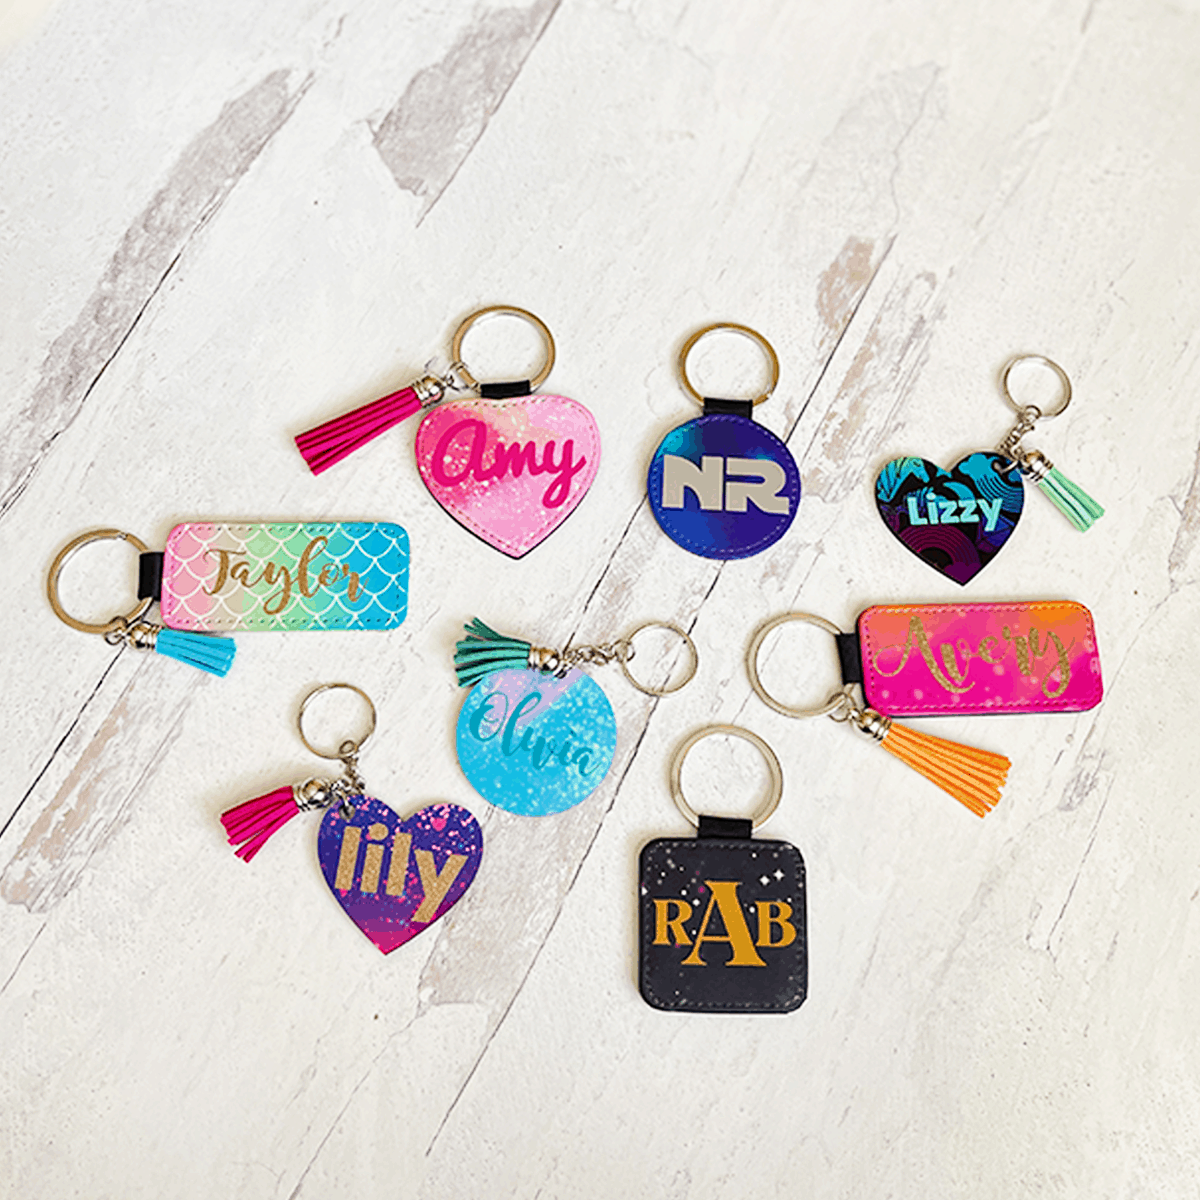
These are so cute! I want to thank you for inspiring me. I have been afraid to cut faux leather on my cricut. Since I discovered you from the makerfest I am excited to try. I had to purchase a few supplies first. I will be making something out of faux leather today! I think I’m going to try the keychains first. Thank you for sharing your wonderful talent!
I’m so excited, Angela! Thanks for letting me know you’re going to try crafting with faux leather! Let me know how it goes. 🙂
So adorable!!
Thank you, Debbie!
These just look fun!!
Thanks, Elizabeth! They are really fun to make, too. 🙂
I absolutely loved the key chains and didn’t think it could get any better, but these penguin earrings are adorable. I especially like the glitter scarf. Thank you so much!
Thank you, Sandy! I’m so glad you like the penguin earrings. They are so fun to make!
Love these. So darn cute.
Thank you, Mary! So glad you like these! 🙂
Love all the sets, soooo cute. An idea, how about Poinsettia earrings and gift tags or ornament?? That would be pretty, maybe in golds??
Thank you Amy!
Jill
Hi, Jill! Thanks for the idea! That *may* or *may not* already be in the works (but not for the 10 Days of Crafting). Stay tuned!
thank you – so cute!
Thanks for your comment, Valorie! It’s my pleasure. 🙂
OMG – every day that the email arrives for the 10 days of crafting I look at it and say, “I want to make that!” Love these – they are so cute. Thanks for all the projects. I can’t wait for my supplies to arrive so I can start making them. I’m so glad I watched your video from Holiday MakerFest that brought me here!
Thank you so much for your comment, Jay! I’m so glad you’re here! 🙂
I HAD to make this today!! I didn’t have yellow vinyl, so I used gold and I think it looks fine. Can’t wait to make some more!!
Gold must look so cute, Paula! I didn’t think of that, thanks for sharing. I’m so glad you like this project!
Just noticed that the penguin svg pattern is not there. I know you must be busy, busy, busy! I’ll check back tomorrow. So loving these holiday projects!
Hi, Jeanne!
Thanks for your comment. The files are there, I promise. 🙂 Your browser is not showing you the live page. To fix this, try refreshing or reloading the page a few times. If that doesn’t work, clear your cache and then refresh again. You can also try from a different device or browser.
Thank you.
Amy
Amy, these are so cute! For some reason I had a little more trouble with these than the candy canes. I used Cricut white everyday iron on and smooth faux leather, mini easy press on lowest setting and parchment paper but the vinyl wrinkled a bit, not sure what I may have done wrong? My mom loves penguins and red so I just had to make her some along with purple scarf ones for me. Do you also have any other recommendations or tips when turning the fishhooks? I purchased some on Amazon via the link from your recommended materials page but I keep having issues with them breaking. Any tips would be helpful. Thank you for this design and tutorial! 💜
Since my granddaughters love penguins but don’t have pierced ears and way to young to drive a car to use the key chain, I’m going to print these cute little guys out with paper & enlarge them and make ornaments with them. Thanks for the cute file.
Finally got earrings made
That’s awesome, Lula!