
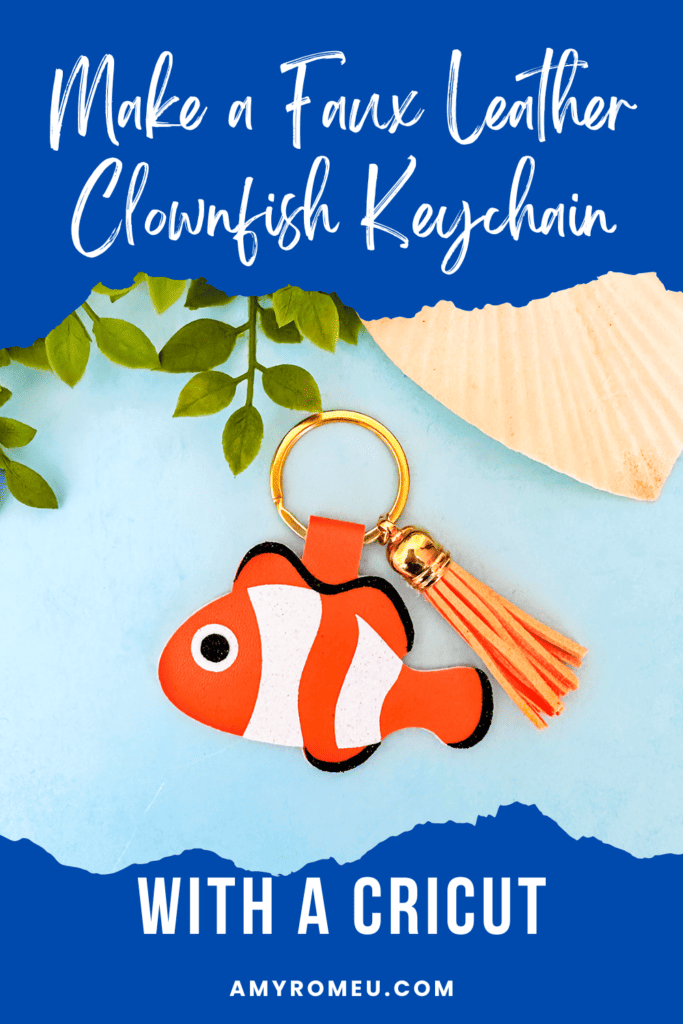
Make a Clownfish Faux Leather Keychain with a Cricut
In this tutorial, I’ll show you how to make a Clownfish Faux Leather Keychain using faux leather, heat transfer vinyl, and a Cricut! This keychain is an easy and fun summer Cricut craft.
Learn how to make a Clownfish Faux Leather Keychain with a Cricut
I love using faux leather and heat transfer vinyl to make simple and fun summer faux leather keychains with my Cricut. This Clownfish Keychain is so easy to make with a Cricut Maker, Maker 3, Explore Air 2 or Explore 3, or even the Cricut Joy.
I have the keychain SVG template for sale in my SVG shop here.
Get the SVG for this project from my SVG Shop
This SVG is also included in my Summer Keychains Event SVG Bundle – you can learn more and get it here.
So if you’re ready to try making this Clownfish Faux Leather Keychain with a Cricut, let’s get started!
Want to watch a video tutorial on YouTube instead? Check it out below!
How to make a Cricut Clownfish Faux Leather Keychain Video Tutorial

You can watch this video now on my Youtube Channel
Printable Instructions for this Project
For printable instructions for this project, click here.
How to make a Clownfish Faux Leather Keychain with a Cricut Step by Step
This page contains some affiliate links (which means if you make a purchase after clicking a link, I will earn a small commission at no additional cost to you). Read my full disclosure policy here.

Materials you’ll need to make a Clownfish Faux Leather Keychain with a Cricut
Get all 12 Days of Cricut Summer Keychain SVGs!
Love this Cricut Summer Keychain project? It’s one of my 12 days of surprise faux leather keychain designs created just for my Cricut Summer Keychains Event. Get all 17 event keychain SVGs at once by purchasing the Instant Access SVG Bundle below.
Step by Step Instructions
Step 1: Get the keychain SVG template for this keychain project
You can get the Clownfish Keychain SVG template included in the Cricut Summer Keychains Event Bundle here or individually from my shop here. You’ll receive an order confirmation email with a link to download the SVG after purchasing.
Save the zipped folder that downloads to your computer. You’ll need to unzip or extract the folder FIRST so you can upload the keychain SVG file to Cricut Design Space.
Step 2: Upload the SVG template to Cricut Design Space.
Click on Upload Image, then browse to where your unzipped file SVG is located on your device.
Click on it to upload it to Design Space. You’ll see a preview of the Clownfish keychain SVG on the screen. Click the UPLOAD button.

Then select the SVGs from your Recent Uploads row and click Add to Canvas. Your Canvas should look like this:

If you are using the Cricut Joy, you may need to resize the keychain layers down a bit to fit on the Joy sized mat. For any other Cricut machine, it isn’t necessary to resize the clownfish keychain. Click the green “Make It” button.
Step 3: Prepare to Cut the Keychain Shapes in Cricut Design Space
First, select “On Mat” for how you’ll upload your materials to Design Space.

Then click on each mat in the Mat Preview screen and toggle the MIRROR button to ON (green). This is because faux leather and heat transfer vinyl cut in reverse (face down) on the cutting mat.


Also drag the shapes on each mat away from the edges of the mat and away from each other slightly.
Make a note of what size faux leather you need to place on your mat to cut the keychain base shape out completely with a little room to spare. For this project and cutting with a Cricut Maker, I need a piece of faux leather about 4 inches wide and 6 inches tall.
See the Layering Guide graphic below to know which layer will cut from what material and in what order to press the vinyl layers.

Click back on the faux leather mat to select it again. Click the green CONTINUE button to make the first material selection.
Step 4: Make Material Selections
Choose the material selections you’ll use to cut each mat. I always cut the faux leather mat first.
I use the Faux Leather (Paper Thin) setting with “More” pressure for the faux leather mat.
If you don’t have this faux leather material setting as a favorite, click “Browse All Materials” to search for it and select it.
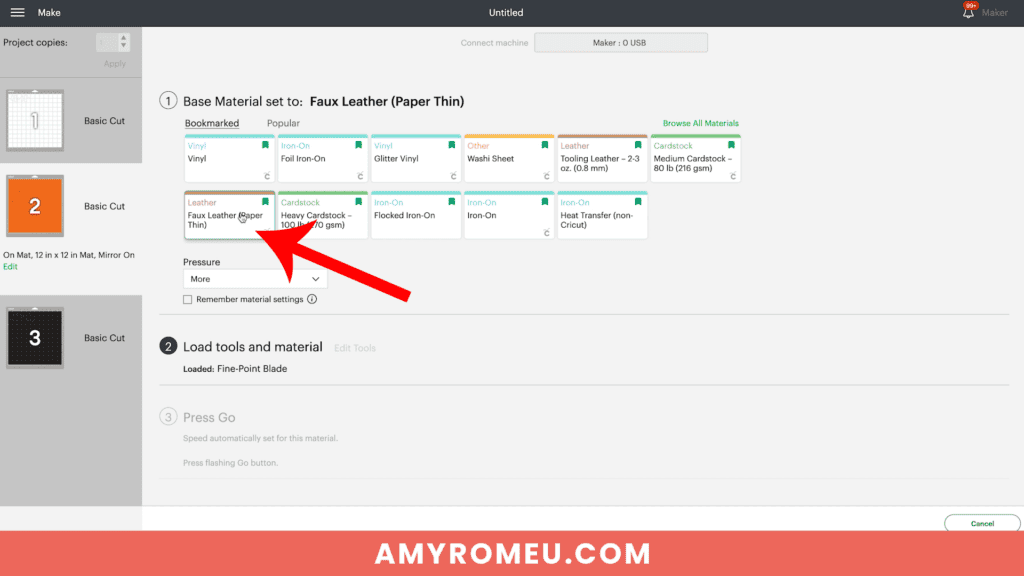
Note for Explore Air 2 users: Cricut Explore Air 2 users will need to turn the dial to “Custom” before choosing Faux Leather (Paper Thin).
Use the material setting recommended by your vinyl manufacturer for your vinyl.
I use the Vinyl or Washi Sheet setting with “Default” pressure for my regular vinyl mats, and the Glitter Vinyl setting with “Default” pressure for my glitter HTV mats.
If you are using Siser Glitter HTV like I do, I find it’s best to repeat the cut one time before unloading the mat.
Step 5: Cut the Faux Leather and Vinyl Mats
Cut a piece of faux leather just slightly larger than the size shown in the mat preview screen.

Place the faux leather pretty side down on a purple Cricut Strong Grip mat in the location shown on the mat preview screen.
Press the faux leather down to the mat well with your hands or roll over it with a brayer. Then put blue painter’s tape around on all sides.

Make sure the white “star wheels” on the roller bar are pushed off to the side so the wheels don’t make indentations in your material.
Load the mat into the Cricut and begin the cut.
Once the cut is complete, BEFORE unloading the mat, use a sharp weeding tool to check and see if the cut is complete.

If not, press the C button again to repeat the cut. You can repeat the cut as many times as necessary as long as you haven’t unloaded the mat.
When the cut is complete, unload the mat and remove the keychain shape. You can trim any stray fuzz with small curved scissors.

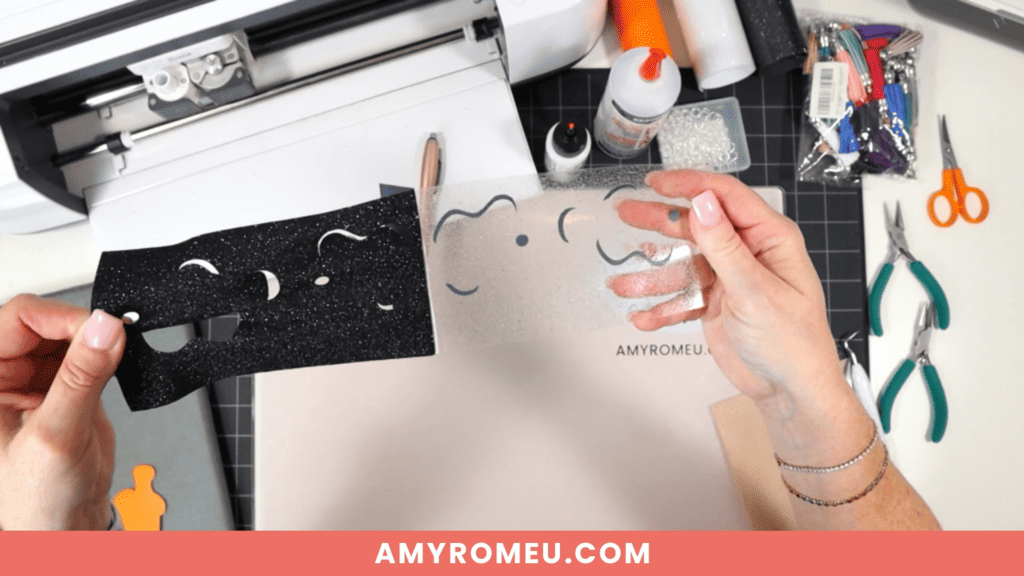
Repeat the cutting process on the Heat Transfer Vinyl mats using a Standard Grip green cutting mat and the recommended cut settings for your particular vinyl.

Remove the cut vinyl from the mat and weed away the excess vinyl.

Trim apart any shapes for the front and back of each side of the keychain, being careful not to trim apart the shapes that have been attached in the SVG to make placement easy.
For example, in the layer in the photo below, don’t trim each of the shapes apart from each other. Only trim the two fishes apart from each other.
When all of your vinyl layers are trimmed apart, it’s time to heat press the vinyl layers of the Clownfish Faux Leather Keychain.
Step 6: Assemble the Clownfish Faux Leather Keychain
Remember to refer to the Layering Guide for this project to see which layers to press in what order.
In this Clownfish keychain project, the white vinyl layer is pressed first and then the black vinyl layer goes on top.
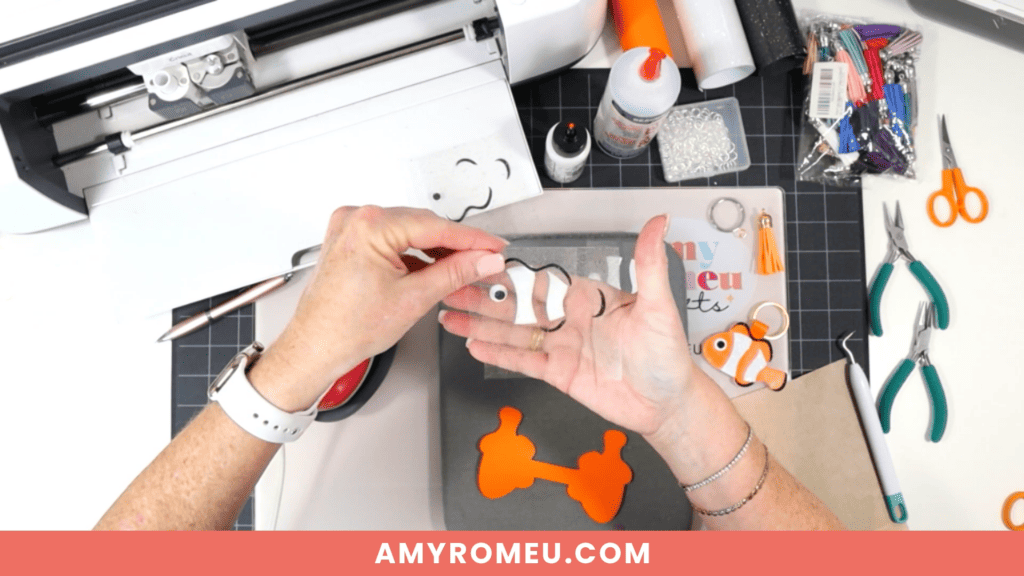
I press vinyl to faux leather using a Cricut EasyPress Mini on the “low” setting (one green bar). You can also use a traditional EasyPress set to 255-265 degrees.
Place the first vinyl layer onto the faux leather layer on a heat pressing pad.

Then cover with a piece of Teflon sheet, parchment paper, or butcher paper.
Press for about 10 seconds. After 10 seconds, remove the cover sheet and carefully try to peel up the clear vinyl cover sheet. If it peels up easily, remove it.

If the vinyl is pulling up, place the clear vinyl cover layer back down and repeat pressing for 5-7 seconds. Repeat this process until the vinyl adheres to the faux leather well.
Once the white vinyl layer is well pressed onto the faux leather keychain shape, repeat with the black vinyl layer.


PRO TIP: When both sides of the keychain have all the vinyl layers applied, place the warm faux leather keychain under your pressing pad or something flat for a minute or two to help it cool flat.
Thread a 1.25″ keyring onto the center of the connected clownfish faux leather keychain shape. You can do this step either before you heat press your vinyl, or after.

Now it’s time to glue the faux leather keychain together.
I’m using Fabri-Tac glue, but you can use any good fabric glue or craft glue that spreads easily and in a thin, even layer, like Bearly Art Glue.
Place the connected faux leather keychain shape pretty side down on your work surface. Spread glue evenly onto the back of one shape only, avoiding the center connector shape.
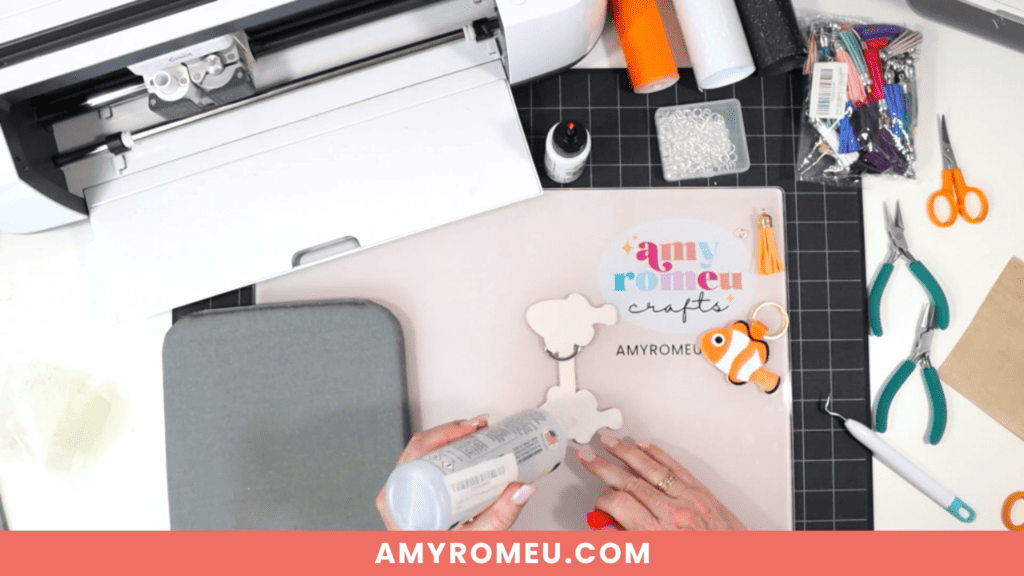
Fold over the top half of the keychain onto the bottom half. Carefully line up the front and back edges and press together. The edges will not stick together right now, and that’s ok!
The next important step will make sure we get a flat keychain with an almost seamless edge.
PRO TIP: Place the glued keychain under something heavy like a book for several hours to let the glue dry well.

After several hours, remove you keychain from the book and check on the glued edges.

Touch up any areas that aren’t completely sealed with glue by using a craft glue with a precision tip like Bearly Art Glue.
You can also color the faux leather edges with a color coordinated Sharpie marker if desired.

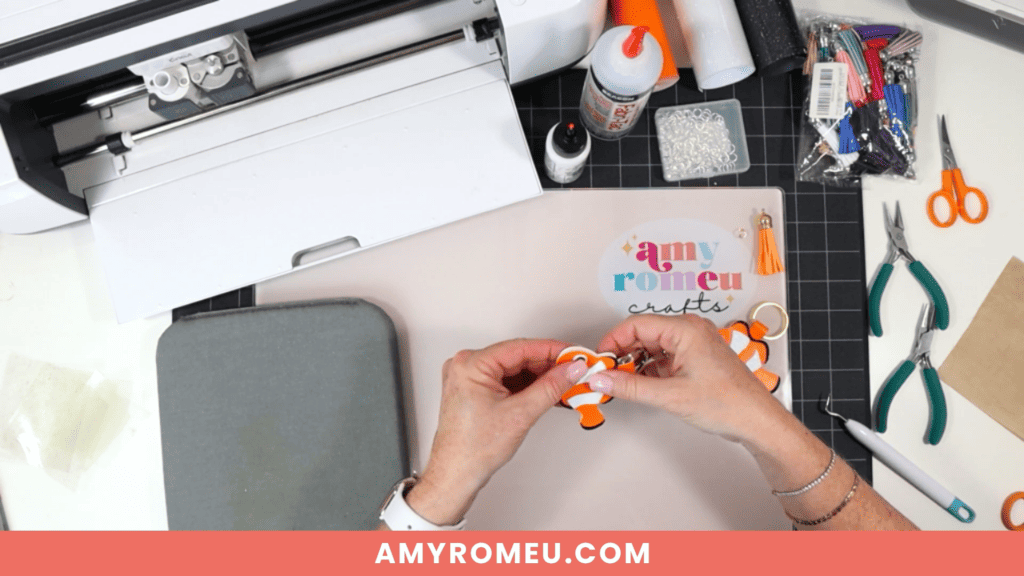
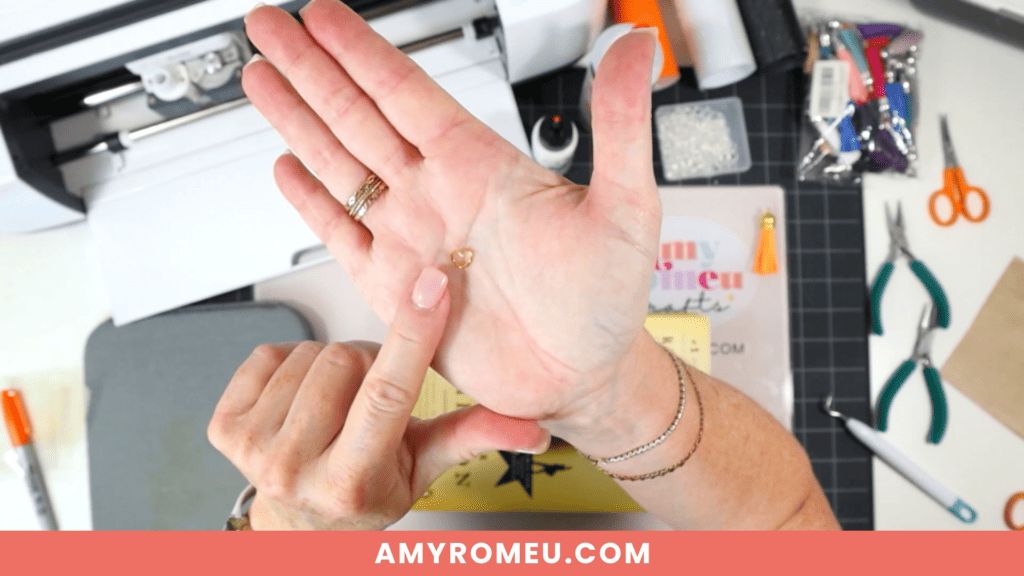
Next, to attach an optional faux suede tassel, use flat nose jewelry making pliers to open a 10mm jump ring. Connect the jump ring to the tassel loop and then attach it to the keyring. Close the jump ring securely.


That’s it! Your Clownfish Faux Leather Keychain is ready to attach to your keys or hang on a backpack!

I hope you’ll enjoy creating different colors of this Clownfish Faux Leather Keychain with your Cricut. Let me know in the comments if you like this project!
Will you make this project?
I would love to see what you have created! Please join my free jewelry making & crafting Facebook group and share your creations with me and all of my crafting friends!
For Printable Instructions, click the image below!

Cricut Clownfish Faux Leather Keychain
Materials
- See blog post for materials & links.
Tools
- See blog post for tools & links.
Instructions
- Download and unzip the keychain SVG folder. Upload the SVG file to Cricut Design Space.
- It isn't necessary to resize the keychain SVG unless you are using the Cricut Joy. (For the Joy, use the sizing arrows to make the keychain shapes smaller until it fits on the Joy sized mat.)
- Click the MAKE IT button.
- When Design Space asks how you will load the materials for this project, select ON MAT.
- In the mat preview screens, click on every mat and toggle the mirror button to ON. (This is for when you are cutting faux leather and heat transfer vinyl for the project. If you are using faux leather and permanent vinyl instead, only mirror the faux leather mat.)
- Now return to each mat and drag the shapes apart from the edges and each other slightly. Make a note of what size material you'll need to cut to place on the mat and cut the shape completely.
- When you've done this for each mat, click back on the faux leather mat. Click CONTINUE.
- I like to cut the faux leather mat first. Choose Faux Leather (Paper Thin) as the material setting. If you don't have this setting selected, click "Browse All Materials" and search for it. (On the Explore Air 2, turn your dial to Custom so you can see the Faux Leather material choice.) Then choose "more" from the Pressure drop down menu.
- Trim a piece of faux leather to the size you noted in the mat preview screen. Place it "pretty" side down on a sticky purple strong grip mat. Tape the faux leather down on all sides with blue painter's tape.
- Load the mat into the Cricut and press the C button to begin the cut. When the cut is complete, BEFORE unloading the mat, use a sharp object like a weeding tool to lift up the corner of a cut to see if it went all the way through. If it did, unload the mat. If not, repeat the cut by pressing the C button again. On a Joy, you'll repeat the cut by clicking on "Rerun" on the screen in Design Space.
- Remove the cut shapes from the mat. Trim away any fuzz with small sharp scissors. Color the edges of the faux leather if desired with a color coordinated Sharpie marker.
- Return to Design Space and cut any vinyl mats using a green standard grip cutting mat. Place heat transfer vinyl shiny side down. I use the Vinyl setting or the Washi Sheet setting with "default" pressure for regular heat transfer vinyl. I use the Glitter Vinyl setting with "default" pressure for glitter heat transfer vinyl and I repeat the cut once if the glitter is thick (Siser brand). For permanent vinyl, I use the Vinyl setting with "default" pressure (make sure mats are NOT mirrored).
- Weed away the excess vinyl and cut the vinyl shapes apart.
- Using a Cricut EasyPress Mini set on the "low" setting or an EasyPress set to 265 degrees, press the heat transfer vinyl layers onto the faux leather base shape one at a time. Refer to the Layers Guide in the tutorial for the pressing order. Place the first vinyl layer onto the faux leather and cover with a cover sheet - Teflon sheet, butcher paper or parchment paper. Then press for 5-10 seconds. Remove the cover sheet and try to peel away the clear vinyl carrier sheet. If the vinyl lifts up, replace the clear carrier sheet and cover sheet and press again for 5-7 seconds.
- Repeat with the rest of the vinyl layers.
- Place the pressed faux leather keychain under something like book or your heat pressing pad for a minute or so after pressing to allow the keychain to cool flat.
- Thread a 1.25" key ring onto the middle section of the larger connected faux leather keychain shape.
- Using fabric glue, carefully apply glue all over the back of just one of the connected keychain shapes, being careful to avoid getting glue on the center connecter shape.
- Fold the connected keychain shape over so the keychain shapes are touching and the edges line up neatly.
- Place the glued keychain under something heavy like a book to dry for several hours.
- To attach an optional tassel, use a 10mm jump ring and flat nose pliers to connect the tassel to the key ring.
Recommended Products
As an Amazon Associate and member of other affiliate programs, I earn from qualifying purchases.

Until next time… and happy creating!

Answers to your questions about making a Clownfish Faux Leather Keychain with a Cricut
Q: How do I get the SVG template for this project?
A: The SVG template for this project is in my SVG shop here. It’s available with a Personal Use and Small Business Commercial Use option.
Q: Can I get all the Summer Keychain Event SVG templates at once?
A: You can purchase all the Cricut Summer Keychain Event SVGs (17 in total) as a Instant Access Bundle in my shop here.
Q: What Cricut is best for cutting faux leather?
A: The good news is there is no “best” Cricut for cutting faux leather. You can cut faux leather with any of the five current Cricut machines – the Cricut Maker, the Cricut Maker 3, the Cricut Explore Air 2, the Cricut Explore 3, and even the Cricut Joy. That’s because you can cut faux leather with a Cricut using the standard Fine Point Blade that comes with each of these machines.
Q: What setting on Cricut do I need to cut faux leather?
A: I use the Faux Leather (Paper Thin) setting with “More” pressure to cut faux leather with any of the five current Cricut machines. I use the standard Fine Point Blade and repeat the cut as needed before unloading the mat. For more of my best Tips, Tricks, and secrets to cutting faux leather with a Cricut, check out my blog post here.
If you loved this Cricut faux leather keychain project, you’ll love these projects too:
Want to remember this project? Save this tutorial to your favorite Pinterest board!

Want instant access to my Free Resource Library full of SVG files?
Just Enter your name and email Below!
By signing up, you’ll get instant access to my FREE SVG Library with hundreds of crafting SVG templates! You’ll also get my weekly newsletter full of crafting ideas, tutorials, and inspiration! Unsubscribe anytime.
How cute are these clown fish keychains!
Love your videos. You are so easy to follow and you make things easy even for us beginners.
so cute and perfect for summer. Thank you so much!
Soooo darn CUTE!!!
Each day is a little bit cuter!
Nemo!!
I love this cute clownfish keychain!
Another cute one!
So dang cute 🥰
Love the keychain project. Streamlined instructions to make it simple to make.
The Clownfish Keychain is so adorable! Thank you for another great SVG file and tutorial
Another great keychain and tutorial! Thank you for making such cute keychains and great tutorials. And a BIG thank you for attaching the layers together to make placement easy for us!
This I have to try!
Thank you
This little clown fish is so cute! Thanks, again, for sharing your talents.
Great Instructions, love love the Clownfish!
I love this Clownfish, it reminds me of Nemo 🙂 My grandson would really love this. I just have to purchase the orange faux leather. Thank you for teaching us to make your fabulous Keychains.
Another cute keychain. I have been wanting to try the HTV for a while but haven’t seen much I wanted to do with it until now. The keychains area great start, but I’m excited to make some of the jewelry too. Thank you Amy for getting me to start using HTV🤗.
Cute little fishie!
I love all of your of your designs. I hope you decide to do another one of these either way thank you
This was a fun project, thank you for your time with all this work.
Nemo!! I love clown fish! Will be buying faux leather for this one.
Nemo!!! Perfectly goes with the sea turtle keychain!
You are amazing! Thank you for sharing all your talents! This have been so much fun to make!
My daughter is going to love this!
SO so cute can’t wait to make this for my students..
Looking forward to doing the cute fish key chain.
Cute little fishy…Thanx
Thanks so much, Amy for sharing your talent and time with us! Love your creations and special events! 🙂
Love this design!! Thanks again for another adorable project!
Amy, you are amazing. Thanks for sharing your creativity with all of us. 🙂
I can’t wait for my faux leather to get here! These are all amazing. Thank you!
I think my Granddaughter and I will have fun making these.
The clownfish is so cute!!!
Amy, I am just speechless 😶, your clownfish looks so lifelike 😍 love it ❤️
This is going to be so cute hanging off a backpack
The Clownfish is so adorable! It’s going to be fun to create them in many different colors.
Thank you Amy for all of your hard work. I just ordered orange faux leather. I love your clown fish!
This is adorable!! I love your creativity and cannot wait to make this!
nemo! so cute
Keep on Swimming Swimming I love Nemo and this one reminds me of him so very cute
I’ve loved all the keyrings in this series, but I think the clown fish is my most favorite. Thank you.
Very cute keychain. Can’t wait to try it!
Amy’s tutorials are easy to follow and provide tips and tricks for each design ensuring a successful product. The clownfish dedign is so cute!
Love the fish keychain. So cute
The clownfish looks a bit easier with only 3 layers and standard colors. Thank you Amy for your detailed instructions.
So precious! Can’t wait to make this!!
My son’s favorite movie was Finding Nemo, so this will be perfect for him!!
Love it!!
CUTE! TU for all the keychain these 12 Days
This is my new favorite!!!
So cute Amy. Your videos are so easy to follow. Thanks
Very cute clownfish
My keychain aquarium is going to be awesome 🙂 Once again you have created an amazing product.
So cute, thanks, Amy!
This would look so cute on a backpack for my grandson. He loves Nemo. Thanks Amy!!!
Too cute
This has been a lot of fun. I hate to see it end.
So glad this is one of the designs! I have orange faux leather left over from when I
did your halloween earrings. I can use some of it for this. Love your stuff!!
So cute!
so much fun. I love making these now that you made easy tutorials.
I love this cute fish! I think it would be fun to use different colors, like pink or turquoise, instead of orange!
This Keychain event is the Catch of the Day!!! I’m so glad I found it. I’m gonna Nemo amazing designs!
This is a favorite!! I will definitely be making this one.
uh-dorable
Nemo 🙂
Very Cote!
Thanks for the marvelous step by step instructions. Nemo is adorable!!!
I love clownfish, they always make me smile! I am definitely going to make this one and name him Nemo.
So cute!
This is adorable and makes me want to make a Dory too!
Super Cute I Love It..
Have you compared the longevity of using Bearly Art Glue versus a fabric glue? Which one do you think holds up the longest?
Hi, Heather! I haven’t done a proper comparison, but I’ve had a keychain on my own keys since March that I glued with Bearly Art Glue and it’s still solid as a rock.
This little guy is so cute! Once my grands see my DS uploads, Grammy will be busy!
Looks like Nemo. Love it.
Yet another stunning keychain project! You make everything look so easy and your tutorial/instructions are so easy to follow. Thank you for sharing your talent and knowledge with us!
how cool. Finding NEMO is my favorite character. cant wait to make this
I love your designs – especially the keychains! I had to order some faux leather and finally received it a couple of days ago. I’m having some difficulty finding faux leather with polka dots. If you have any ideas of where I can get some, please let me know!
Thank you!
Lynn G
I just love this little clownfish keychain!!!
Very cute fish Keychain. Thanks for sharing.
Thank you Amy for another adorable SVG keychain design that is perfect for all ages. The clownfish is so cute!! You have been so kind to share your knowledge, expertise, and amazing SVG designs with us. You are the best!!
This is so adorable!
Love it. Thanks again. I can’t wait to start making them.
Love this little clownfish it is so cute!
Thanks for always including these detailed blog posts of instructions along with the videos. They really help! And thanks for keeping both available after the event. I can’t possibly make all these keychains in 12 days 🤪🤪🤪
This clown fish is so adorable. Another great day of fantastic keychains.
I don’t have any orange faux leather, gives me an excuse to go shopping!
I love this one! Before I retired, I used to tell my coworker to “just keep swimming” when we would feel overwhelmed at work, so I think I’ll make this for her! Thank you so much Amy!
Great tutorial
Hope Dory is day 11!!!
Such a cute and fun key chain project!! Love it!
Cute keychain thank you
This would be cute with glitter vinyl!!
Another cute one!
Clownfish always make me happy! Thanks!
I love this one! The grandkids will want to take it from me!!
Such a cute Clownfish keychain, Amy!! Thank you for the detailed instructions. It looks like a quick project that even a beginner like me could easily do. Thanks again!!
Day 10 did not disappoint! That clownfish is adorable. Thank you for providing the svg, video and tutorial.
movie memories. love it
All i can see is Nemo in this keychain. I love it and hope that next time you make a Dory keychain next 😀 Thank you for making this cute event and super easy patterns too!
Thank you for making these videos seem so easy!!
so cute
So cute. Looks easy to make.
Good for the aquarium crowd.
OMG its nemo <3