
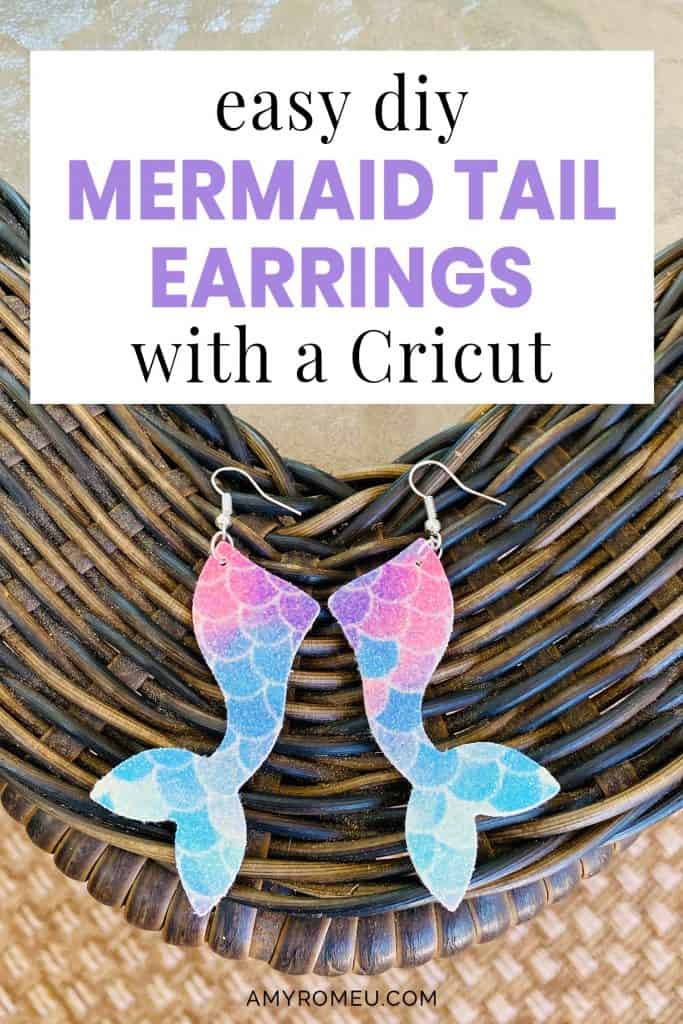
Easy Cricut DIY Mermaid Tail Earrings

How To Make Mermaid Tail Earrings
If you’ve seen the really pretty printed mermaid scale faux leather at Hobby Lobby but you weren’t sure what to do with it, I can totally relate! I bought some of the beautiful rainbow mermaid scale faux leather ribbon and I’ve been holding on to it for a few weeks. Finally my daughter suggested I make faux leather mermaid tail earrings with it, and I thought that was a great idea!
I made these mermaid tail earrings with my Cricut Maker, but you can also make them with the Cricut Explore Air 2, the Cricut Joy, or you can even cut these earrings by hand, no cutting machine required! No matter how you do it, this is a great DIY faux leather earrings for beginners project.
If you want to make these fun and easy mermaid tail earrings yourself, I’m sharing my original SVG cut file free! You’ll find out how to download my free SVG file for this project at the bottom of this post.
Ready to learn how to make these easy DIY faux leather mermaid tail earrings? Let’s get started!
But first, if you want to watch a video of this project first, click here:
This post contains some affiliate links (which means if you make a purchase after clicking a link, I will earn a small commission at no additional cost to you). Read my full disclosure policy here.
DIY Cricut Mermaid Tail Earrings – Materials List
- A Cricut. I have the Cricut Maker, available at Amazon here. You can also use the Cricut Explore Air 2 or even the new Cricut Joy, on Amazon here. You can see all of these machines available on Cricut.com here.
- Cricut Strong Grip (Purple) Cutting Mat. You can buy these on Amazon here, or at Michael’s here. They are also available at Hobby Lobby, Joann’s, and Walmart.
- If you don’t have a Cricut or other cutting machine, don’t worry! These quick and easy mermaid tail faux leather earrings are a very simple shape. You can print out the included .png file and cut the pattern out of the faux leather by hand.
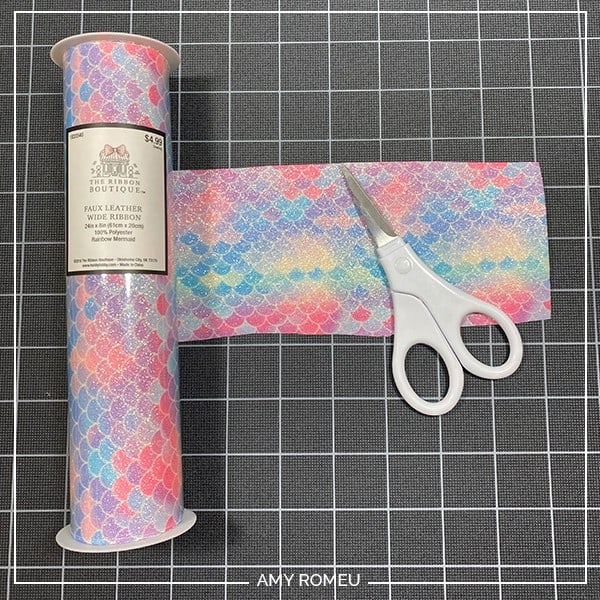
Mermaid print faux leather. I used this mermaid print faux leather ribbon from Hobby Lobby. They also have these mermaid scale faux leather ribbons to choose from.
Generally, you’ll find Hobby Lobby faux leather ribbon in the fabric section, near the ribbon spools, instead of over by the crafting or Cricut supplies.
I also really love this mermaid scales faux leather from the shop Craftyrific on Etsy (it’s one of my favorite faux leather shops!).
This assortment of mermaid scales faux leather from Amazon looks great, too! I’m going to have to get some and try it!
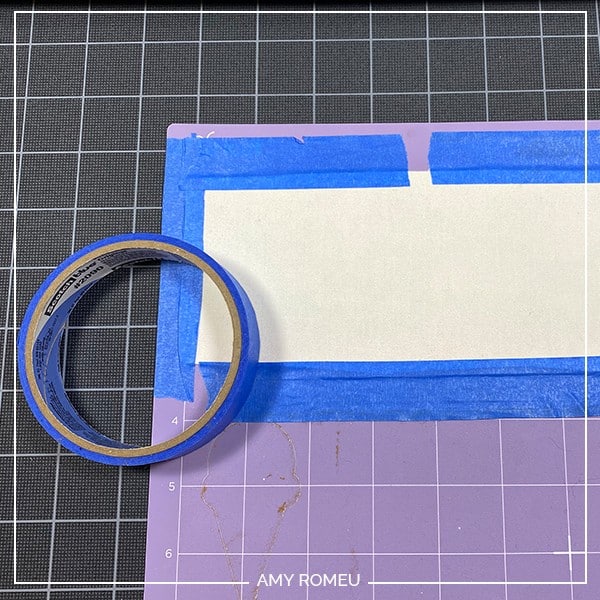
- Blue painter’s tape. This will help keep your faux leather firmly in place on your cutting mat, without damaging your mat or your material. You may already have some from a previous painting project. Or you can get it at any hardware store and most big box or grocery stores. Amazon also has it here.
- A weeding tool or a sharp pointed tool. I use the weeding tool from my Cricut tool set here.
- Glue with a fine tip. My favorite is Art Glitter Glue with the precision tip. It doesn’t have glitter in it, and the screw on precision tip makes applying glue to small items like earrings very easy. You can get it on Amazon in a small bottle here or as a large and small bottle set here.
- A small hole punch for cutting the earring holes. This is my go-to hole punch for making Cricut earrings from Amazon here. I love it and it’s super inexpensive. It is called a “paper punch” but I use it all the time to punch through two layers of thick faux leather with no problems.
- Earring hooks – I used earring hooks from this assortment of earring hooks in different finishes these from Amazon here. Hobby Lobby, Michael’s, and other craft stores, as well as your local bead store, will have lots of earring hooks as well.
- Small jump rings – I used this assortment of 6mm size jump rings in different metal finishes from Amazon here. Your local craft store or bead store will have plenty of jump rings to choose from if you want to pick some up in person. You could use 5mm size too if that’s what you have, try not to go smaller than that or your earrings won’t dangle freely from the earring hook.
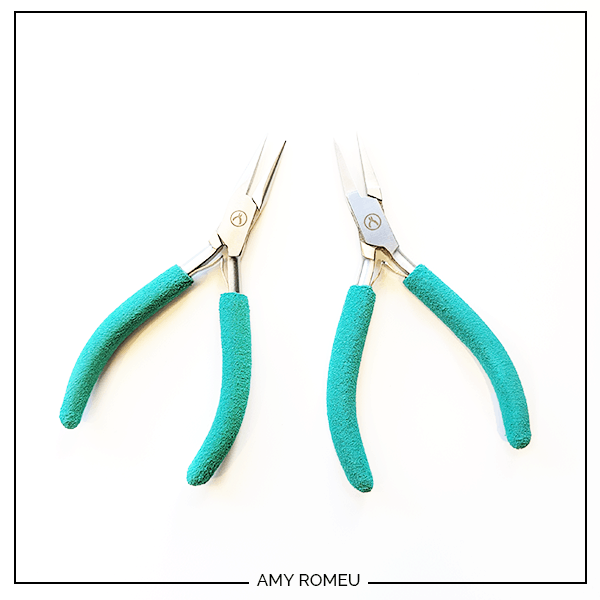
Two pairs of flat nose pliers – I’m using one pair of wide nose pliers and one pair of needle nose pliers here, but you can use any two flat nose pliers you have around the house (or strong tweezers in a pinch!).
My favorites are Wubbers brand in the “Baby” size. You can see the Baby Wubbers Chain Nose Piers on the left on Amazon here, and the Baby Wubbers Flat Nose Pliers on the right on Amazon here. These are very high quality pliers that will last you a long time!
Note: Be sure to check out my post Beginner’s Guide To Jewelry Making Tools for all the information you need to know about buying and using jewelry making tools.
PROJECT INSTRUCTIONS
STEP 1 – Download Free SVG
Download the free SVG cutting file for these earring shapes from my free Resource Library. They are Design #141. You can fill out the form below to get the password to and link for my Resource Library emailed to you instantly.
Save the zipped folder that downloads to your computer. You’ll need to unzip or extract the files FIRST before you can upload the cutting file to Cricut Design Space. Make a note of the file location after you unzip it so you can find it in the next step.
NOTE: If you don’t have a Cricut, just print the .png file included in the download folder you get my Resource Library. Print out the page on letter sized paper and trim out the shapes with small scissors. Then place your cut out template on the back of the faux leather and trace the outline. Then trim out the four shapes. Proceed to Step 6!
STEP 2 – Upload SVG to Cricut Design Space
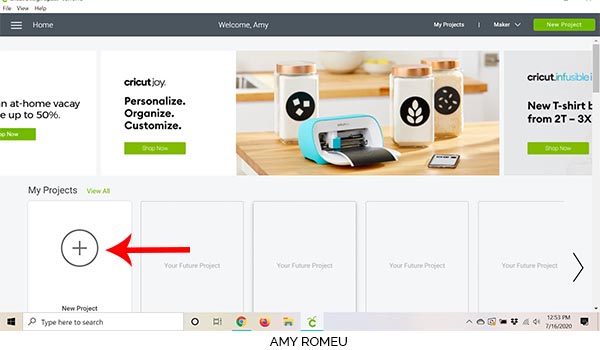
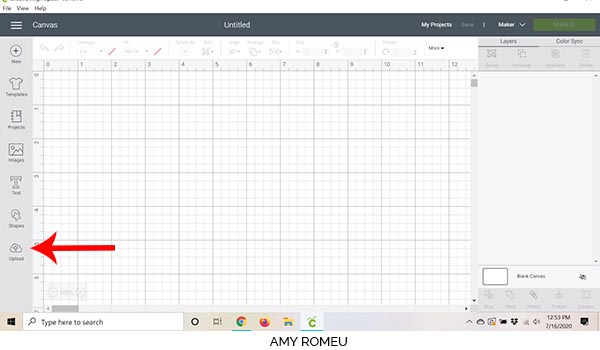
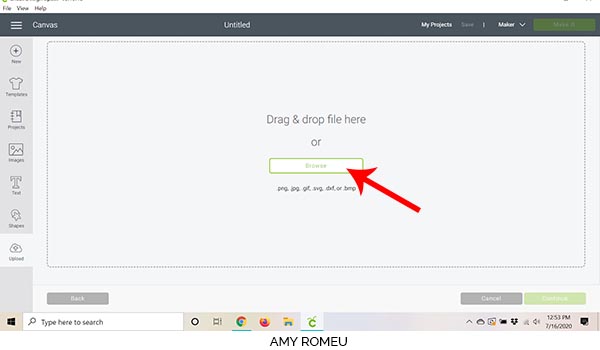
When you open Cricut Design Space, click on NEW PROJECT to get started. Then click on UPLOAD from the left hand side menu.
Click on the UPLOAD IMAGE icon, then click BROWSE to locate your file.
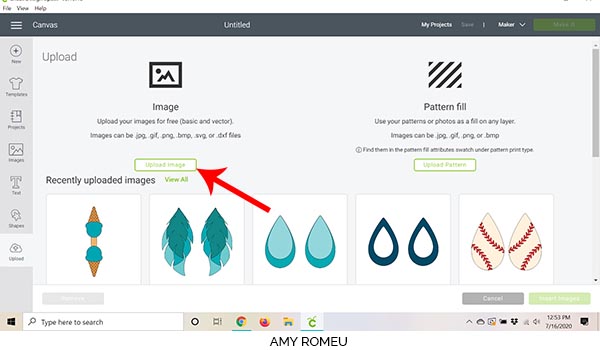
Navigate to where you’ve saved the already unzipped SVG file for this project. Double click on the SVG file to bring it into the upload screen in Design Space.
If you get an error saying “file type not supported,” that usually means your folder that contains the SVG file is not unzipped, or you are trying to upload the wrong file.
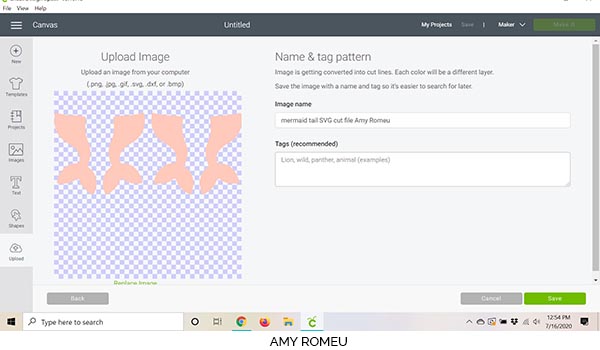
You’ll see a preview of the earring shapes for this project. Hit the green SAVE button.
After you’ve selected your file to upload, you’ll see it as the first item in your “recently uploaded designs” row.
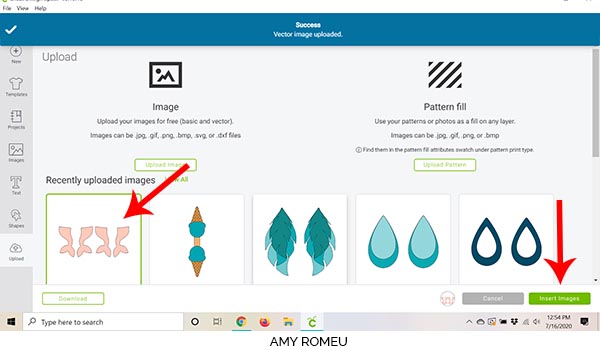
Click on it so it is outlined in green. Then click on the green INSERT IMAGES button in the bottom right corner.
STEP 3 – Prepare SVG for Cutting
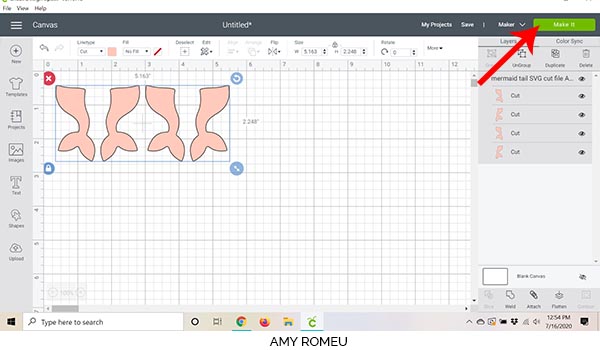
This brings the earring cut shapes into Cricut Design Space. Drag the mermaid tail shapes up to the top left corner of your canvas. Then click the green MAKE IT button.
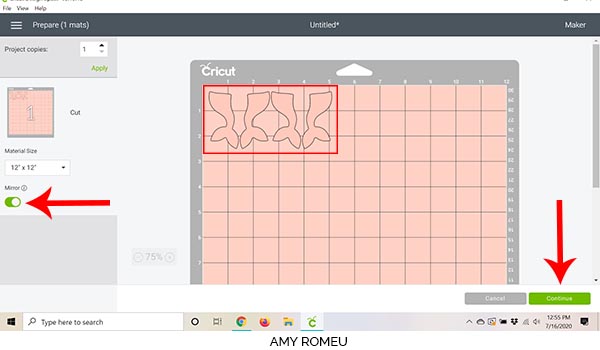
STEP 4 – Prepare the Mat for Cutting
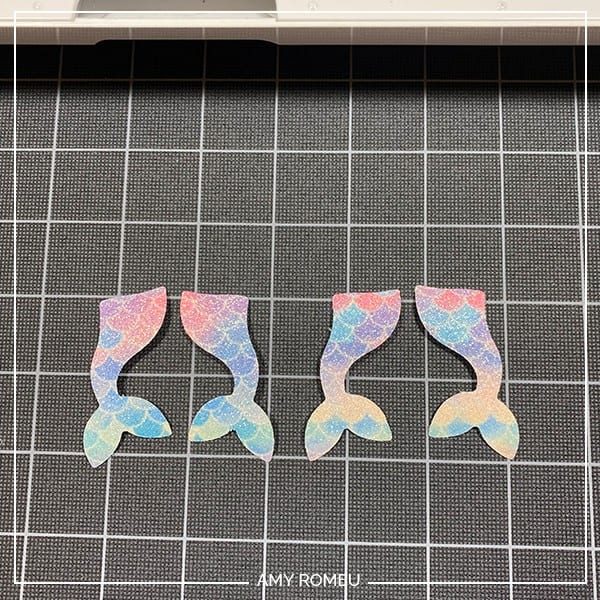
This earring project will cut from only one material – the mermaid print faux leather. In the mat preview screen, you see four shapes will cut – two for the front and two for the back.
The first thing to do in this mat preview screen is MIRROR the cutting mat. Faux leather cuts face down, so you need to mirror your mat. Then make a note of the size of faux leather you’ll need to place on your mat to cut these shapes from. Then click CONTINUE.
If you are using a Cricut Explore Air 2 to make these earrings, turn the material dial to Custom now.
If you are using a Cricut Joy, see this Cricut Joy earring tutorial or this Cricut Joy earring tutorial for specific instructions on how to cut faux leather with the Cricut Joy.
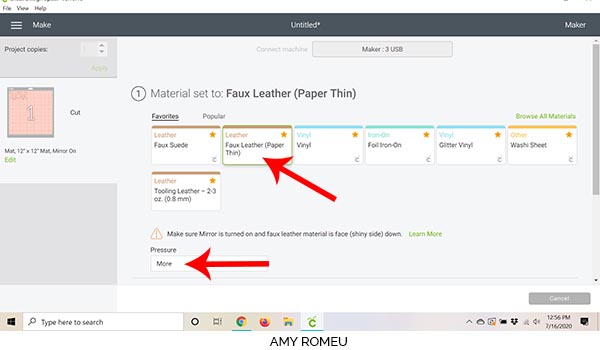
The material setting I’ll be using is Faux Leather (Paper Thin). This is an automatic double cut setting and I use it to cut all kinds of faux leather, even if it’s not “paper thin.” (This material setting is available on the Cricut Maker, the Explore Air 2, and the Cricut Joy.)
If you don’t have this material setting as a favorite, click on “Browse All Materials” to search for it. Click on it to select it to bring it into the material settings page. Then set the dropdown pressure menu to “More.”
Once your material is selected, it’s time to cut the material.
STEP 5 – Prepare the Mat for Cutting
Trim the faux leather to the size you noted earlier in the mat preview screen, allowing a little extra on all sides.
Then place the faux leather printed side down in the top left corner of your mat. Make sure the scales are facing the direction you want them to.
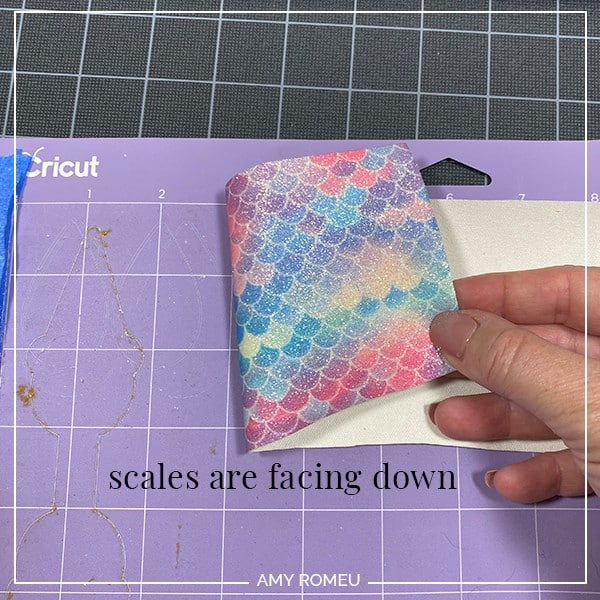
Now tape the mermaid scales faux leather down on all sides with blue painter’s tape.
Load the mat into the Cricut by pressing the double arrows button. The press the C button to start the cut. After the machine cuts, and BEFORE you unload the mat, check the cut to see if the material was cut all the way through.
If not, press the C button again (without unloading the mat!) to repeat the cuts.
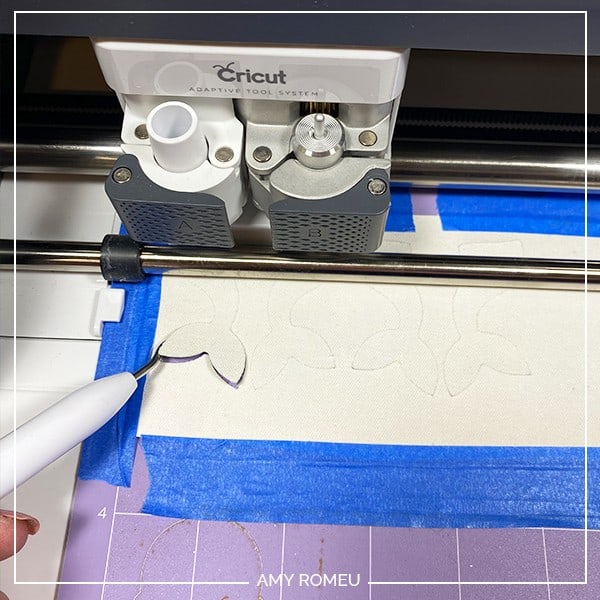
If your shapes have cut all the way, remove them from the mat. Trim any small strings or lint fuzz with small scissors.
STEP 6 – Glue The Earring Layers Together
Now it’s time to glue the front and the back of the mermaid tail faux leather earrings together. I like to use Art Glitter Glue for this step (it doesn’t have any glitter in it, and it dries clear).

Carefully apply small dabs of glue on the backs of the mermaid tail earring shapes. Press the front to the back carefully. Repeat for the second earring.
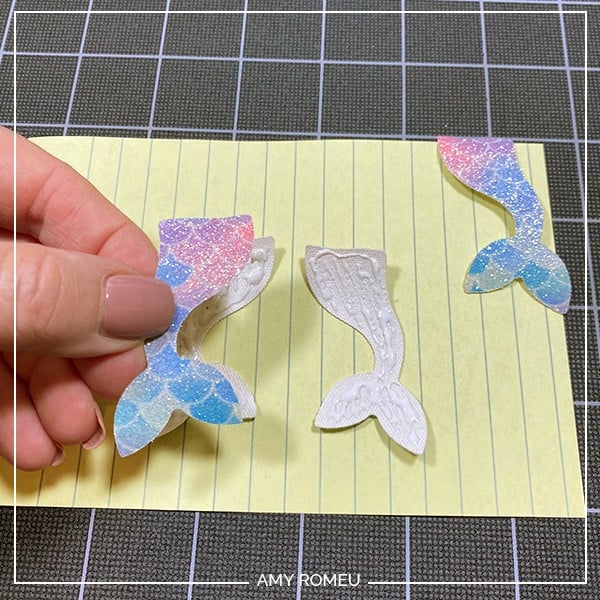
Then press both of the earrings under something heavy like a book for a few hours (overnight is best).
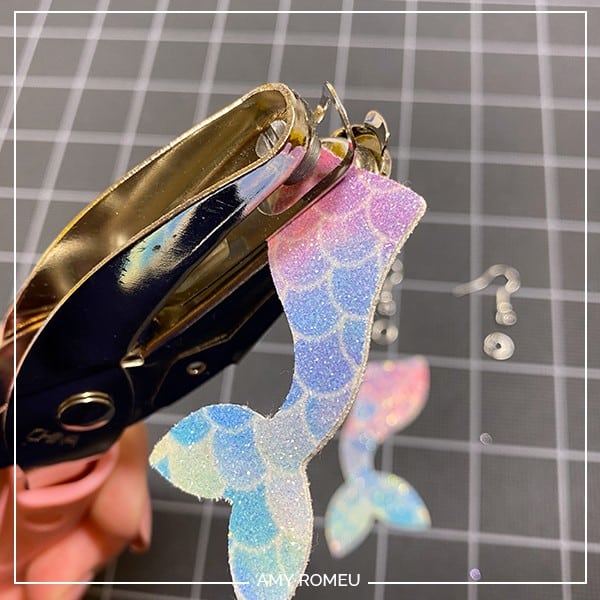
STEP 7 – Make The Earring Holes
I made the earring holes myself in these mermaid tail faux leather earrings – I used my favorite hole punch to make the perfect sized earring holes. The hole punch is from Amazon here.
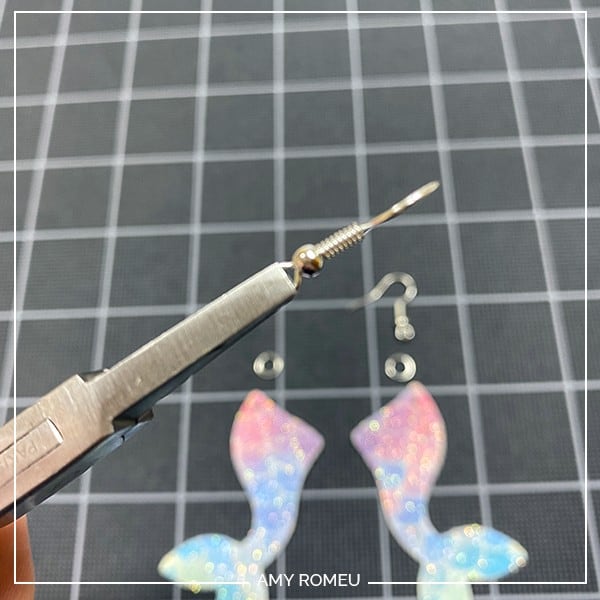
STEP 8 – Attach the Earring Hooks
Now it’s time to assemble your earrings!
You’ll need small jump rings, earring hooks, and two pairs of flat nose pliers.
To connect the earring hooks to the mermaid tail earrings, you’ll first need to turn the bottom loop on the fishhook sideways so your earrings will hang correctly.
See the example image below to see how the orientation of the earring hook has to change so your earrings will hang straight.

To see more about this, visit my post about how to make faux leather earrings hang straight here.
You’ll do this using one pair of flat nose pliers. While holding the hook firmly between two fingers, grip the entire earring loop between the pliers and twist your wrist until the loop is perpendicular to the earring post. Repeat with the second earring hook.
Open the jump ring by gripping it on each side with a pair of flat nose pliers (as shown below). Rotate one wrist forwards or backwards, so the circle creates an opening but doesn’t bend out of it’s circle shape.
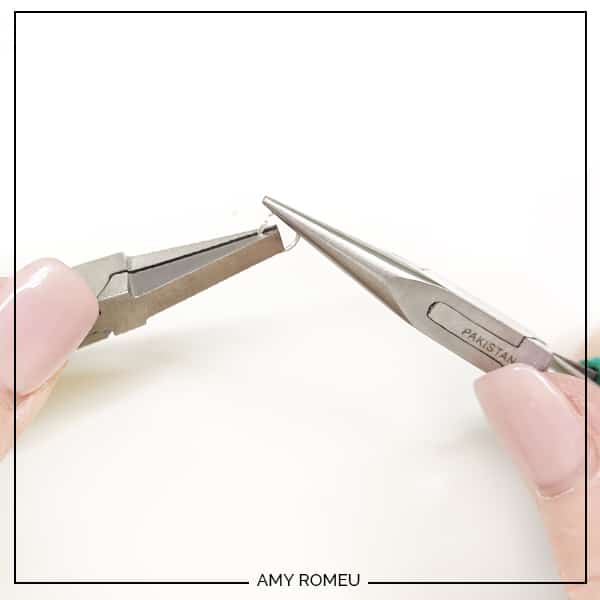
When the jump ring is open, slide on the mermaid tail, the earring hook, and close the jump ring again.
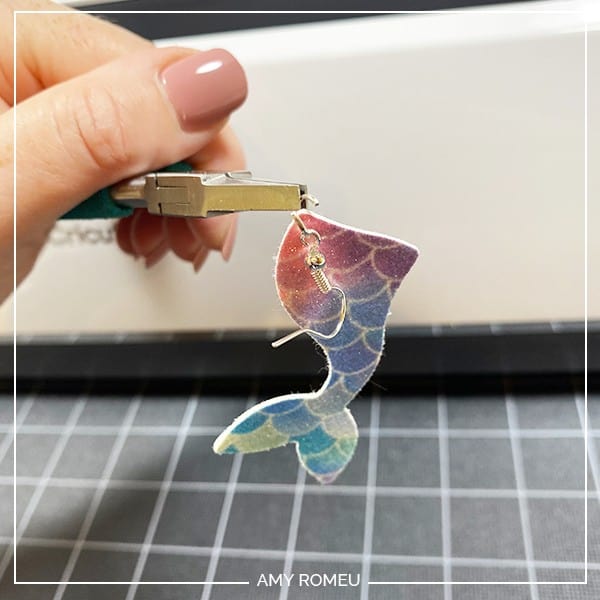
Pay attention to which side is the front of your earring as you do this to be sure your earring and hook are both facing the right direction.
Then use your two pliers to close the jump ring again, using a wrist twist in the opposite direction. This takes a little practice, but you’ll get it!
What do you think? Are you going to try this project? If you do, please post a comment and attach a photo of your easy DIY faux leather mermaid tail earrings! I would love to see them!
Want to see all of my Cricut earring & jewelry tutorials? CLICK HERE

Until next time… and happy creating!
Want the FREE SVG file you so you make these DIY CRICUT MERMAID TAIL EARRINGS yourself?
Get it from our Resource Library! You’ll receive the password for the Resource Library instantly after filling out the form below!
Want to remember this? Post this DIY CRICUT MERMAID TAIL EARRINGS project to your favorite Pinterest board!
Love the mermaid earrings