How To Make Cricut Faux Leather Heart Crystal Earrings
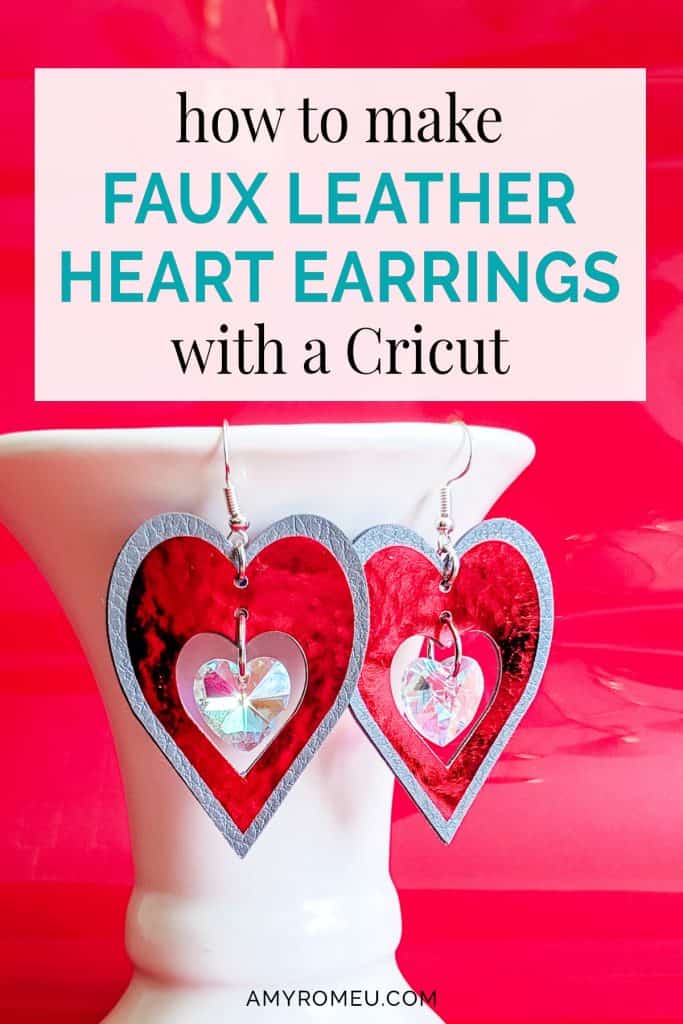
How To Make Cricut Faux Leather Heart Crystal Earrings
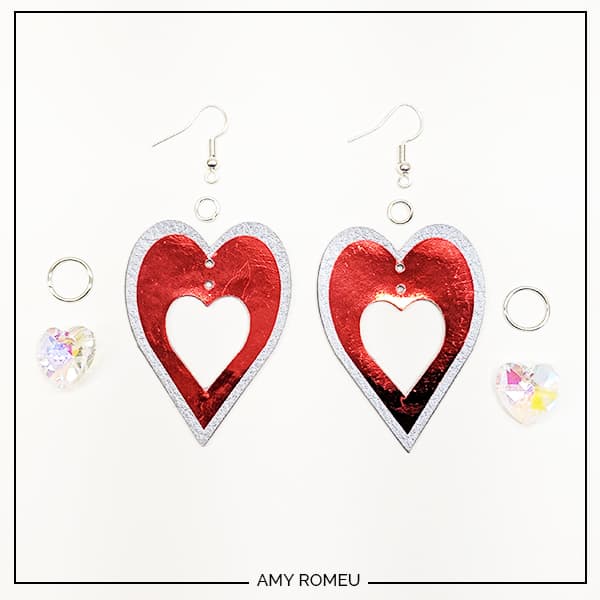
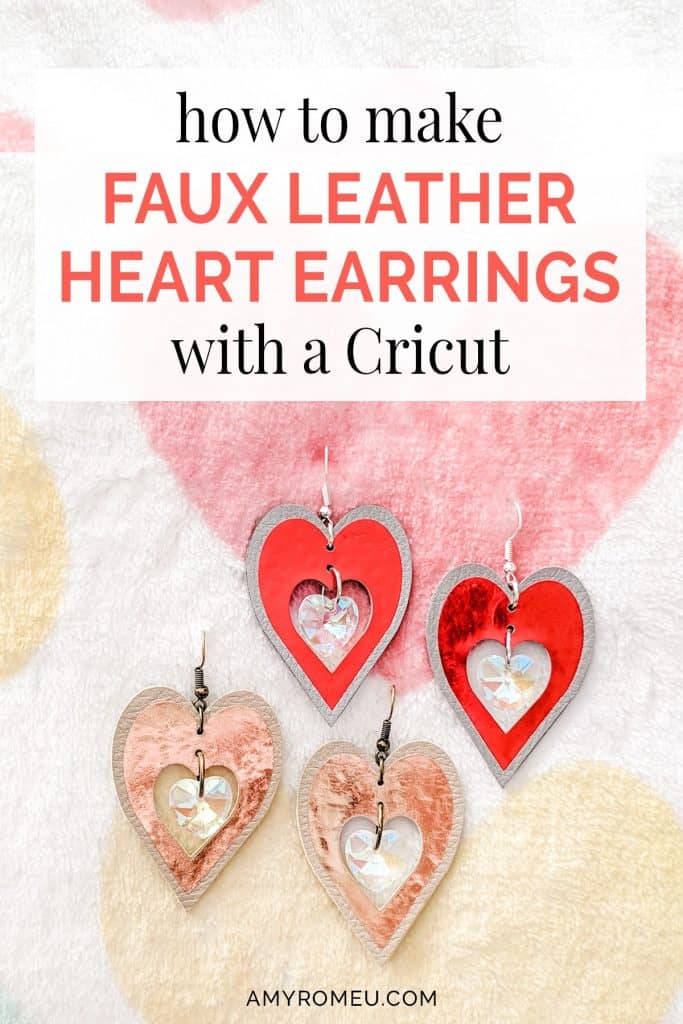
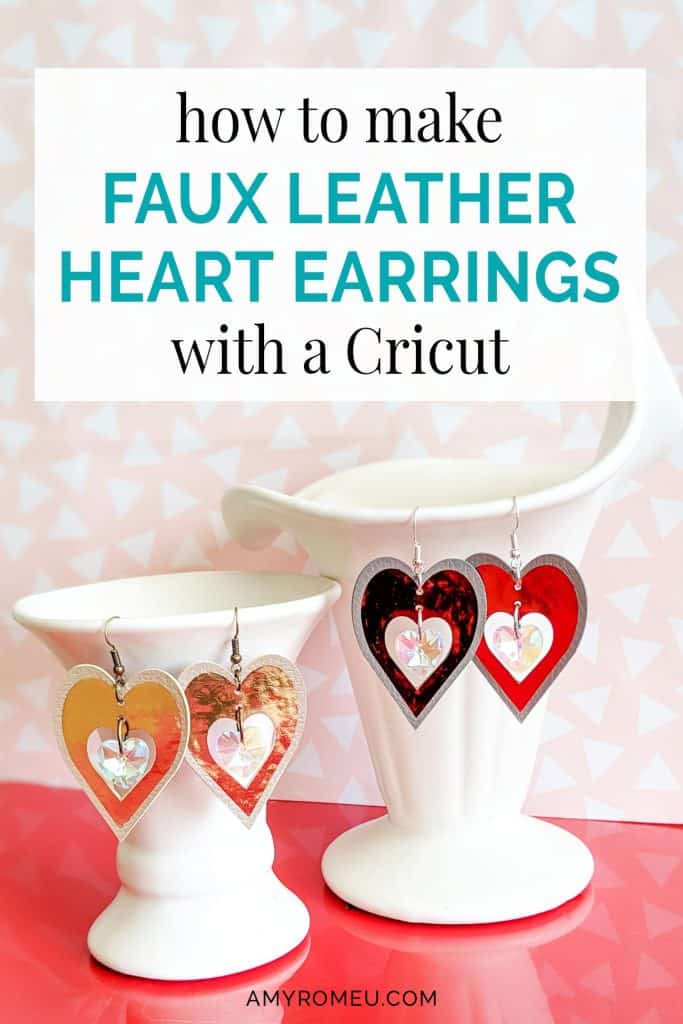
There’s something timeless about heart jewelry, don’t you think? I honestly think so. It’s perfect for Valentine’s Day, but also any time of the year. The heart is a classic shape that never goes out of style. That’s why I wanted to make some faux leather earrings with a Cricut that are shaped like hearts – and of course, I wanted to add some sparkle with a crystal heart charm. If this is a project you’d like to try, I’m going to show you step by step how I made them, so stick around!
These earrings are made from Cricut pebbled faux leather – the easiest faux leather to make earrings with, in my opinion – and Cricut Iron On Foil. They are super easy to make, and the crystal heart dangle adds some sparkle. (If you don’t want to add the heart, you don’t have to! I’ll teach you how to quickly edit the earring shapes in Cricut Design Space to make these earrings without the dangle, too).
You may be under the impression that you can’t make faux leather earrings if you don’t have a Cricut Maker – but that’s simply not true! I cut all the shapes for these earrings with just the Cricut Fine Point Blade, which means they can be made with either the Maker or the Explore Air 2!
If you’re ready to learn the steps I took to make these Cricut Faux Leather and Crystal Heart Earrings, keep reading for all the info! I’m also sharing my SVG cut file for these earrings FREE so you can make these great earrings for Valentine’s Day, or any day of the year.
You’ll find out how to download my free SVG file for this project at the bottom of this post. So let’s get started!
Want to see all of my Cricut earring & jewelry tutorials? CLICK HERE
This page contains some affiliate links (which means if you make a purchase after clicking a link, I will earn a small commission at no additional cost to you). Read my full disclosure policy here.
CRICUT Valentine’s Day Faux Leather & Heart Crystal Earrings – Materials List
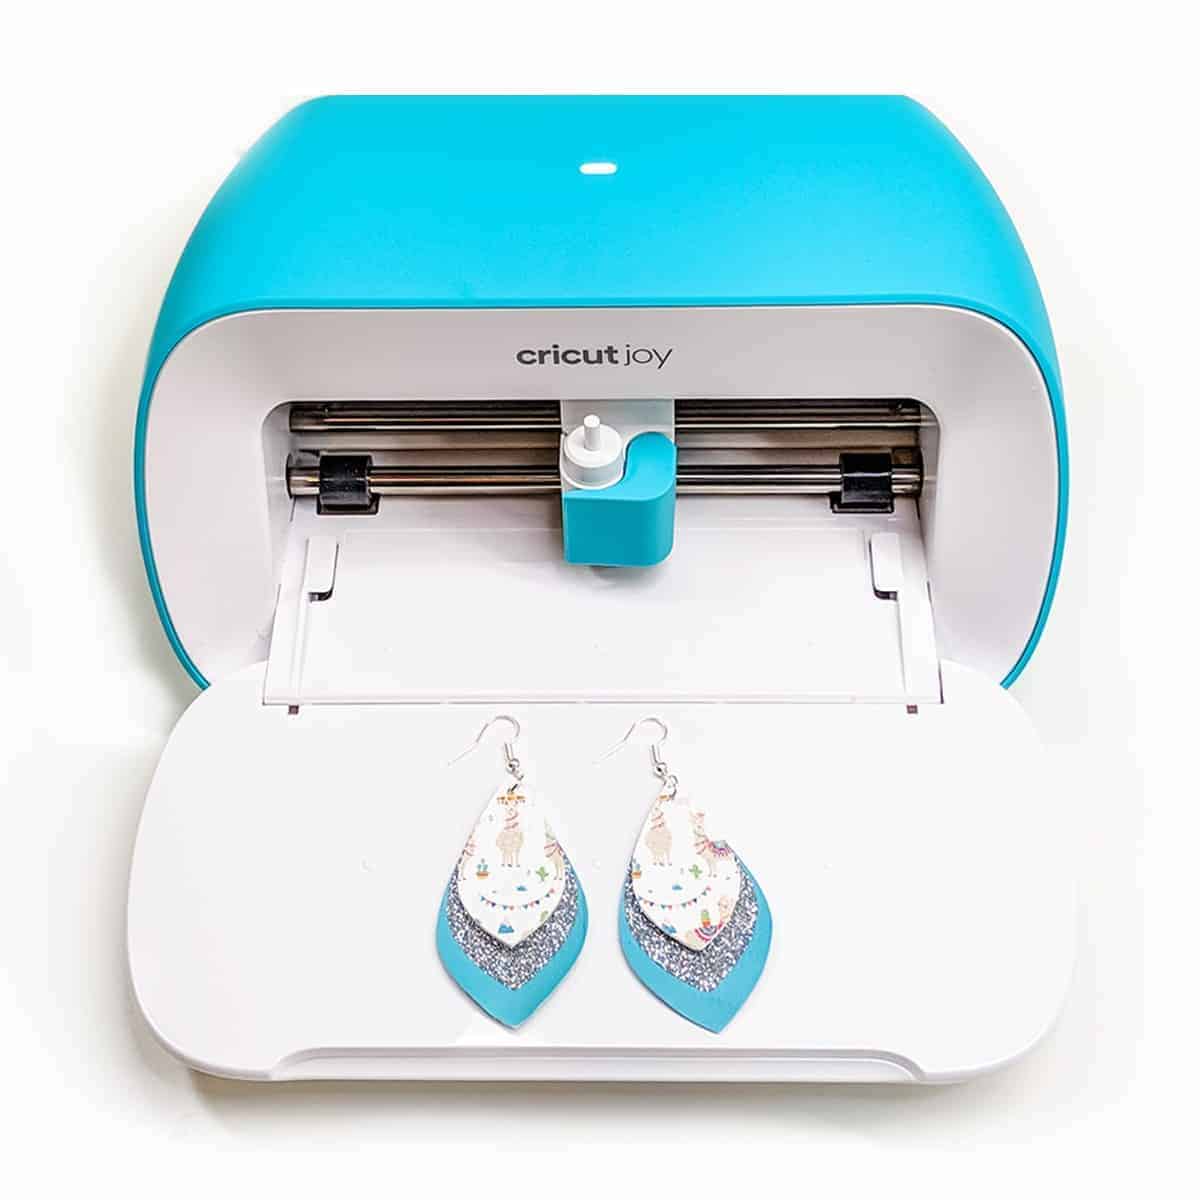
- A vinyl cutting machine. I have the Cricut Maker, available at Amazon here. But can also use the Cricut Explore Air 2 or any cutting machine that will cut thin faux leather. You can also cut these by hand if you don’t have a cutting machine – print out the PDF available in my free resource library and use it as a pattern to cut out your shapes!
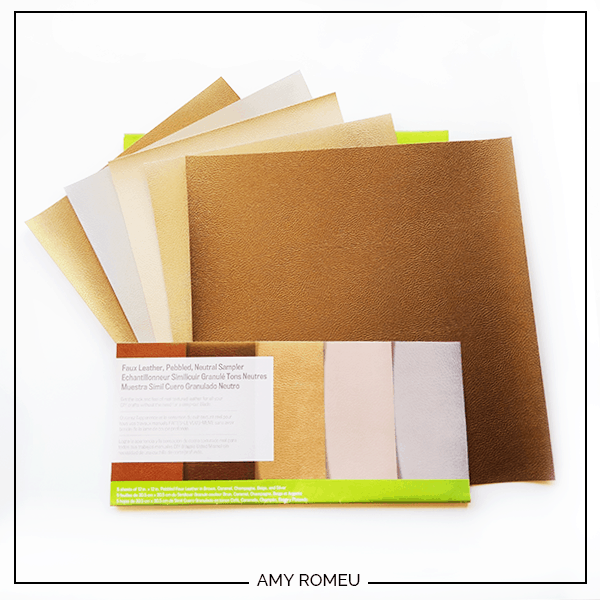
- Cricut Faux Leather in Metallic colors. I bought this exact Cricut Faux Pebbled Leather Sampler Pack on Amazon. It has five 12″x12″ sheets of faux leather in Brown, Caramel, Beige, Champagne, and Silver. I used Silver for the red/silver earrings and Champagne for rose gold earrings shown in this project.
- Cricut Iron On Foil in color of your choice. I used Cricut Iron On Foil in Red (from this sampler pack of different colors of Cricut iron on foil) for the silver pair from Amazon here. I used Cricut Iron On Foil in Rose Gold for the second set of earrings from Amazon here
- Cricut Strong Grip (Purple) Cutting Mat. You can buy these on Amazon here, or at Michael’s here. They are also available at Hobby Lobby, Joann’s, and Walmart.
- Cricut Standard Grip (Green) Cutting Mat. You should have gotten one with your Cricut Maker or Explore Air machine, but if you need a new one or like to have more than one, they are available on Amazon here. You can also buy these mats anywhere Cricut products are sold.
- A basic set of weeding tools. I use my Cricut tool set every day, available on Amazon here. You can get also get the basic Cricut tool set at Michael’s here, or anywhere Cricut products are sold.
- Blue painter’s tape (optional). If your purple mat isn’t very sticky, you’ll want to tape your faux leather down to your mat to keep it from moving around. If your mat is new and very sticky, you won’t need it. You can get blue painter’s at any hardware store or big box store. Even my grocery store sells it! You can also find blue painter’s tape on Amazon here.
- A Cricut Easy Press or a Cricut Easy Press Mini (what is what I use for pressing earrings). I bought my Easy Press Mini from Amazon here. (You can also press your earrings on a traditional heat press if you have one. If you do use a traditional heat press, be sure to use light pressure with the pebbled faux leather so the pressure doesn’t flatten out the pebbled texture.)
- EasyPress Mat. If you will be using the Easy Press Mini as your earring heat press like I do, you’ll need an EasyPress Mat to press your items on without damaging your surface with heat. I use the 8×10 size, which you can see on Amazon here. It’s the perfect size for making Cricut jewelry.
- Glue with a fine tip. My favorite is Art Glitter Glue with the precision tip. Don’t worry, it doesn’t have glitter in it! You can get it on Amazon in a small bottle here or as a large and small bottle set here. Make sure you buy the bottle that comes with a screw on precision tip. This tip helps you squeeze very small amounts of glue in very small spaces, perfect for Cricut faux leather earrings.
- Heart shaped crystals. The ones I used are 14x8mm size and are from Amazon here. Fire Mountain Gems also sells great Swarovksi heart shaped crystals. The clear crystal color is here and red shimmer is here.
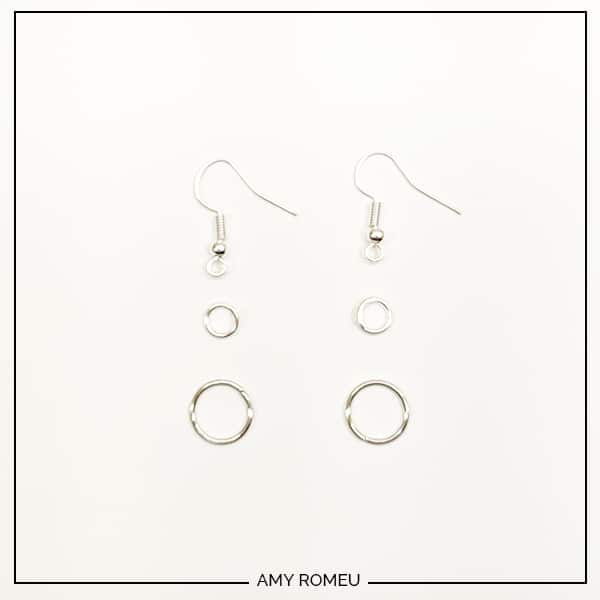
- Earring hooks – I used earring hooks from this assortment of earring hooks in different finishes these from Amazon here. Hobby Lobby, Michael’s, and other craft stores, as well as your local bead store, will have lots of earring hooks as well.
- Large jump rings – I bought these 10mm jump rings in an assortment of metal finishes from Amazon here. The jump ring has to be large – at least 10mm – to fit through the crystal charm. You could use an 11mm or 12mm jump ring, but I wouldn’t go bigger than 12mm or smaller than 10mm.
- Small jump rings – I used this assortment of 6mm size jump rings in different metal finishes from Amazon here. Again, your local craft store or bead store will have plenty of jump rings to choose from if you want to pick some up in person. You could use 5mm size if that’s what you have, but I wouldn’t go any smaller than 4mm or larger than 6mm for this project.
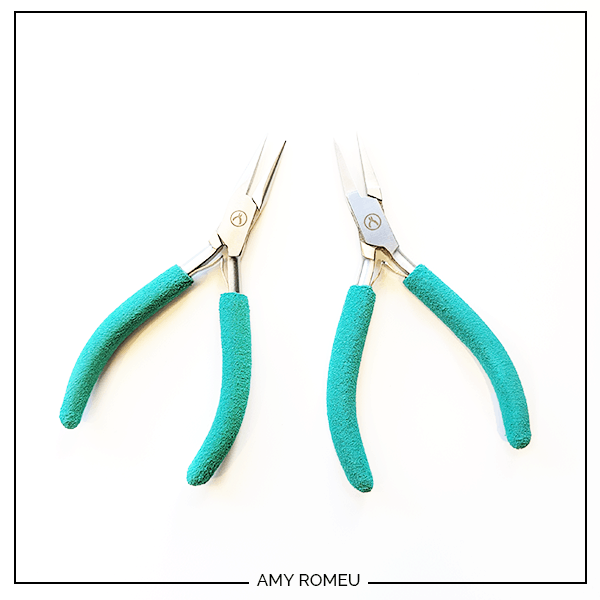
- Flat nose pliers – I’m using one pair of wide nose pliers and one pair of needle nose pliers. Together they make opening and closing jump rings much easier! You can use any two flat nose pliers you have in your jewelry making tool box .My favorites are Wubbers brand in the “Baby” size. You can see the Baby Wubbers Chain Nose Piers on the left on Amazon here, and the Baby Wubbers Flat Nose Pliers on the right on Amazon here.
Note: Be sure to check out my post Beginner’s Guide To Jewelry Making Tools for all the information you need to know about buying and using jewelry making tools.
Cutting by hand?
If you’ll be cutting these shapes out by hand from the PDF instead of using a cutting machine, I suggest using small curved scissors like my favorite 4 inch curved Fiskars scissors on Amazon here. To punch the holes in the faux leather, I love my 1/16″ Paper Punch, for cutting holes in faux leather and faux suede. You can see the one I have and use all the time on Amazon here.
PROJECT INSTRUCTIONS
STEP 1 – Download Free SVG
Download the free SVG cutting file for these earring shapes from my free Resource Library. It’s Design #119. Get the password instantly after filling out the form below.
Save the zipped folder that downloads to your computer. You’ll need to unzip or extract the files FIRST before you can upload the cutting file to Cricut Design Space. Make a note of the file location after you unzip it so you can find it in the next step.
STEP 2 – Upload SVG to Cricut Design Space
When you open Cricut Design Space, click on NEW PROJECT to get started. Then click on UPLOAD from the left hand side menu.
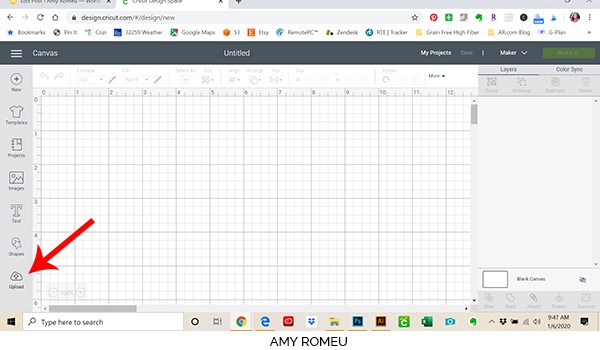
Click on the UPLOAD IMAGE button, then click BROWSE to locate your file.
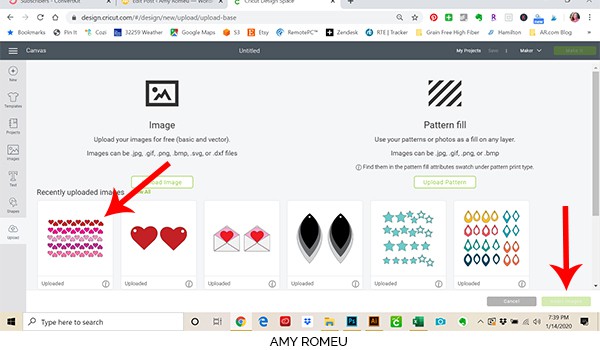
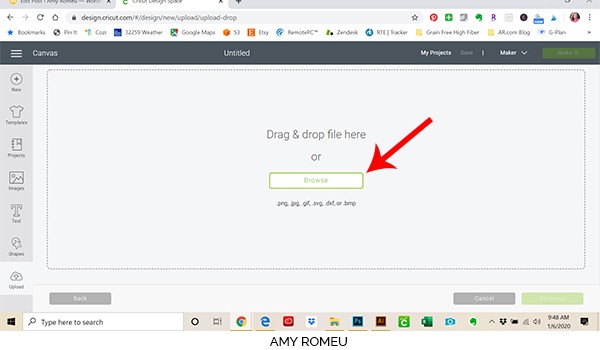
Navigate to where you’ve saved the already unzipped SVG file for this project. Double click on the SVG file to bring it into the upload screen in Design Space.
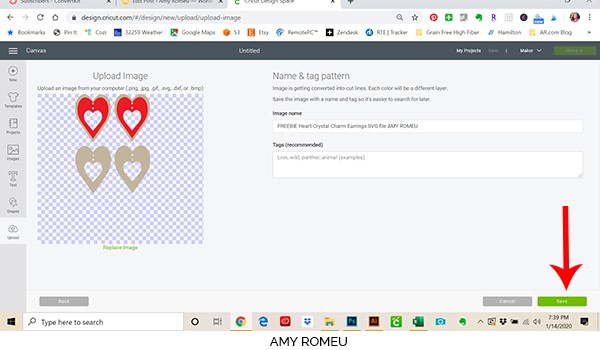
You’ll see a preview of the earring shapes for this project. Hit the green SAVE button.
After you’ve selected your file to upload, you’ll see it as the first item in your “recently uploaded designs” row.
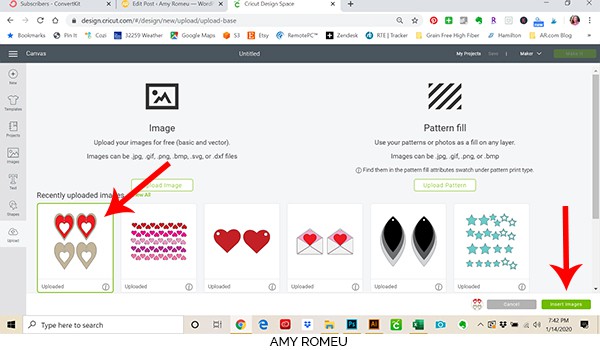
Click on it so it is outlined in green. Then click on the green INSERT IMAGES button in the bottom right corner.
STEP 3 – Prepare SVG for Cutting
This brings the heart earring shapes into Cricut Design Space. This is what your canvas will look like right after the upload (below). Here you can see the two layers that make up the front of the earring are together. Below them are the back shapes if you are going to glue backs onto your earrings. This is an optional step – a lot of jewelry makers want to make double sided earrings with their Cricut so the back of the earrings look attractive and finished.
(If you don’t want to cut the backs shapes to glue onto the back of your earrings, you can click UNGROUP from the Layers menu top right and then delete the two bottom tan hearts. )
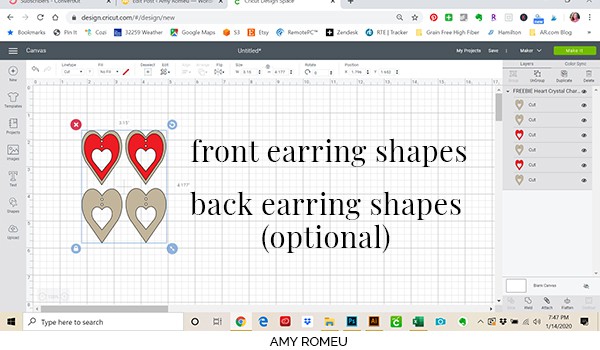
The hearts are already perfectly sized for earrings, and more importantly, the cut out heart is the exact right size for the heart crystal. For that reason, I don’t recommend resizing your hearts.
The earring holes are already in the file, and your Cricut will cut them our for you. If you want to make the holes instead with a hole punch or a sharp tool, you can hide the holes so your Cricut doesn’t cut them. I’ll have instructions for hiding the holes from cutting a little later in the next step.
I often cut the earring holes myself – the hole punch I use to make perfect sized earring holes in faux leather is available on Amazon here.
When your designs are first uploaded into Design Space, they are all grouped together. Click and drag the hearts up to the top most left corner of the screen.
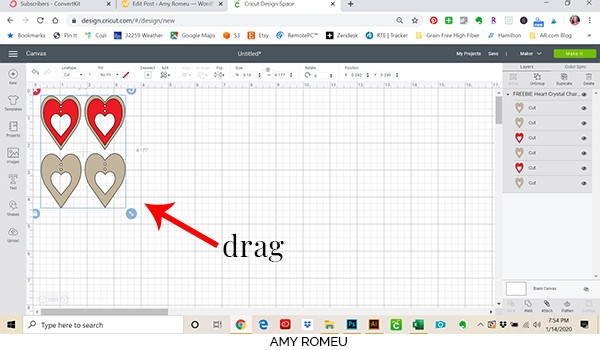
If you want to cut the holes out the earring shapes as shown in the file, you can hit the green MAKE IT button. If you plan to cut the holes yourself, follow the steps below to hide the cut holes before hitting the MAKE IT button.
Optional: How to NOT cut the earring holes (if desired)
To hide the earring holes, or just the bottom holes if you don’t want to add a charm, first ungroup all the earring shapes by selecting all of them and clicking UNGROUP from the menu at the top right side of your screen. Then select a single shape and click the CONTOUR icon in the lower right.
When the Contour box pops up, click on the hole to hide it. (You may need to zoom in or out using the + or – buttons to see all the parts of each earring shape).
You should see the hole disappear from the Contour pop up window box and also disappear from the screen in Cricut Design Space. Close out the contour pop up window and repeat the steps to hide as many earring holes as you want – all four if you will punch your own holes, or just the bottom ones if you want the earrings without charms.
After you’ve hidden the earring holes, hit the green MAKE IT button.
STEP 4 – Prepare Mats for Cutting
This earring project will cut two different materials on two mats. You can see both mats that will cut on the left hand side of your screen.
- The first mat will cut the faux leather shapes.
- The second mat will cut the iron on foil.
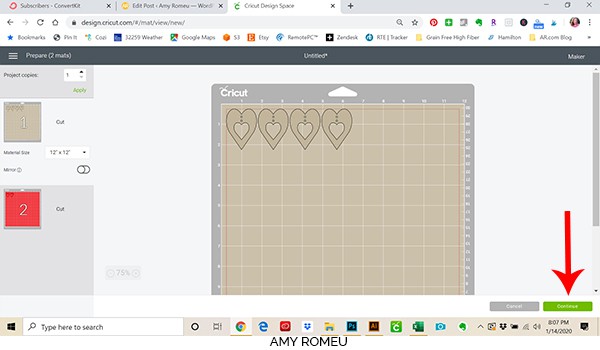
From this first mat, the faux leather mat, you can leave the MIRROR toggle set to OFF. The heart shapes are already mirrored for you.
From this screen we can see the hearts will cut from a piece of faux leather that’s about 2.5 inches tall x 7 inches wide. Cut your faux leather into a piece this size. and click the green CONTINUE button.
STEP 5 – Choose Your Material
Next we need to choose our material we will be cutting from. The Cricut brand faux leather cuts really well and very easily. If you are cutting these earring shapes from Cricut Pebbled Faux Leather, you will choose Faux Leather (Paper Thin) as your material setting.
IMPORTANT: If you are cutting these shapes from a different faux leather than the Cricut Pebbled Faux Leather, I recommend you make adjustments to your material settings so the Cricut will cut your shapes more than once. You can read about how to make a custom material setting with multiple cuts in this post here.
When the Material selection screen opens, click on BROWSE ALL MATERIALS on the right.
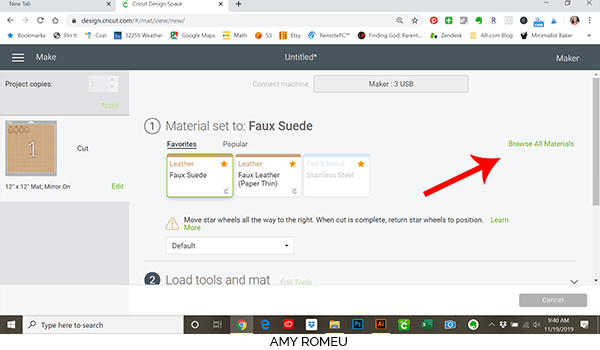
Type “faux leather” in the search bar and it should pop up.
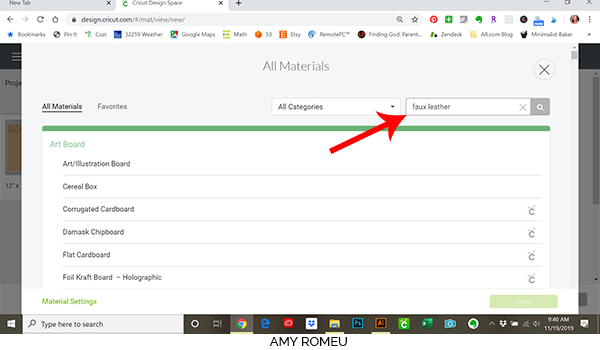
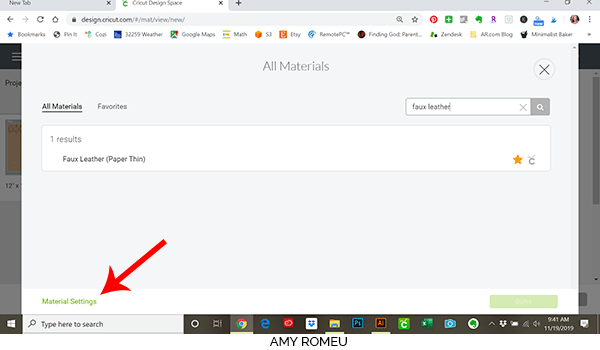
When Faux Leather (Paper Thin) appears, click on it click on it to select it. You can click on the star to turn it yellow and add this material to your favorites as a shortcut for next time.
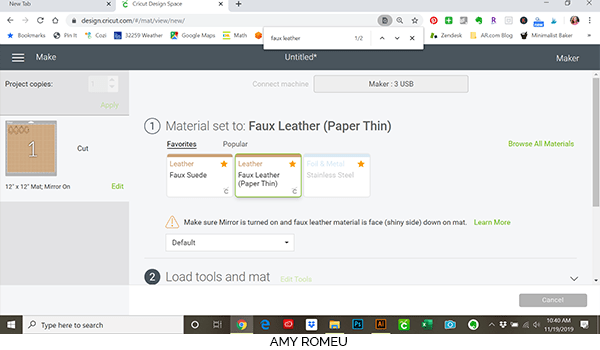
Now you’ll be prompted to make sure your fine point blade is loaded in Clamp B. This is the blade that came with the Cricut Maker.
Cricut Explore users will want to turn the Smart Set Dial to Custom and select Faux Leather (Paper Thin) from the list of custom materials. You’ll also use the Fine Point Blade. Any other cutting machine users can follow their machine’s settings for thin faux leather or faux suede.
You may also want to change your cut setting to MORE from the second drop down menu on this screen, depending on the newness of your blade and how your Cricut normally cuts.
Remember, if you need your Cricut to cut your pattern a second time, you can press the “cut” button again after your first cut (don’t unload your mat!) and your mat will cut again.
Cricut Explore users can turn the Smart Set Dial to Custom and select Heavy Leather as the material. You’ll also use the Fine Point Blade. Any other cutting machine users can follow their machine’s settings for thick material like leather or denim.
STEP 6 – Prepare Mats For Cutting
Place your already cut and sized faux leather sample in the upper left hand side of your purple mat. Your material on the mat should cover the design area shown in your mat preview in Cricut Design Space.
(I love my Fiskars Rotary Cutter to cut my faux leather material to the exact size right on my mat – just don’t press too hard! It’s are available on Amazon here.)
I find that Cricut Pebbled Faux Leather sticks very well to my purple mats without needing to tape it down. If your mat is not very sticky, or you are using a different faux leather, I strongly recommend taping down all the sides to your mat with blue painter’s tape. This will keep your material from shifting on your mat as you cut it.
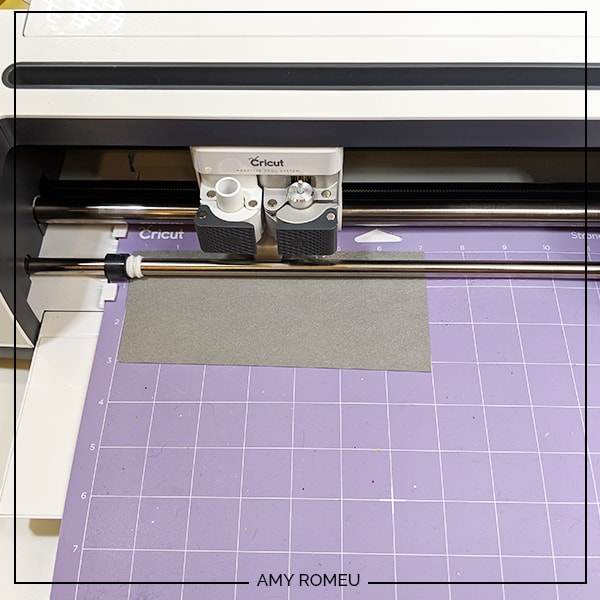
STEP 7 – Cut The Faux Leather Shapes
Load your mat into your machine by pressing the button with the two arrows. Then press the flashing GO (C) button to start cutting.
After your Cricut cuts your faux leather, unload your mat by pressing the button with two arrows again. This is what your cuts will look like.
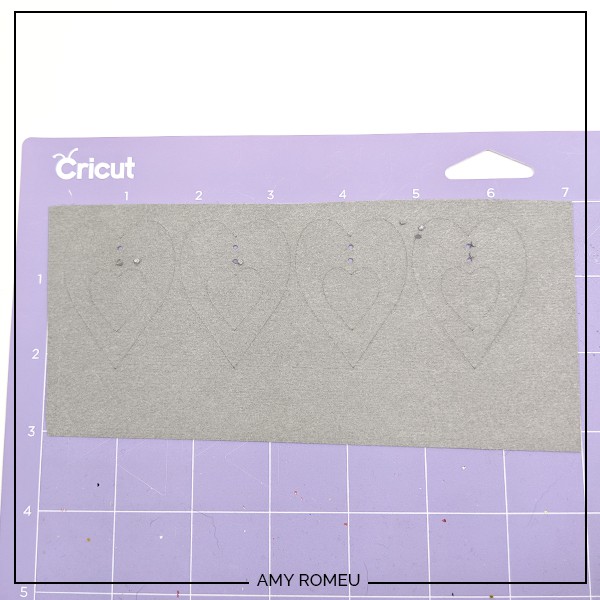
Using the mini-spatula and/or your weeding tool, carefully pull the excess faux leather off the mat, leaving the cut pieces on the mat. Then pull up the hearts and use the sharp weeding tool to poke out the holes.
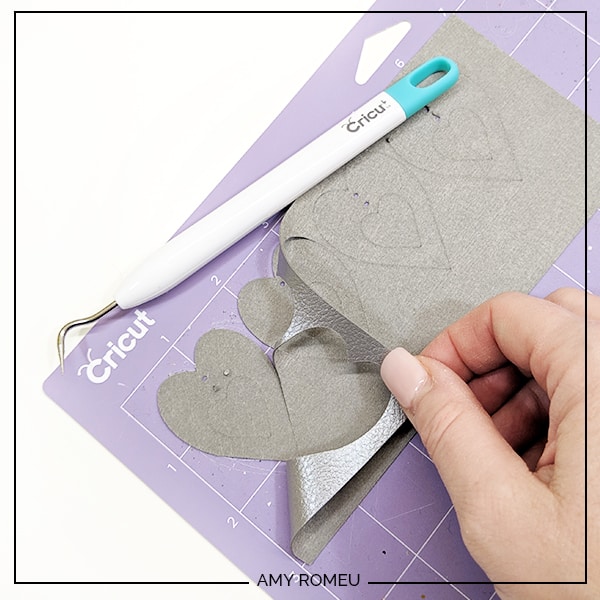
If your earring holes didn’t cut cleanly, you can trim the excess material with some small pointed scissors. I love my 4 inch curved tip Fiskar scissors from Amazon for this kind of trim work.
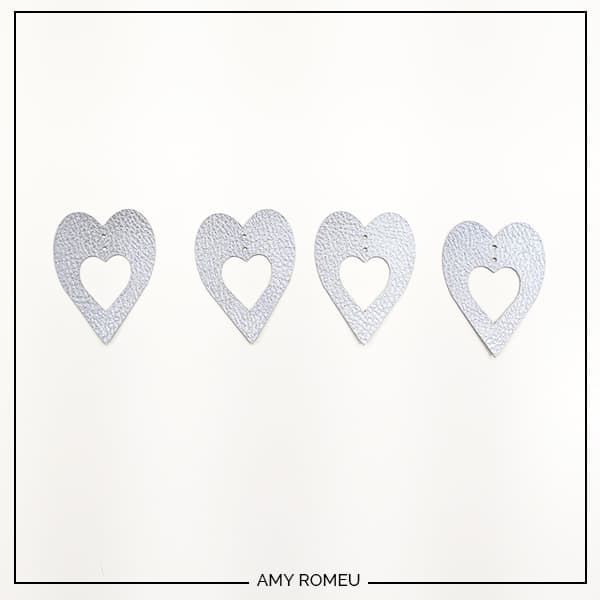
Set aside your hearts for now.
TIP: When you remove the hearts from your mat, try to keep them in order of how they were cut on the mat so you can match up the fronts and the backs.
STEP 8 – Cut The Iron On Foil
For this design, I’m using Red Cricut brand Foil Iron On. It comes in so many great colors!
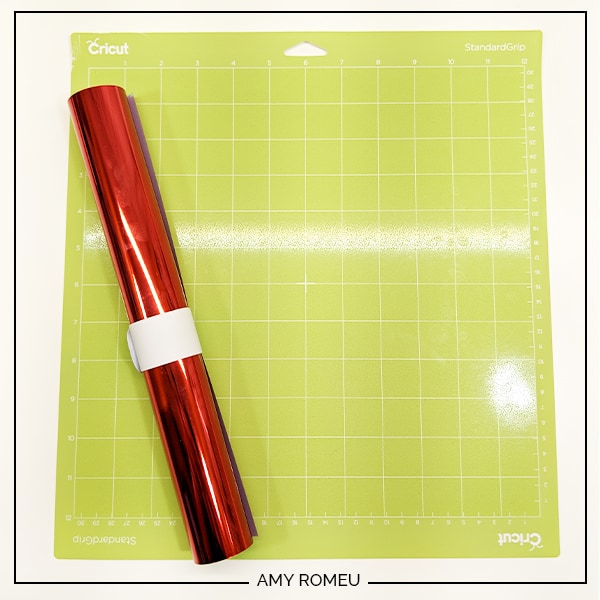
Note: If you’re wondering what the white band around my HTV tube is, it’s a white slap bracelet! They are great for keeping my vinyl rolls neatly wound. You can get slap bracelets in lots of colors, but I prefer the all white slap bracelets from Amazon here.
In Cricut Design Space, hover your mouse over the little image of the red cutting mat on the left hand side. Make note of the size of iron on foil your shapes will cut from.
Cut your iron on foil piece to size place it shiny side down on your green cutting mat. Press it down all over to be sure it sticks firmly.
Change your material selection for this mat to Foil Iron On and leave the cut pressure at Default (unless you know your machine cuts regular HTV better with the MORE or LESS setting).
IMPORTANT: Foil Iron On needs to be mirrored before cutting. Make sure your Mirror setting is turned ON. You can do this by clicking EDIT on the little red mat preview and turning the MIRROR toggle to ON.
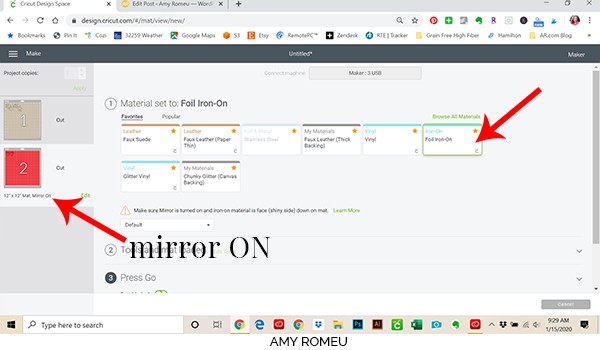
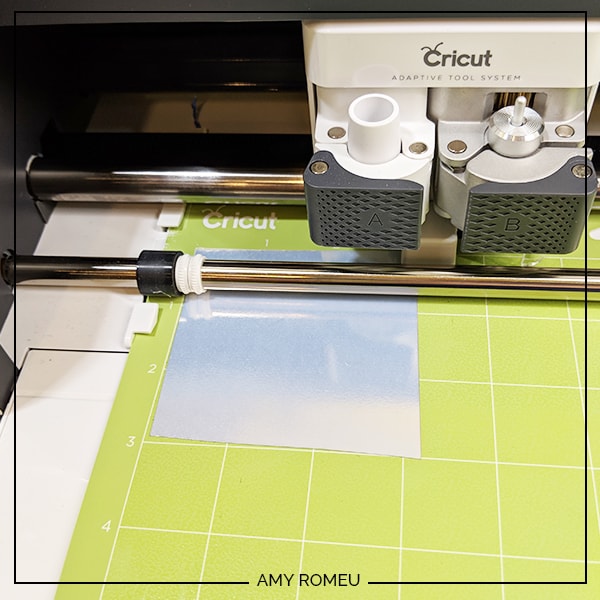
Load your mat and press GO. When your mat is finished cutting, unload the mat and weed the excess foil from around your shapes. Remember, the foil needs to stay on the clear transfer tape!
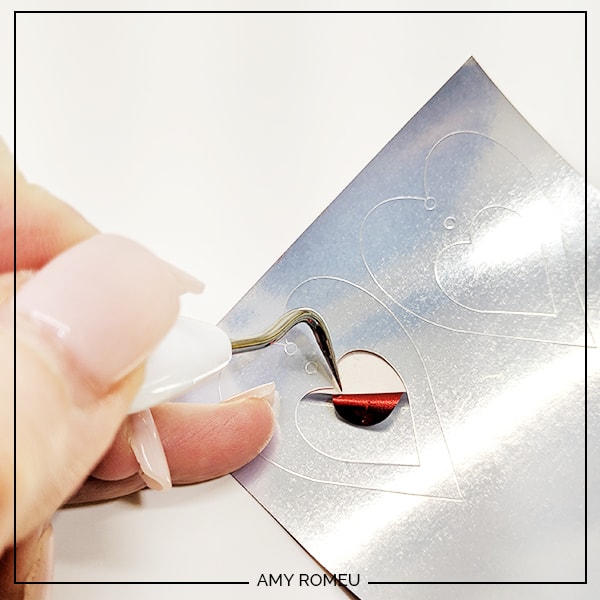
Remove the transfer tape with just your hearts on it from your mat. Trim the transfer tape so the hearts are separated and easier to press.
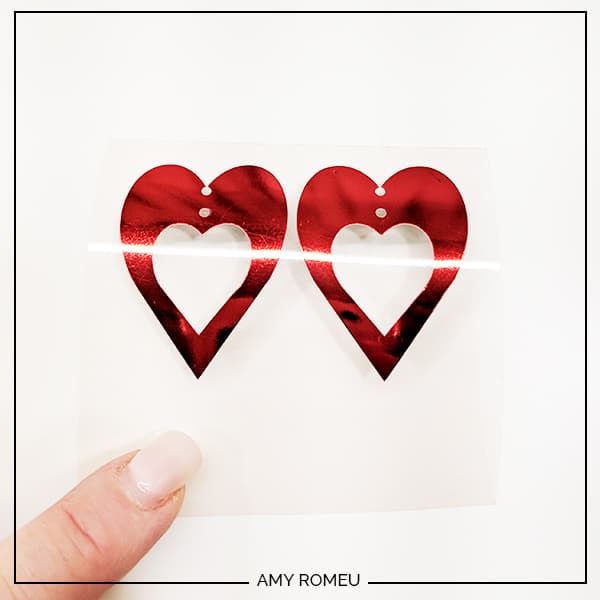
STEP 9 – Press the Iron On Foil to the Faux Leather
Time to press the foil iron on heart onto your faux leather heart. Before you do that, be sure to match up your front and back faux leather hearts so they line up correctly.
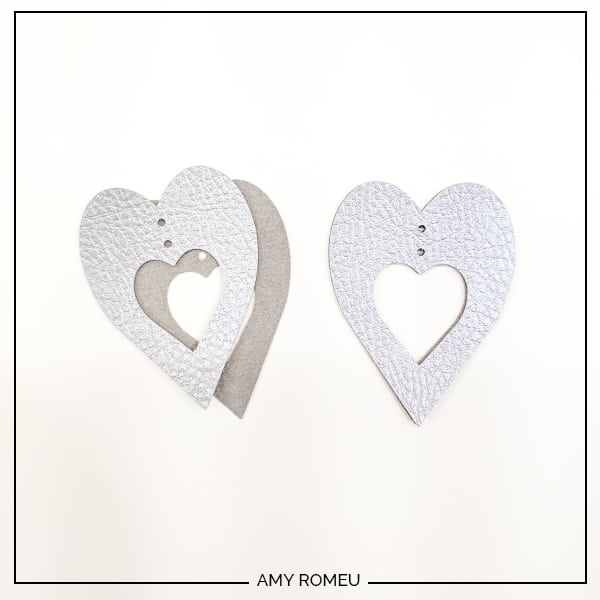
To press the foil onto the leather, you can use a home iron, an Easy Press, or my favorite, the Easy Press Mini. You can use a heat press, too, but don’t use too much pressure or you’ll lose the texture in the faux leather.
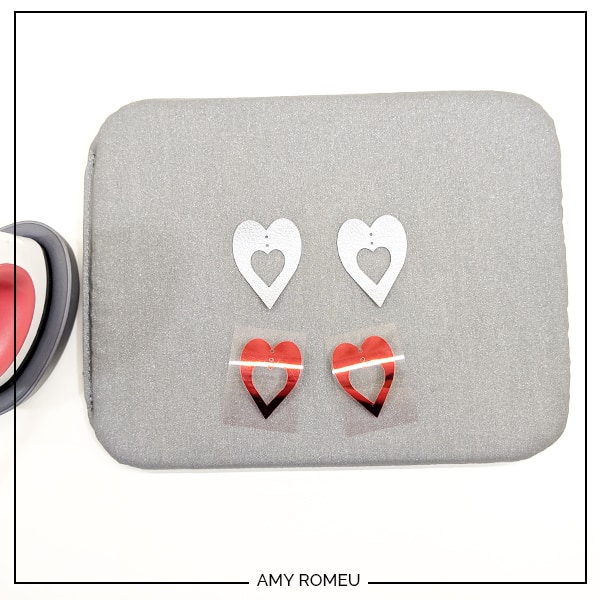
I used the lowest heat setting on the Easy Press Mini for these earrings. Layer your iron on foil over the faux leather heart, being sure to line up the earring holes and cutouts.
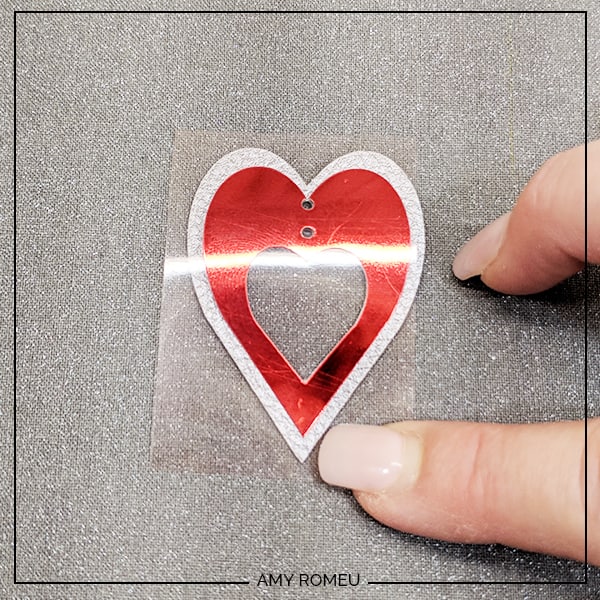
Make sure you have your Easy Press Pressing Pad or a towel in place and press for 10-15 seconds. I carefully glide the Easy Press Mini around while I press. Repeat for the other foil iron on heart.
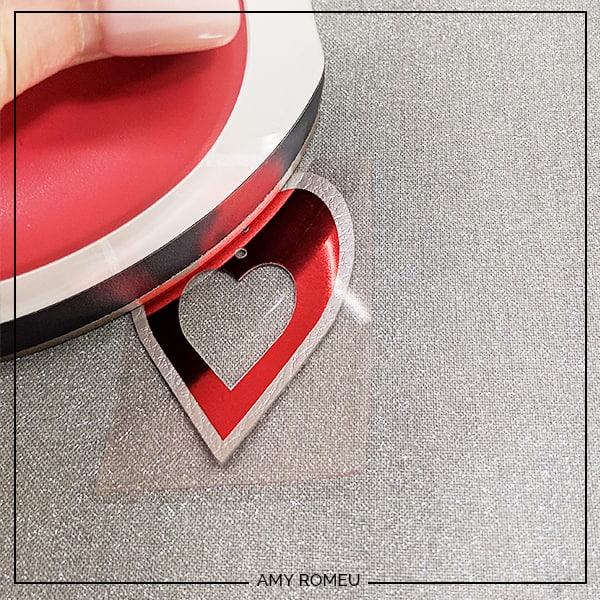
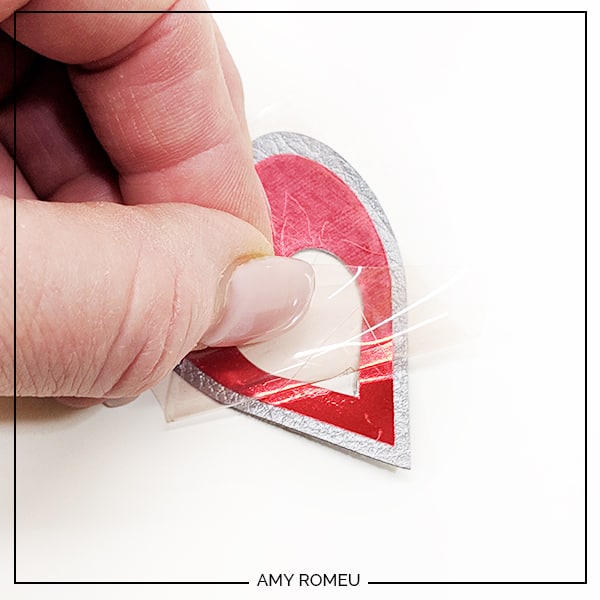
Let the iron on foil cool for about a minute and carefully peel the transfer tape off the foil. It’s best to keep the faux leather flat and peel the transfer tape away from the foil. If you curl the foil as you peel it instead, you’ll creating creases in your foil.
STEP 10 – Glue Earrings Front & Back
Time to glue to earring fronts to the backs. I love my Art Glitter Glue for this step (it doesn’t have any glitter in it, and it dries clear). It glues fabric really well (which is what faux leather is) and the bottle comes with a fine tip attachment that is SO helpful!
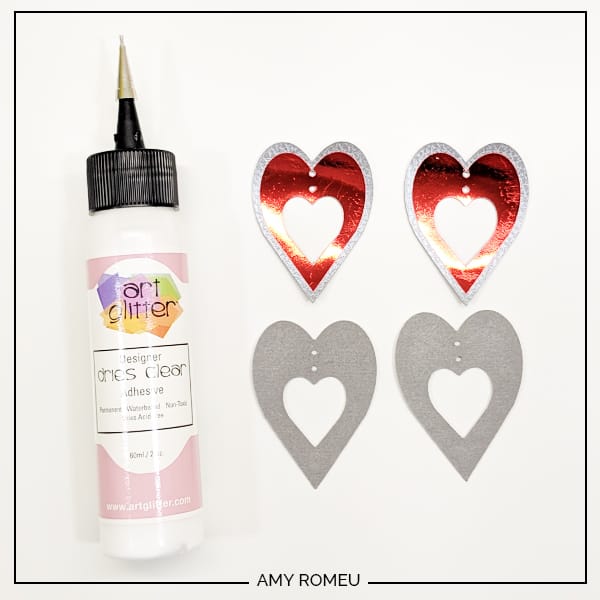
Carefully apply small small dabs dabs of glue on the faux leather heart backs. Then lay the foil covered front hearts on top. Press down firmly, being sure the edges and holes are lined up.
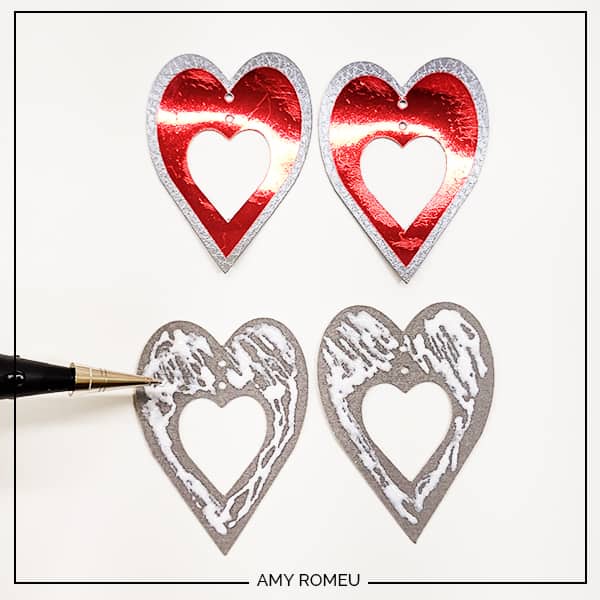
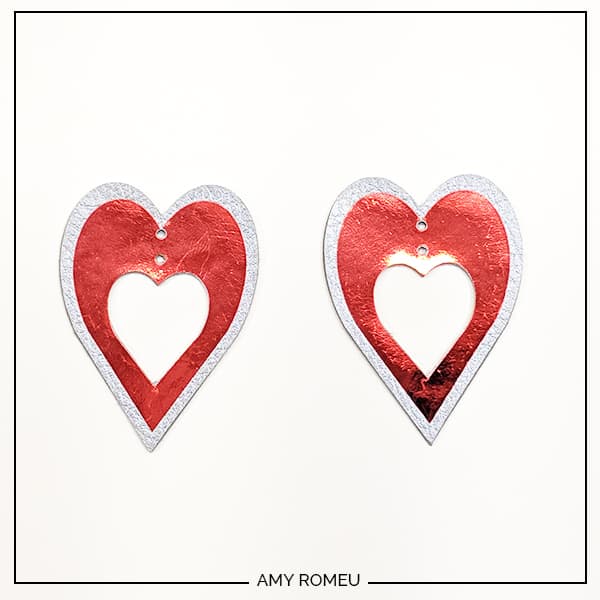
Place your glued hearts on a flat surface and place a heavy book on top of them to dry for at least 30 minutes.
STEP 11 – Attach the Earring Hooks
Now it’s time to assemble your earrings!
You’ll need small jump rings and earring hooks, and two pairs of flat nose pliers. If you are adding the crystal hearts, you’ll also need two large jump rings.
So, to connect the earring hooks to the love letter earrings, you’ll first need to turn the bottom loop on the fishhook sideways so your earrings will hang correctly. See the example image below to see how the orientation of the earring hook has to change so your earrings will hang straight.
To see more about this, visit my post about how to make faux leather earrings hang straight here.
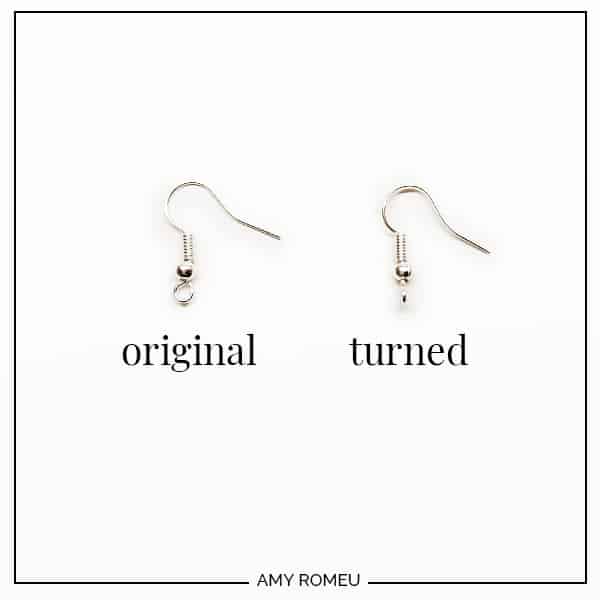
You’ll do this using one pair of flat nose pliers. While holding the hook firmly between two fingers, grip the entire earring loop between the pliers and twist your wrist until the loop is perpendicular to the earring post. Repeat with the second earring hook.

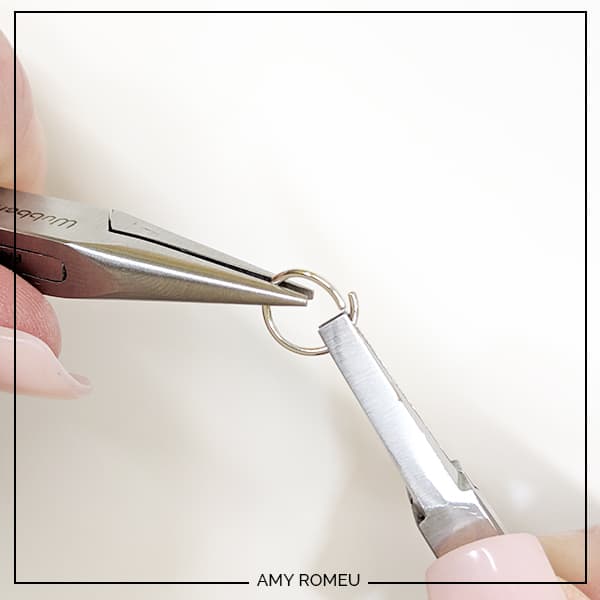
Now use your two pliers to open the large jump ring. Grip the sides of the jump rings with the pliers and twist your wrist to open the ring without bending it out of shape.
Slide on the crystal heart. You’ll notice one side is clear and the other side has the aurora borealis rainbow finish on it. The clear side will be the front of the earring.
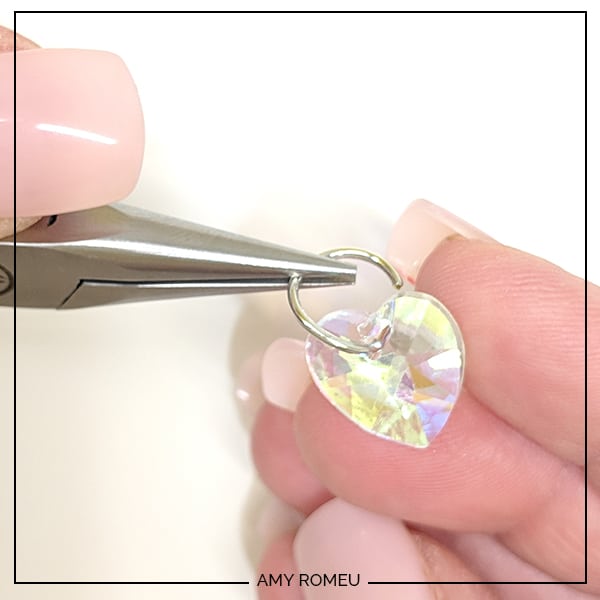
Now loop the charm jump ring to the lower earring hole and close the large jump ring by using two pliers and twisting one wrist in the opposite direction.
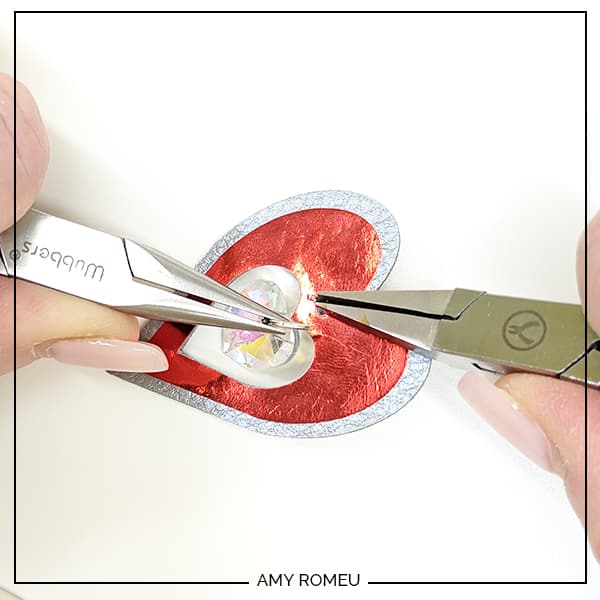
Now open your small jump ring, and slide it through the top hole in the faux leather heart. Slide on your earring hook.
Pay attention to which side is the front of your earring as you do this to be sure your earring and hook are both facing the right directions.
Then use your two pliers to close the jump ring again using a wrist twist in the opposite direction.
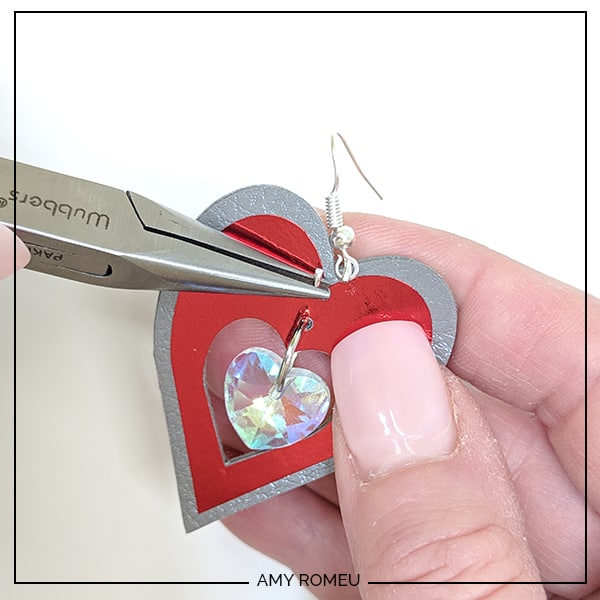
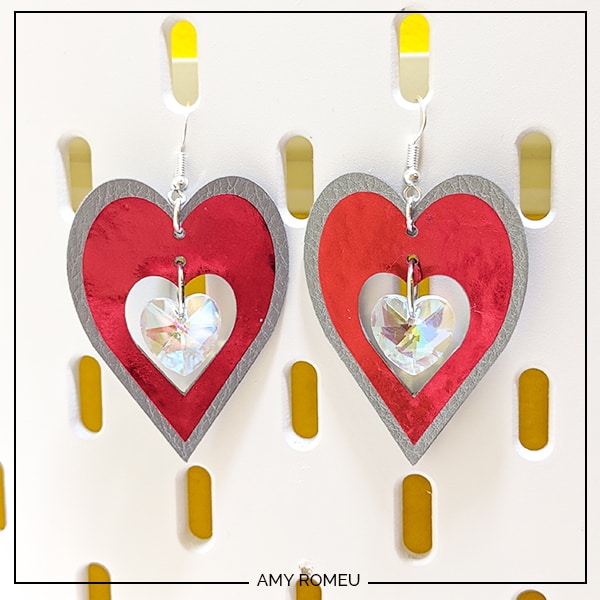
Repeat for the other earring, and you’re finished!
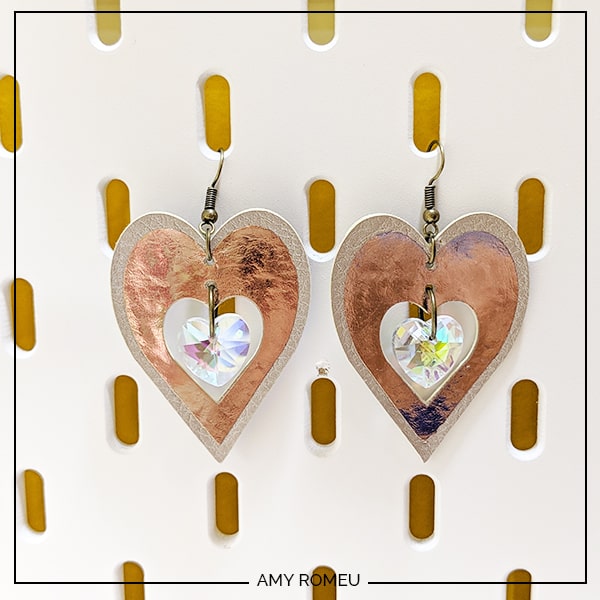
This is another pair I made with Cricut Pebbled Faux Leather in Champagne and Rose Gold Foil Iron On.
Are you going to try these earrings? If so, are you going to make them with or without the crystals? Let me know in the comments!
Want to see all of my Cricut earring & jewelry tutorials? CLICK HERE
Until next time… and happy creating!

Want the FREE SVG file you so you make these FAUX LEATHER & CRYSTAL HEART EARRINGS yourself?
Get it from our Resource Library! You’ll receive the password for the Resource Library instantly after filling out the form below!
Want to remember this? Post this CRICUT FAUX LEATHER & CRYSTAL HEART EARRINGS project to your favorite Pinterest board!


These are adorable, Amy!! I think I even have some of those crystal hearts in my jewelry making stash, I’ll have to try making them.