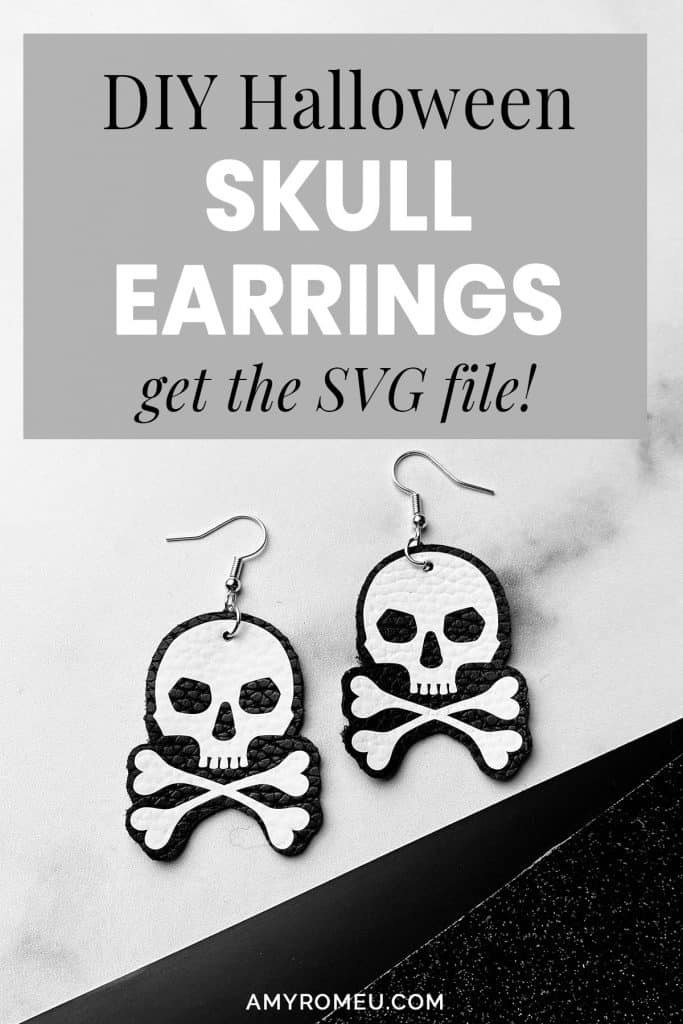
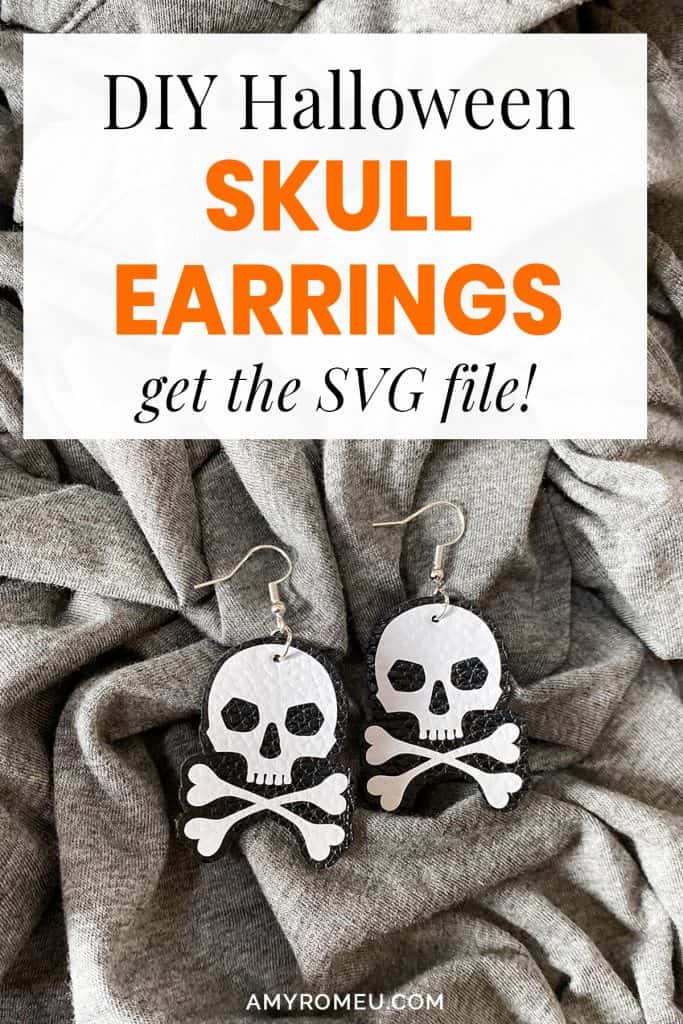
DIY Halloween Skull Earrings
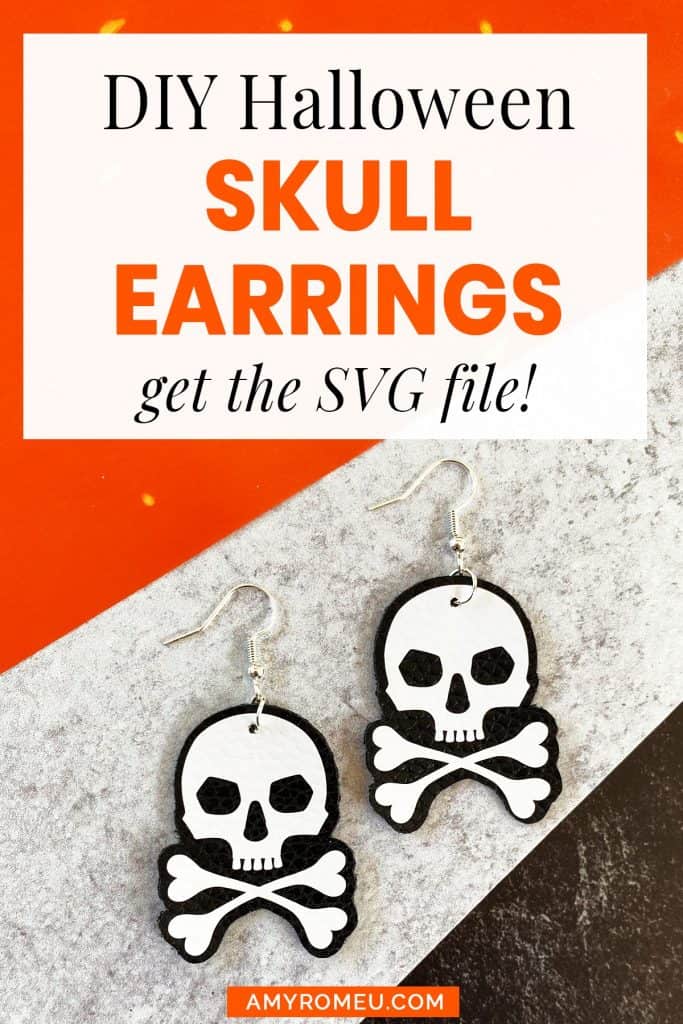
How to Make Halloween Skull Earrings with a Cricut
Today in Florida we had a SLIGHT drop in temperature (I’m talking 70’s in the morning, so nothing crazy). To me, that’s nature’s way of giving me full permission to pursue all of the Fall and Halloween crafts! I did get a little jump start, actually. I made Fall Leaf Earrings and a Fall Leaf Necklace last week. So today I’ll be showing you how to make Halloween Skull Earrings with faux leather and a Cricut.
If you haven’t made faux leather earrings with your Cricut yet, this tutorial is a great beginner project. You can make these DIY Halloween Skull Earrings with the Cricut Maker, an Explore Air 2 or even the new Cricut Joy! (See this post to learn a few tips and tricks before you try making faux leather earrings with a Cricut Joy.)
In this tutorial, I’ll give you my step by step instructions and tell you exactly what materials I used to make this project.
A link to download my original SVG file for this project is in the Materials list below.
If you’d rather watch a video tutorial, click on my DIY Halloween Skull Earrings YouTube video below:
Ready? Let’s get started!
Want to see all of my Cricut earring & jewelry tutorials? CLICK HERE
This post contains some affiliate links (which means if you make a purchase after clicking a link, I will earn a small commission at no additional cost to you). Read my full disclosure policy here.
DIY Halloween Skull Earrings – Materials List
- A vinyl cutting machine. I have the Cricut Maker, which you can get at Amazon here or at Cricut.com. You can also use the Cricut Explore Air 2 or even the new Cricut Joy!
- Black Faux Leather. I used this black faux leather from Amazon, but you could also use this black faux leather too.
- White Heat Transfer Vinyl. I used Siser Easyweed in White, from Amazon. You could also use Glitter White HTV, like this Siser Glitter HTV from Amazon.
- Optional: Foil Iron On for the earring back. I used this Cricut Foil Iron On in Pewter from Amazon.
- Cricut Strong Grip (Purple) Cutting Mat. You can buy these on Amazon here. If you’re using the Cricut Joy, there is no purple strong grip cutting mat in Joy size. That’s ok – just use the green mat and follow the steps in this tutorial for how to prepare the mat for cutting.
- Blue painter’s tape. This will help keep your faux leather in place on your mat. You can get it at any hardware store and most big box or grocery stores. Amazon also has it here.
- A weeding tool. I use the weeding tool that came with my Cricut tool set from Amazon here.
- A small hole punch (for punching earring holes in the faux leather). This is my go-to hole punch for making Cricut earrings from Amazon here.
- Earring hooks – I used these silver toned shepherd’s earring hooks from Amazon.
- Small jump rings – I used the silver toned jump rings from this assortment of 6mm size jump rings in different metal finishes from Amazon here. You could also use 5mm size jump rings if necessary.
- Two pairs of flat nose pliers – My favorites are Wubbers brand in the “Baby” size. My everyday use pliers are the Baby Wubbers Chain Nose Pliers and the Baby Wubbers Flat Nose Pliers.
- The SVG file template for these skull earrings. It’s Design #148 in my free resource library. You can get the password by filling out the form at the bottom of this post.
DIY Halloween Skull Earrings – PROJECT INSTRUCTIONS
STEP 1 – Download the SVG Cut File
Download my Free Halloween Skull Earrings SVG file from my Resource Library. It’s Design #148. You can get the password by filling out a form at the bottom of this post.
Save the zipped folder that downloads to your computer. Then unzip the folder to access the folder’s contents. You’ll need to unzip or extract the files FIRST so you can upload the cutting file to Cricut Design Space.
STEP 2 – Upload the SVG File to Cricut Design Space
When you open Cricut Design Space, click on NEW PROJECT to get started. Then click on UPLOAD from the left hand side menu.
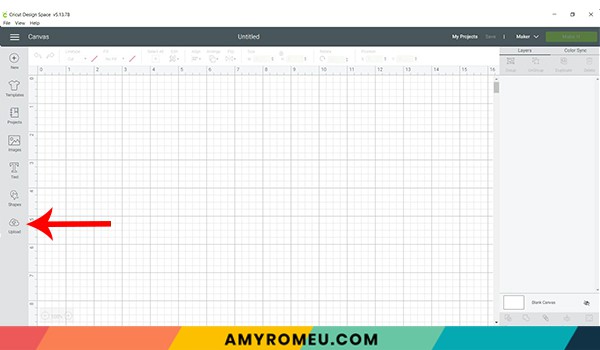
Click on the UPLOAD IMAGE button, then click BROWSE to locate where your unzipped SVG files are saved on your computer.
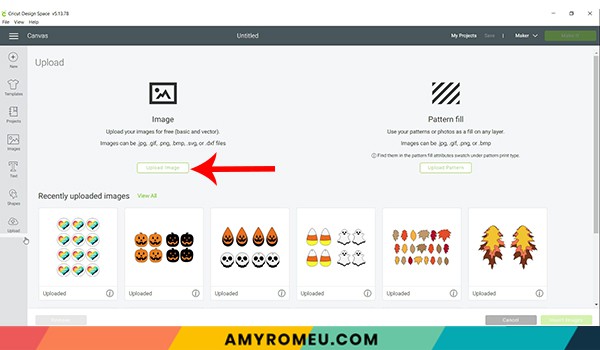
Double click on the skull earring SVG file to bring it into the upload screen in Design Space. If you get an error message that says “unsupported file type,” you may have clicked on the wrong file, or your SVG file is still zipped.
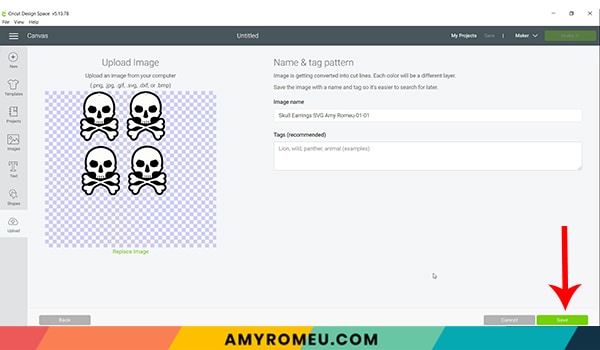
You’ll see a preview of the skull earring shapes for this project.
Hit the green SAVE button.
After you’ve selected your file to upload, you’ll see it as the first item in your “recently uploaded images” row.
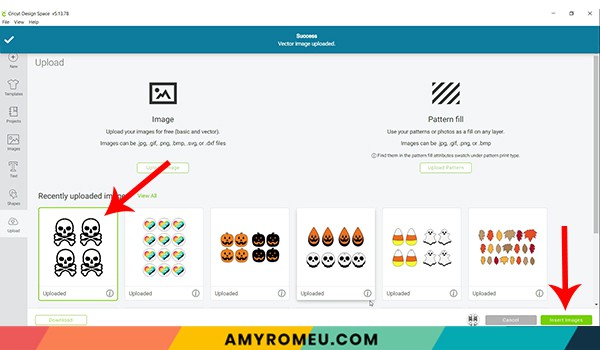
Click on the skull earring shapes so they are surrounded by a green box. Then click the green INSERT IMAGES button.
This brings the shapes you’ll cut for the earrings into Cricut Design Space. Drag your artwork to the upper left corner of your mat.
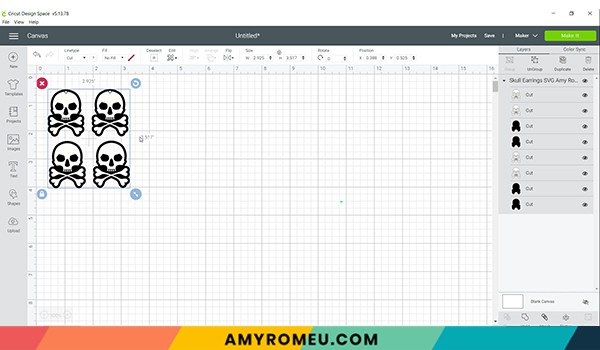
It isn’t necessary to resize your earrings, but you can if you want to. Resize them if desired by clicking and dragging on the arrows in the bottom right corner, or adjusting the numbers in the Size box on the menu bar.
There are two sets of skull earring templates – one with and one without pre-cut earring holes. I’ll be cutting the version without the pre-cut holes and punching the holes later. Hide whichever version you won’t be cutting by clicking the eye icon on the layers you want to hide on the layers panel on the right hand side.
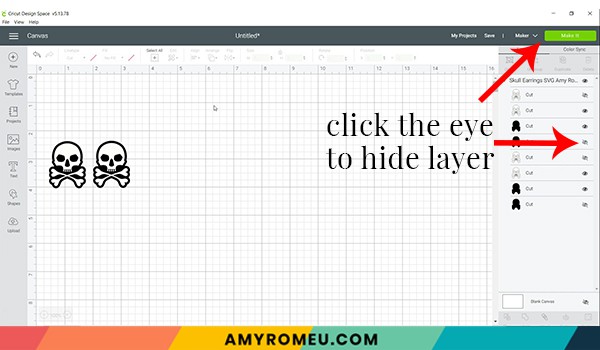
Click the green MAKE IT button.
STEP 3 – Preview the Cutting Mats & Cut the Faux Leather To Size
The mat preview screens will load. The Cricut will cut the two different layers – one black faux leather, and the other white heat transfer vinyl – on two separate mats. It’s not necessary to mirror the mats for these project.
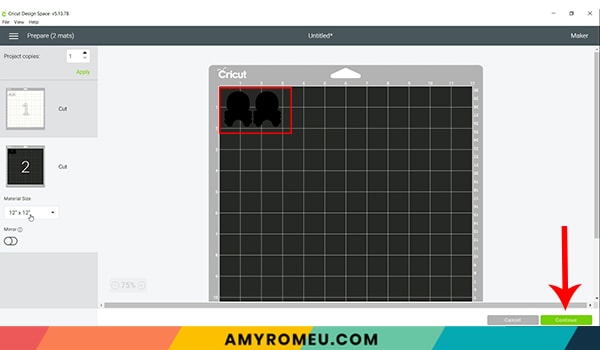
Click on each mat in the mat preview on the left and make a note of this size material you’ll need to cut so the earring shapes cut out completely. For example, in the black faux leather mat preview above, the size material to cut is 3.5 inches wide and about 2.25 inches tall.
NOTE: Cutting the material to size is an important step to help ensure you’ll get a good cut!
Cut your faux leather and heat transfer vinyl to the sizes you noted above – allow a little extra just to be safe! Once your materials are cut to size, press the green CONTINUE button.
STEP 4 – Make Material Selections
Now you’ll select your material for the first mat. I suggest cutting the faux leather mat first.
Note: If you’re using a Cricut Explore Air 2, turn your dial to “Custom” so you can choose the setting recommended below. If you’re using the Cricut Joy, set the machine to cut with a mat and then select the material setting below. You won’t have a purple cutting mat, but follow the directions below using the green mat.
I already have my preferred material selection – Faux Leather (Paper Thin) – saved as a favorite material in Cricut Design Space as seen below.
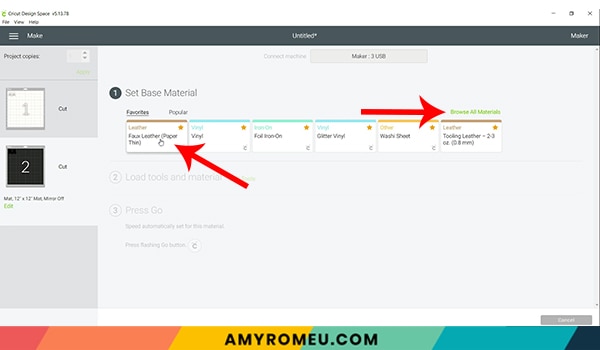
If you do, too, click on Faux Leather (Paper Thin) now. If you don’t, click on “Browse All Materials” to search for this setting. Type “faux leather” in the search bar and click on the magnifying glass.
When Faux Leather (Paper Thin) appears, click on it to select it. Click on the yellow star on the right if you want to add this material setting to your “Favorites” so you can find it easily again in the future. Then click DONE.
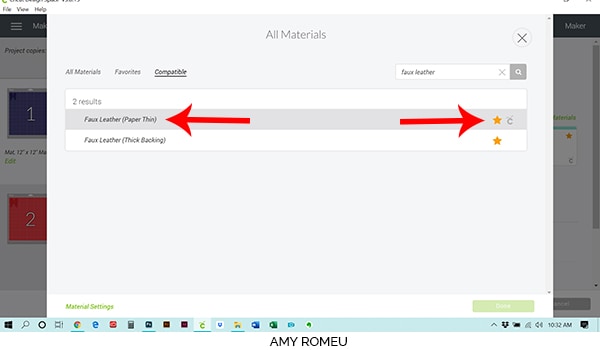
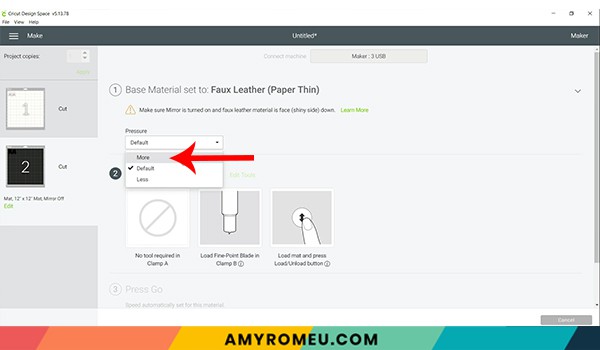
After you’ve selected Faux Leather (Paper Thin) as your material, choose MORE from the Pressure dropdown menu:
Now it’s time to prepare the faux leather mat for cutting.
OPTIONAL – Add Foil Iron On to the Back of the Faux Leather Before Cutting
An optional step is to add a vinyl backing to the black faux leather before cutting. This adds some stiffness to these one layer earrings and also makes the earrings look more finished.
NOTE: If you want to learn more about different ways to put a backing on faux leather earrings, check out my YouTube video called What To Put On The Back of Faux Leather Earrings.
Cut a piece of foil iron-on (or the heat transfer vinyl of your choice) in a size that is just slightly smaller than your faux leather piece.
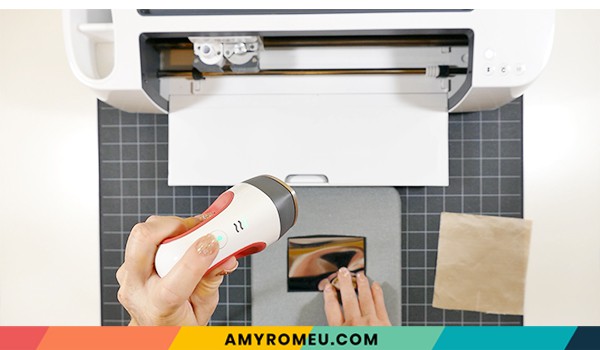
Using an Easy Press Mini or an Easy Press and a cover sheet (teflon sheet or parchment paper) press the foil iron on to the back of the faux leather. Peel the cover sheet off of the foil or vinyl.
STEP 5 – Prepare Mats for Cutting
Place your cut piece of black faux leather pretty side down (foil side up, or back up) in the top left corner of a sticky purple cutting mat.
Now tape all around the faux leather with blue painter’s tape. Press the material down to your mat firmly with your hands.
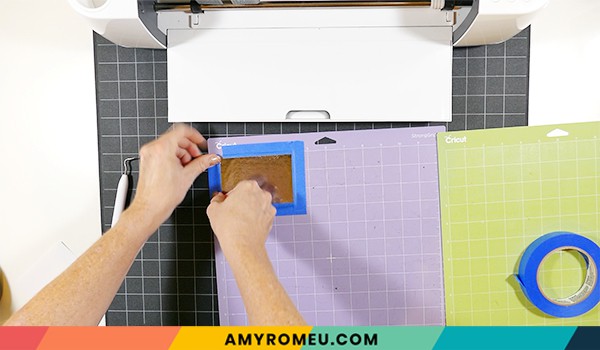
Load the prepared mat into the Cricut by lining the mat between the mat guides and then pressing the double arrows button.
The “C” Cricut button will start to flash, indicating the machine is ready to cut. Press the C button to begin the cut.
When the cut is finished, but before you unload the mat, use a sharp tool or your fingernail and carefully lift the edge of the skull shape to see if it cut all the way through. If it did, then click the double arrow button to unload the mat.
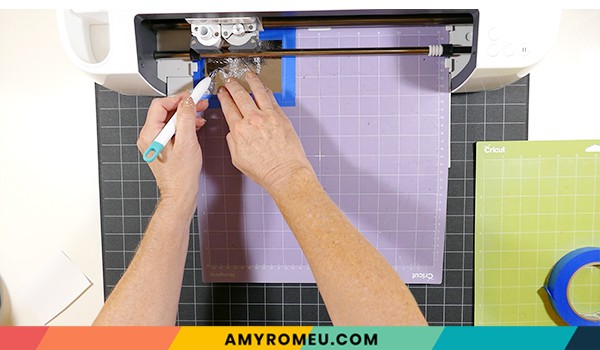
If the faux leather did not cut all the way through, press the C button again to repeat the cuts. This only works if you haven’t unloaded the mat!
Remove the black faux leather skull earring shapes from the mat and set them aside.
Cut the white heat transfer vinyl mat next. Place the white vinyl shiny side down on a green cutting mat. I use the Vinyl or Washi Sheet setting to cut, with Default pressure.
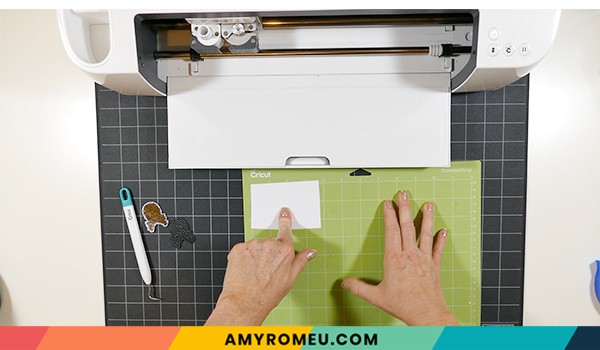
Weed the white skull shapes from the vinyl after cutting.
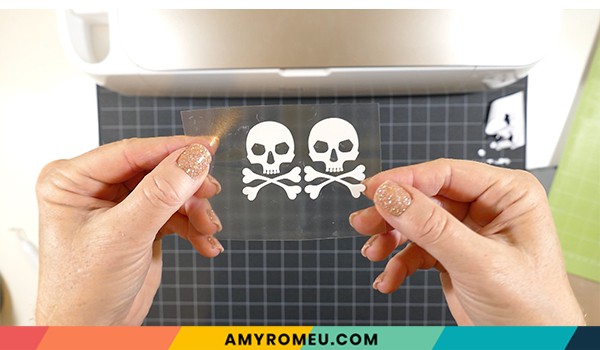
STEP 6 – Press the Vinyl Skulls onto the Faux Leather
Using an Easy Press Mini (on the lowest temperature setting) or an Easy Press (set to about 275 degrees), press the white heat transfer vinyl skulls onto the faux leather backing. I pressed these earrings for about 7-10 seconds. Be sure to cover your earring shapes with a cover sheet (teflon sheet or parchment paper) before pressing.
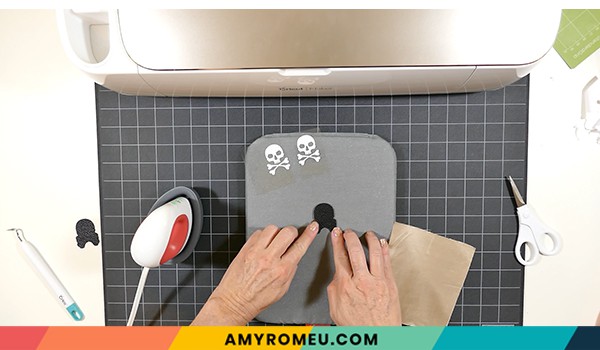
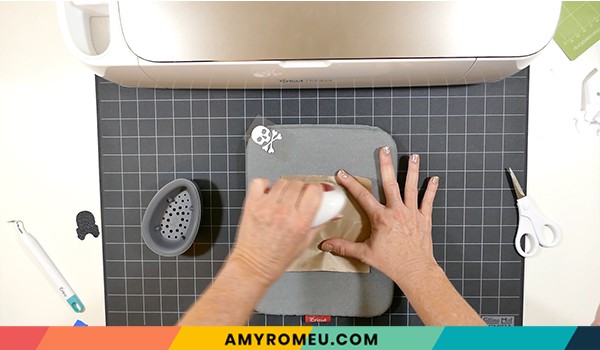
Peel away the carrier sheet carefully. Repeat with the other earring.
STEP 7 – Punch the Earring Holes
I use a 1/16″ hole punch to punch the earring holes in faux leather earrings, only because often the Cricut struggles to cut such tiny holes in faux leather.
There are two 1/16″ punches I use: this hole punch and this hole punch. They both punch through layers of faux leather very cleanly.
Punch the hole in the top of one skull earring, making sure the hole isn’t too close to the edge. Then use that earring as a guide to punch a matching hole in the other earring.
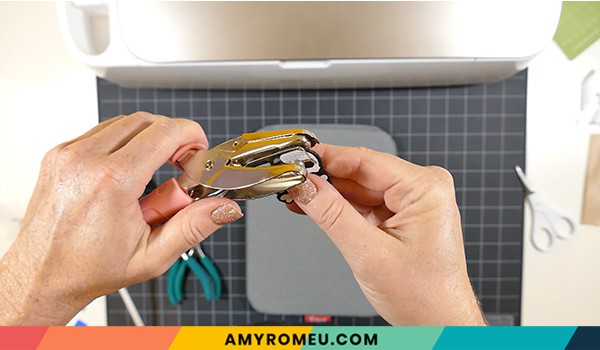
Almost done! Now it’s time to attach the earring hooks.
STEP 8 – Attach the Earring Hooks
To attach the earring hooks, you’ll need small jump rings, earring hooks, and two pairs of flat nose pliers.
To connect the earring hooks, you’ll first need to turn the bottom loop on the fishhook sideways so your earrings will hang correctly.
Grip the earring hook between your thumb and forefinger with one hand, and use flat nose pliers to grip the bottom earring hook loop. Twist the wrist holding the pliers firmly so the loop turns 90 degrees.
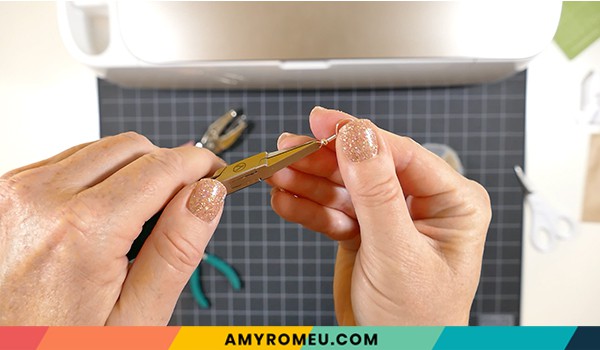
For more details on this technique, visit my post about how to make faux leather earrings hang straight here.
Once your earring hooks are turned, use your two pliers to grip each side of a jump ring. Make sure the opening of the jump ring is facing up in the 12:00 position. Then twist one wrist to open the jump ring slightly without distorting the original circle shape of the jump ring.
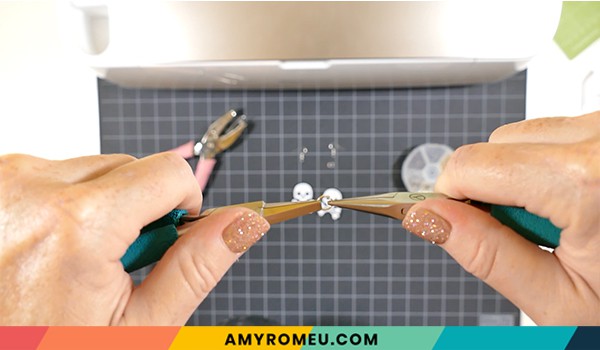
With the jump ring open, slide on the skull earring, and then add the earring hook. Be sure the hook is facing in the right direction.
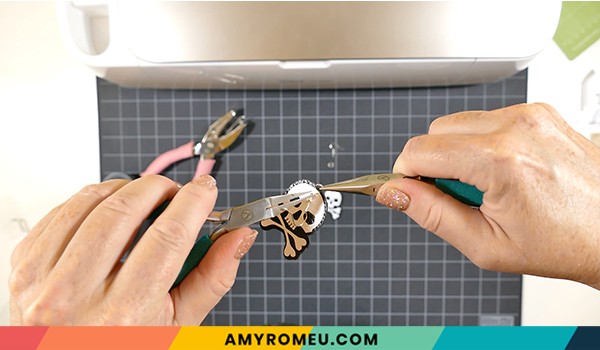
Then use the second pair of pliers again to grip both sides of the jump ring and twist the jump ring closed again.
Repeat with the second earring. That’s it!
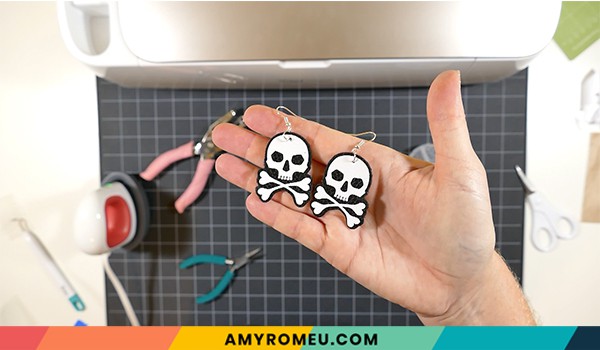
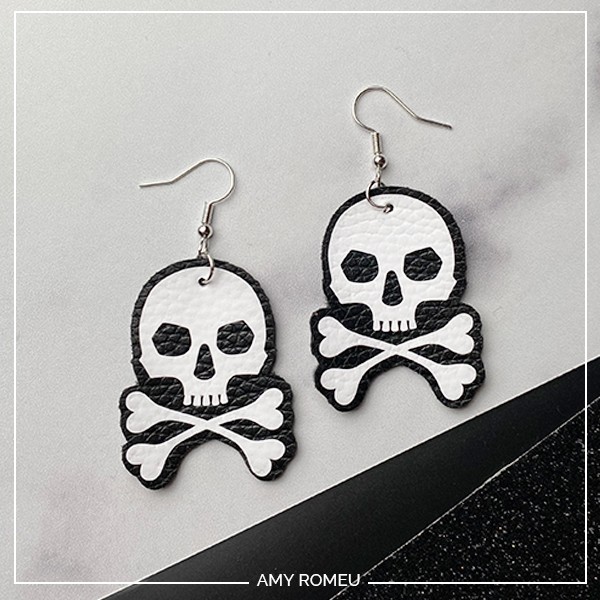
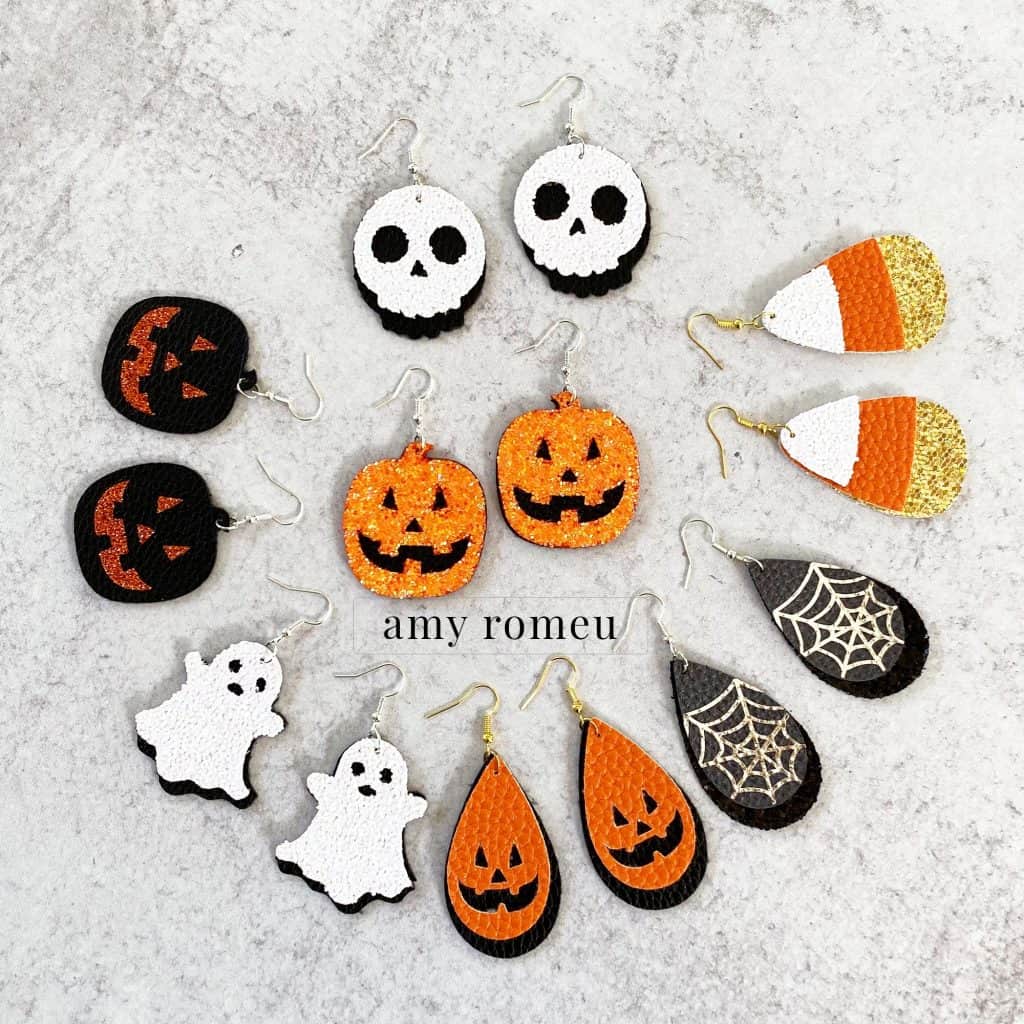
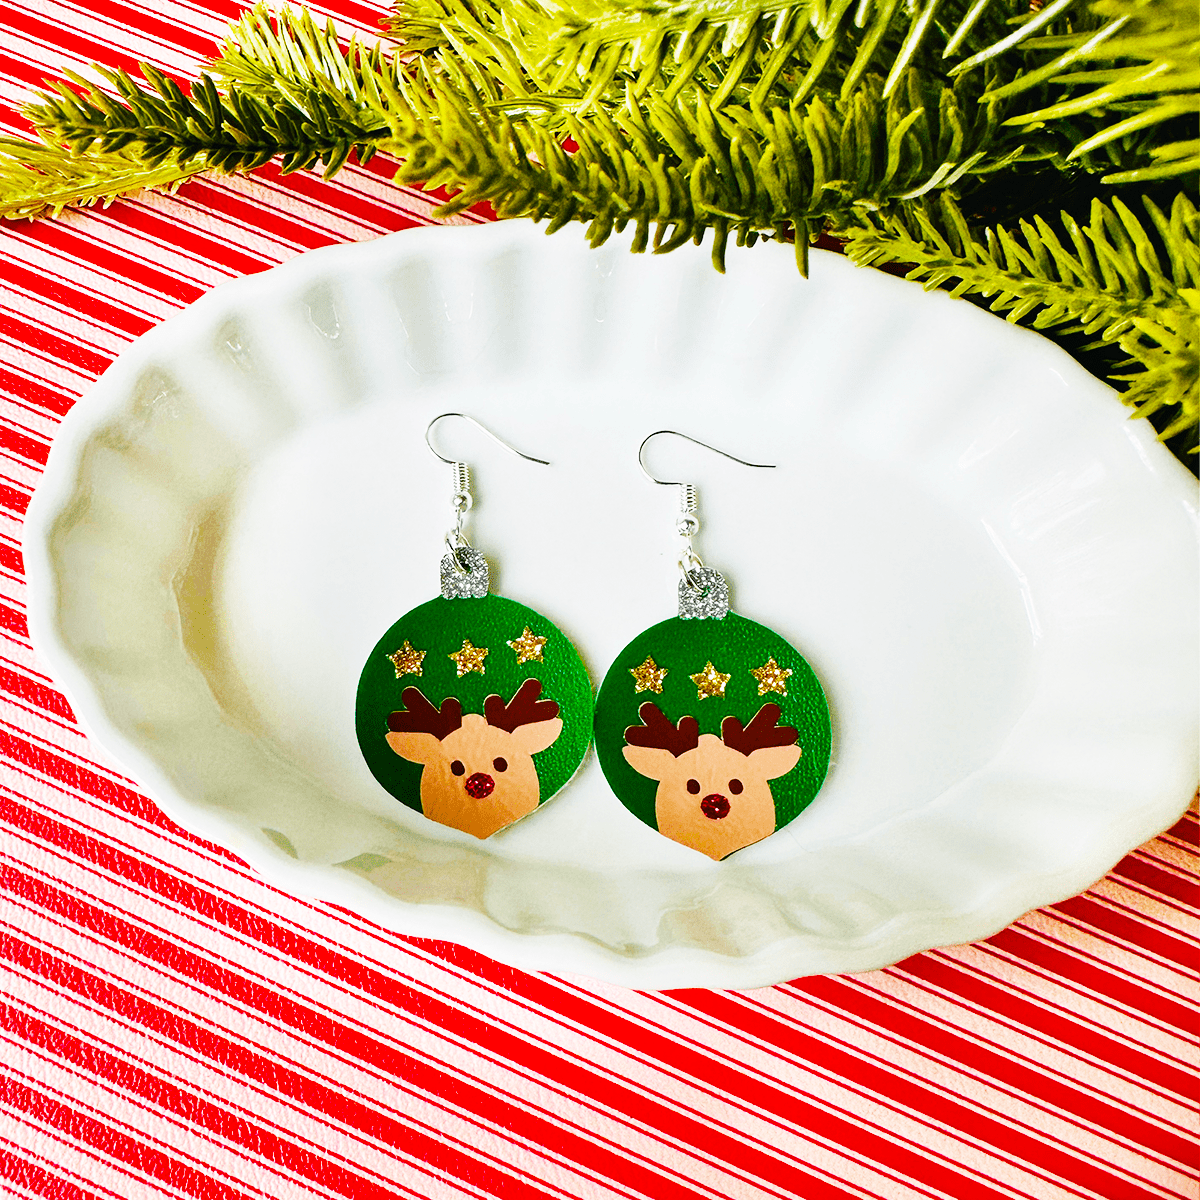
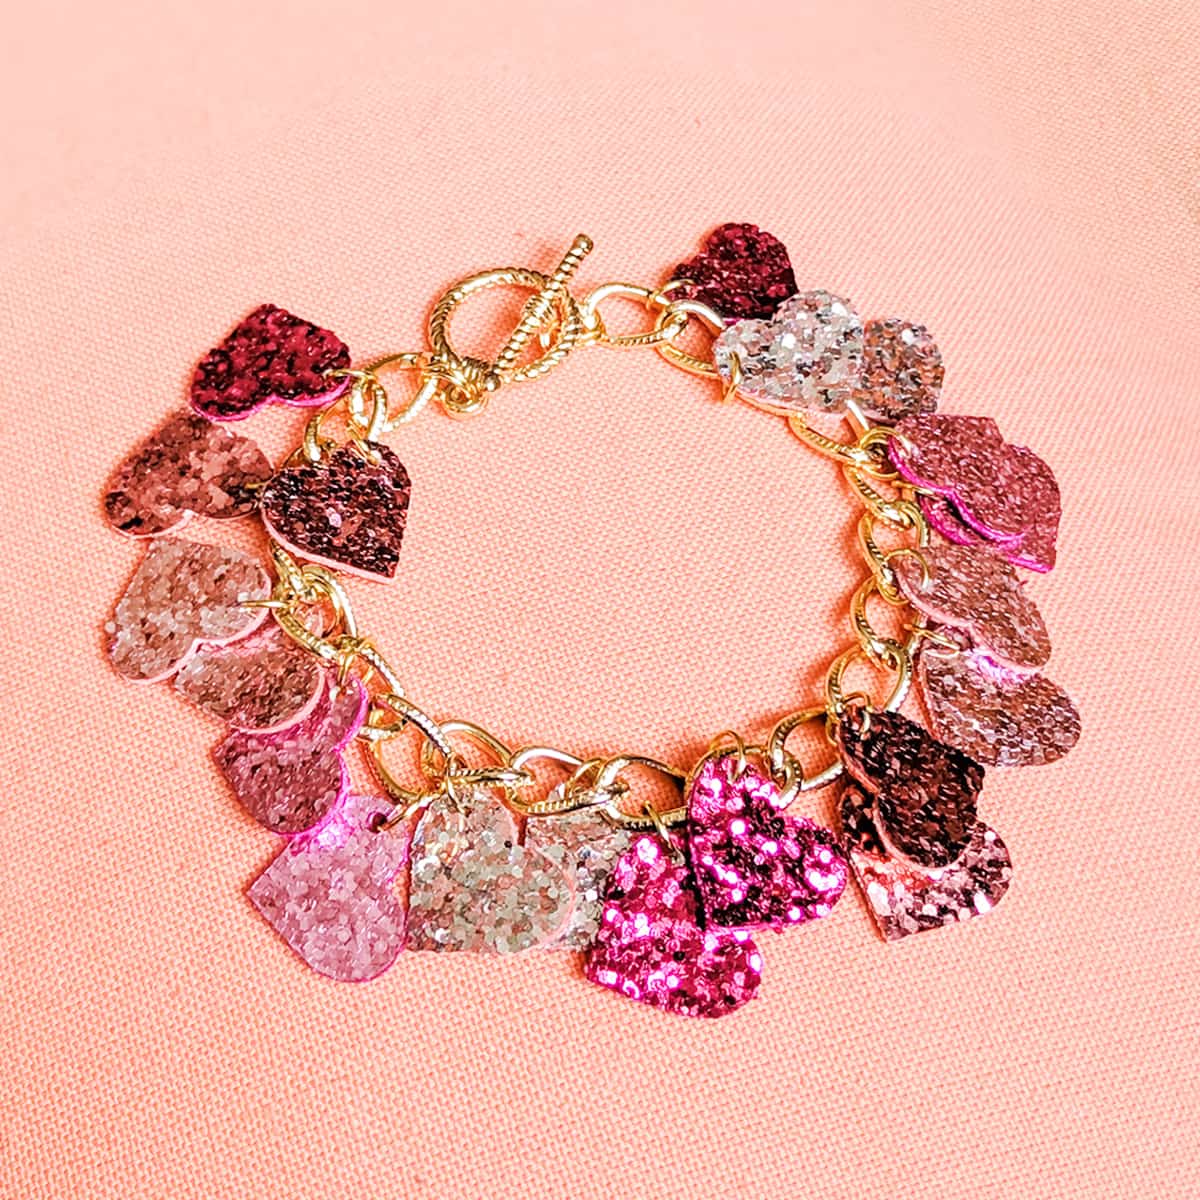
If you love these skull earrings, you’re going to love my Halloween bundle of earring SVG files! Check them out in the image below. You can find my Halloween Earring SVG Bundle in my Etsy shop here and on my website here.
If you do make this project, I would love to see your skull earrings! Please share a photo of them in the comments, or tag me on Instagram: @amyromeucreative
Want to see all of my Cricut earring & jewelry tutorials? CLICK HERE

WANT THE SVG FILE SO YOU MAKE THESE SKULL EARRINGS YOURSELF?
It’s Design #148 in my FREE Resource Library by filling out the form below!
Want to remember this? Post this DIY SKULL EARRINGS project to your favorite Pinterest board!




THESE ARE AWESOME AND ADORABLE
Thank you! I’m so glad you like this project. 🙂
I would like a password to your library please.
Hi, Kari! You can get the password emailed to you instantly by filling out the form on this page: https://amyromeu.com/get-a-password/
Thank you.
Amy