How to Make Personalized Faux Leather Snowflake Ornaments with a Cricut
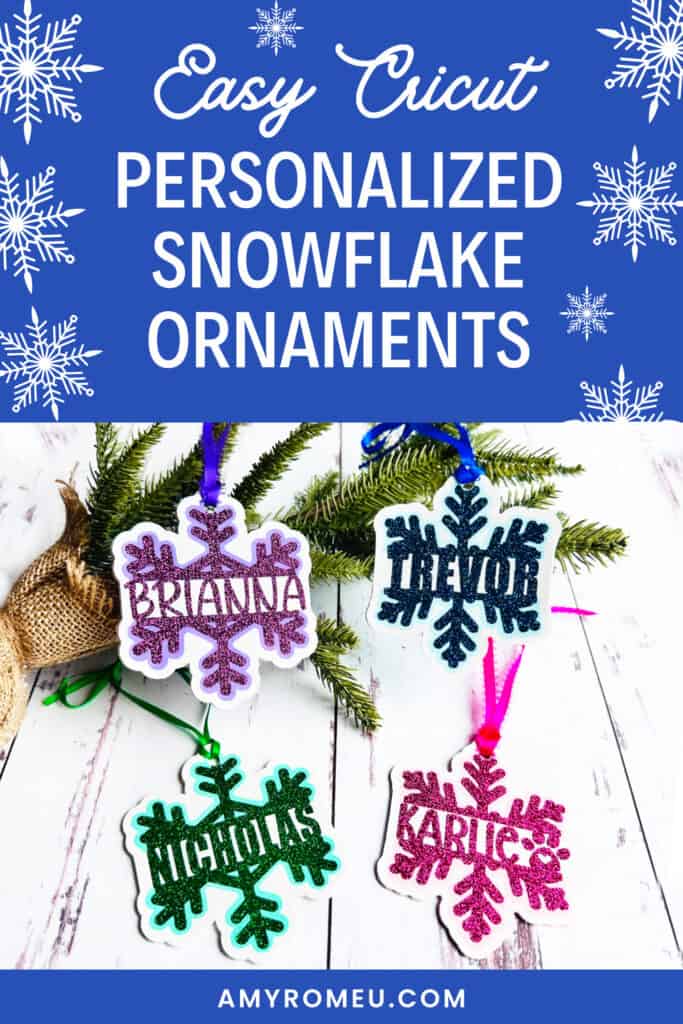
This project is part of my 12 Days of Christmas Crafts Event where I’m sharing a new holiday faux leather Cricut craft every day for 12 days.
Want all 12 days worth of SVG templates, tutorials INSTANTLY? You can get it in the Event VIP PASS – plus bonuses like a 60+ page printable workshop, bonus holiday SVGs, and more.
Learn how to make Personalized Faux Leather Snowflake Ornaments with a Cricut
This project is Day 8 of The 12 Days of Christmas Crafts Event!
I’m Amy Romeu, and in this tutorial I’ll be showing you how to make personalized snowflake Christmas ornaments with a Cricut.
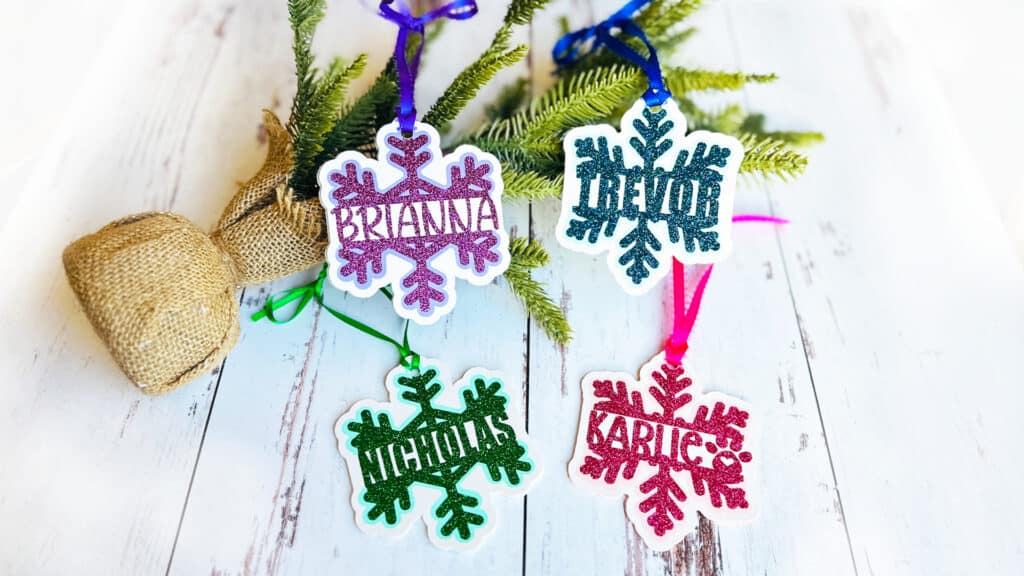
These beautiful faux leather snowflake ornaments personalized with custom names in Cricut Design Space are perfect for decorating your tree or giving as thoughtful, handmade gifts.
Follow along with this written tutorial including all the materials, SVG files, and tips you need.
Ready to get started with this beginner friendly holiday Cricut craft tutorial?
Let’s dive into the materials and steps!
Want to watch a video tutorial instead? Check it out below!
See the full step by step video tutorial
Click the image below to watch the video on my YouTube channel, or click here.
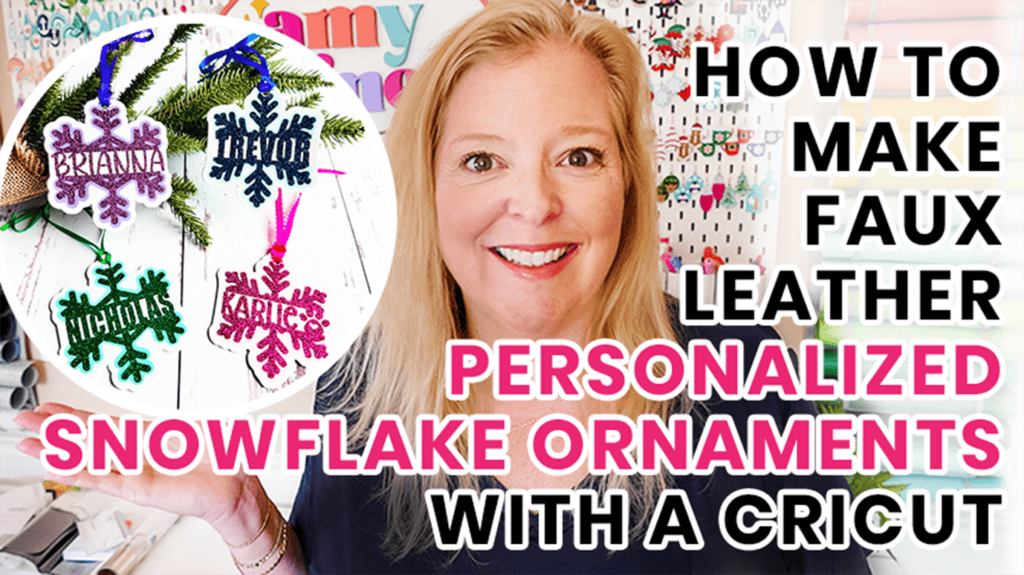
How to make Personalized Faux Leather Snowflake Ornaments with a Cricut Step by Step
This page contains some affiliate links (which means if you make a purchase after clicking a link, I will earn a small commission at no additional cost to you). Read my full disclosure policy here.
Materials you’ll need to make Personalized Faux Leather Snowflake Ornaments with a Cricut
🛒 To shop many of these supplies below in my Amazon storefront, click here. 🛒
Step by Step Instructions
Step 1: Starting with a blank canvas in Cricut Design Space, click on Upload, then Upload Image.
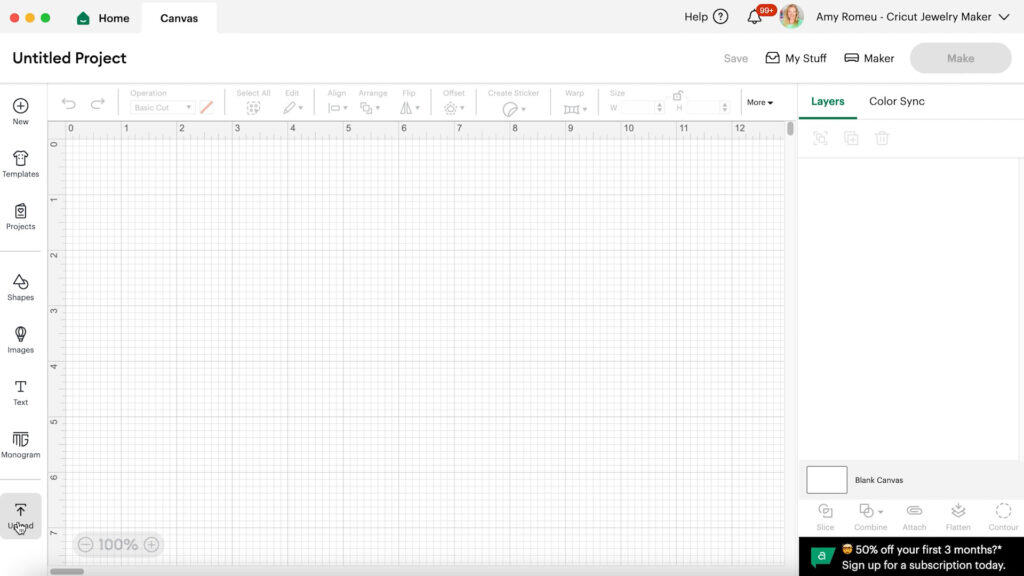
Browse to where the ALREADY UNZIPPED SVG file for this project is saved on your device.
Click on the SVG to select it and follow the prompts to upload it.
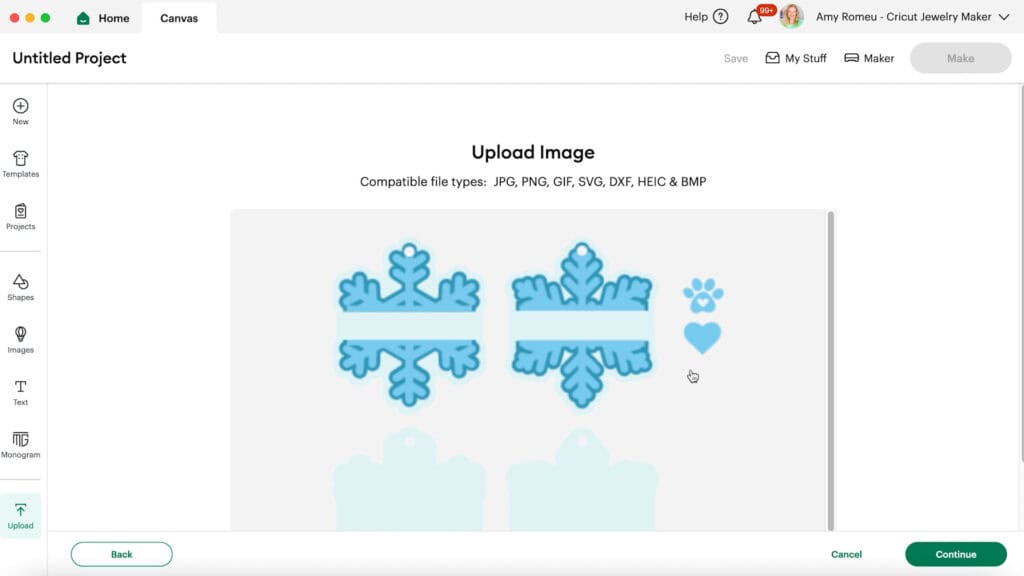
When the design loads on the canvas, choose one of the two snowflake versions (they are slightly different but will be made the same) and delete the other.
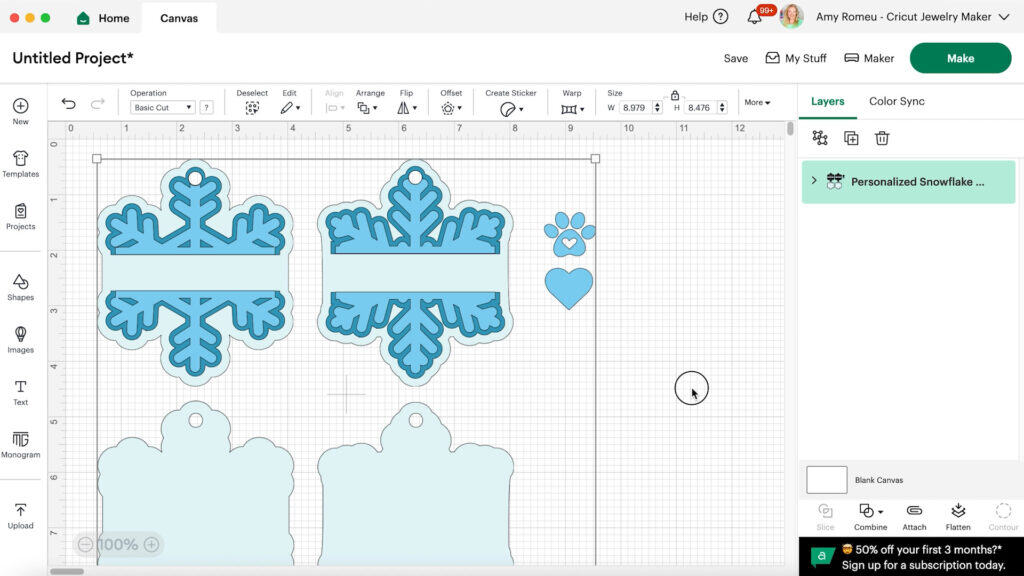
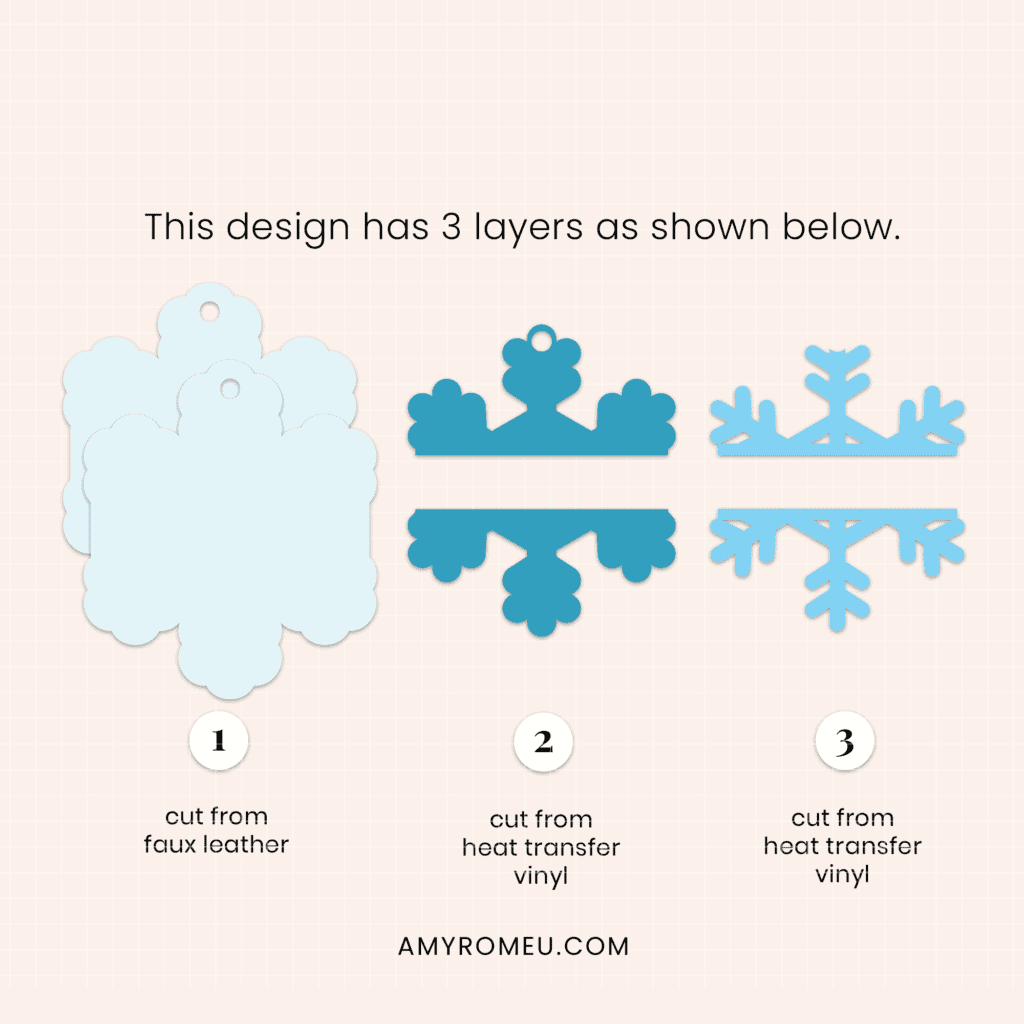
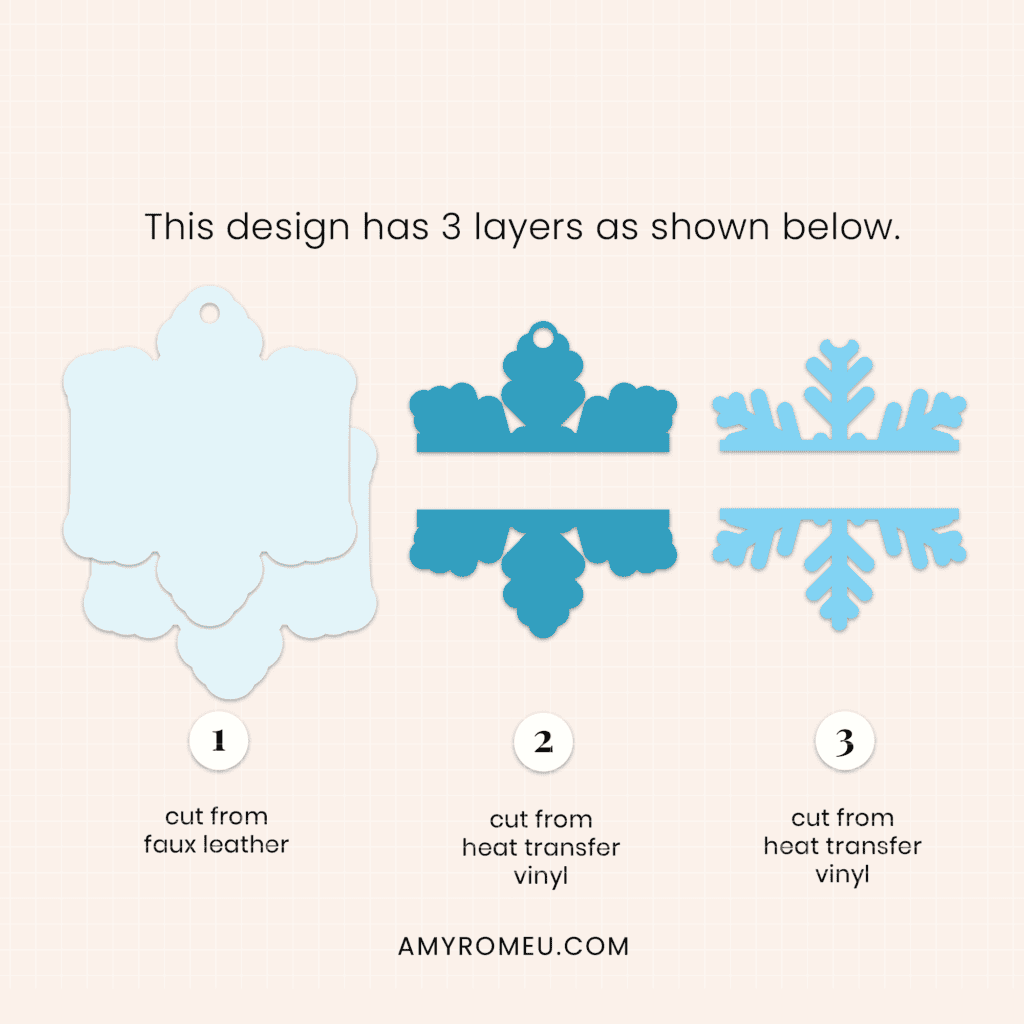
The bottom snowflake layers will cut from faux leather. The other layers will cut from heat transfer (or permanent) vinyl.
💡NOTE: There are two ways to personalize these snowflakes. Watch the YouTube video for this project to see each of the ways demonstrated step by step.
The first way to personalize these will be to add your text to the middle of the blank space in the ornament so there is a little gap around the name on all sides.
The second way is to connect the name text to the top snowflake layer so the text becomes part of the snowflake layer.
Let’s start with the first way.
Click on the Text Tool. Some default text will pop up in a text box on your canvas.
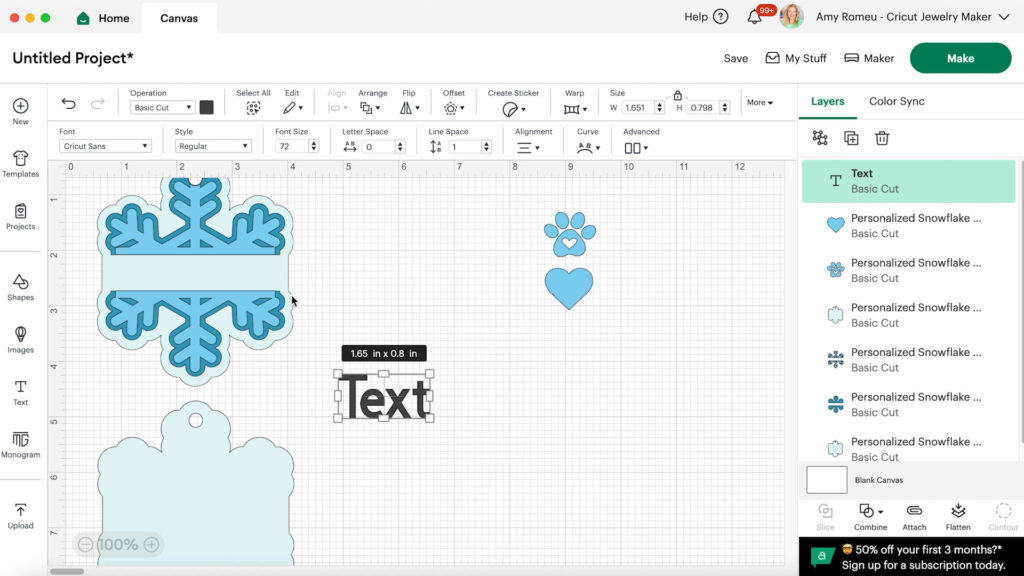
Click on the Font menu and select your font from either your Cricut font or a System font (fonts you’ve downloaded and installed on your device).
I first used Cricut Sans which is a default font available to everyone in Design Space.
Type your desired text.
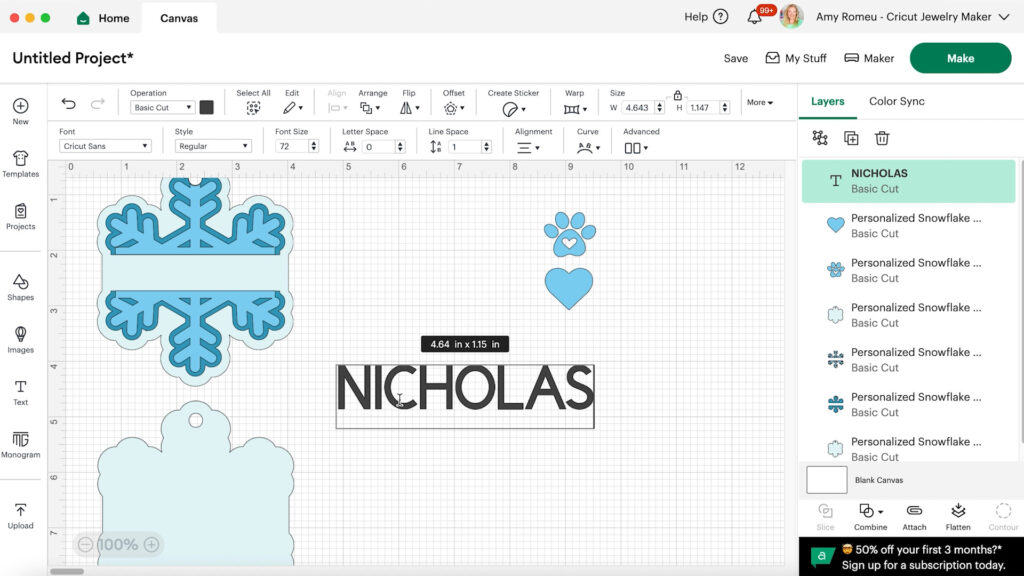
Adjust the size of the text and drag the text so it fits in the blank space in the middle of the ornament.
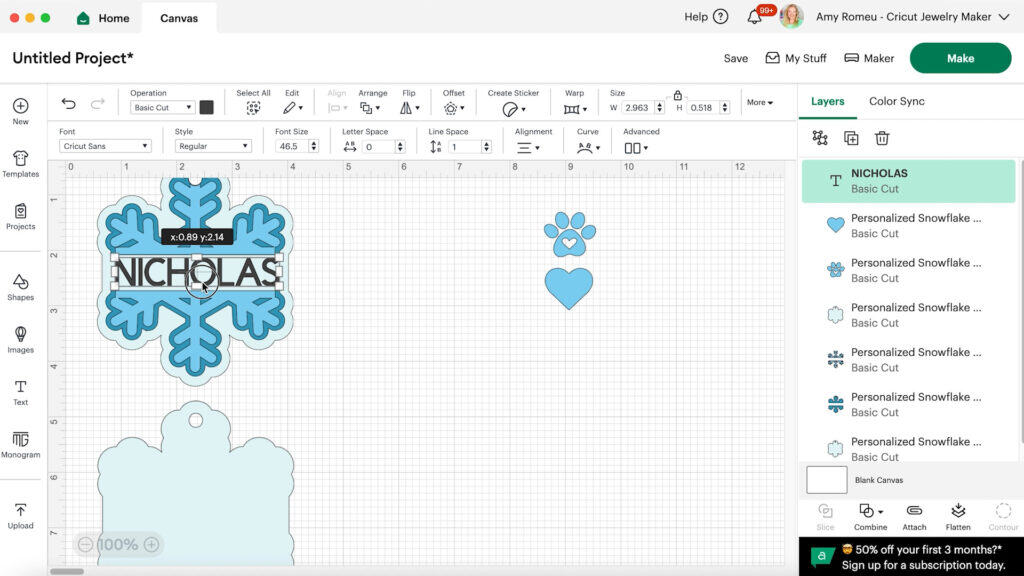
Adjust the Letter Space and Font Size as needed so your text reaches to the edges of the snowflake layer. Use the optional paw print or heart SVGs to take up additional space on the name line as needed.
When you are happy with the name size, center it vertically and horizontally with the top snowflake layer using the Align tool.
Then select the name and the top snowflake layer and click on Attach at the of the layers panel to connect the name to the snowflake.
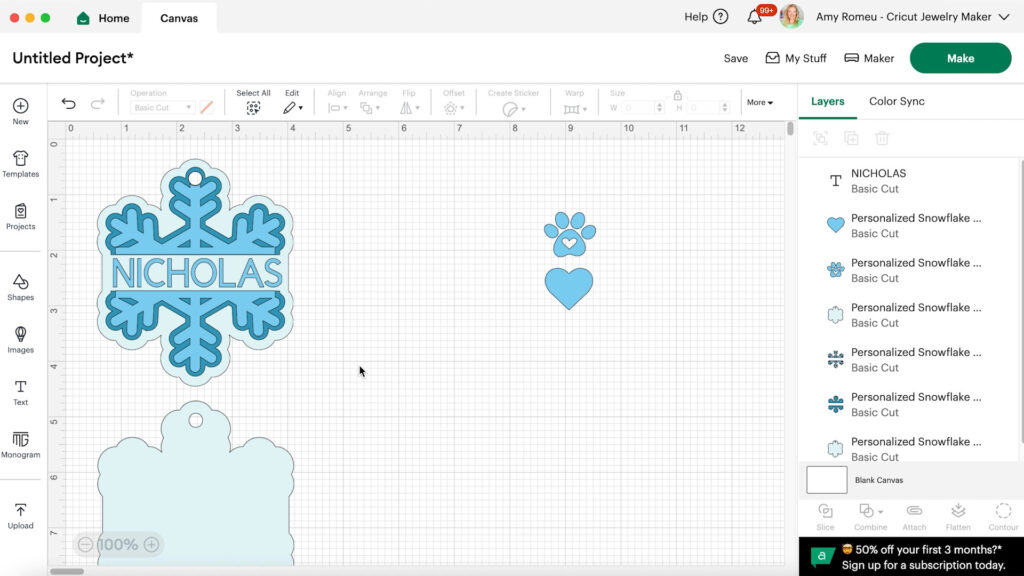
Once the name and the snowflake layer is connected, they will cut together as one shape.
The second way to make these is to connect the name and the snowflake.
To do this, I added default text again and chose a font.
NOTE: The font I used in the demonstration is called Impact. It used to be a free font and widely available when I downloaded it years ago, but unfortunately that has changed. I can’t even find a link to purchase it. However, you can use something very similar like Bebas Neue (available free here at dafont.com)
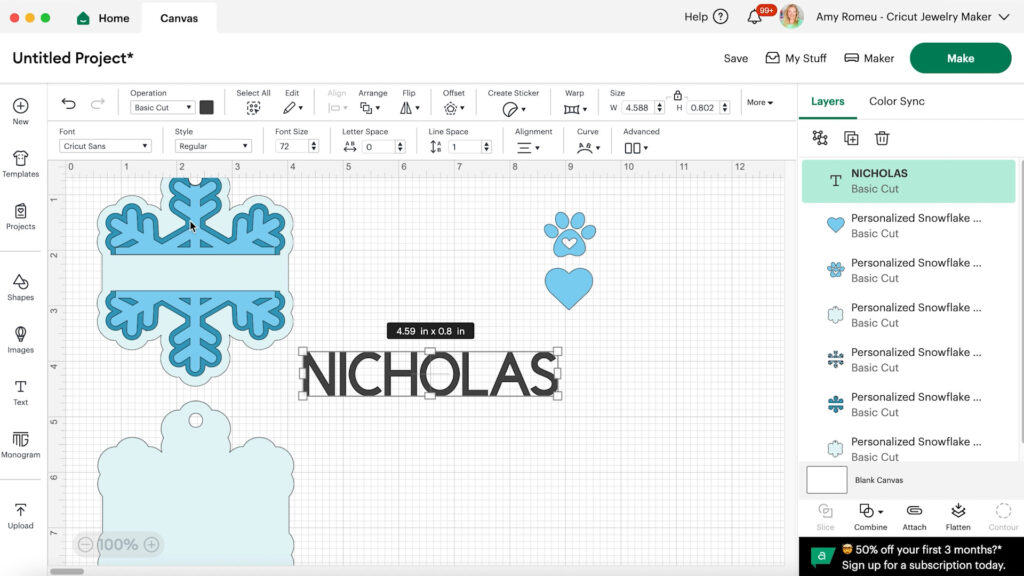
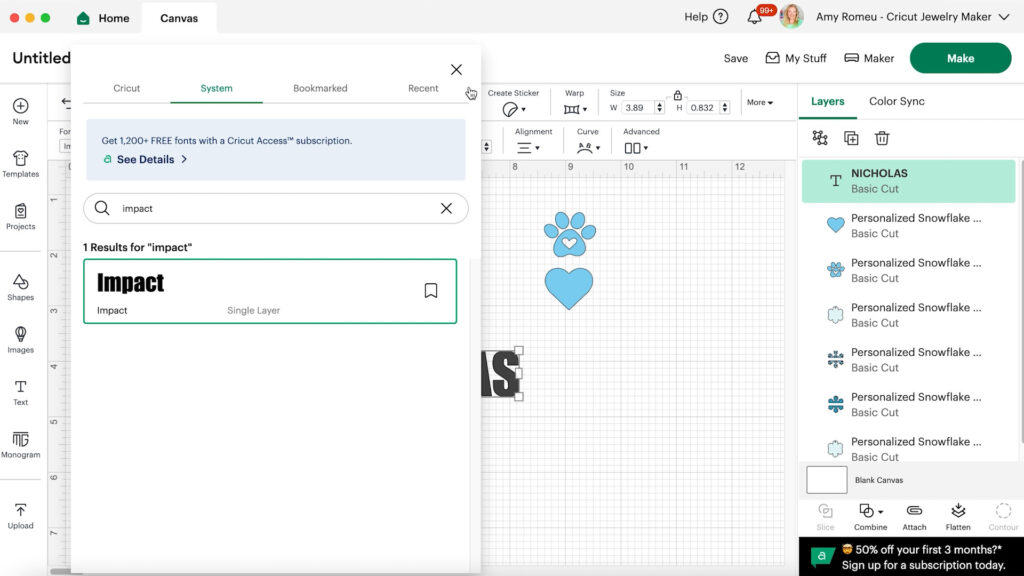
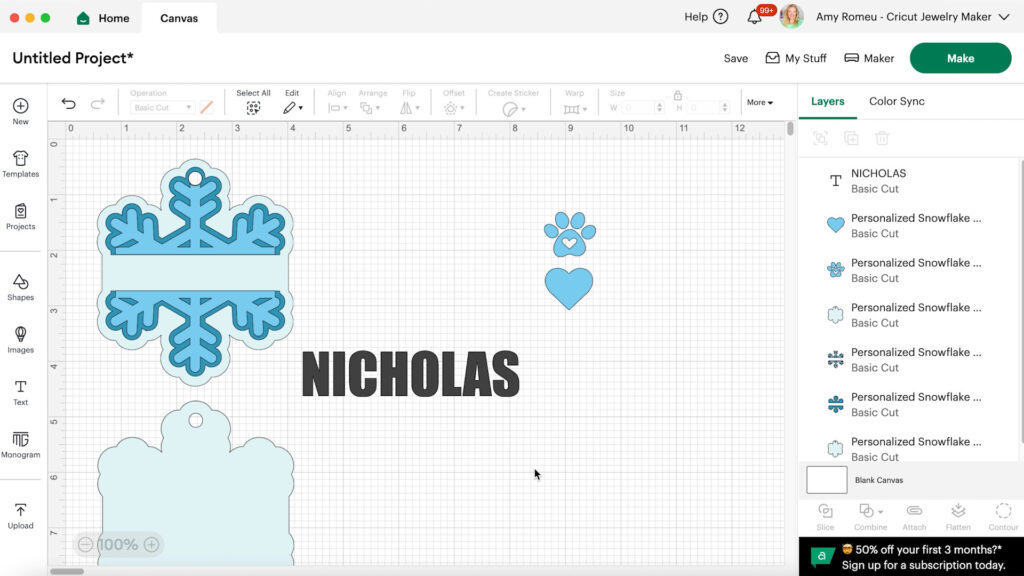
Drag the name into the blank area of the snowflake. Size it so it fits inside the blank area. Ideally the top and bottom of the letters should connect to the top snowflake layer.
The best way to achieve this is to play around with the font size and also the overall size. Unclick the padlock above the size box and increase the letter height without increasing the size.
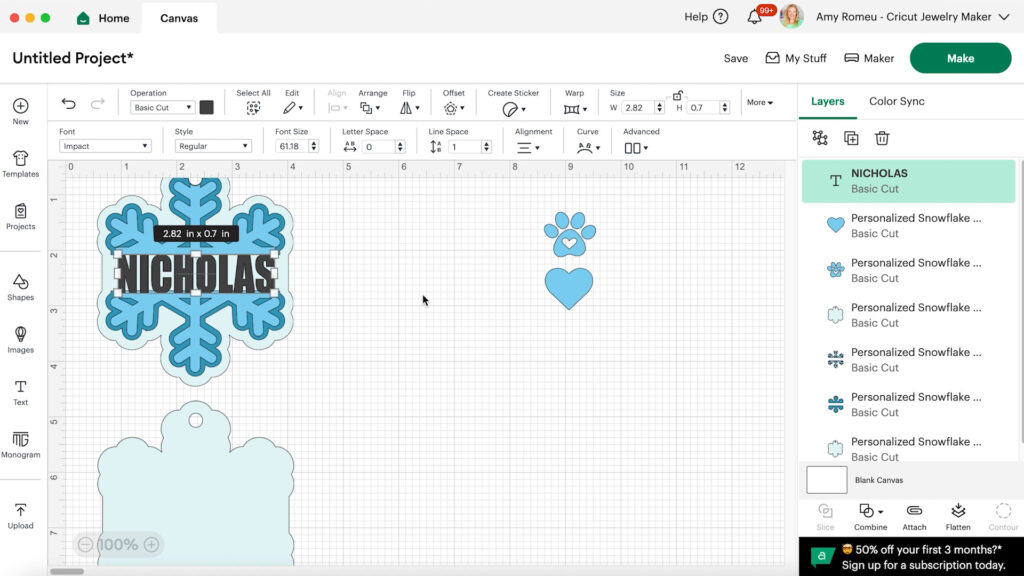
Again you can watch the video for this in detail.
Once your name is overlapping the snowflake layer at the top and bottom, click the name and the snowflake layer and click COMBINE and then WELD. This will create one layer that will cut from vinyl.
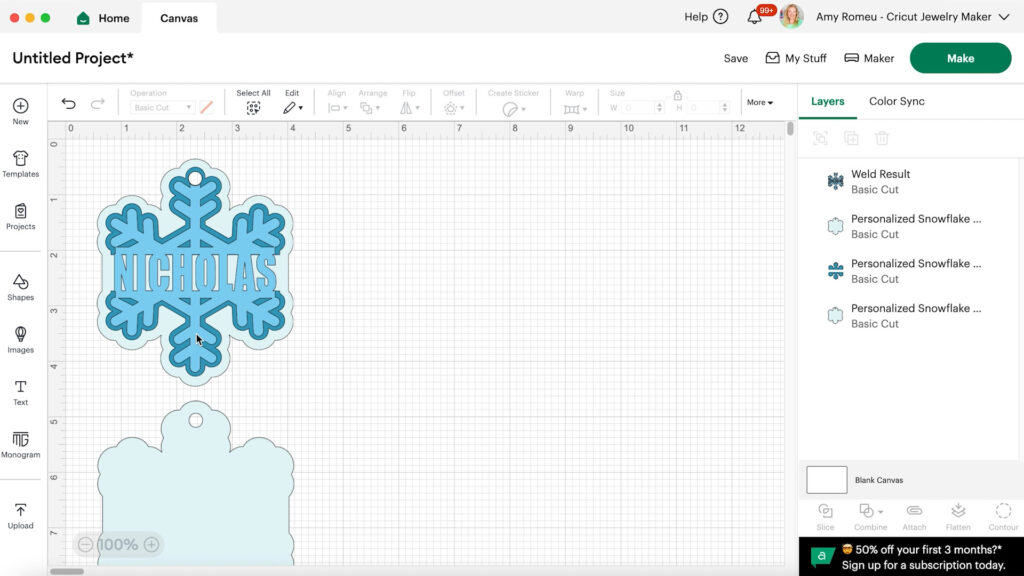
If you have any odd little spots around the letters that you don’t want to cut after you’ve welded, you can use the Contour feature to keep them from cutting. More on that in the video tutorial.
Click the MAKE IT button.
STEP 2: Click on EACH mat on the left hand side and toggle the Mirror toggle ON. That’s because faux leather and heat transfer vinyl cut in reverse.
NOTE: If you want to cut the vinyl layers from permanent vinyl instead of HTV, you can do that. Just don’t mirror the vinyl mats in that case.
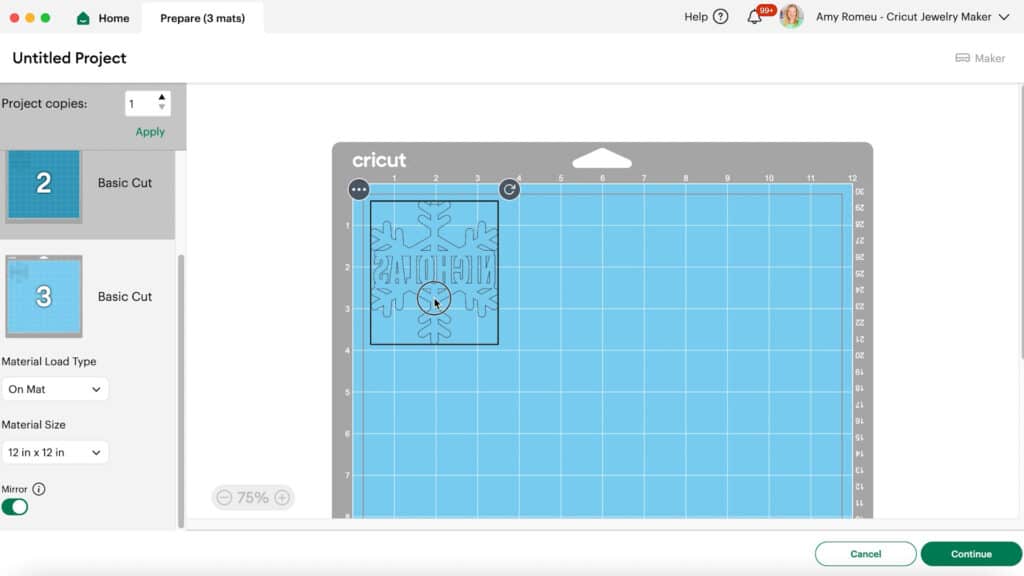
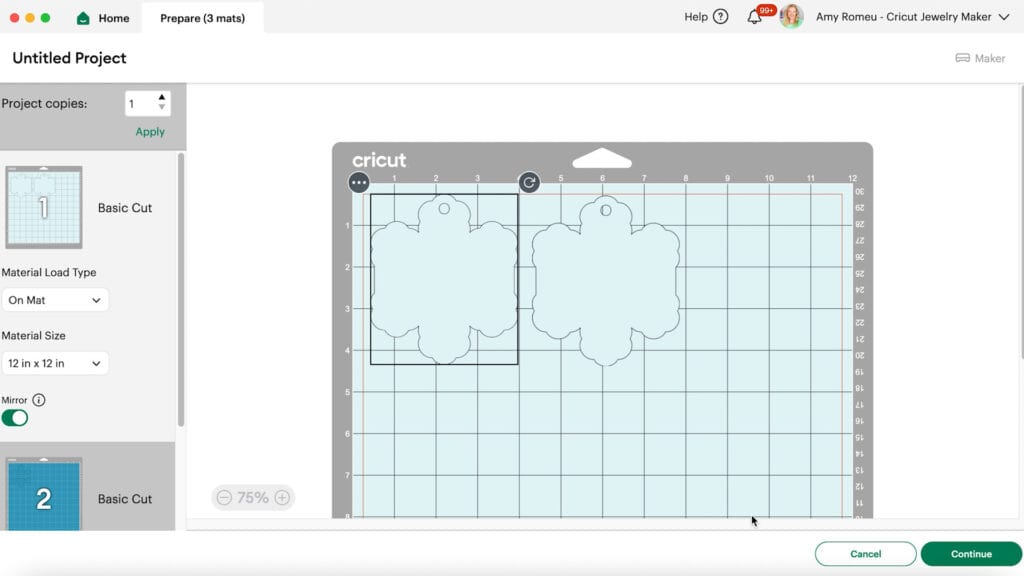
After all the mats are mirrored, go back through each one and drag the shapes apart from the edges (and from each other if there is more than one shape on the mat).
Click the CONTINUE button.
When the material selection screen loads, click on the faux leather mat and then select the Faux Leather (Paper Thin) setting.
If you don’t have that setting bookmarked as a favorite like I do, you can click on Browse All Materials and search for it. (If you are using the Explore Air 2, you’ll need to turn your dial to Custom before you can find that setting in search.)
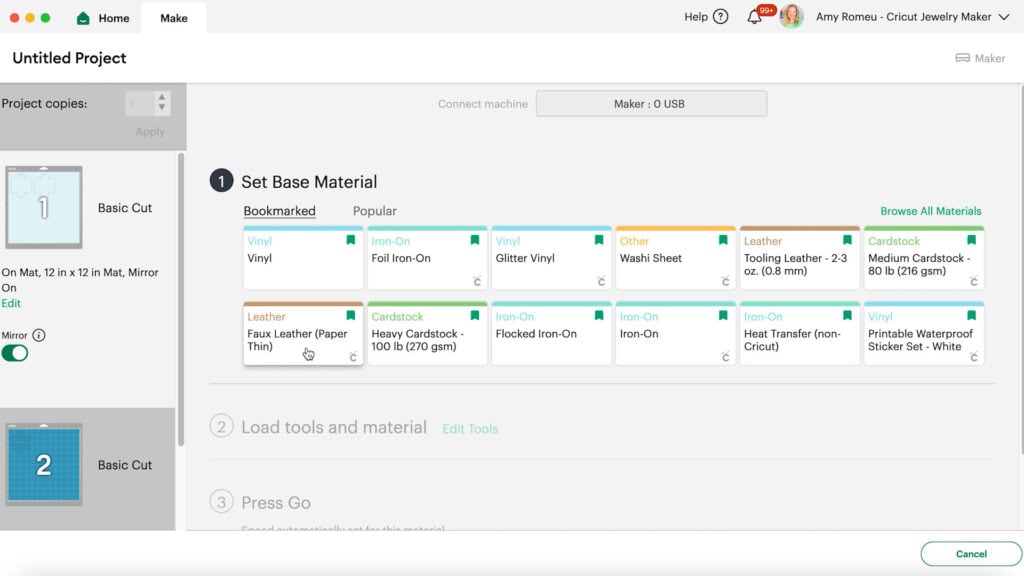
Then choose “More” from the dropdown Pressure menu.
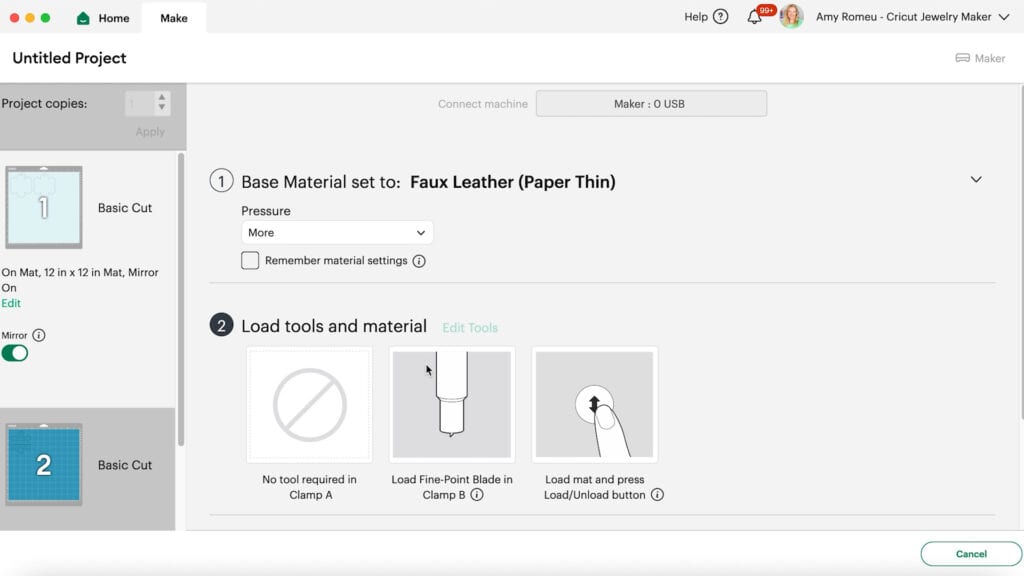
For the vinyl mats, you’ll choose the recommended cut setting for your brand/type of vinyl.
Step 3: Trim a piece of faux leather to a size just slightly larger than the shapes that are going to cut. Place the faux leather pretty side down on a purple strong grip cutting mat.
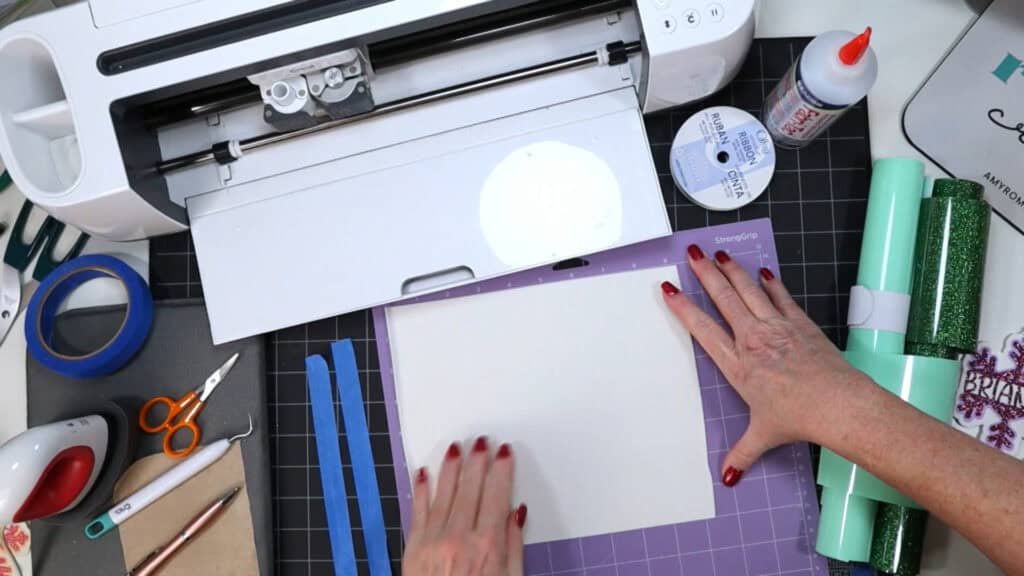
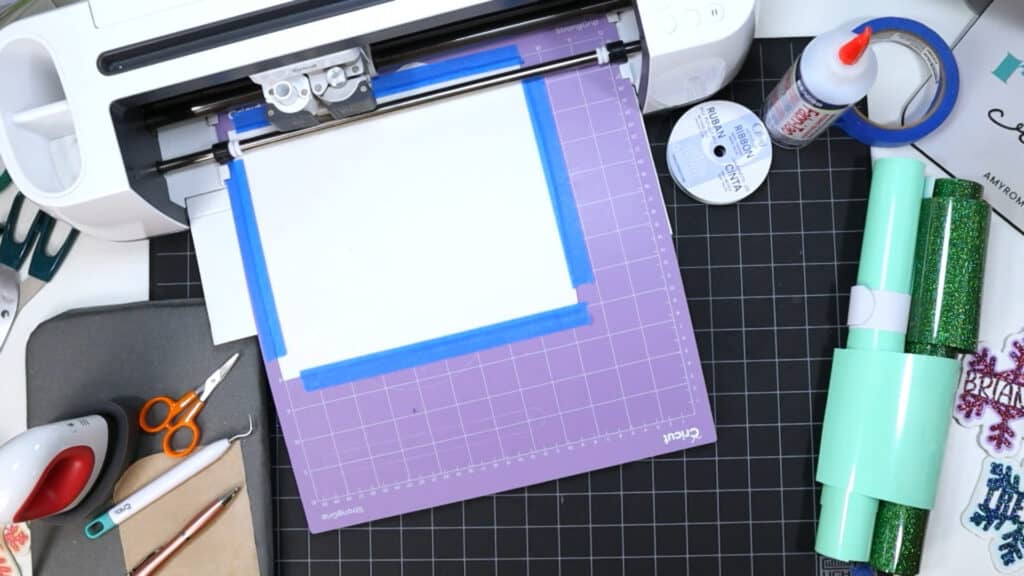
Place blue painter’s tape around all sides of the faux leather. Load the mat into the Cricut and begin the cut.
When the cut is complete, before unloading the mat, lift a small edge of the cut to ensure the cut went through. Repeat the cut if needed by pressing the cut button again.
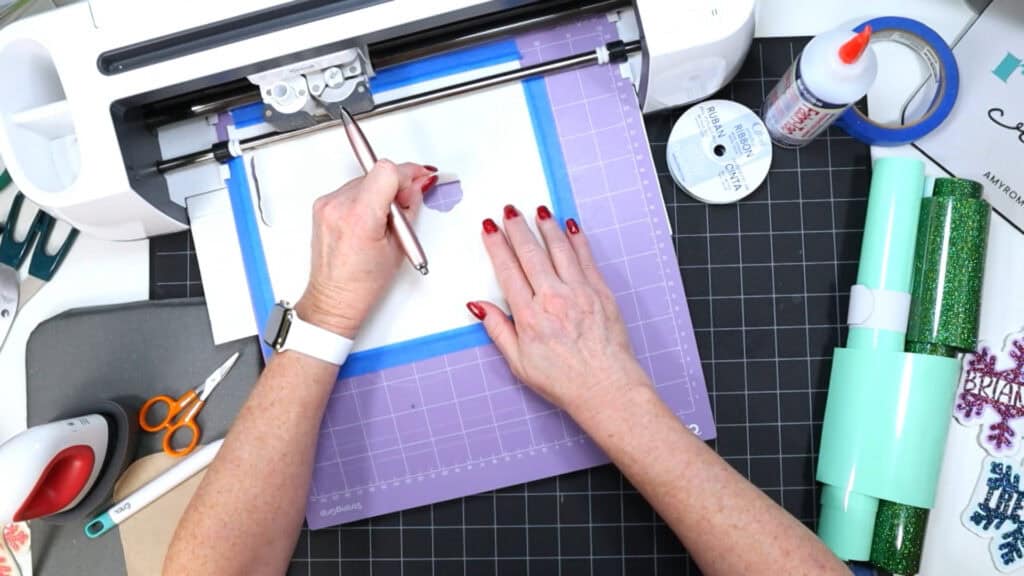
Once the shapes are cut through, remove the shapes from the mat.
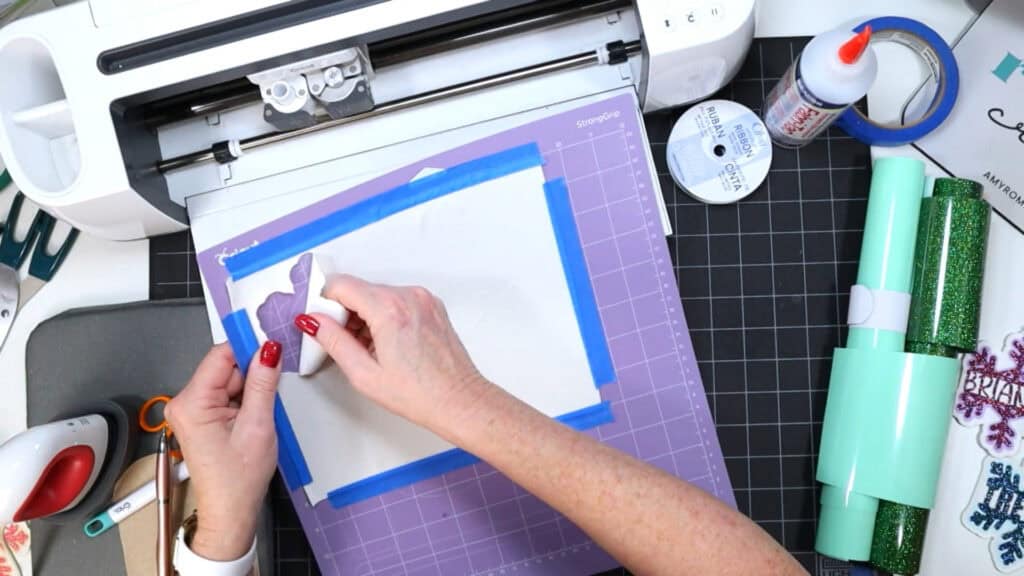
Return to Design Space and cut and weed all of the heat transfer vinyl mats.
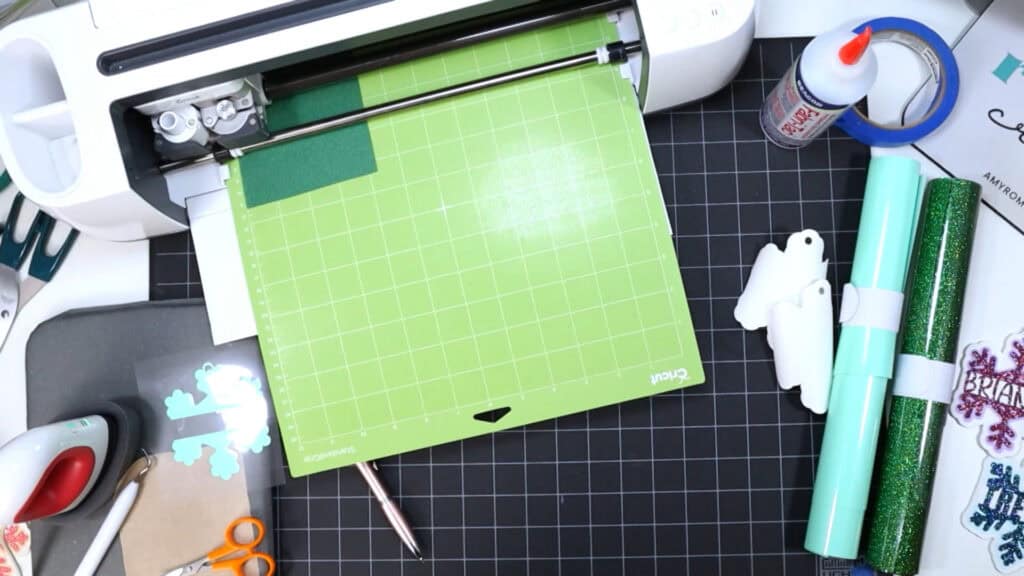
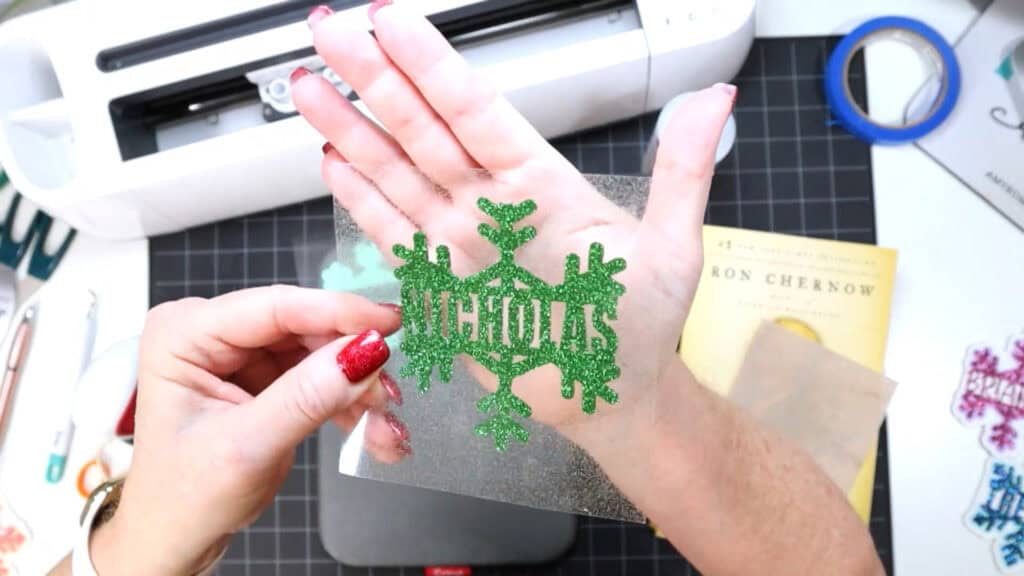
Step 4: When all the vinyl layers are cut and weeded, gather your heat press (Easy Press Mini, EasyPress, or traditional heat press), heat pressing pad, and cover sheet like a Teflon sheet, butcher paper, or parchment paper.
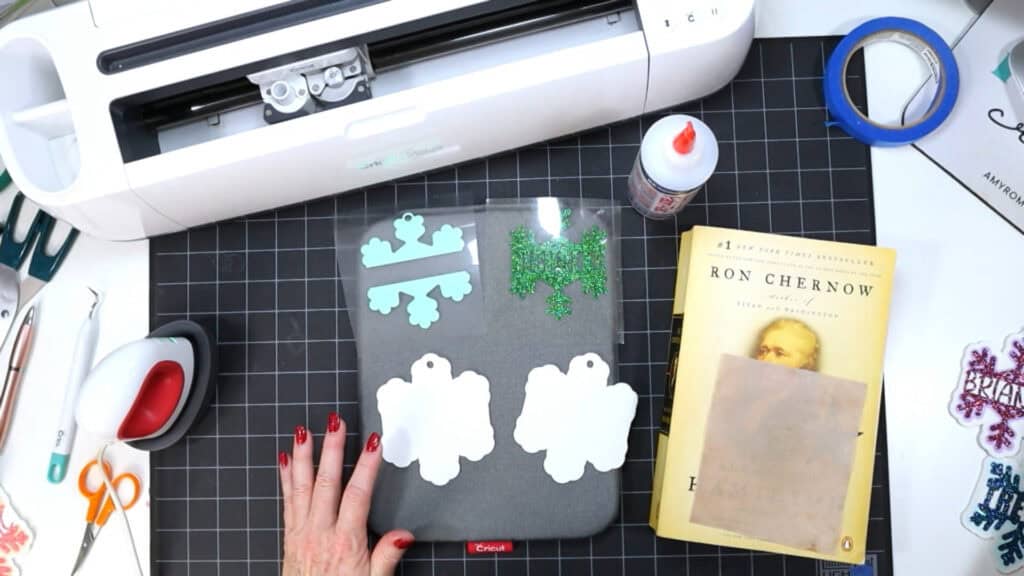
Refer to the Layering Guide below for the order to press the vinyl layers.
Place the front faux leather shape on the heat pressing pad.
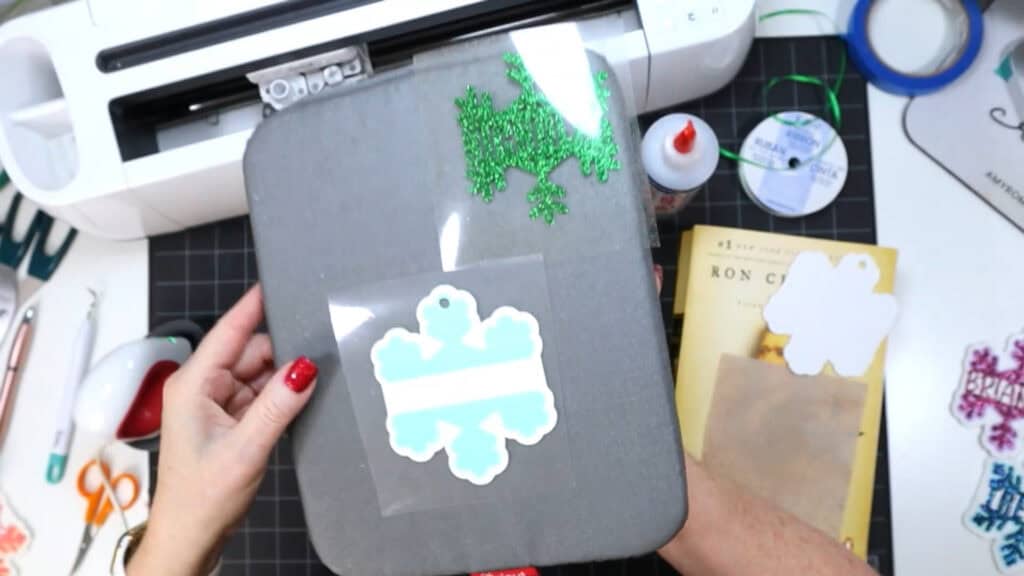
Heat the EasyPress Mini to the Low setting (the first green line) or another heat press to 265 degrees.
Place the first heat transfer vinyl layer on the faux leather shape. Cover with the cover sheet and press for 7-10 seconds.
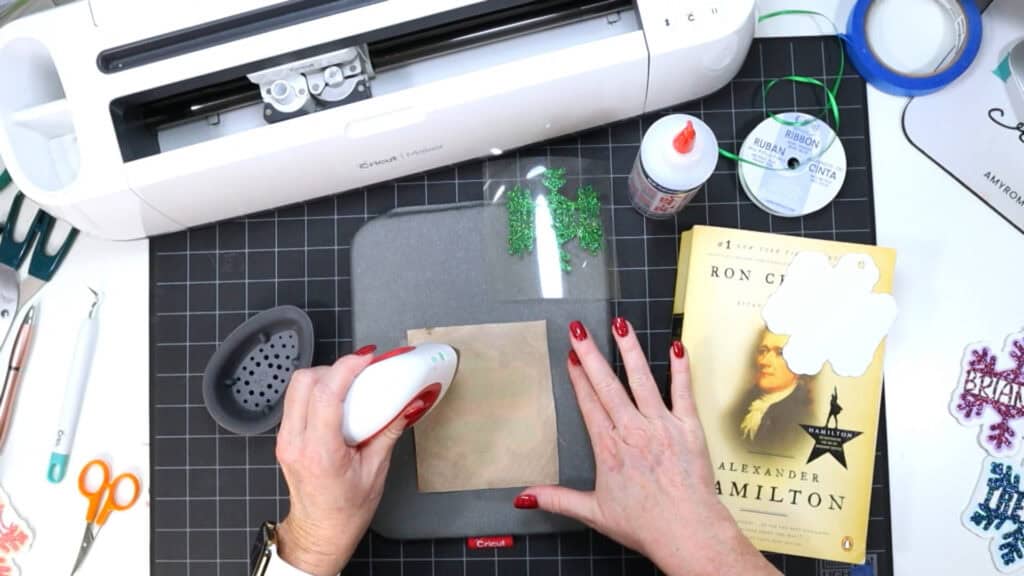
Remove the cover sheet and slowly peel away the clear carrier sheet on the vinyl layer. If the vinyl lifts up, carefully place the carrier sheet back down and press again.
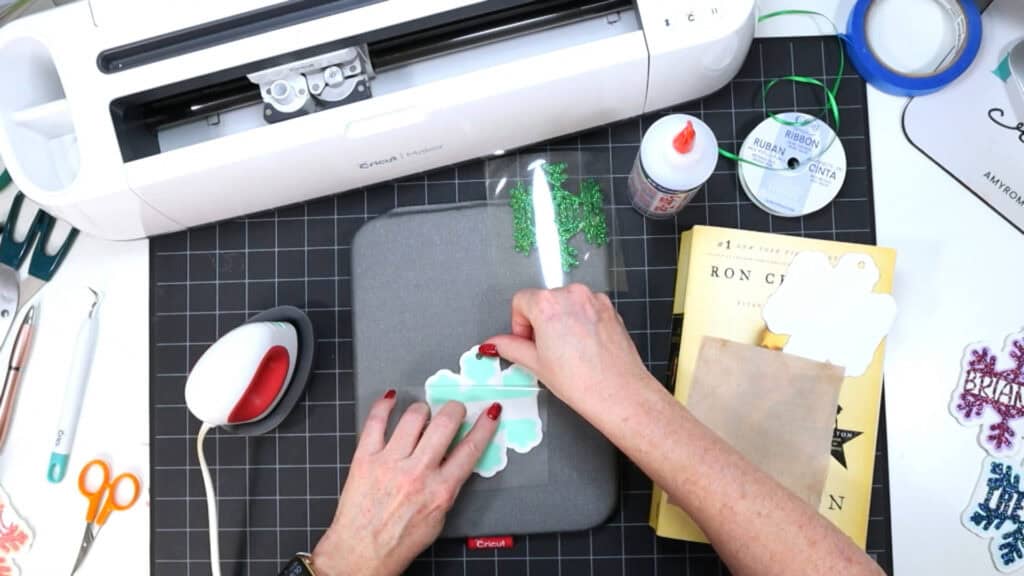
Once the first layer is well pressed, repeat pressing the other vinyl layer on top.
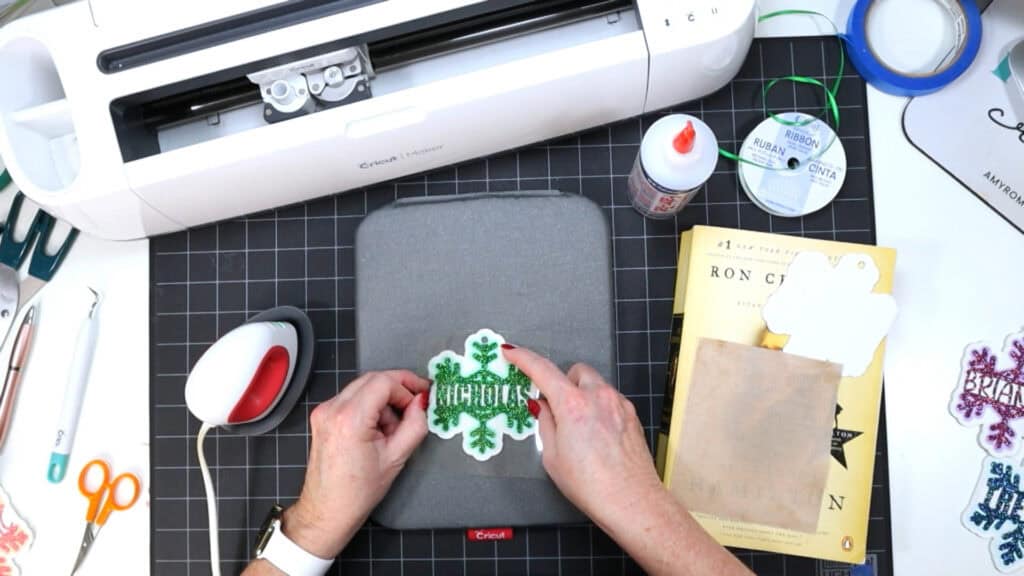
When all the layers are pressed, place the warm faux leather underneath the heat pressing pad for about a minute so it can cool flat.
Step 5: Glue the front and back ornament shapes using a good fabric or craft glue. I used Beacon Fabri-Tac. Start by placing glue all over the back of one of the shapes.
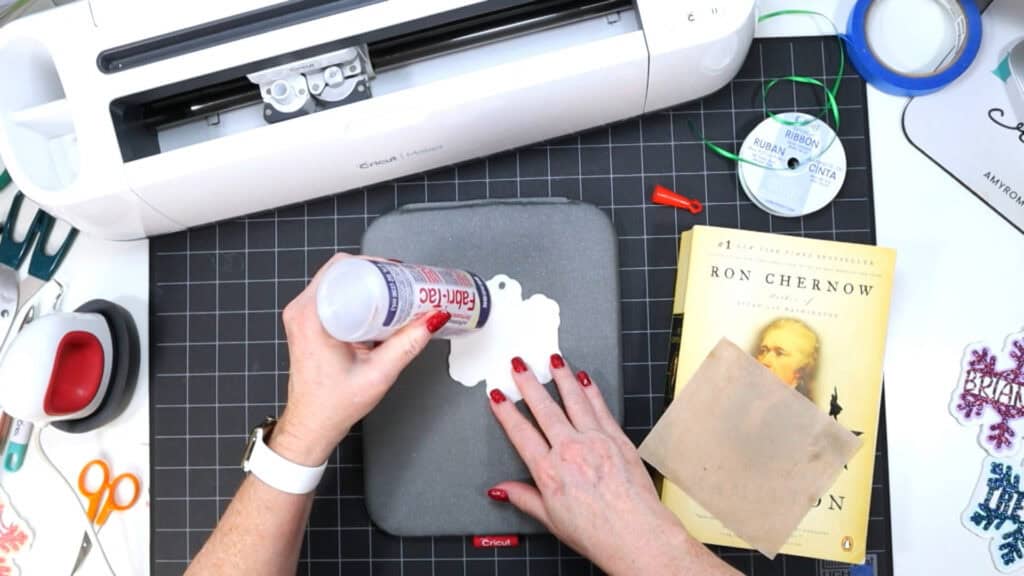
Be sure to line up the edges and the hole of the ornament neatly.
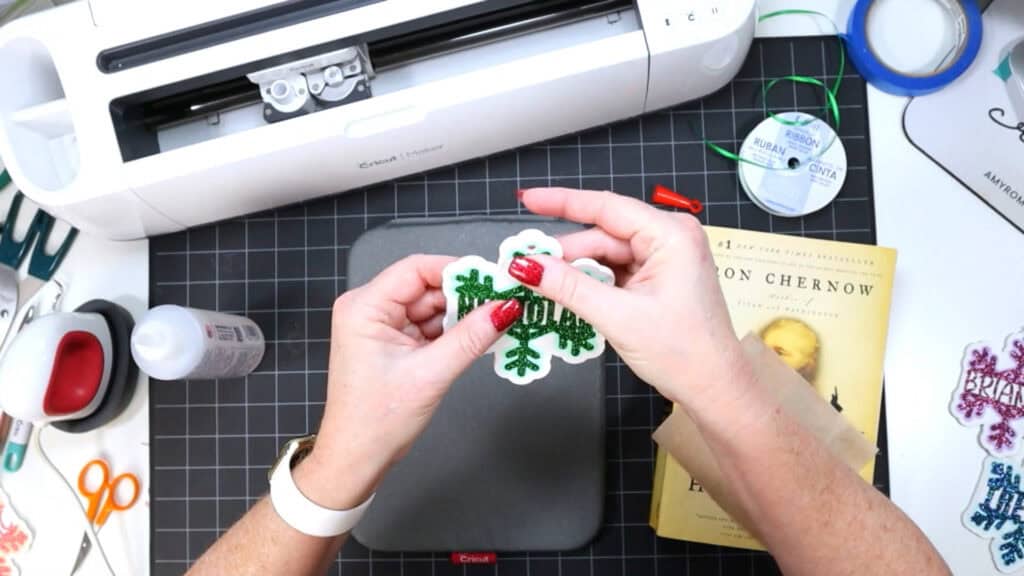
IMPORTANT! Place the glued ornament underneath a heavy book for at least an hour so the shapes glue well with a seamless edge.
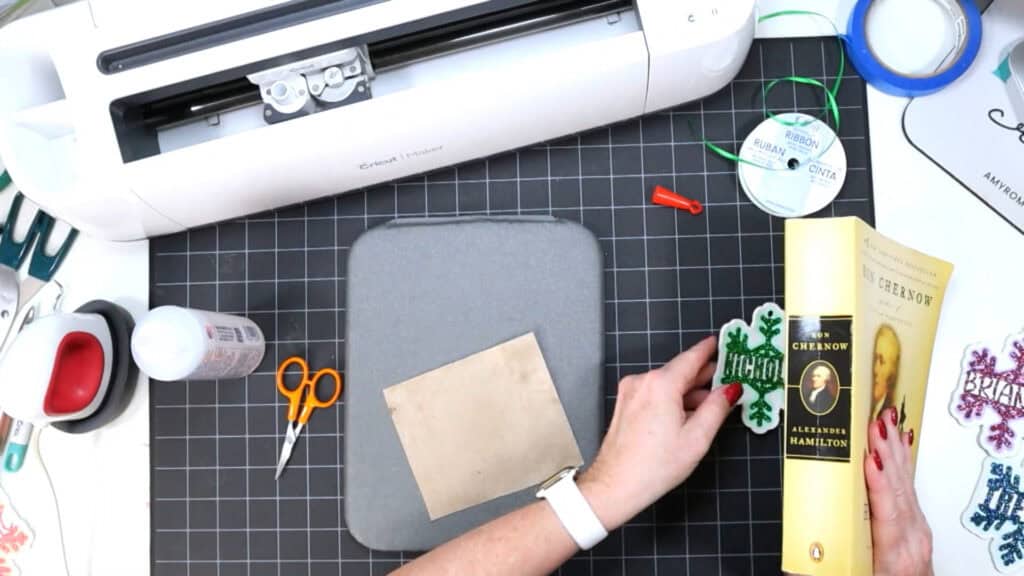
Finally, tie a ribbon through the ornament hole for easy hanging. That’s it!
Answers to your questions about making Personalized Faux Leather Snowflake Ornaments with a Cricut
Q: Which Cricut machines will cut faux leather?
A: You can cut faux leather with any of the current Cricut machines because they all cut faux leather with the standard fine point blade included with each machine. For this project you can use the Cricut Maker, Cricut Maker 3, Cricut Explore 3, Cricut Explore Air 2, the Cricut Joy Xtra, or the Cricut Joy.
Q: What do I need to press heat transfer vinyl onto faux leather?
A: To press heat transfer vinyl onto faux leather you’ll need a traditional heat press, Cricut EasyPress, or Cricut EasyPress Mini.
Q: How do I get the SVG template for this project?
A: Get the SVG file from my SVG Shop here. For even more holiday faux leather crafts project from my 12 Days of Christmas Crafts Event, click here.
If you loved this project, you’ll love these projects too:
Will you make this project?
I would love to see what you have created! Please join my free faux leather crafting making Facebook group and share your creations with me and all of my crafting friends!
Until next time… and happy creating!

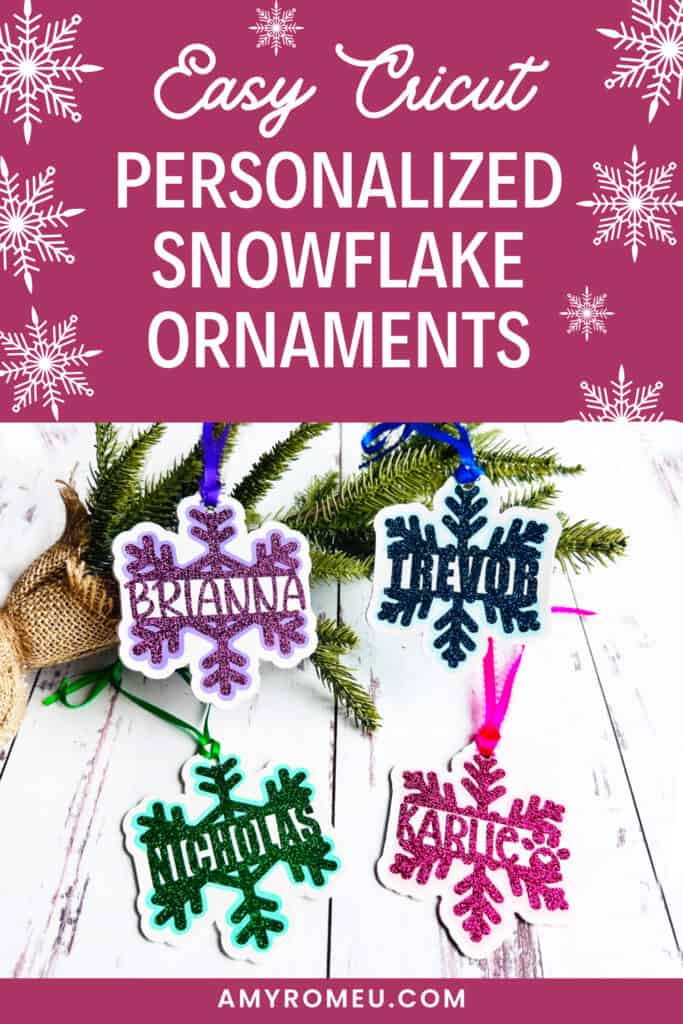
Want to remember this project? Save this tutorial to your favorite Pinterest board!
Want instant access to my Free Resource Library full of SVG files?
Just Enter your name and email Below!
By signing up, you’ll get instant access to my FREE SVG Library with hundreds of crafting SVG templates! You’ll also get my weekly newsletter full of crafting ideas, tutorials, and inspiration! Unsubscribe anytime.



Such clear, complete instructions. Can’t wait to make these!