
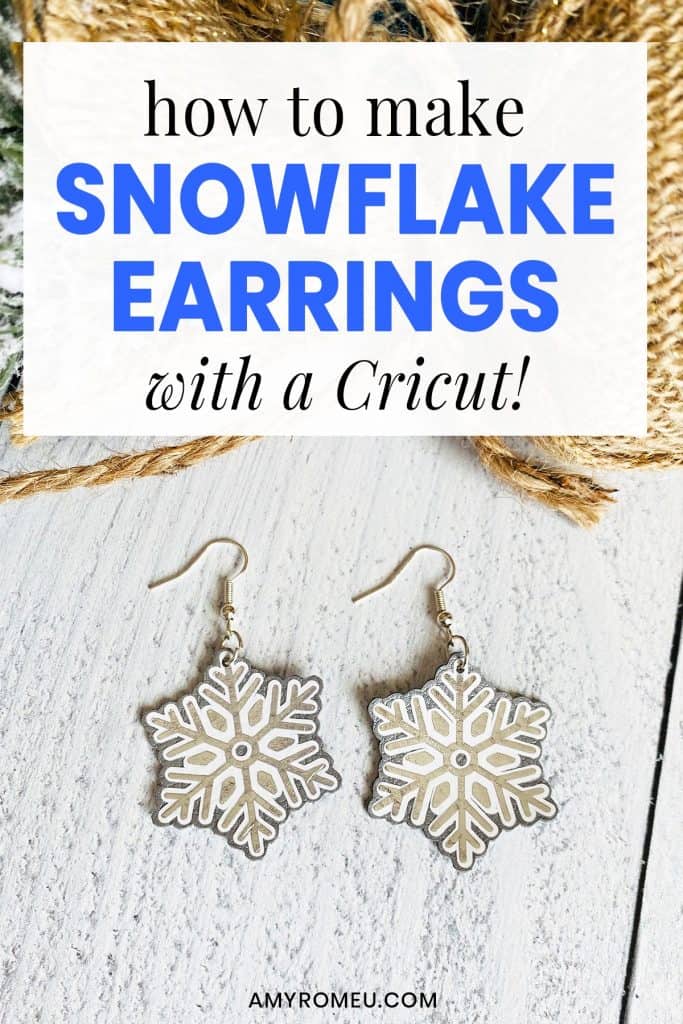
DIY Snowflake Earrings with a Cricut
How to Make Snowflake Earrings with a Cricut
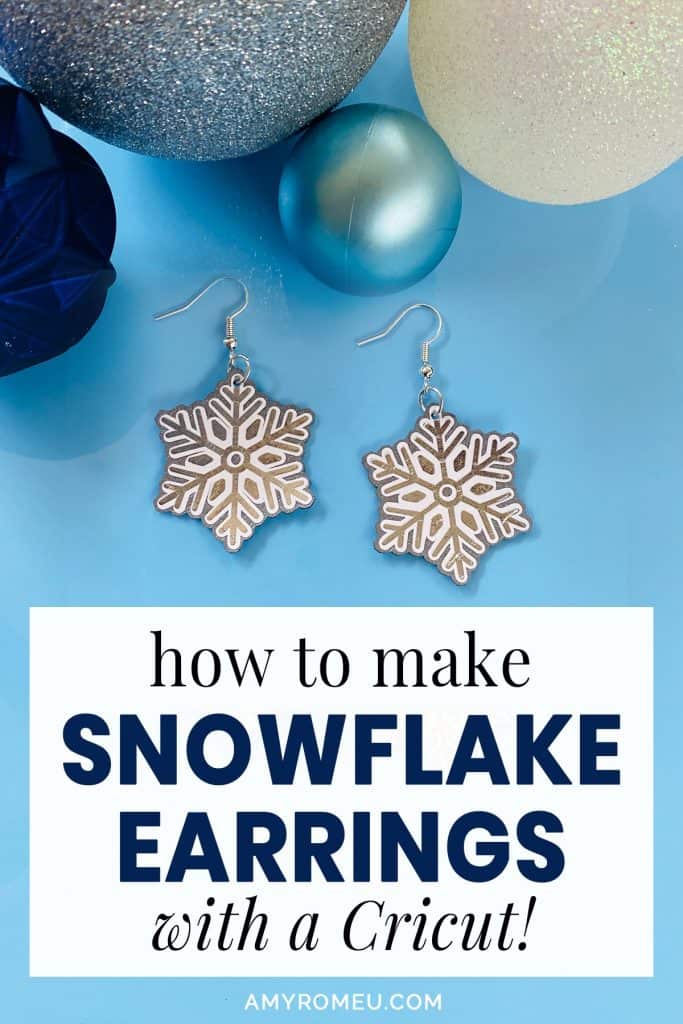
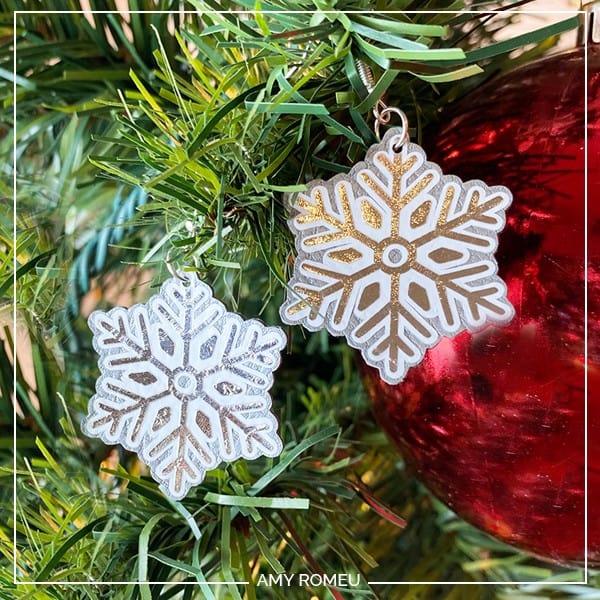
The holidays are approaching, and it’s time to make some festive Christmas earrings to wear during wintertime (full disclosure: I live in Florida, so I use the word “wintertime” very loosely). I wanted to make some snowflake earrings with faux leather and my Cricut, so I came up with this snowflake layered earring design that turned out too cute not to share! These earrings are on the smaller side, and I have some tips and tricks for cutting small shapes from faux leather, foil iron on, and heat transfer vinyl for you. So if you want to learn exactly how to make these cute snowflake earrings with a Cricut Maker, I’m going to show you step by step in this post!
I’ll be using my Cricut Maker for this project, but you can also use a Cricut Explore Air 2, or even the Cricut Joy. Cricut Explore Air 2 users will turn their dial to custom before choosing the faux leather cut setting (more on that in a bit). Cricut Joy users will want to read this post or watch this video on how to cut faux leather with a Cricut Joy – there are a few extra steps that are specific to that machine, but you can totally do it!
Finally, I love to share my designs, so I’ll give you my SVG cut file for these snowflake earrings FREE so you can get started making your own DIY snowflake earrings with a Cricut right away!
You can download my SVG file for this project at the bottom of this post.
If you’d rather watch a video of my Snowflake Earrings tutorial, it’s only available as part of Jennifer Maker’s Holiday MakerFest! It’s an online crafting event featuring more than 40 crafting, DIY, and holiday planning and organization experts. The live MakerFest has already taken place, but VIP All Access Passes are still available if you want to watch my workshop (and 39 others!). Click the button below to learn more:
Ready? Let’s get started!
Want to see all of my Cricut earring & jewelry tutorials? CLICK HERE
This page contains some affiliate links (which means if you make a purchase after clicking a link, I will earn a small commission at no additional cost to you). Read my full disclosure policy here.
DIY Snowflake Earrings – Materials List
- Cricut Maker, or Cricut Explore Air 2, or Cricut Joy
- Cricut Purple Strong Grip Cutting Mat
- Cricut Green Standard Grip Cutting Mat
- Cricut Easy Press Mini or small Easy Press
- Cricut EasyPress Mat
- Teflon Cover Sheet or Parchment Paper
- Cricut Faux Leather (Silver) – I STRONGLY recommend using Cricut Faux Leather for this project. The small snowflake shapes have a scalloped edge that will cut best with Cricut brand Faux Leather.
- Cricut Foil Iron-On (Chrome)
- Cricut Everyday Iron-On (White)
- Cricut Weeding Tool Set
- Blue Painter’s Tape (I like 3/4″ size but 1″ works, too)
- Art Glitter Glue with Ultra-Fine Metal Tip
- 1/16″ Hole Punch (or this 1/16″ Hole Punch)
- Baby Wubbers Chain Nose Jeweler’s Pliers (or any small flat nose pliers you have with smooth jaws)
- Baby Wubbers Flat Nose Jeweler’s Pliers (or any small flat nose pliers you have with smooth jaws)
- Earrings Hooks in Silver color
- Jump Rings, 5mm size, Silver color
Note: Be sure to check out my post Beginner’s Guide To Jewelry Making Tools for all the information you need to know about buying and using jewelry making tools.
PROJECT INSTRUCTIONS
STEP 1 – Download the SVG Cut File
Download the SVG cut file for the snowflake earring shapes from my Resource Library. You can get the password to my library via a link at the bottom of this post.
Save the zipped folder that downloads to your computer. Then unzip the folder to access the folder’s contents. You’ll need to unzip or extract the files FIRST so you can upload the cutting file to Cricut Design Space.
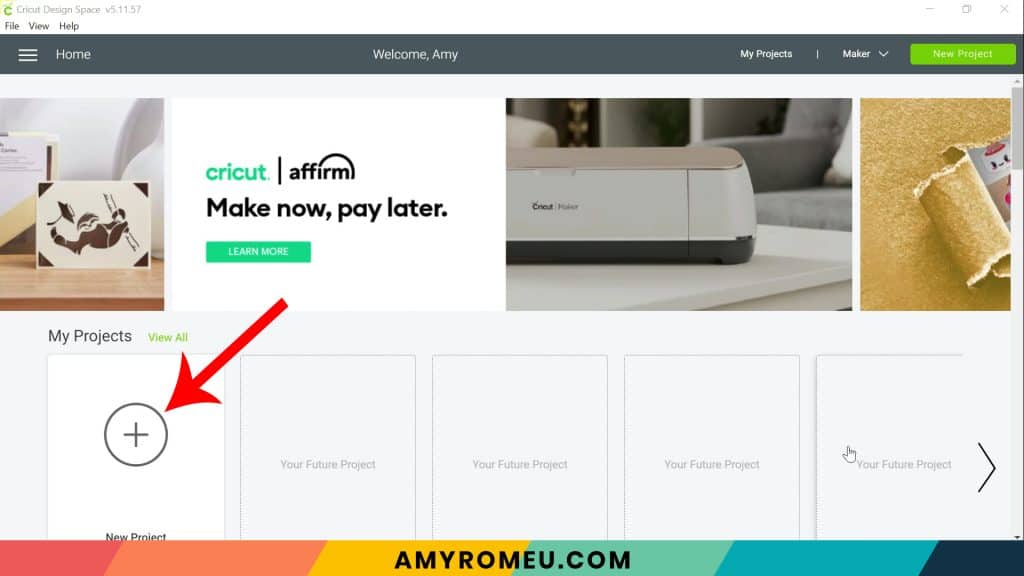
STEP 2 – Upload the SVG File to Cricut Design Space
When you open Cricut Design Space, click on NEW PROJECT to get started. Then click on UPLOAD from the left hand side menu.
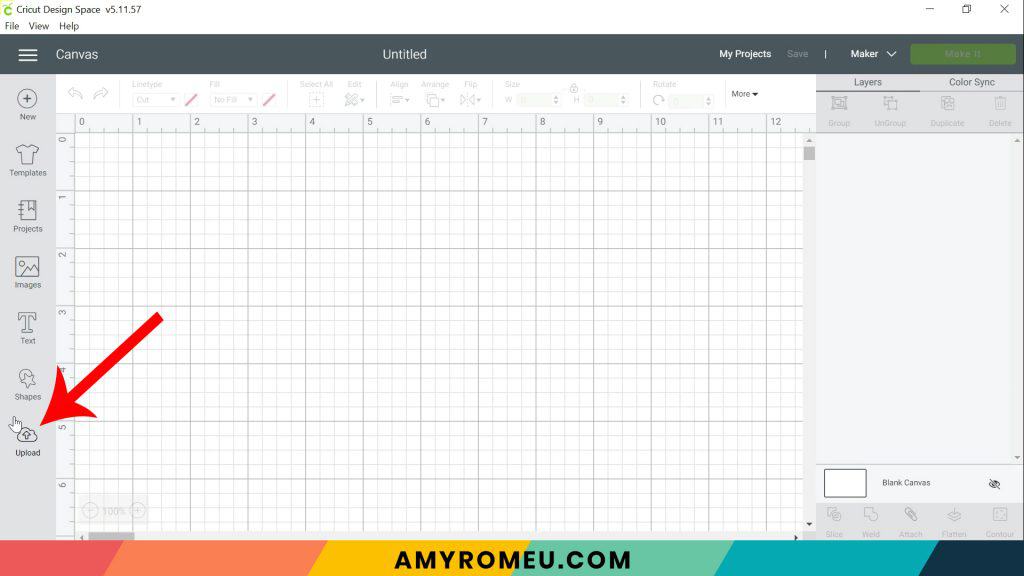
Click on the UPLOAD IMAGE button, then click BROWSE to locate where your unzipped SVG files are saved on your computer.


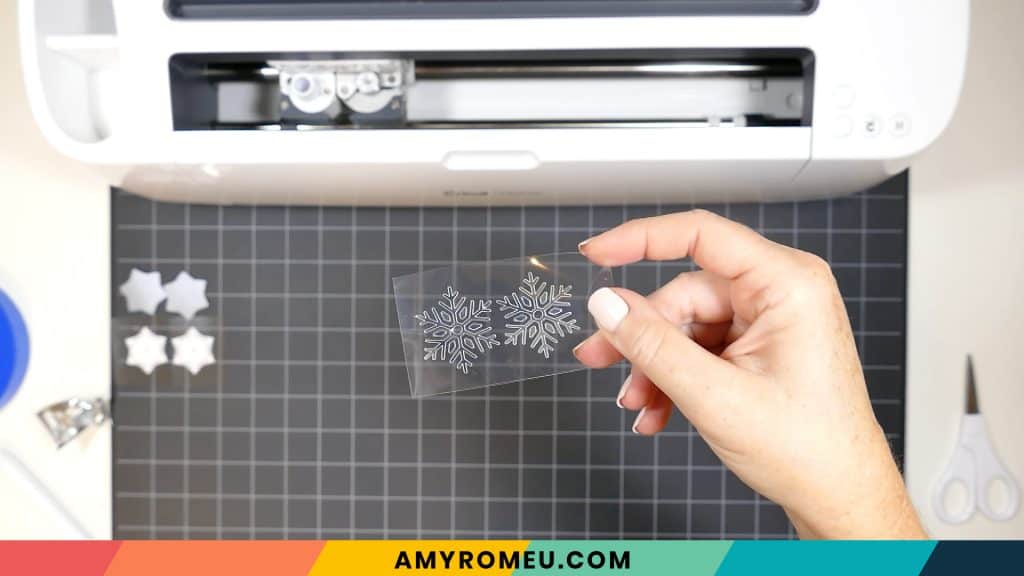
Double click on the snowflake earring SVG file you downloaded from my Resource Library to bring it into the upload screen in Design Space. If you get an error message that says “unsupported file type,” you may have clicked on the wrong file, or your SVG file is still zipped.

You’ll see a preview of the snowflake earring shapes for this project.
You’ll notice this design doesn’t have pre-cut earring holes. That’s because for these kinds of layered projects, I prefer to make the earring holes with a hold punch. More on that in a bit!
Hit the green SAVE button.
After you’ve selected your file to upload, you’ll see it as the first item in your “recently uploaded images” row.

Click on the teardrop earring shapes so they are surrounded by a green box. Then click the green INSERT IMAGES button.
This brings the shapes you’ll cut for the earrings into Cricut Design Space. Drag your artwork to the upper left corner of your mat. I don’t recommend resizing these earrings any smaller, but you can size them a little larger if you want to. You can resize them by clicking and dragging on the arrows in the bottom right corner, or by selecting both earring shapes and changing the height in the SIZE box at the top of the canvas.
Once you’ve adjusted the size of your earrings (if desired), click the green MAKE IT button in the top right.

STEP 3 – Mat Preview
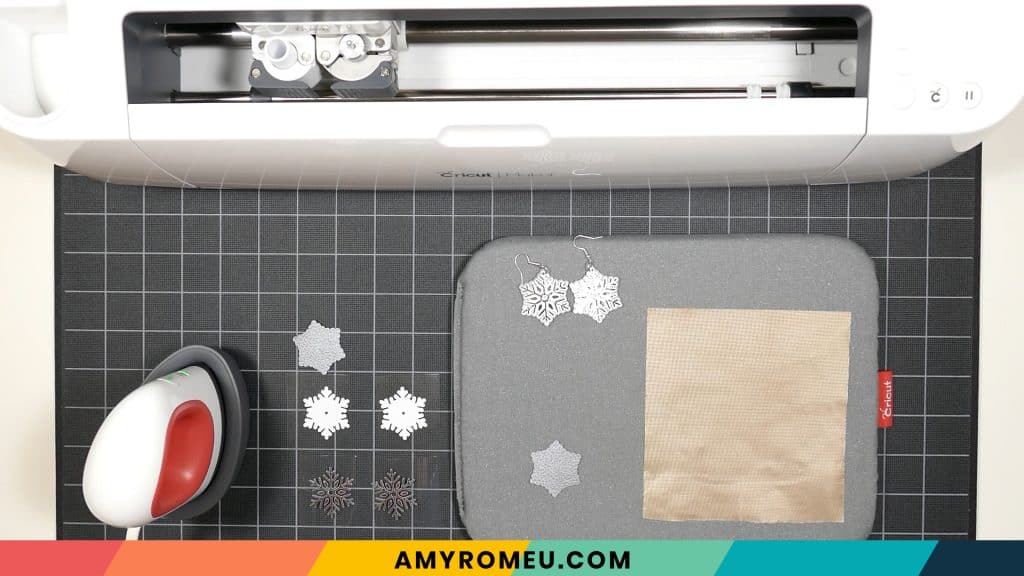
The mat preview screens will load. Cricut Design Space will automatically separate the three different layers on three different mats.
The white mat will cut from white heat transfer vinyl. The light grey mat will cut from foil iron-on, and the dark grey mat will cut from faux leather. It isn’t necessary to mirror any of these mats in this project.
Scroll down through the mat previews and select the faux leather, dark grey mat. I like to cut this mat first. Press the CONTINUE button.

STEP 4 – Make Material Selection
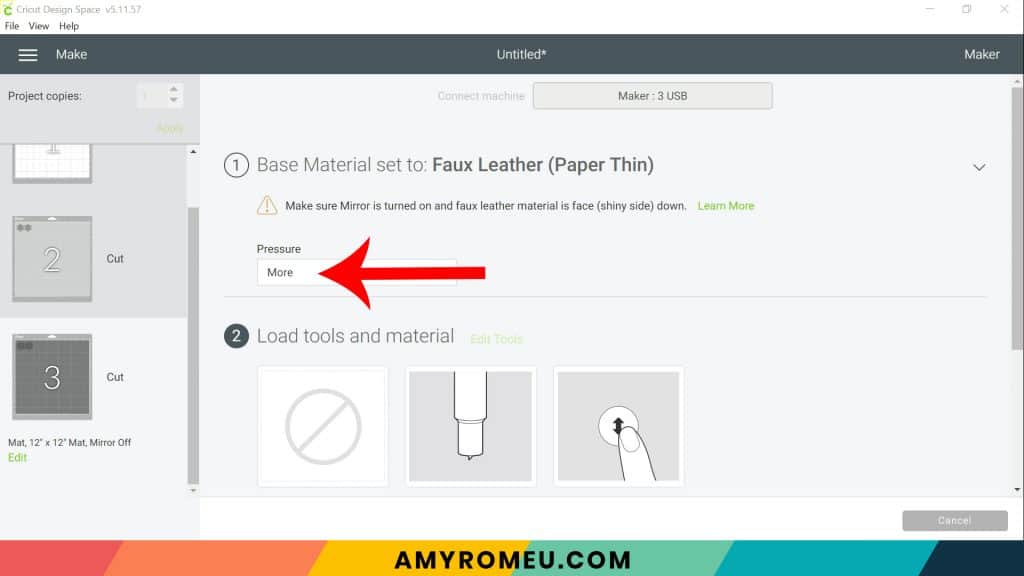
Now you’ll make your material selection for this cut. I already have my preferred material selection – Faux Leather (Paper Thin) – saved as a favorite material in Cricut Design Space as seen below.

If you do, too, click on Faux Leather (Paper Thin) now. If you don’t, click on “Browse All Materials” to search for this setting. Type “faux leather” in the search bar and click on the magnifying glass.
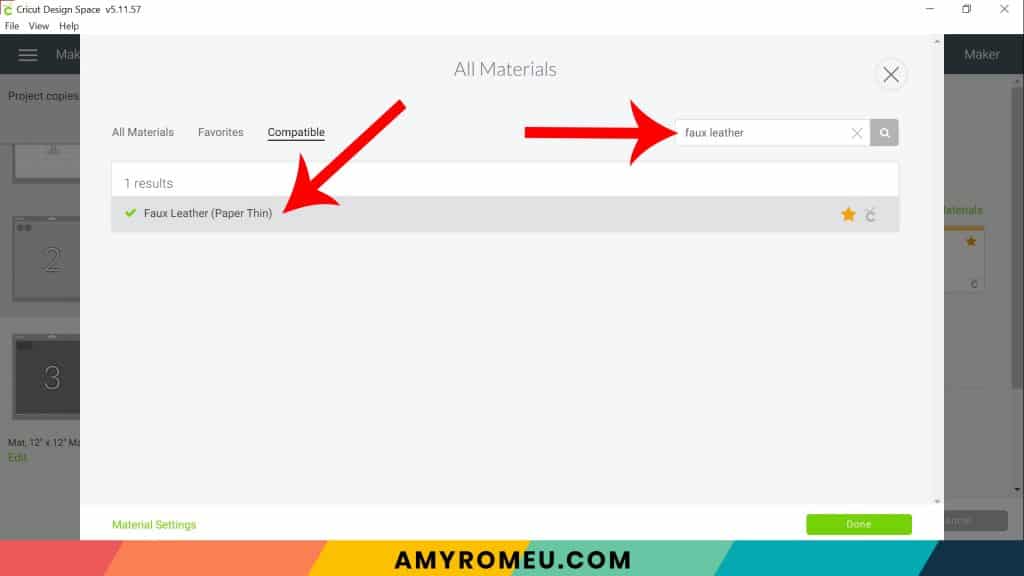
When Faux Leather (Paper Thin) appears, click on it to select it. Click on the yellow star on the right if you want to add this material setting to your “Favorites” so you can find it easily again in the future. Then click DONE.
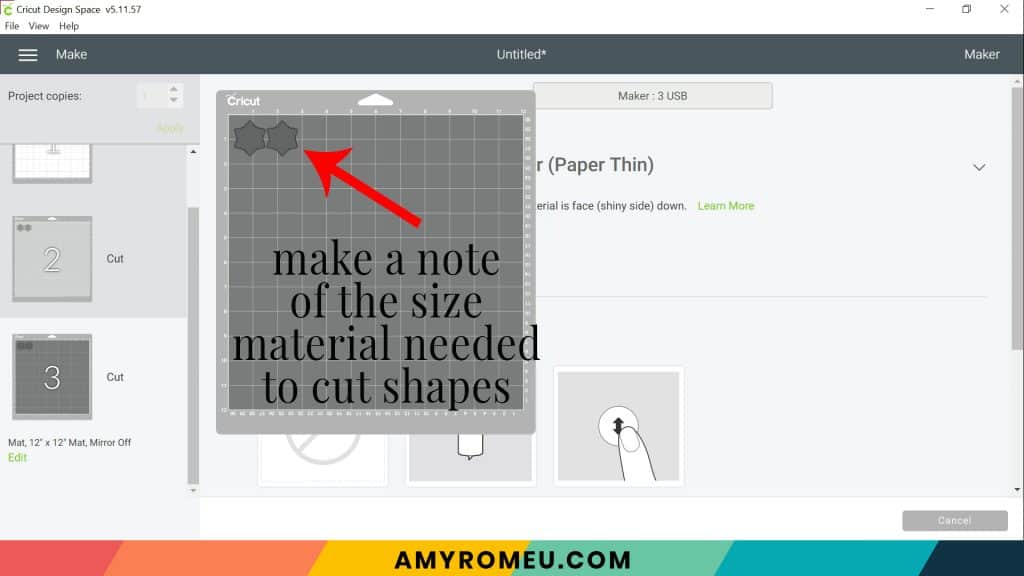
Hover over the dark grey mat to make a note of the size faux leather you need to cut and place on your mat.
After you’ve selected Faux Leather (Paper Thin) as your materials, choose MORE from the Pressure drop-down menu.
Once you’ve made the material selection, it’s time to prepare the faux leather for cutting.
STEP 5 – Apply Backing to Faux Leather Before Cutting
For this project, I’ve added a backing of foil iron-on to the earrings. This gives the thin Cricut brand Faux Leather some structure and keeps the snowflake shapes from curling. It also adds some interest and a professional, finished look to your earrings.
If you don’t want to do this step, I recommend adding a faux leather backing to the earrings instead. You can do this by duplicating the faux leather snowflake shapes and then mirroring them. This will cut a second pair that you can place on the back of the faux leather front snowflake shapes.
Follow all the rest of the steps below to heat press the snowflake vinyl cutouts to the front snowflake. Then use Art Glitter Glue to glue the front and back shapes together. Press the glued snowflake earrings under something heavy like a book for at least a few hours (overnight is best).
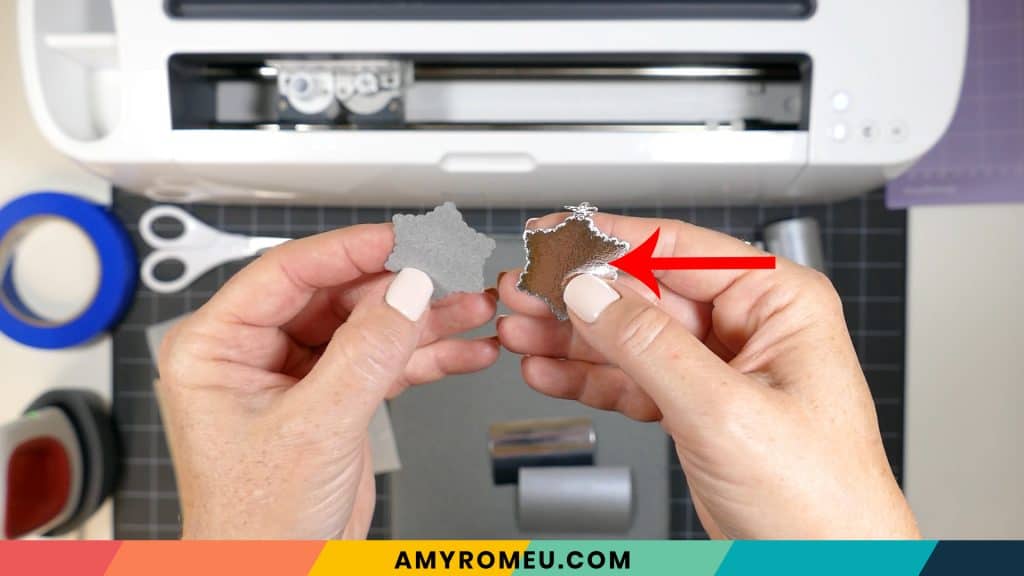
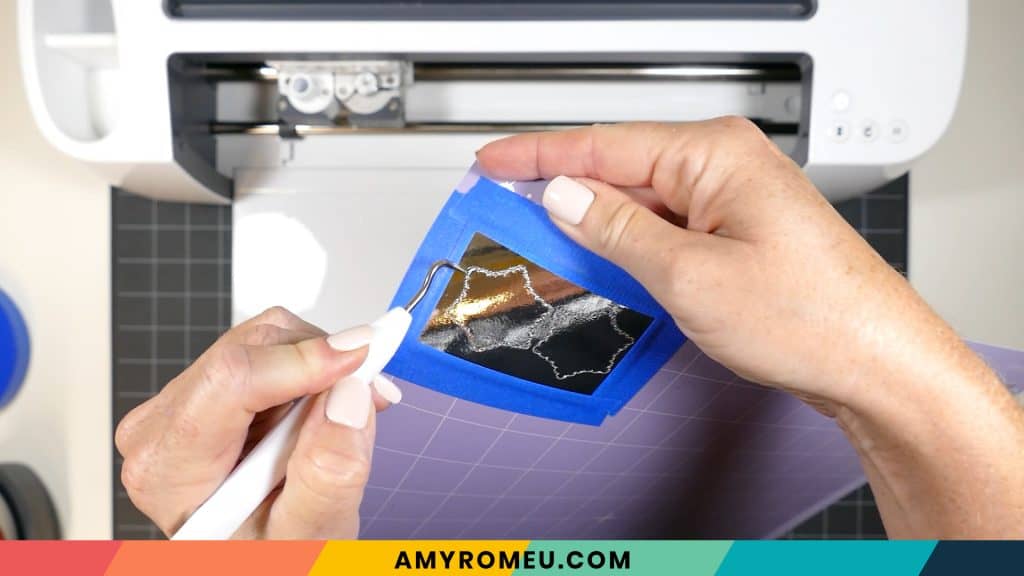
To do this, I like to press a piece of foil iron-on to the back of the piece of faux leather before I cut the snowflake shapes with the Cricut.
Cut a piece of faux leather to the size you noted in the mat preview screen. Then cut a piece of foil iron on just slightly smaller than the faux leather piece.
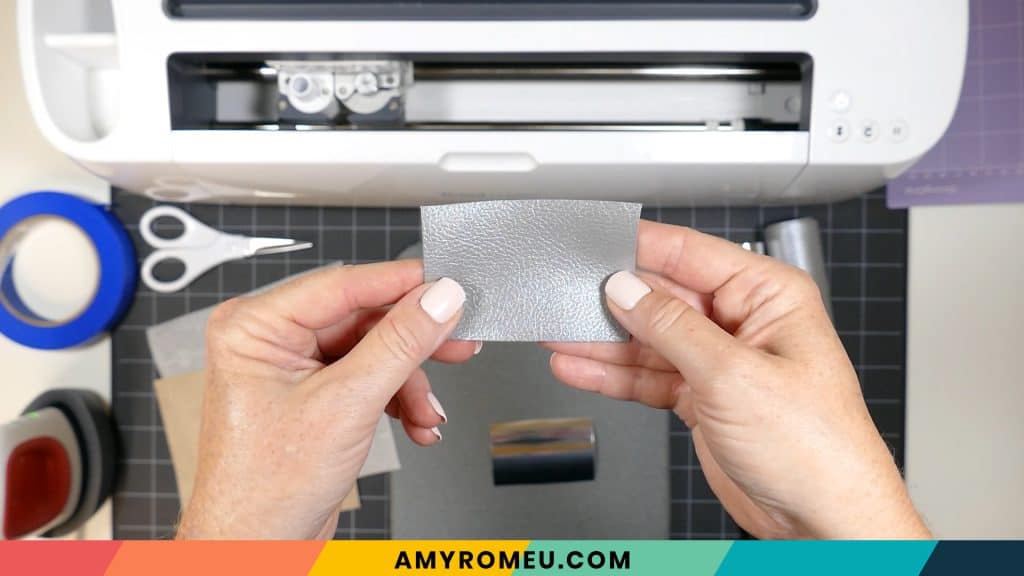
Place the foil piece on back of the faux leather. The shiny transfer tape and the pretty side of the faux leather should both be facing out.
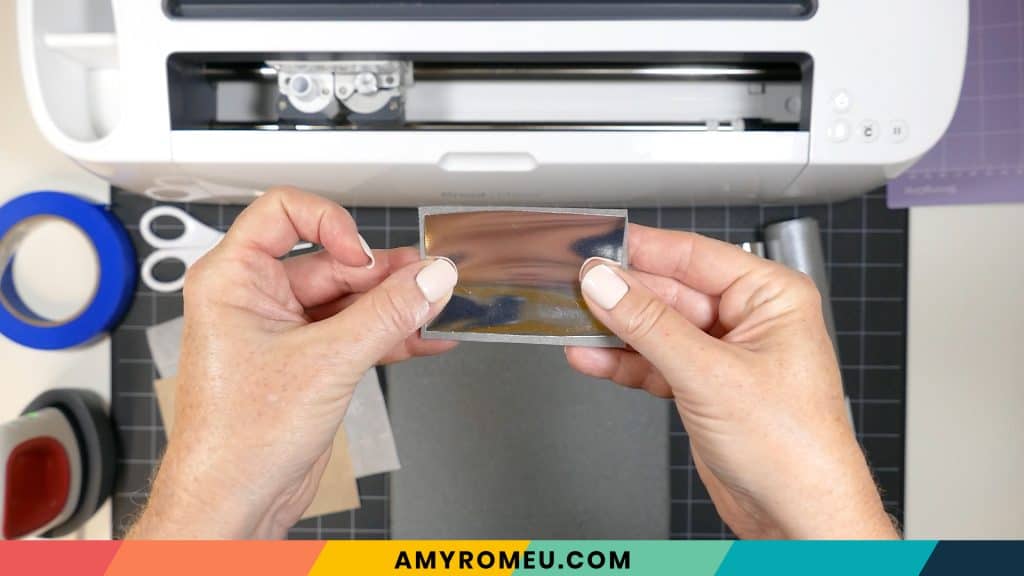
Place the faux leather and foil sandwich on a pressing pad or a towel. Cover with a piece of teflon sheet or parchment paper. Use an Easy Press or an Easy Press Mini to press the foil onto the back of the faux leather. I use an Easy Press Mini on the lowest setting and keep the Mini moving at all times, for about 10-15 seconds.

The foil iron-on will be hot! Keeping the piece of material flat on your work surface, carefully peel away the clear transfer sheet. This will keep your foil iron-on as wrinkle free as possible.
Now your material is ready to cut!
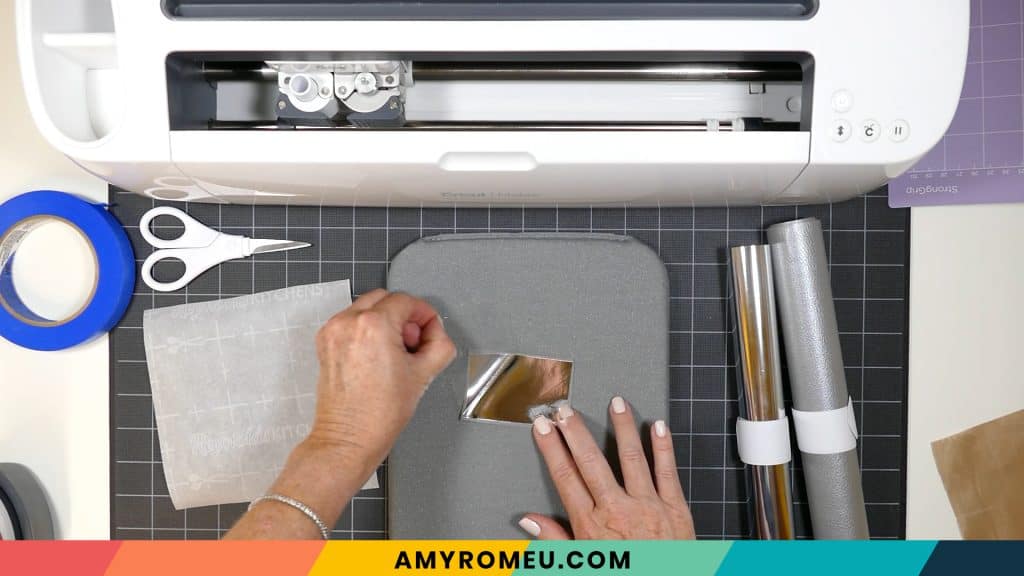
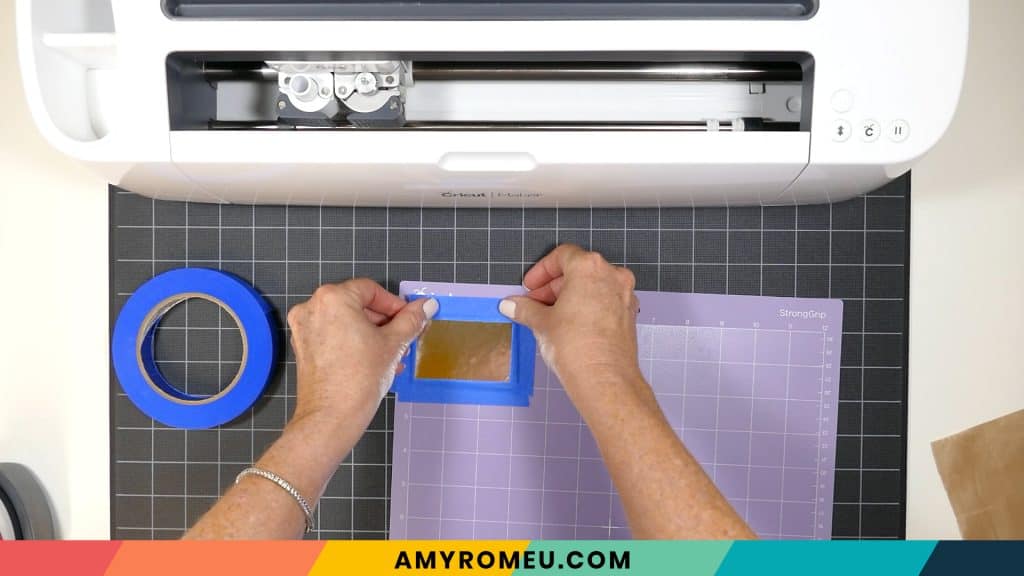
STEP 6 – Prepare Faux Leather Mat for Cutting
Place the faux leather pretty side down (foil iron-on side up) on the purple mat in the same location shown in the Cricut Design Space preview.
Now tape all around the faux leather with blue painter’s tape. Press the material down to your mat firmly with your hands.
Before you load the mat into the Cricut, push the white guide wheels on the roller bar off to the side so they don’t roll over the faux leather.
Load the prepared mat into the Cricut by lining the mat between the mat guides and then pressing the double arrows button. The “C” button will start to flash, indicating the machine is ready to cut. Press the C button to begin the cut.

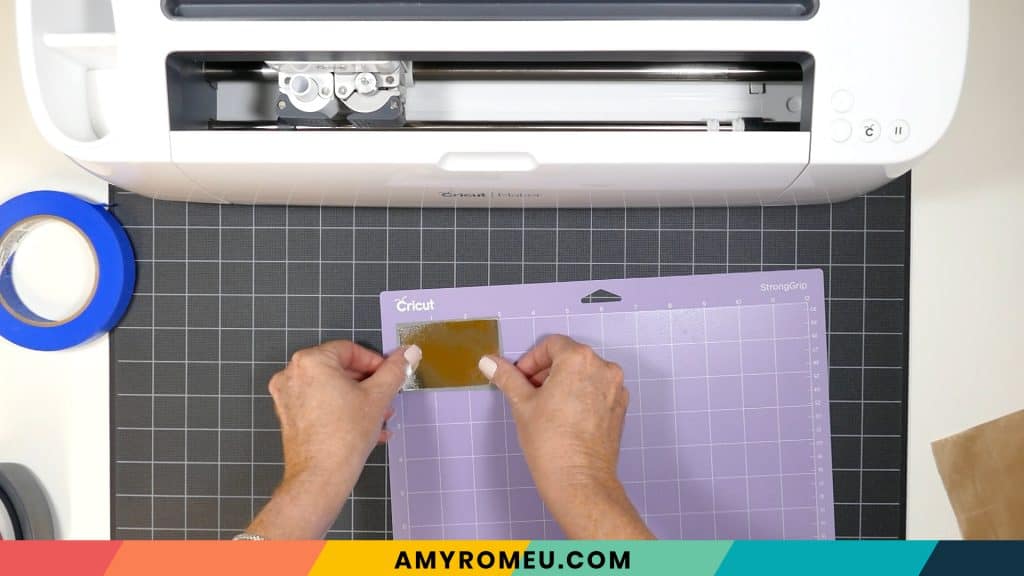
When the cut is finished, BEFORE unloading the mat, use a sharp tool to carefully peel up one of the snowflake edges to see if the cut went all the way through. If it did, unload the mat. If it didn’t, press the C button again to repeat the cut.

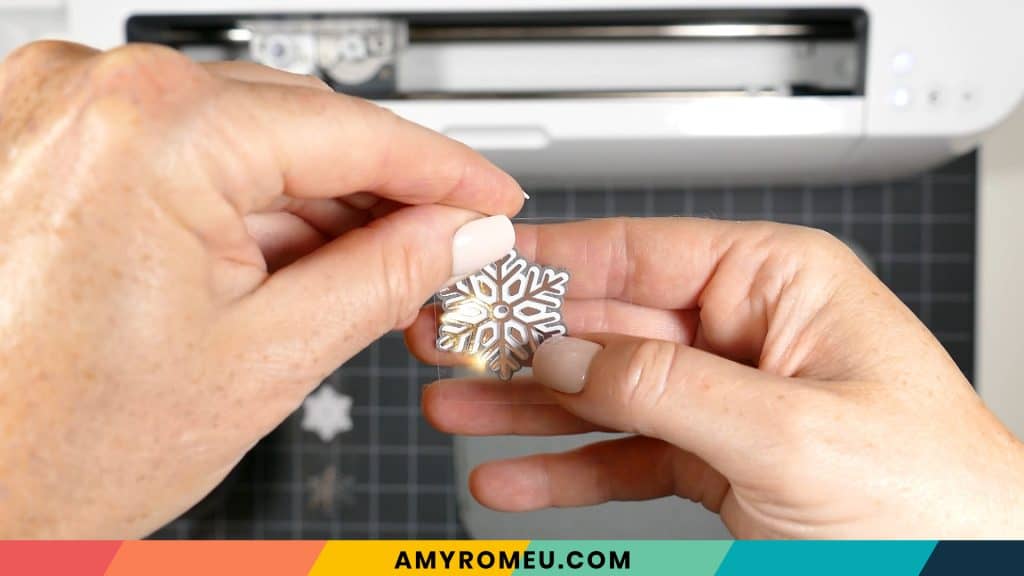
Carefully remove the snowflakes from the mat and set them aside.
STEP 7 – Cut the Foil Iron-On and HTV Mats
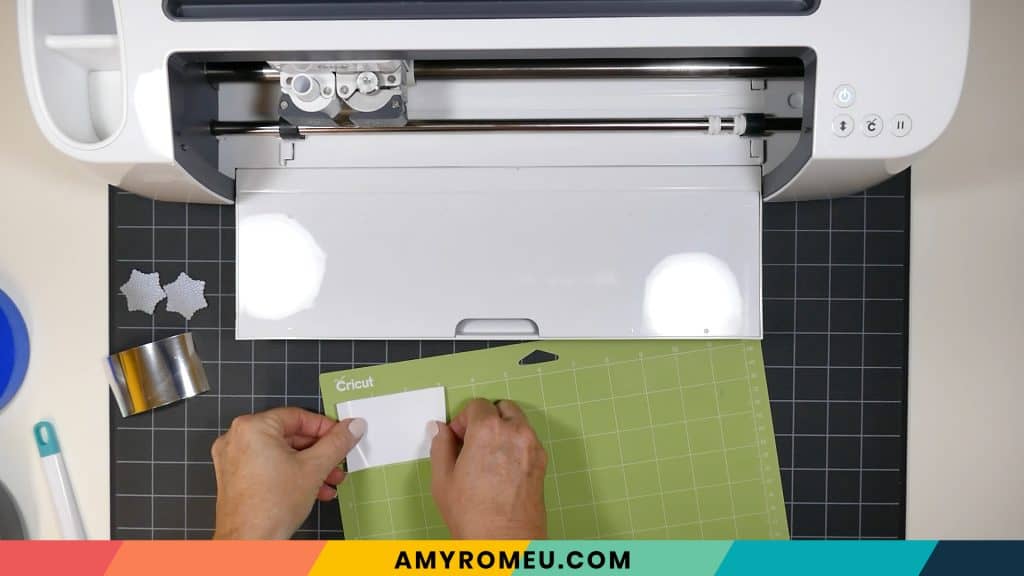
Cut the white mat, using heat transfer vinyl, next. Hover over the white mat and cut a piece of white HTV slightly larger than the shapes that need to cut.

For the material selection, choose VINYL and leave the Pressure menu at Default.
Place the white HTV on a green cutting mat. Load the mat into the Cricut and begin the cut.
When the cut is complete, repeat the steps above with the light grey mat. Use the Foil Iron-On setting to cut this material (Cricut Explore Air 2 users will turn the dial to custom to access this setting).
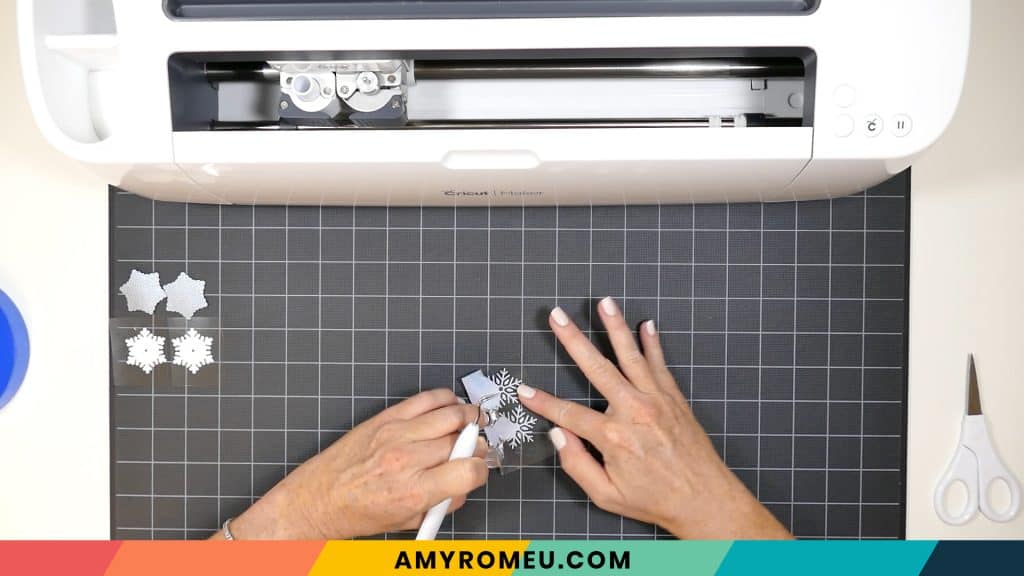
While the foil mat is cuttting, use a sharp weeding tool to weed the white snowflake shapes.
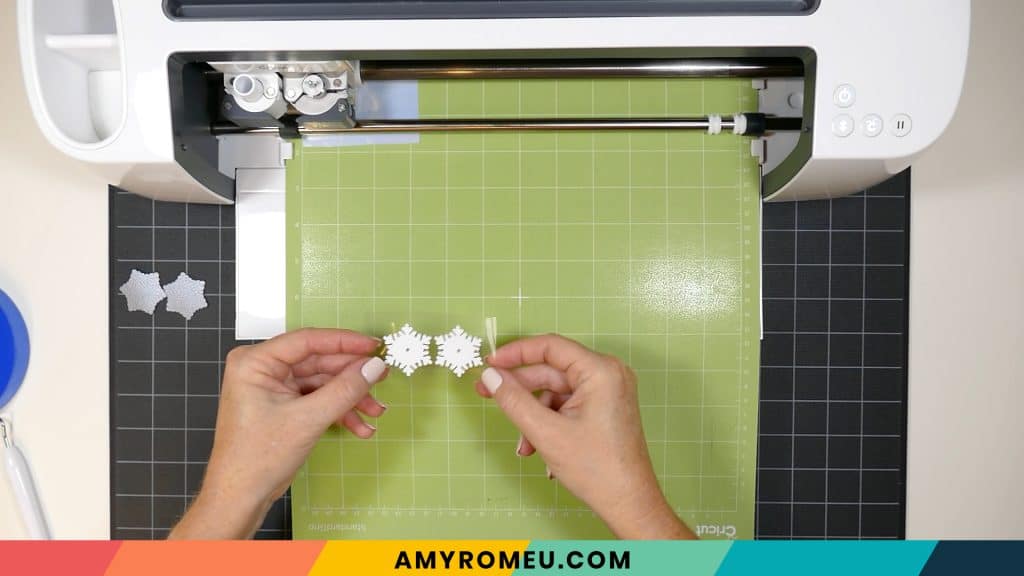
Then weed the foil snowflakes.
STEP 8 – Press the Snowflake Layers
Using an Easy Press or Easy Press Mini, press the vinyl snowflake layers onto the faux leather base.
Press the white layer first, then the foil.

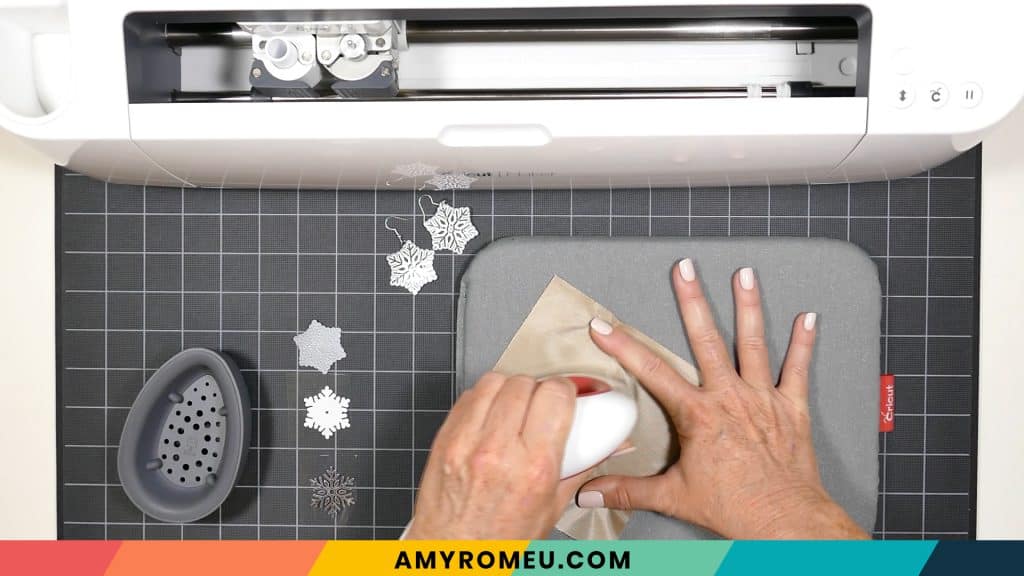

Repeat for both earrings.
STEP 9 – Punch the Earring Holes
Even though the Cricut often cuts earring holes well, I prefer to punch them with a small hole punch.
I use a 1/16″ inch size hole punch. They are available on Amazon here and here.
Punch a hole at the top of the first earring. Then layer the first earring over the second and use the first punched hole as a guide to punch the second hole.
Once both of the earring holes are punched, it’s time to attach the earring hooks.
STEP 10 – Attach the Earring Hooks
Now it’s time to assemble your earrings!
You’ll need small jump rings (I recommend 5mm or 6mm) and earring hooks.
Before you connect the earring hooks, first you’ll need to turn the bottom loop on the fishhook sideways so your earrings will hang correctly. See the example image below to see how the orientation of the earring hook has to change so your earrings will hang straight.
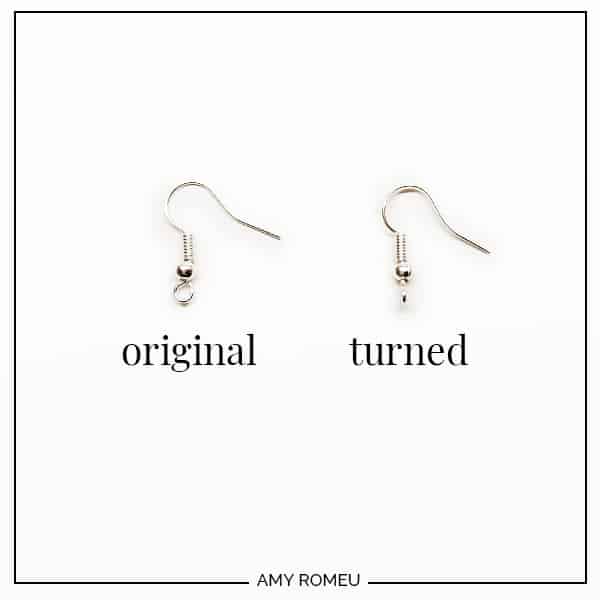
To see more about this, visit my post about how to make faux leather earrings hang straight here. Or watch my YouTube video here.
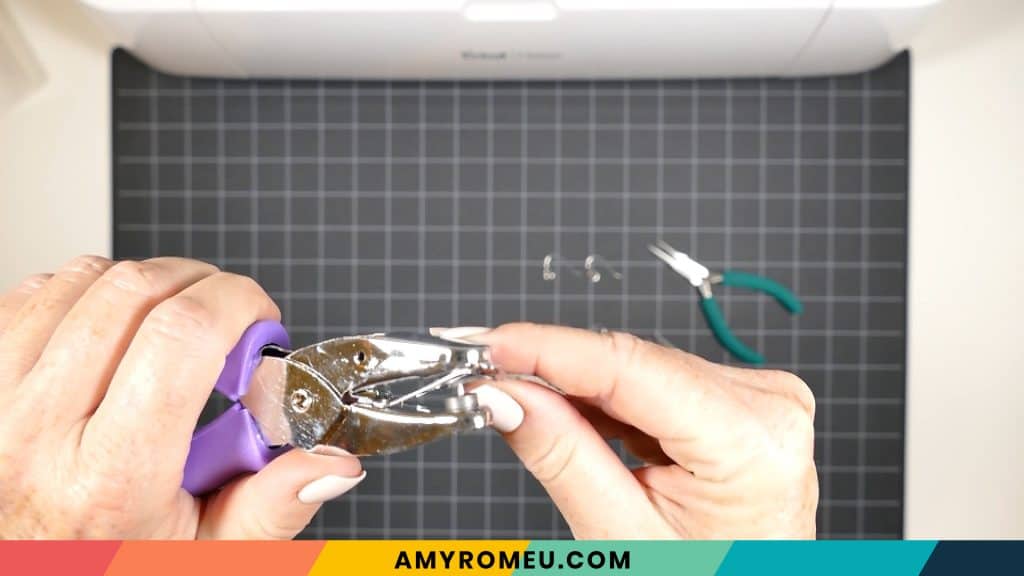
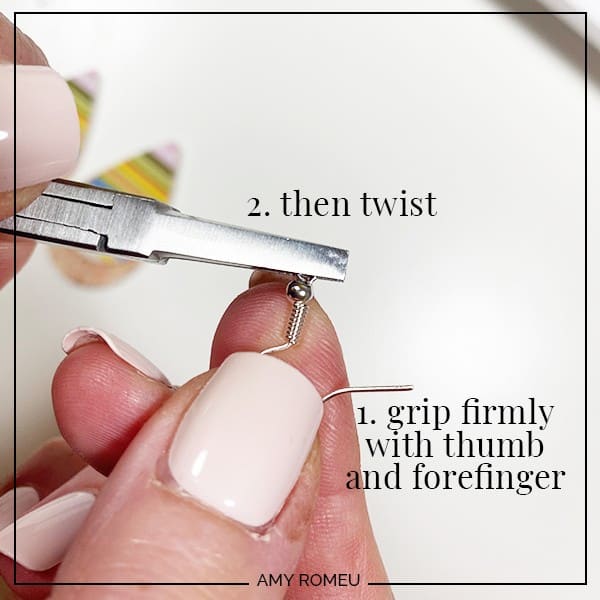
You’ll do this using one pair of flat nose pliers. While holding the hook firmly between two fingers, grip the entire earring loop between the pliers and twist your wrist until the loop is perpendicular to the earring post. Repeat with the second earring hook.
Once your earring hooks are turned, use your two pliers to open your jump rings, as shown below. It’s important to open them without distorting the original circle shape of the jump ring. You can do this by twisting only one wrist forward to open the jump ring like a door.
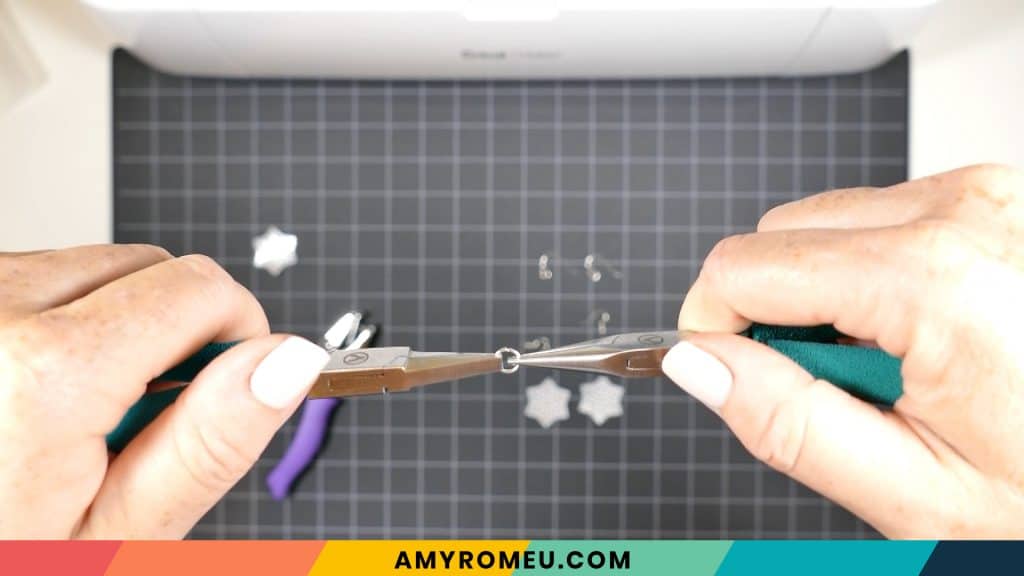

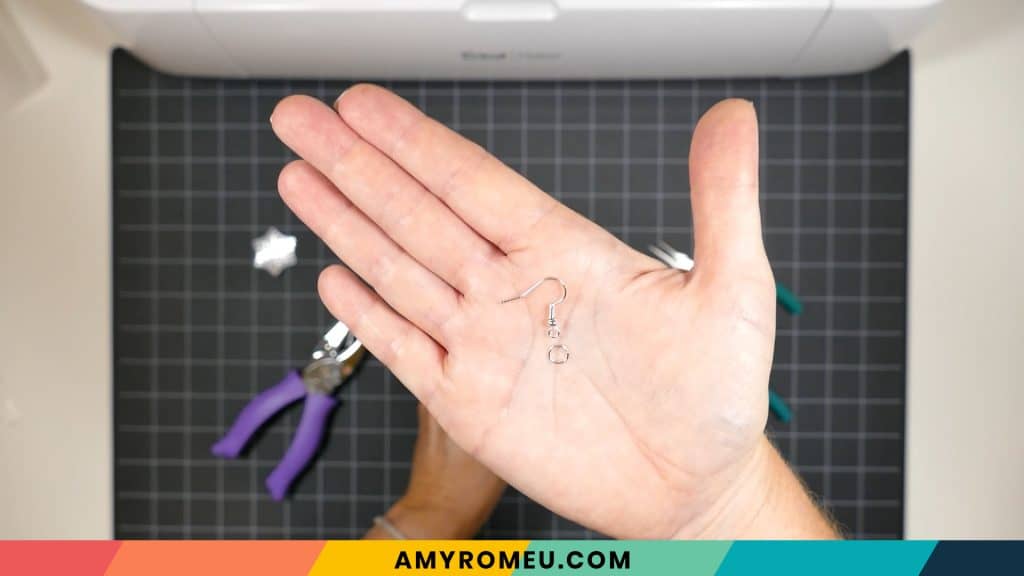
Once your jump ring is open, slide on the snowflake and the earring hook. Pay attention to which direction the earring hook is facing.

Use the two pliers again to close the jump ring by simply reversing the wrist movement. Now repeat the above steps with the second earring. That’s it! Aren’t these snowflake earrings adorable?
Don’t forget – a complete video tutorial for my Snowflake Earrings is only available at the Holiday MakerFest! Tickets to attend are FREE! Click the button below to grab yours:


If you do make this project, I would love to see your earrings! Please share a photo of them in the comments, or tag me on instagram: @amyromeucreative
Want to see all of my Cricut earring & jewelry tutorials? CLICK HERE
Until next time… and happy creating!

WANT THE FREE SVG FILE SO YOU MAKE THESE SNOWFLAKE EARRINGS YOURSELF?
GET IT FROM OUR RESOURCE LIBRARY! YOU’LL RECEIVE THE PASSWORD FOR THE RESOURCE LIBRARY INSTANTLY AFTER FILLING OUT THE FORM BELOW!
Want to remember this? Post this DIY SNOWFLAKE EARRINGS project to your favorite Pinterest board!

Love the tutorial on the earrings. Do you have a tutorial on using them as an ornament?
Hi, Tracy!
Thanks for your comment. I’m sorry for the delay in replying, I missed it somehow!
I don’t have the snowflake ornament tutorial on my website yet, but I do have the snowflake earrings tutorial.
The ornament SVG file is different from the earring file in just three ways. 1. The ornament is larger 2. the ornament has a pre-cut hole 3. the ornament has two sides to cut, a front and a back (glue the two sides together with a fabric or craft glue).
Here’s the link to the snowflake earring tutorial: https://amyromeu.com/diy-snowflake-earrings-cricut/
Do you need the ornament SVG file? If so, you can get it here:
http://amyromeu.com/makerfest
Thank you!
Amy
These are so cute!!
I would love to print the instructions and supply listings.
Glitter glue is listed as a material but I do t see it mentioned in the steps. What is the glue for?
Hi, Alicia! Thanks for your comment. Some people like to cut a mirrored image of the front snowflake also out of faux leather and glue it to the back to create a double sided snowflake earring. They do this instead of pressing HTV onto the back of the front snowflake. I will edit the post to reflect this option and how to use the glitter glue. Thank you! Amy
Thank you. Sorry for posting my question twice.
How do you change an svg to something readable? When I open it it’s just a page of mixed computer jargon that are unreadable.
Hi, Lauren! I’m sorry you are having trouble!
Generally you don’t need to open the SVG file, it’s designed to upload (after it’s been unzipped) directly into Cricut Design Space. My video tutorials shows that process step by step which will help. 🙂 If you need further assistance, please reach out to [email protected]. Thank you!
Amy