
DIY Mask Holder or Mask Taco

DIY Mask Holder or Mask Taco
If you’re reading this post in the future, you may be wondering why someone would need a mask holder – but right now, we all need to wear masks, and a mask holder is the perfect accessory. I don’t know about you, but I’m always digging around in my purse or my pocket for my mask. I thought, wouldn’t it be great to have a little place to store it on the go? So this DIY Mask Holder was born. I made it using my Cricut Maker – but you can also make it with a Cricut Explore Air 2 and a Cricut Joy. I’ll show you exactly how to do it using a Maker, an Explore Air 2, or a Joy, in this post.
You can add your own custom text to your mask holder as well. These mask holders make great gifts, for the holidays, or anytime of year – especially for those hard to shop for teenagers. If you want to try this project yourself, I’m giving you my original SVG cut file for the mask holder FREE! I’ve included a Cricut Joy sized version to make it easier for you to cut using a Joy if that’s your preferred machine.
You can get the mask holder SVG file by filling out a form in the Materials list below, or at the bottom of this post.
If you want to watch the YouTube video for this project, click below:
Ready? Let’s get started!
This page contains some affiliate links (which means if you make a purchase after clicking a link, I will earn a small commission at no additional cost to you). Read my full disclosure policy here.
DIY Mask Holder – Materials List
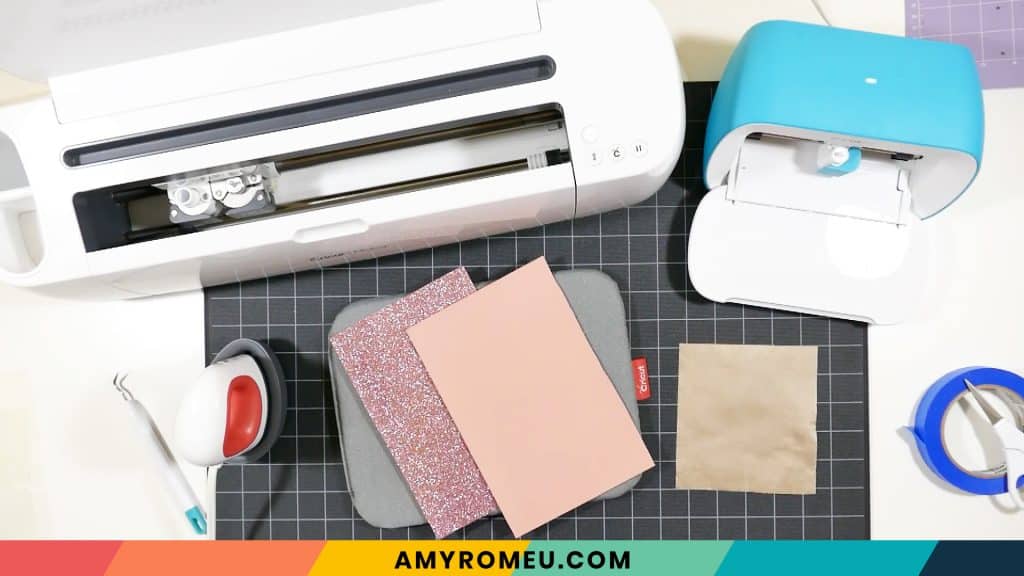
- A Cricut. I have the Cricut Maker, available at Amazon here. You can also use the Cricut Explore Air 2 or the Cricut Joy, on Amazon here. You can see all of these machines available on Cricut.com here.
- Cricut Strong Grip (Purple) Cutting Mat. Get a purple mat on Amazon here, or at any craft store. (If you are using the Cricut Joy, you’ll use the green cutting mat instead.)
- Cricut Standard Grip (Green) Cutting Mat, available on Amazon here. This is the mat that comes with the Cricut. Use this mat if you’ll be adding heat transfer vinyl to your mask holder (optional).
- Faux Leather of your choice. For this project, I used smooth faux leathers in assorted colors (specifically colors “Latte” and “Blush” from this Etsy shop. Their smooth faux leathers are a good thickness that still cuts easily on the Cricut. The popsicle faux leather is from my personal stash and no longer available on Etsy, but this one is very similar. The black and white wide stripe is from Etsy here. The black shiny pebbled leather is from Amazon here.
- HTV Vinyl in the color of your choice. You can use Cricut Every Day Iron On from here or Siser EasyWeed from Amazon here. You can also use glitter heat transfer vinyl, or even permanent vinyl if that’s what you have on hand.
- Blue painter’s tape. This will help keep your faux leather firmly in place on your cutting mat, without damaging your mat or your material. You can get it at any hardware store, or you can get it on Amazon here.
- A Cricut Easy Press or a Cricut Easy Press Mini (what I use to make earrings and keychains). I bought my Easy Press Mini from Amazon here.
- If you will be using the Easy Press Mini, you’ll need an EasyPress Mat to safely press your items on. I use the 8×10 size, available on Amazon here.
- Teflon sheets (I cut them down smaller) from Amazon here.
- A weeding tool or a sharp pointed tool and craft scissors. I use the weeding tool and scissors from my Cricut tool set here.
- The mask holder SVG templates, design #158 in my Resource Library. To get the password via email instantly, fill out the form below, or the form at the bottom of this post.
PROJECT INSTRUCTIONS
STEP 1 – Download Mask Holder SVG Files
Download the SVG templates for these mask holders from my Resource Library. You can fill out the form above or at the bottom of this post to get the password to my Resource Library.
Save the zipped folder that downloads to your computer.
You’ll need to unzip or extract the files FIRST before you can upload the personalized photo keychain designs to Cricut Design Space. Make a note of the file location after you unzip it so you can find it in the next step.
STEP 2 – Upload SVG to Cricut Design Space
After you’ve unzipped the folder and made a note of the file location, open Cricut Design Space and click on New Project. Then choose Upload from the left hand side menu on the canvas.
Click on Upload Image and navigate to your saved (unzipped!) SVG file.
Double click on it to bring it into the upload screen in Design Space. You’ll see a preview of the file.
Click Save. Now you’ll see it as the first item in your “recently uploaded designs” row. Click on it and then click on the green “insert images” button in the bottom right corner.
(For step by step directions on how to upload the SVG file to Cricut Design Space, with photos, click here.)
This brings the mask holder shapes into Cricut Design Space. The pink one is sized to cut on the Cricut Maker or the Cricut Explore Air 2. The blue one is sized to cut on the Cricut Joy.

If you’re using a Cricut Maker or an Explore Air 2:
Cricut Maker: Click on the eye next to the blue mask holder shape to hide it. Click the MAKE IT button.
Cricut Explore Air 2 – Turn your dial to CUSTOM. Click on the eye next to the blue mask holder shape to hide it. Click the MAKE IT button.
On the mat preview screen, make a note of what size faux leather piece you’ll need to place on your mat to cut the mask holder shape (it’s about 8 inches by 5 inches, as shown inside the red border I’ve drawn). It’s not necessary to mirror the mat. Press continue.

Click the CONTINUE button.
If you’re using a Cricut Joy
Be sure the Cricut Joy is your selected machine in the top menu bar.
Click the eye icon next to the pink mask holder shape to hide it from cutting. Press the CONTINUE button.

On the next screen, choose “ON MAT” for how you will feed your material.

Drag the mask holder shape on the mat preview so it’s centered on the Joy sized mat. Click CONTINUE.

Follow the material setting selection in the next step. (NOTE: You won’t see faux leather as a material option if you didn’t choose “ON MAT” in the earlier screen. If necessary, go back and do that.)
STEP 3 – Choose Material Settings
The material selection process will be the same no matter which machine you are using.
On the next screen in Cricut Design Space, choose Faux Leather (Paper Thin) as the material setting. If you don’t already have the Faux Leather (Paper Thin) material setting in your Favorites, click on Browse All Materials, search for Faux Leather (Paper Thin), and then click on it to select it.

Change the Pressure setting to MORE in the dropdown menu for all three machines.


Once the material settings are selected, it’s time to prepare the faux leather for cutting.
STEP 4 – Optional – press Heat Transfer Vinyl onto Faux Leather before cutting
If you want to add some extra interest and color to the inside of the mask holder, you can do that, but it’s totally optional! There are two ways to do it.
- One is to DUPLICATE and MIRROR the mask holder shape in Cricut Design Space, and cut that duplicated shape out of heat transfer vinyl. Cut the first mask holder shape from faux leather. Then match up the shapes and press the HTV to the underside of the faux leather mask holder using a heat press.
2. You can also press the heat transfer vinyl to the back of the faux leather first, before you cut the mask holder shape. To do this, cut a piece of heat transfer vinyl slightly smaller than the faux leather shape you’ve already cut. Using an EasyPress Mini, an EasyPress, or a traditional heat press, press the HTV onto the back of the faux leather. I used an EasyPress Mini on the medium heat setting with glitter heat transfer vinyl. For HTV or foil, use the low setting.
For a regular EasyPress, set it to 255-275 degrees, depending on the recommended heat for your chosen material.

Carefully peel away the carrier sheet from the faux leather and allow the faux leather to cool while flat.

Step 5 – Prepare & Cut The Faux Leather Mat
If you haven’t already cut your faux leather by doing the optional step above, cut a piece to the size you noted in the mat preview screen.
If you’re using a Cricut Maker or an Explore Air 2:
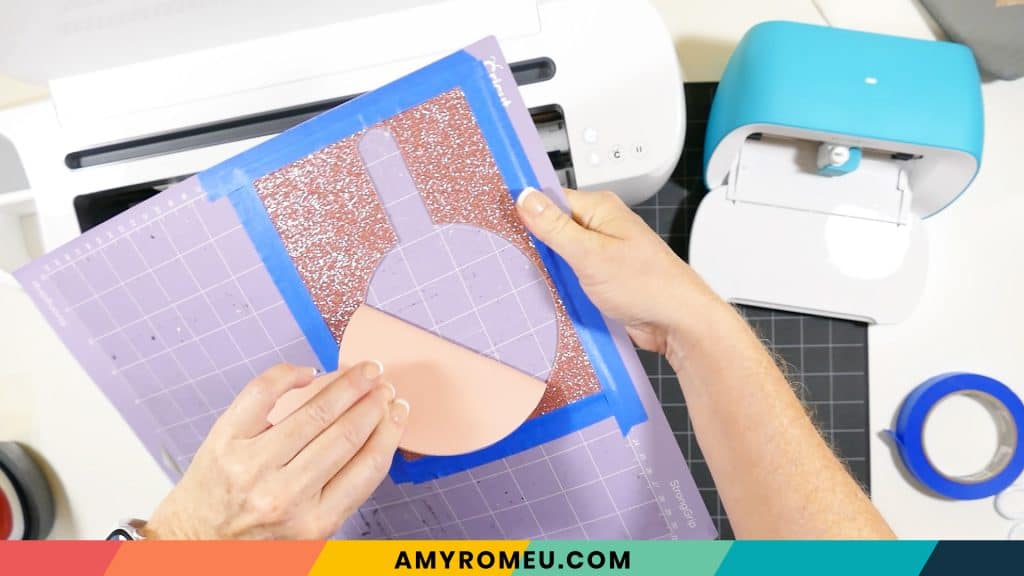
Place the faux leather pretty side down on a sticky purple mat in the same location on the mat as shown in the mat preview (top left corner here).
Then tape the faux leather down to the mat on all sides using the blue painter’s tape. Load the mat into the machine by pressing the arrows button. Be sure the white star wheels on the roller bar are moved out of the way so they don’t leave tracks on your faux leather.


Be sure to move the white star wheels on the roller bar off to the side so they don’t roll over the faux leather.
Press the flashing C button to begin the cut.
If you’re using a Cricut Joy:
For a Cricut Joy: Use the green mat and tape the faux leather down on all sides. Load the mat into the Cricut and follow the prompts on the screen in Cricut Design Space to start the cut.


Load your mat into the Cricut by lining up the cutting mat under the mat guides. Press the double arrow button to feed the mat into the machine.
When the cut is complete, and before you unload the mat, use your weeding tool to check one corner of the mask holder shape to make sure it cut completely. It most likely will need repeated cuts.
On the Cricut Maker & Explore Air 2, press the C button again to repeat the cut.
On the Cricut Joy, go back to the Design Space screen and select “Rerun” to repeat the cut.
Repeat this process of checking the cut and reruning the cut as many times as necessary. It make take 4 or 5 cuts for the material to cut all the way through, especially if you have HTV on the back.
NOTE: If you are struggling to cut the material with HTV on the back, I suggest trying to alterative method I mentioned at the beginning of Step 4.

Unload the mat and remove the faux leather shapes.
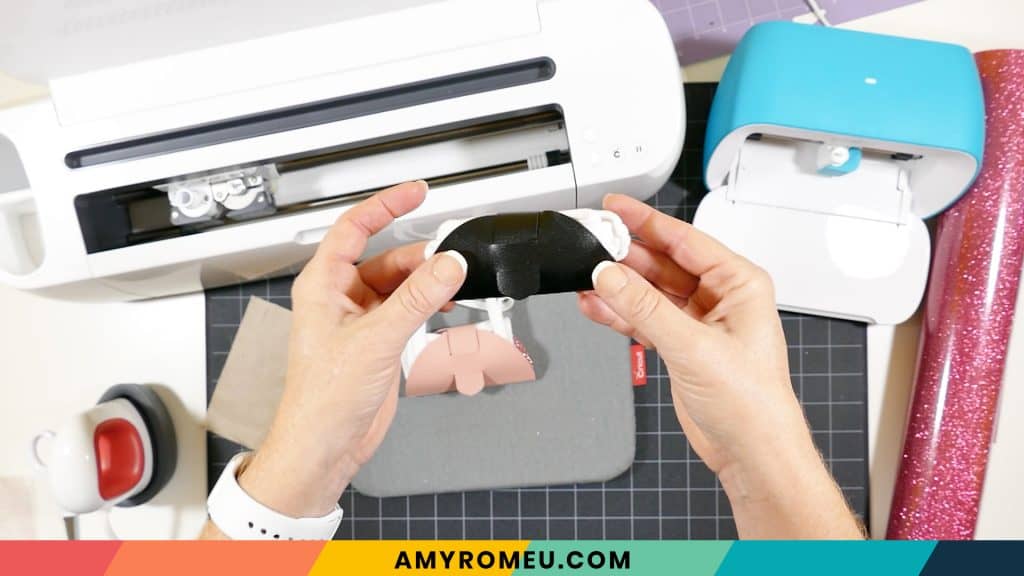
STEP 6 – Press the Center Seam Flat
To make a nice crisp seam at the bottom of the mask holder, fold the mask holder in half and put the tab inside the slits to line everything up. Then use the heat press again (with a cover sheet) to gently press the seam flat. This should just take a few seconds of heat.


STEP 7 – OPTIONAL – Add Text to the Mask Holder
If you want to add text to your mask holder, you can easily do that using the text tool in Cricut Design Space. Choose a font that will be easy to weed and type out your desired text. I used Pacifico, a free font from dafont.com that I’ve installed on my computer and use in Cricut Design Space.
Adjust the letter spacing as desired. I like to move the letters closer together so I can make the line of text larger. Size your text box as large as you want, but not bigger than the back of the mask holder. I like to leave at least a half an inch of room on either side of my text box.
When your text is how you want it, click WELD to connect all of the letters together. Then click the MAKE IT button. Be sure to MIRROR the text from the mat preview screen before you cut!
Cut your vinyl on a green cutting mat. I like to use the WASHI SHEET material setting to cut regular HTV, the Foil Iron -On Setting for foil iron on, and Glitter Vinyl for glitter vinyl. Carefully weed your text using a sharp weeding tool.
I used the Easy Press Mini on the lowest temperature setting. For the Easy Press, check the recommended temperature guidelines for the specific vinyl you are using here.

Press the text onto your mask holder using medium heat and a teflon or parchment paper cover sheet.
Then fold up your mask so it fits inside the mask holder. You can leave the straps inside, or leave them out.


Do you like this project? Are you going to make a mask holder ask a gift, or for yourself? If so, please post a comment and attach a photo of your mask holder! I would love to see it. You can also tag me on Instagram: @amyromeucreative.
Want to see all of my Cricut earring & jewelry tutorials? CLICK HERE
Until next time… and happy creating!

Want the FREE SVG files so you can make these MASK HOLDERS yourself?
Get them from my Resource Library! You’ll receive the password for the Resource Library instantly after filling out the form below!
Want to remember this? Post this DIY MASK HOLDERS project to your favorite Pinterest board!

What a great project! I can’t wait to give it a try!
Thank you for all these wonderful project ideas. I really love this one. I never know what to do with my mask. I am going to make several of these as gifts for my family.
Wow! That is so awesome I love it! I will make a bunch of them to give away! Thank you so much!!
Great gift-making idea! Thank you, Amy
I love this and can cut it by hand, don’t have a cutting machine yet. S need to win this one.
Great and easy gift idea just in time for Christmas!
This is a wonderful idea. It will be a stocking stuffer for my grandchildren. I love the way you explain the project. You make it sound so easy.
Thanks, Regina! I’m so glad you liked this project. That makes me heart happy!
These are very nice but I can see where the covid could come in contact with the mask because its not completely closed on all sides.
Would love to find a design that is closed on the sides and a flap over the top closing the “lid”.
Being an essential worker I am always looking for extra ways to protect myself.
Hi, Nancy. Thanks for your comment. I’ll add your idea to my idea list, it’s a great one. Thank you. Take care of yourself, and be safe!
Thank you for this tutorial.
You’re welcome, Brenda! It’s my pleasure. Thanks for checking it out!
Thanks for another great tutorial. I also love Nancy’s idea about making one that is enclosed. Look forward to any and all your tutorials.
Hi, I made your mask holder today as a Christmas gift for my granddaughter. I ironed on a cute cat on a moon, and used the same iron on to put on a mask for her. Thank you!! It was super easy, stylish, (she’s 17), and fun to make. I was able to cut 3 from a 12×12 sheet. So excited to make more.
I’m so glad, Debee! Thanks for letting me know you enjoyed making this project. That makes my heart happy!
Hi Amy I’m trying to download your svg files and I can’t find them in your library I was able to do the first three but not the last two.
Hi, Sanjuana. Thanks for your message.
The files are all there in the library. 🙂 However, your browser isn’t showing you the current version of the library page. You may need to refresh the library page, clear your device’s cache, or try viewing the library from another device or browser.
You can also try logging in to the library again using this link: https://amyromeu.com/resourcelibrary/
I hope that helps! Thank you. Amy
Love the mask project but I think I missed a step in the process. When I upload the svg, they come as one unit and I cannot cut just the large one. Any ideas on what I missed
Hi, Sheila! Are you able to click the eye on the layer for the one you don’t want to cut to hide it? You can also try ungrouping them before cutting. Let me know if either of those things work for you. Thank you! Amy
Hello. I was want to know if I need a license to sell the Mask Holder?
Hi, Maurethia! Yes, all of my designs are for personal use only, but I do have small business commercial licenses available for physical products made with my designs. The commercial use license for the mask holder is here:
https://shop.amyromeu.com/collections/commercial-licenses/products/single-design-commercial-license-for-10-days-of-crafting-event-makerfest-templates
Thank you!
Amy