Gingerbread Boy & Gingerbread Girl Gift Tags

How to Make Gingerbread Gift Tags with a Cricut
Today I’m doing something unusual on my blog (although not in real life!)… I’m crafting with a material other than faux leather! Wait, what? Yes, you read that right! The queen of faux leather earrings is doing something different today. But let me tell you why! I recently presented a workshop at the amazing Holiday MakerFest hosted by Jennifer Maker. I demonstrated how to make Gingerbread Man Earrings and Snowflake Earrings in the workshop, and I received so many requests for 1) to turn my gingerbread man designs into a gift tag and 2) to make a matching gingerbread girl! So I’ve made this Gingerbread Boy & Gingerbread Girl Gift Tag project just for you!
These Gingerbread Boy & Gingerbread Girl Gift Tags are made from copper foil cardstock and heat transfer vinyl. Did you know you can press HTV onto cardstock? You can! I’ll show you how. I’ll be using a Cricut Maker to demonstrate this project, but you can also make these Gingerbread Man Gift Tags with an Explore Air 2 or the Cricut Joy.
In this tutorial, I’ll give you my step by step instructions and tell you exactly what materials I used to make this project. A link to download my original SVG file for this project is in the Materials list below.
If you’d rather watch a video tutorial, click on my Gingerbread Boy & Girl Gift Tags YouTube video below:
Ready? Let’s get started!
This post contains some affiliate links (which means if you make a purchase after clicking a link, I will earn a small commission at no additional cost to you). Read my full disclosure policy here.
Gingerbread Boy & Gingerbread Girl Gift Tags – Materials List
- A vinyl cutting machine. I have the Cricut Maker, which you can get at Amazon here or at Cricut.com. You can also use the Cricut Explore Air 2 or even the new Cricut Joy!
- Copper Foil Cardstock. I used this copper foil cardstock from Michael’s here. You can also use any brown cardstock (I recommend at least 65lb) or something like this Kraft paper colored cardstock, also from Michael’s here.
- Heat Transfer Vinyl in assorted colors. I used Siser Glitter HTV in Red and Siser Easyweed in Light Pink, and White.
- Cricut Standard Grip (Green) Cutting Mat. Available on Amazon here. You can also use the Blue Light Grip Cutting Mat.
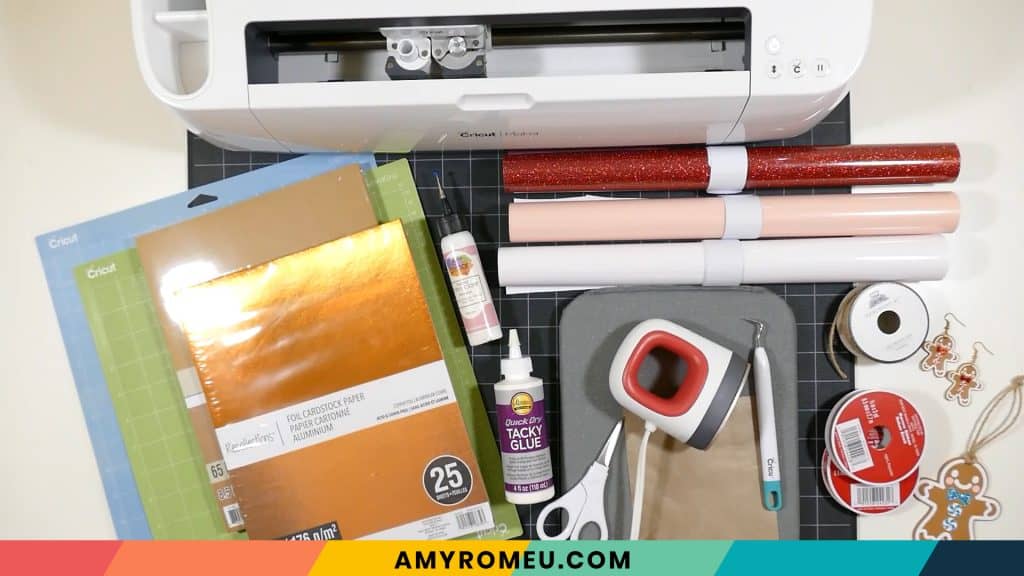
- A weeding tool. I use the weeding tool that came with my Cricut tool set from Amazon here. For small or intricate designs, I also love my Pin Pen Weeding Tool from 143Vinyl.com.
- Cricut EasyPress Mat. I have the 8×10 size, which I use a lot for making small things like earrings and keychains.
- Ribbon. I used this 3/8″ wide black and red buffalo plaid ribbon from Michael’s.
- The SVG file template for these Gingerbread Gift Tags. It’s Design #156 in my free resource library. You can get the password to my library instantly by filling out the form below, or the form at the bottom of this post.
Gingerbread Boy & Gingerbread Girl Gift Tags – PROJECT INSTRUCTIONS
STEP 1 – Download the SVG Cut Files
Download my free Gingerbread Boy & Girl Gift Tags SVG file (Design #156) from my Resource Library. Save the zipped folder that downloads to your computer. Then unzip the folder to access the folder’s contents. You’ll need to unzip or extract the files FIRST so you can upload the cutting file to Cricut Design Space.
STEP 2 – Upload the SVG File to Cricut Design Space
Upload the unzipped SVG file to Cricut Design Space. If you need help uploading a file to Cricut Design Space, click here.
Drag the designs to the top left corner of the canvas. If you don’t plan on making both tags, you can hide the the tag you don’t want to cut by clicking on the eye icon next to the layers you don’t want to cut.
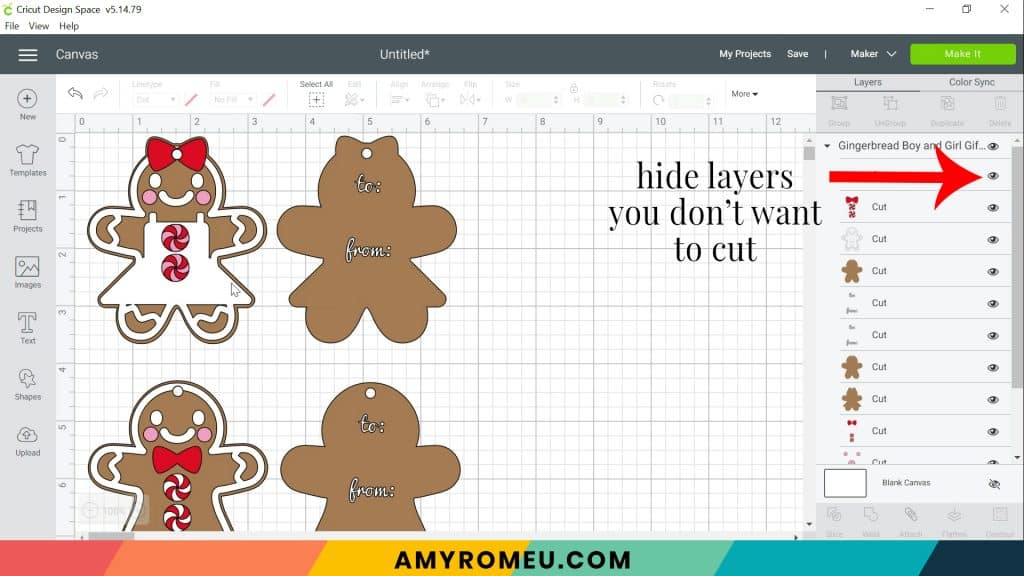
If you don’t want to cut the “to” and “from” for the back, you can hide those layers, too.
Click the green MAKE IT button.
STEP 3 – Preview the Mats
The mat preview screens will load. The Cricut will cut one cardstock mat and three heat transfer vinyl mats.
I suggest cutting the cardstock layer first. The cardstock mat will not be mirrored, but the three heat transfer vinyl mats will. So go through each mat now in the mat previews and toggle the green MIRROR button on for the vinyl mats so you don’t forget.
Click and drag your shapes to a different location on your mat if you’d like to maximize the cutting layout.
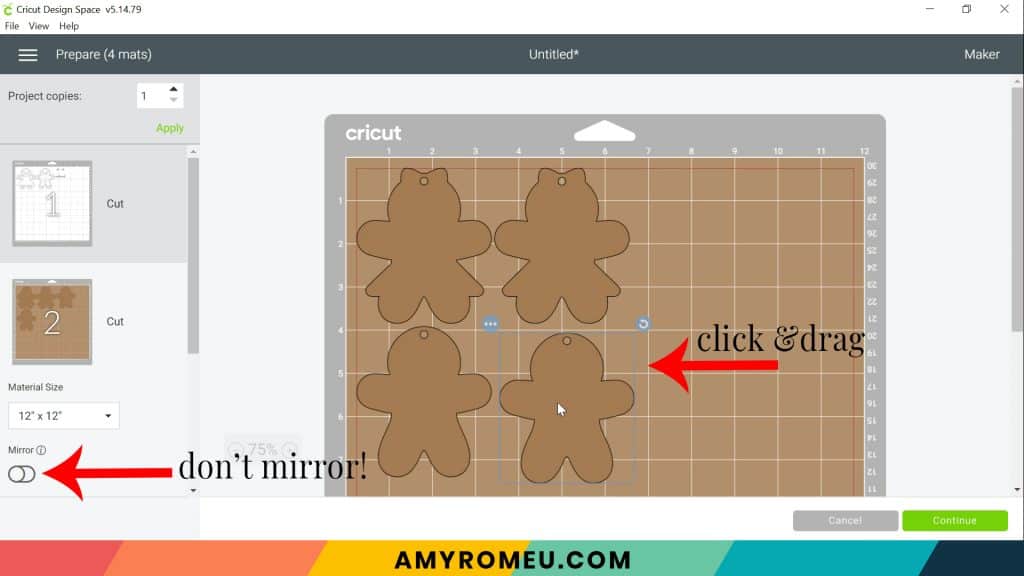
Press the green CONTINUE button.
STEP 4 – Make Material Selections
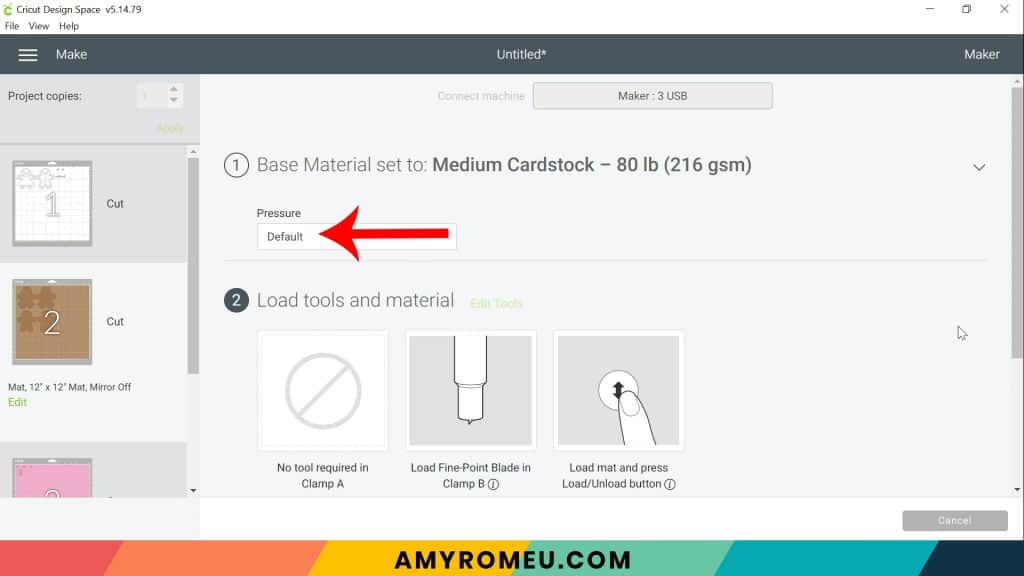
To cut the cardstock mat, I recommend using the Medium Cardstock setting. If you don’t have it set as a favorite setting already, you can click on “Browse All Materials” to search for it. Type “cardstock” in the search bar and click on the magnifying glass. Then click on “Medium Cardstock – 80lb” to select it.
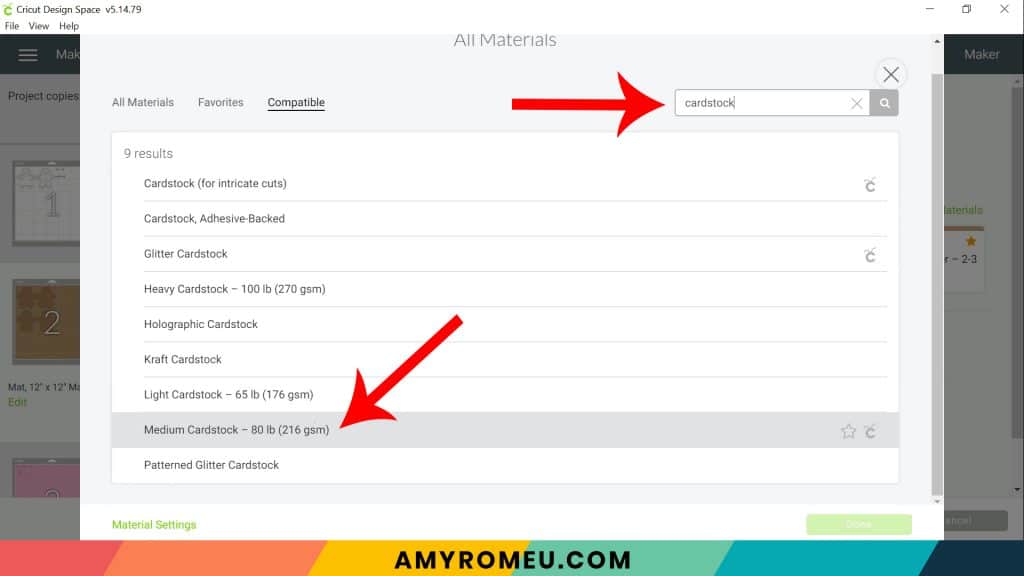
Then click DONE.
After you’ve selected Medium Cardstock as your material, leave the Pressure setting at Default.
STEP 5 – Cut the Cardstock & Vinyl
Place the copper foil cardstock shiny side up on a green or blue cutting mat. Be sure your white star wheels are moved out of the way so they don’t leave tracks on the foil cardstock.
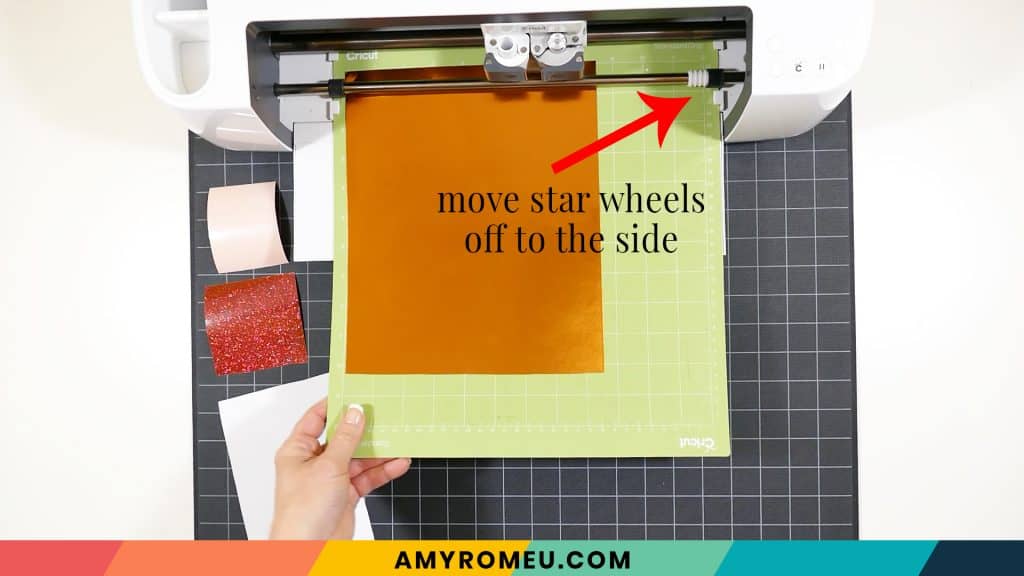
Load the prepared mat into the Cricut by lining the mat between the mat guides and then pressing the double arrows button.
The “C” Cricut button will start to flash, indicating the machine is ready to cut. Press the C button to begin the cut.
When the cut is finished, removed the cut cardstock shapes and set them aside.
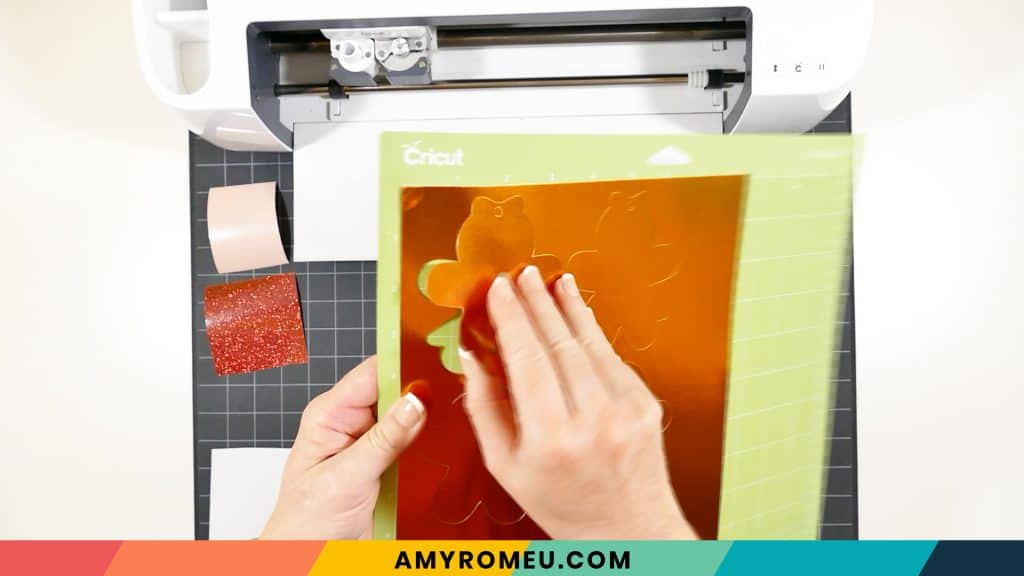
Return to Cricut Design Space to start cutting the heat transfer vinyl mats in the order shown on the mat preview screen. Place the vinyl shiny side down on a green or blue cutting mat. I use the Vinyl or Washi Sheet setting to cut regular heat transfer vinyl. I use Glitter Vinyl to cut glitter HTV, and Foil Iron On to cut foil. I use the Default pressure for all vinyl cuts (I usually repeat the cut for glitter vinyl, however).
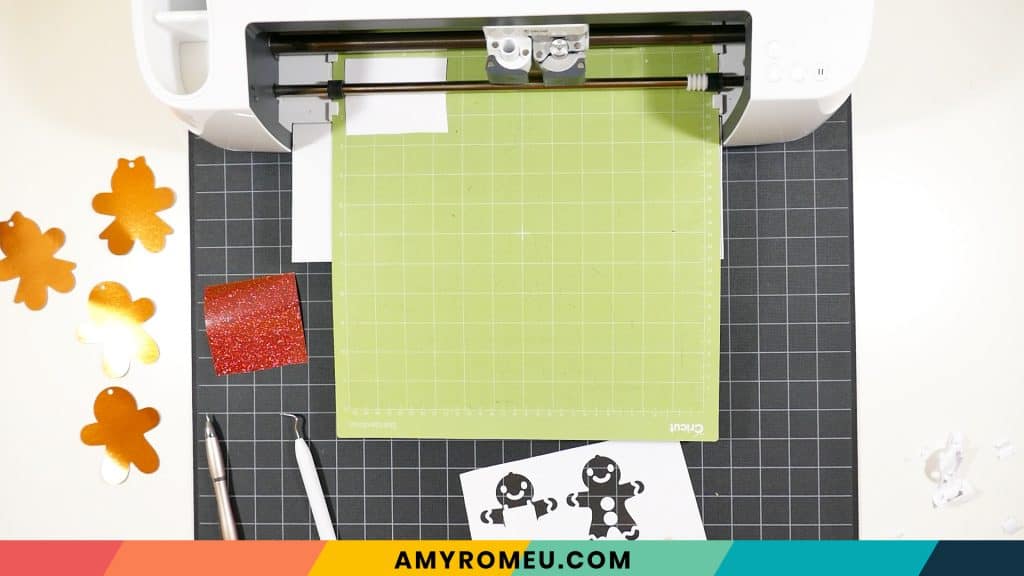
Cut each vinyl mat using the appropriate cut setting and weed to remove the excess vinyl.
STEP 6 – Press the Vinyl onto the Cardstock
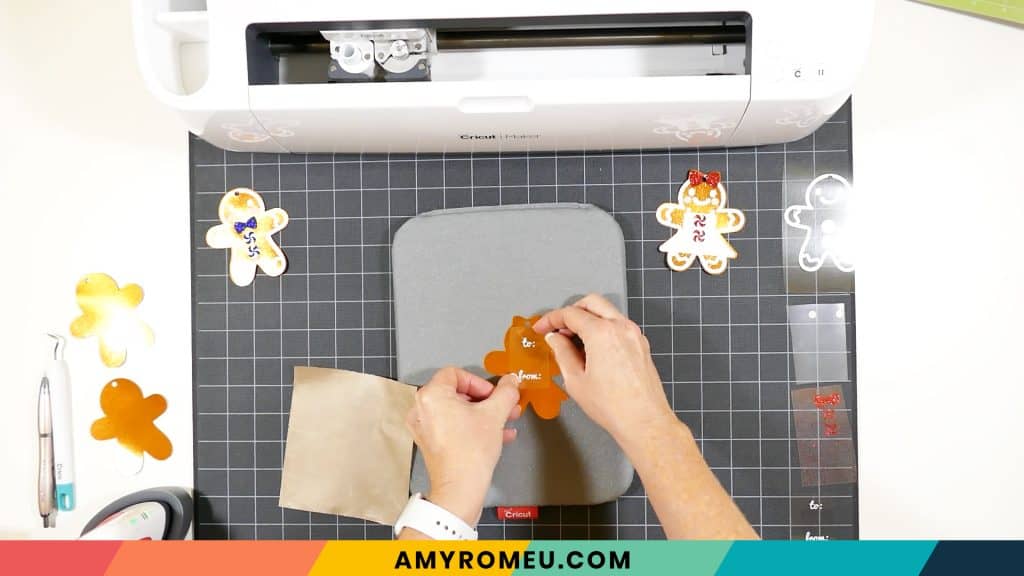
For the next step, use an Easy Press Mini (on the lowest temperature setting) or an Easy Press (set to about 275 degrees), to press the vinyl layers one at a time onto the gingerbread man cardstock shapes.
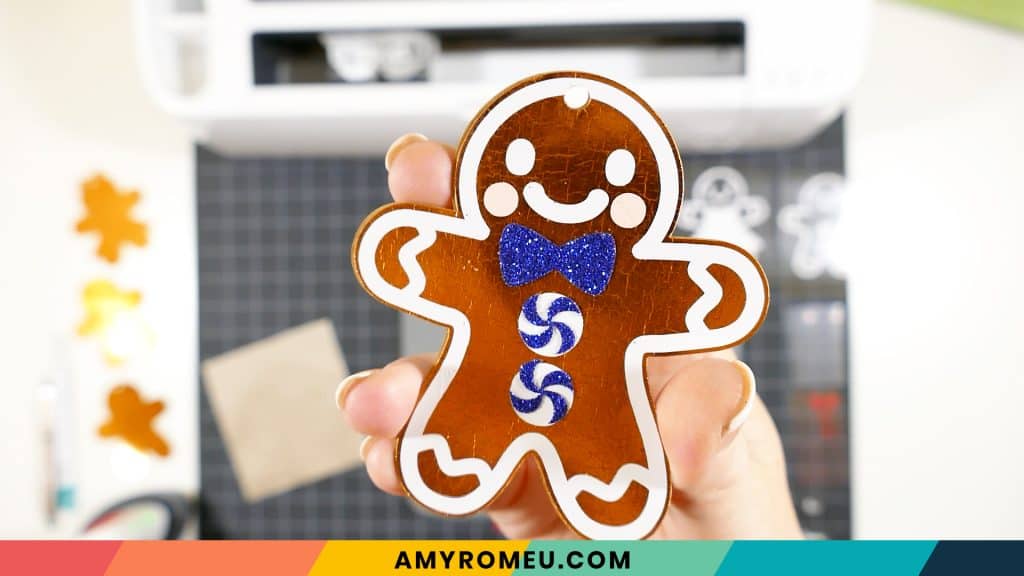
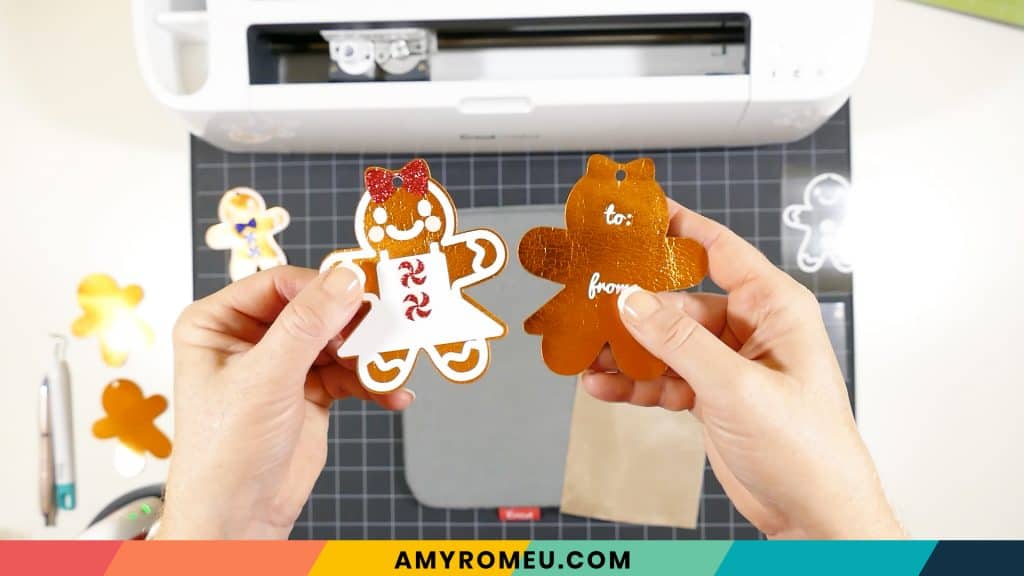
NOTE: If you’re using the same pretty copper foil cardstock from Michael’s that I am, be aware the the foil will crackle slightly with the heat from the heat press. You can see what I mean in the image below. The crackling will subside after it cools again, but some crackling will remain. I think it makes the cardstock gingerbread boys and girls look more like real cookies!
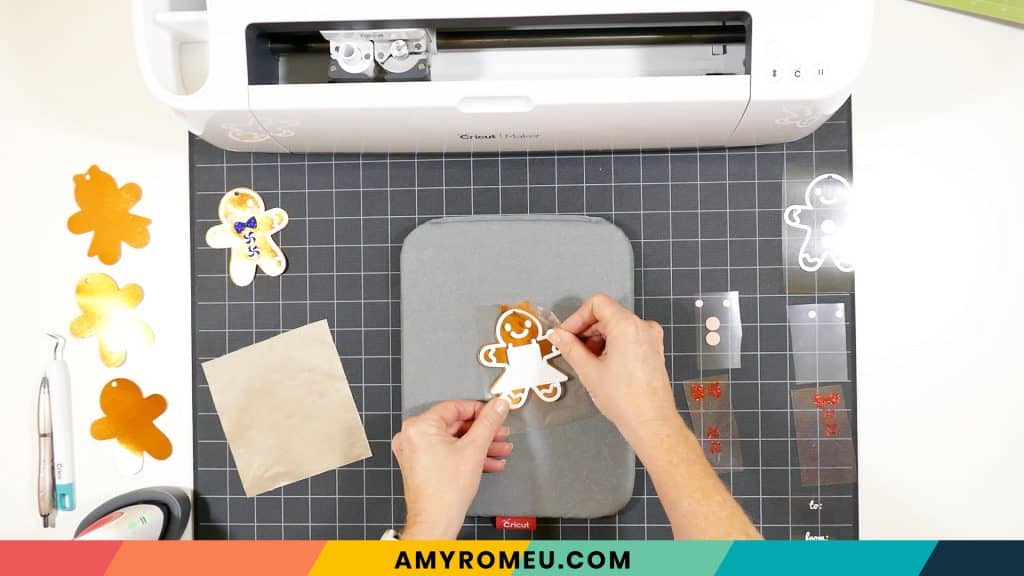
Line up the first vinyl layer – the white “icing” layer – over the cardstock gingerbread boy or girl shape. Then cover with a cover sheet (teflon sheet or parchment paper) before pressing. Press the layer for 5-7 seconds, just long enough for it to adhere to the layer below.
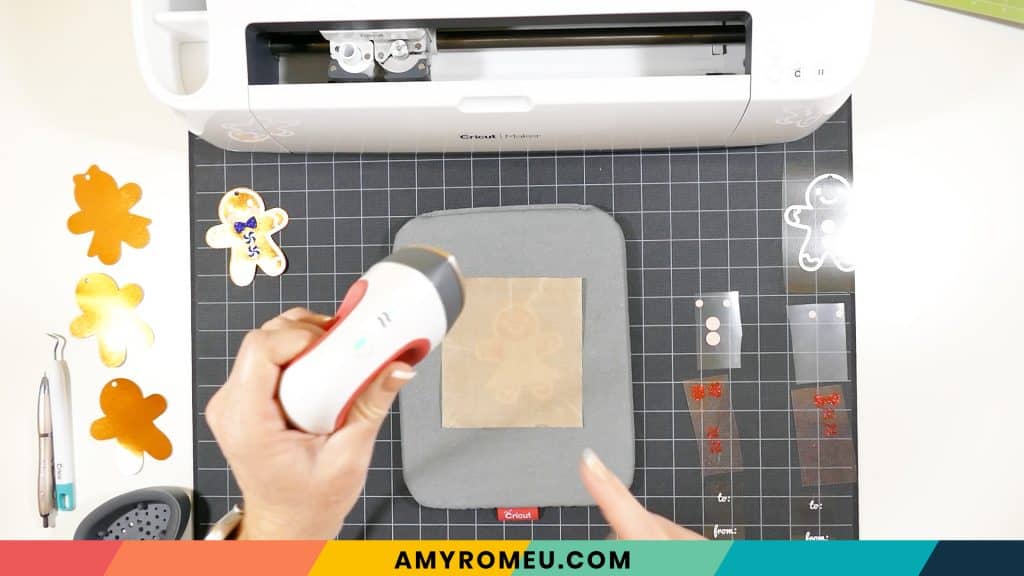
Peel away the vinyl carrier sheet carefully. It’s best to keep the gingerbread shape flat and curl and peel the carrier sheet up and away, instead of the other way around. This keeps the gingerbread foil cardstock from wrinkling.
Repeat with the remaining two layers. For the girl, be sure to press the pink layer (cheeks) before the red one (bow).
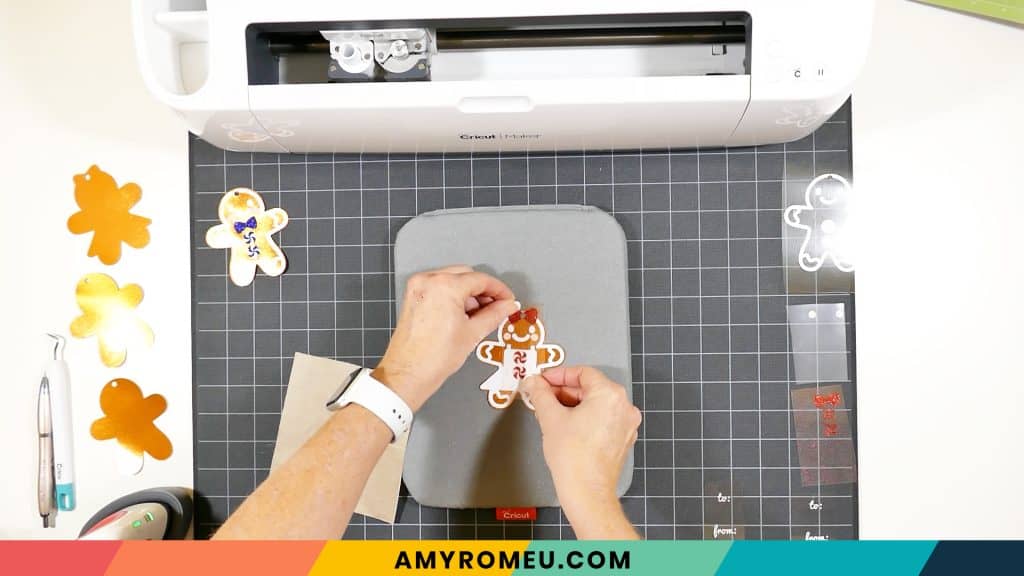
If you are pressing the gift tag text on the back, do that now. Then immediately place the pressed tags under something flat and heavy so they will cool down and flatten.
STEP 7 – Glue the Tag Together
Use glue, glue dots, or a tape runner to glue to fasten the top and bottom of the gift tag together.
I used Aleene’s Quick Dry Tacky Glue and spread a thin layer all over the inside of the bottom piece of cardstock. You want to get close to the edge but not right up to the edge because you don’t want a lot of glue seeping out.
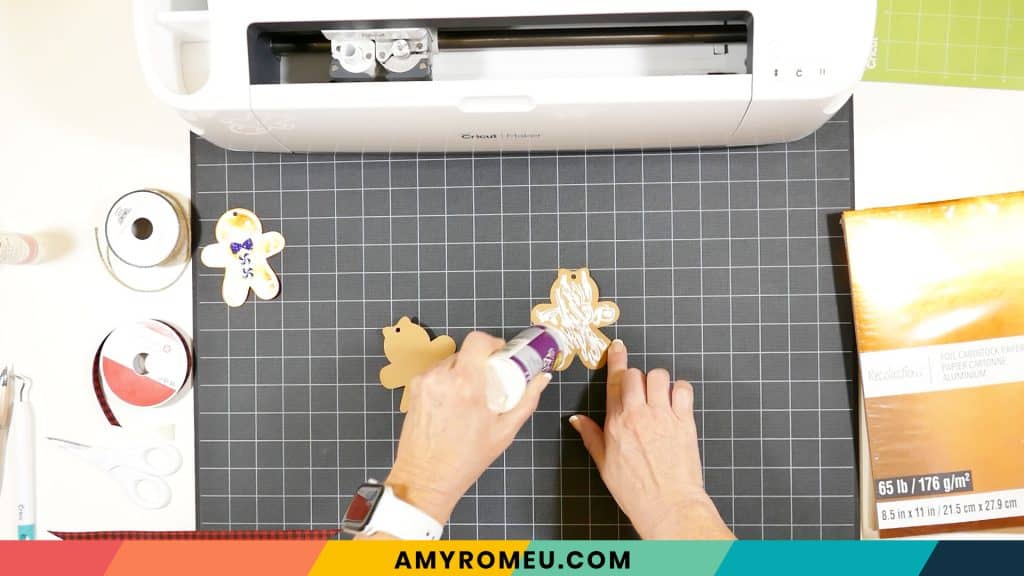
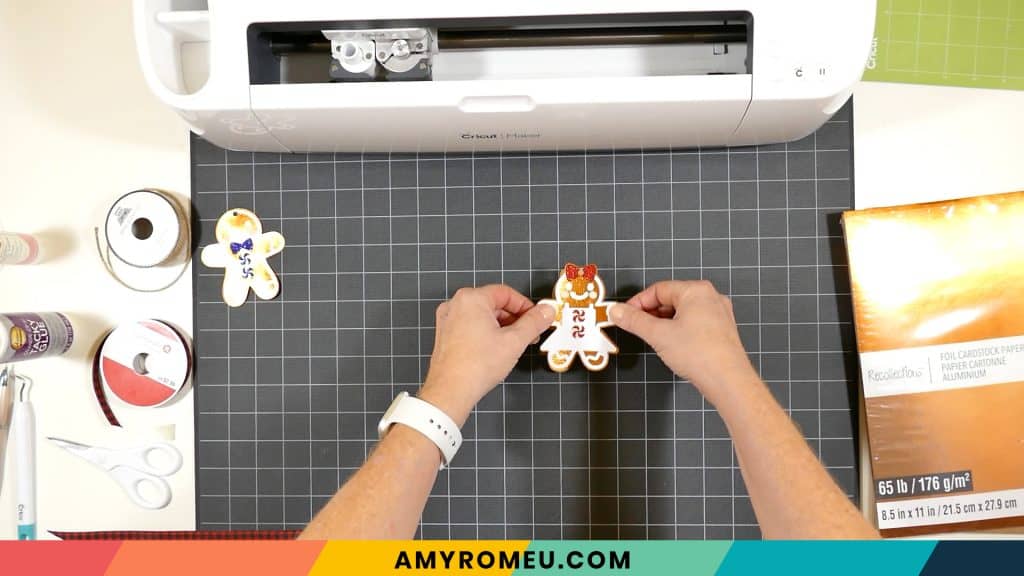
Place the top gingerbread boy or girl shape onto the bottom shape and carefully press all over. Immediately place the glued tag under something heavy and flat while it dries, for about an hour.
STEP 8 – Attach the Ribbon
Cut a 10 inch piece of ribbon or twine. Fold it in half and thread the ends through the cardstock hole. Then thread the ends through the ribbon loop at the other side and pull.
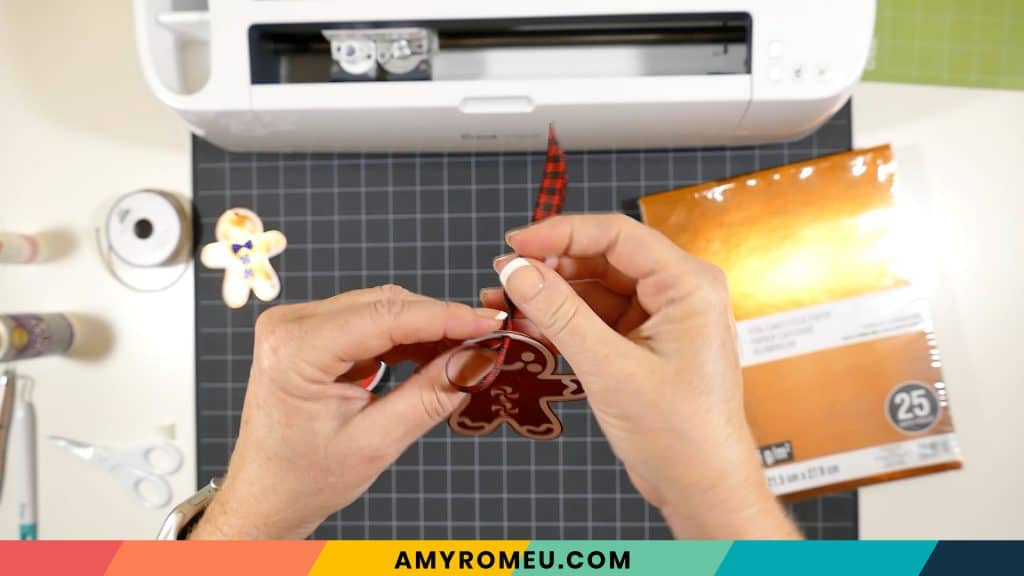
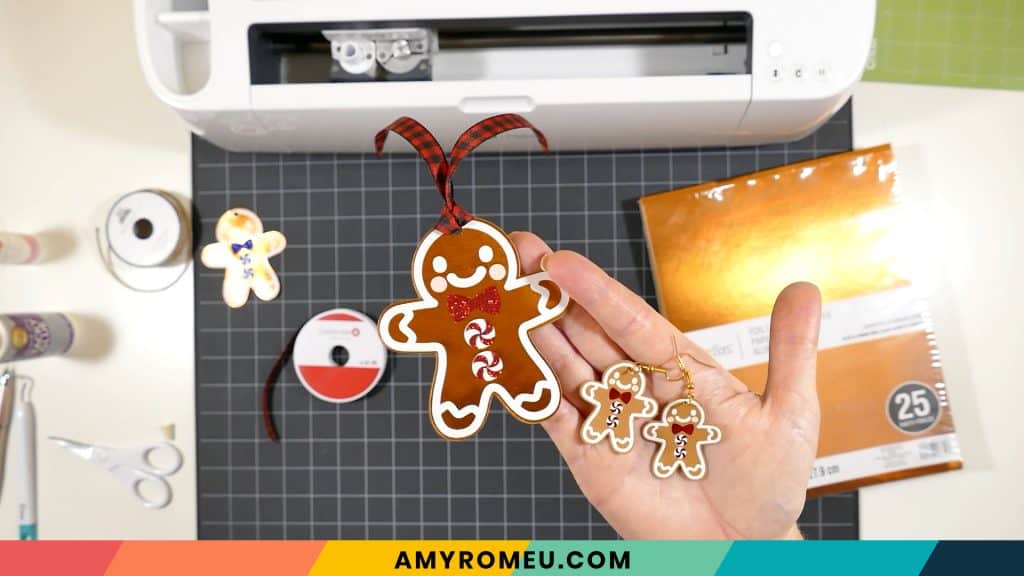

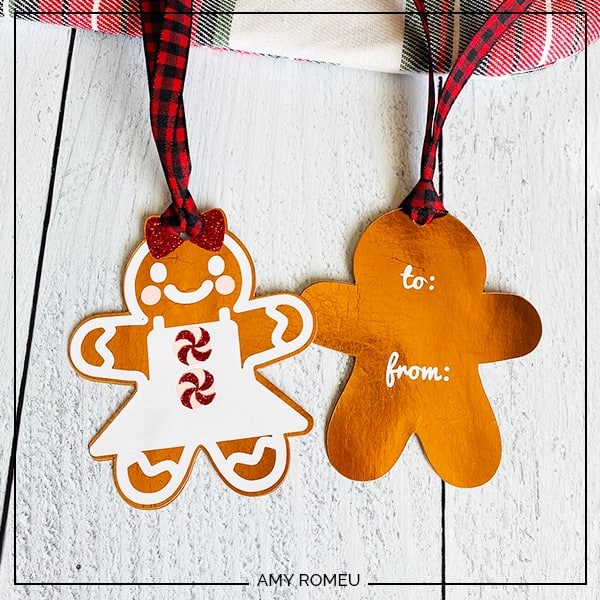
Isn’t that cute? If you want to see my tutorial for the matching Gingerbread Man earrings, you can see it here: Gingerbread Man Earrings Tutorial
If you do make this project, I would love to see your Gingerbread Man gift tags! Please share a photo of them in the comments, or tag me on Instagram: @amyromeucreative

WANT THE SVG FILES SO YOU MAKE THESE GINGERBREAD MAN GIFT TAGS YOURSELF?
You can get it from my FREE Resource Library by filling out the form below!
Want to remember this? Post this GINGERBREAD BOY & GIRL GIFT TAGS project to your favorite Pinterest board!





thank you Miss Amy- you’re tutorials are so easy to follow and your work is beautiful
Hi, Darcy! Thanks for your comment. I really appreciate your kind words! I’m glad you are finding my tutorials helpful. 🙂
These are just too cute! I will be making the matching gift tags and a sweatshirt for my grandchildren. They will love them! Thank you so much!
Your instructions are so clear and detailed! Thank you!
Thank you so much, Melissa!
These are too adorable!! Thank you Amy!!
Awww, thanks, Trudy! It’s my pleasure!
Just found your blog. I am just discovering cricut. Love these tags. SOOOO CUTE. Do you have to use heat transfer vinyl? Can you use a permanent vinyl instead? Thank you.
Hi, Cheryl! Thanks for your comment! You can absolutely use permanent vinyl instead. 🙂