
How To Make Leather Earrings With Charms
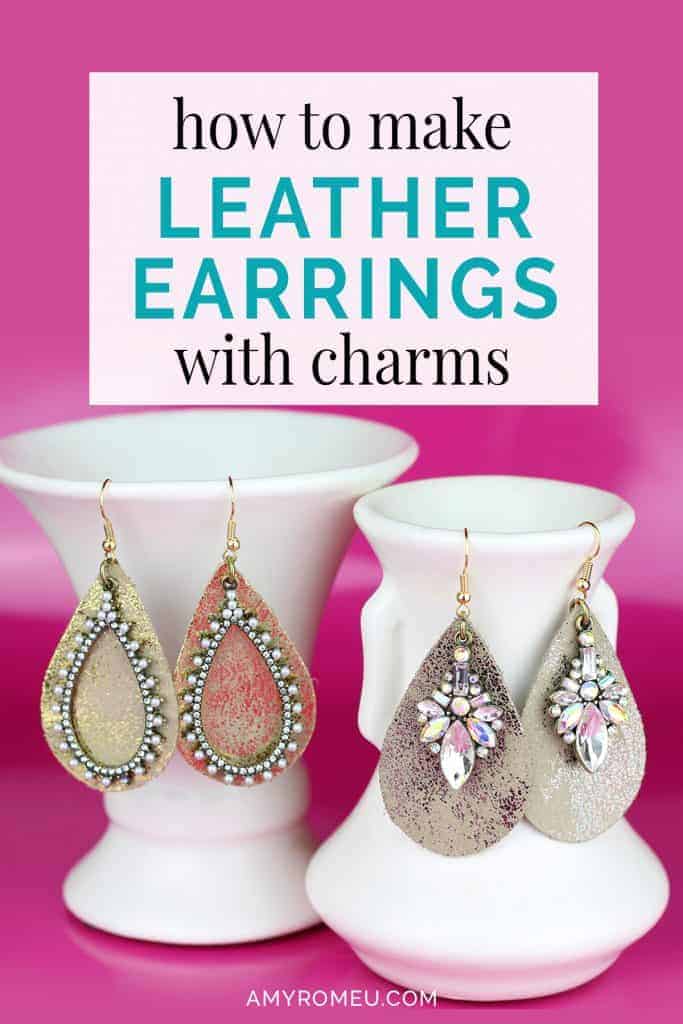
How To Make Leather Earrings With Charms
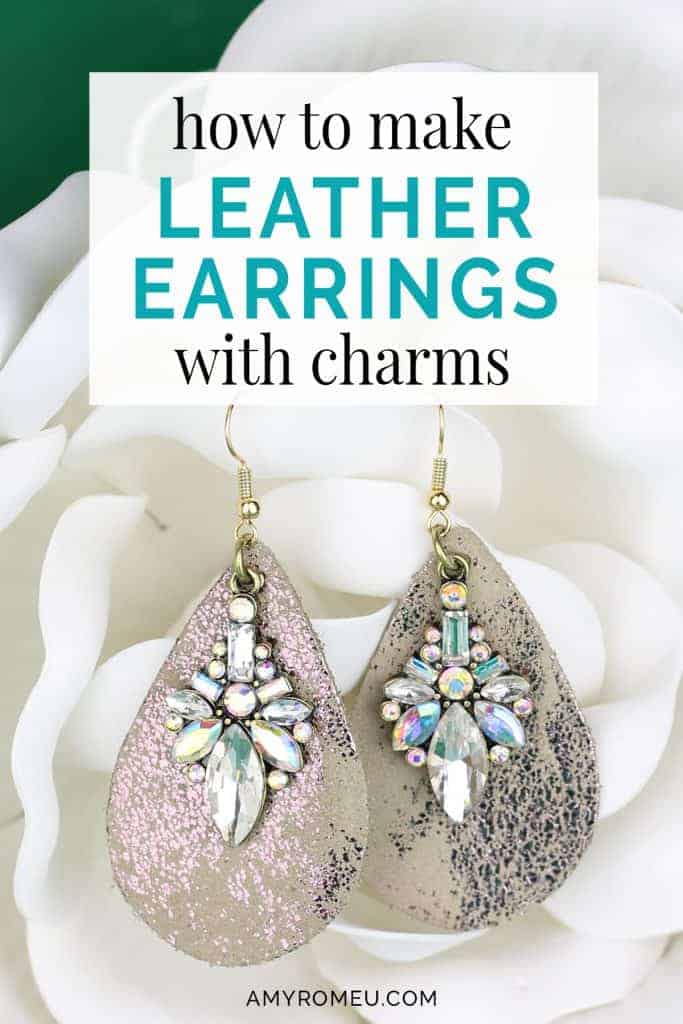
I’ve been on a roll lately making a ton of leather and faux leather earrings! I love how simple yet trendy they look, and they are so easy to make. Sometimes it’s fun to glam them up, though, and that’s what I’ve done with the two DIY leather earrings with charms I’ve made in this post.
The great thing about this earring project is you only need to open and close a few jump rings to make this cute pair of leather earrings with charms!
Jump rings are best opened and closed with two pairs of flat nose pliers. If you haven’t used tools before, don’t worry… you’ve got this! I’ll show you how to do it step by step in this tutorial.
If you want to check out the other leather earring tutorials I’ve done, you can see my leather earrings with chain fringe here (made using only wire cutters) and my leather earrings made super fast (and without tools ANY tools at all!) here.
I’ll be using pre-cut leather shapes for this project, but if you want to cut your own teardrop leather shapes using your own Silhouette or Cricut cutting machine, you can certainly do that! To make it easy for you, I’ve created a free SVG file you can download with the shapes you can cut yourself. You can get the teardrop shape earrings cut file from the bottom of this post.
This page contains some affiliate links (which means if you make a purchase after clicking a link, I will earn a small commission at no additional cost to you). Read my full disclosure policy here.
LEATHER EARRINGS WITH CHARMS – Materials List
- Leather or Faux Leather Teardrop Earring Shapes with pre-drilled holes
- The exact ones I bought from Hobby Lobby are here (a 2 pack of colors called Sand Gold and Sand Oil).
- Fish Hook Ear Wires
- Dangle charms of your choice
- & 5. Two pairs of flat nose pliers – I’m using one pair of wide nose pliers and one pair of chain nose pliers here, but you can use any two flat nose pliers.
- My favorites are Wubbers brand in the Baby size, on Amazon here.
- See my post Beginner’s Guide To Jewelry Making Tools for all the information you’ll need to know about jewelry making tools.
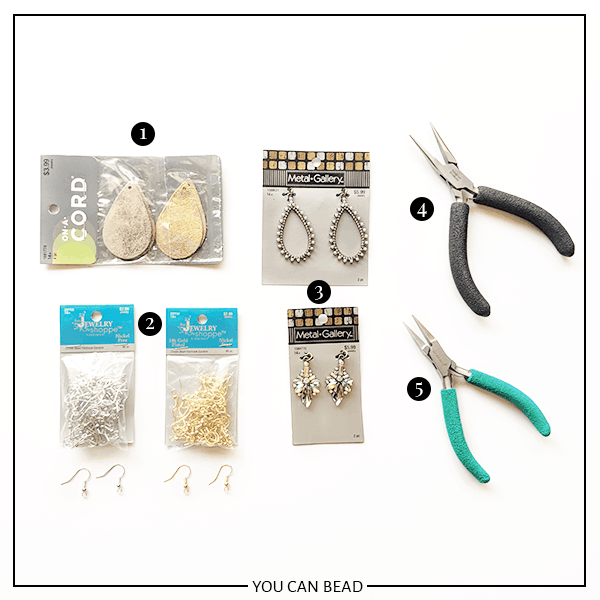
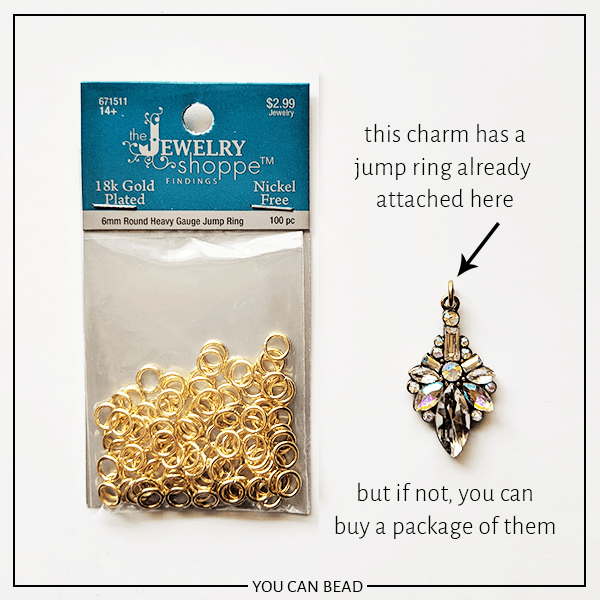
OPTIONAL – Jump Rings in 5mm or 6mm size (if your dangles don’t come with jump rings)The exact ones I have are from Hobby Lobby here, but I didn’t need to use them with this project because the charm already had a jump ring attached.
INSTRUCTIONS
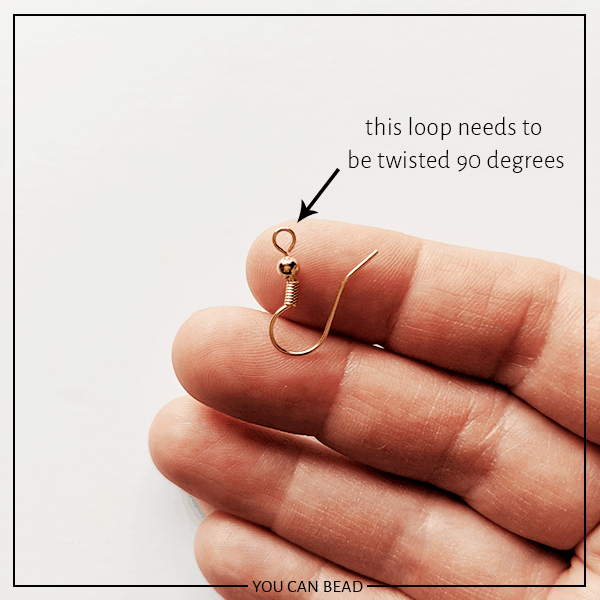
STEP 1
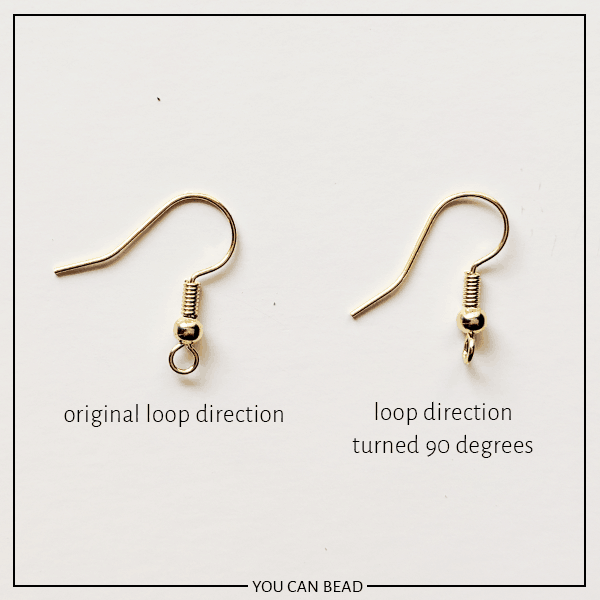
The first thing you need to do is change the direction the earring wire loop is facing so when you attach your charm with a jump ring, it will hang correctly. If you didn’t do this step, your charm would hang sideways, not flat, on the leather shape, and you don’t want that!
STEP 2
To twist the loop on the earring 90 degrees, you’ll need to get a tight grip on the loop with flat nose pliers. I’m using wide flat nose pliers here. (If you aren’t familiar with the different types of jewelry making pliers, be sure to check out my Beginner’s Guide to Jewelry Making Tools here).

STEP 3
While holding the loop firmly in the jaws on your flat nose pliers, use your other hand to firmly grasp as much of the earring wire hook as you can between your thumb and index finger.
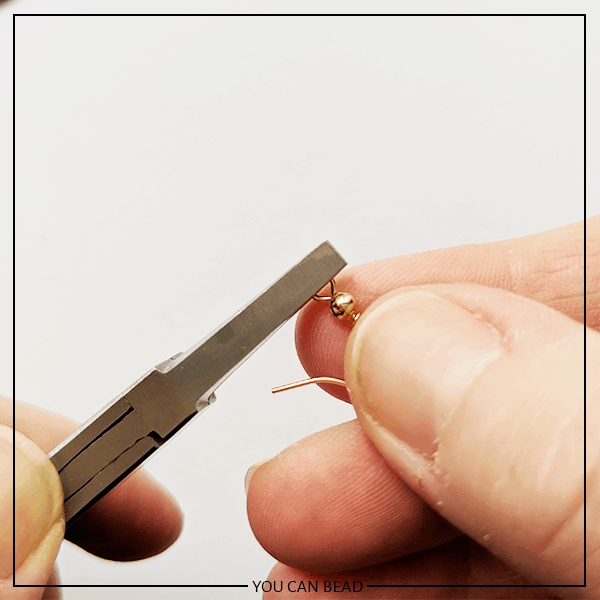
TIP: Use your dominant hand to hold the pliers. I am left handed, so my photos always show my left hand doing the primary task, but you can do the same steps with whatever hand you feel comfortable using!
STEP 4
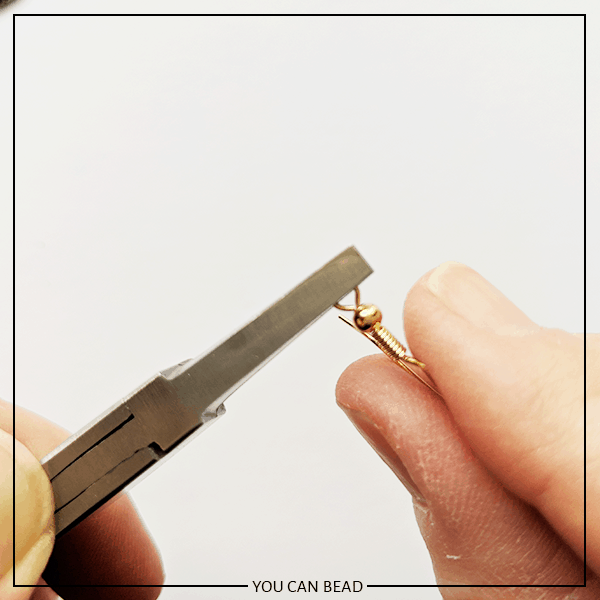
While you have a firm grip with the pliers on the earring loop and your fingers on the earring hook, gently twist the pliers 90 degrees until the loop is perpendicular to the earring hook, as shown. It doesn’t matter which if you twist the loop towards you or away from you. Just twist firmly and gently.
If your thumb and forefinger are covering as much of the hook as possible, the hook should not get out of shape. However, if it does, you can easily manipulate it back into the original form.
This is what your earring hook should look like when you’re finished.
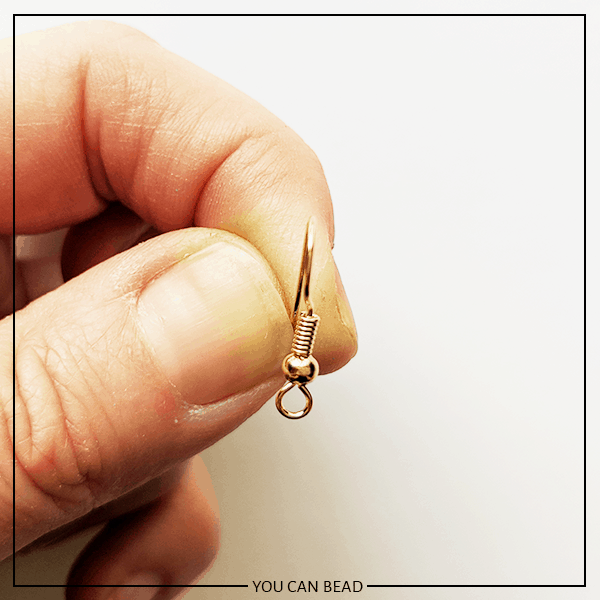
Now repeat with the other earring hook, and set both earring hooks aside.
STEP 5
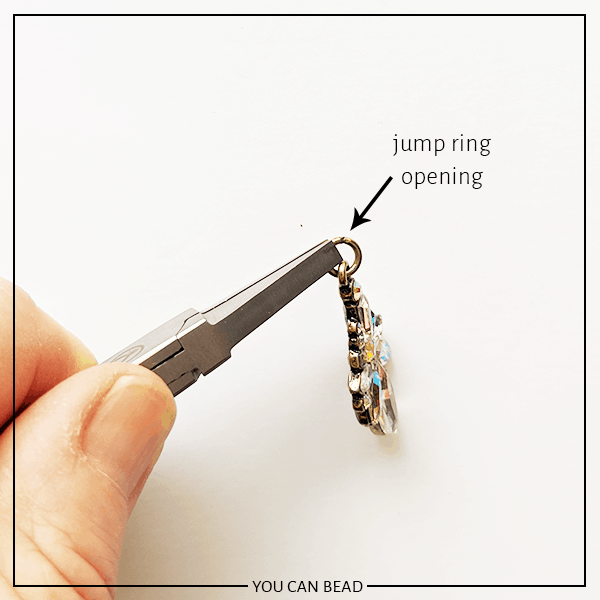
The next thing we need to do is OPEN or ATTACH a jump ring to your charm, so we can connect it to the leather shape and the earring hook.
If your charm comes with a jump ring, like this one did, you’ll need to open it. If your charm didn’t come with a jump ring, you’ll need to attach one. See the materials list above for the jump rings I recommend for this step.
In either case, you’ll follow the same steps for opening and closing the jump ring.
Fair warning! This next step might take some practice if you haven’t used pliers or worked with jump rings before. Jump rings are one of those things that can really frustrate beginning jewelry makers, but it’s an essential skill to learn, so don’t give up too easily!
I suggest practicing on some jump rings without charms at first if you aren’t experienced with opening jump rings. Once you get the hang of it, it will be easier to open a jump ring with a big charm hanging off the bottom.
Ok! Let’s get going…
While holding the first pair of flat nose pliers in your hand, firmly grip as much of one half of the jump ring as you can between the pliers’ jaws. Make sure the jump ring opening is not within the plier jaws and is facing up, like the photo below.
STEP 6
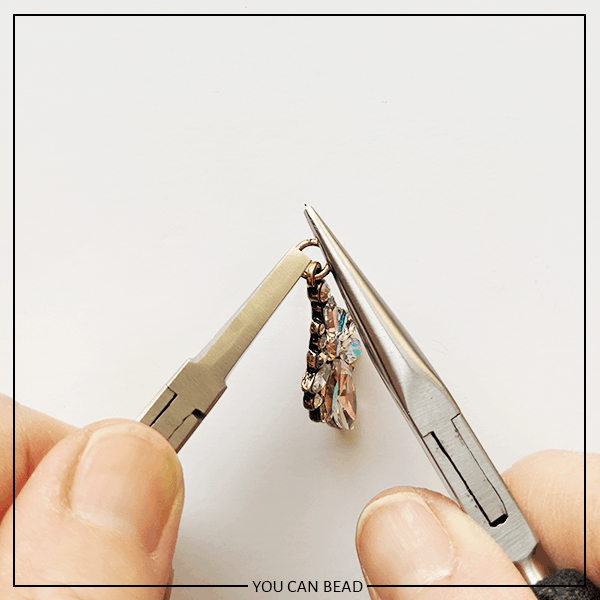
Keep a firm grip on the jump ring and grab your second set of pliers. I’m using a wide nose pair and a needle nose pair, but you can use whatever flat nose pliers you have in your jewelry making tool arsenal.
Firmly grip the other half of the jump ring with the second set of pliers. Again, be sure you aren’t gripping the jump ring opening, and the opening is still facing up.
STEP 7
This is the tricky part! With a firm grip on both pliers, gently twist one pair of pliers away from you (it doesn’t matter which hand you use, just keep the other hand firm and steady). This will open the jump ring without distorting the circle shape.
Don’t close it yet, and keep your firm grip on the jump ring with one hand to avoid dropping the charm.
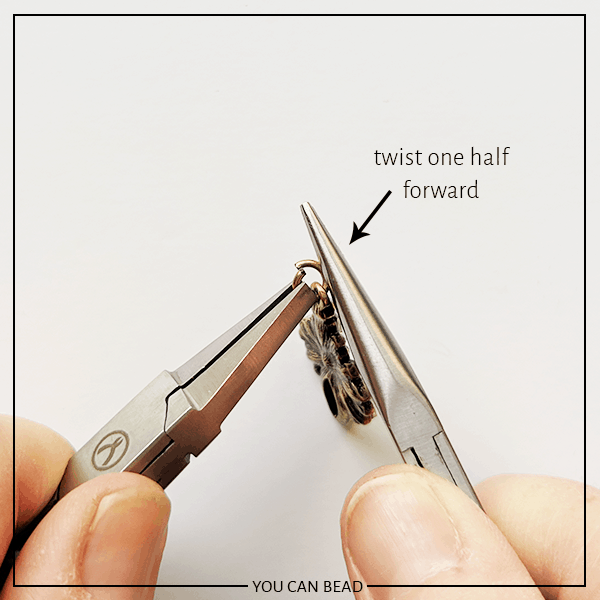
TIP: The key to opening and closing jump rings correctly is to never distort the shape of the ring by pulling it out of it’s circle shape. If you pull the ring out of it’s circle shape, it will be very difficult to close it correctly, and it will be nearly impossible to form it into a circle again.
Instead, practice the method shown above. It will take practice to get comfortable, but once you get it down, you’ll be able to open and close jump rings in a few seconds.
Opening and closing jump rings is like opening and closing a door. When you open the door, it moves out of the door frame, but when you close it, it come backs perfectly inside the frame. In the case of a jump ring, the two ends are touching before you twist the ring open. If you open it with a twist forward and then back again, the ends will return to their positions and closed shape. Perfectly closed jump rings will ensure your earrings don’t fall apart!
STEP 8
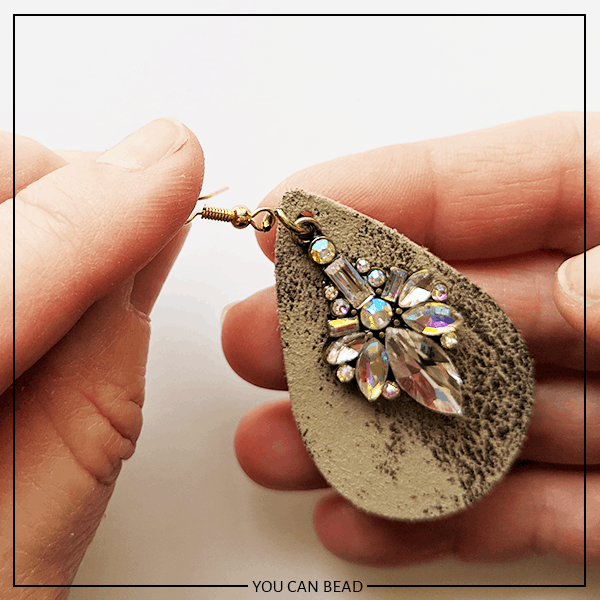
Now it’s time to assemble the parts of your earring. Slide the leather teardrop shape onto the open jump ring, behind the charm.
STEP 9
Now slide your earring hook (with the loop you twisted in the first step) onto the open jump ring. Make sure the earring hook is facing the right way. If any of your parts fall off of your open jump ring, don’t worry. Just pick them up and try again. It happens!
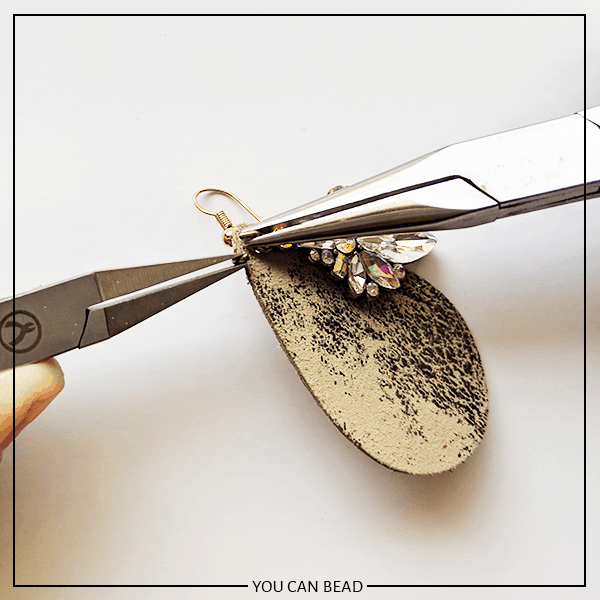
STEP 10
With the charm, leather teardrop, and earring hook all on the jump ring, it’s time to close the jump ring back up. You’ll want to use your two flat nose pliers again, having a firm grip on each one. It may take a few tries to do this part because of all the earring parts on the jump ring, but you can do it. Again, this is where practicing first on an empty jump ring is a good idea!
Whichever half of the jump ring you twisted forward, use the same hand and pair of pliers and twist that half of the ring in the opposite direction, back into place.
If you’ve done it right, the ends of the jump ring will meet up perfectly again, without any gap. If not, you’ll need to grip both halves of the jump ring with the two pliers one more time and twist the jump ring open and closed for a second time.
The goal is to have a tightly closed jump ring. It will take practice to master this technique of opening and closing jump rings, but once you get it, you get it. You’ll be able to do so many jewelry making tasks once you master this skill.
If necessary, you can start over with new jump rings and keep trying until you get it!
STEP 11
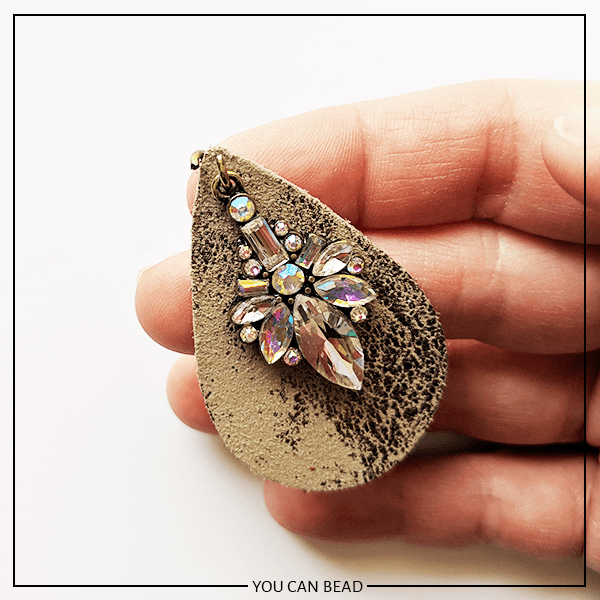
Repeat attaching the charm, leather shape, and hook for the second earring and close the jump ring. That’s it! You did it!
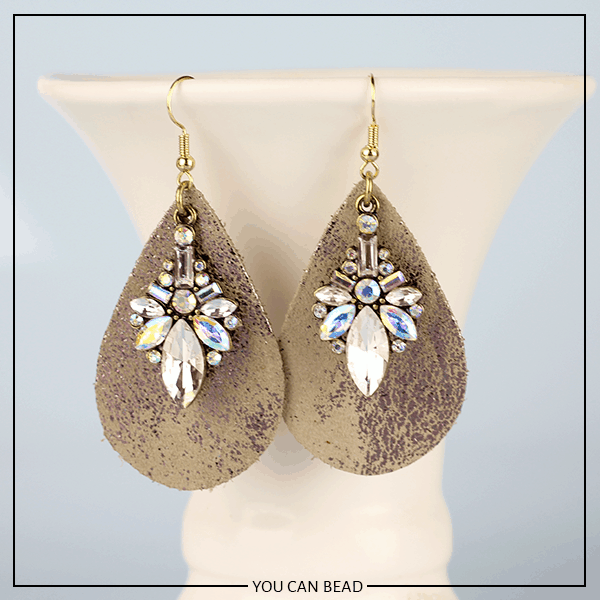
Another pair of leather earring with charms
I used the same steps above to make another pair of earrings from the 2 pack of leather teardrop shapes from Hobby Lobby. The materials for these are linked in the materials list in the top of this post. What do you think?
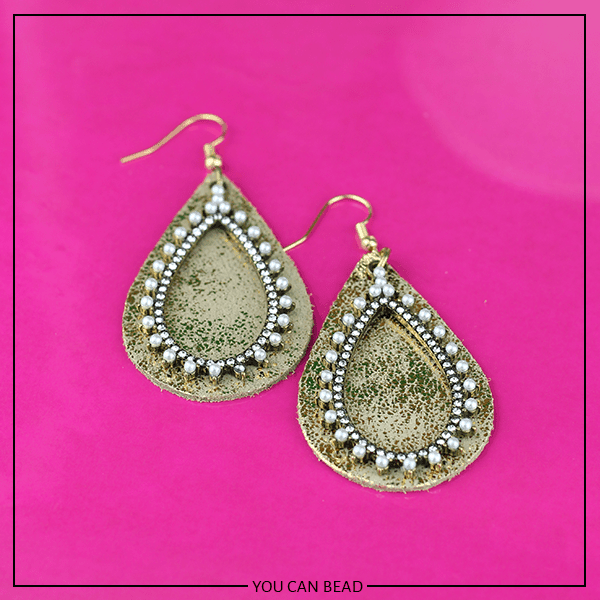
I’ve always loved simple leather earrings, but adding charms is so fun! It makes them more dramatic and interesting, I think!
What do you think? Would you wear leather earrings with charms or dangles? Let me know in the comments!
Until next time… and happy creating!

Want the FREE Leather Teardrop Shape SVG Cutting File?
Get it from our Resource Library! You’ll receive the password for the Resource Library instantly after filling out the form below!
Want to remember this? Post this DIY Leather Earrings With Charms tutorial to your favorite Pinterest board!
I have been beading for 20 years and never thought of turning the loop on the earwires! I think that’s brilliant! Nice tutorial !
Thanks for your comment, Debra! I really appreciate it. I’m so glad you gained something of value from my post – I love learning new things, too.
My earring falls apart when I try turning them
Hi, Linda! Try holding as much of the earring hook between your thumb and forefinger as possible with one hand while gripping as much of the earring loop you are going to turn between the jaws of the flat nose pliers. This protects the wire of both the hook and loop from bending and breaking. The loops can also break off if your earring hooks are of inferior quality. I would suggest trying different hooks. Let me know if those tips help! Thank you. Amy