
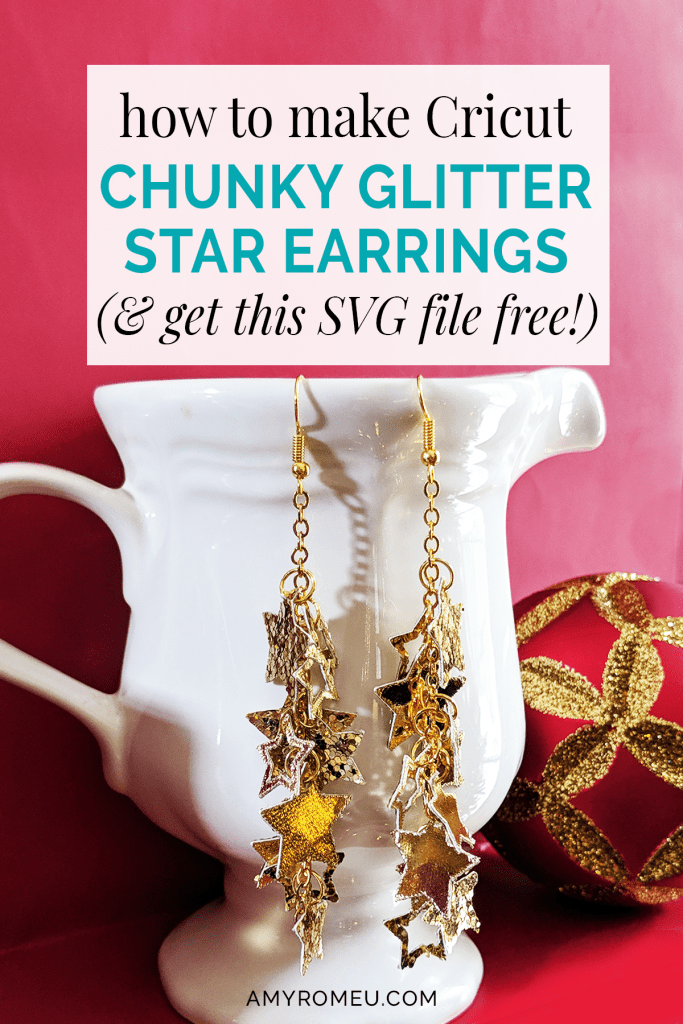
How To Make Cricut Chunky Glitter Star Earrings
How To Make Chunky Glitter Star Earrings with A Cricut
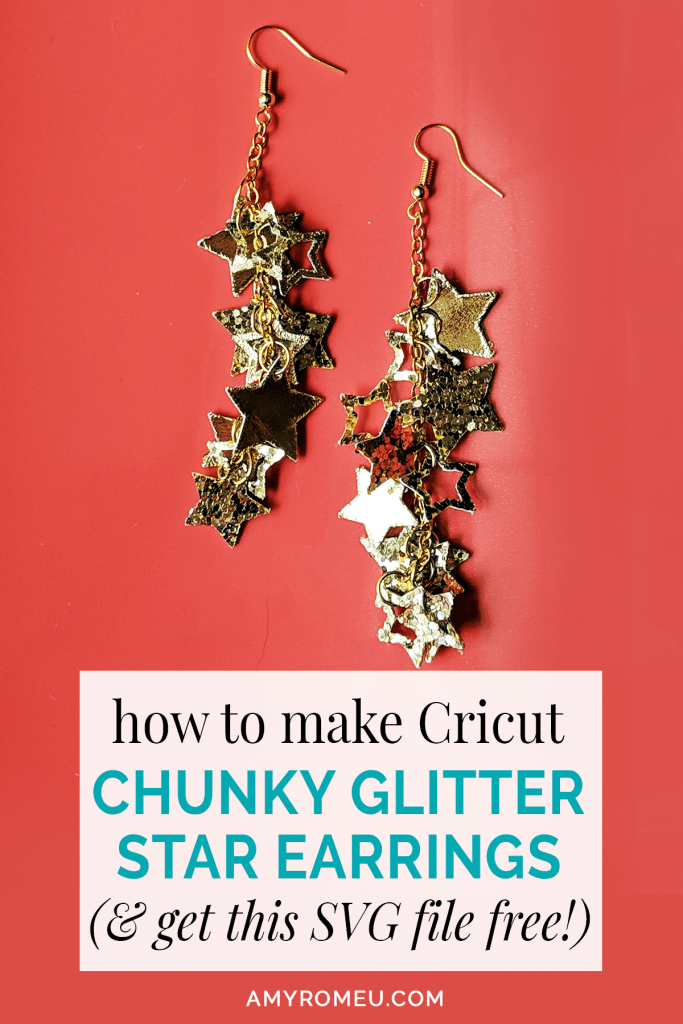
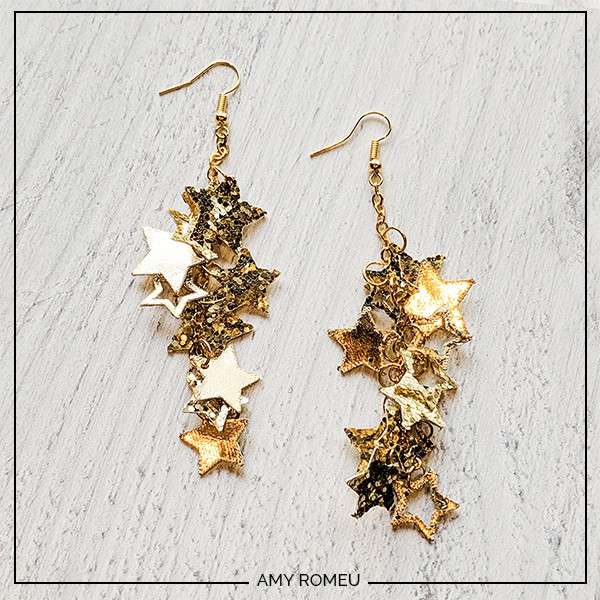
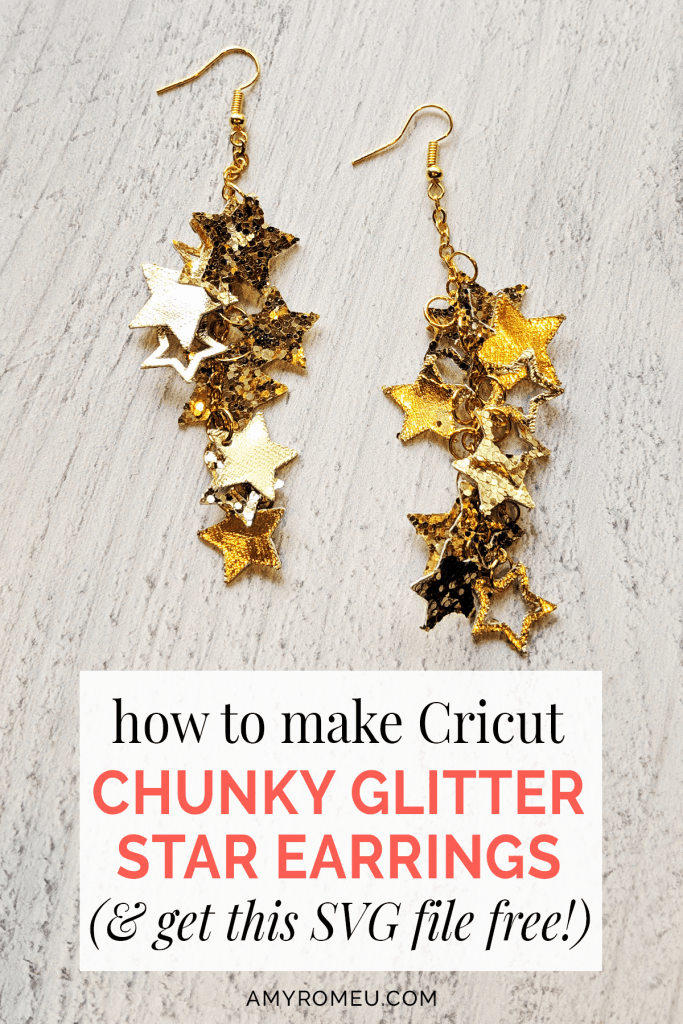
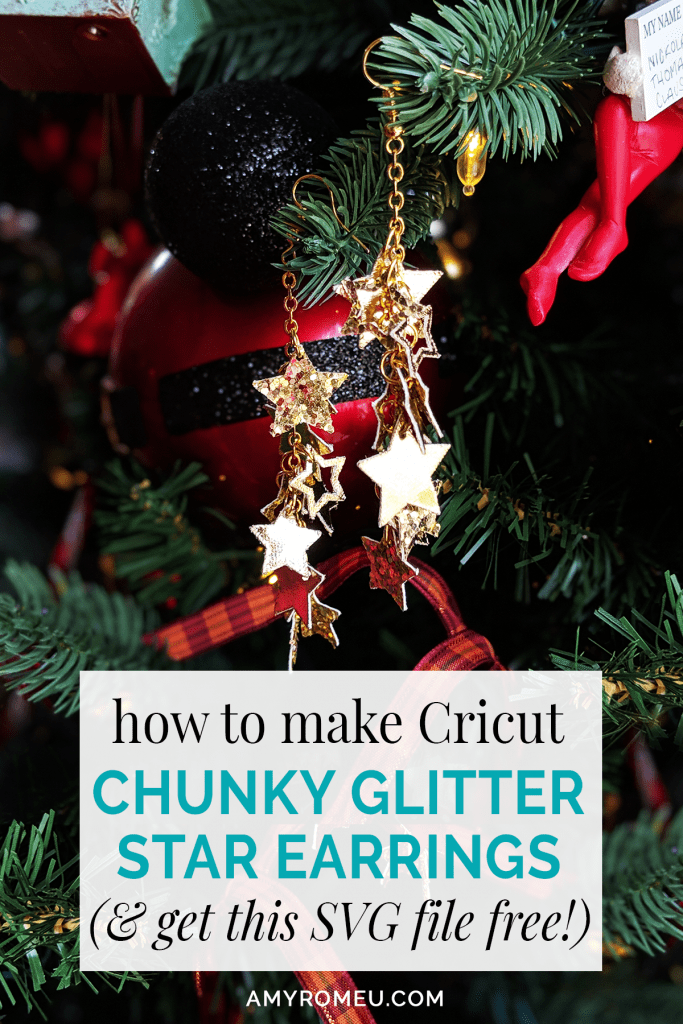
I love using my Cricut to whip up earrings to match an outfit, and today is no exception. I’ve got a holiday party to go to and I wanted some quick, sparkly earrings to go with my dress. I came up with these earrings that I’m calling “shooting stars.” They are made of double sided stars cut with my Cricut, and feature chunky glitter on the front and foil iron-on on the backs. They shimmer and sparkle in such a fun way!
The best part is chunky glitter sheets can be cut with the Cricut Fine Point Blade – which means if you don’t have the Cricut Maker yet, you can still create these earrings with your Cricut Explore Air or Explore Air 2! I LOVE cutting chunky glitter sheets with my Cricut, but I know that’s a new material that a lot of people want to try but are not quite sure how to. This project is a great one to dive into the world of jewelry making with chunky glitter.
In this tutorial, I’ve got so many great tips and tricks to share! I’ll share my tips for cutting chunky glitter, including how I keep my mat from getting ruined from the glitter. I’ll also give away my secret for making perfect two sided stars using two different materials!
Finally, I’ll give you my SVG cut file for these stars FREE so you can eliminate the hassle of sizing out a bunch of little stars and get right to the fun part – making Cricut jewelry!
Want to see all of my Cricut earring & jewelry tutorials? CLICK HERE
You’ll find out how to download my free SVG file for this project at the bottom of this post.
If you want to learn exactly how I made these festive and sparkly Cricut earrings, read on! I’ll give you my step by step instructions and tell you exactly what materials I used to make this project.
Ready? Let’s get started!
This page contains some affiliate links (which means if you make a purchase after clicking a link, I will earn a small commission at no additional cost to you). Read my full disclosure policy here.
CRICUT SHOOTING STAR CHUNKY GLITTER EARRINGS – Materials List
- Chunky Glitter in the color of your choice. For this project, I used a sheet of gold chunky glitter from an assortment pack I bought from Amazon here. This chunky glitter has a canvas backing, which makes it perfect for this project. You CAN cut chunky glitter with just your Cricut’s fine point blade, so this project is super do-able for both an Explore Air 2 and a Maker!
- Cricut Iron On Foil in color of your choice. I used Cricut Iron On Foil in Light Gold from Amazon here. You can also get this at Hobby Lobby, Joann’s, or Michaels.
- Cricut Strong Grip Transfer Tape. This is to protect your mat from the chunky glitter residue AND hold your chunky glitter sheet firmly to your cutting mat. I like the Cricut brand for this application because it’s super sticky. I bought mine from Amazon here.
- Blue painters tape (as needed). This will help keep your glitter vinyl in place on your mat. (If your mat is new and very sticky, you may not need to use it.) You can get it at any hardware store and most big box or grocery stores. Amazon also has it here.
- A vinyl cutting machine. I have the Cricut Maker, available at Amazon here. You can also use the Cricut Explore Air 2 or any cutting machine you have that will cut a thicker material like canvas backed chunky glitter.
- Cricut Strong Grip (Purple) Cutting Mat. You can buy these on Amazon here, or at Michael’s here. They are also available at Hobby Lobby, Joann’s, and Walmart.
- A Cricut Easy Press or a Cricut Easy Press Mini (what is what I use for pressing earrings). I bought my Easy Press Mini from Amazon here. You may already have an Easy Press, but if you don’t and want to get one, I recommend the 9×9 size. It’s a great size for making jewelry and other craft items like baby onesies and more. It’s available on Amazon here. (You can also press your earrings on a traditional heat press if you have one. If you do use a traditional heat press, be sure to use light pressure with the pebbled faux leather. Too much pressure can flatten out the pebbled texture.)
- If you will be using the Easy Press Mini like I do, you’ll need an EasyPress Mat to safely press your items on. I use the 8×10 size, which you can see on Amazon here.
- A weeding tool and a small spatula tool (if you have one). I had all the tools I needed in my Cricut tool set here. You can get also get the basic Cricut tool set at Michael’s here, or from Hobby Lobby, Joann’s, or Walmart.
- Bulk Chain for jewelry making – I used this gold plated chain in 2x3mm size from Amazon here, but you can also but this from Michael’s or Hobby Lobby or Joann’s. I also buy a lot of chain in bulk from Yadana’s Beads on Etsy. You only need about 6 inches so you could even re-purpose an old necklace for this project! Whatever chain you use, I recommend not going any smaller than 2x3mm size for the loops. The chain loops need to be large enough for a jump ring to fit through.
- A small hole punch (if you plan to punch holes in your earrings after you cut the shapes instead of having the Cricut cut them). This is my go-to hole punch for making Cricut earrings from Amazon here.
- Earring hooks – I used earring hooks from this assortment of earring hooks in different finishes these from Amazon here. Hobby Lobby, Michael’s, and other craft stores, as well as your local bead store, will have lots of earring hooks as well.
- Small jump rings – I used this assortment of 6mm size jump rings in different metal finishes from Amazon here. Again, your local craft store or bead store will have plenty of jump rings to choose from if you want to pick some up in person. You could use 5mm size or even 4mm size if that’s what you have, but I wouldn’t go any smaller than 4mm or larger than 6mm for this project.
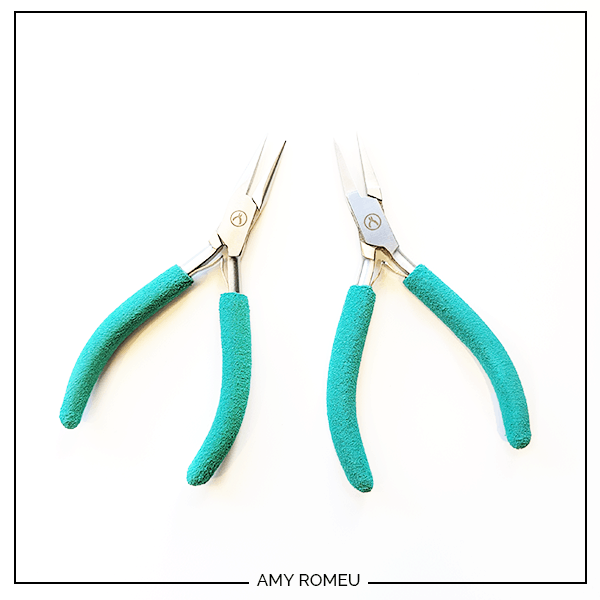
- Two pairs of flat nose pliers – I’m using one pair of wide nose pliers and one pair of needle nose pliers here, but you can use any two flat nose pliers you have in your jewelry making tool box .My favorites are Wubbers brand in the “Baby” size. You can see the Baby Wubbers Chain Nose Piers on the left on Amazon here, and the Baby Wubbers Flat Nose Pliers on the right on Amazon here.
Note: Be sure to check out my post Beginner’s Guide To Jewelry Making Tools for all the information you need to know about buying and using jewelry making tools.
PROJECT INSTRUCTIONS
STEP 1 – Download the Free SVG File
Download the free SVG cutting file for this Shooting Star Earrings project from my free Resource Library. It’s Design #115. You’ll receive the password for the Resource Library instantly after filling out the form below!
Save the zipped folder that downloads to your computer. You’ll need to unzip or extract the files FIRST so you can upload the cutting file to Cricut Design Space.
STEP 2 – Upload SVG to Cricut Design Space
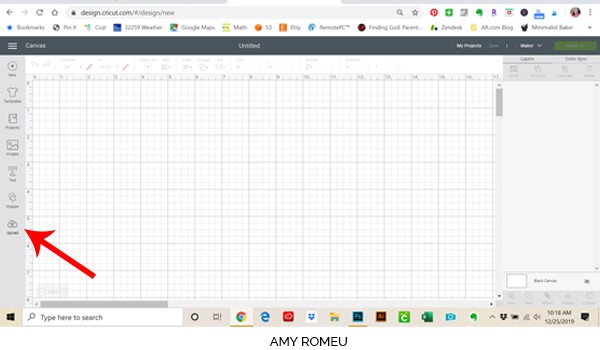
After you’ve unzipped the folder and made a note of the file location, open Cricut Design Space and choose Upload from the left hand side menu.
Click on the UPLOAD IMAGE button, then click BROWSE to locate your file.

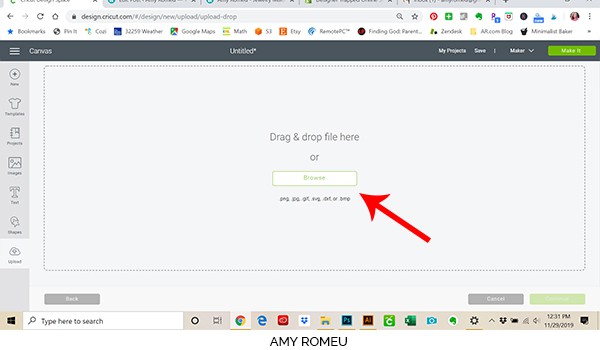
Navigate to where you’ve saved the already unzipped SVG file for this project. Double click on the SVG file to bring it into the upload screen in Design Space.
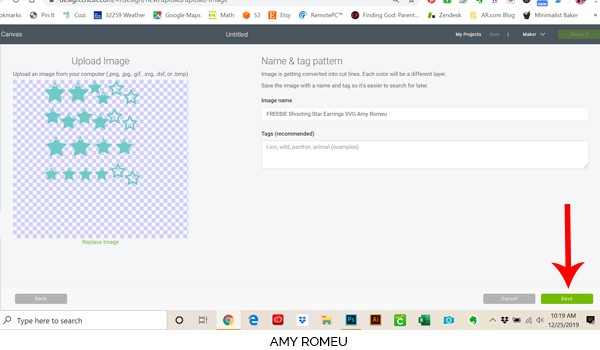
You’ll see a preview of the earring shapes for this project. Hit the green Save button.
After you’ve selected your file to upload, you’ll see it as the first item in your “recently uploaded designs” row.
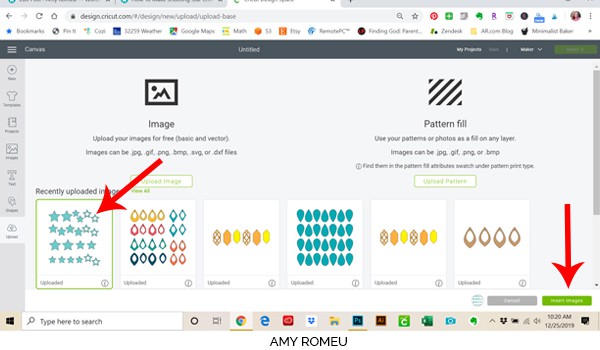
Click on it and then click on the green “insert images” button in the bottom right corner.
STEP 3 – Prepare Star Shapes on Canvas
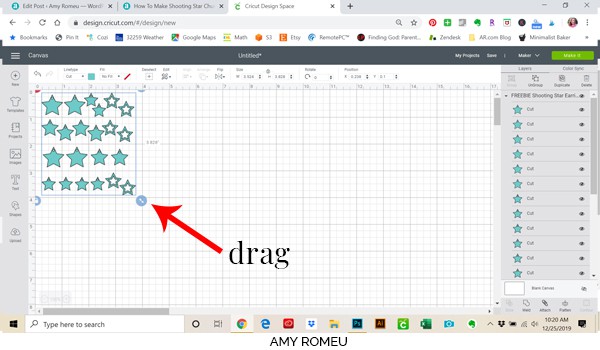
This brings the earring star shapes into Cricut Design Space. You don’t need to adjust the size at all, they are already sized perfectly for this project.
Use your cursor to draw a box around all the elements, and drag the rectangle up to the top most left corner of the screen. You’ll be placing your material to cut on your mat in the upper left hand corner.
Optional: How to NOT cut the earring holes (if desired)
This star SVG file has the earring holes already in the design so the Cricut will cut them out for you when it cuts the stars. If you want Cricut to cut the earring holes for you, you can skip this step. Be aware that the hole won’t cut out perfectly because of the thickness of the material and the size of the hole, but the cut will give you enough of a hole that you can trim out with small scissors.
However, I know some people like to make their own earring holes themselves. Maybe their blade isn’t new, or they know cutting very small shapes on their machine is tricky. Or maybe they just prefer to make their own holes using a hole punch or a sharp tool. (The hole punch I use is available on Amazon here.) It’s very easy to hole punch the hole or just push a sharp tool through the material after the stars are cut. It’s totally up to you.
There are two ways to do this. First, I’ve included a “no holes” version of the SVG file in my resource library. You can download and cut that file if you’d like.
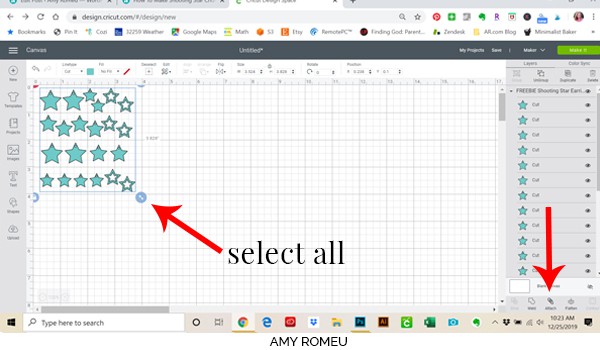
The second way to cut your holes after the stars are cut is to hide the cut holes so your Cricut won’t cut them. To hide the earring holes, first ungroup all the stars by selecting all of them and clicking Ungroup from the menu at the top right side of your screen. Then select a single star and click the Contour icon in the lower right.
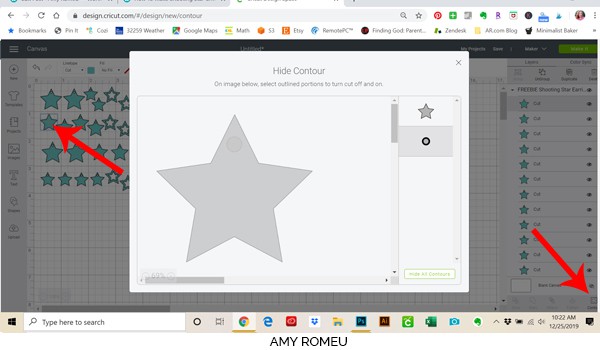
When the Contour box pops up, click on the hole to hide it. You should see the hole disappear from the Contour pop up window box and also disappear from the screen in Cricut Design Space. Close out the contour pop up window and repeat the steps to hide as many earring holes as you want.
If you’re wondering why the cut out star shapes don’t have holes – they don’t need them. We will attach the jump ring directly to the cut out stars – you’ll see what I mean in a bit.
IMPORTANT! ATTACH the stars together before cutting!
If you just press the green Make It button after this step, your Design Space will automatically lay out the stars to cut like the picture below:
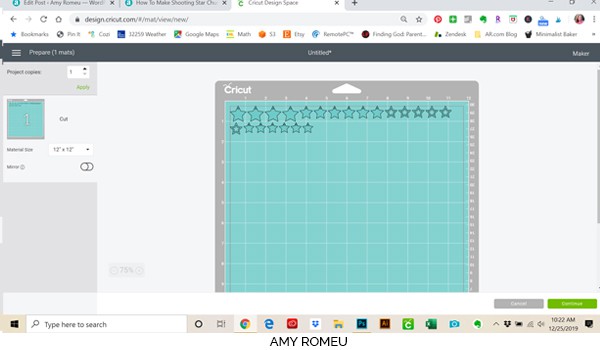
If we were cutting vinyl, that would be a good layout to save material and minimize waste. However for this project, our number one priority is making sure the chunky glitter vinyl will stay on the mat and not shift around. For that reason, a larger, more rectangular piece of vinyl will cut better for us.
To change the layout of how the stars will cut out on your mat, we need to ATTACH the stars BEFORE we hit the Make It button.
To ATTACH your stars together, draw a box around all of the stars to select them as a group. Then click on the paper clip “Attach” icon in the bottom right. This will maintain the layout of the stars and give us a rectangular box to cut instead of a long horizontal strip.
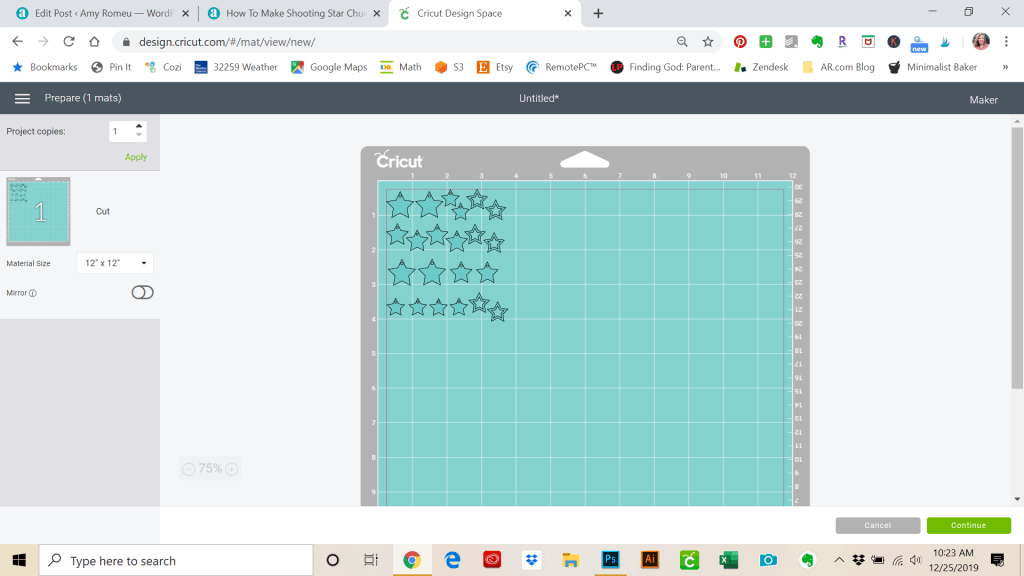
After attaching all the stars together, hit the green Make It button. Your cutting mat layout should look like this. Note that your stars will cut from a shape that is roughly 4 inches wide and a little more than 4 inches tall. Make a note of this size for later.
From this screen, you can leave Mirroring OFF. It’s not necessary to mirror for this project.
You may be wondering at this step – why do we only have one cutting mat that will cut from just one material – when we are cutting shapes that will have glitter on one side and foil iron-on on the other side?
Don’t worry, I’ve got a trick I want to show you for cutting small, double sided shapes perfectly – we are going to press the foil iron-on onto the back of the chunky glitter BEFORE we cut it. Sounds crazy, right? But it works, I promise!
We’ll get to that in a few minutes. For now, click the green Continue button.
STEP 4 – Make Material Selections
Next we need to choose our material. I’ll cut the Chunky Glitter faux leather using the regular fine point blade.
On the Materials screen, click on BROWSE ALL MATERIALS on the right.
Search for Faux Leather (Paper Thin). Click on it to select it. Then choose “More” pressure from the Pressure drop down menu.
Cricut Explore Air 2 users can turn the Smart Set Dial to Custom and then Faux Leather (Paper Thin) will be an available option.
STEP 5 – Press a Backing to the Glitter Faux Leather
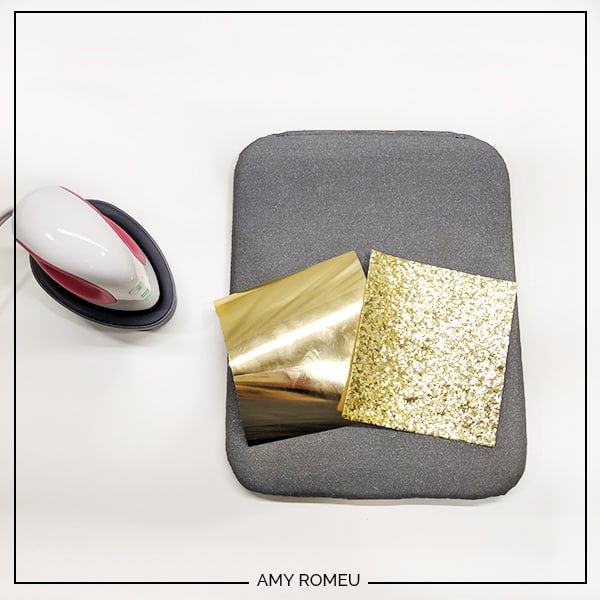
Gather your materials for this next step. You’ll need your sheet of chunky glitter, your iron-on foil, and strong grip transfer tape. You’ll also need a purple (strong grip) mat.
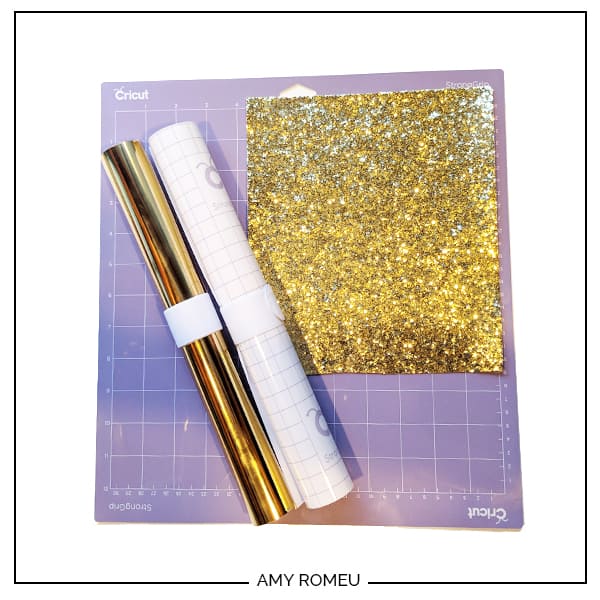
Note: If you’re wondering what the white bands are around my foil and transfer tape tubes, they are white slap bracelets! They are great for keeping my vinyl rolls neatly wound. You can get slap bracelets in lots of colors, but I prefer the all white slap bracelets from Amazon here.
Cut your foil iron-on and glitter vinyl in the size you noted earlier. In this case, it’s 4 inches wide by 4 1/2 inches tall. Then cut a piece of strong grip transfer tape 1 inch larger, so 5 x 5 1/2 inches. Set aside the transfer tape for now.
Next we will set up our glitter and foil materials for making our double sided stars. You could cut out the stars twice if you wanted to – one mat with foil and another mat with glitter vinyl. Then you could weed out the stars from each material, then match up the fronts and the backs of each star and heat press them individually… but I’ve got a better way!
I told you I’d share my secret for having small, double sided shapes with perfectly matched foil and glitter sides. Well, here it is!
We are going to heat apply the foil-iron square on to the back of the chunky glitter. This will create a large, two sided material that we will cut all of the stars from at once, resulting in double sided, perfectly matched stars. Boom!
Let me show you how to do that. You’ll need your easy press or easy press mini, a heating pad surface, your foil iron-on and your chunky glitter iron on. You should also have a piece of parchment paper or a teflon sheet to protect your heating surface and your mat from residue.
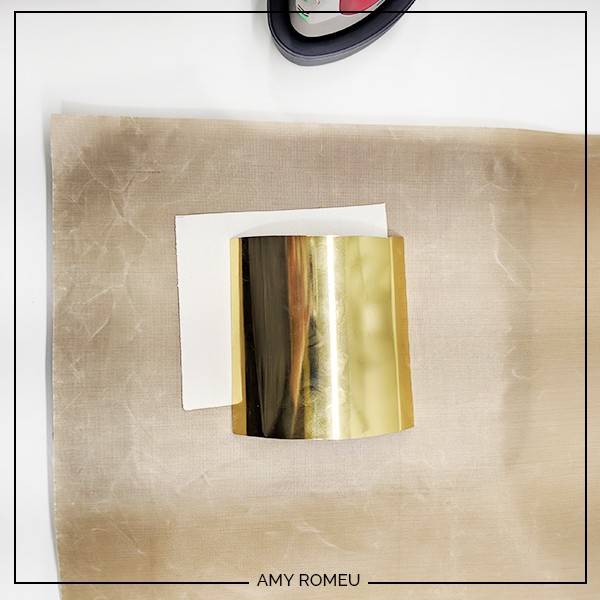
Place your teflon sheet or parchment paper on your heat mat. Then place the glitter sheet glitter side down. Your iron-on foil (with the clear protective sheet still on) will be face up. Line up the edges of the two squares as much as you can. Then cover the top with a protective sheet and press. On the easy press mini, I use the lowest heat setting and moved the mini press all around the surface for 15-20 seconds.
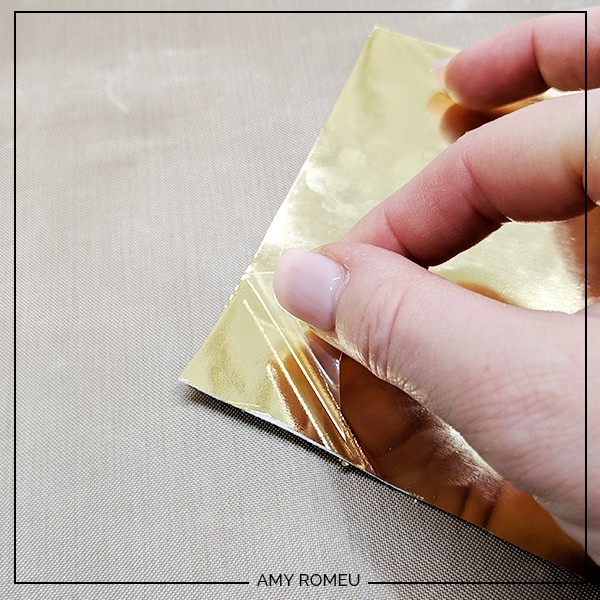
Let your newly pressed glitter and foil sandwich cool slightly. Then, while keeping the material as flat as possible, peel off the clear protective layer from the foil. Keeping the foil as flat as possible prevents creases in the foil.
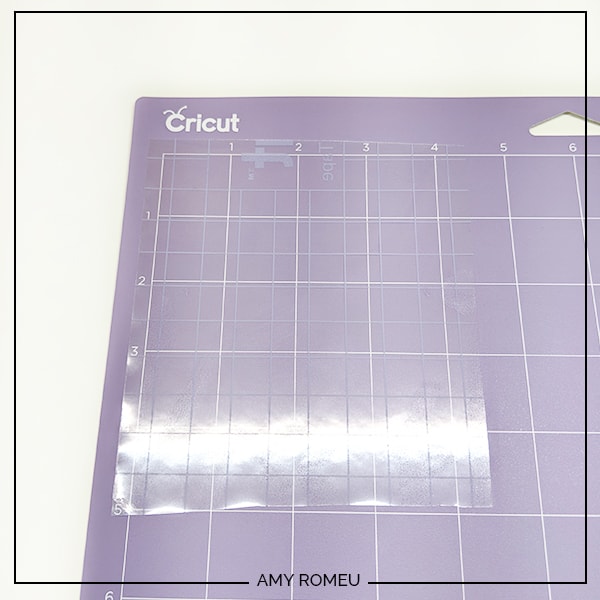
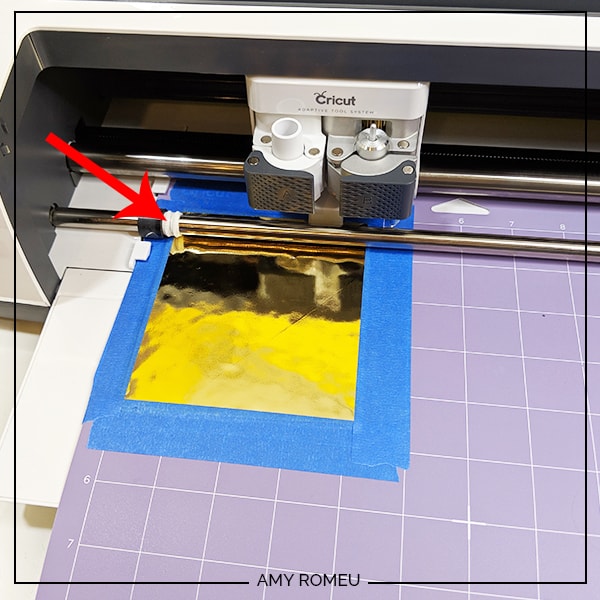
Now it’s time to prepare your mat for cutting. Place your Cricut strong grip transfer tape STICKY SIDE UP on at the top left corner of your Cricut purple strong grip mat. I placed my transfer tape outside of the area I knew I would be cutting just a little bit. Press the piece down as much as you can so it sticks well to the mat. This step will protect your cutting mat from getting glitter stuck all over it after you make your cut.
STEP 6 – Cut the Stars from Chunky Glitter
Place your glitter and foil sandwich glitter side down in the top left corner of your mat. Press it down all over and then tape the sides down with blue painters tape. This is what it will look like. Before you load your mat, remember to move your white star wheels off to sides of your roller bar so they don’t make track marks in your foil.
Load your mat into your machine by hitting the load button (two arrows) on your Cricut Maker.
Then hit the Go button (the Cricut face) on your maker and it will start to cut.
After your machine finishes cutting your earring shapes, unload your mat by pressing the two arrows/unload button again). You’ll see the double cut helped to cut the star shapes nicely.
Carefully remove the painters tape from your mat and then lift the glitter and vinyl sheet from your mat, peeling slowly from one corner.
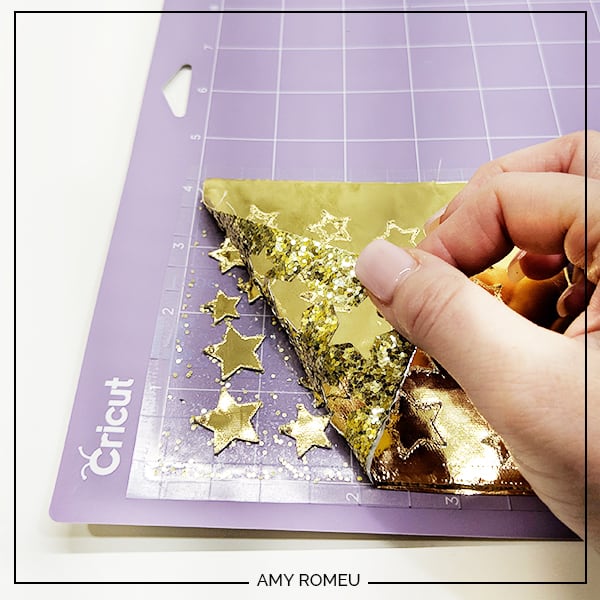
Then use a spatula tool to lift each shape off of the mat, and then the sharp weeding tool to clear the earring holes. If your earring holes didn’t cut cleanly, you can trim the excess material with some small pointed scissors.
I always have my 4 inch curved tip Fiskar scissors handy for tasks like these.
Note: If your earring holes didn’t cut well at all, you can always hide the holes using the Contour icon and cut the stars without holes as I mentioned above.
Don’t forget to remove the clear transfer tape from your mat. See how that kept all of the messy glitter off of your mat? Cool trick, right?
Once you’ve got all of your star shapes cut out and the earring holes clear, you’re ready to start assembling your earrings!
STEP 7 – Assemble The Shooting Star Earrings
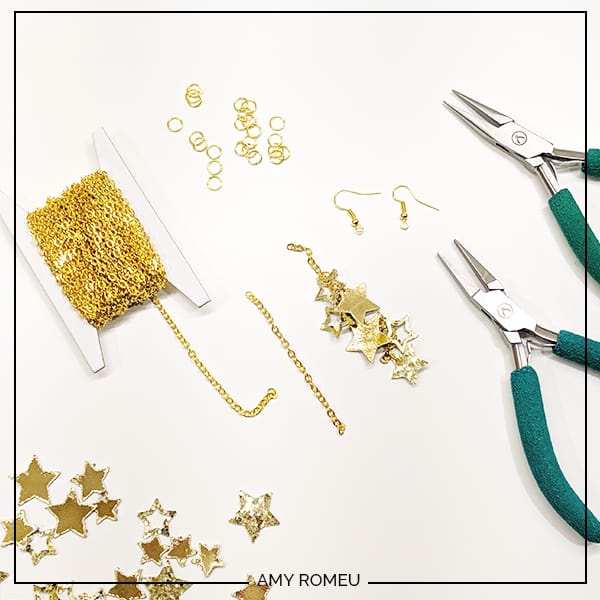
Now it’s time to assemble the earrings. You’ll need a 5 inch piece of chain cut into two 2 1/2 inch sections, some small jump rings, and earring hooks.
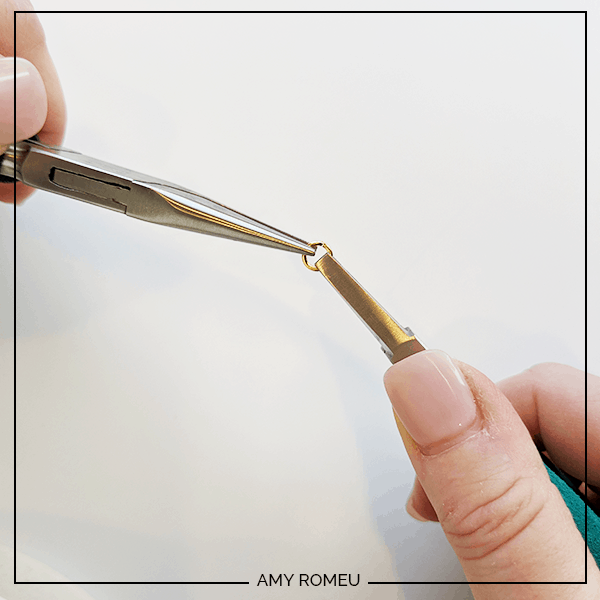
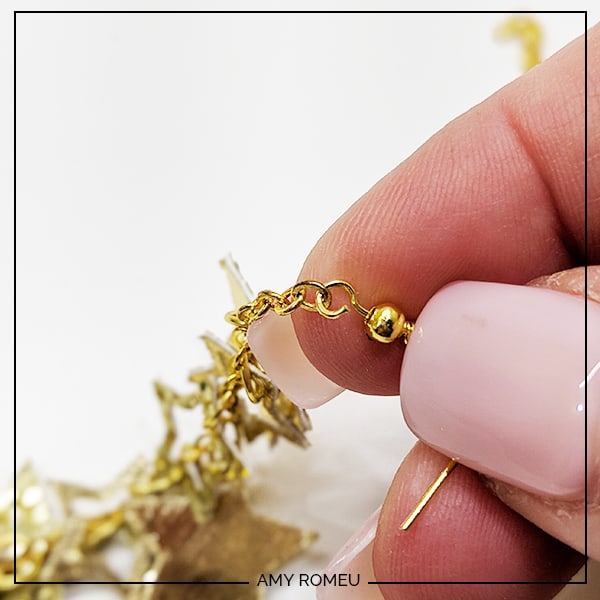
Use your flat nose pliers to open a jump ring, slide on a star, hook the jump ring onto a loop in the chain, and close the jump ring again. It’s easiest to open and close jump rings using two pair of pliers, like this.
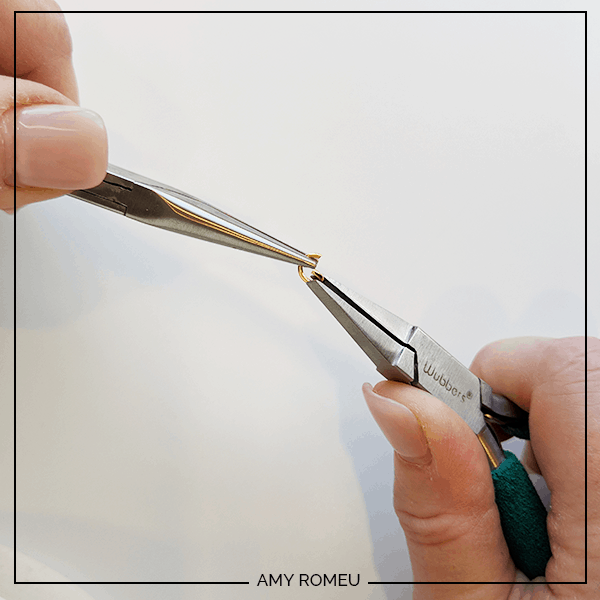
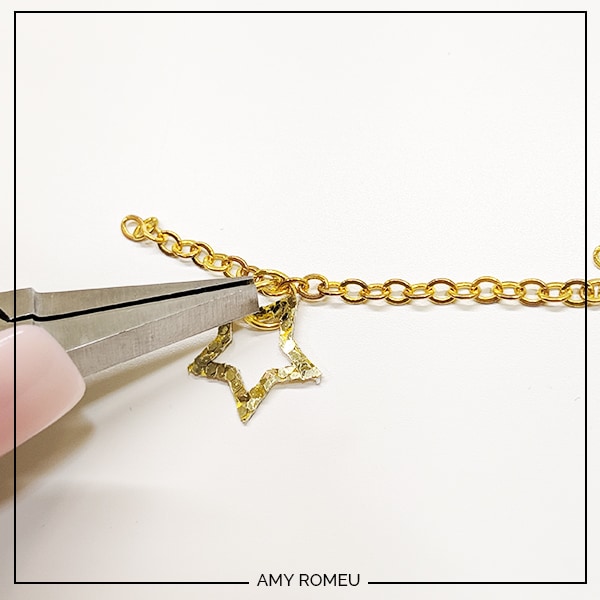
Continue adding stars up and down the chain until your earring has the desired fullness. Repeat with the other section of chain.
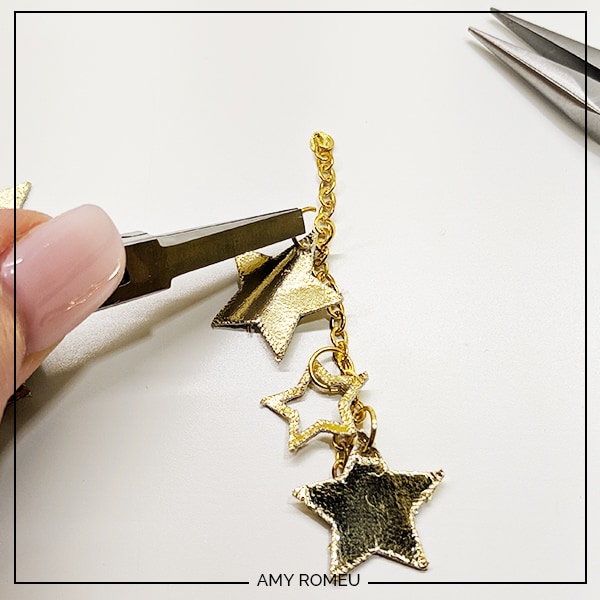
When you are finished, it’s time to attach the earring hooks.
STEP 8 – Attach the Earring Hooks
Now you’ll need to open the small loop on the earring hook to attach it to your chain.
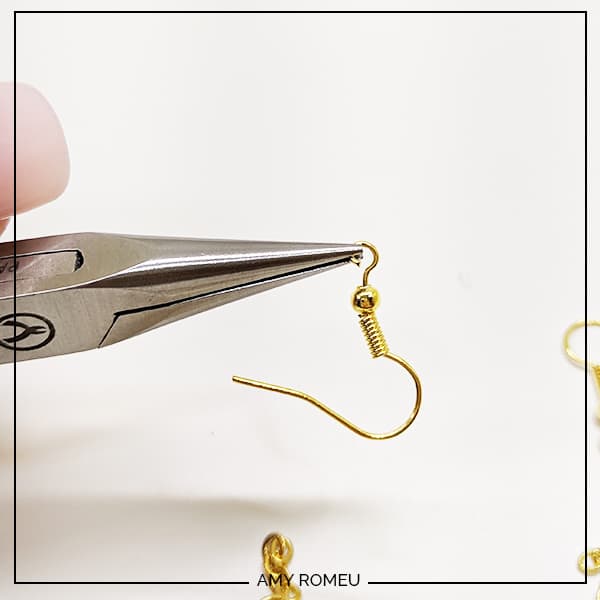
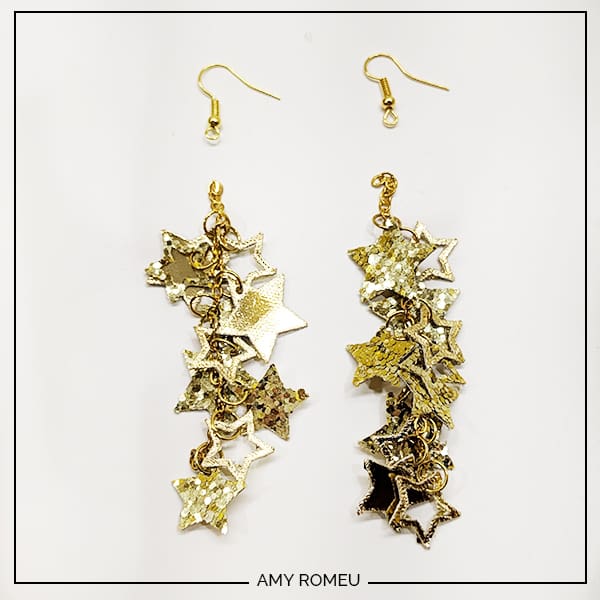
Using pliers, grip the open side of the earring loop and twist up. You want to open the loop but not bend out of it’s circle shape. Slide your chain onto the earring hook and then repeat the process to close the earring hook tightly.
Repeat with the other earring. That’s it!
Are you going to try this project? If you do, please post a comment and attach a photo! I would love to see what combinations of chunky glitter and iron-on foil you choose!
If you liked this project and want to see all of my Cricut Jewelry tutorials, click here.
Until next time… and happy creating!

Want the FREE SVG file you so you make these CRICUT SHOOTING STAR CHUNKY GLITTER EARRINGS yourself?
Get it from our Resource Library! You’ll receive the password for the Resource Library instantly after filling out the form below!
Want to remember this? Post this CRICUT SHOOTING STAR CHUNKY GLITTER EARRINGS project to your favorite Pinterest board!
I love these so much! And think it’s amazing what you’re doing with a cricut. Yay you!!! ♥️
Thank you so much, Jennifer! I agree, it’s so fun creating new and exciting things with a Cricut! 🙂
These are amazing! What order would you put the stars in? I mean I’m sure “follow your heart” is an option but I’m still working on that particular skill when it comes to crafting, and I’d really like to get as close to the picture as possible. I look forward to following many of your tutorials! Thanks!
Hi, Heather! Great question. I tried to alternate the shapes so no two of the same stars were next to each other.