
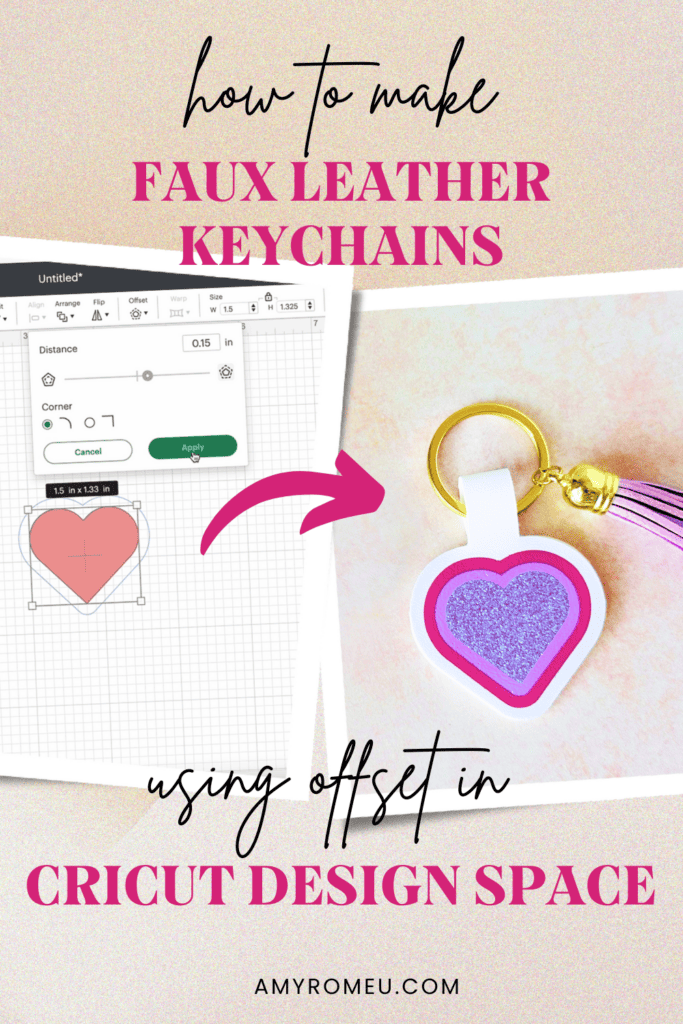
Make Your Own Faux Leather Keychains using Offset in Cricut Design Space
Learn how to design your own faux leather keychains using the offset feature in Cricut Design Space. Once you’ve designed your keychain in Design Space, use faux leather and heat transfer vinyl to complete this easy faux leather DIY project. You can make this project with the Cricut Maker, Maker 3, Explore Air 2, Explore 3, the Cricut Joy or the Joy Xtra – or any cutting machine that cuts heat transfer (iron on) vinyl.
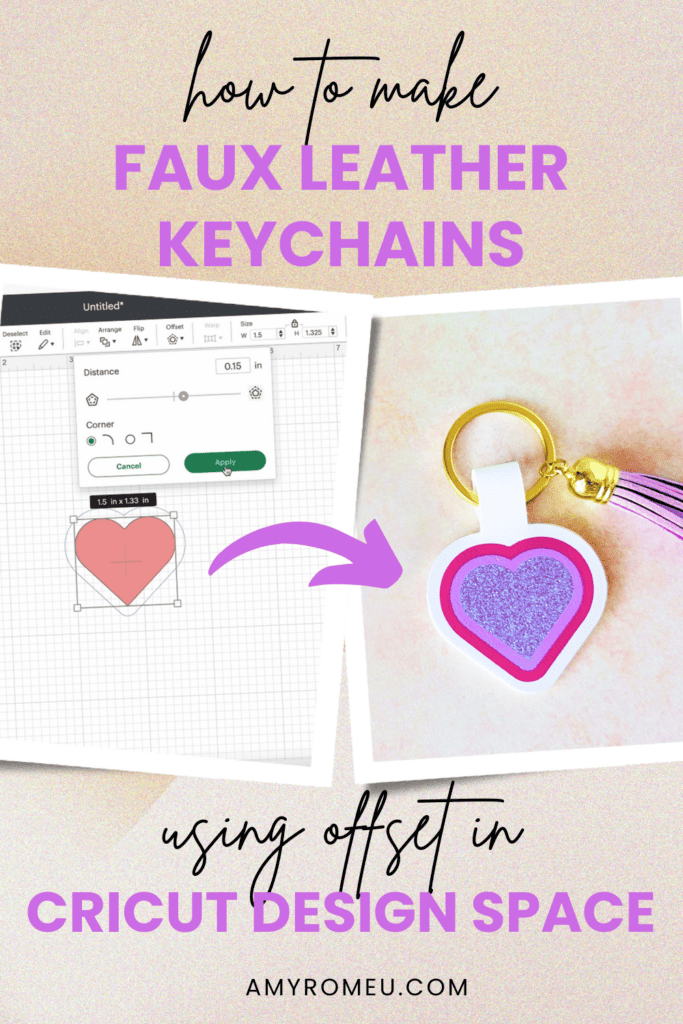
Learn how to make Faux Leather Keychains using Offset in Cricut Design Space
Everyone loves a personalize gift, and it’s so easy to customize these faux leather jewelry boxes using heat transfer (iron-on) vinyl on faux leather with my Cricut.
These Faux Leather Personalized Jewelry Boxes make great gifts for bridesmaids, teenagers, and anyone who appreciates a custom gift!
You can make this project with a Cricut Maker, Maker 3, Explore Air 2 or Explore 3, the Cricut Joy, or the Cricut Joy Xtra. You can also use a Silhouette or Siser Romeo or Juliet or any cutting machine that cuts heat transfer or iron on vinyl.
Want to watch a video tutorial instead? Click here to watch or click on the image below.

How to make Faux Leather Keychains in Cricut Design Space Step by Step
This page contains some affiliate links (which means if you make a purchase after clicking a link, I will earn a small commission at no additional cost to you). Read my full disclosure policy here.
Step 1 : Gather the Materials to Make Faux Leather Keychains with a Cricut
- Cricut cutting machine of your choice. You can see all of the current Cricut machines that can cut faux leather here.
- Faux Leather of your choice. I used this white faux leather from Amazon.
- Heat Transfer (Iron-On) Vinyl of your choice. I used Siser Easyweed in Pink and Lilac and Siser Glitter Heat Transfer Vinyl in Mermaid Blue.
- Purple strong grip cutting mat
- Green standard grip cutting mat
- Fabric or craft glue like Fabri-Tac or Bearly Art Glue
- Split Ring Keyrings in Gold or Silver
- Faux Suede Tassels – gold cap or silver cap
- Blue painter’s tape
- Easy Press Mini
- EasyPress Mat, 8×10
- Weeding tool or Pin Pen
- Teflon sheet
🛒You can also shop the supplies above in my Amazon Storefront here.
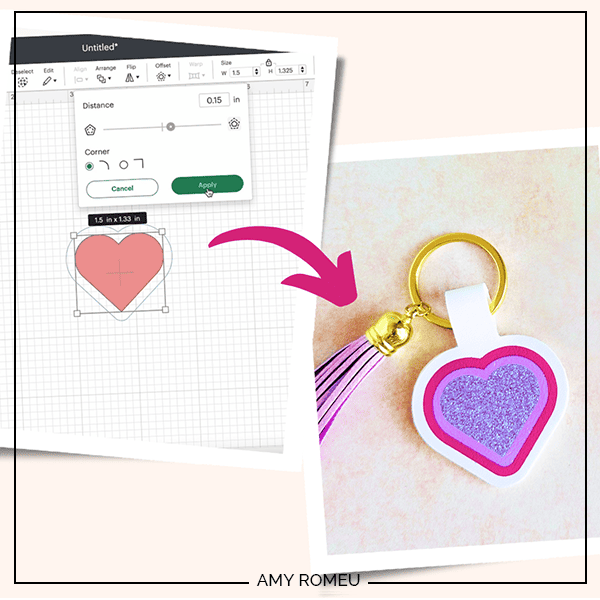
Step 2: Create the Base Design in Cricut Design Space
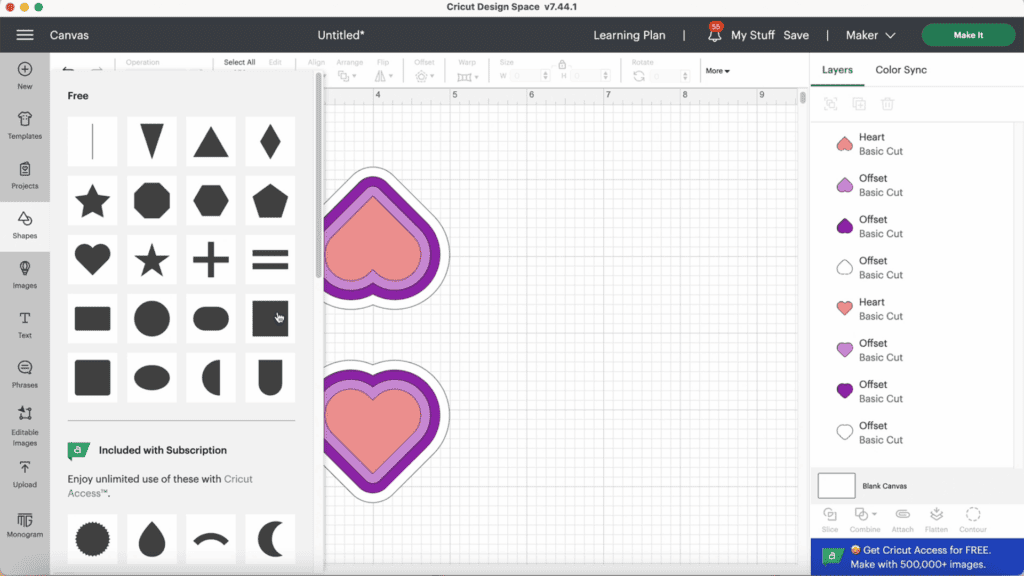
Start with a blank canvas in Cricut Design Space. Click on the Shapes tool and select a basic heart shape. This will place a heart shape on your canvas.
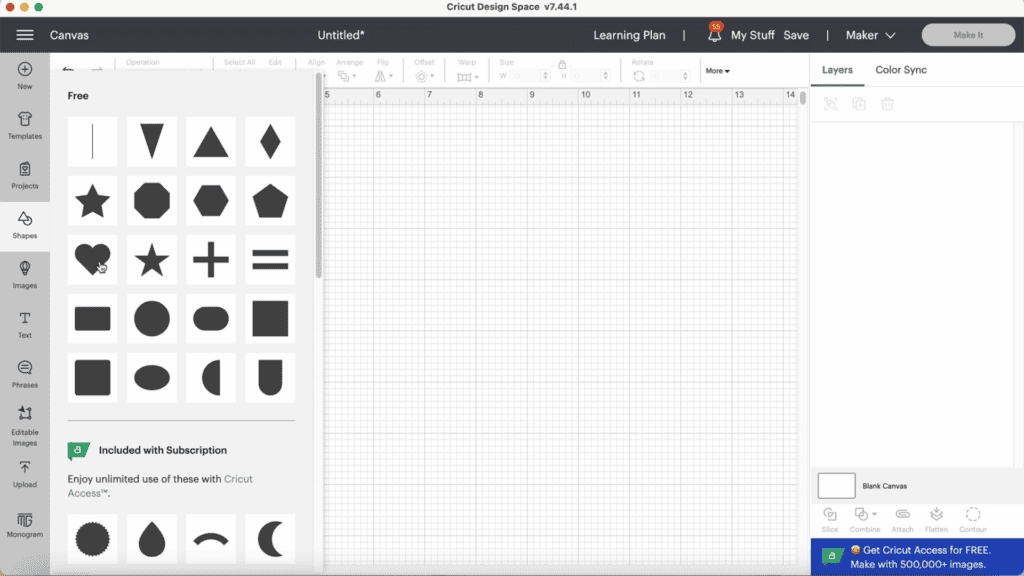
The color of the shape in Design Space doesn’t matter since you will cut the design from your chosen material colors. You can recolor the heart if you’d like.
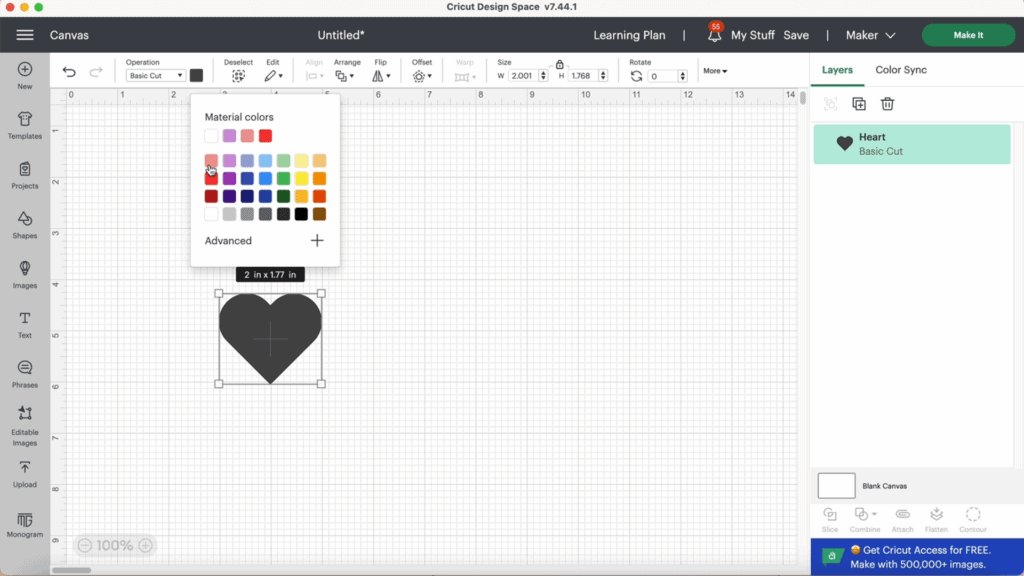
I made the heart pink.
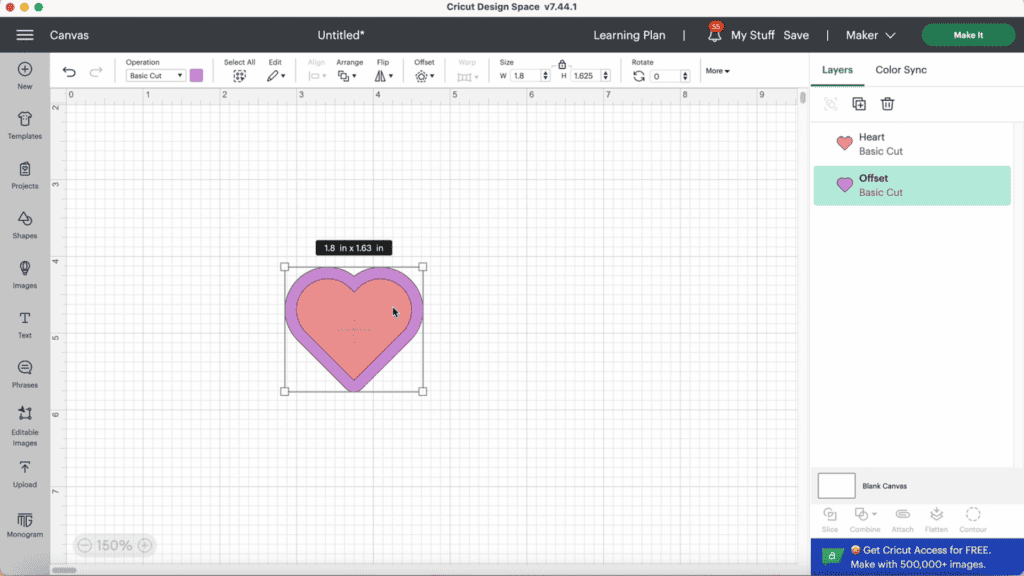
Step 3: Resize Your Shape
Adjust the size of your heart to about 1.5 inches wide to ensure the offsets added later match the desired size.
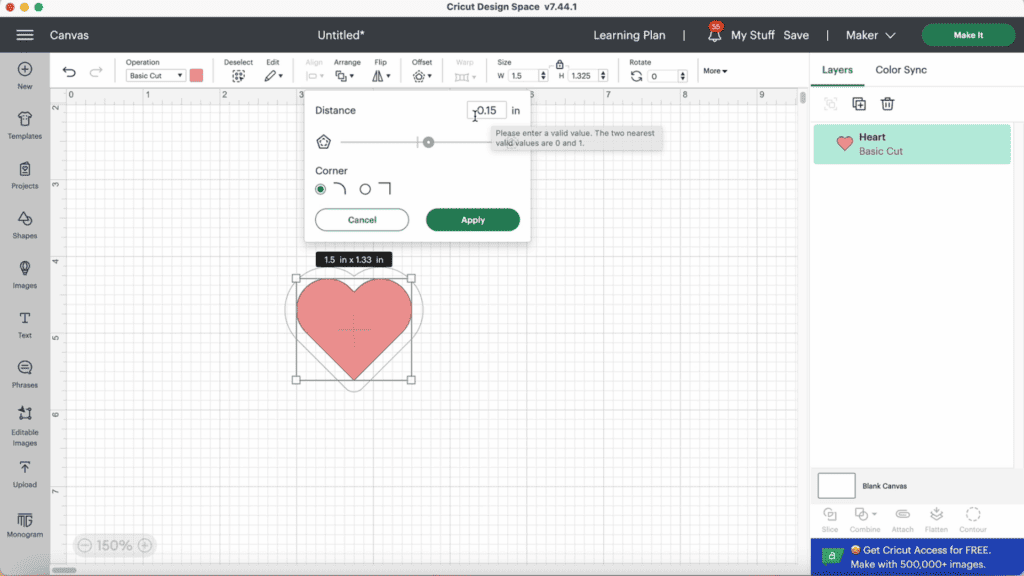
Step 4: Add Your First Offset
Click on the Offset tool on the top menu bar to add an outline around your heart.
Adjust the offset distance to your liking; I recommend starting with 0.15 inches.
Choose a corner designs – rounded or sharp. I applied rounded corners for a smoother look.
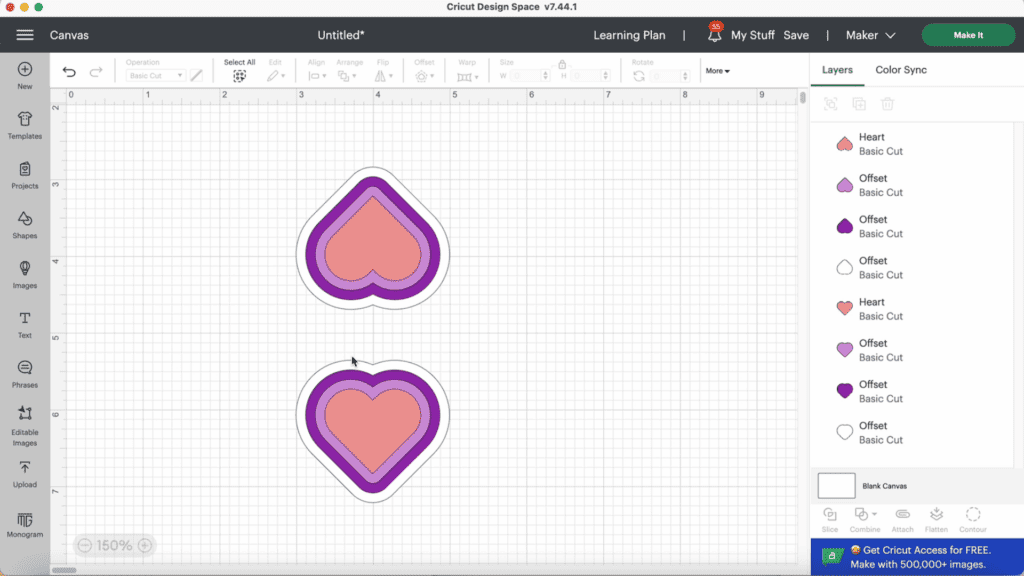
Step 5: Repeat Adding Offsets
Repeat the offset process to create multiple layers.
For this project, I created three layers of HTV (one heart with two outlines).
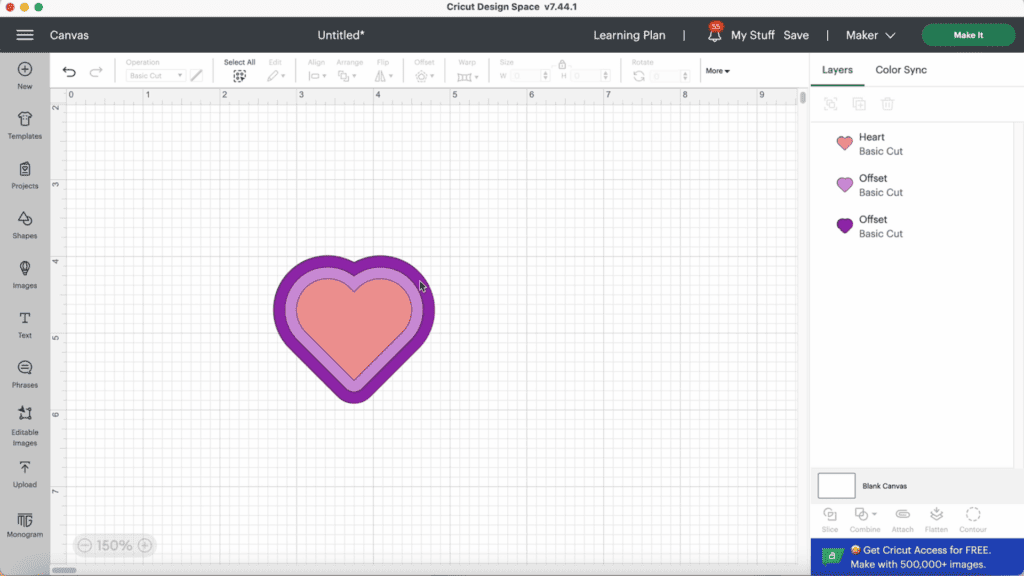
Then add a final offset for the faux leather base, which will be slightly larger to accommodate the HTV layers.
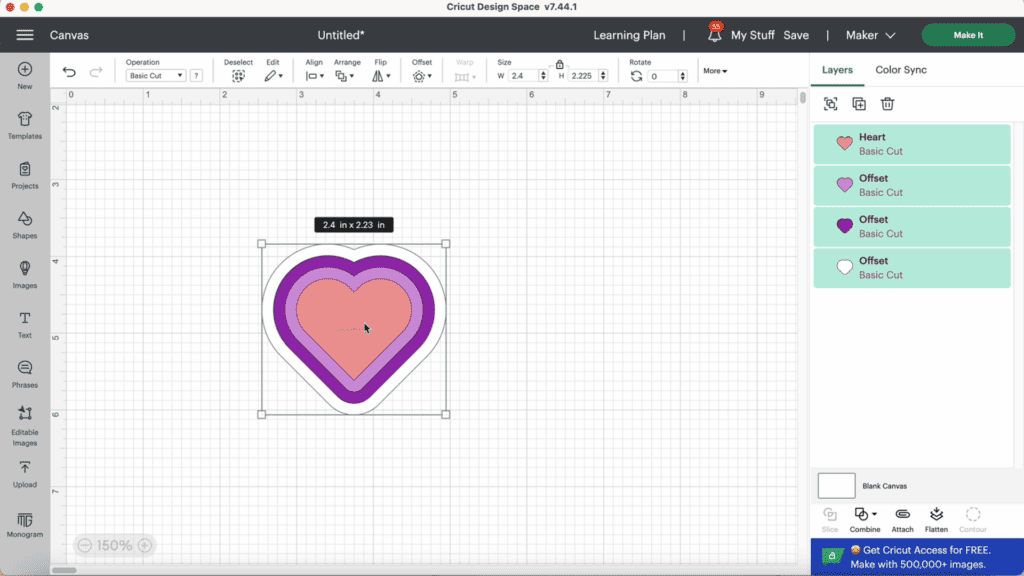
Step 6: Resize and duplicate the shapes.
Select all of the layers and resize down to 2 inches.
Duplicate the layered heart set and flip it vertically to create a mirror image. These will form the front and back of the keychain.
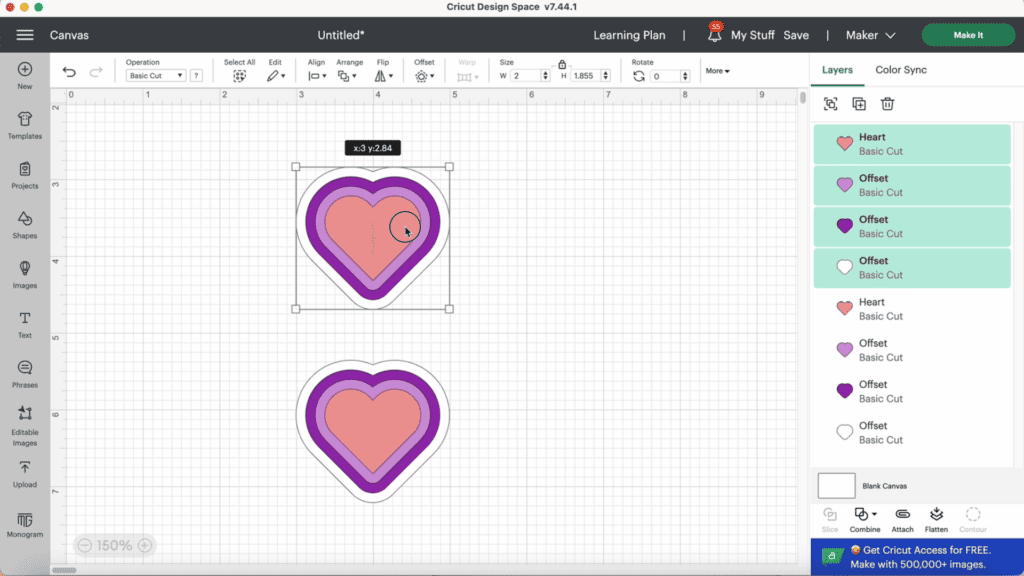
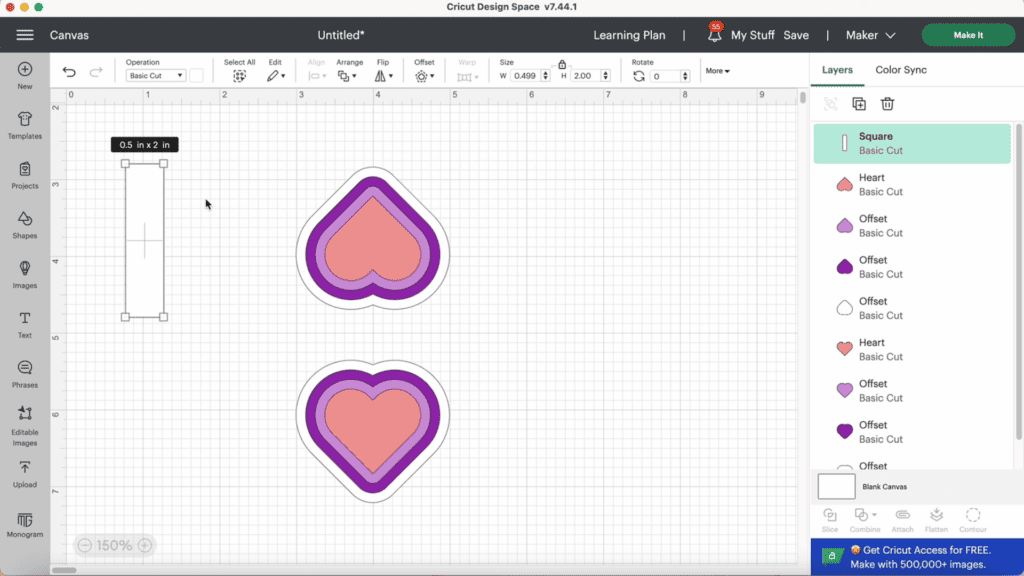
Step 7: Add a Connecting Shape to Create the Keychain
Next, add a square shape to make the “bridge” to hold the key ring.
Resize it to .5 inches wide and 2 inches tall.
Place it between the top layers of the hearts, ensuring it connects both sides.
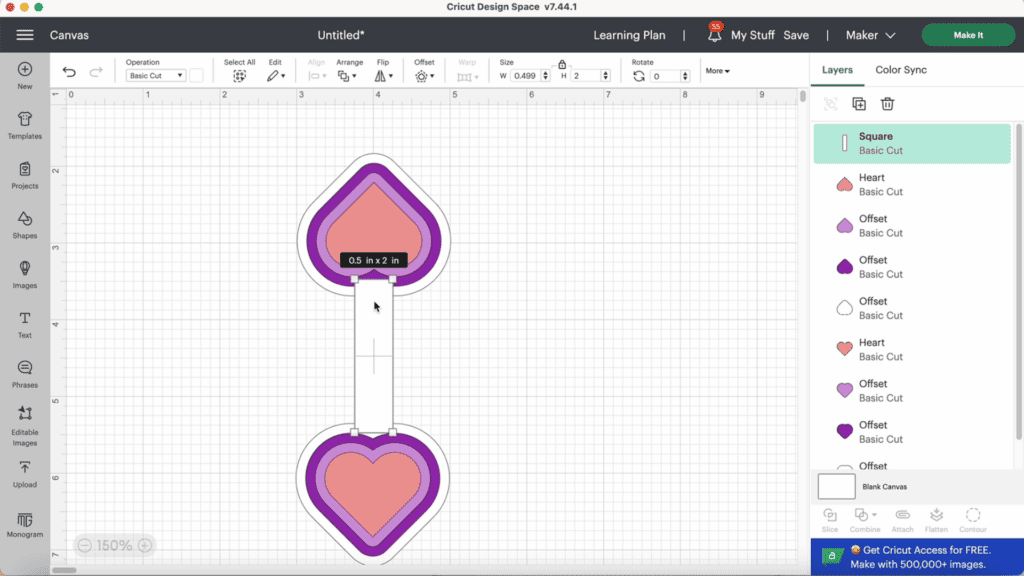
Select all three base layers (the two bottom hearts and the bridge shape) and click on Combine and then Weld.

This will create an attached faux leather base shape.
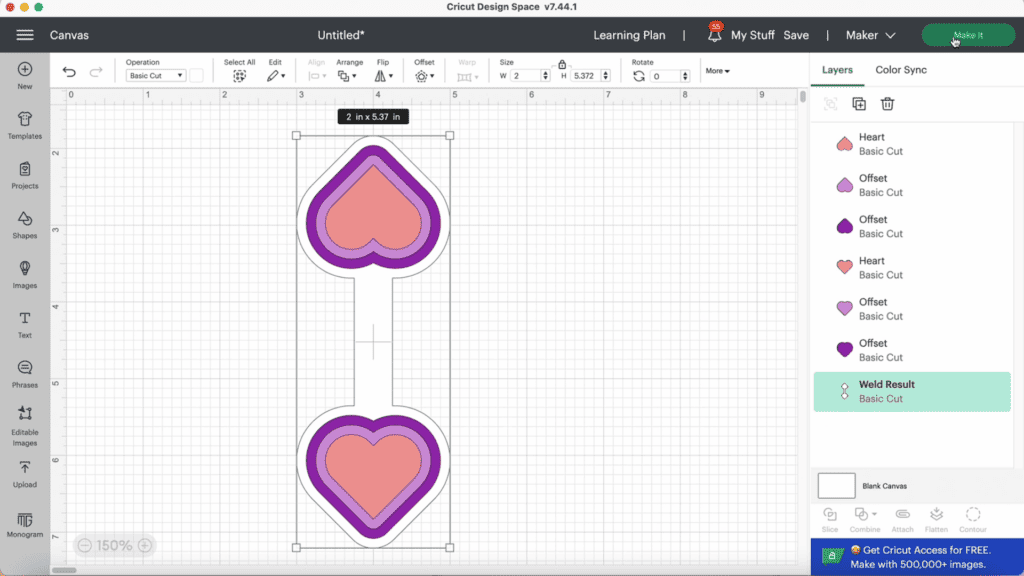
Now the faux leather and vinyl layers are ready to cut.
Click “Make It.”
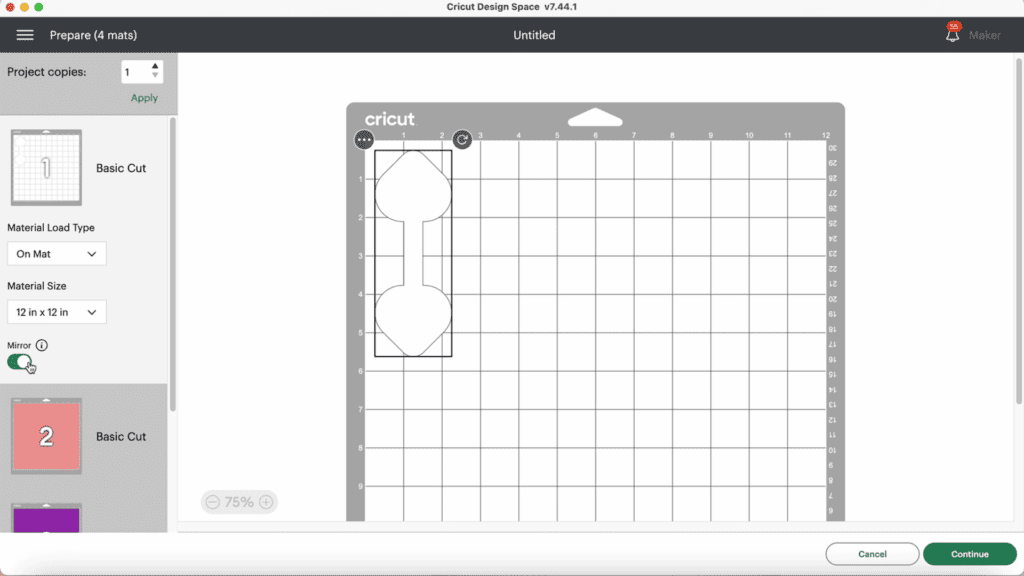
Step 8: Prepare the Design to Cut
First, select “On Mat” for how you will cut the materials.
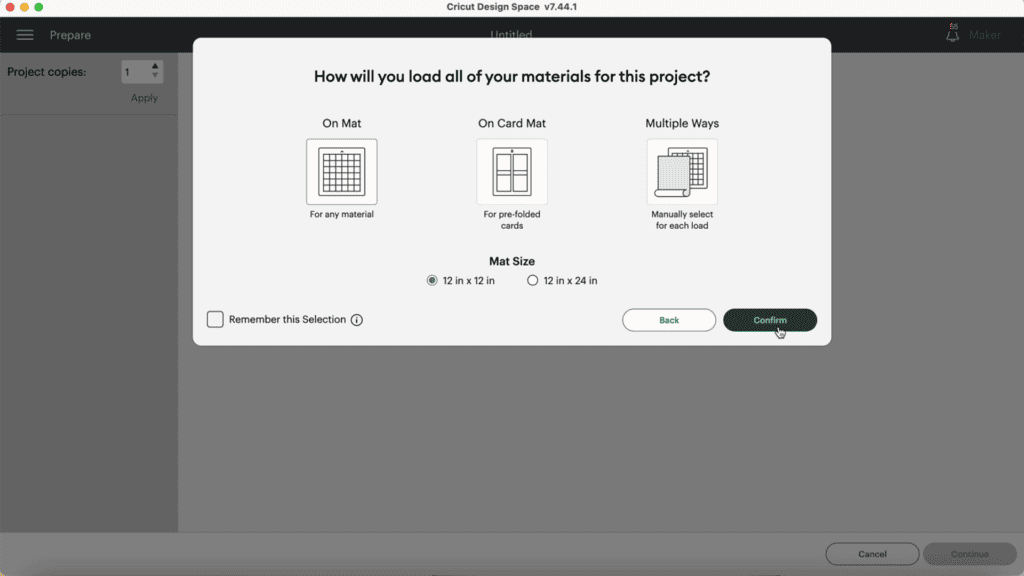
Then in each mat preview, click the “Mirror” toggle to ON to reverse the design since faux leather and heat transfer vinyl cut in reverse.
Drag the shapes on the mat preview apart from the edges of the mat a little, and away from each other.
When all the mats are mirrored and prepped, click “Continue” and choose the Faux Leather (Paper Thin) setting for the faux leather mat.
If you are using the Explore Air 2, you’ll need to turn your dial to “Custom” before you can find the Faux Leather (Paper Thin) setting.
To cut the vinyl mats, you’ll choose the material setting that corresponds to the heat transfer vinyl you’re using (e.g., foil iron-on, glitter vinyl).

Step 9: Cut the Faux Leather Mat
Trim a piece of faux leather just slightly larger than the shape that needs to cut.
Place it pretty side down on a purple strong grip cutting mat. Then apply blue painter’s tape on all sides.
Load the mat into the Cricut and begin the cut.
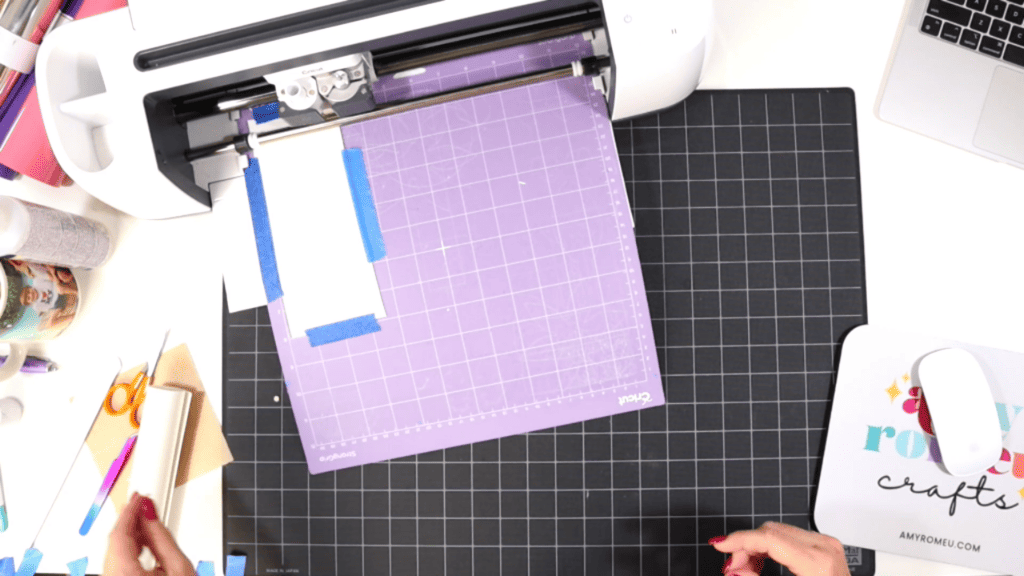
Check the cut after it’s complete, before unloading the mat.
Repeat the cut if necessary.
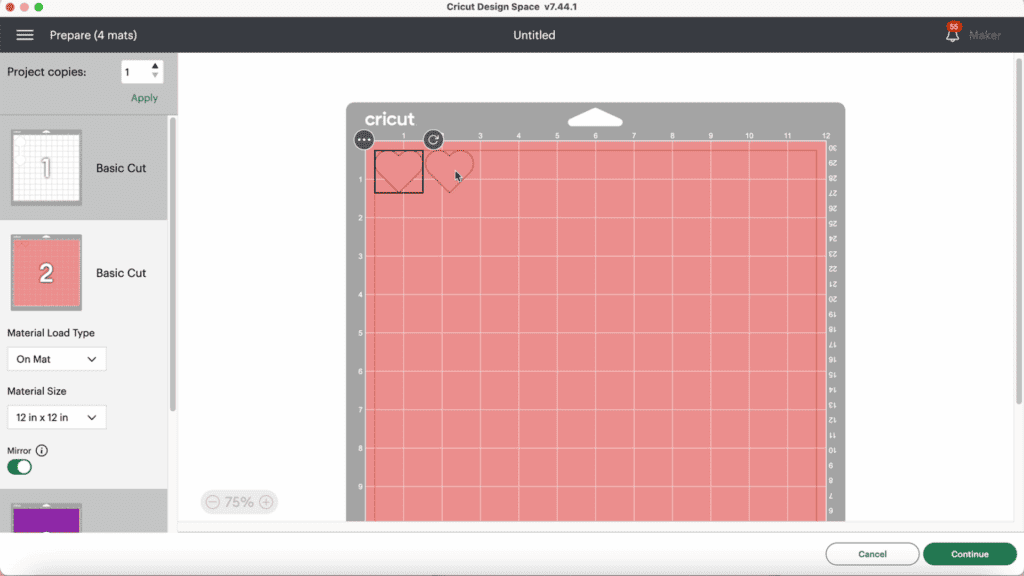
Step 10: Cut the Heat Transfer Vinyl Mats
Place each color of heat transfer vinyl shiny side down on a green cutting mat in the location as shown in the mat preview screen.
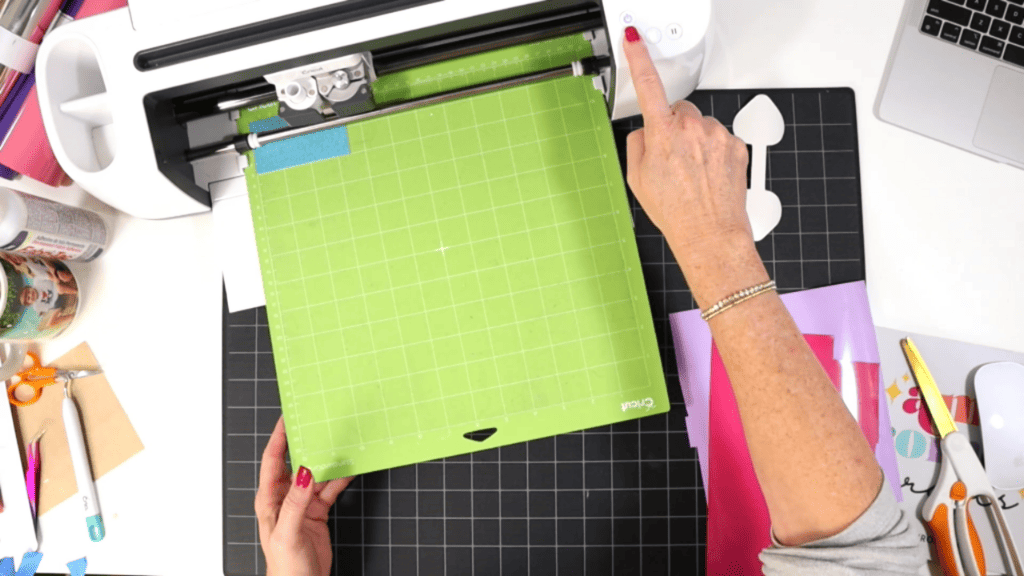
Insert the mat into your cutting machine and click “Go” to start the cutting process.
When each cut is complete, unload the mat and carefully weed away the excess vinyl using a weeding tool.
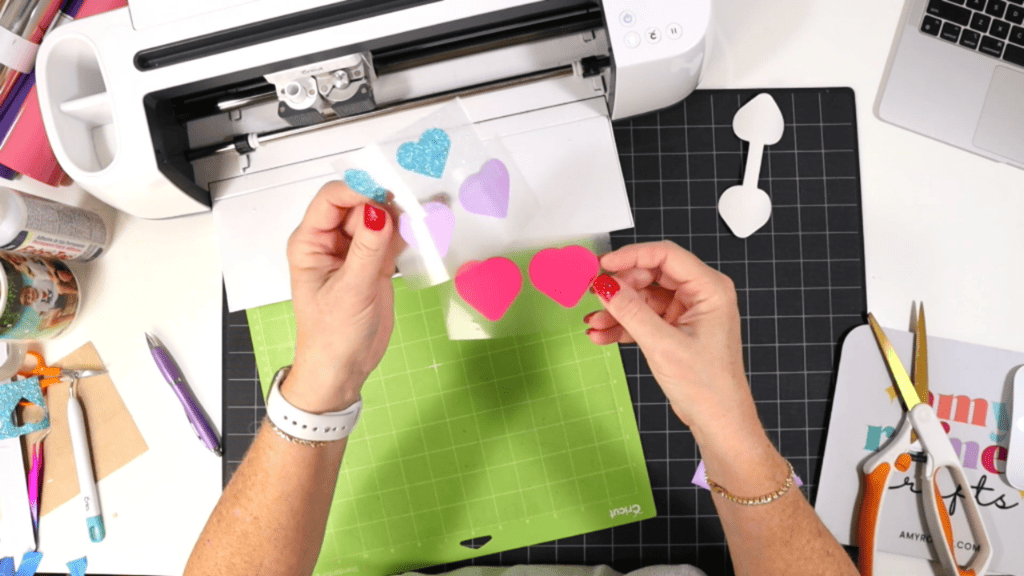
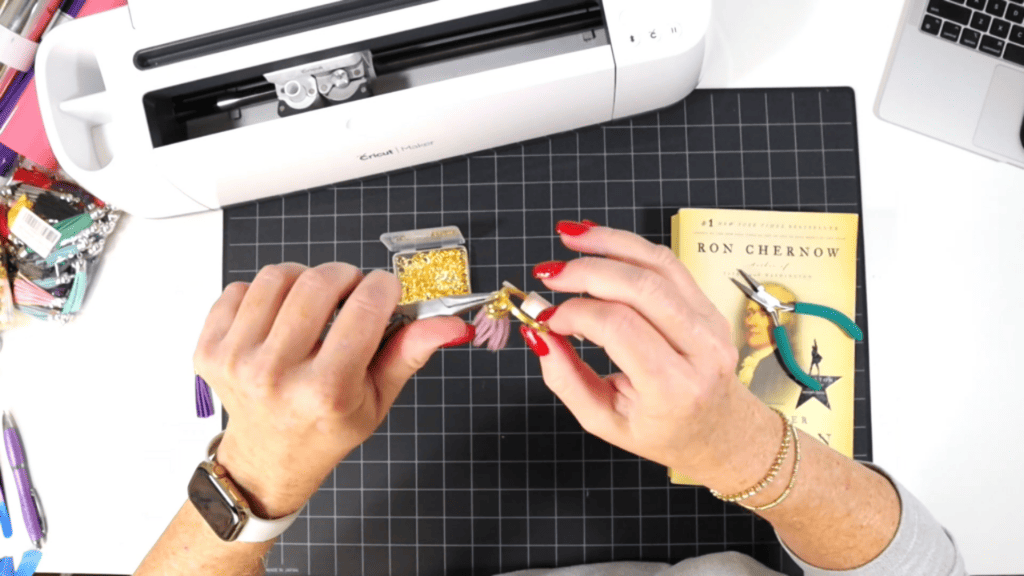
Step 11: Pressing the Vinyl Layers onto the Faux Leather
Gather your faux leather and vinyl shapes, a heat pressing pad, and a Cricut EasyPress Mini (or an EasyPress).
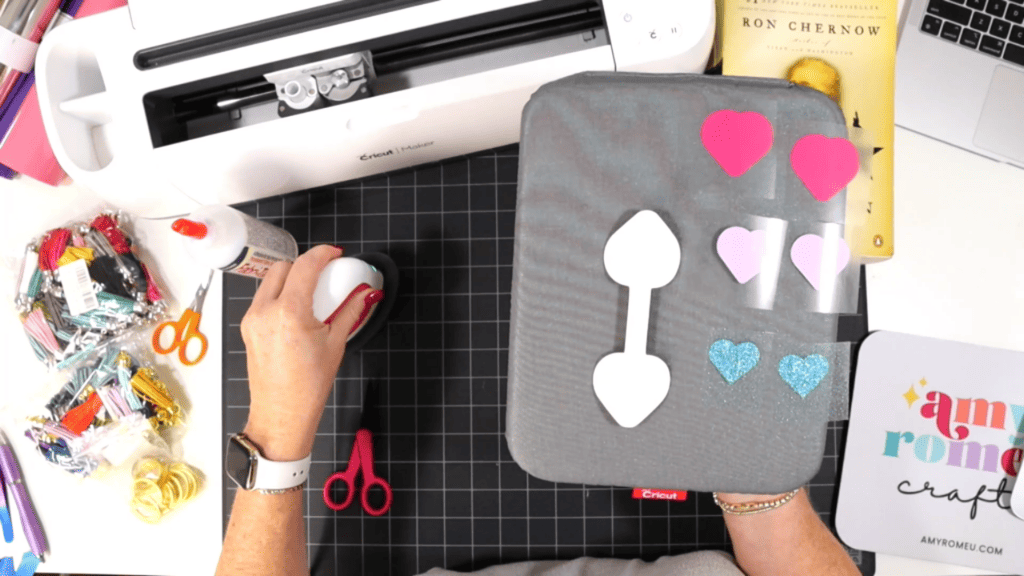
Place the outermost vinyl layer on the faux leather base.
Cover it with a cover sheet (Teflon sheet, butcher paper, or parchment paper).
Set your EasyPress Mini to the low setting or a regular EasyPress to about 265 degrees Fahrenheit.
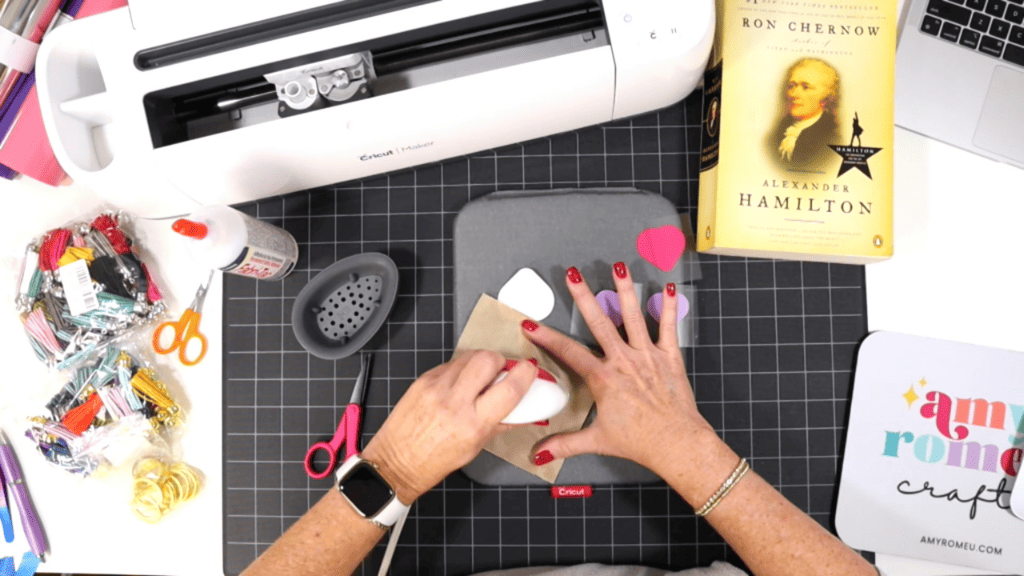
Apply light and even pressure to the design, moving the heat source around to cover the entire design.
Press for approximately 10 seconds, making sure not to press on the box’s edges to avoid flattening or melting.
Carefully peel away the clear transfer sheet. If the vinyl lifts, gently reapply and press again.
Repeat with pressing all of the vinyl layers on both sides.
Then place the warm faux leather keychain under the heat pressing pad for about a minute to let it cool flat.
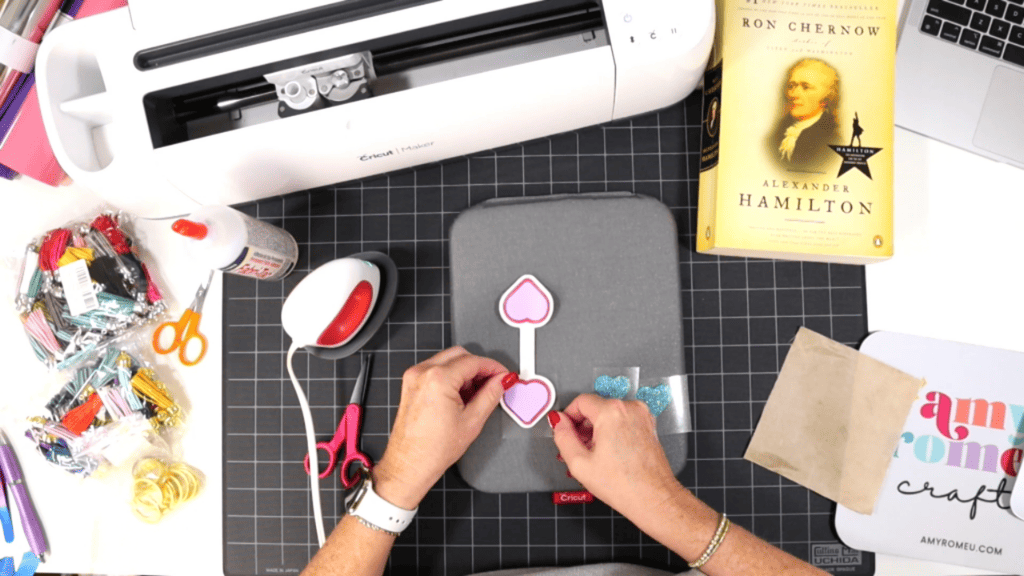
Step 12: Assembling the Keychain
Thread the keyring onto the bridge area of the keychain.
Place the keychain pretty side down on your work surface.
Apply glue to the back of one side of the keychain.
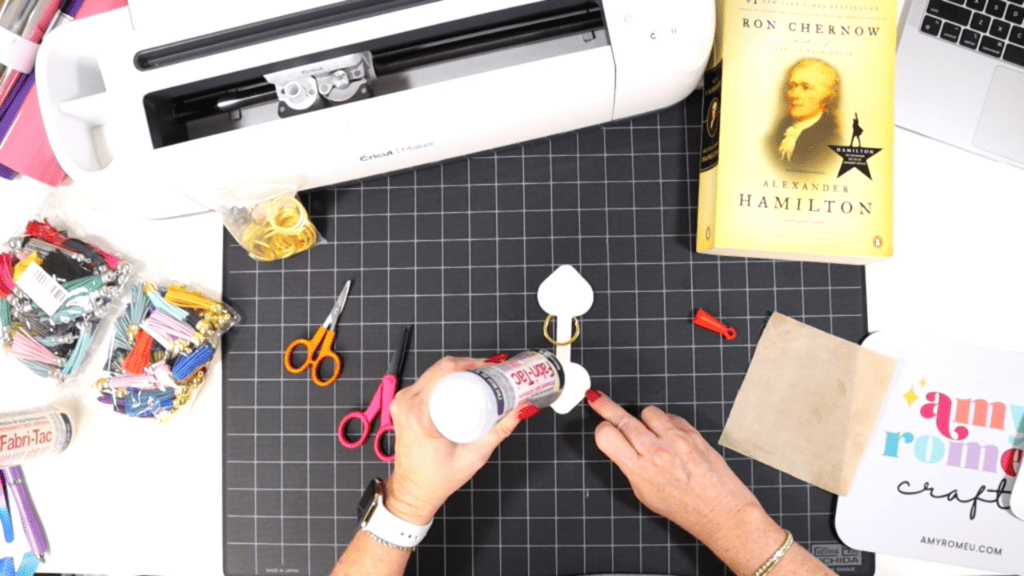
Fold the two halves of the keychain together.
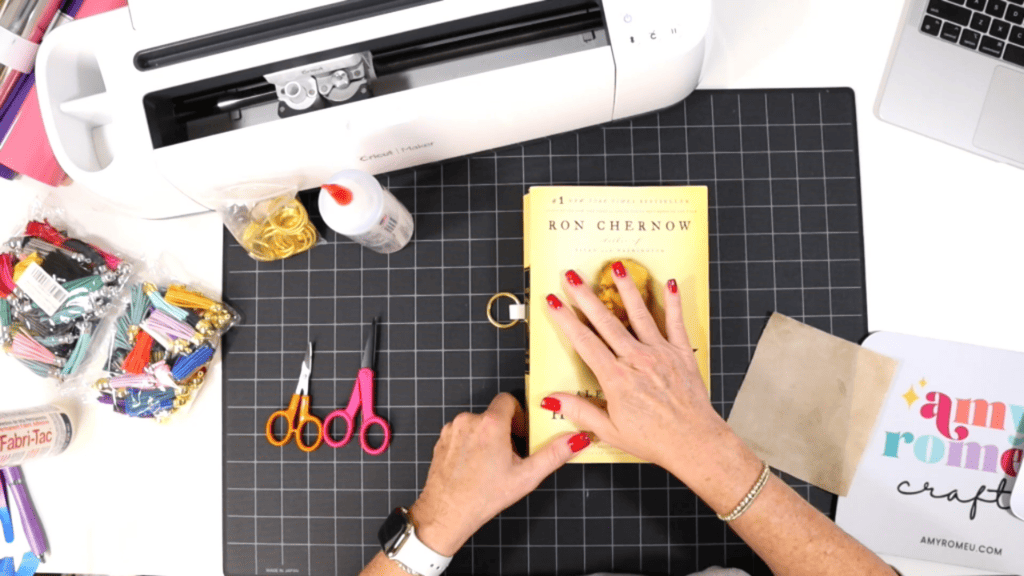
Place the glued keychain under a heavy book to dry for a few hours.
After the keychain is dry, add an optional faux suede tassel if desired.
That’s it!

I hope you’ll enjoy creating your own Faux Leather Keychain designs with your Cricut. Let me know in the comments if you’d like to see more Cricut Design Space Tutorials like this one.
Answers to your questions about making Faux Leather Keychains with a Cricut
Q: What setting on a Cricut do I need to cut faux leather?
A: I use the Faux Leather (Paper Thin) setting with “More” pressure to cut faux leather with any of the five current Cricut machines. I use the standard Fine Point Blade and repeat the cut as needed before unloading the mat. For more of my best Tips, Tricks, and secrets to cutting faux leather with a Cricut, check out my blog post here.
Q: What Cricut is best for cutting faux leather?
The good news is there is no “best” Cricut for cutting faux leather. You can cut faux leather with any of the five current Cricut machines – the Cricut Maker, the Cricut Maker 3, the Cricut Explore Air 2, the Cricut Explore 3, and even the Cricut Joy. That’s because you can cut faux leather with a Cricut using the standard Fine Point Blade that comes with each of these machines.
Q: Can I create different shapes for the keychain designs?
A: Yes you can! You can get creative with the basic shapes in Cricut Design Space, or you can upload your own SVG shapes/designs to add an offset to. The sky is the limit!
Want instant access to my Free Resource Library full of SVG files?
Just Enter your name and email Below!
By signing up, you’ll get instant access to my FREE SVG Library with hundreds of crafting SVG templates! You’ll also get my weekly newsletter full of crafting ideas, tutorials, and inspiration! Unsubscribe anytime.
If you loved this keychain project, you’ll love these projects too:
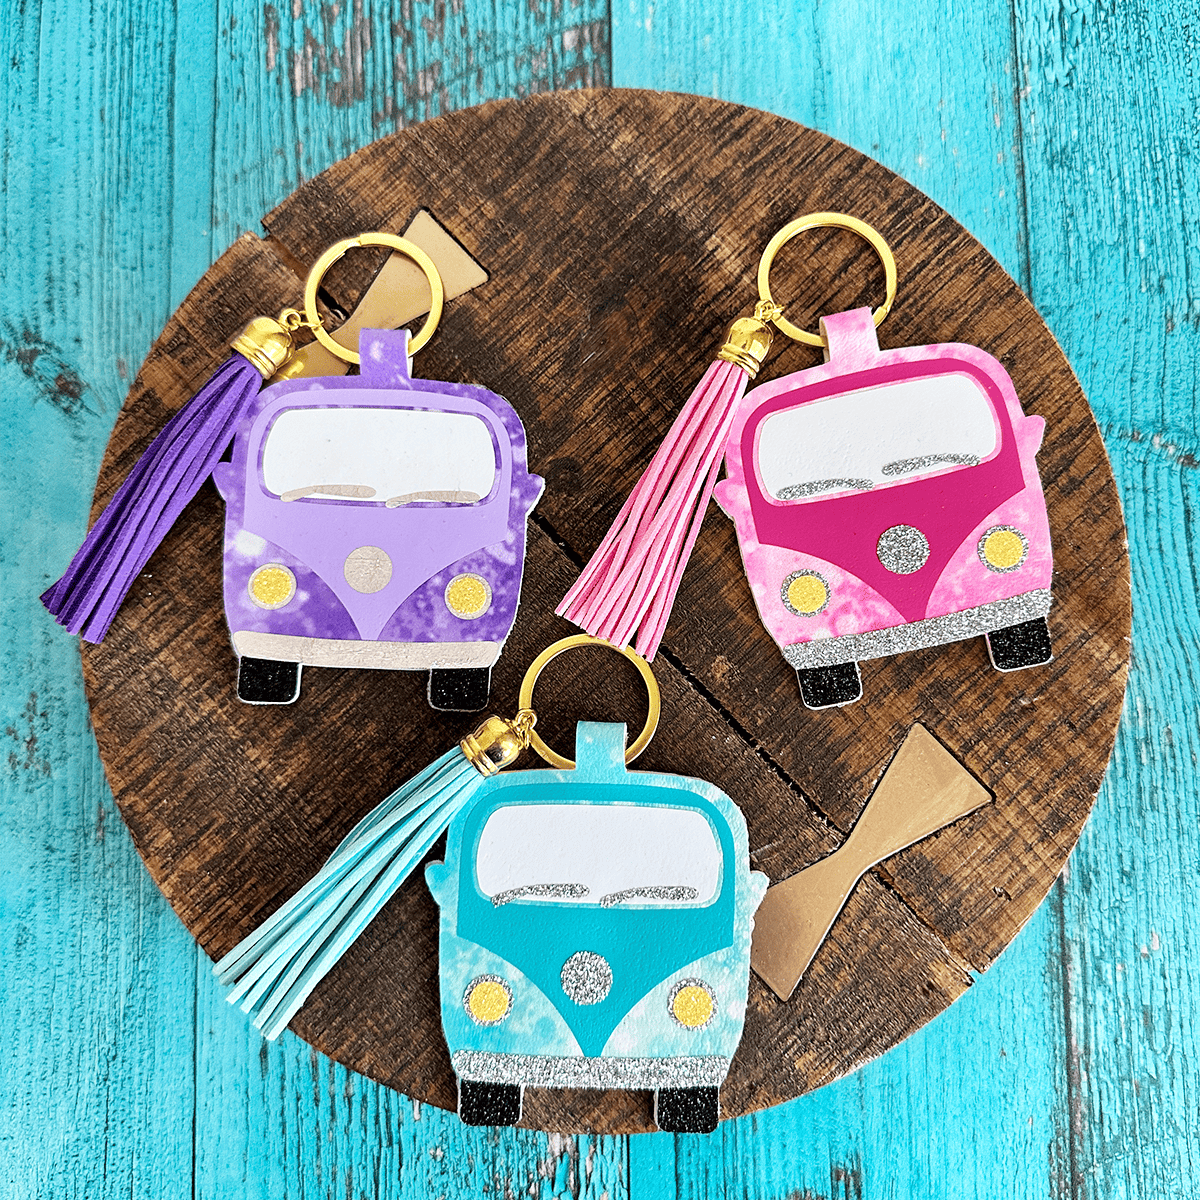


Will you make this project?
I would love to see what you have created! Please join my free faux leather crafting Facebook group and share your creations with me and all of my crafting friends!
Until next time… and happy creating!

Want to remember this project? Save this tutorial to your favorite Pinterest board!
Thank you! I almost had it right trying to figure it out, it was the bridge that was throwing me, I just couldn’t figure out the right size. I don’t math well.
Amy,
I love this key chain. Thank you so much.
Thank You, Amy. I really enjoyed your video and found your instructions easy to follow, as always. Definitely going to try doing this. 💕💕