
How to Make 2020 Toilet Paper Earrings with a Cricut
How to Make 2020 Toilet Paper Earrings with a Cricut
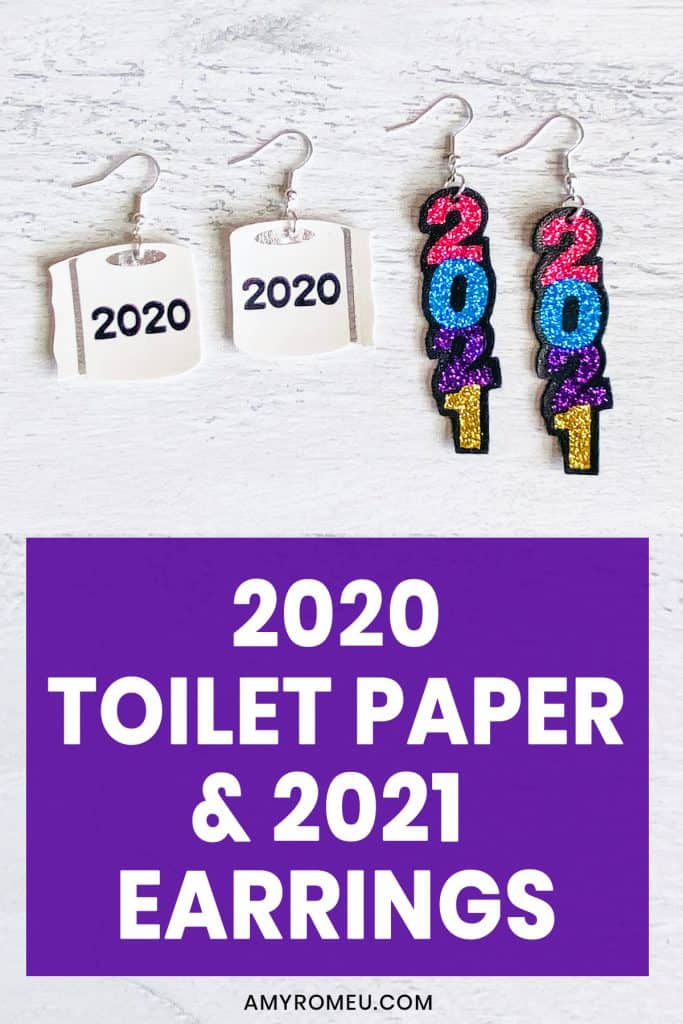
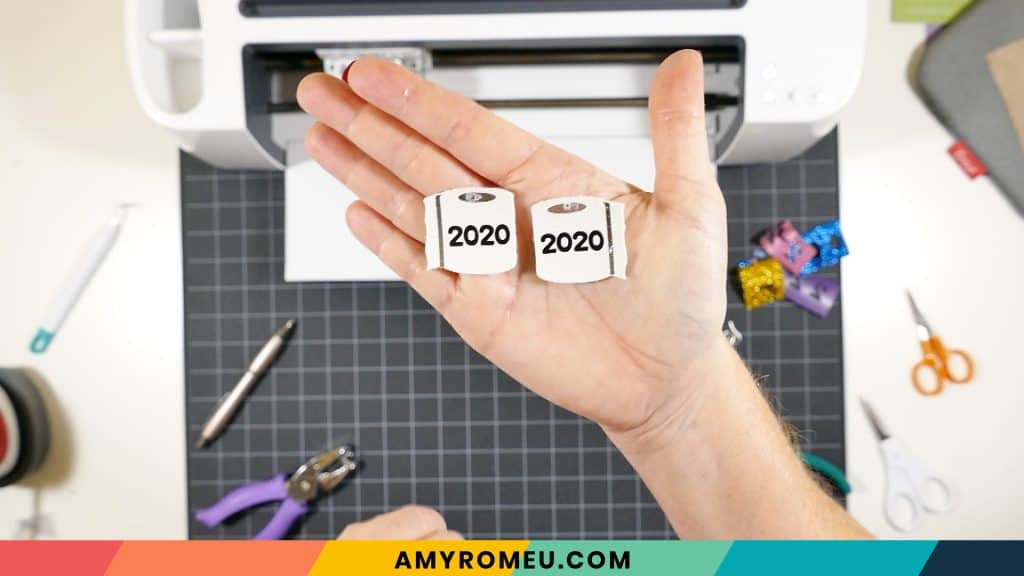
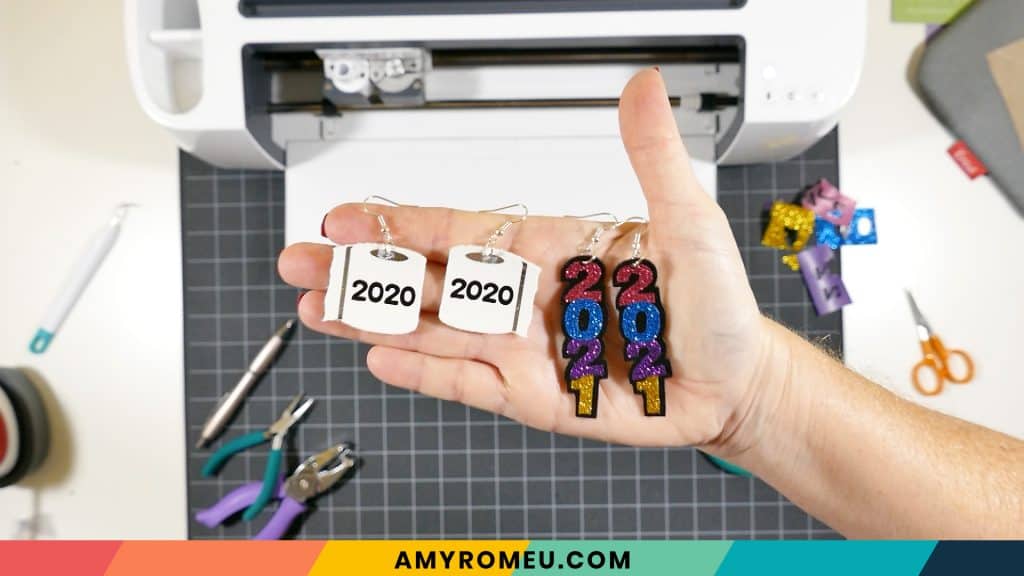
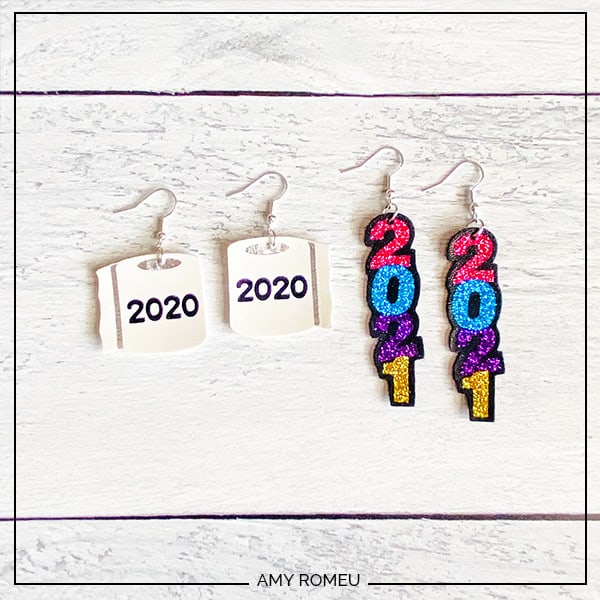
Well, it’s been a very strange year, don’t you agree? As we approach the end of 2020, it’s hard not to look back and remember some of the weirder things that have happened this year – like the great toilet paper crisis. I made these toilet paper earrings back in March, but I wanted to make a new pair as the year comes to a close. I also wanted to make some happy and joyful New Year’s Eve Earrings for the new year 2021, too. So these 2020 Toilet Paper Earrings and 2023 New Year’s Eve Earrings were born.
These earrings are made from faux leather and layered heat transfer vinyl. If you haven’t tried making faux leather earrings with your Cricut before, this is a great project to try. You can make these 2020 Toilet Paper Earrings and 2023 New Year’s Eve Earrings with the Cricut Maker, an Explore Air 2 or even the Cricut Joy! (If you plan to use the Cricut Joy, you’ll want to check out this post first.)
In this tutorial, I’ll give you my step by step instructions and tell you exactly what materials I used to make this project.
A link to download my original SVG file for this project is in the Materials list below.
If you’d rather watch a video tutorial, click on my 2020 Toilet Paper Earrings YouTube video below:
Ready? Let’s get started!
Want to see all of my Cricut earring & jewelry tutorials? CLICK HERE
This post contains some affiliate links (which means if you make a purchase after clicking a link, I will earn a small commission at no additional cost to you). Read my full disclosure policy here.
2020 Toilet Paper & 2021 Earrings – Materials List
- A vinyl cutting machine. I have the Cricut Maker, which you can get at Amazon here or at Cricut.com. You can also use the Cricut Explore Air 2 or even the new Cricut Joy!
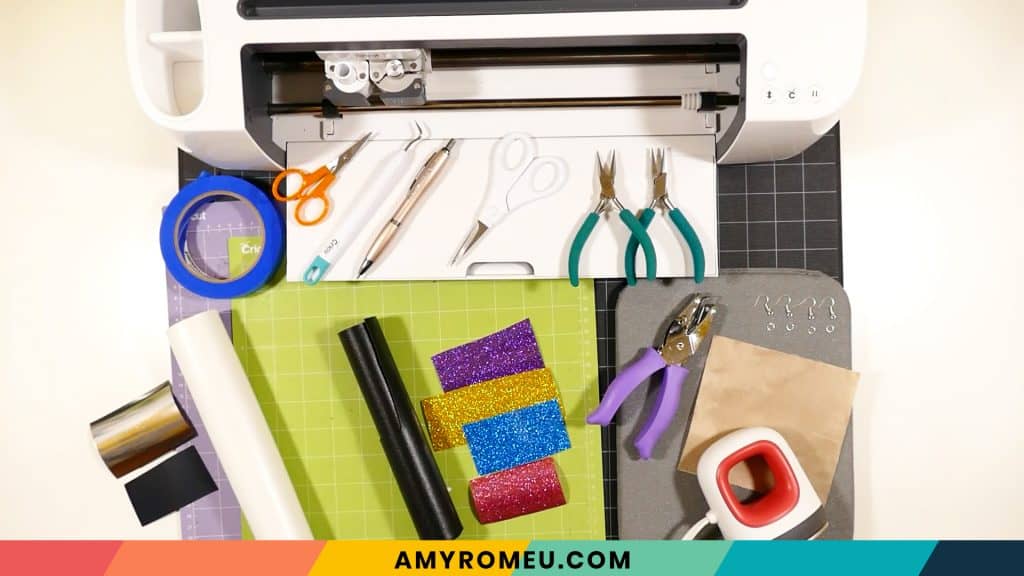
- Cricut Strong Grip (Purple) Cutting Mat. You can buy these on Amazon here.
- Cricut Standard Grip (Green) Cutting Mat. Available on Amazon here.
- Blue painter’s tape. This will help keep your faux leather in place on your mat. You can get it at any hardware store and most big box or grocery stores. Amazon also has it here.
- A weeding tool. I use the weeding tool that came with my Cricut tool set from Amazon here.
- Cricut EasyPress Mat. I like the 8×10 size for making earrings.
- Small curved scissors – I love these curved scissors from Amazon.
- A small hole punch (for punching earring holes in the faux leather). This is my go-to hole punch for making Cricut earrings from Amazon here.
- Earring hooks – I used these silver toned shepherd’s earring hooks from Amazon.
- Small jump rings – I used the silver toned jump rings from this assortment of 6mm size jump rings in different metal finishes from Amazon here. You could also use 5mm size jump rings if necessary.
- Two pairs of flat nose pliers – My favorites are Wubbers brand in the “Baby” size. My everyday use pliers are the Baby Wubbers Chain Nose Pliers and the Baby Wubbers Flat Nose Pliers.
- For 2020 Toilet Paper Earrings –
- White Faux Leather (I used this one from Amazon)
- Black Heat Transfer Vinyl (I used this Siser Easyweed from Amazon)
- Foil Iron-On (I used Cricut brand in the color Chrome) or Grey Heat Transfer Vinyl like this Siser Easyweed from Amazon
- For 2023 Earrings –
- I used this smooth black faux leather from Amazon. You can also use this pebbled black faux leather with good results.
- Assorted colors of Glitter Heat Transfer Vinyl. I used Siser Glitter HTV in the colors Blush, Blue, Purple, and Gold. If you want to get a lot of different colors of glitter HTV to play with, here’s a great assortment pack of 12 different Siser Glitter colors.
- The SVG file templates for these 2020 Toilet Paper Earrings and 2023 New Year’s Eve Earrings. They are Design #161 in my free resource library. You can get the password to my library instantly by filling out the form below, or at the bottom of this post.
2020 Toilet Paper & 2021 New Year’s Eve Earrings – PROJECT INSTRUCTIONS
STEP 1 – Download the SVG Cut Files
Download my free 2020 Toilet Paper & 2021 New Year’s Eve Earrings SVG file (#161) from my Resource Library. (If you don’t have a password to the library, fill out the form above and it will be emailed to you instantly.)
UPDATED December 2021: I’ve also added 2022 to my Resource Library. Just look for Design #161.
Save the zipped folder that downloads to your computer. Then unzip the folder to access the folder’s contents. You’ll need to unzip or extract the files FIRST so you can upload the cutting file to Cricut Design Space.
STEP 2 – Upload the SVG File to Cricut Design Space
If you need help uploading a file to Cricut Design Space, click here, or watch the YouTube video for this project which has step-by-step file uploading directions.
I’ve uploaded the 2020 Toilet Paper Earrings to Cricut Design Space to make them first.
When the toilet paper earring shapes are on your canvas, choose if you want to cut the shapes with the pre-cut holes or without (if you’ll be making the holes yourself with a hole punch.
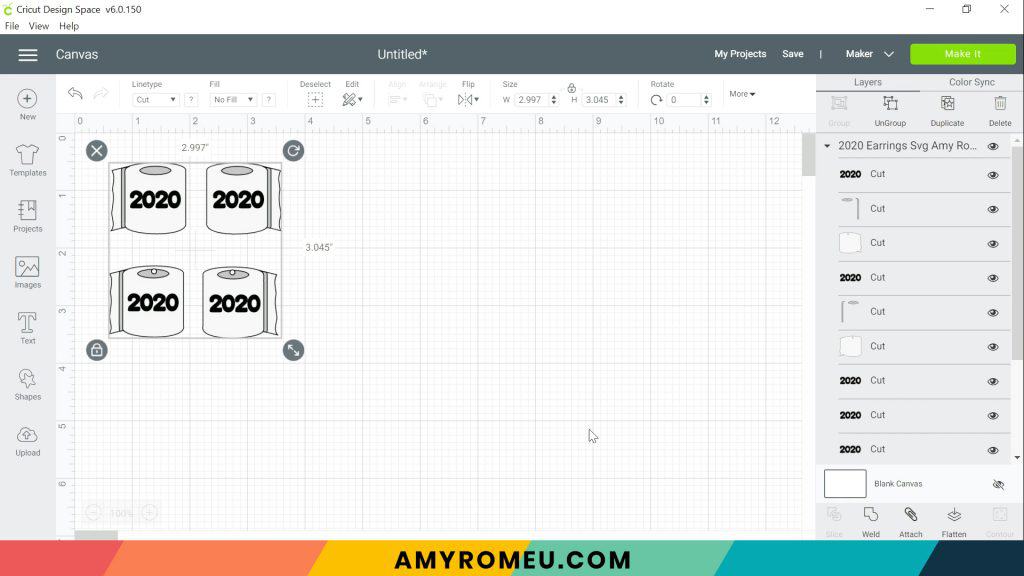
Hide (or delete) the layers for the earrings you aren’t going to make now clicking on the eye next to the layers you want to hide.
I’ll be using a hole punch to make the holes in these toilet paper earrings after the layers are assembled, so I’ll hide the pre-cut earring hole pair.
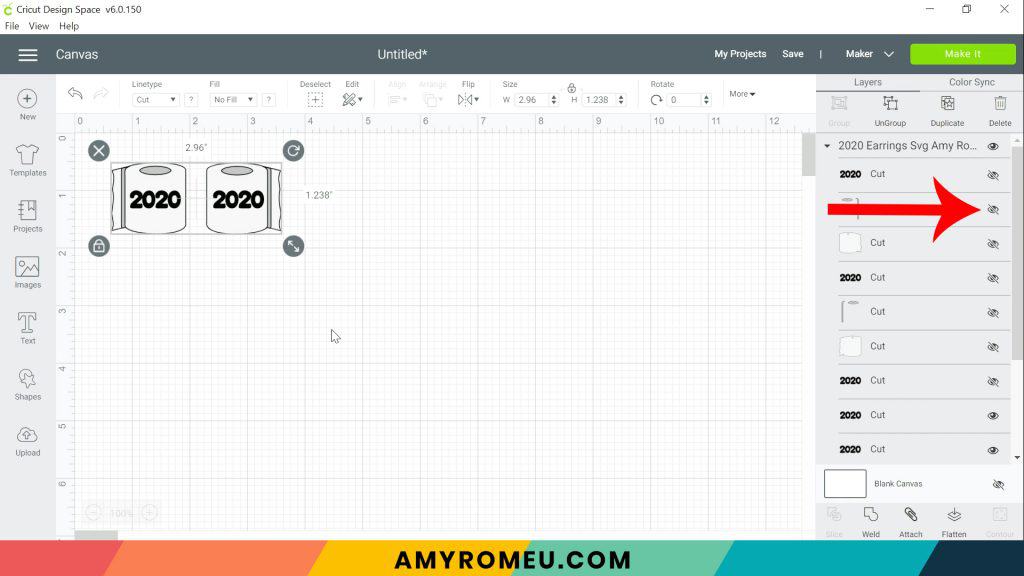
These earrings are already sized for earrings, but they are definitely big and bold in size! You can size them down slightly smaller if you’d like. Do that by dragging the size arrow smaller, or adjust the size in the size box in the top menu bar.
Click the green MAKE IT button.
STEP 3 – Preview the Cutting Mats & Cut the Faux Leather To Size
The mat preview screens will load. The Cricut will cut one faux leather layer and two heat transfer vinyl layers (the grey toilet paper details and the black 2020 text), all on separate mats.
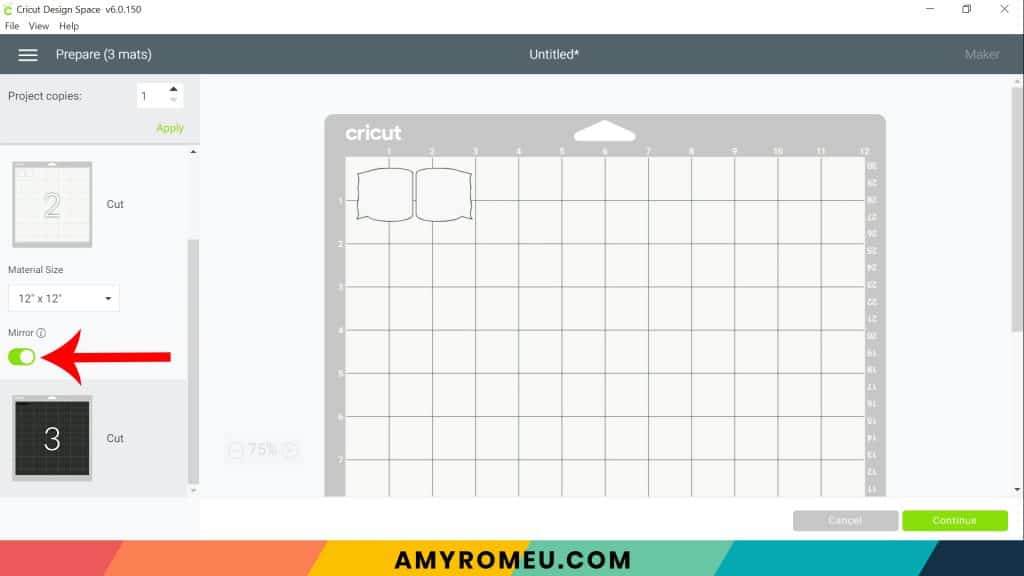
You don’t need to mirror the faux leather mat for this toilet paper earrings project, but you must mirror the mats for the heat transfer vinyl mats. Vinyl mats are cut face down and therefore the cut shapes must be mirrored before cutting.
Mirror both of the heat transfer vinyl mats in the mat preview on the left hand side.
Click on the white mat to see what size material the toilet paper shapes will cut from. In the mat preview below I see I’ll want to cut a piece of white faux leather about 3.5 inches wide and 2 inches tall.
Press the green CONTINUE button.
STEP 4 – Make Material Selections
Now you’ll select your material for the first mat. I suggest cutting the faux leather mat first.
Note: If you’re using a Cricut Explore Air 2, turn your dial to “Custom” so you can choose the setting recommended below. If you’re using the Cricut Joy, set the machine to cut with a mat and then select the material setting below. You won’t have a purple cutting mat, but follow the directions below using the green mat.
I already have Faux Leather (Paper Thin) saved as a favorite material in Cricut Design Space like I do below, you can click on it to select it.
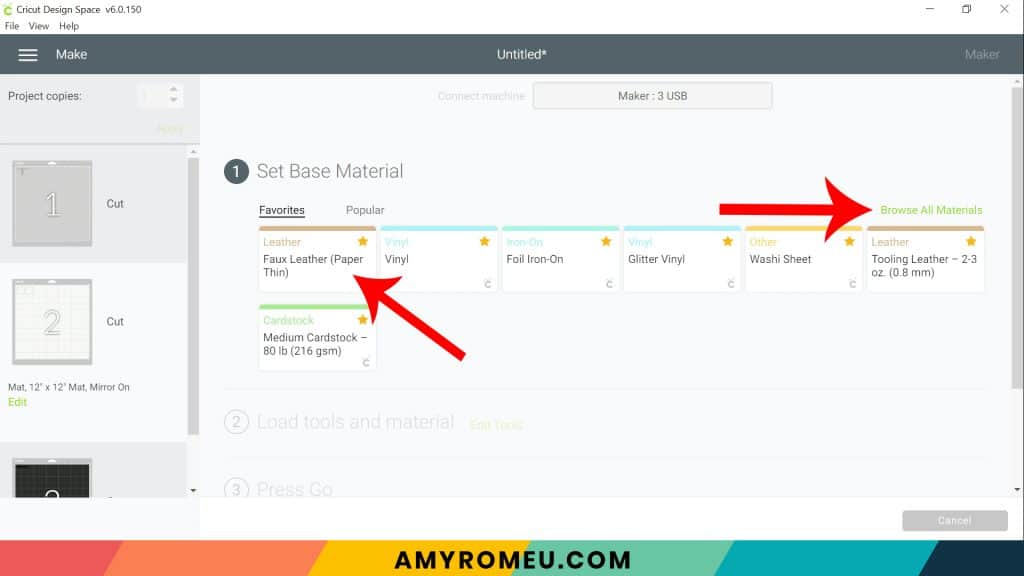
If not, click on “Browse All Materials” to search for this setting. Type “faux leather” in the search bar and click on the magnifying glass.
When Faux Leather (Paper Thin) appears, click on it to select it. Click on the yellow star on the right if you want to add this material setting to your “Favorites” so you can find it easily again in the future. Then click DONE.
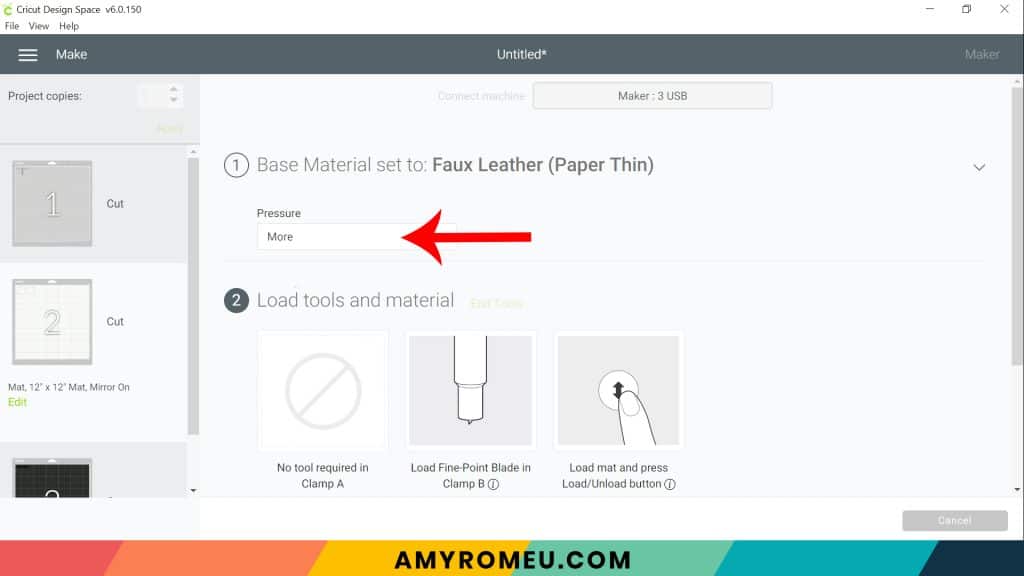
After you’ve selected Faux Leather (Paper Thin) as your material, choose MORE from the Pressure dropdown menu:
Now it’s time to prepare the faux leather mat for cutting.
STEP 5 – Cut Faux Leather Mat
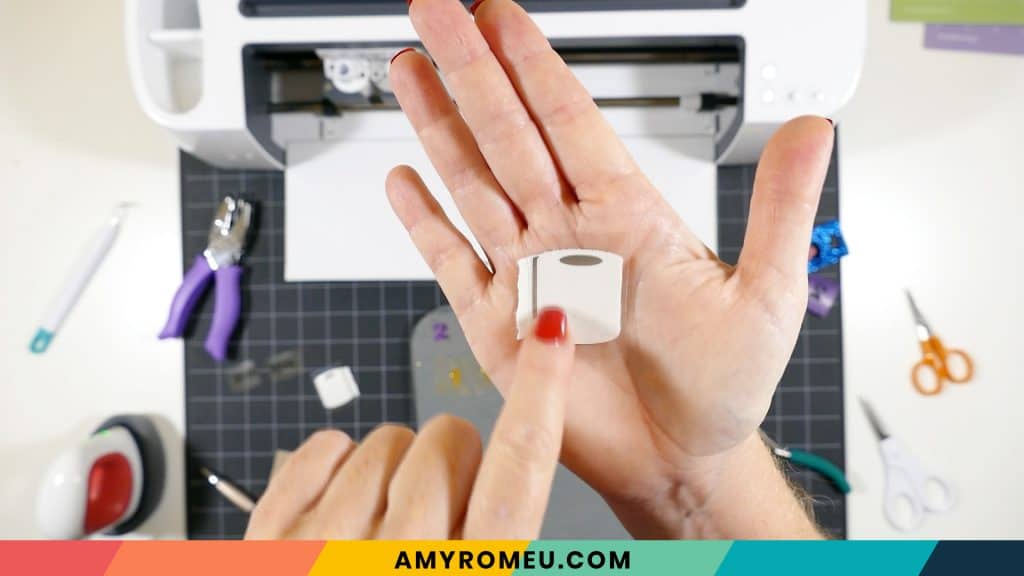
Cut a piece of white faux leather to the size you noted in the mat preview screen. Place your cut piece of faux leather pretty side down in the top left corner of a sticky purple cutting mat.
Now tape all around the faux leather with blue painter’s tape. Press the material down to your mat firmly with your hands.

Load the prepared mat into the Cricut by lining the mat between the mat guides and then pressing the double arrows button. Make sure your white star wheels are moved out of the way so they don’t leave marks on your faux leather.
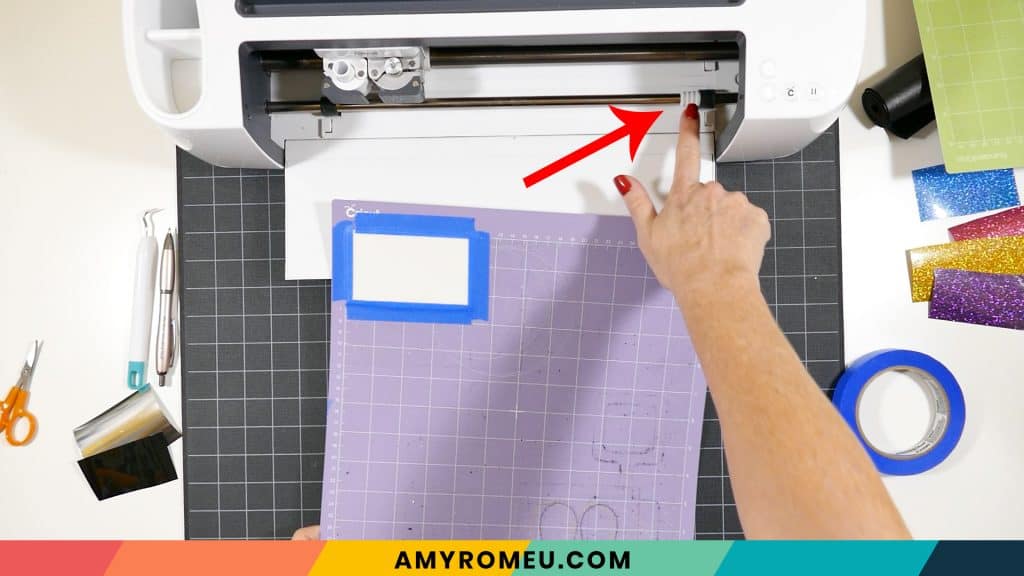
The “C” Cricut button will start to flash. Press the C button to begin the cut.
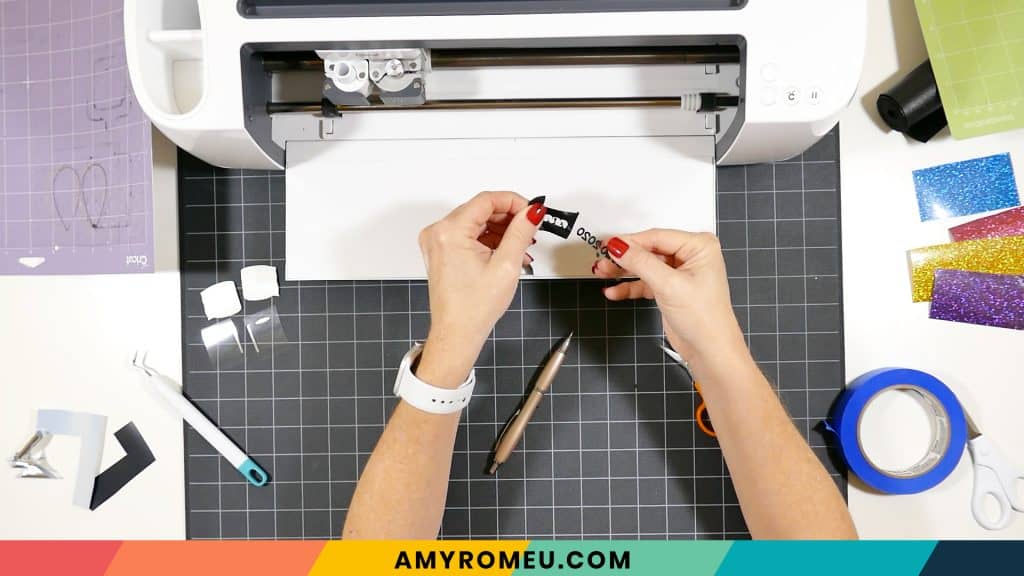
When the cut is finished, but before you unload the mat, use a sharp tool like your weeding tool and carefully lift the edge of the earring shapes to see if they cut all the way through. If they did, then click the double arrow button to unload the mat. If not, press the C button to make the cut again.
When the cut is complete, remove the shapes from the mat. Trim any fuzzies with small scissors.
STEP 6 – Cut Heat Transfer Vinyl Mats
Return to Cricut Design Space to start cutting the heat transfer vinyl mats in the order shown on the mat preview screen.
For the heat transfer vinyl mats, I’ll use the Washi Sheet setting for the solid black HTV and Foil Iron-On for the foil. If you’re using Glitter HTV, use the Glitter Vinyl setting.
I use the Default pressure for all vinyl cuts (I usually repeat the cut for glitter vinyl, however – just press the C button again to repeat the cut).
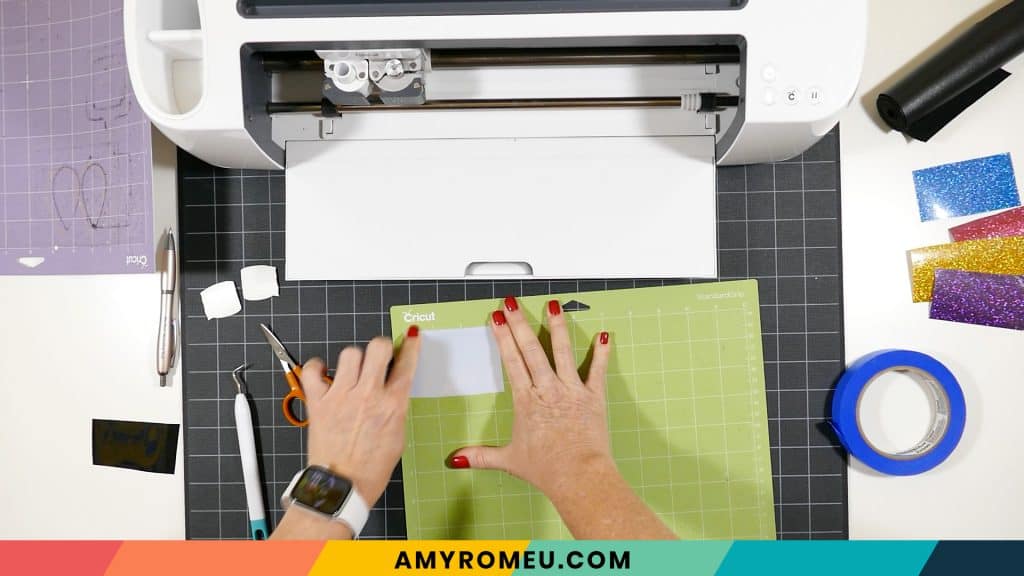
Place the vinyl shiny side down on a green cutting mat. Cut each vinyl mat using the appropriate cut setting and weed to remove the excess vinyl.
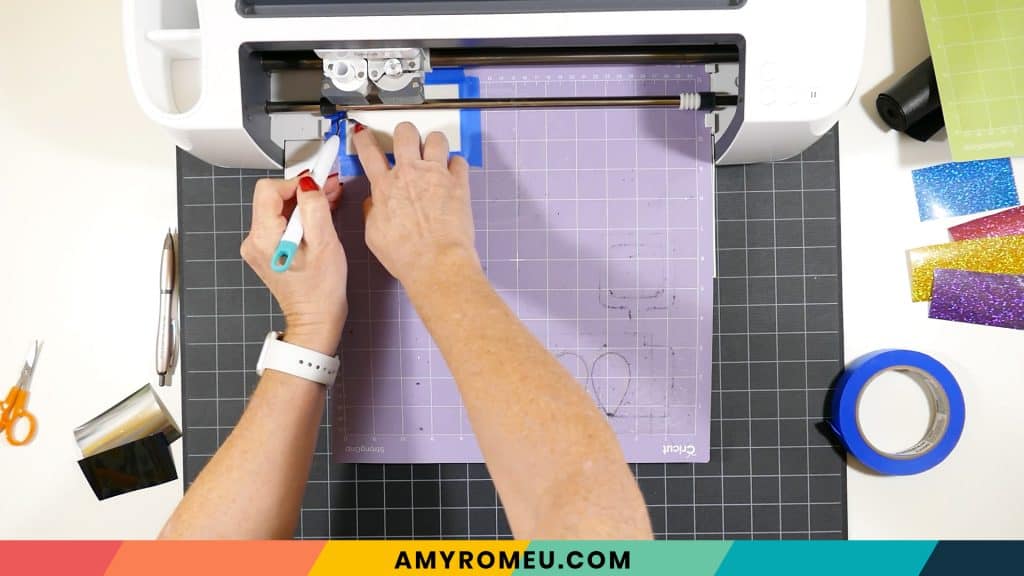
STEP 7 – Press the Vinyl onto the Faux Leather
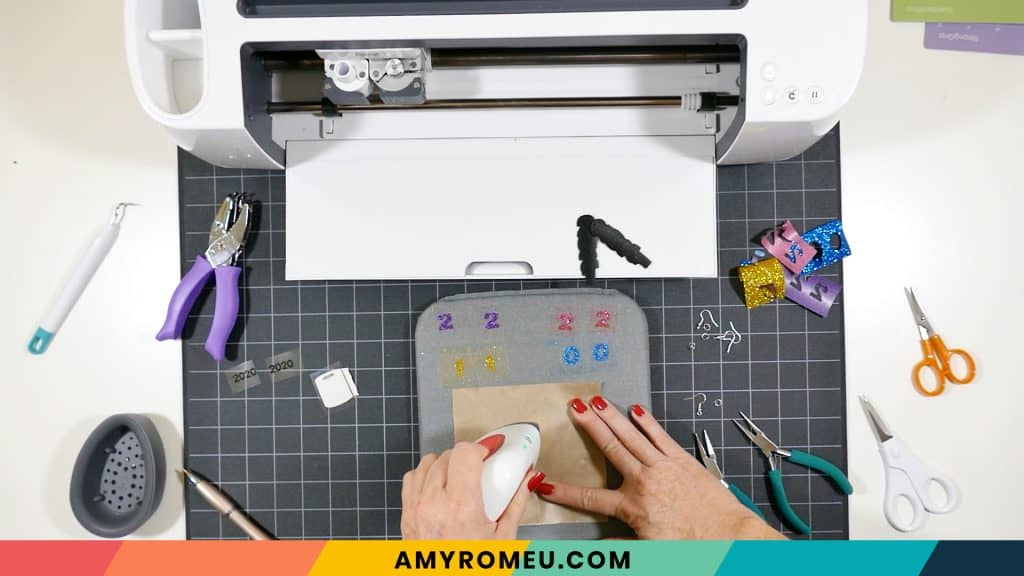
Using an Easy Press Mini (on the lowest temperature setting) or an Easy Press (set to about 275 degrees), press the two vinyl layers onto the toilet paper roll one at a time. Do the grey/silver detail first, then the 2020.
Cover with a cover sheet (teflon sheet or parchment paper) before pressing. Press this layer for 5-7 seconds, just long enough for the layer to adhere to the layer below.
Peel away the carrier sheet carefully. If the vinyl lifts up with the carrier sheet, lay the carrier sheet back down again and press more.
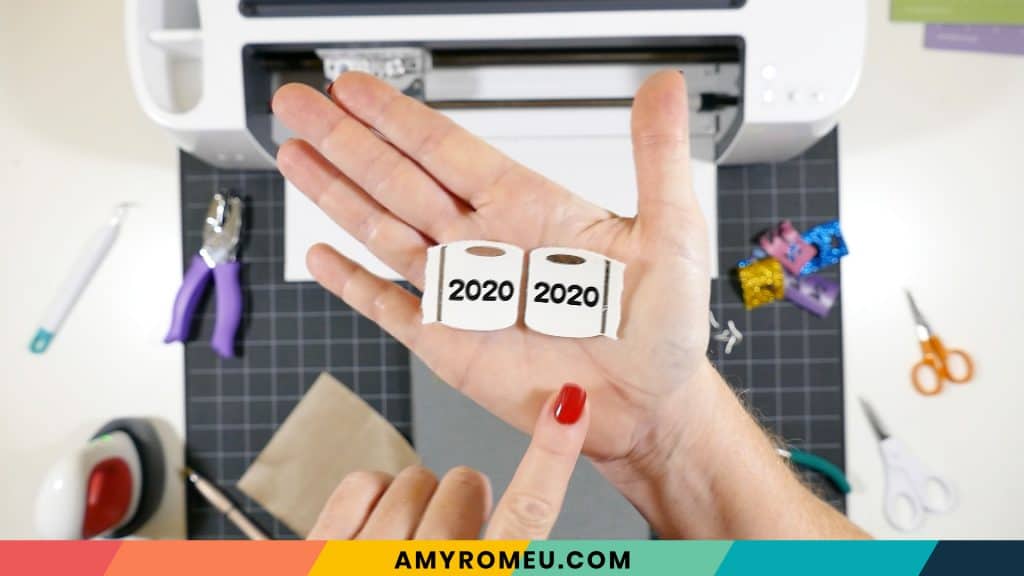
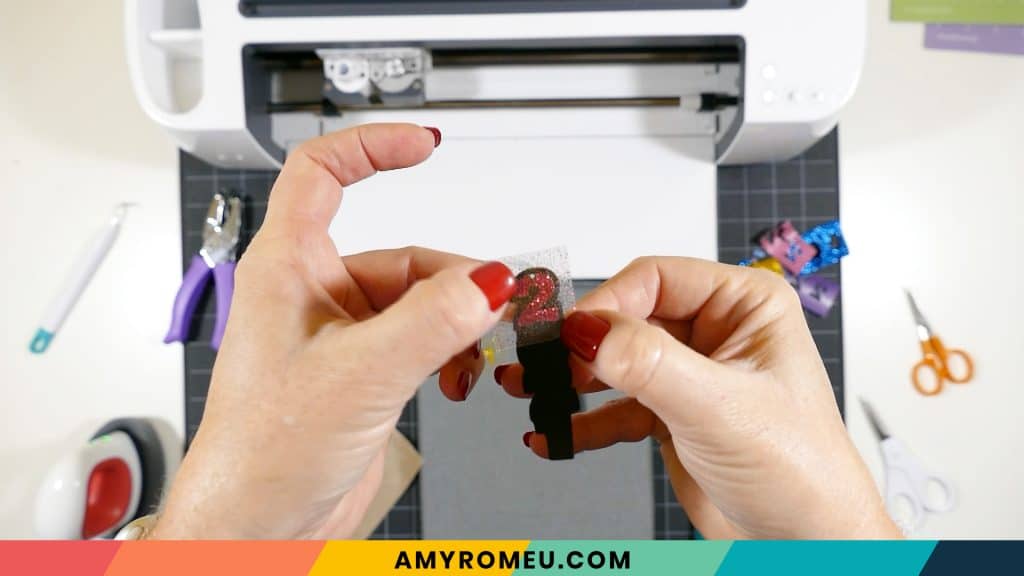
Layer on the 2020 text, and press again with a cover sheet over the toilet paper earring.
Then press the two layers of vinyl onto the other earring.
STEP 8 – Punch the Earring Holes
If you didn’t use the SVG with the pre-punched holes, use a 1/16″ hole punch to punch the earring holes. These are the two punches I use: this hole punch and this hole punch. They both punch through layers of faux leather very cleanly. If you don’t have a hole punch, you can use a sharp object to make the hole.
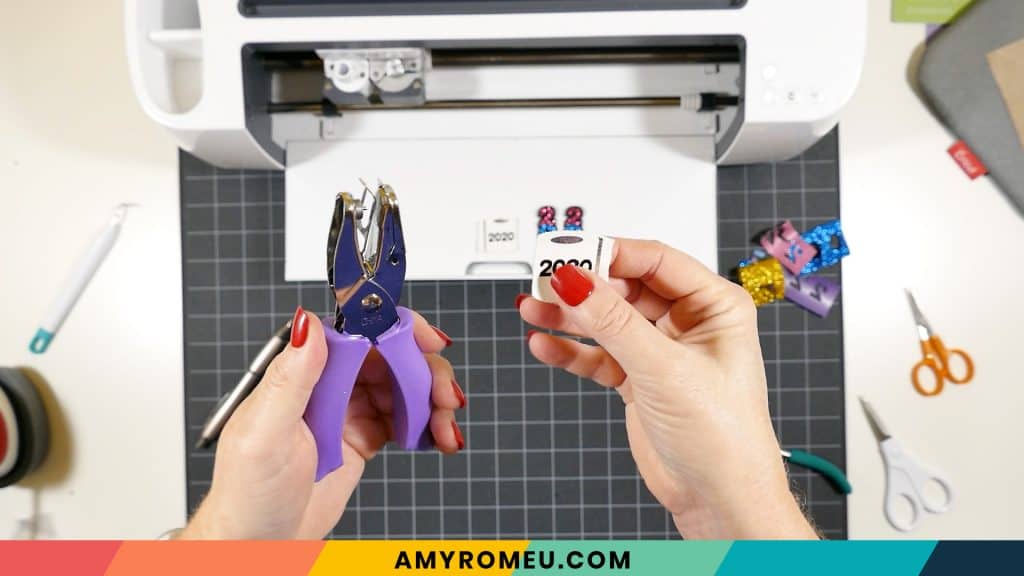
Punch the hole in the top of one earring, making sure the hole isn’t too close to the edge. Then use that earring as a guide to punch a matching hole in the other earring.
Now it’s time to attach the earring hooks.
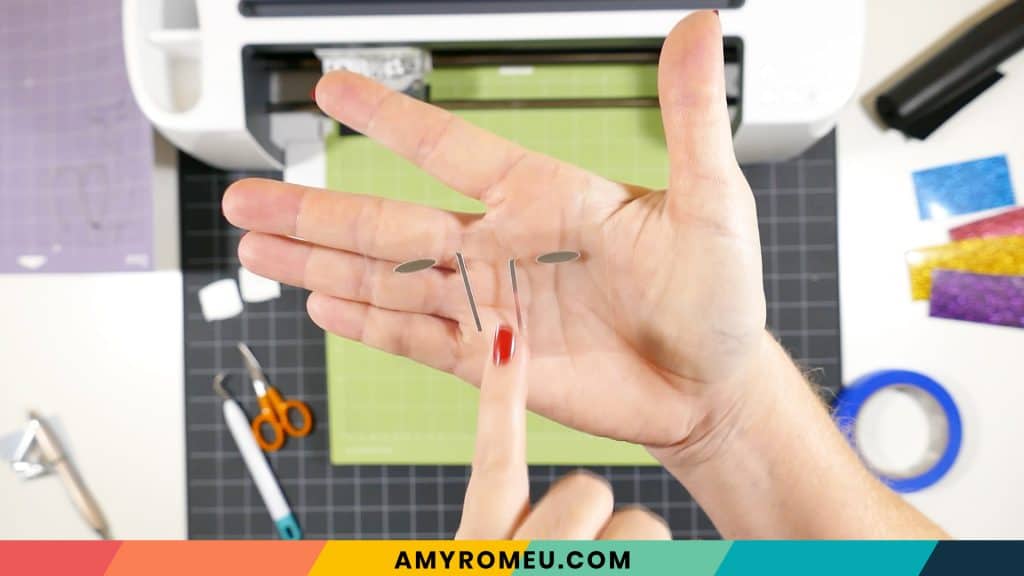
STEP 9 – Attach the Earring Hooks
To attach the earring hooks, you’ll need small jump rings (I like 6mm size, but 5mm is good, too), earring hooks, and two pairs of flat nose pliers.
To connect the earring hooks, you’ll first need to turn the bottom loop on the earring 90 degrees so your earrings will hang correctly.
For more details on this technique, visit my post about how to make faux leather earrings hang straight here.
Grip the earring hook between your thumb and forefinger with one hand, and use flat nose pliers to grip the bottom earring hook loop. Twist the wrist holding the pliers firmly so the loop turns 90 degrees.

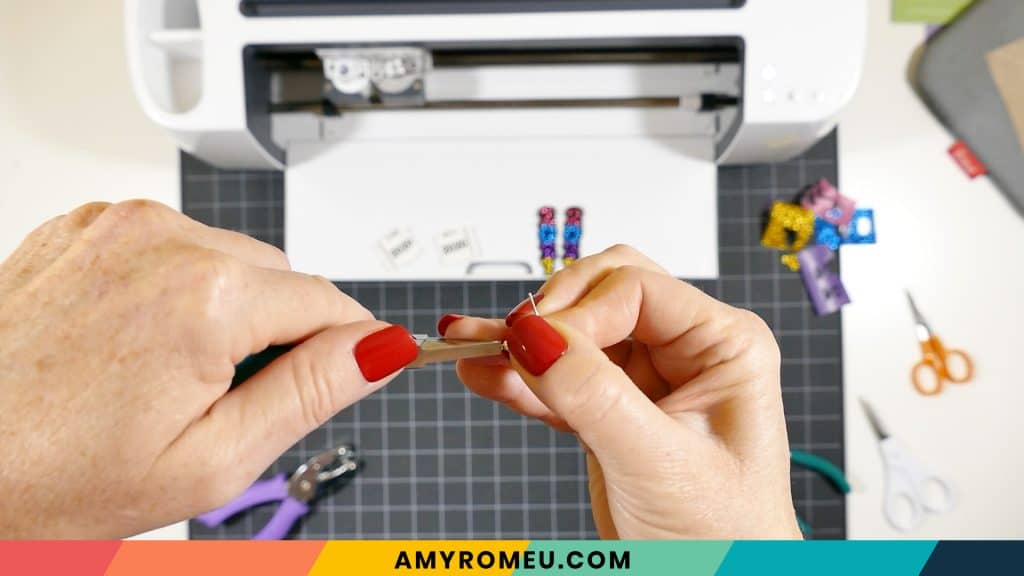
Once you’ve twisted the earring hook loop 90 degrees, use two pliers to grip each side of the jump ring. Make sure the opening of the jump ring is facing up in the 12:00 position on a clock face. Grip the jump ring firmly on each side with pliers at the 3:00 and 9:00 positions. Then twist one wrist to open the jump ring slightly without bending it out of it’s original circle shape.
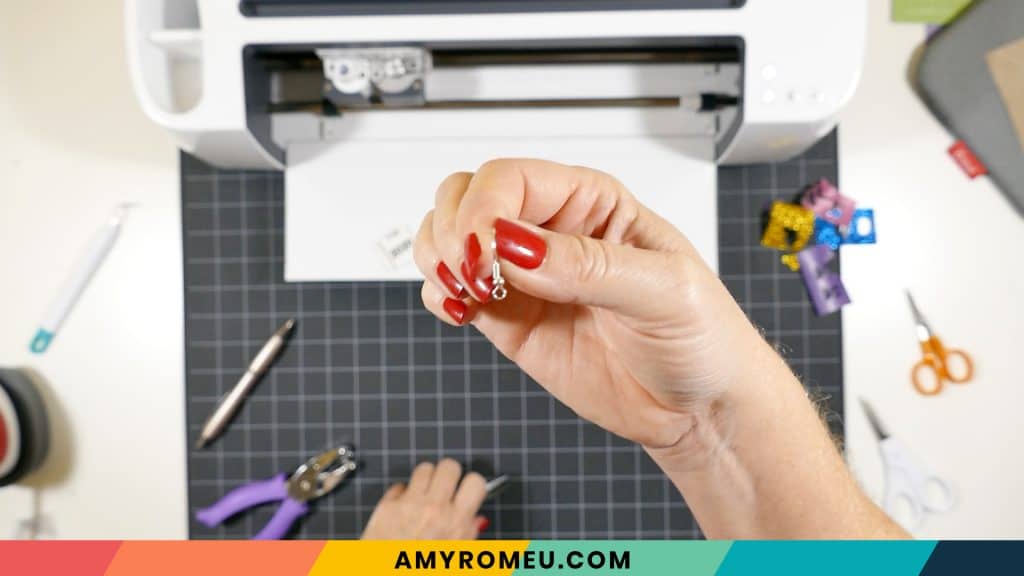
With the jump ring open, slide on the faux leather earring, and then add the earring hook. Be sure the hook is facing in the right direction.
Then use the second pair of pliers again to grip both sides of the jump ring and twist the jump ring closed again.
Repeat with the second toilet paper earring.
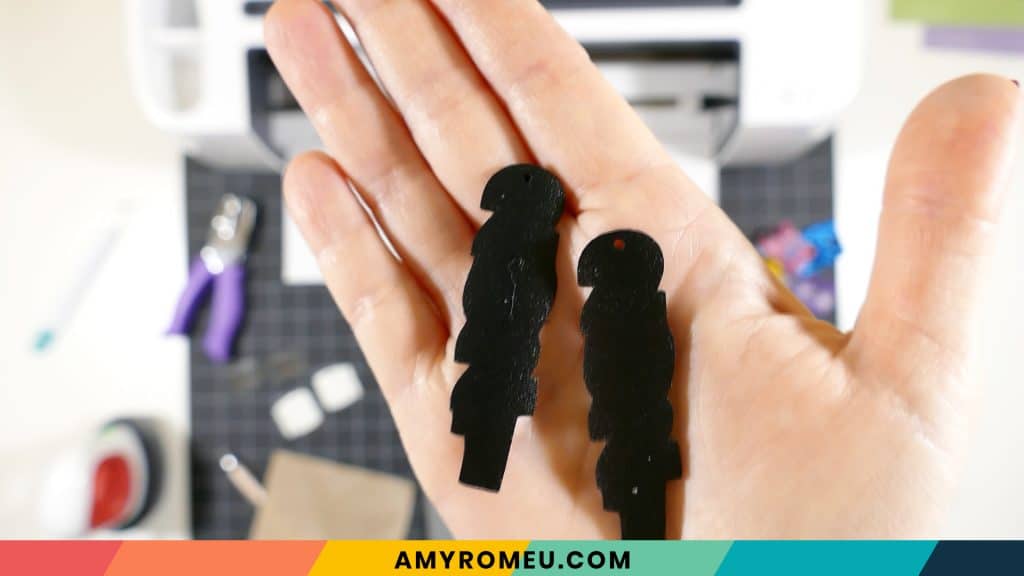
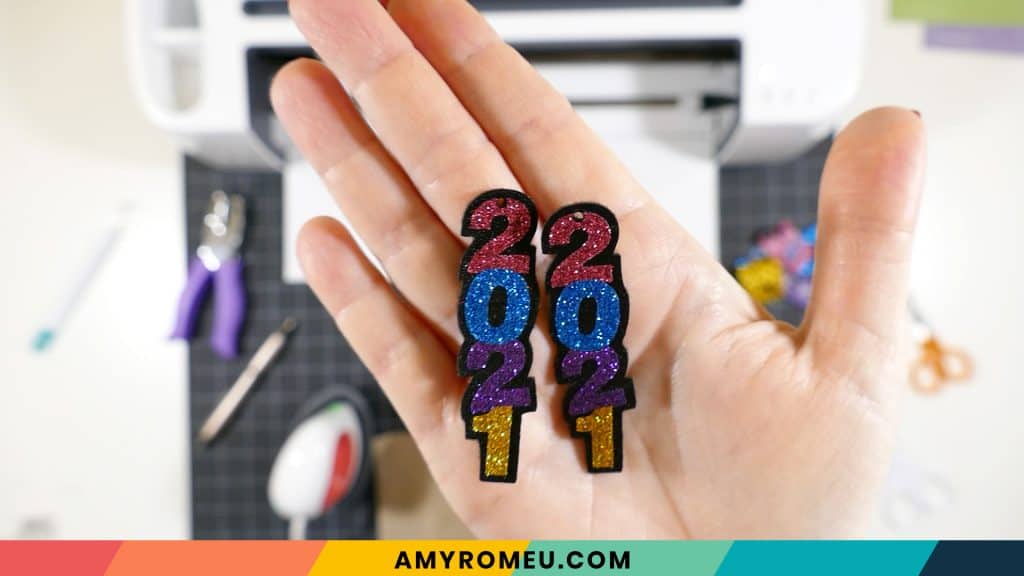
STEP 10 – Make the New Year’s Eve 2023 Earrings
NOTE: The free file in my library has been updated for 2023.
Repeat the cutting process for the 2021 earring shapes. It’s important to note that you’ll need to mirror ALL the mats, including the faux leather mat, before cutting.
This design includes numbers which must be mirrored before cutting from heat transfer vinyl. The faux leather design has the number shape outlines incorporated, so those shapes must be mirrored too.
Cut the faux leather mat with the faux leather pretty side down, taped on all sides, using the Faux Leather (Paper Thin) setting and “More” pressure.
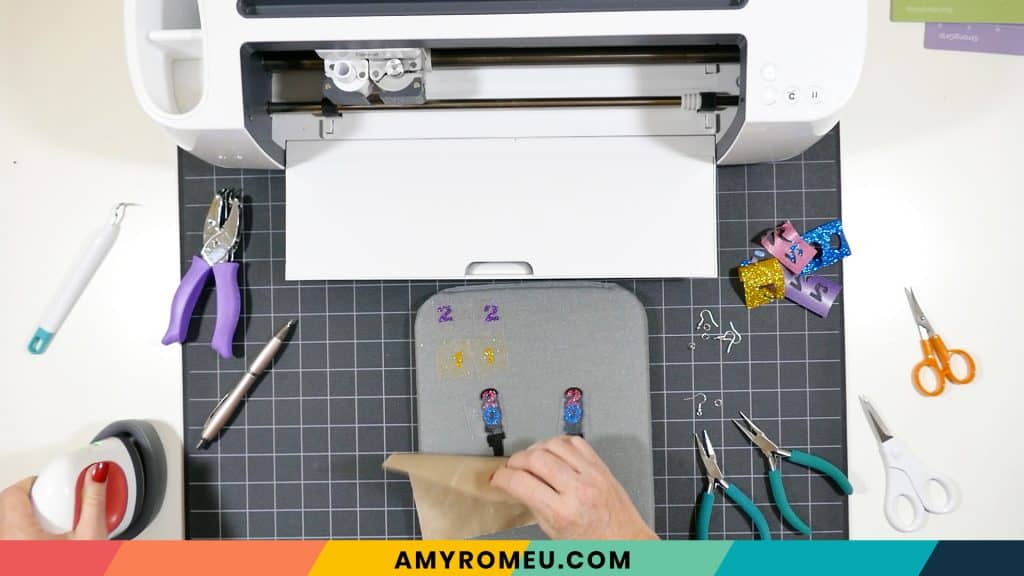
I cut the glitter vinyl layers using the Glitter Vinyl setting and “More” pressure.
Layer the vinyl numbers on the faux leather back one at a time and press one layer at a time with an EasyPress Mini, EasyPress, or home iron on a low setting with no steam.
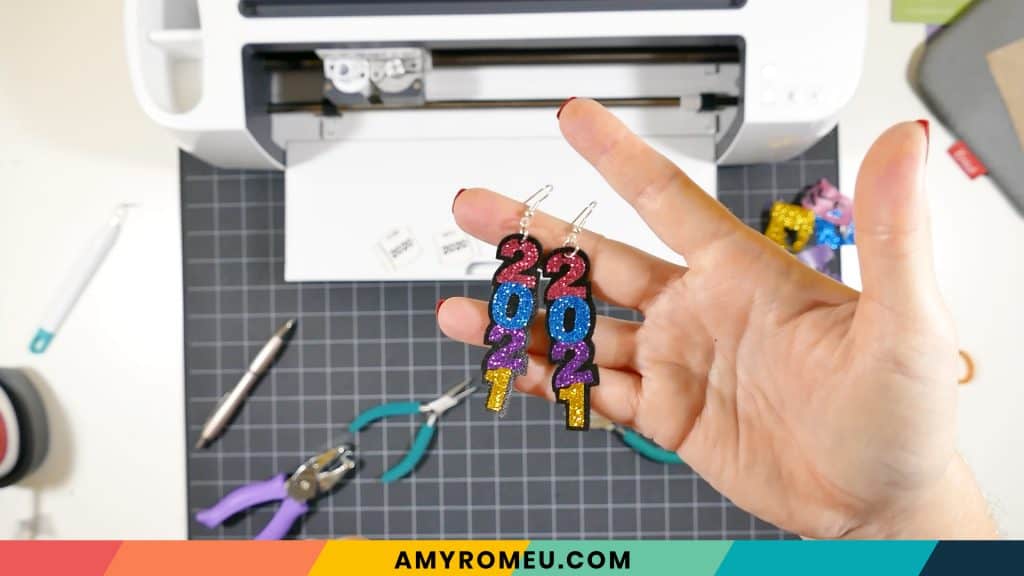
If you do make this project, I would love to see your 2020 Toilet Paper earrings and your 2023 New Year’s Eve earrings! Please share a photo of them in the comments, or tag me on Instagram: @amyromeucrafts
Want to see all of my Cricut earring & jewelry tutorials? CLICK HERE

WANT THE SVG FILES SO YOU MAKE THESE 2020 TOILET PAPER EARRINGS and 2023 EARRINGS YOURSELF?
You can get them from my FREE Resource Library by filling out the form below!
Want to remember this? Post this 2020 TOILET PAPER EARRINGS and 2023 EARRINGS project to your favorite Pinterest board!

Hi Amy-
I was just wondering if it is OK to use your designs for commercial use. I am working to start up a little shop to sell items with the profits to go to animal rescues and charities. I respect everyone’s creative property. I didn’t see anything specific on the page. Thanks…love your designs!
Hi, Suzanne! Thank you for your comment. I do offer commercial use licenses for my designs – I’ve sent you an email with more information. Thank you!
Hello I have the same question? I am looking in to selling some earrings I saw on here and I saw it says you can make for resale? Thanks for the great tutorials 🙂
Hello,
Thank you for writing. I do offer commercial licenses for the sale of earrings made from my designs. Please send me an email at [email protected] and let me know which design or designs you are interested in and I can assist you further. Thank you.
Amy
Amy~
Thank you for all the exciting projects the past 10 days. I am an earring nut, so love seeing that it is your specialty! I am excited for the drawing, although I’ve never had much luck with winning! Lol. Have a Happy Thanksgiving and stay safe! I am a Healthcare worker, and currently on leave as I have COVID 🙁 and it is not real fun to say the least, but at least had time to watch all your videos! God Bless
OMG!!!! This was so hard for me to pick just one project for the Poll. I loved all of them, I pick the Mask Holder because I found that was very clever and useful, Thank you so much for doing this, in a year where all of us in the world need some distraction and craft ideas!! Have an Amazing Thanksgiving Day!! A lot of Blessings for you and your family Amy!!
Amy I’ve loved all your 10 days of projects. Thanks so much for sharing your experience with us!
Did you put vinyl on the backs of these earrings? Like you did on the gingerbread and snowflake earrings in the Holiday Makerfest
Hi, Anna! I didn’t on these, but you can if you want to!
Oh I love the 2020 earings. Thanks for all the awesome crafts. Really enjoyed making everything. But I think my fav is the keychain because it’s something I can gift for friends and family to use year round.
Thanks for such a great 10 days of projects! With no travel plans this Thanksgiving holiday, I look forward to trying several of them out!! Thanks again and Happy Holidays!
Hi, Cindy! Thanks for your comment. That sounds like a great way to spend the holiday. I can’t wait to see what you make. Happy Thanksgiving! Amy
Hi Amy, I must be missing something because I cannot find the files for #161 in your Library. The last one shown is #159. Does that mean that I’m missing a couple of the patterns in my library? Please help because I love watching your videos and you make it look so easy. Thank you and have a blessed Thanksgiving.
Hi, Diane!
Thanks for your message. The files are there, I promise. 🙂 Your browser is not showing you the live page. To fix this, try refreshing or reloading the page a few times. If that doesn’t work, clear your cache and then refresh again. You can also try from a different device or browser.
Thank you.
Amy
Amy,
Thank you so much for all of the fun projects you’ve shared these ten days!
Your videos have, as always with yours, been so helpful and easy to follow!!
I’m new to my Cricut Explore Air 2 and have learned so much from you!
Thank you again, I hope you and yours have a fabulous Thanksgiving!!
Hi, Trudy! Thank you so much for your comment. I’m so glad you’ve enjoyed the 10 Days of Crafting. Happy Thanksgiving to you and your family, too!
Amy