
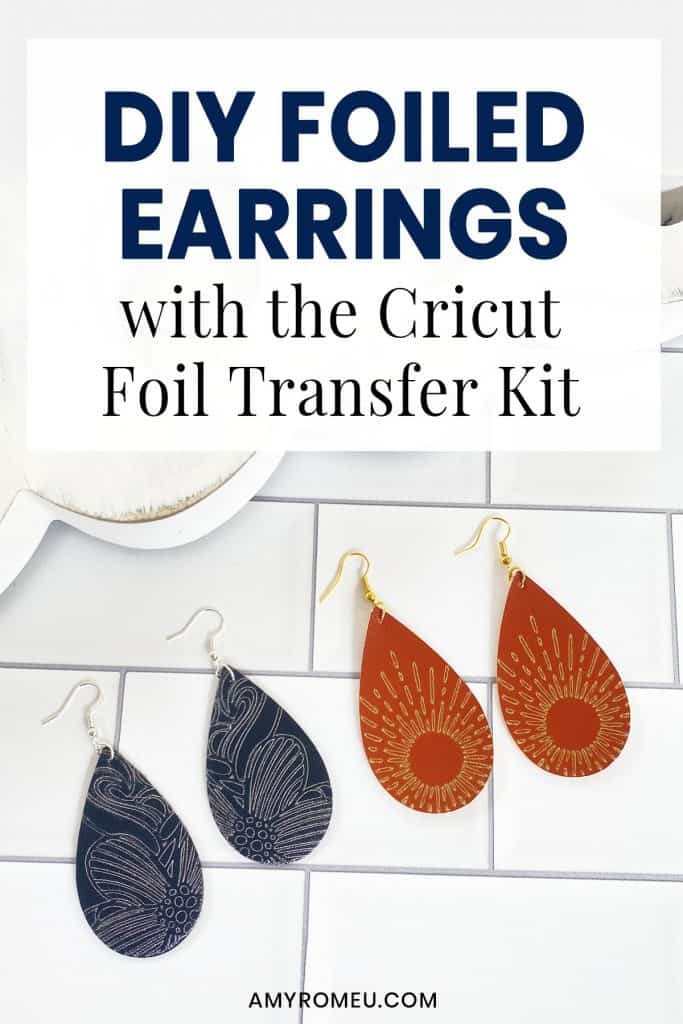
Foiled Faux Leather Teardrop Earrings with the Cricut Foil Transfer Kit

How to Make Foiled Leather Teardrop Earrings with the Cricut Foil Transfer System
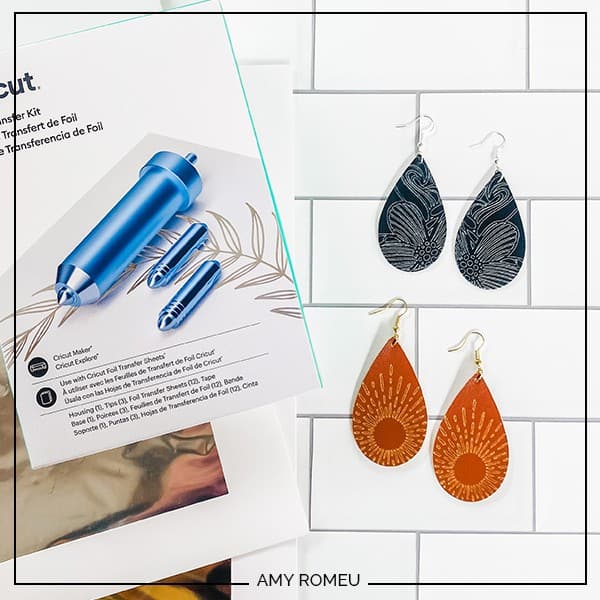
Cricut recently announced a new product in it’s crafting line-up – the Cricut Foil Transfer Kit – and I couldn’t wait to use it to foil some faux leather earrings! As soon as my Cricut Foil Transfer Kit arrived from Cricut’s website, I got straight to work designing some faux leather foiled earring designs. If you want to learn how to make foiled earrings with the Cricut Foil Transfer Kit, this post is for you!
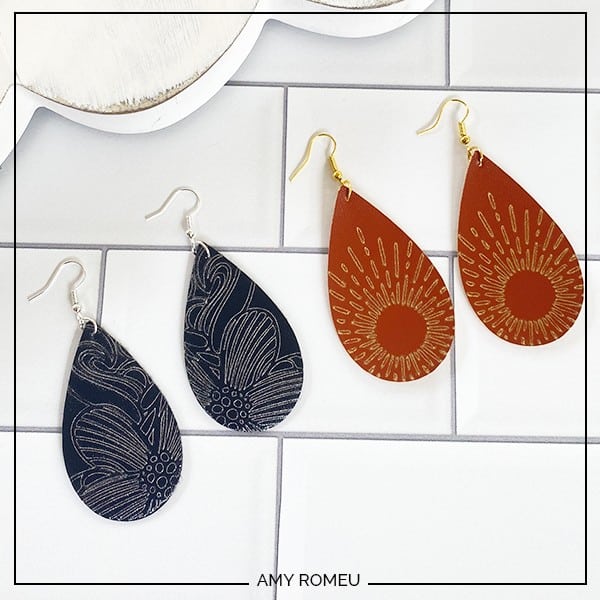
For these faux leather earrings, I’m using SMOOTH faux leather in black and tan, instead of using pebbled faux leather. The foiling kit works best on very smooth surfaces, and faux leather earrings are no exception! I’ll give you links to all the materials I used in the Materials list below.
There are few important things to note about the new Cricut Foil Transfer Kit before we get started:
- First, the foiling tip (like the knife blade) only works with desktop versions of Cricut Design Space (not the mobile app on iPhone or iPad).
- Also, the foiling tip works with the Cricut Maker and the Cricut Explore machine family, but NOT the Cricut Joy.
- Finally, Cricut recommends using faux leather instead of genuine leather for foiling.
If you like these earrings and want to try making foiled earrings yourself, you can get my original Foiled Teardrop Earrings SVG earring template files from my Free Resource Library! I’ll have the link to download my SVG file at the bottom of this post.
If you’d rather watch a video tutorial for this project, click here:
p.s. If you want to check out all of my Cricut Jewelry tutorials, click here.
Ready? Let’s get started!
This page contains some affiliate links (which means if you make a purchase after clicking a link, I will earn a small commission at no additional cost to you). Read my full disclosure policy here.
Foiled Faux Leather Earrings with the Cricut Foil Transfer Kit- Materials List
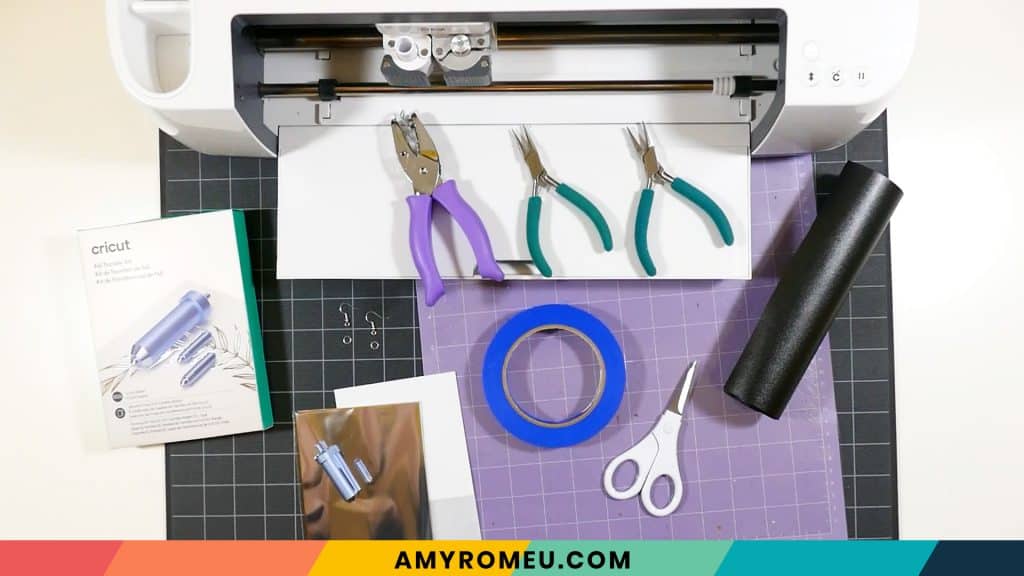
- Cricut Foil Transfer Kit – This kit includes the foiling tip housing and three foiling tips in fine, medium, and bold thicknesses. It also includes some foil sheets in silver, gold and white, as well as special Cricut foiling tape. Get the Cricut Foil Transfer Kit from Amazon here or from Cricut’s website here.
- A vinyl cutting machine. I have the Cricut Maker, available at Amazon here. You can also use the Cricut Explore Air 2 or any Cricut in the Explore family.
- SMOOTH faux leather in the color of your choice. I used this smooth black faux leather from Amazon and also this smooth brown faux leather (in the color Caramel) from Thicket Company on Etsy.
- Cricut Foil. (This is different from Foil Iron-On). I used the Silver and Gold that comes in the Cricut Foil Transfer Kit, but you can buy more like the Gold Foil pack here and the Silver Foil pack here. You can also buy colored foils from the Cricut website, like this pack of jeweled colors.
- Cricut Strong Grip (Purple) Cutting Mat. You can buy these on Amazon here.
- Blue painter’s tape. The regular hardware store kind, like this one from Amazon. This one is my favorite size, it’s not as wide as 1 inch.
- A weeding tool. I use the one in my Cricut tool set here.
- A small hole punch (for punching earring holes in the faux leather). This is my go-to hole punch for making Cricut earrings from Amazon here.
- Earring hooks – I used these silver toned shepherd’s earring hooks from Amazon.
- Small jump rings – I used the silver toned jump rings from this assortment of 6mm size jump rings in different metal finishes from Amazon here. You could also use 5mm size jump rings if necessary.
- Two pairs of flat nose pliers – I’m using one wide nose and one needle flat nose here, but you can use any two flat nose pliers. My favorites are Wubbers brand in the Baby size, on Amazon here.
Be sure to check out my post Beginner’s Guide To Jewelry Making Tools for all the information you’ll need to know about jewelry making tools.
- The foiled earring templates, design #151 in my Resource Library. To get the password via email instantly, fill out the form below, or the form at the bottom of this post.
PROJECT INSTRUCTIONS
STEP 1 – Download SVG from Library
Download the free SVG files for two Foiled Earring designs from my free Resource Library. Fill out the form at the bottom of this post to get the password to the library.
Save the zipped folder that downloads to your computer. You’ll need to unzip or extract the files FIRST so you can upload them to Cricut Design Space.
STEP 2 – Upload SVG to Cricut Design Space
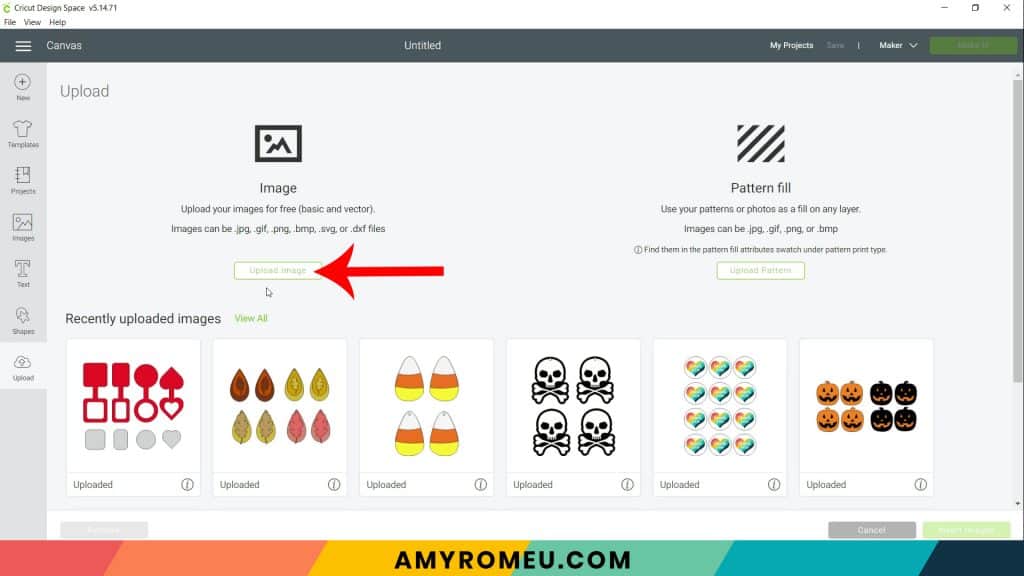
After you’ve unzipped the folder and made a note of the file location, open Cricut Design Space and click on New Project. Then choose Upload from the left hand side menu on the canvas.

Click on Upload Image and navigate to your saved (unzipped!) SVG file.
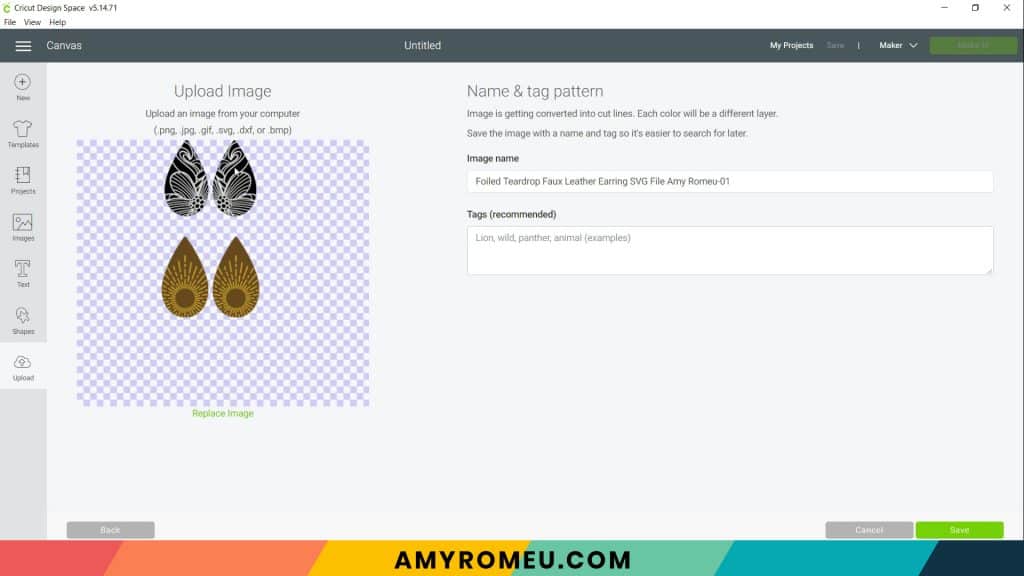
Double click on it to bring it into the upload screen in Design Space. You’ll see a preview of the file.
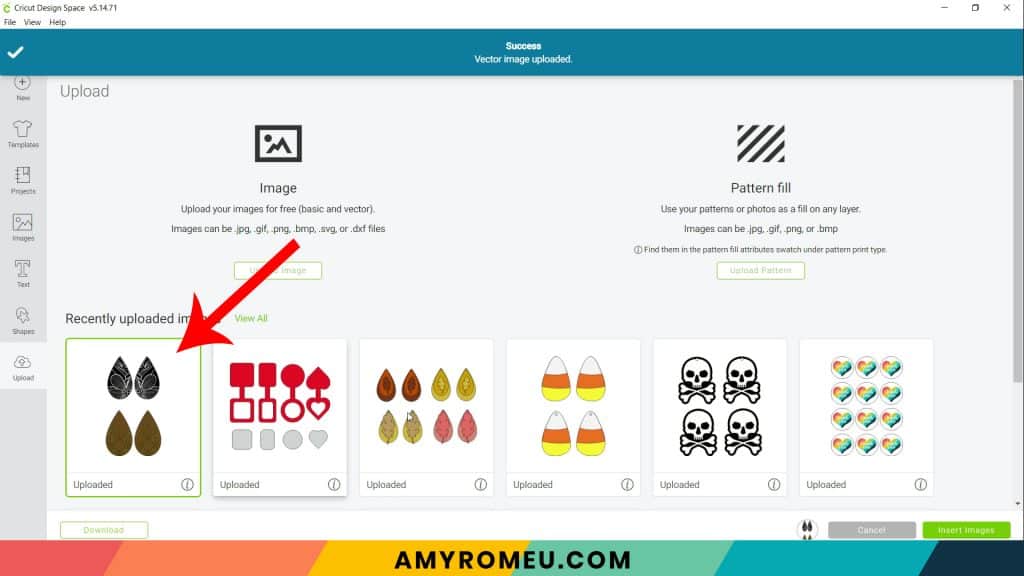
Click Save. Now you’ll see it as the first item in your “recently uploaded designs” row. Click on it and then click on the green “insert images” button in the bottom right corner.
This brings the design into Cricut Design Space. Drag the earring shapes up to the top left corner of your canvas.
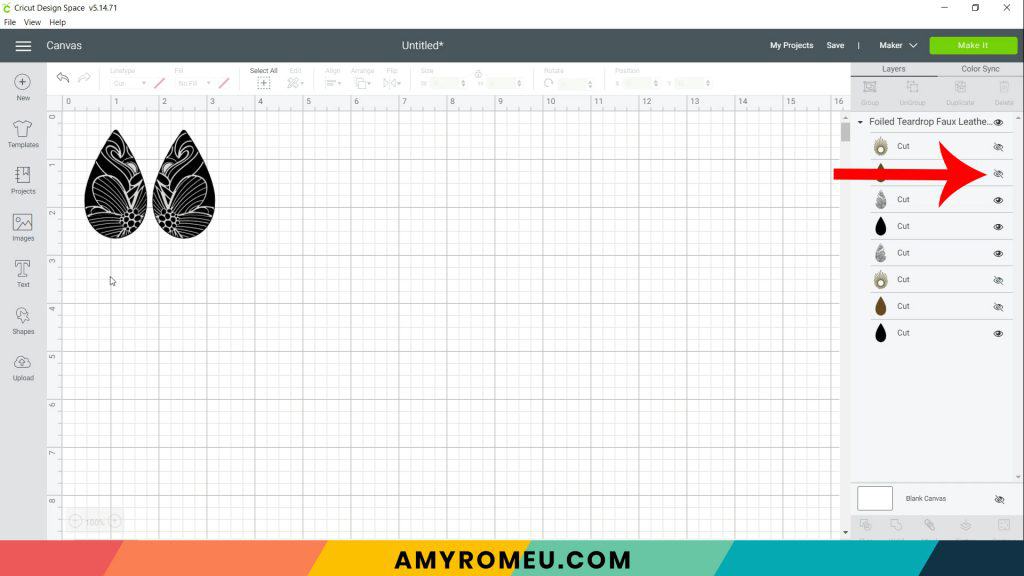
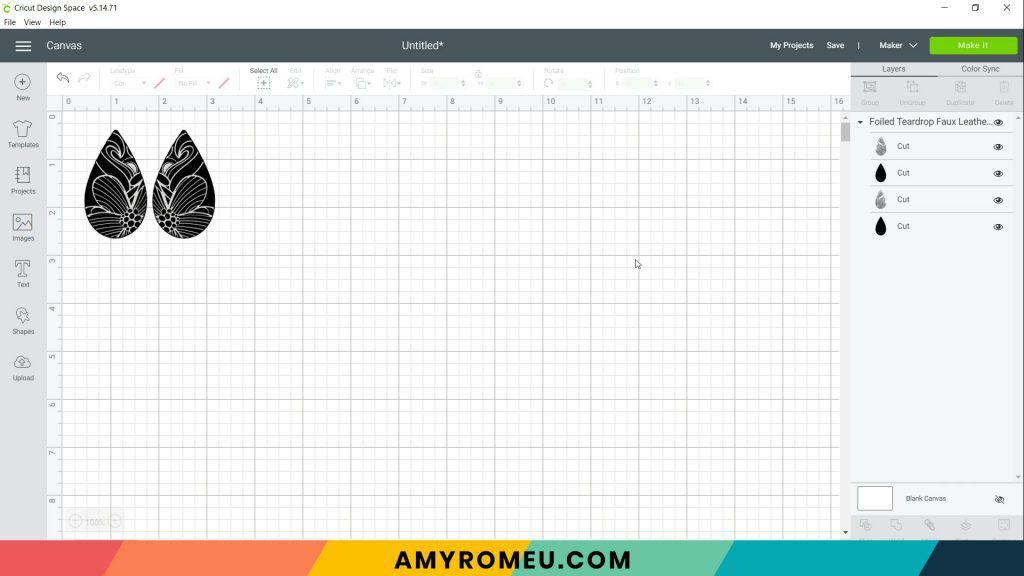
Hide the earring layers you won’t be cutting now – in this case, the brown and gold ones – by clicking the eye icon next to them in the layers panel. You can also click on those layers and delete them.
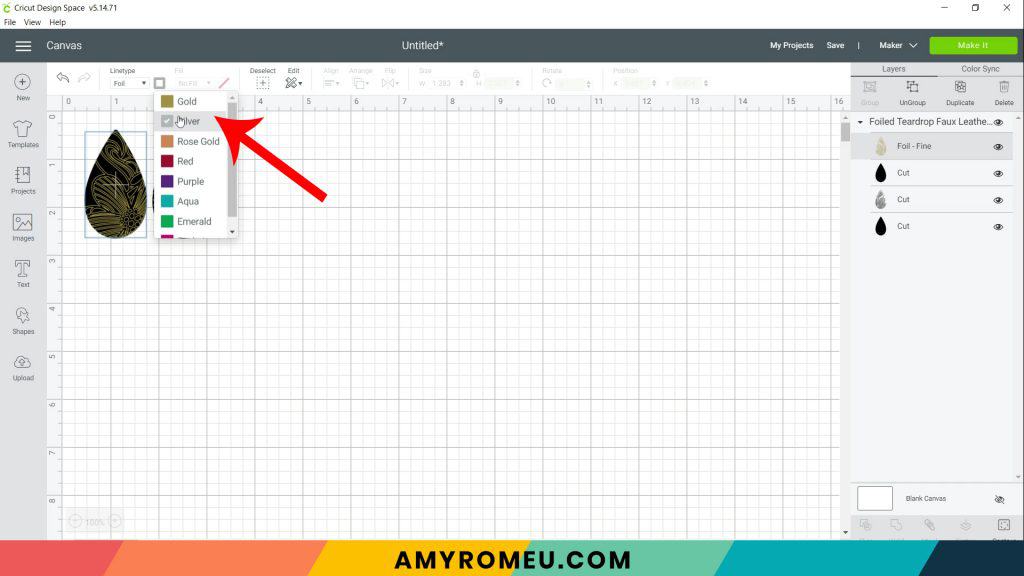
Now click on the first silver layer that will be foiled to select it. You should see a box around the layer on the canvas. Click on the dropdown menu under Linetype. Select Foil, and then Fine.
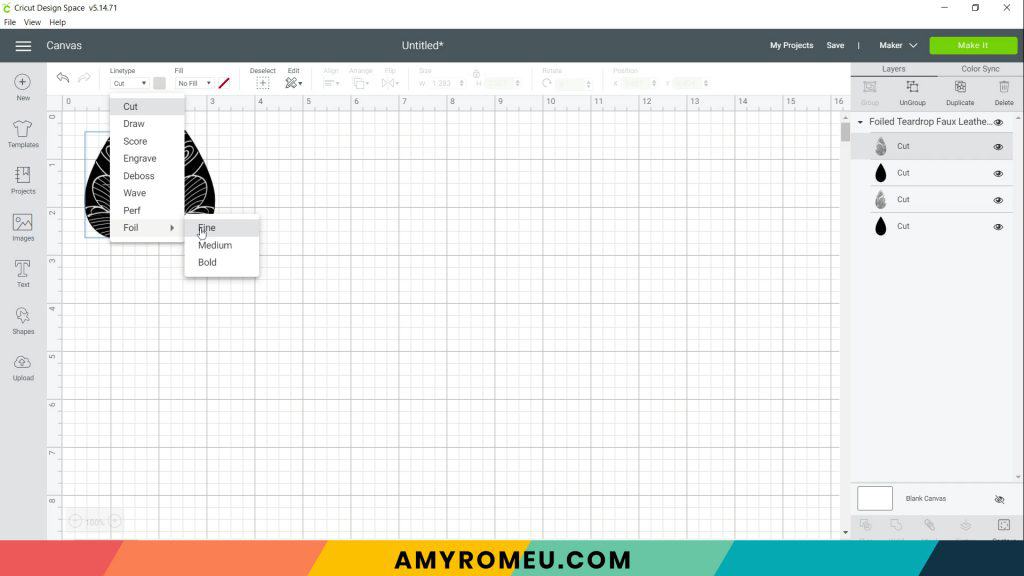
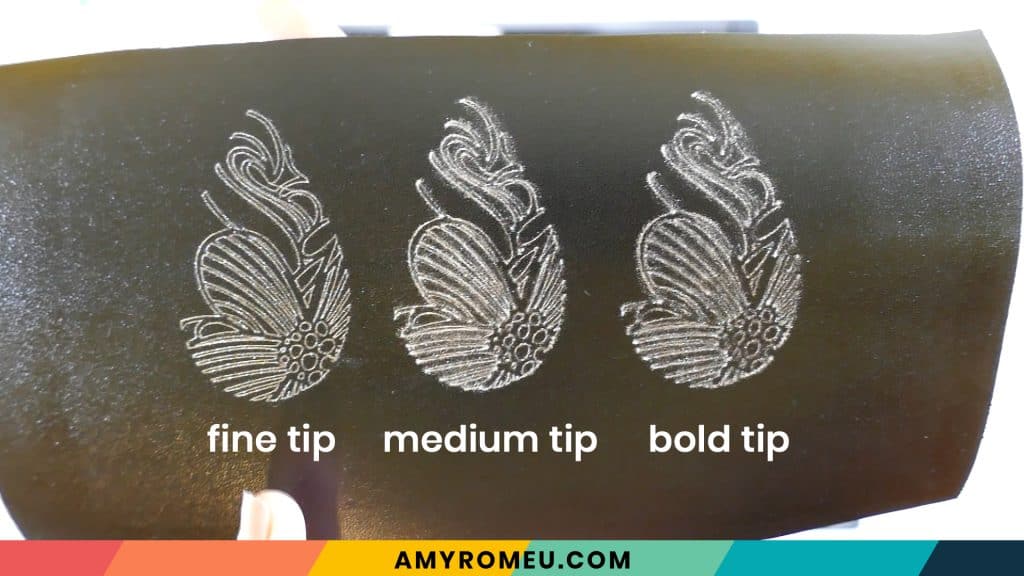
NOTE: I’m choosing the Fine tip for this design because I did a sample run with all three tip sizes, and the Fine tip worked best. This is how the design looks using each different tip:
After you choose Foil from the Linetype menu, the design will change colors to a gold foil color. Choose another foil color – in this case, Silver – to match the color you intend to use if you’d like. (This is just a preview of how your earrings will look, and the foil color you select doesn’t matter for the end product.)
Repeat these two steps with the second earring. Click on the foil layer to select it, change the linetype from Cut to Foil – Fine, then change the foil color to Silver.
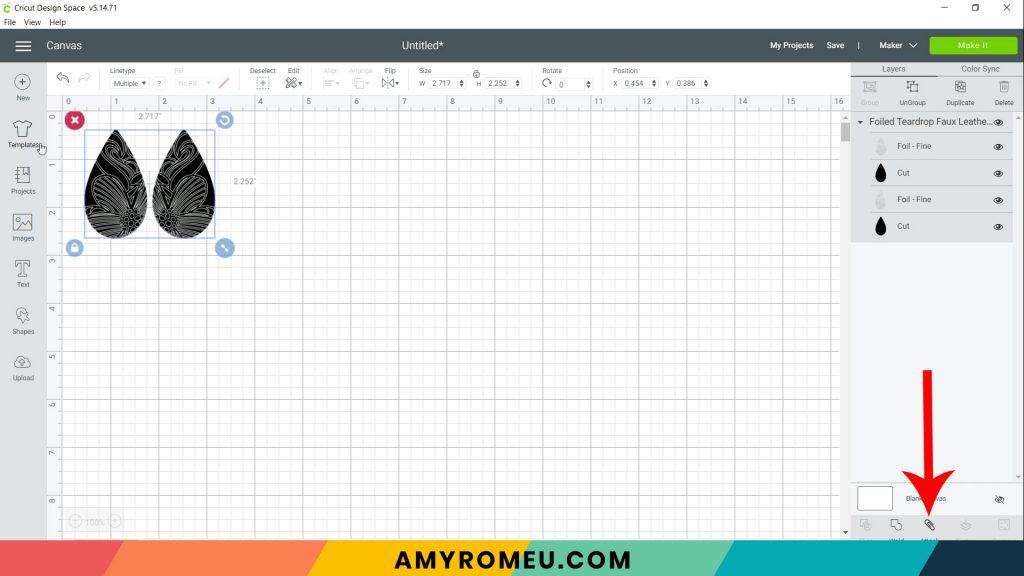
IMPORTANT!!! Now use your cursor to select both earring shapes together – this should draw a box around all of the earring shapes, as well as shade the layers in the layers panel to grey. With ALL of the layers selected, click ATTACH (the paperclip icon) at the bottom of the layers panel.
The layers must be ATTACHED for the foiling and cutting processes to work together properly.
Your canvas should change slightly and look like this, with the word ATTACH above the layers in the layers panel:
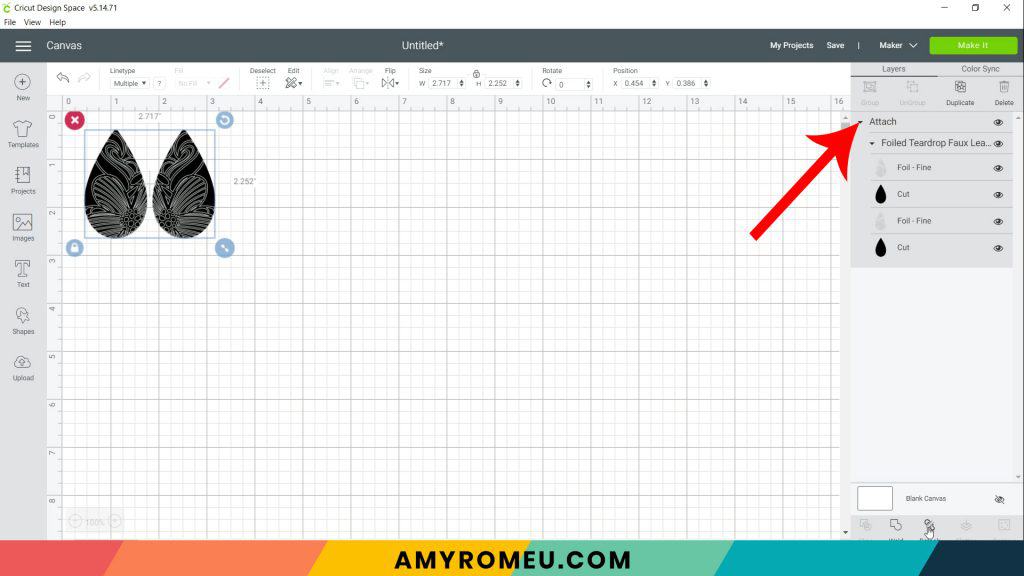
Once you’ve attached all of the layers together, click the green Make It button in the top right hand corner.
STEP 3 – Material Selection
After you click Make It, your mat preview screen will look like this. First, click on the earring shapes in the mat preview and drag them away from the left hand side of the mat preview, so the shapes will foil and cut away from the edge of the mat. You’ll see what I mean in the next step.
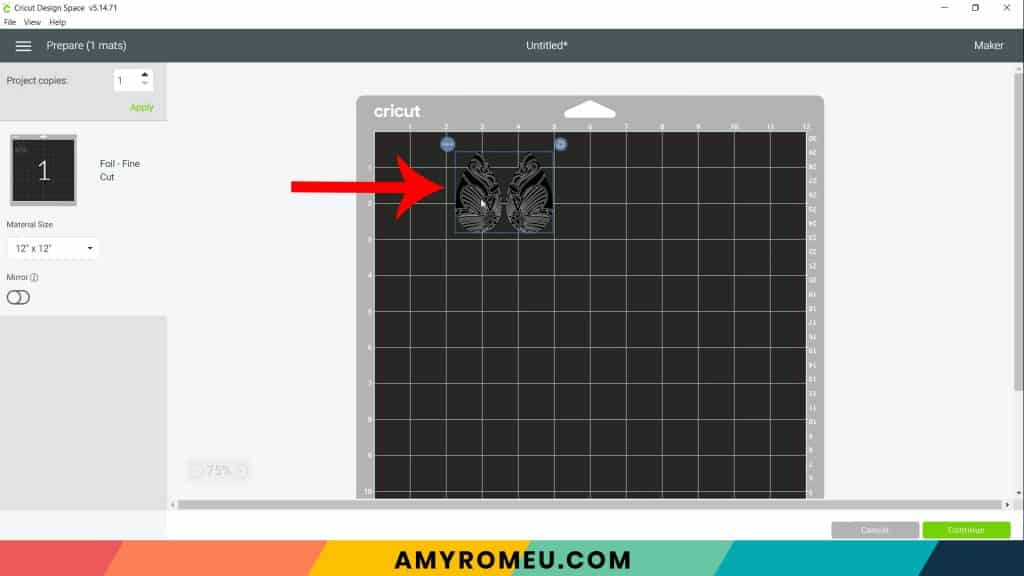
Next, make a note of what size faux leather you’ll need to cut so the shapes will cut out completely. I usually add an extra half inch to the minimum size when making earrings, but when foiling, you’ll want to add an extra inch of faux leather on all sides. Again, this will make sense in the next step.
Don’t MIRROR the mat, since foiling requires the faux leather to be placed face up on the cutting mat.
Click Continue to select your material. If you are using an Explore Air 2, be sure your dial is set to CUSTOM now.
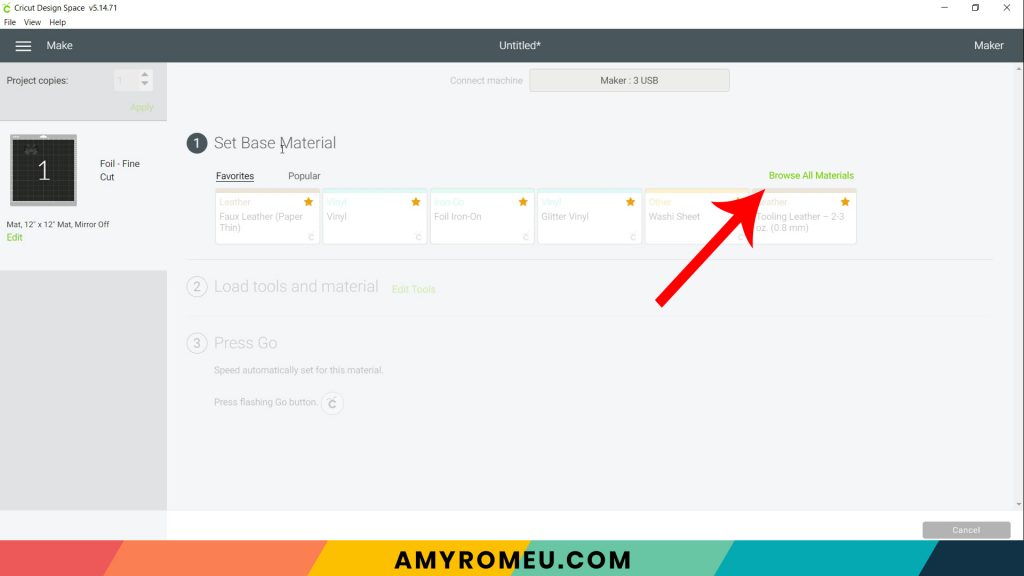
If you have the setting Faux Leather (Paper Thin) selected as a favorite, you’ll see it is greyed out and can’t be selected (on both the Maker and the Explore Air 2). Click on Browse All Materials to choose a material from a list of compatible base materials for foiling.
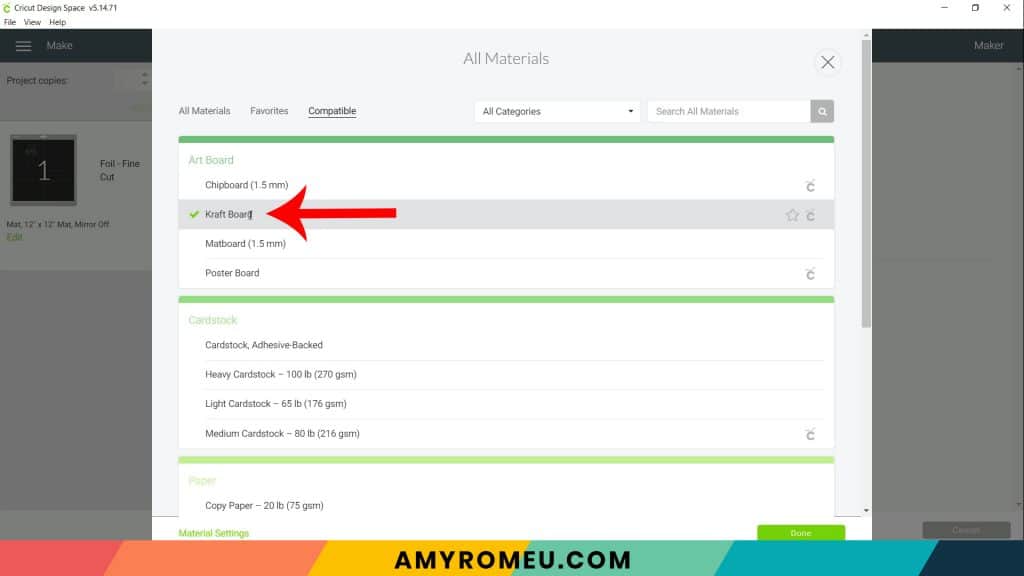
You need to choose a base material of a similar thickness. I chose Kraft Board when testing foiling on faux leather with both a Maker and an Explore Air 2, and this setting worked for both machines, but you may need to experiment.
Once you’ve selected your material, I suggest leaving the pressure dropdown at the Default setting. You can always make an adjustment for future projects if you find you need to.
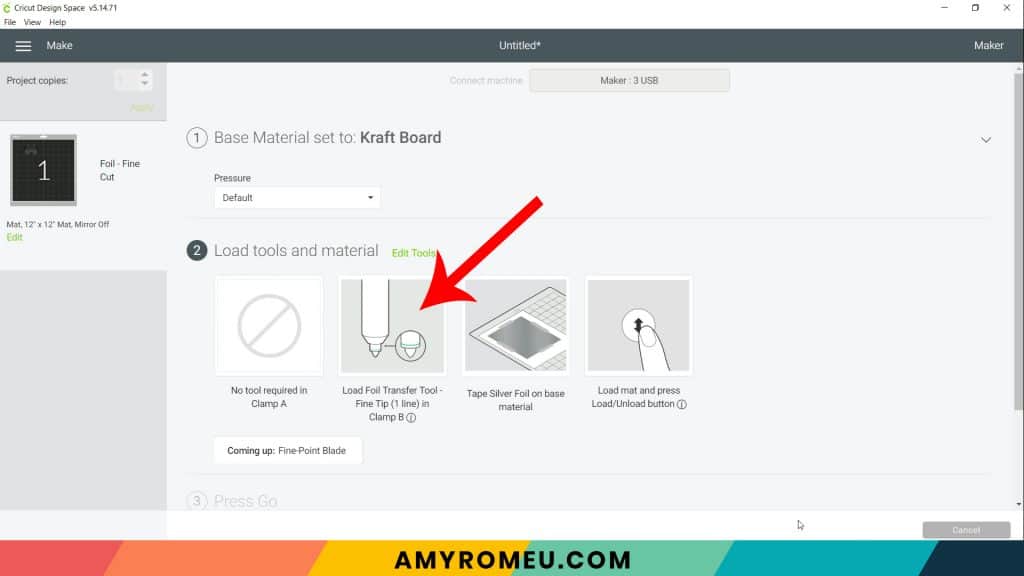
Cricut Design Space will instruct you to load the Foil Transfer Tool with the Fine Tip into Clamp B. I’ll show you how to do that in the next step.
Now it’s time to prepare the purple mat for foiling and cutting.
STEP 4 – Foil and Cut the Earrings
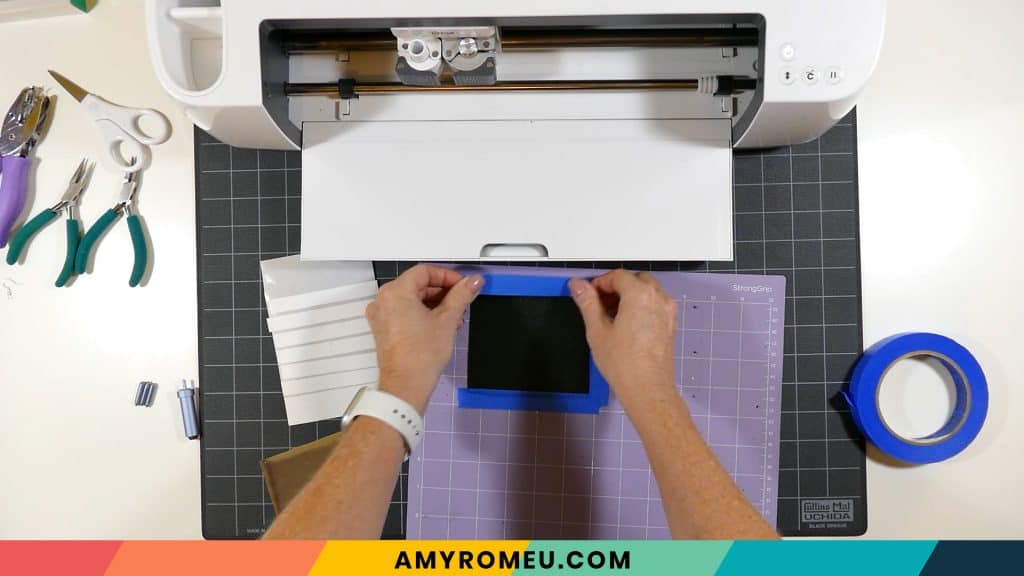
Place the smooth faux leather PRETTY SIDE UP on the location shown in the mat preview screen. I’ve placed my faux leather about two inches away from the edge of the mat. This is because we will be taping the faux leather down to the mat on all sides, and then taping down the foil. We don’t want the tape layers to be running underneath the mat guides on the Cricut over and over.
At this time, be sure your white star wheels on the roller bar are pushed all the way to the left or right sides so they don’t roll over your material.
Using the blue painter’s tape, tape the faux leather down on all sides.
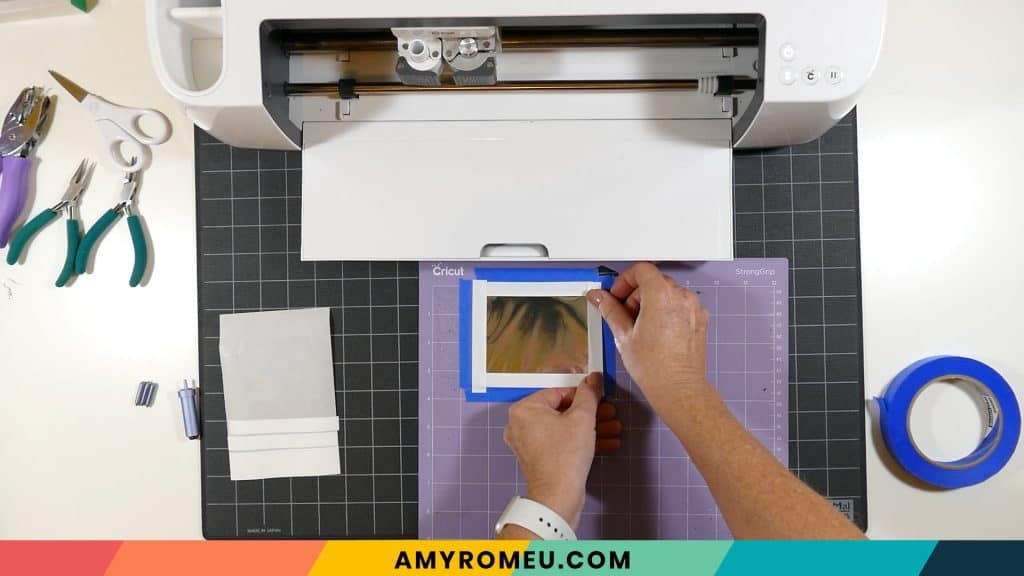
Now cut a piece of Cricut foil smaller than the faux leather piece. If the foil overlaps the faux leather and will touch the mat, trim the foil first! The foil will stick to your Cricut mat and that’s not what you want.
Place it shiny side up on the faux leather piece and use the special Cricut foiling tape to tape it down on all sides. It’s important to keep it as smooth and wrinkle free as possible, but it doesn’t have to be perfect. Try to have the tape stick to the faux leather and not the blue painter’s tape where possible (it will stick better).
I found that applying another layer of blue painter’s tape over where the white tape meets the blue tape helps to really keep the foil in place, but that may be overkill!
Insert the Fine tip into the Foiling Tool housing by depressing the plunger at the end of the housing and pressing in the tip before releasing the plunger. The tip should remain inside the housing.
NOTE: The tips are marked with lines to differentiate the different thicknesses – one line is the Fine Tip, two lines is the Medium Tip, and three lines is the Bold Tip.
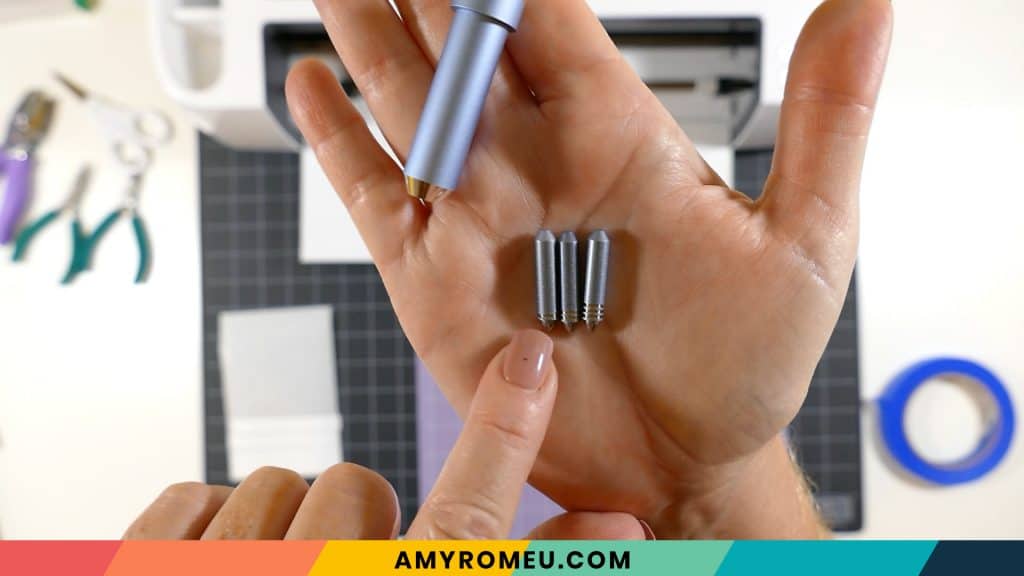
Insert the Foiling Tip Housing with the Fine Tip (one line) into Clamp B.
Load your mat into the Cricut and press the C button to begin the foiling process.
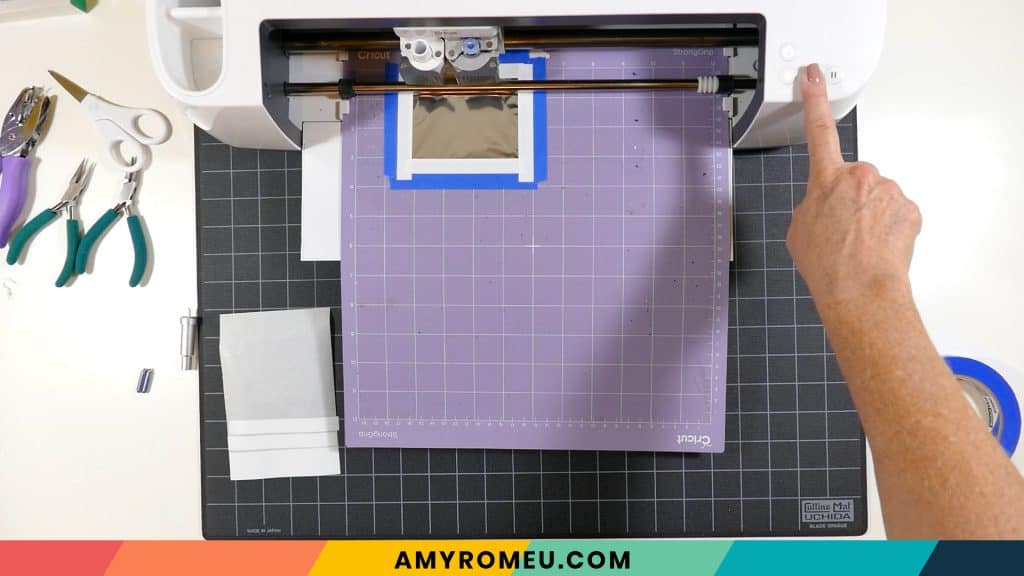
If your foil shifts around while foiling, press the pause button and use your fingers to press the tape down firmly again.
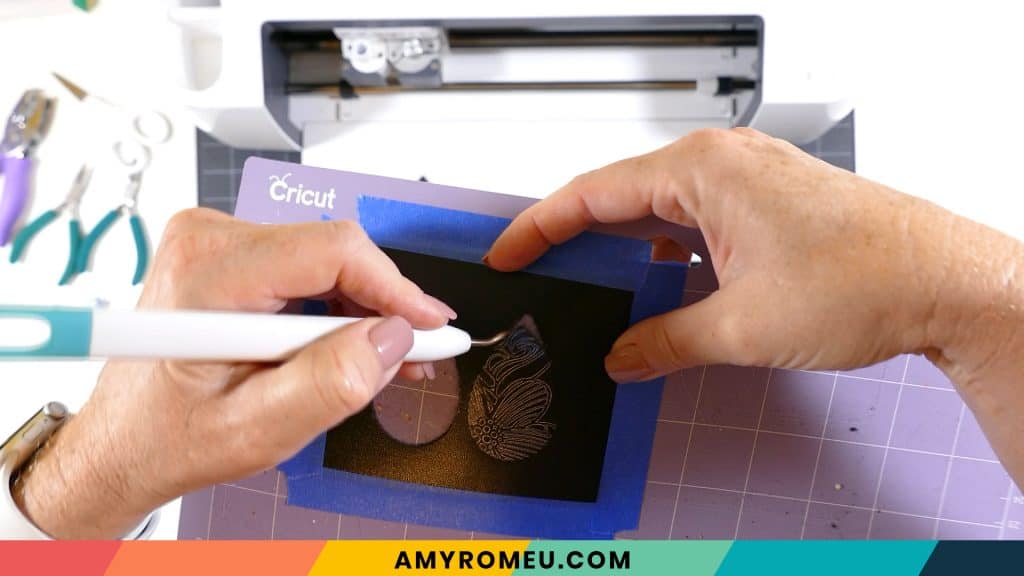
When the foiling is complete, DON’T UNLOAD THE MAT!!!
Cricut Design Space will prompt you to remove the foil. Peel it away carefully.(Don’t throw away the white foiling tape – it can be reused!)
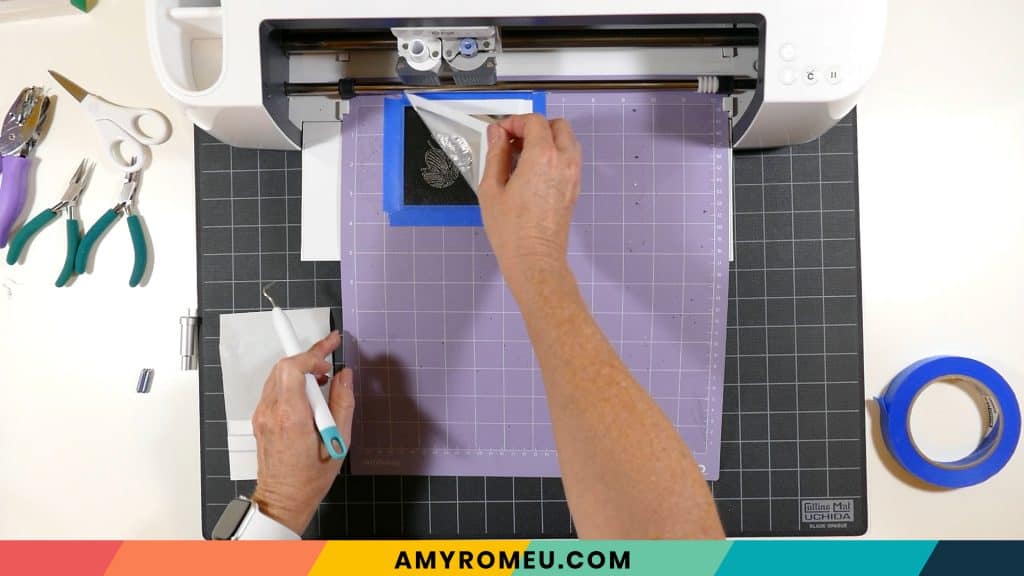
Remove the Foiling Tip Housing and replace the Standard Fine Point Blade into Clamp B.
Press the C button again to begin the cutting process.
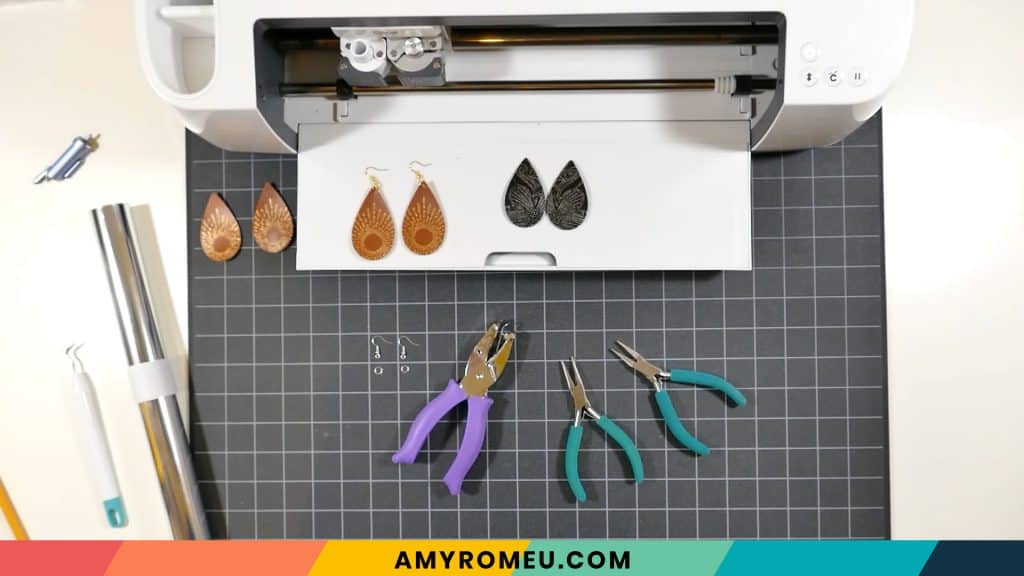
When the cut is complete, press the double arrows button to unload the mat. Remove the earring shapes from the mat and set them aside.
STEP 5 – Punch Earring Holes
I use a 1/16″ hole punch from Amazon here to punch the holes for the earring hooks. If you don’t have a hole punch, use a sharp tool. Punch a hole in both earrings, not too close to the top.

STEP 6 – Attach Earring Hooks
Now it’s time to attach the earring hooks. You’ll need earring hooks, two 5 or 6mm jump rings, and two pair of flat nose pliers.
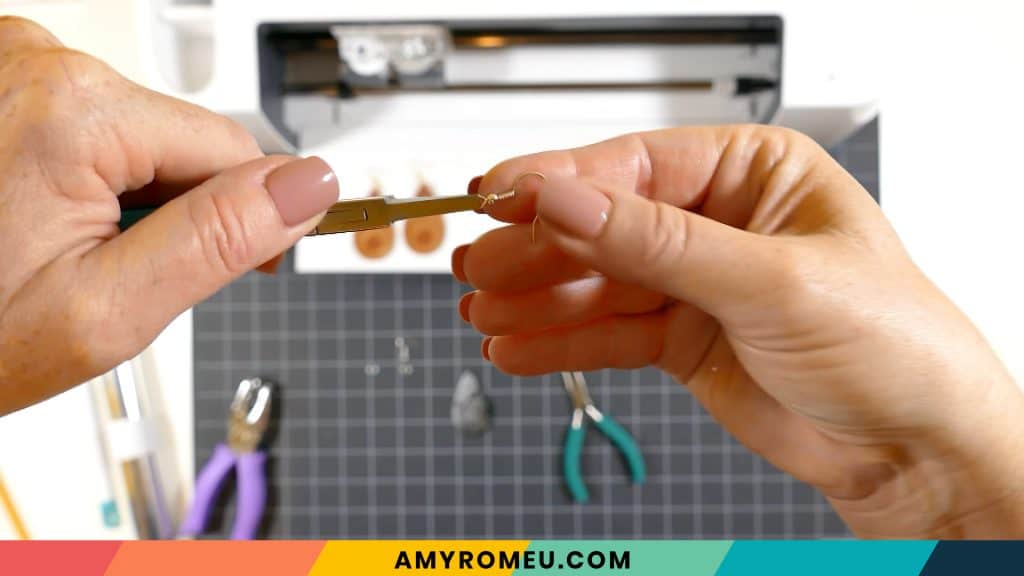
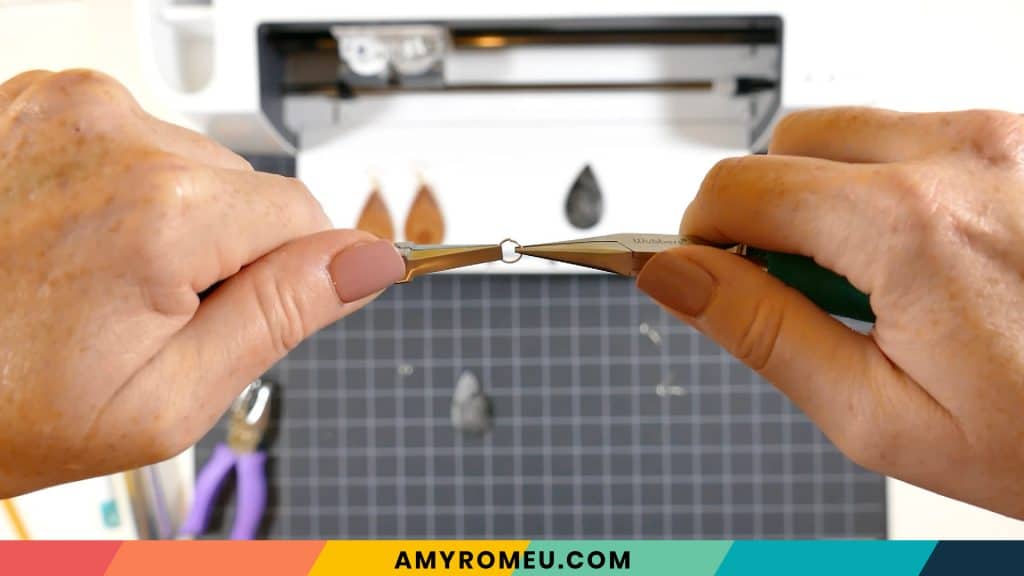
The first step is to twist the bottom loop on the earwire first so the earrings hang correctly from the jump ring. To do this, grip the earring hook between your thumb and forefinger, and then grip the earring hook loop inside flat nose pliers. Twist your wrist 90 degrees to turn the earring hook loop.
If you want to learn more about how to make earrings hang straight, visit this post, How to Make Faux Leather Earrings Hang Straight.
Now you’ll need to open your jump ring to slide the foiled earrings on. Using two pliers, grip each side of the jump ring, making sure the opening in the jump ring is facing up (the twelve o’clock position).
Rotate one wrist forwards or backwards, so the jump ring opens, but doesn’t bend out of it’s circle shape.
Slide your foiled faux leather teardrop earring shape onto the jump ring, then slide your earring hook onto the jump ring. Pay attention to which side is the front of your earring as you do this.
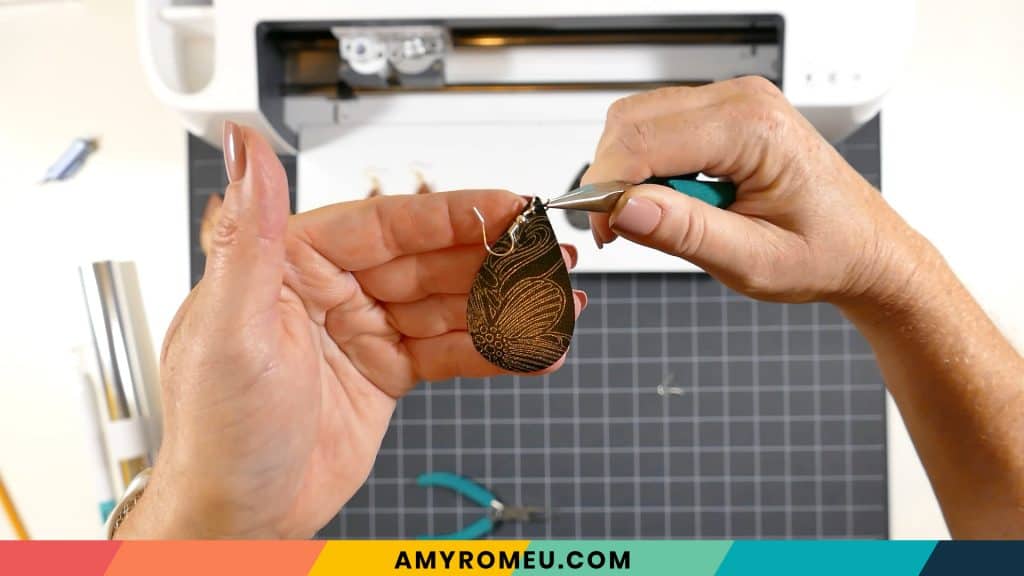
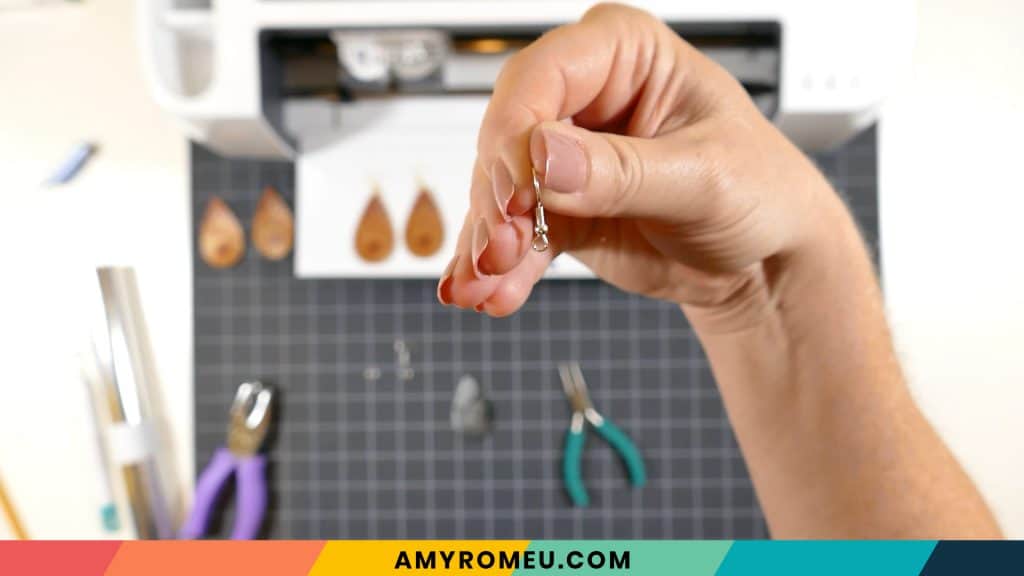
Now close up your jump ring using the same two pliers technique. Twist your wrist in the opposite direction than when you opened it, and the ends of the jump ring should meet up again perfectly. If they don’t, use your pliers to gently maneuver the ring closed.
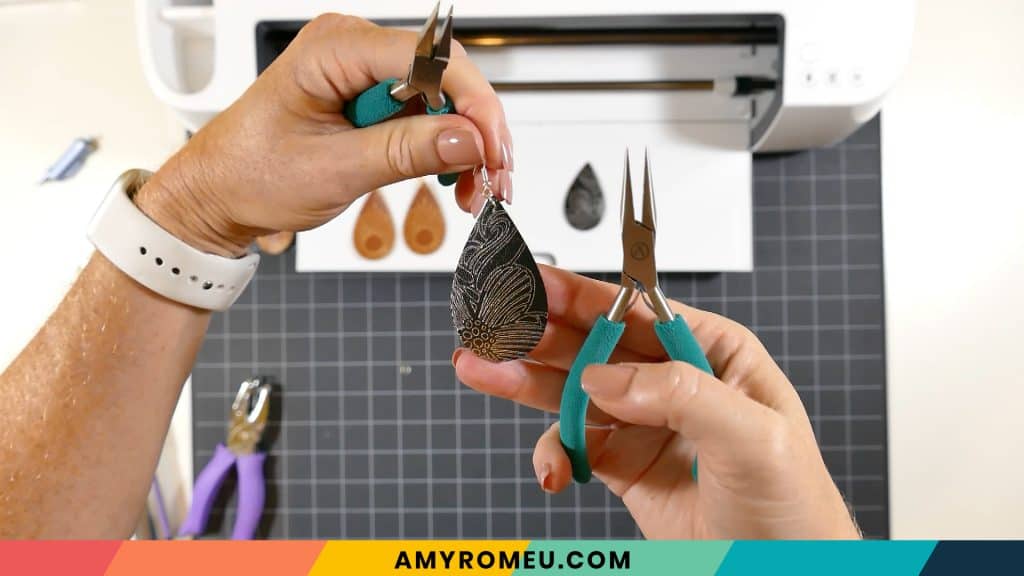
Repeat for the other earring. That’s it!
If you want to make the second earring pattern, the gold starburst on the caramel colored faux leather, use the Medium Tip for that design.
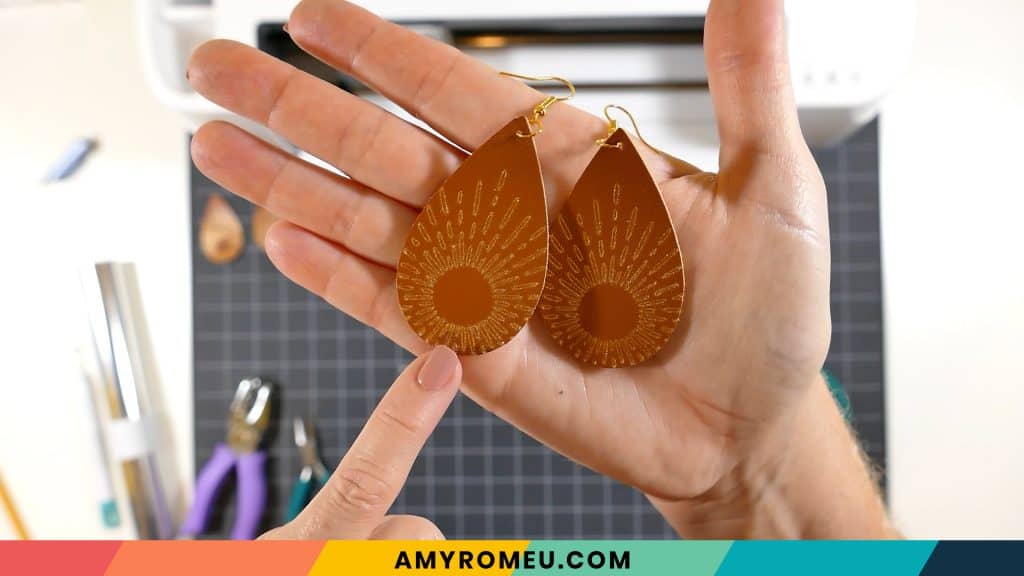
Are you going to try making these foiled faux leather teardrop earrings? It’s easy and fun, I promise! If you do, please send me a photo, or tag me on Instagram: @amyromeucreative. I’d love to see your work!
If you liked this project and want to see all of my Cricut Jewelry tutorials, click here.
Until next time… and happy creating!

Want the FREE SVG files you so you make these Foiled Faux Leather Teardrop Earrings yourself?
They are Design #151 in my Free Resource Library! You’ll receive the password for the Resource Library instantly after filling out the form below!
Want to remember this? Post this Foiled Faux Leather Teardrop Earrings project to your favorite Pinterest board!
I love these! I tried to make them and they didn’t cut all the way through. When I hit the C again, it started cutting the transfer pattern and not just the outside.
Hi, Lisa! I had the same question when I made my earrings. Fortunately my shapes cut out completely the first time, but I do like to have a back up plan if I need to repeat the cut. Normally I can press the C button like you did, but you’re right, the foiling process is different. I’m still testing and trying to figure out the way to repeat the cut if necessary. I’ll update my post when I come up with the solution. In the meantime, I would make sure your faux leather is one at cuts cleanly the first time if possible. Also be sure your pressure is set to “more.” Thank you for your comment!
Mine didn’t come out nearly as shiny as yours. Once I ironed on the back all the sparkle went away. The medium looked the same as the fine. I’m bummed, I was really hoping this would jumpstart my earring biz!
Hi, Lindsey! Thank you for your comment! I think the heat may mess up the foil effect somewhat. If you want to iron on a backing onto the faux leather, I suggest doing that first and then cutting and foiling the design. I have a YouTube video that shows how to do that: https://www.youtube.com/watch?v=Q1IK6EfA6c8
Where in your library can i find these at? Is there a number associated with this design so i can find it easier? Thank you
Hi, Lisa! Thanks for your comment. This design is #151 in my Resource Library. Thank you. Amy
Hi Lisa, I just made a batch of foil earrings. They are super cute. I have a problem and a question though. I’m finding that the foil actually wipes off very easily. I just read the comment above about a heat press eliminating the foil, but I have not done that. They are fresh off the cutter and just wiping off with my fingers. Is there some way we can seal these? I’m thinking a polycrylic spray of something similar. Have you ever tried that?
Hi, Karen!
Thanks for your comment. I would suggest trying a Polycrylic spray, too. Also I have a crafting friend who used a waterproof shoe spray to keep the foil on the faux leather. You can read more about her technique in her blog post here: https://nelidesign.com/faux-leather-and-foil-how-to-make-luggage-tags/
Let me know what you end up trying and how it goes for you!
Amy