
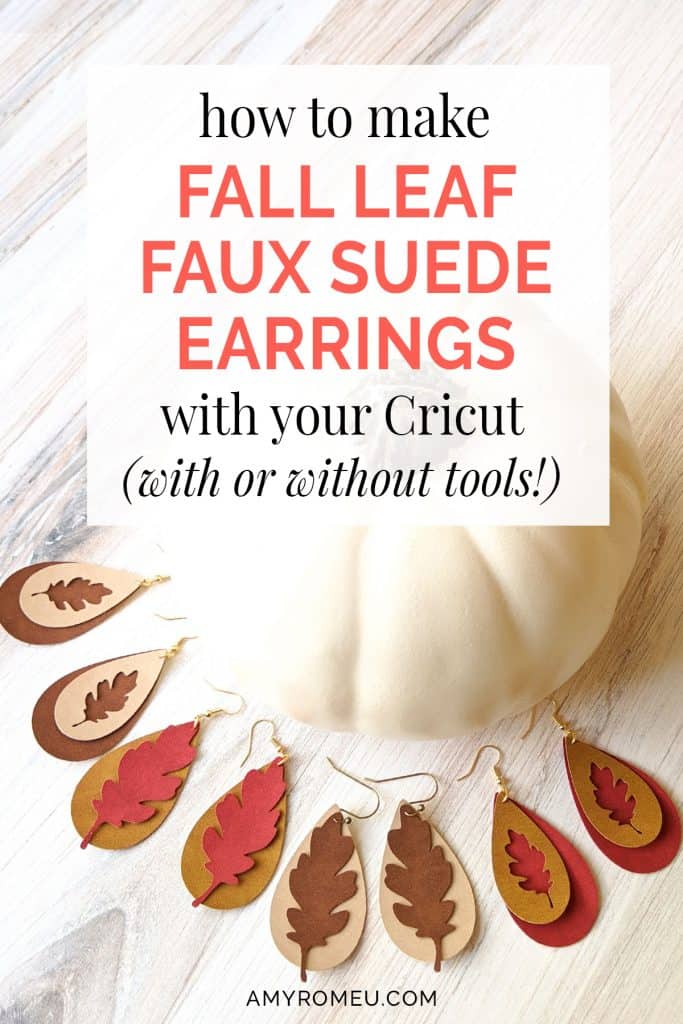
How To Make Faux Suede Fall Leaf Earrings With Your Cricut

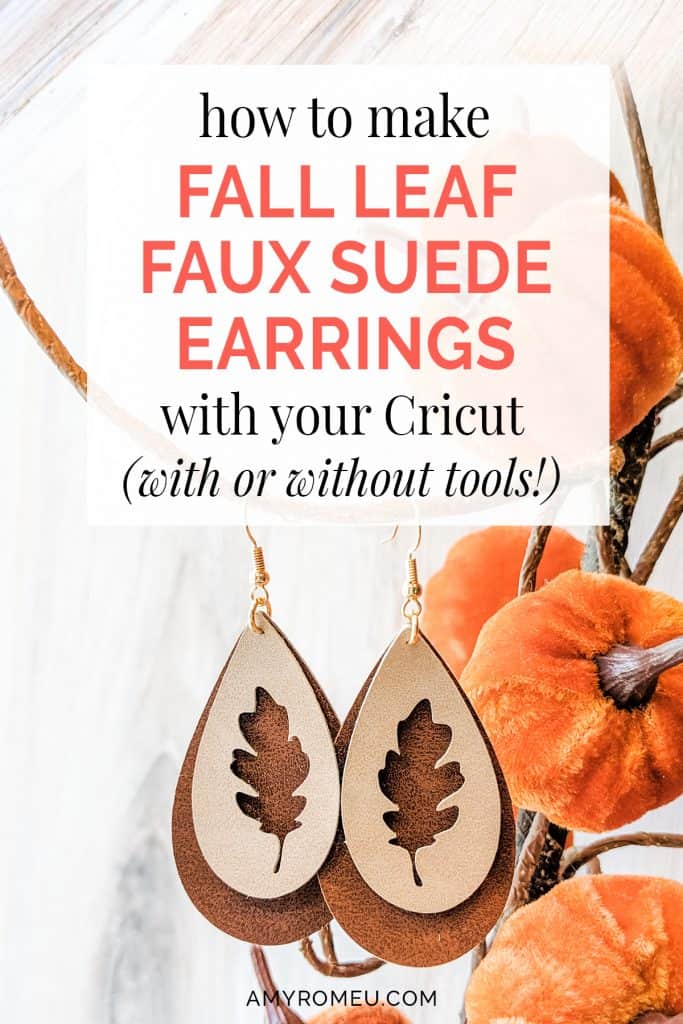
How To Make Faux Suede Fall Leaf Earrings With Your Cricut (with or without tools!)
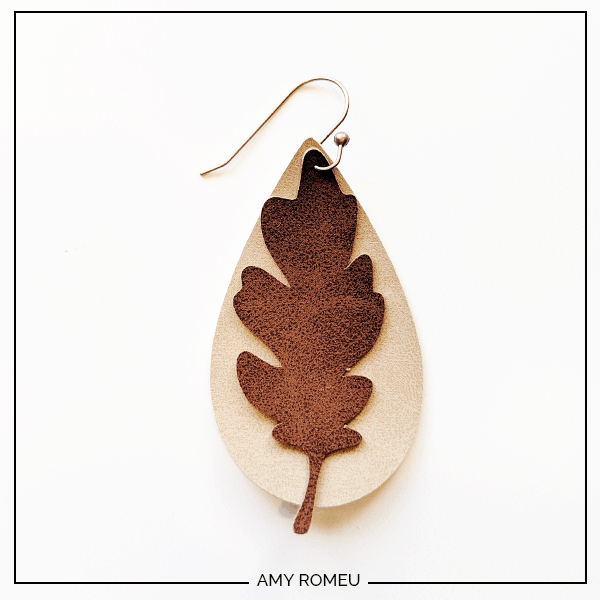
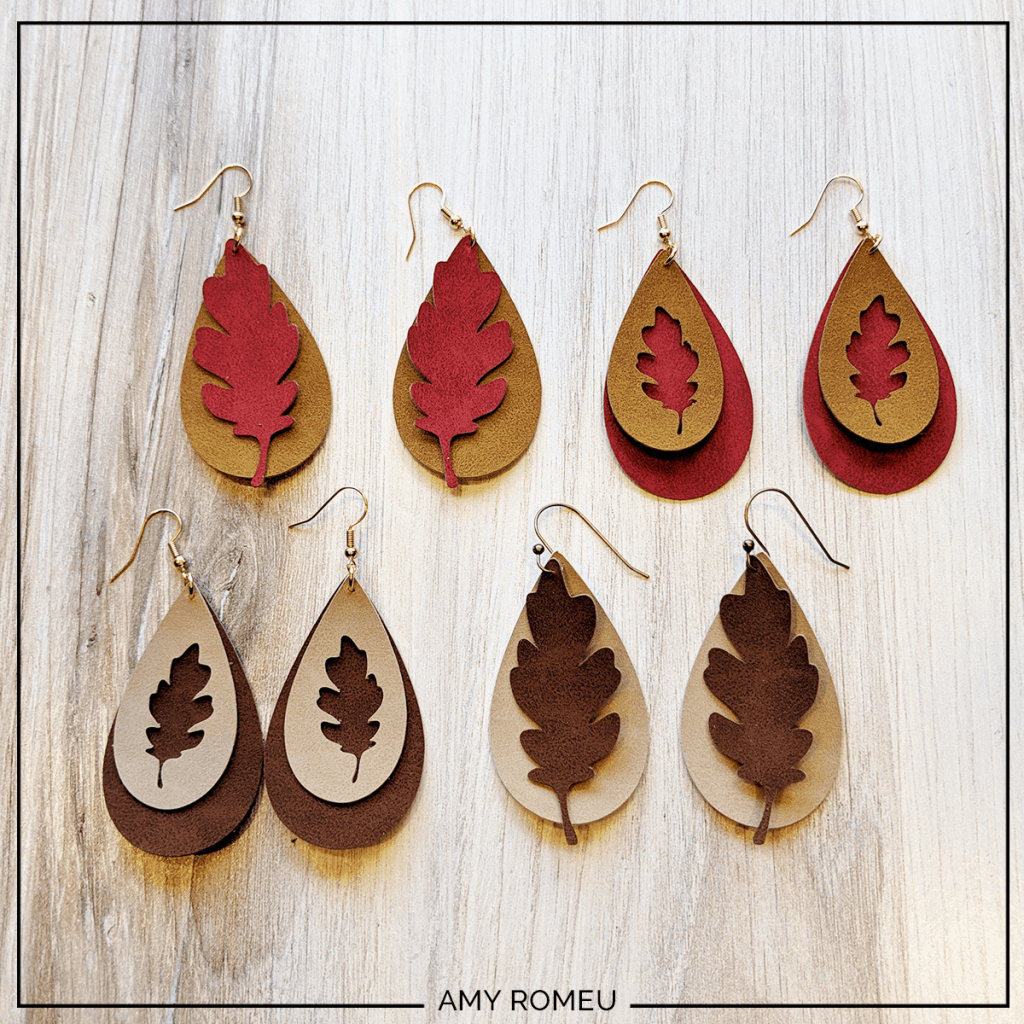
It’s Fall again, and I’m all about the pumpkin spice lattes and fall fashion colors and textures. I was going to wear some of the faux suede earrings that I made last year, and then I decided to make some brand new ones with faux suede and glitter. So in this tutorial I’ll be showing you how to do both as I make some quick fall leaf design earrings with my Cricut Maker from a great fall material – faux suede. Faux suede is lightweight and great for layering, so I designed a layered earring in two styles, so the mix and match possibilities are endless!
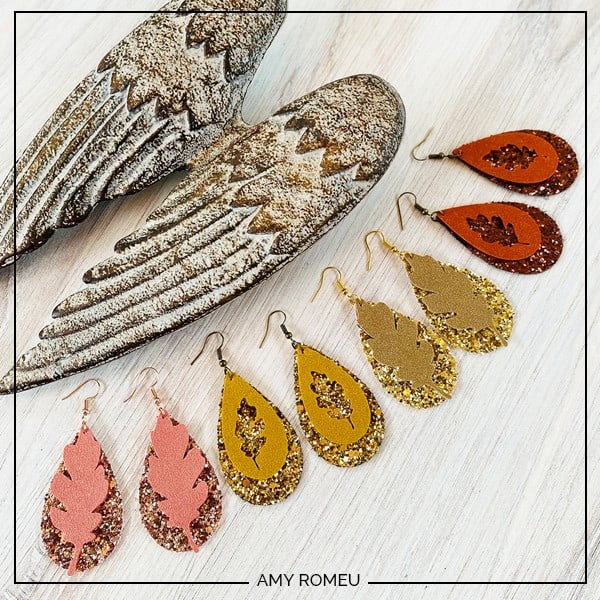
For the earrings I made last year from only faux suede, I only needed to buy one assorted pack of Cricut faux suede to have a variety of fall colors for this project (I’ll tell you exactly which one in just a minute!). For the updated version, I bought some fashion colors in faux suede and paired them with chunky glitter sheets. I’ll give you links to all the materials I used in the Materials list below.
No matter which look you go for, you can cut these faux suede earrings with a Cricut Maker or a Cricut Explore Air 2 with just the regular old standard fine point blade!
Finally – if you’ve been wanting to make jewelry with your Cricut, but the thought of using jewelry making tools is a little scary, I’ll have two versions of how to finish this project for you – one with and one without tools!
If you like these earrings and want to make this project yourself, you can get my original Fall Leaf Faux Suede Earrings SVG file for free so you can make this exact project yourself! I’ll have the link to download my SVG file at in the Materials section AND at the bottom of this post.
p.s. If you want to check out all of my Cricut Jewelry tutorials, click here.
Ready? Let’s get started!
This page contains some affiliate links (which means if you make a purchase after clicking a link, I will earn a small commission at no additional cost to you). Read my full disclosure policy here.
Fall Leaf Faux Suede Earrings – Materials List
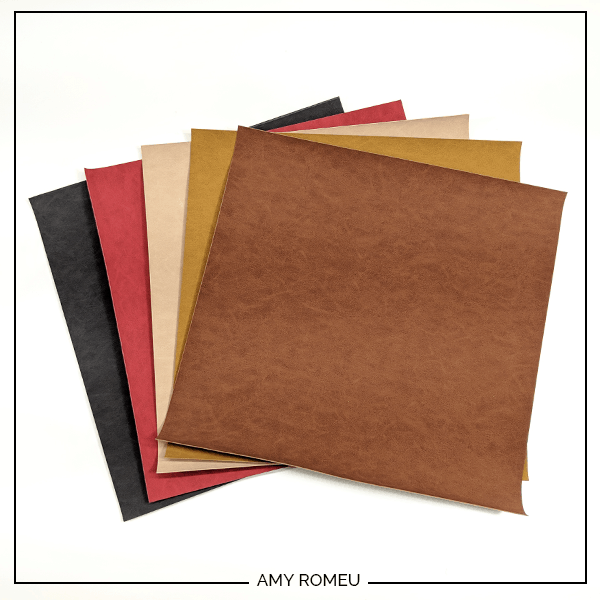
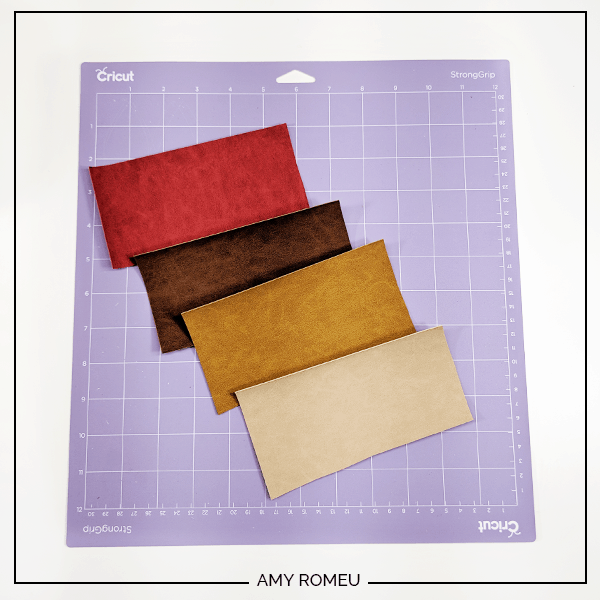
- For the all suede earrings – faux suede sheets in fall colors. I bought this Cricut Faux Suede Rustic Sampler which has 5 12″x12″ sheets of faux suede in the following colors: Black, Red, Tan, Caramel, and Brown. I used all of the colors except Black for these earrings.
- For the faux suede and glitter earrings – I used fashion colors of faux suede from this assortment pack on Amazon. I also used chunky glitter sheets from this assortment pack on Amazon. I also used this mocha brown chunky glitter from one of my favorite Etsy shops for faux leather here.
- A vinyl cutting machine. I have the Cricut Maker, available at Amazon here. You can also use the Cricut Explore Air 2, or even the Cricut Joy! Check out this post here and this post here about how to cut faux leather with a Cricut Joy.
- Cricut Strong Grip (Purple) Cutting Mat. You can buy these on Amazon here, or at Michael’s here. They are also available at Hobby Lobby, Joann’s, and Walmart.
- A weeding tool and a small spatula tool (if you have one). I had all the tools I needed in my Cricut tool set here. You can get also get the basic Cricut tool set at Michael’s here, or from Hobby Lobby, Joann’s, or Walmart.
- Earring Findings. If you’ll be using jewelry making tools, you’ll need two findings – earring hooks and jump rings. The hooks I used – Jewelry Shoppe’s 18k Gold Plated 21mm size Short Fishhook Earwires – are from Hobby Lobby here. I used 6mm gold plated jumprings, also from Hobby Lobby. The exact ones I bought are here, but you can find both the ear wires and the jump rings at any craft store or bead shop, or on Amazon.
Note: I recommend the 6mm size jump ring for this project. You can use 5mm size if that’s all you can find, but I wouldn’t go smaller or bigger than that.
- Two pairs of flat nose pliers – I’m using one wide nose and one needle flat nose here, but you can use any two flat nose pliers.My favorites are Wubbers brand in the Baby size, on Amazon here.
Be sure to check out my post Beginner’s Guide To Jewelry Making Tools for all the information you’ll need to know about jewelry making tools.
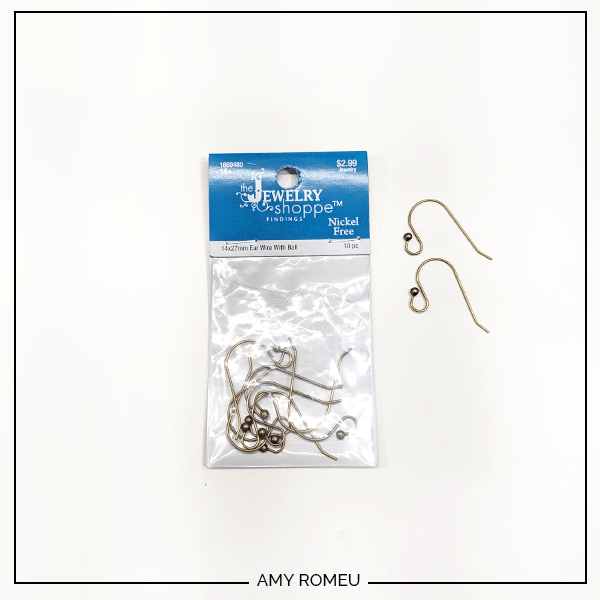
- If you don’t want to use (or don’t have) jewelry making tools, don’t worry! You can still make these earrings with earring hooks called Ear Wires with Balls. I bought mine (below) in an Antique Brass finish from Hobby Lobby here. They have other finishes as well. You can also find these earring hooks at any bead store or craft store. These earwires are great because you don’t need tools or jumprings, and you can make a pair of earrings in just minutes!
- The FREE SVG Earring Template for this project. It’s Design #112 in my Resource Library. Fill out the form below to get the password via email instantly!
PROJECT INSTRUCTIONS
STEP 1 – Download SVG from Library
Download the free SVG files from my free Resource Library. It’s Design #112. The link to get the password is at the bottom of this post.
IMPORTANT NOTE: These SVG files are for personal use only. If you’d like to sell earrings made from these two SVG files, you can purchase a small business commercial use license here and here.
Save the zipped folder that downloads to your computer. You’ll need to unzip or extract the files FIRST so you can upload them to Cricut Design Space.
The step by step tutorial below demonstrates making these earrings with only faux suede. To cut chunky glitter with your Cricut, be sure to check out my YouTube video all about how to cut glitter faux leather with a Cricut. I share a great tip on how to keep your mat from getting ruined with glitter:
STEP 2 – Upload SVG to Cricut Design Space
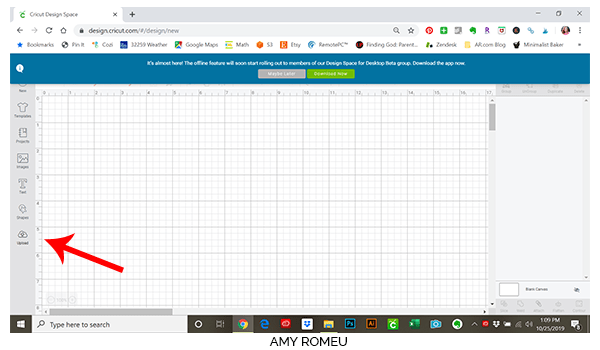
After you’ve unzipped the folder and made a note of the file location, open Cricut Design Space and choose Upload from the left hand side menu.
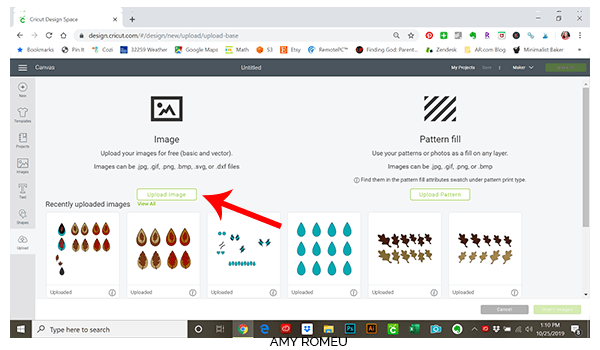
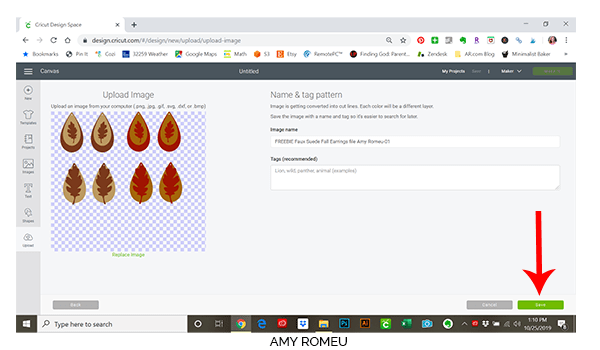
Click on Upload Image and navigate to your saved (unzipped!) SVG file. Double click on it to bring it into the upload screen in Design Space.
You can add tags if you’d like to at this point to help you find this file later on. You could add “fall” or “earrings” or “leaves” or whatever you think you’ll want to search for later. If you don’t want to add any tags, just click the green save button in the lower right.
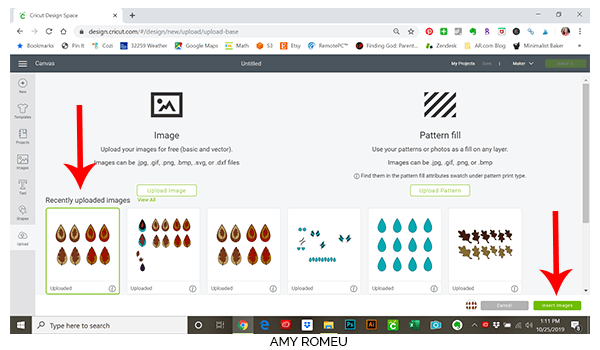
After you’ve selected your file to upload, you’ll see it as the first item in your “recently uploaded designs” row. Click on it and then click on the green “insert images” button in the bottom right corner.
This brings the design into Cricut Design Space. Using the blue arrows in the bottom right hand corner of the rectangle border around the earrings, drag the entire rectangle up to the top most left corner of the screen. This positions your art in the top left hand corner so it’s ready to cut on the same position on your mat.
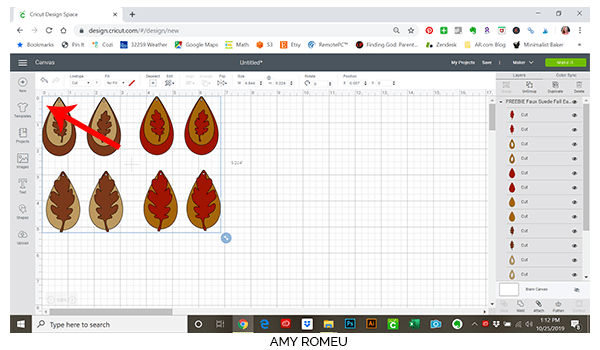
You don’t need to resize your earrings unless you want to. Each one should already be 2.25″ inches tall. However you can resize them if you’d like! The earring holes are already part of the design.
Once you’re happy with the size and placement of your earring shapes, click the green Make It button in the top right hand corner!
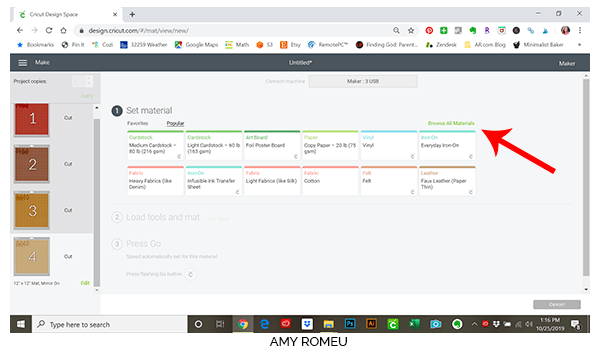
STEP 3 – Material Selection
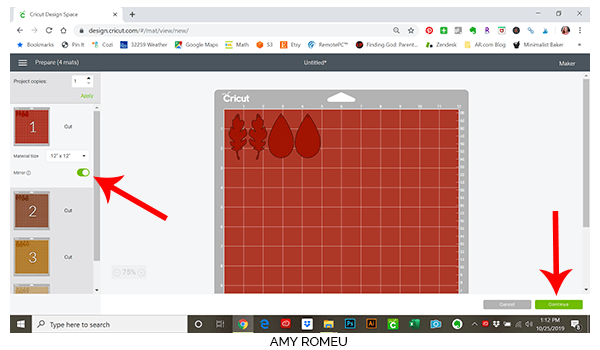
Your Design Space software will automatically sort the four colors of faux suede into different mats. Since you’ll be placing your faux suede face down, you’ll want to select each colored mat on this screen and toggle the Mirror button to on (green). (In this project, mirroring isn’t really necessary, but I like to do it to reinforce the habit so I don’t forget to do it when I really need to.)
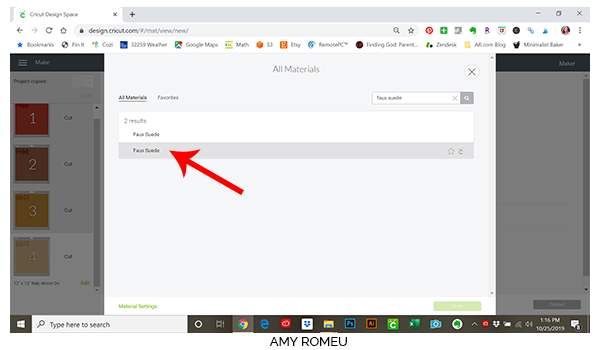
Then click Continue to select your material. If you don’t already have Faux Suede saved as a favorite material, you can click on “Browse All Materials” and then search for Faux Suede.
Click on Faux Suede to select it, then press the green done button.
UPDATED: If you are using the thicker faux suede from Amazon, I recommend using the Faux Leather (Paper Thin) setting with “More” selected from the Pressure dropdown menu.
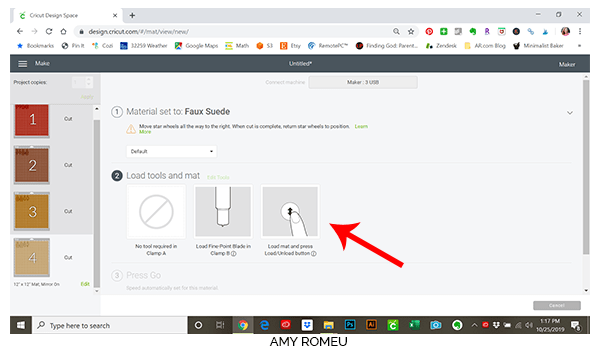
Once your material is selected and your mats are mirrored, you’re ready to cut! Your screen will look like the one below. There are just a few more things to do first.
STEP 4 – Cut Each Mat
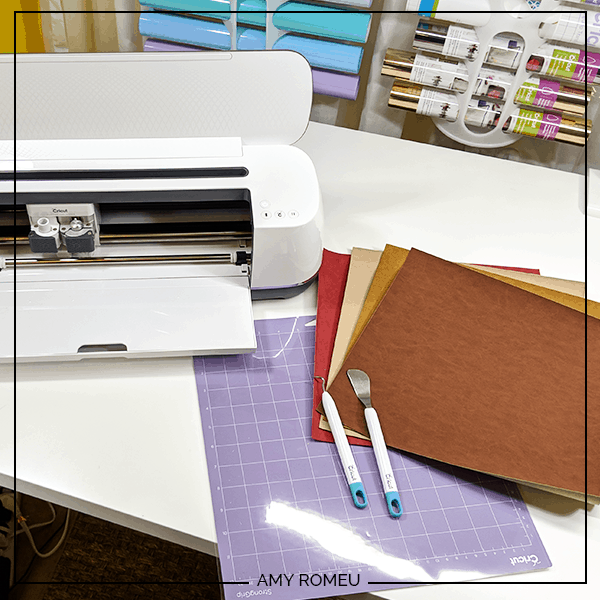
Gather your materials for this next step. You’ll need the four colors of faux suede, your spatula and “poker” tool, and a purple strong grip mat.
At this point you’ll want to make sure you’ve loaded your Fine Point Blade in Clamp B (this blade came with the Cricut Maker).
Cricut Explore users will want to turn the Smart Set Dial to Custom and select Faux Leather (Paper Thin) from the list of custom materials. You’ll also use the Fine Point Blade. Any other cutting machine users can follow their machine’s settings for thin faux leather or faux suede.
Cut a 6 inch wide by 3 inch tall piece of each of the four colors of faux suede.
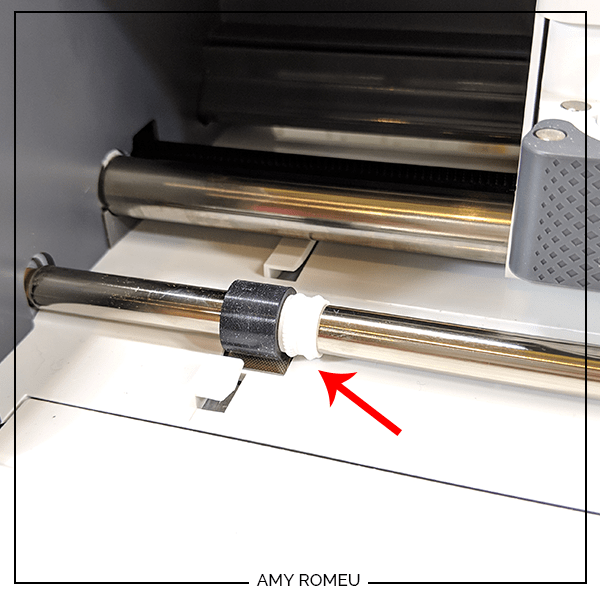
Before you start to load your mats, you’ll want to move your white star wheels off to the sides so they don’t leave marks on your suede, like this:
Place the first one cut piece of faux suede that will cut, the Red one, face down at the top left corner of your cutting mat. Press down on the faux suede all over so it sticks well to your mat.
UPDATED: If you are using the thicker faux suede from Amazon instead of the Cricut brand, TAPE down the material on all sides to the purple mat with blue painter’s tape before cutting.
Load your mat into your machine by hitting the load button (two arrows) on your Cricut Maker.
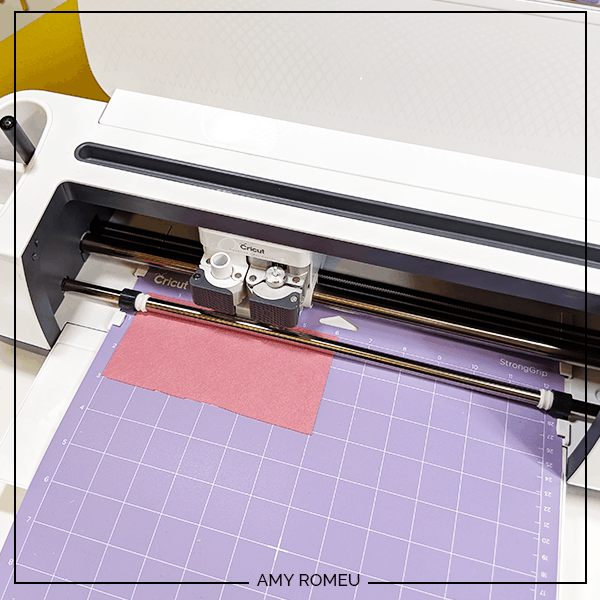
Then hit the Go button (the Cricut face) on your Cricut Maker or Explore Air 2 and it will start to cut.
After your machine finishes cutting the first color, before unloading the mat, check the cut for completeness. If necessary, press the C button again to repeat the cut.
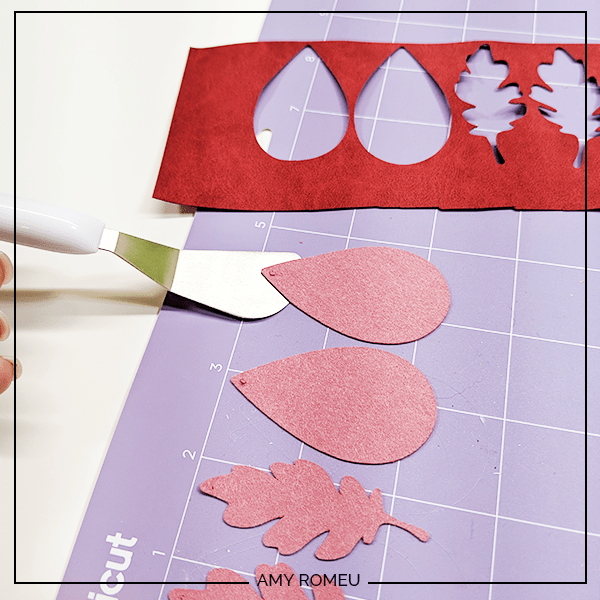
Then unload your mat (pressing the two arrows/unload button again) and begin to remove your earring shapes from the mat.
I remove the excess suede from the mat first. Then I use the spatula tool to lift each shape off of the mat, and then the poker weeding tool to clear the earring hole.
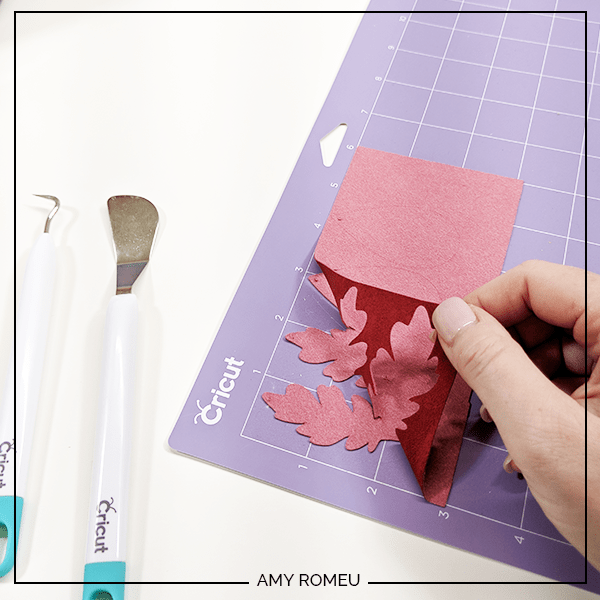
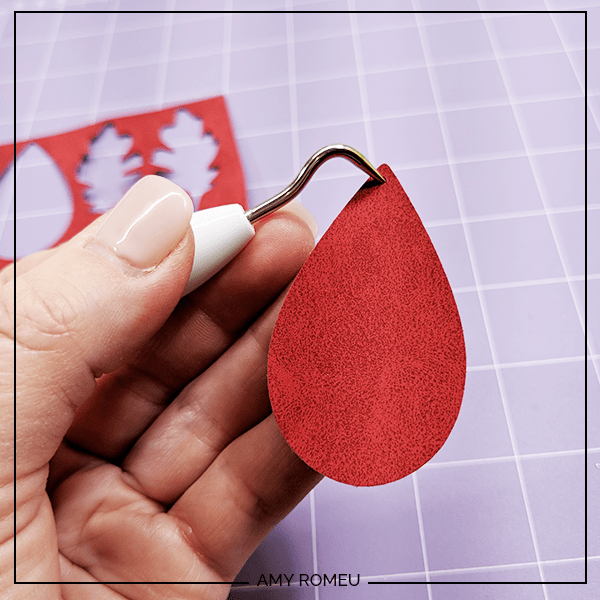
If the earring hole doesn’t come out cleanly, just use some small scissors to snip the circle from the backside. You can also use a small hole punch like this one from Amazon to make the earring holes, that’s what I do!
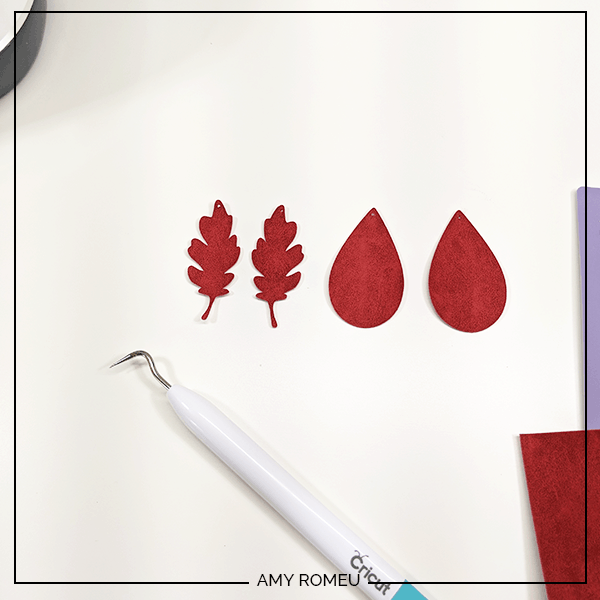
Load your mat again with the second color, making sure it’s face down and pressed firmly, and press the go button again. Repeat until all of your shapes are cut, weeded, and the hole is open.

STEP 5 – Attach Earring Hooks
Now it’s time to attach your earring hooks! I promised you two ways to do this, one using jewelry making tools and one without them, so let’s do each one at a time.
Make Earrings Without Jewelry Making Tools
This can’t be easier. Take your earwire hooks with balls and gently open the loop a little wider with your fingers so the ball has a small space between it and the post.
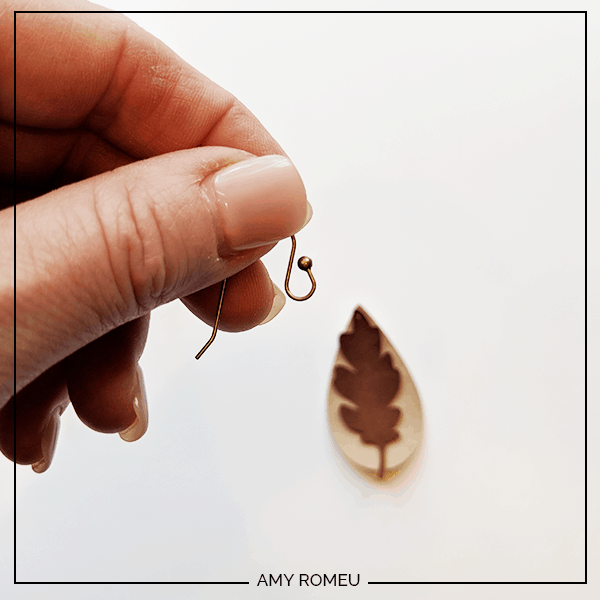
Thread the earring shapes onto the earring hook, paying attention to which way the earring will hang. Pull the shapes down into the u part of the hook, and then close the gap again gently with your fingertips. Repeat with the second earring. That’s it!

Make Earrings With Jewelry Making Tools
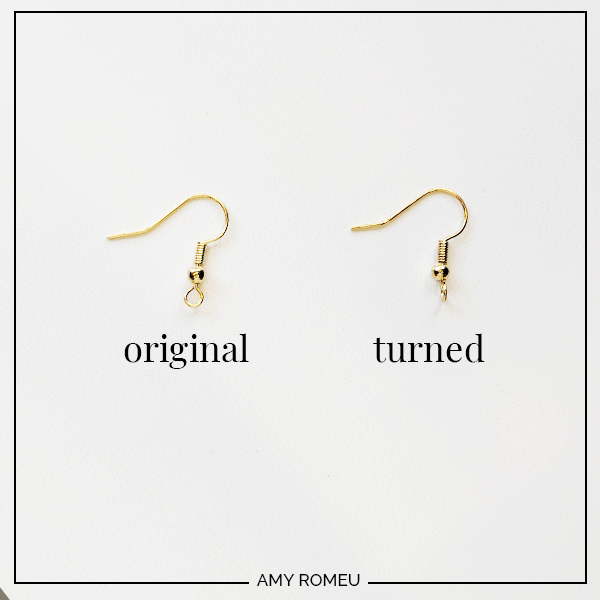
For this technique, we’ll be using fishhook earwires that we’ll need to open with pliers, along with jumprings. We will need to twist the bottom loop on the earwire first so the earrings hang correctly from the jumpring. I’ll show you exactly what I mean next.
But first, you may be wondering why you can’t just hang the faux suede shapes directly from the fishhook earring loop and skip the jumpring altogether. The answer is: technically, you can, but the more professional way to finish earrings is to use a jumpring. Also, the faux suede shapes will have more movement if they are attached to a jumpring. But I’ve seen lots of leather and faux leather earrings made both ways, and it’s really up to you!
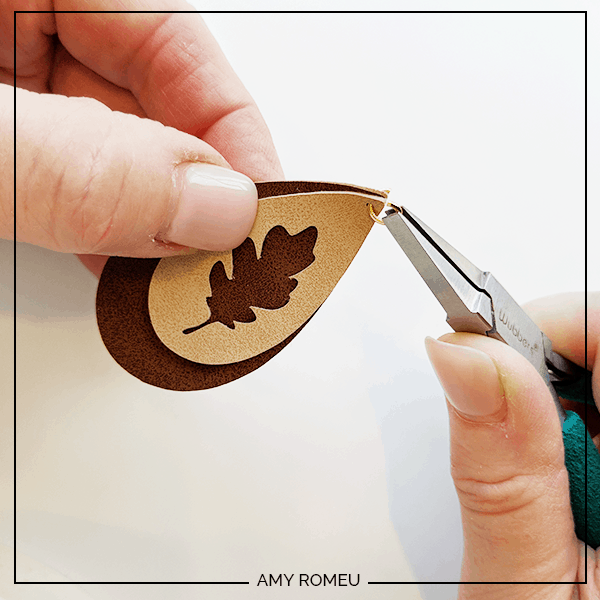
Ok, let’s see how this works. The first step is to turn the bottom loop on the fishhook sideways. See the image below to see what I mean.
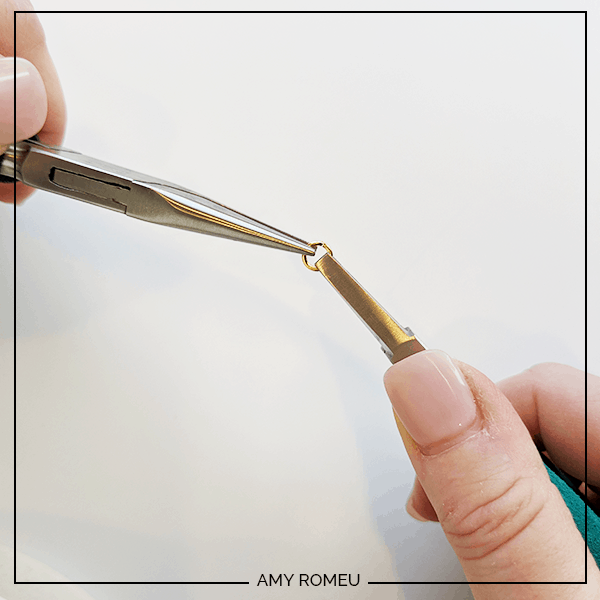
You’ll do this using flat nose pliers. While holding the hook firmly between two fingers, grip the loop between the pliers and twist until the loop is perpendicular to the earring post. Repeat with the second earring hook.

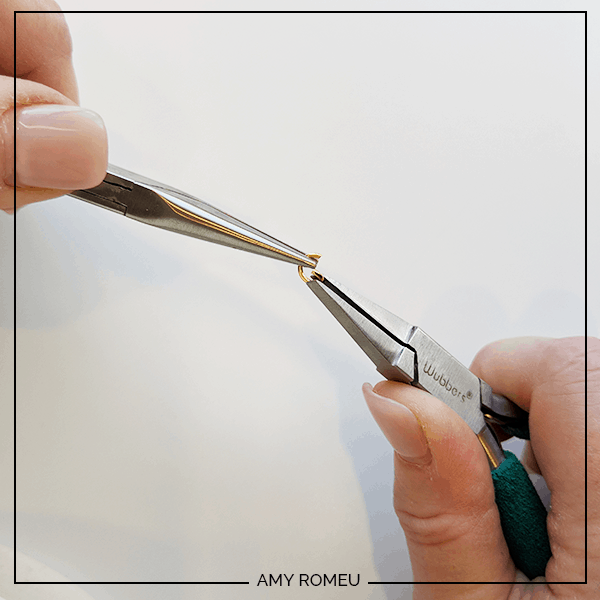
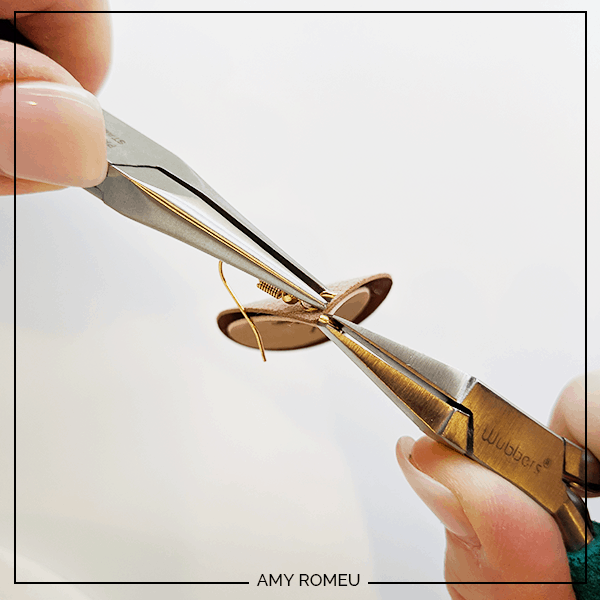
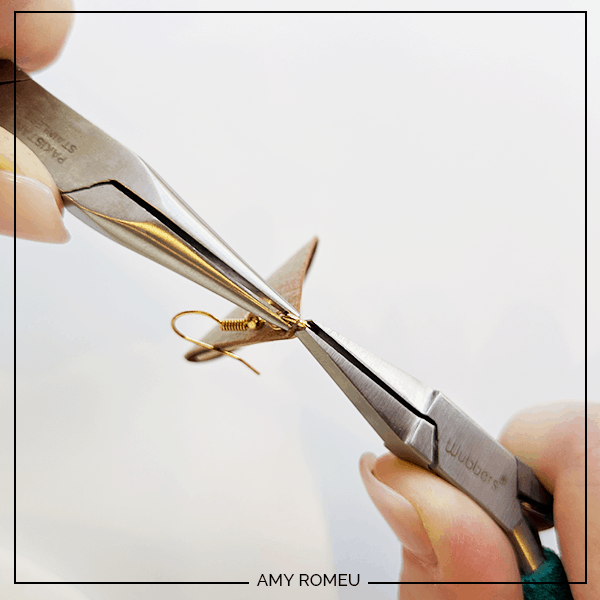
Now you’ll need to open your jumpring to slide the suede earrings on. Using two pliers, grip each side of the jump ring, making sure the opening in the jumpring is facing up (the twelve o’clock position).
Rotate one wrist forwards or backwards, so the circle creates an opening but doesn’t bend out of it’s circle shape.
Slide your faux suede shapes onto your jump ring, then slide your earring hook onto the jump ring. Pay attention to which side is the front of your earring as you do this.
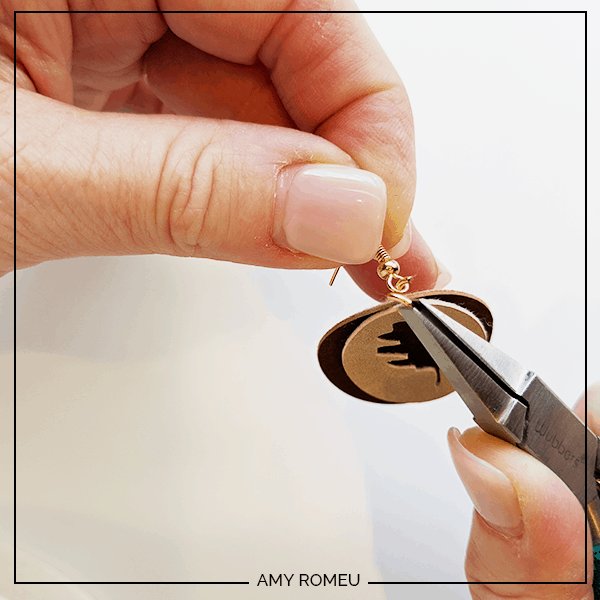
Now close up your jump ring using the same two pliers technique. Twist your wrist in the opposite direction than when you opened it, and the ends of the jump ring should meet up again perfectly. If they don’t, use your pliers to gently maneuver the ring closed.
Repeat for the other earring. That’s it! Now you’ve got four pair of Faux Suede Fall Leaf earrings. Keep your favorites and give the rest to friends or family. They will be excited that you made something special, just for them!
Are you going to try this project? It’s easy and fun, I promise! If you make these Fall Leaf Faux Suede Earrings, please send me a photo! I’d love to see your work!
If you liked this project and want to see all of my Cricut Jewelry tutorials, click here.
Until next time… and happy creating!

Want the FREE SVG file you so you make this Fall Leaf Faux Suede Earrings project yourself?
Get it from our Resource Library! You’ll receive the password for the Resource Library instantly after filling out the form below!
IMPORTANT NOTE: These SVG files are for personal use only. If you’d like to sell earrings made from these two SVG files, you can purchase a small business commercial use license here and here.
Want to remember this? Post this Fall Leaves Faux Suede Earrings project to your favorite Pinterest board!
Leaf link isn’t working to download
Hi, Greg!
I just tested the leaf earrings download in my library and it worked fine for me. Did you download the zipped folder from my resource library and then unzip the folder to access the contents?
Thank you.
Amy
How do I make them a little thicker ? I’m afraid with I put the jump ring it will tear the faux leather over time ! By The Way I’m using dollar tree faux leather for a A tester till I get some from hobby lobby today !!
Hi, Sabrina!
Great question. You could put a back on them, or even better, make them double sided. 🙂 I have a YouTube video with four different ways to put a back on faux leather earrings you may find helpful:
https://youtu.be/Q1IK6EfA6c8
Amy
If using the chunky glitter, do I put that glitter side down or up? Also, what setting should I use on maker 3? Thank you, Lori
Hi, Lori! I put chunky glitter with the glitter side down, but only after putting some strong grip transfer tape on the mat first (sticky side up) to keep the glitter off the mat.
I use the same setting I do for all other faux leather earrings – Faux Leather (Paper Thin) with “more” pressure and repeat the cut a few times.
I have all of my glitter cutting tips and tricks in this video here: https://youtu.be/svA0qoGptYU
I hope that helps!
Amy