
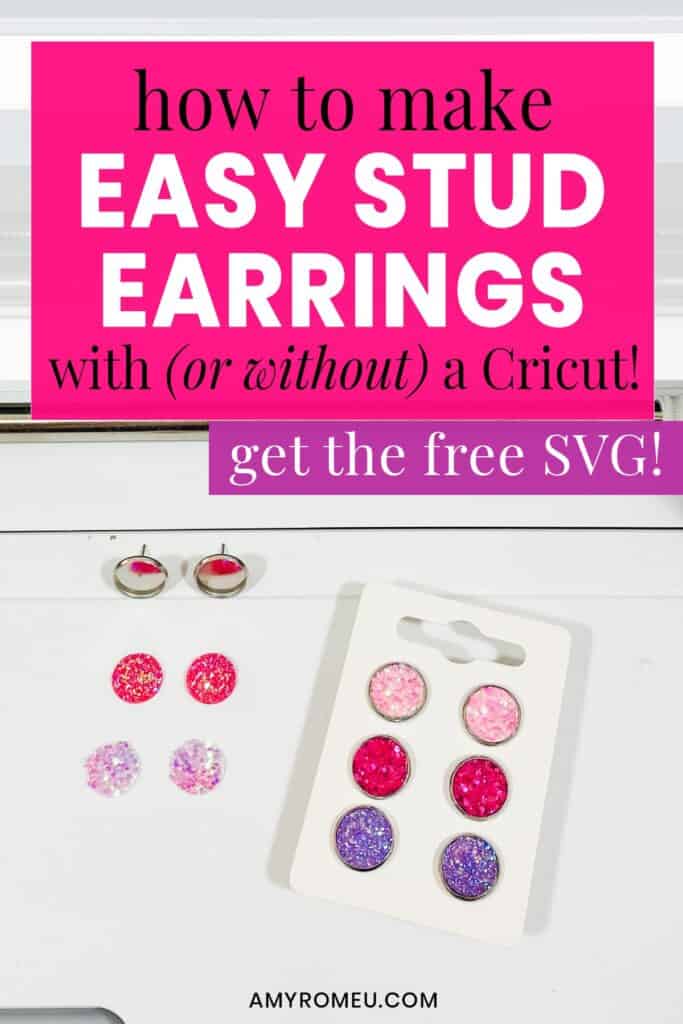
How to Make Stud Earrings with or without a Cricut
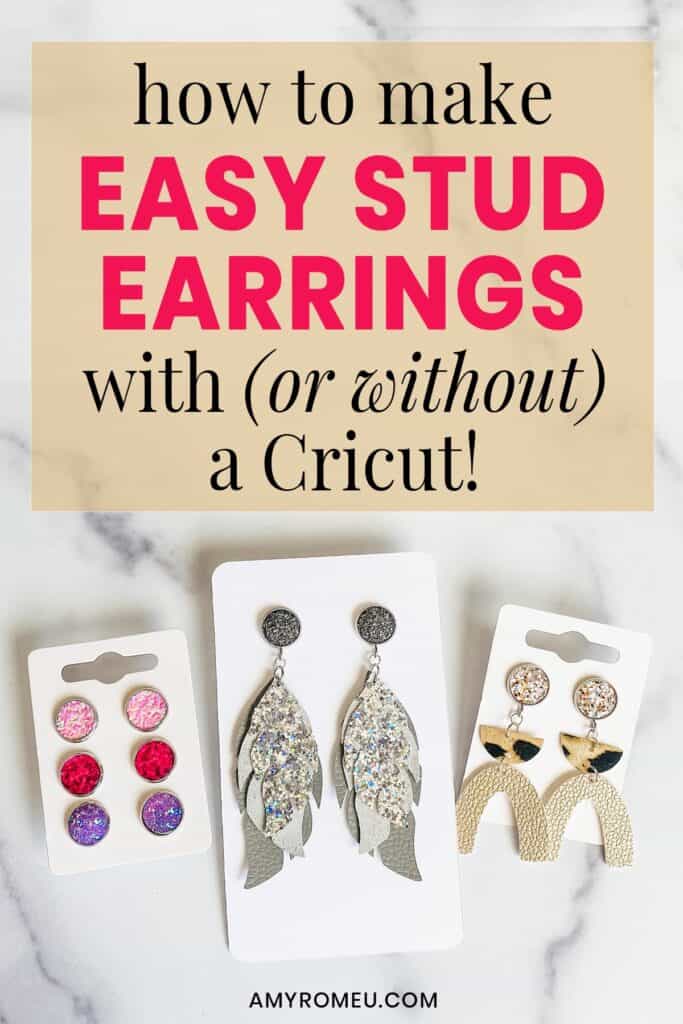
Easy DIY Faux Leather Stud Earrings with or without a Cricut
If you’ve been watching earring trends lately, then you know the stud earring is back! But no, these aren’t your mama’s stud earrings from the days of shoulder pads and big hair. These studs are modern and sleek bezel settings that feature a cabochon or a faux leather or genuine leather circle.
These studs are so quick and easy to make, and if you sell earrings, they are a great way to repurpose the faux leather scraps you were going to throw away into fun and fashionable earrings you can offer your customers. I’ll show you how to put them together in cute sets of 3, or how you can enhance other faux leather earring designs with studs.
I’ll be using my Cricut Maker, but you can also use the Cricut Explore Air 2 or even the Cricut Joy (read more about making earrings with the Joy in this post).
In this tutorial I’ll show you three ways to make stud earrings, with and without a Cricut, so you can add these top selling earrings to your earring inventory for your customers.
I’ll give you my step by step instructions and tell you exactly what materials I used to make stud earrings three different ways. I’ll also have the 10mm and 12mm stud earring SVG earring templates for you in my Free Resource Library so you can make these earrings yourself. There will be a link to get the SVG in the Materials section of this tutorial.
If you’d rather watch a video tutorial, click on my How to Make Stud Earrings with or without A Cricut YouTube video below:
Ready? Let’s get started!
Want to see all of my Cricut earring & jewelry tutorials? CLICK HERE
This post contains some affiliate links (which means if you make a purchase after clicking a link, I will earn a small commission at no additional cost to you). Read my full disclosure policy here.
DIY Stud Earrings – Materials List
As I mentioned, there are three ways I’ll be showing you to make stud earrings. The materials you need will vary with the method you decide to use. However for all three methods I’ll be using the following supplies:
- Faux leather or glitter faux leather scraps. You know you have a ton. Get them out of that drawer or box or bag you’re hiding them in!
- 12mm or 10mm stud settings. These are the two most popular stud sizes, but 8mm and 14mm sizes are also available. I used a few different versions of 10mm and 12mm stud earring findings from Amazon:
- Stainless Steel 12mm Stud Earrings in assorted colors
- Stainless Steel 12mm Stud Earrings with loops
- Stainless Steel 10mm Stud Earrings, silver tone
- Stainless Steel 10mm Stud Earrings with Glass Cabachons
- Stainless Steel 10mm Stud Earrings with loops, assorted colors
- Stainless Steel 12mm Stud Earrings Dangles with Glass Cabochons, assorted colors
- Wood Stud Earrings, 12mm size
- Glass Cabochons, 12mm, sold separately
- Loctite Gel Super Glue, from Amazon here. This glue has gotten hard to find since making this video, so I’ve started using this Gorilla Glue here.
- Stud Earring Cards. I cut my own using my original earring card SVG template bundle, in my shop here.
- Small curved scissors – I love these curved scissors from Amazon.
1. Hole Punch Method
- 12mm (1/2 inch) Circle Punch, from Amazon here.
2. Leather Punch Method
- Leather Punch Set, from Amazon here.
- Mallet, from Amazon here.
3. Cricut (or cutting machine) Method
- A vinyl cutting machine (optional). One of the methods I’ll be showing you will be using a Cricut Maker, but you can also use a Cricut Explore Air 2, a Cricut Joy, or a Silhouette cutting machine.
- Cricut Strong Grip (Purple) Cutting Mat. You can buy these on Amazon here.
- Blue painter’s tape. This is regular hardware store painter’s tape, but you can also get it on Amazon here.
- A weeding tool. I use the weeding tool that came with my Cricut tool set from Amazon here.
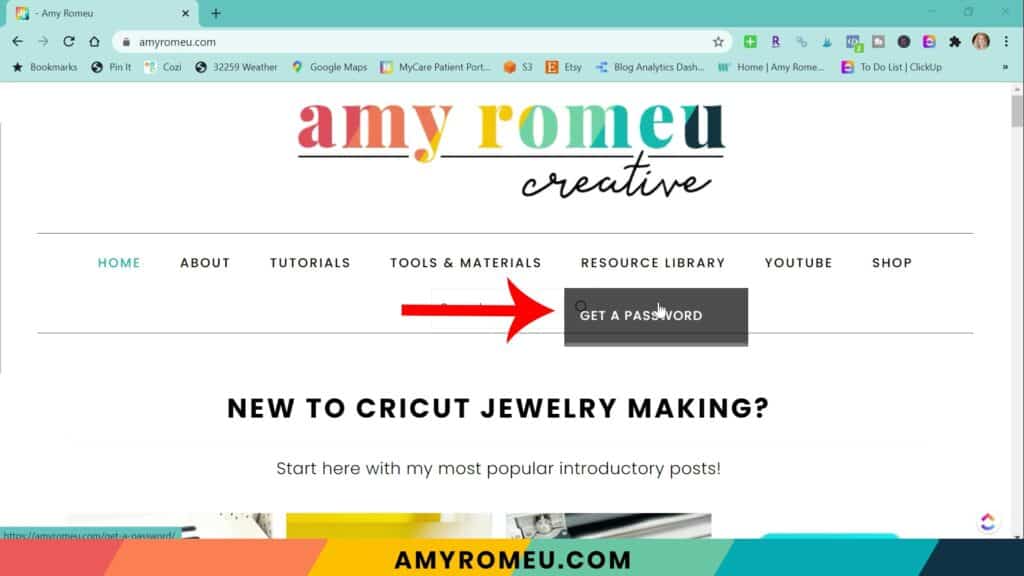
- The SVG file template for these 10mm and 12mm size Stud Earrings. It’s Design #170 in my free resource library. You can get the password to my library instantly by filling out the form below, or at the bottom of this post.
DIY Stud Earrings – PROJECT INSTRUCTIONS
Let’s go over the 3 different ways you can make the circle faux leather shapes that will fit inside the stud earring bezel settings.
METHOD 1 – CIRCLE PUNCH
This method using a circle punch to punch out a 12mm circle from a sheet of faux leather. This is the circle punch I bought on Amazon and I was pleasantly surprised by how well it cut chunky faux leather sheets.
Simply slide the material into the punch. Check from the other side to see where the circle will cut from the material. Place the punch on a flat surface for the best cut, and press the lever down firmly.
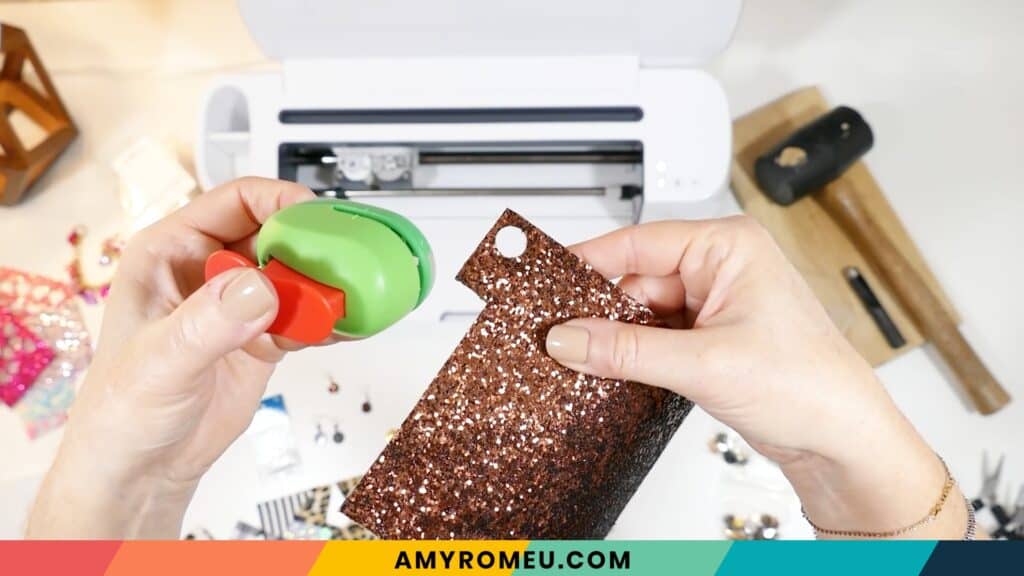
You may need to trim up the edges of the circle with some small scissors.
I recommend using this punch for faux leather and chunky glitter faux leather. This punch won’t work well on genuine leather.
METHOD 2 – LEATHER PUNCH
For genuine leather circles, you’ll want to use a leather punch and a mallet. Be sure you are punching on a hard surface. I used an old cutting board. This leather punch set from Amazon has a variety of punch sizes, including 12mm and 10mm sizes.

To use a leather punch, place your material flat on a hard surface. It doesn’t matter if you place it face down or face up. Hold the punch perfectly perpendicular (straight up) over the material you want to punch. Then carefully strike the top of the punch with a mallet several times until you see a clean hole is made.
The leather punch works best on genuine leather. It will also work on some faux leathers, but not all. Experiment on scraps first before trying to punch a lot of circles.
METHOD 3 – CRICUT
STEP 1 – Download the SVG Cut Files
Download my free Stud Earrings SVG file (#170) from my Resource Library. (If you don’t have a password to the library, fill out the form above and it will be emailed to you instantly.) Or you can click on Get A Password underneath the Resource Library tab on my homepage menu.
Save the zipped folder that downloads to your computer. Then unzip the folder to access the folder’s contents. You’ll need to unzip or extract the files FIRST so you can upload the cutting file to Cricut Design Space.
STEP 2 – Upload the Cut File to the Cutting Machine
Upload the SVG to Cricut Design Space if you are using a Cricut. There’s also a DXF file included if you are uploading to Silhouette Studio Basic Edition.
If you need help uploading a file to Cricut Design Space, click here.
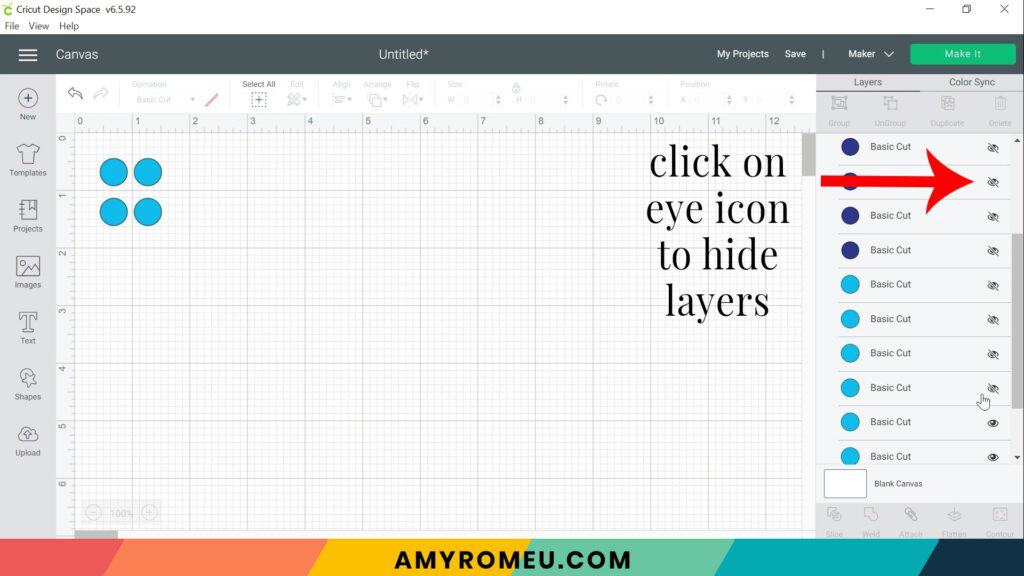
After your file is uploaded, you’ll see there are two different colored circles. The darker blue circles are 12mm size, and the lighter blue are 10mm size.
Don’t resize the circles or else they won’t fit in the 10mm and 12mm stud earring findings.
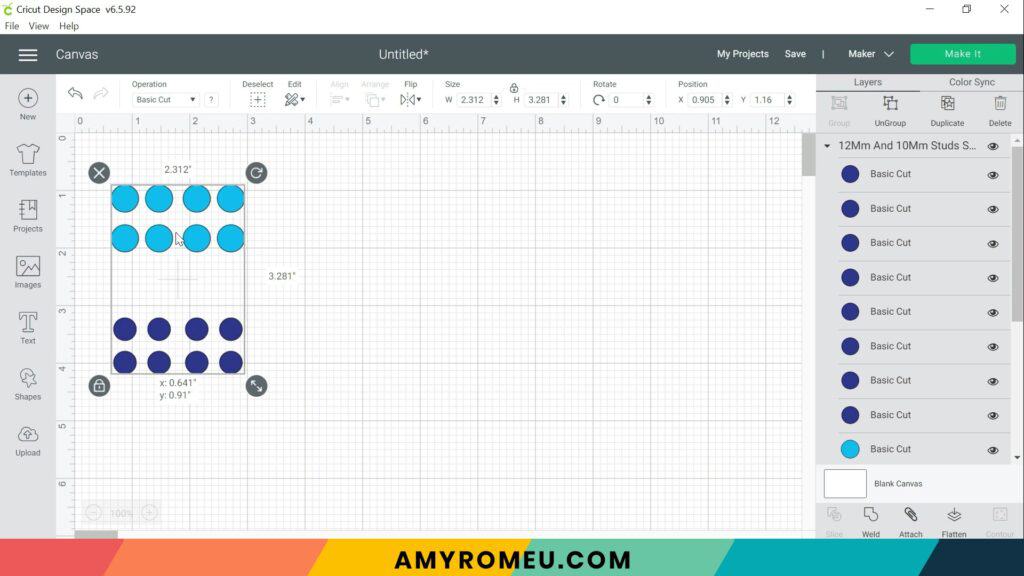
You can make more circles by clicking and dragging a box around the circles you want to copy and then clicking Duplicate.
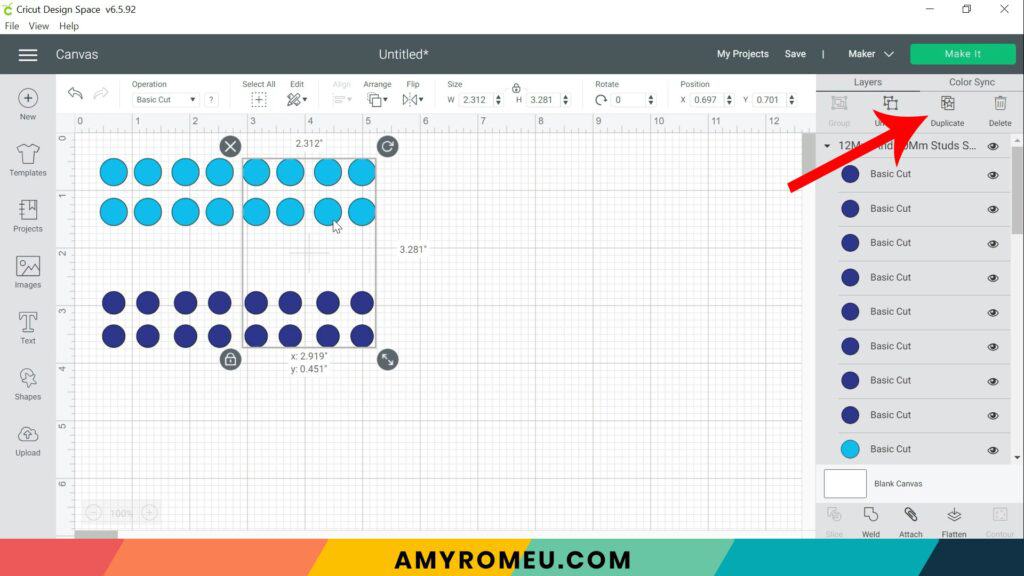
Hide circles you don’t want to cut by clicking the eye icon next to each layer.
If you’d like to recolor the circles, select them and then choose another color from the top menu bar. It isn’t necessary though, because they will cut from whatever material you choose.
When you have the desired number of circle, click MAKE IT.
You can drag the circles around on the mat to change their cutting placement to match your faux leather scrap if desired.
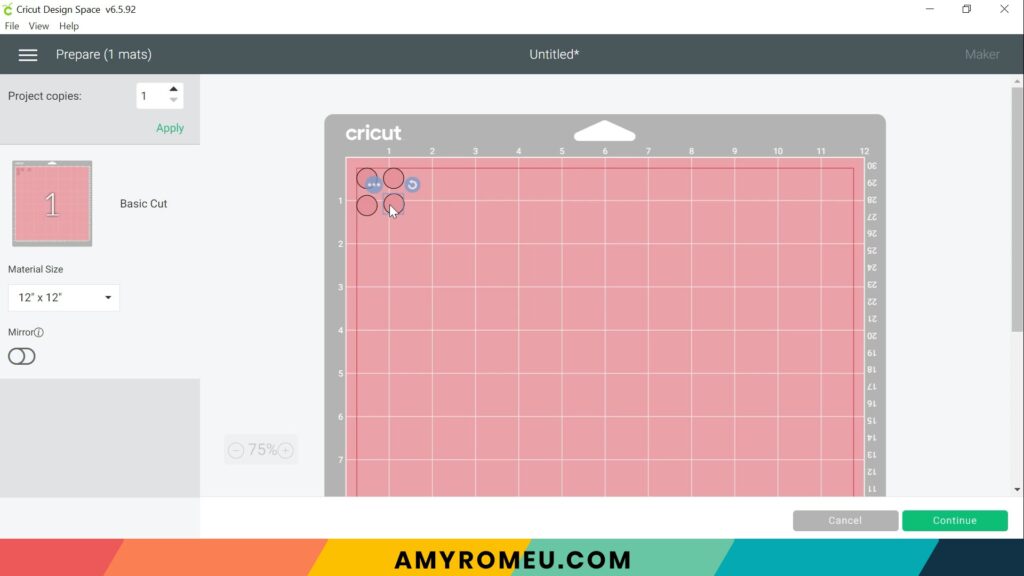
Click the green CONTINUE button.
STEP 3 – Make Material Selection
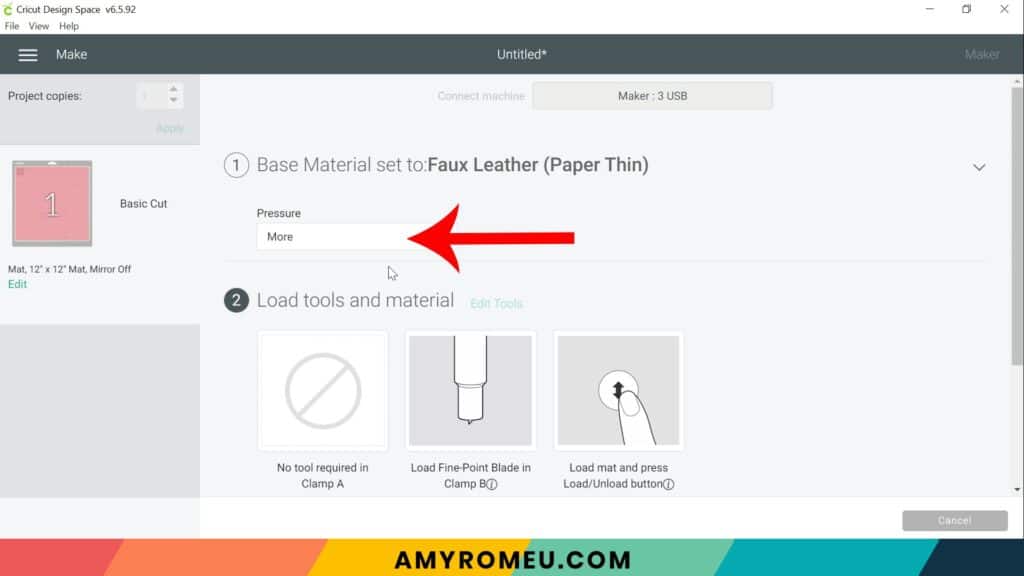
Now you’ll select your material.
Note: If you’re using a Cricut Explore Air 2 like I am, turn your dial to “Custom” so you can choose the setting recommended below. If you’re using the Cricut Joy, set the machine to cut with a mat and then select the material setting below. You won’t have a purple cutting mat, but follow the directions below using the green mat. If you’re using a Cricut Maker, you’ll just make the material selection as shown.
I already have Faux Leather (Paper Thin) saved as a favorite material in Cricut Design Space. If you do too, you can click on it to select it.
If not, click on Browse All Materials to search for it and select it.
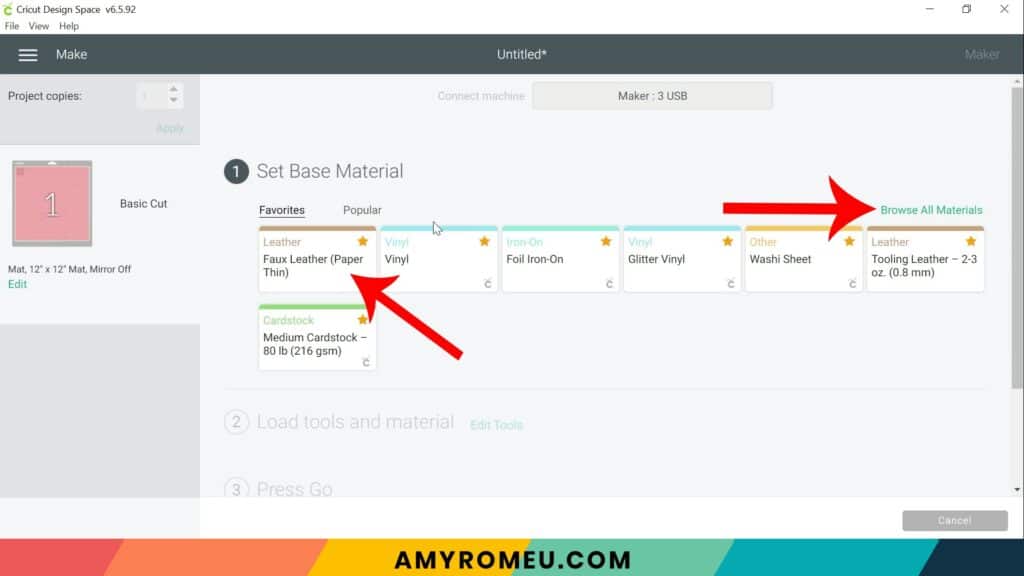
Then select “More” from the pressure dropdown menu.
You’re ready to cut the circles!
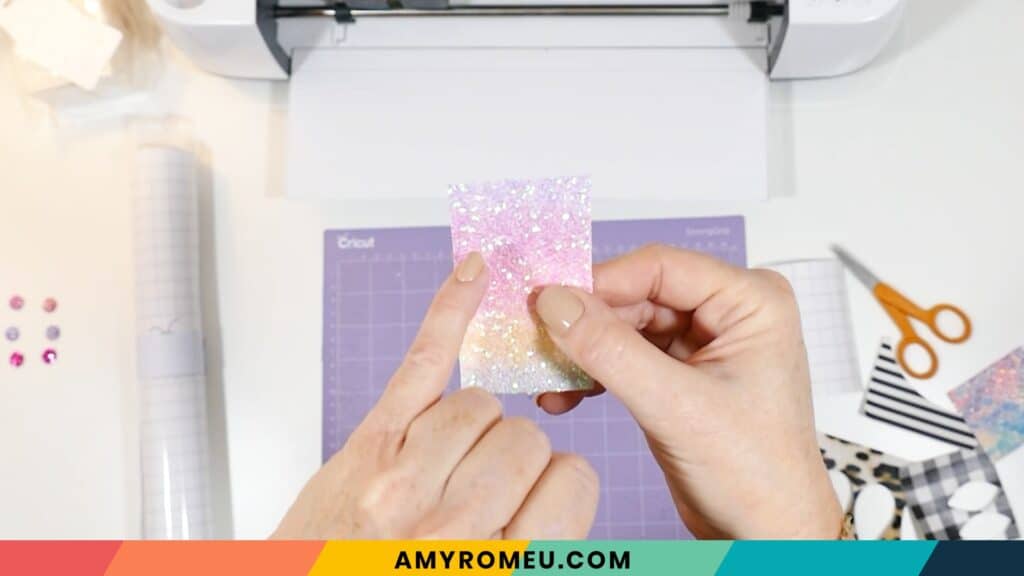
Consider the print, if any, on your faux leather and how you will place your material on your mat to be sure you get matching circles.
For this scrap of glitter faux leather, I want to get two matching color circles, so I’ll place the material this direction up on my mat.
If I were to turn the material sideways, I would get circles of different colors, which I don’t want for matching studs.
STEP 4 – Cutting the Circle Shapes
First we need to prepare the faux leather mat for cutting.
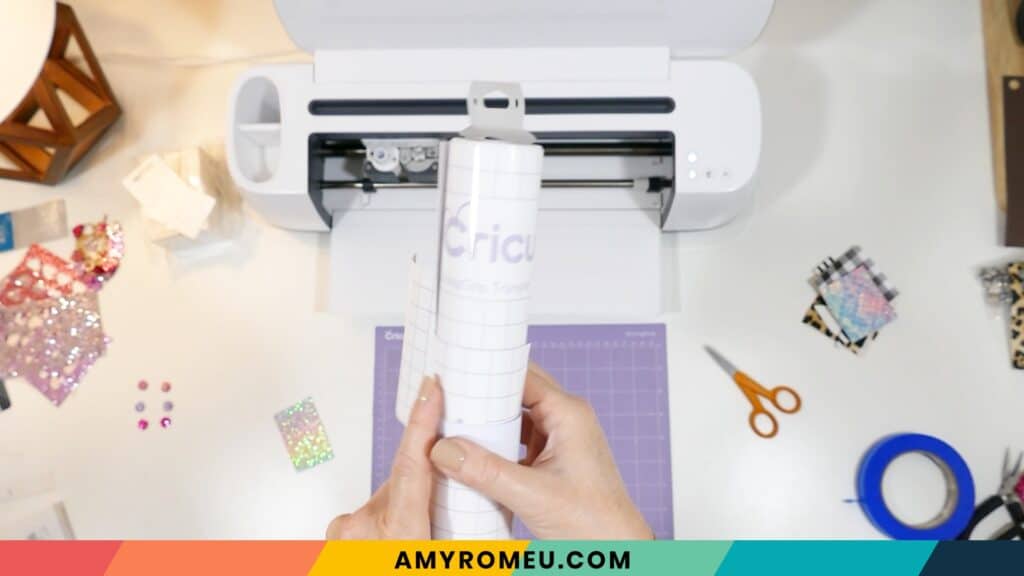
For these circles, I’ll be cutting chunky glitter faux leather. To protect my mat from glitter getting stuck to it, I place a piece of Cricut brand Strong Grip Transfer Tape sticky side up on my mat in the location the circles will cut from.
If you aren’t cutting chunky glitter, you can skip the transfer tape step.
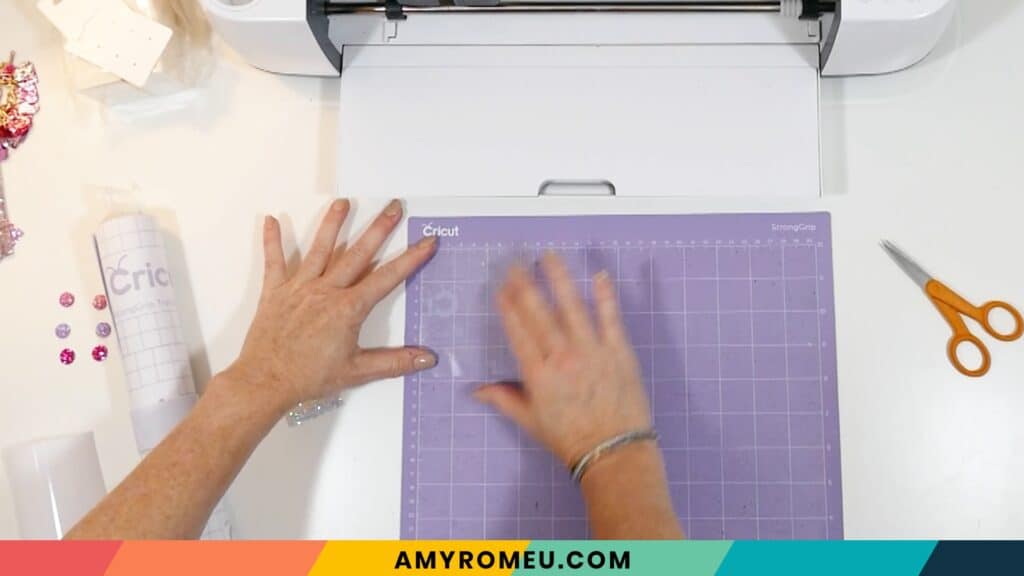
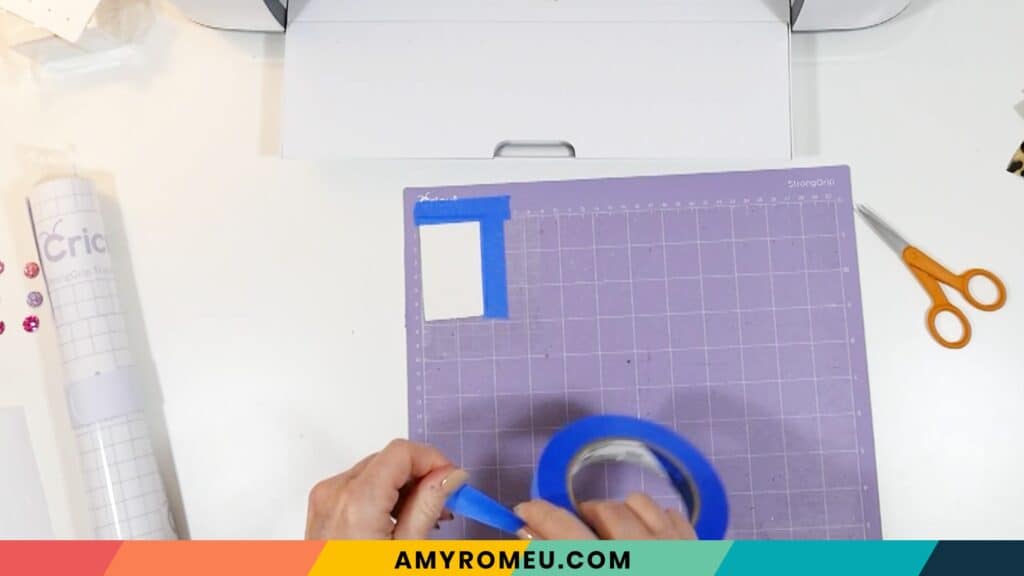
Place your piece of faux leather pretty side down on a sticky purple cutting mat (on top of the transfer tape if you are cutting glitter faux leather).
Now tape all around the faux leather with blue painter’s tape. Press the material down to your mat firmly with your hands.
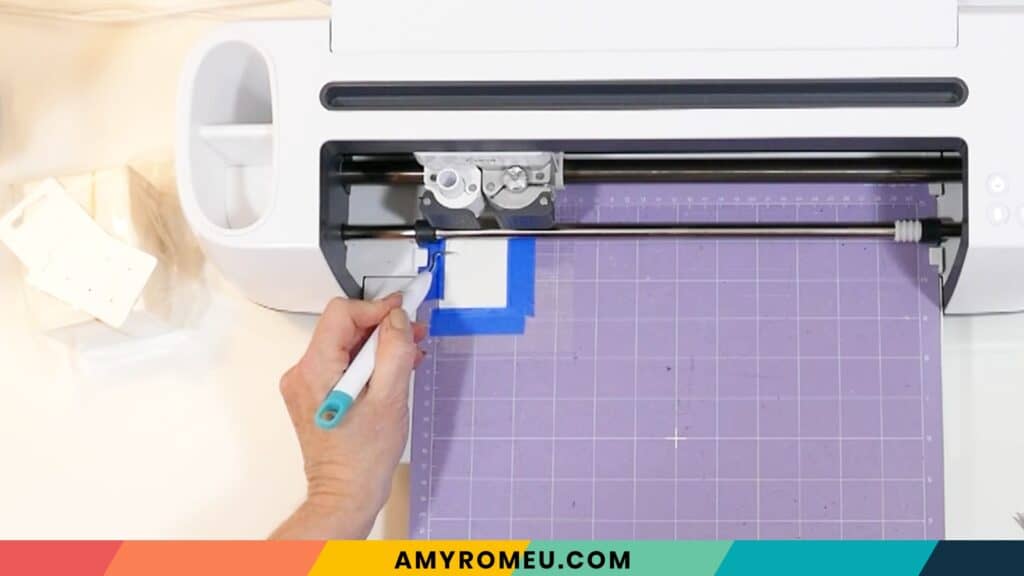
Load the prepared mat into the Cricut by lining the mat between the mat guides and then pressing the double arrows button. Be sure your white star wheels on the roller bar are moved out of the way so they don’t leave tracks on your faux leather.
The “C” Cricut button will start to flash, indicating the machine is ready to cut. Press the C button to begin the cut.
When the cut is finished, but before you unload the mat, use a sharp tool like your weeding tool and carefully lift the edge of the circle shapes to see if they cut all the way through. If they did, then click the double arrow button to unload the mat. If not, press the C button to make the cut again.

Trim the edges of the cut circles with small curved scissors if necessary.
GLUING THE STUD EARRINGS
However you cut the circles, it’s time to glue them into the stud earring findings.
I like to use Loctite Gel Super Glue. It is easy to control how much comes out of the bottle, and the gel texture keeps the glue from running all over the place.
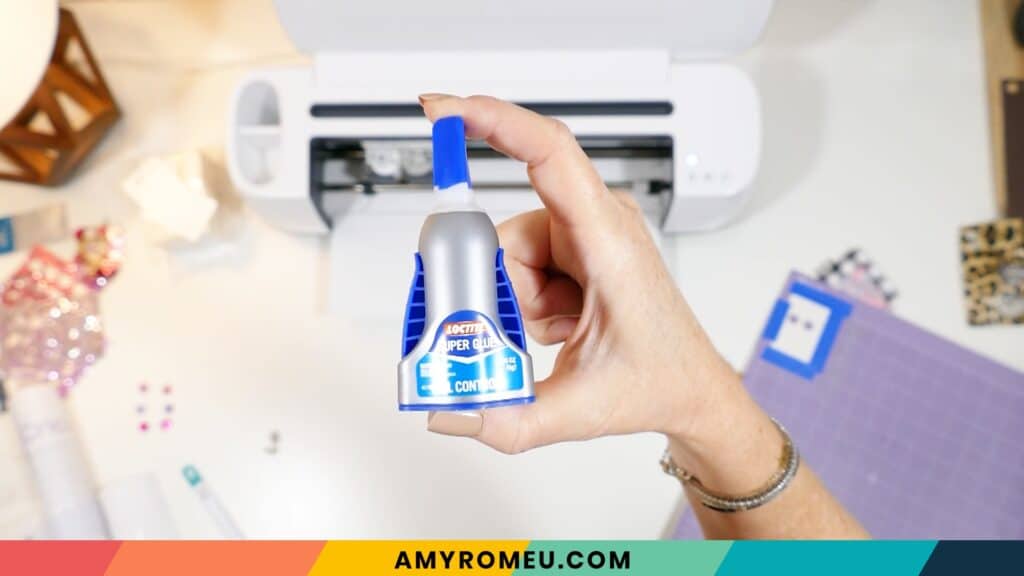
Squeeze the sides of the super glue bottle to place a small amount of gel super glue at the center of the stud earring finding.
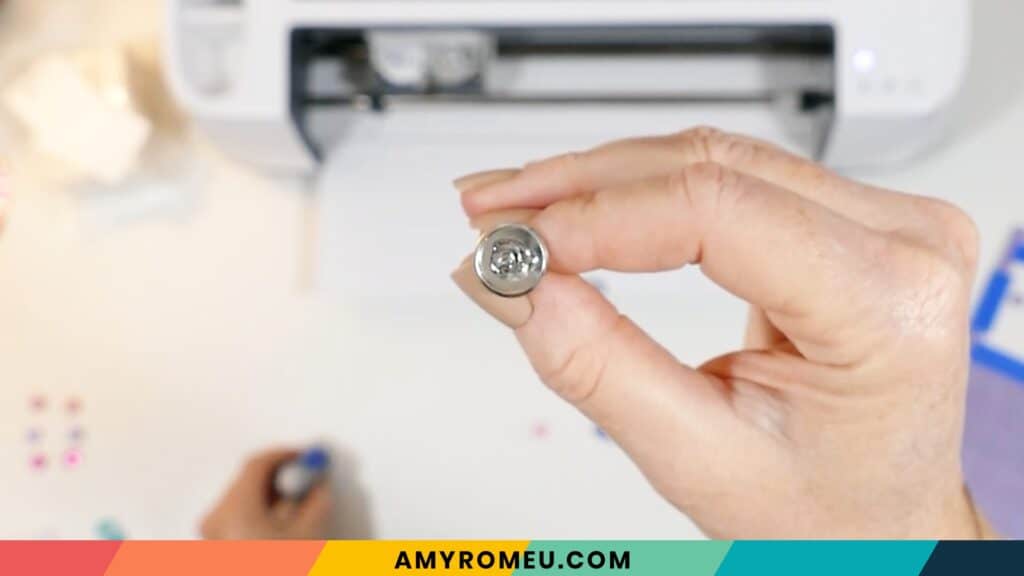
Then place your cut faux leather in the finding and press firmly.
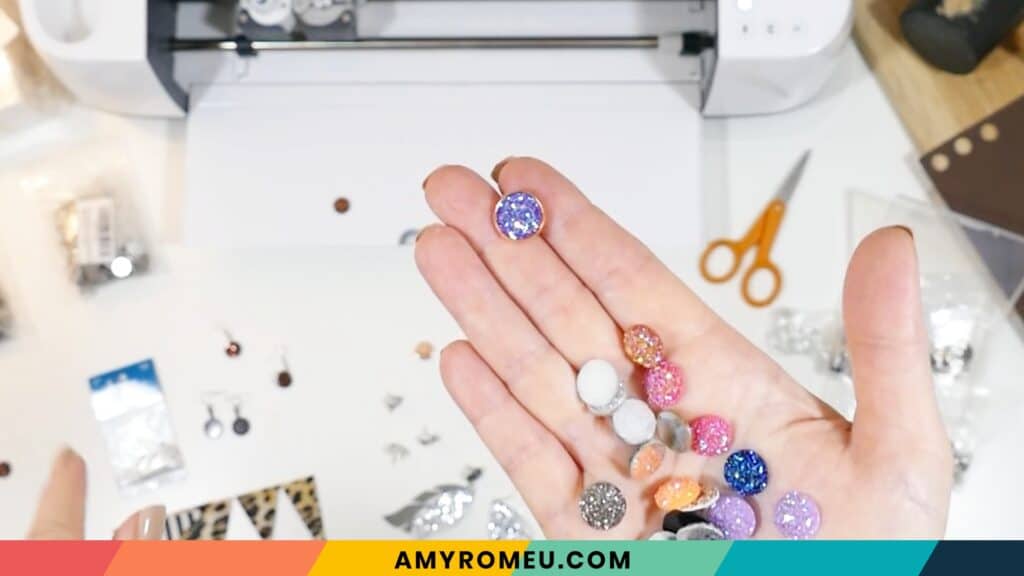
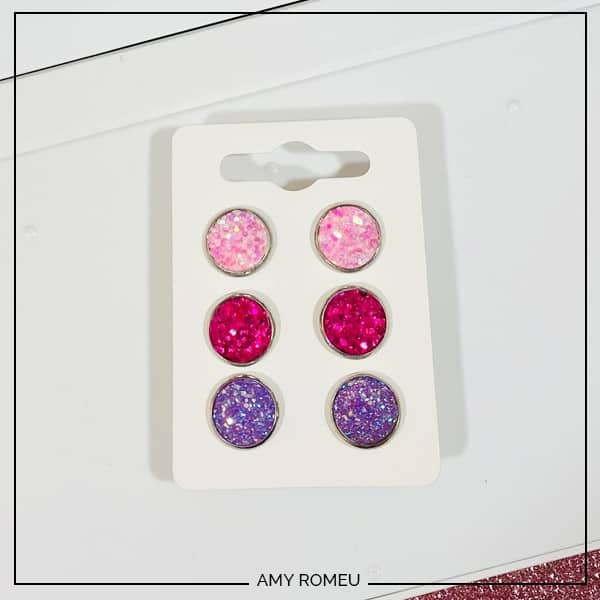
That’s it! Repeat with as many cut faux leather circles as you’d like and place your finished earrings on earring cards in coordinated sets. I use these three pair earring cards from Amazon.
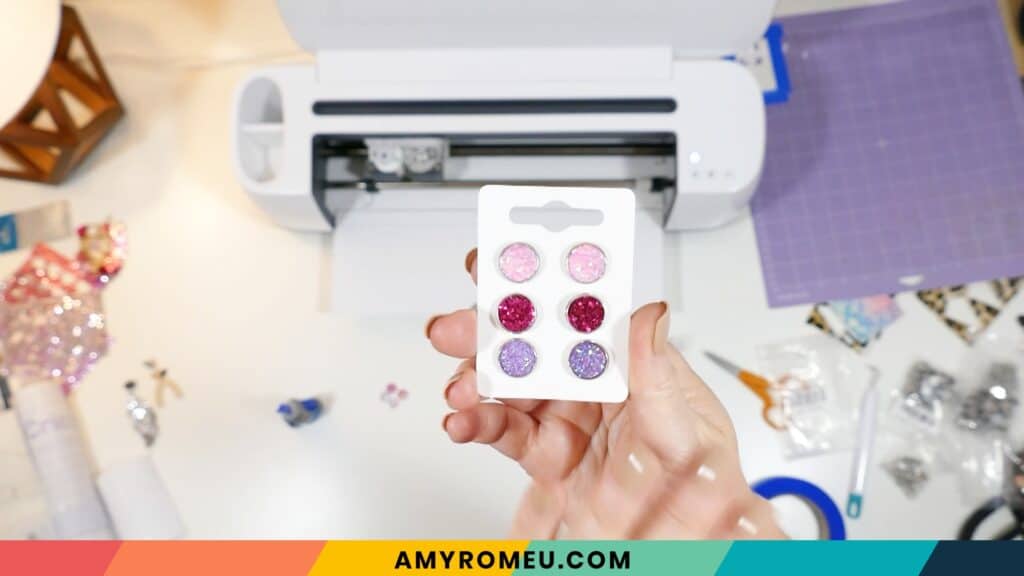
Another way to make stud earrings is to place druzy cabochons inside the stud earring settings. Use the same gluing process. I used these druzy cabochons from Amazon. They are available in 12mm and 10mm size.
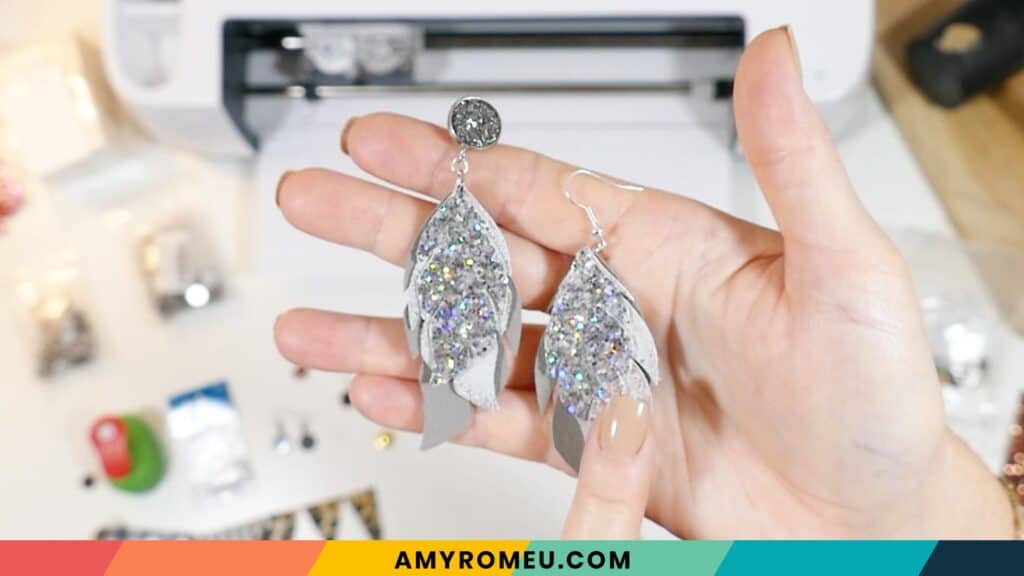
You can also make stud earrings with loops at the bottom and then hang other faux leather earring shapes for a new and updated look. You can see how replacing a traditional earring hook with a stud enhances the look of any faux leather earrings.
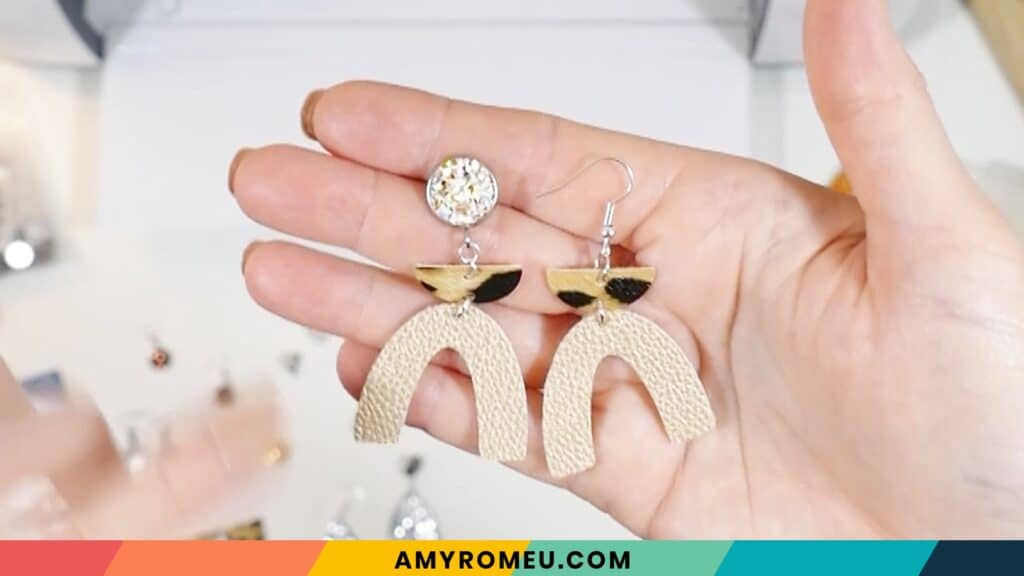
The top earrings are made using my Modern Shapes Earring SVG from my Etsy shop. Click here to see it.
The bottom earrings are made from my original layered Feathers earring SVG. You can see it in my Etsy shop here.
What do you think about this easy stud earring project? Are you going to try making some DIY faux leather stud earrings yourself?

If you do make this project, I would love to see your stud earrings! Please share a photo of them in the comments, or tag me on Instagram: @amyromeucreative
Want to see all of my Cricut earring & jewelry tutorials? CLICK HERE

WANT THE SVG FILE SO YOU MAKE THESE EASY STUD EARRINGS YOURSELF?
You can get it from my FREE Resource Library by filling out the form below!
Want to remember this? Post this DIY STUD EARRINGS project to your favorite Pinterest board!
Hi Amy,
Love these! Can’t wait to make them. So I ordered the 10mm size stud earrings and I got the 12mm hole puncher. Didn’t realize it until I was ready to make the earrings. So my question is what kind of 10mm size hole puncher do you recommend?
Hi, Jacqueline! Thanks for your comment. At the time I wrote this post, I couldn’t find a good 10mm punch, only a 12mm one. I recommend using the Cricut to cut the 10mm circles. 🙂
Where can i get the stub earring with the hook to hang the leather down? I cant find it.
Hi Amy. Where do I get the stud earring findings with the loop on the bottom so I can make some dangly earrings?
Hi! Please check the materials section on this post for a link to the findings with the bottom loop. Thank you!
Love these and think I’ll have to try some this weekend. I would love to learn more about using cabochon vs. UV resin in these earrings. Can you please share your favorite UV resin?