How to Make Ice Cream Cone Earrings with a Cricut
How to Make Ice Cream Cone Earrings with a Cricut
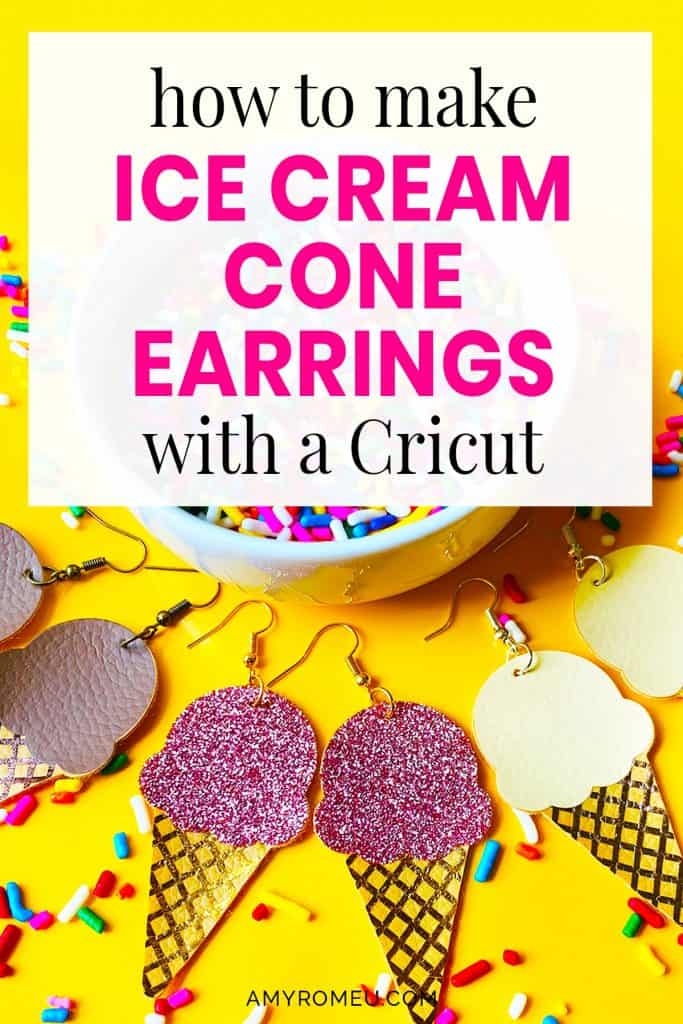
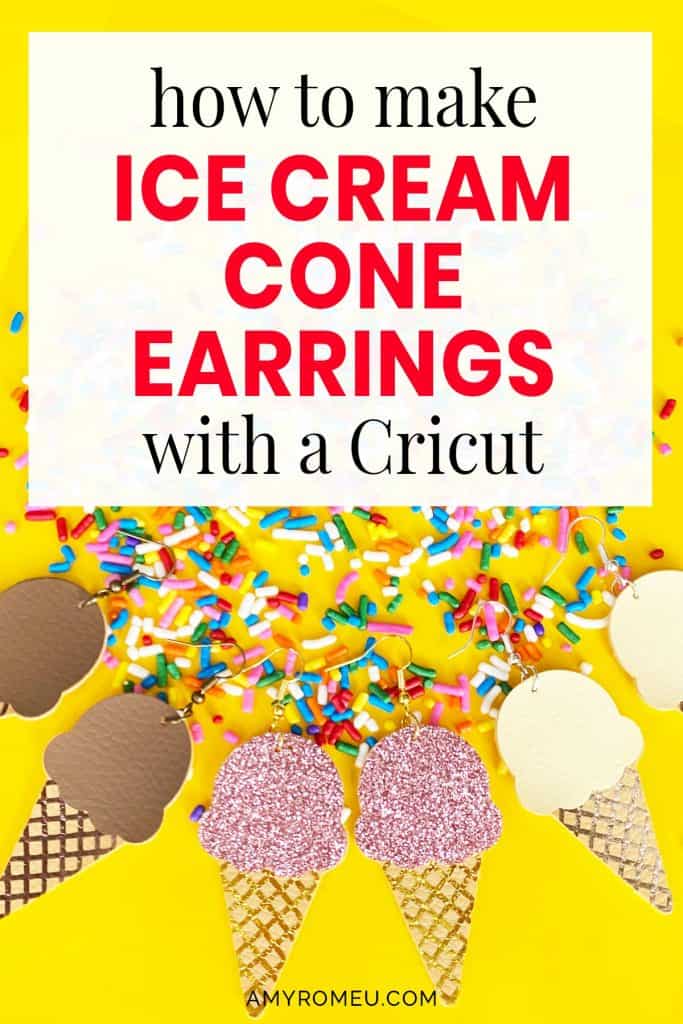
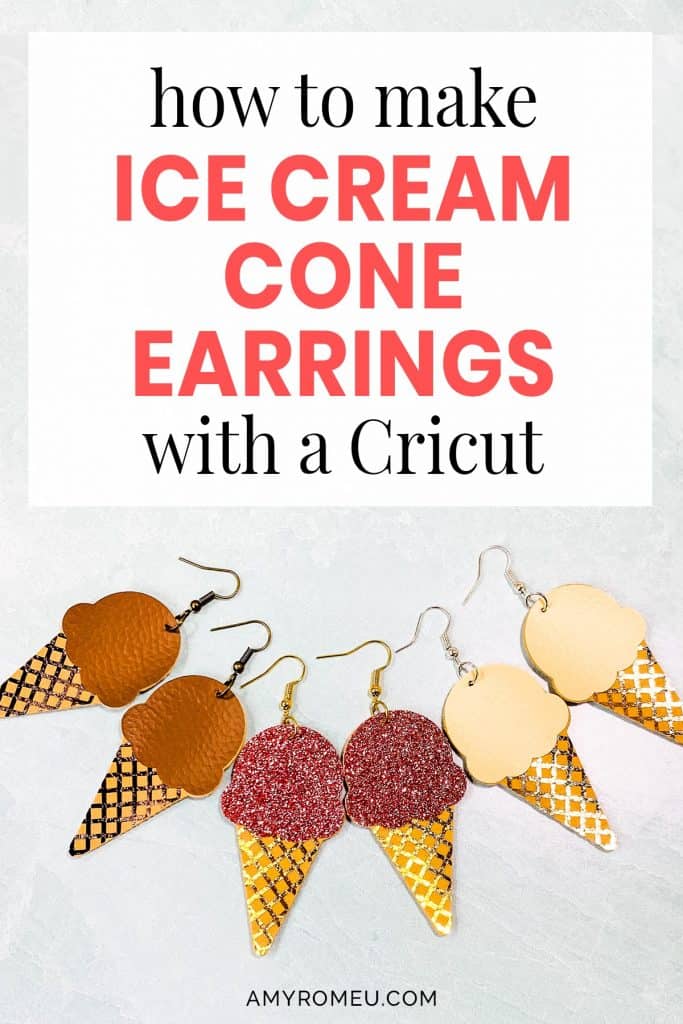
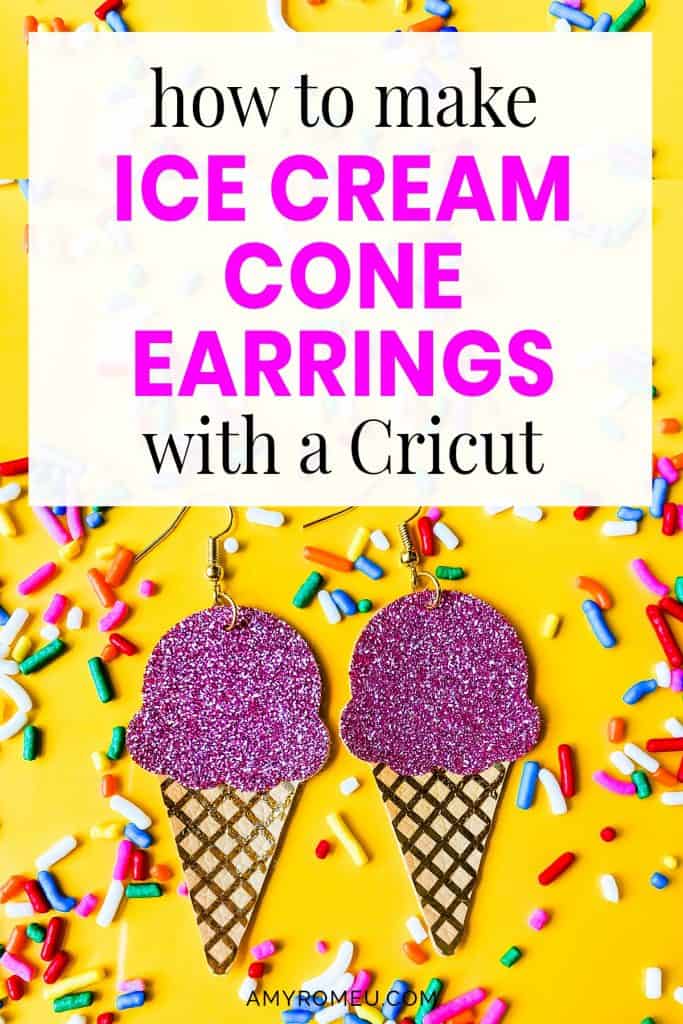
Summer is here, and boy is it hot outside! I’m in Florida and now that school is out, every day is a pool day. The kids love to enjoy a cold ice cream treat after a day in the sunshine, so I decided to make some cute ice cream cone earrings with my Cricut! How cute are they? If you want to learn how I made ice cream cone earrings with a Cricut, keep reading and I’ll show you how!
I made these ice cream cone earrings with my Cricut Maker, but you can also make them with the Explore Air 2, or even the Cricut Joy (you can read more about how to cut earrings with the Cricut Joy in my post here.) All three machines come with the standard fine point blade, which is the blade used to cut faux leather.
The ice cream cone is made from faux leather, and the cone texture and the ice cream scoop are made from heat transfer vinyl. You can choose any colors you’d like for this project, which makes it extra fun!
If you want to make these fun ice cream cone earrings yourself, I’m sharing my original SVG cut file free! You’ll find out how to download my free SVG file for this project at the bottom of this post.
Want to see all of my Cricut earring & jewelry tutorials? CLICK HERE
Ready? Let’s get started! Oh, and if you prefer a video – check out my video tutorial project below:
This page contains some affiliate links (which means if you make a purchase after clicking a link, I will earn a small commission at no additional cost to you). Read my full disclosure policy here.
DIY Cricut Ice Cream Cone Earrings – Materials List
- A Cricut. I have the Cricut Maker, available at Amazon here. You can also use the Cricut Explore Air 2 or even the new Cricut Joy, on Amazon here. You can see all of these machines available on Cricut.com here.
- Cricut Strong Grip (Purple) Cutting Mat. You can buy these on Amazon here, or at Michael’s here. They are also available at Hobby Lobby, Joann’s, and Walmart.
- Cricut Standard Grip (Green) Cutting Mat, available on Amazon here. They are also available at Michael’s, Hobby Lobby, Joann’s, and Walmart.
- For the “cone” – tan faux leather, light gold, light brown, or any similar color. For this project, I used the tan faux leather in this assortment of solid faux leather colors from Amazon here.
- For the “ice cream scoop” – heat transfer vinyl in the color of your choice. You can use Cricut Every Day Iron On from here or Siser EasyWeed from Amazon here. I used Siser Easy Weed Glitter in Rose Gold, available on Amazon here.
- For the “cone” texture – heat transfer vinyl or foil iron on in the color of your choice. I used Cricut Foil Iron On in Light Gold, available on the Cricut website here.
- Blue painter’s tape. This will help keep your faux leather firmly in place on your cutting mat, without damaging your mat or your material. You may already have some in the garage, or you can get it at any hardware store and most big box or grocery stores. Amazon also has it here.
- A Cricut Easy Press or a Cricut Easy Press Mini (what is what I use for pressing earrings). I bought my Easy Press Mini from Amazon here. It’s always good to check Cricut.com for pricing on the Easy Press Mini here – they have really good sales sometimes!
- If you will be using the Easy Press Mini like I do, you’ll need an EasyPress Mat to safely press your items on. I use the 8×10 size, which you can see on Amazon here.
- A weeding tool or a sharp pointed tool. I use the weeding tool from my Cricut tool set here.
- Glue with a fine tip. My favorite is Art Glitter Glue with the precision tip. Don’t worry, it doesn’t have glitter in it! You can get it on Amazon in a small bottle here or as a large and small bottle set here. The screw on precision tip allows you to squeeze very small amounts of glue in very small spaces, perfect for this and many other Cricut earring projects.
- A small hole punch for cutting the earring holes. This is my go-to hole punch for making Cricut earrings from Amazon here. I love it and it’s super inexpensive. It is called a “paper punch” but I use it all the time to punch through two layers of thick faux leather with no problems.
- Earring hooks – I used earring hooks from this assortment of earring hooks in different finishes these from Amazon here. Hobby Lobby, Michael’s, and other craft stores, as well as your local bead store, will have lots of earring hooks as well.
- Small jump rings – I used this assortment of 6mm size jump rings in different metal finishes from Amazon here. Again, your local craft store or bead store will have plenty of jump rings to choose from if you want to pick some up in person. You could use 5mm size too if that’s what you have.
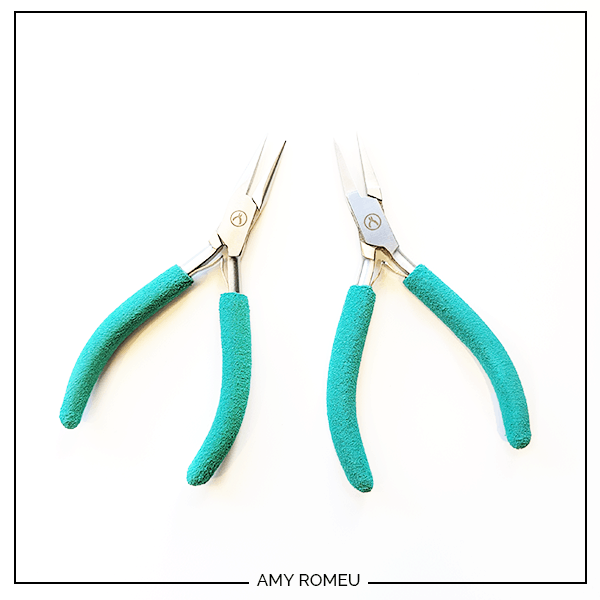
- Two pairs of flat nose pliers – I’m using one pair of wide nose pliers and one pair of needle nose pliers here, but you can use any two flat nose pliers you have in your jewelry making tool box. My favorites are Wubbers brand in the “Baby” size. You can see the Baby Wubbers Chain Nose Piers on the left on Amazon here, and the Baby Wubbers Flat Nose Pliers on the right on Amazon here. These are very high quality pliers that will last you a long time!
Note: Be sure to check out my post Beginner’s Guide To Jewelry Making Tools for all the information you need to know about buying and using jewelry making tools.
PROJECT INSTRUCTIONS
STEP 1 – Download Free SVG
Download the free SVG cutting file for these earring shapes from my free Resource Library. It’s Design #136. You can fill out the form at the bottom of this post to get the password to my Resource Library.
Save the zipped folder that downloads to your computer.
You’ll need to unzip or extract the files FIRST before you can upload the cutting file to Cricut Design Space. Make a note of the file location after you unzip it so you can find it in the next step.
STEP 2 – Upload SVG to Cricut Design Space
When you open Cricut Design Space, click on NEW PROJECT to get started. Then click on UPLOAD from the left hand side menu.
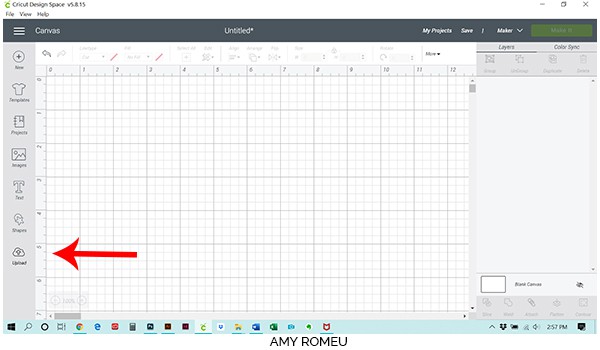
Click on the UPLOAD IMAGE button, then click BROWSE to locate where your downloaded folder is saved.
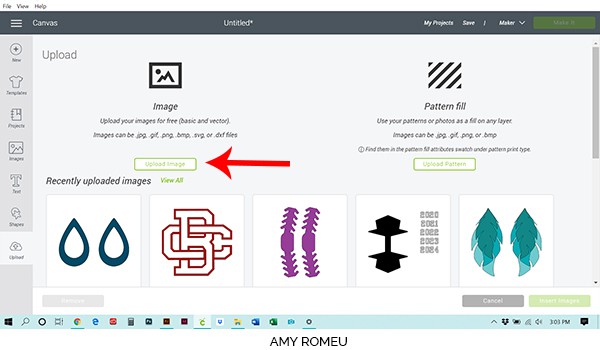
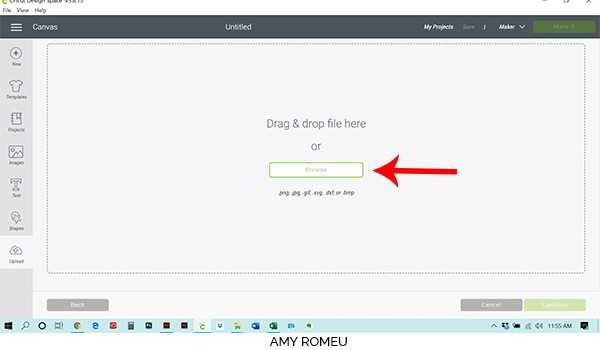
Navigate to where you’ve saved the already unzipped SVG file for this project. Double click on the SVG file for this project to bring it into the upload screen in Design Space. If you get an error saying “file type not supported,” that usually means your folder that contains the SVG file is not unzipped, or you are trying to upload the wrong file.
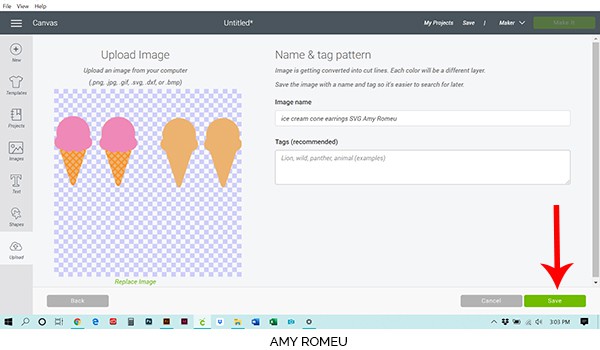
You’ll see a preview of the earring shapes for this project. Hit the green SAVE button.
After you’ve selected your file to upload, you’ll see it as the first item in your “recently uploaded designs” row.
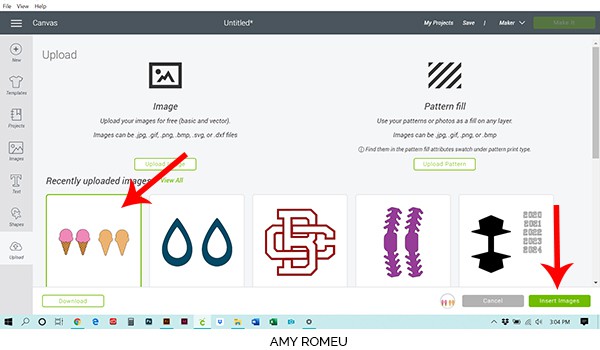
Click on it so it is outlined in green. Then click on the green INSERT IMAGES button in the bottom right corner.
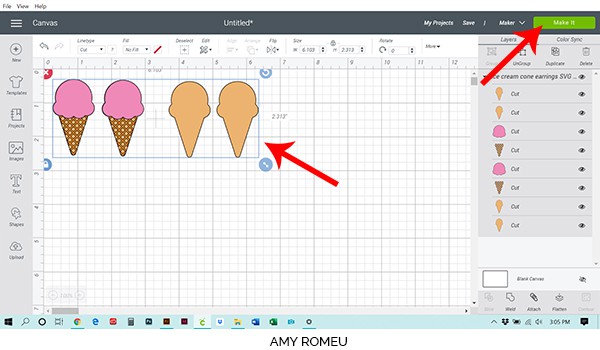
This brings the earring cut shapes into Cricut Design Space. Drag the ice cream cone shapes up to the top left corner of your canvas.
The first pair of ice cream cone shapes is the front of the earring. There is a faux leather layer, then a layer of foil cross hatching for the cone texture, and a glitter HTV layer for the ice cream scoop.
The second pair of ice cream cone shapes will also cut from faux leather and will be glued to the back of the left ice cream cone shapes. This will give the back of your earrings a finished look, as well as keep the earrings from curling by giving them some structure and stiffness.
If you don’t want to cut backs for your earrings, you can hide them to keep them from cutting by clicking on the eye icon next to each of the layers you don’t want to cut.
NOTE: These earrings are on the large size – if you want to make them smaller, you can do that now by dragging the shapes to a smaller size. I don’t recommend going any smaller than 1.75″ tall, or else the foil cross hatching on the cone may be too hard to weed!
When you are ready to move on, click the green MAKE IT button.
STEP 3 – Cut the First Vinyl Mat
Gather your faux leather and heat transfer vinyl or foil iron on materials for the next step.
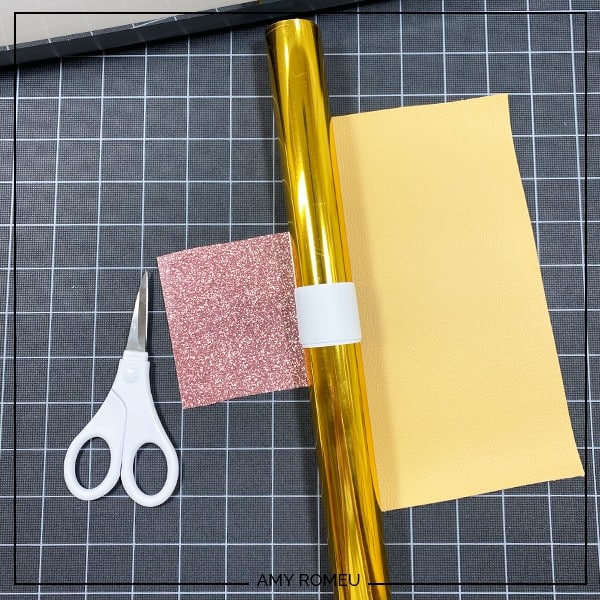
Note: If you’re wondering what the white band around my foil iron on tube is, it’s a white slap bracelet! They are great for keeping my vinyl rolls neatly wound. You can get slap bracelets in lots of colors, but I prefer the all white slap bracelets from Amazon here.
Cricut will separate each material color and type into its own mat for you. Your mats will be shown on the mat preview screen and will cut in the order shown. You can always skip ahead to cut the mats in a different order by clicking on whichever mat you want to cut next.
The most important thing to do before you do anything else is to MIRROR each mat. Both faux leather and heat transfer vinyl must cut face down, so you need to mirror all of your mats in this project. Go ahead and slide the MIRROR ON toggle for EACH mat now, so you don’t forget later!
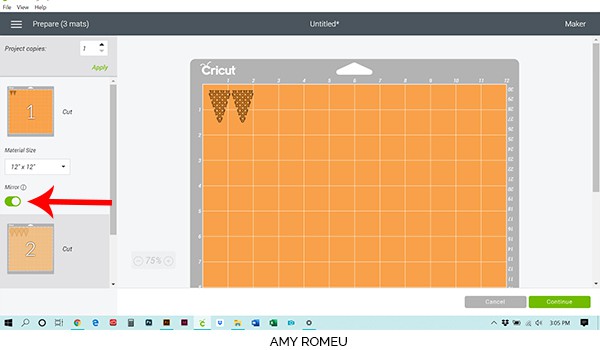
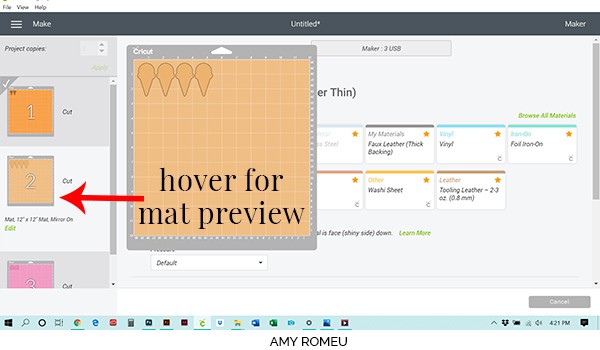
Before you hit the green CONTINUE button, hover over the first mat preview and make a note of the size of material you’ll need to cut the shapes completely from. This gold mat will cut from the gold colored foil iron on.
I hovered over each mat preview during this step and cut all of my material for each mat, but you can do it one mat at a time if you prefer. I like to leave an extra half inch on all sides of the material when I cut it to allow room for error.
Once you’ve made a note of the material size and placement location on the first mat, press the CONTINUE button.
STEP 4 – Choose Material Settings
On the next screen, you’ll make your material settings. For all of the vinyl and foil iron on cuts in this project, I used the Washi Tape setting (instead of Vinyl). The Washi Tape cut setting tends to make intricate cuts better. If you don’t already have the Washi Tape material setting in your Favorites, click on Browse All Materials, search for Washi Tape, and then click on it to select it.
I leave the Pressure setting in the next dropdown menu at “Default,” but you may need to adjust the pressure based on how your Cricut cuts.
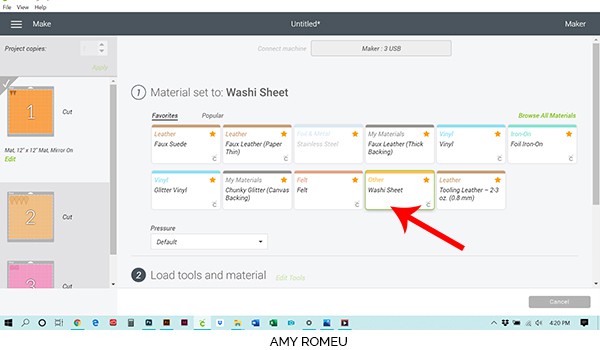
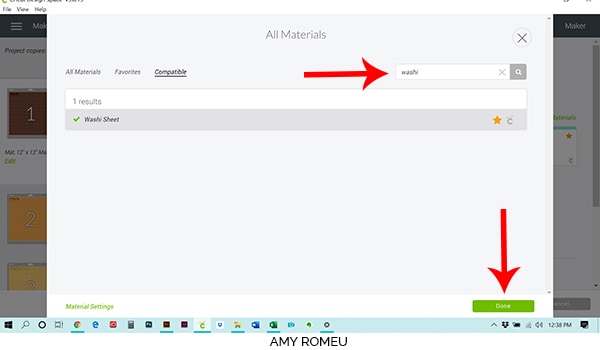
Once the material settings are selected, it’s time to prepare your first cutting mat.
STEP 5 – Prepare & Cut The Vinyl Mats
Place the gold foil iron on piece you cut to size shiny side down on a green Cricut cutting mat in the same location on the mat as shown in the mat preview (top left corner here).
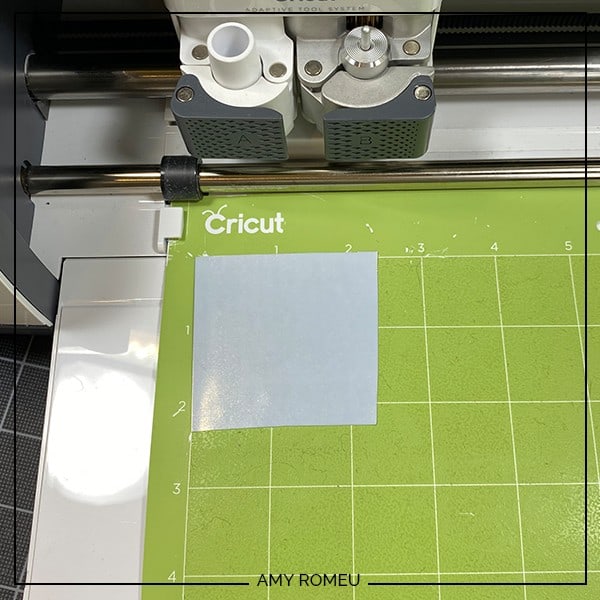
Load your mat into the Cricut by lining up the green mat under the mat guides. Press the double arrow button to feed the mat into the machine. If your mat doesn’t feed in straight, or if one side isn’t under the mat guide, just press the double arrow button again to push the mat back out, so you can try again.
When your mat is loaded correctly, press the flashing C button to start the cut.
When the cut is complete, unload the mat by pressing the double arrows button and remove the vinyl from the mat. Using your weeding tool, remove the excess vinyl around the cut shapes.
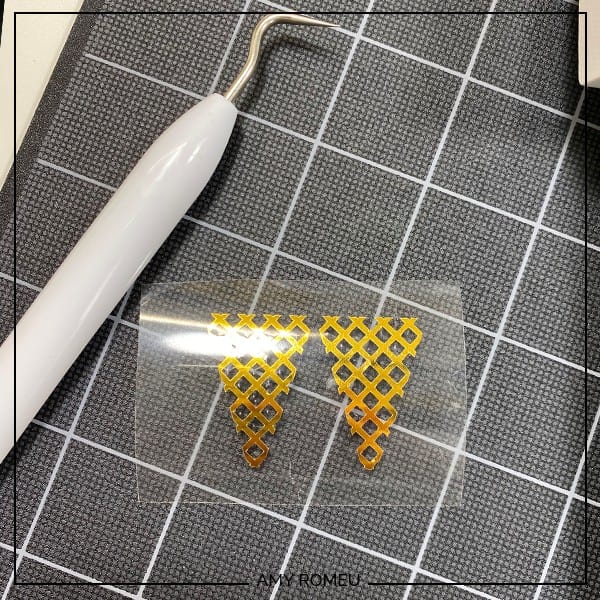
The next mat to cut is the faux leather mat. If you want to skip the faux leather mat and finish cutting all of the vinyl mats first, you can do that by clicking on the glitter vinyl mat in the mat preview screen on the left.
Remember your glitter vinyl mat must be MIRRORED before cutting.
Choose Glitter Vinyl from the material choices screen, or click on Browse All Materials to choose this setting.
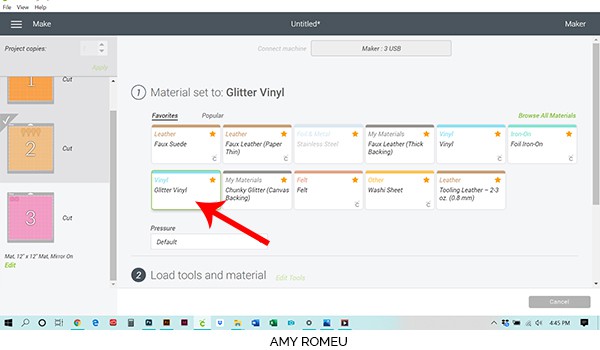
Place the glitter vinyl shiny side down on the green cutting mat.
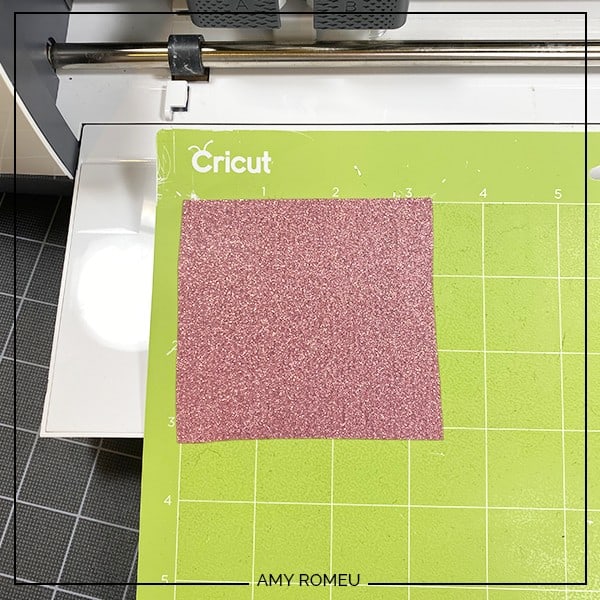
Load the mat into the machine and press the C button to start the cut. Unload the mat and use your weeding tool to remove the excess glitter from the carrier sheet. Glitter vinyl can be tricky to cut! Bend the glitter vinyl carefully to reveal where the cuts are so you can start weeding in that spot.
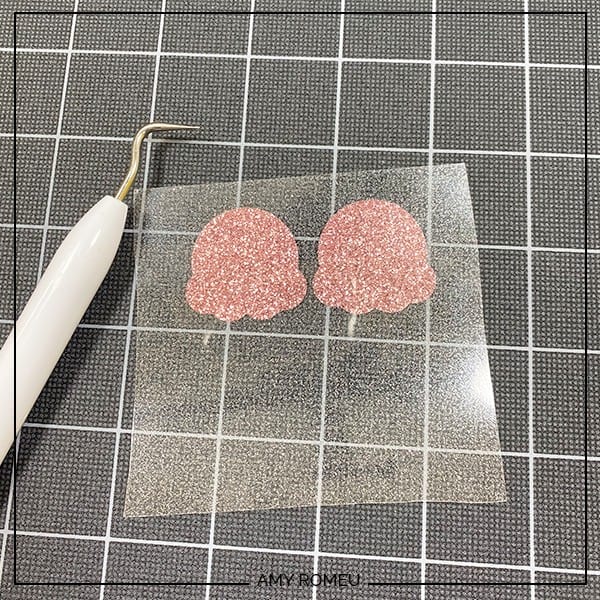
Set the weeded ice cream scoops aside.
STEP 6 – Prepare The Faux Leather Layer For Cutting
When you get to the faux leather layer, you’ll need to select a different material setting. Before you do that, hover over the faux leather mat in the mat preview and cut the faux leather to size, if you haven’t already. Be sure your mat is mirrored. If not, click the green EDIT option under the mat preview screen to mirror the mat before cutting.
STEP 7 – Choose Your Material Setting
Select Faux Leather (Paper Thin) as your material setting. (If you are using an Explore Air 2, turn your dial to Custom first.) This setting is an automatic double cut, and it’s the setting I use most often for faux leather.
If you don’t have Faux Leather (Paper Thin) as a favorite material, you can click on “browse all materials” (in green, top right) and add it.
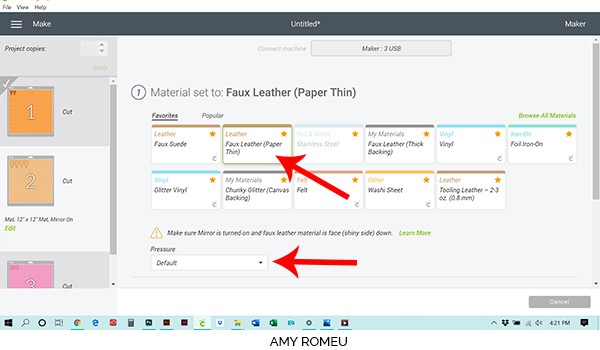
I like to cut faux leather using “more” pressure, but your machine may cut fine with just the default setting.
Prepare your purple strong grip mat for cutting. Place your cut faux leather pretty side down in the top left corner of your mat as shown in the mat preview. Then tape it down on all sides with blue painter’s tape.
NOTE: It’s important to place the material on a very sticky part of your purple mat. If your mat is well used, like mine. the top left corner might not be very sticky any more! If that’s the case, you can edit the mat layout from the mat preview screen and move the shapes to any location you want on the mat.
To do that, click on the Edit menu underneath the mat preview. Click on the shapes one at a time and drag them to their new location. In this project, I moved my shapes to the center of the top of my mat, as shown.
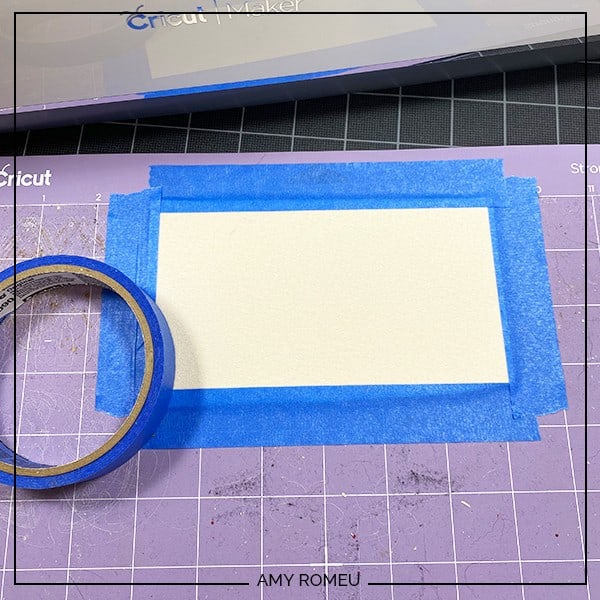
Feed the faux leather mat into your Cricut and press the C button to cut. Unload your mat when the cut is complete and remove the ice cream cone shapes from the mat.
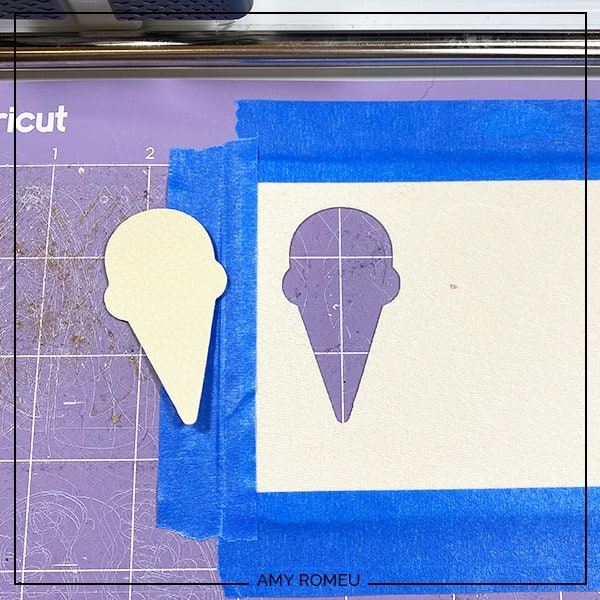
Match up the two front and back cone shapes and set them aside.
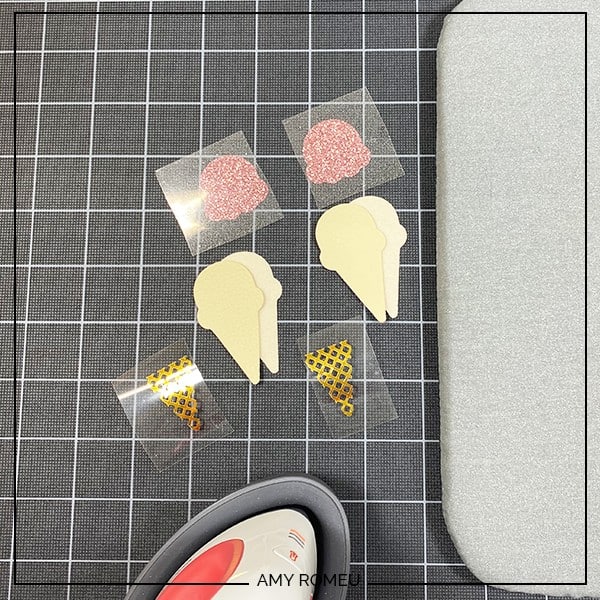
STEP 8 – Press The Vinyl Onto The Ice Cream Cone Earrings
Gather your Easy Press Mini or Cricut Easy Press, a heat pressing pad, and a Teflon sheet or piece of parchment paper.
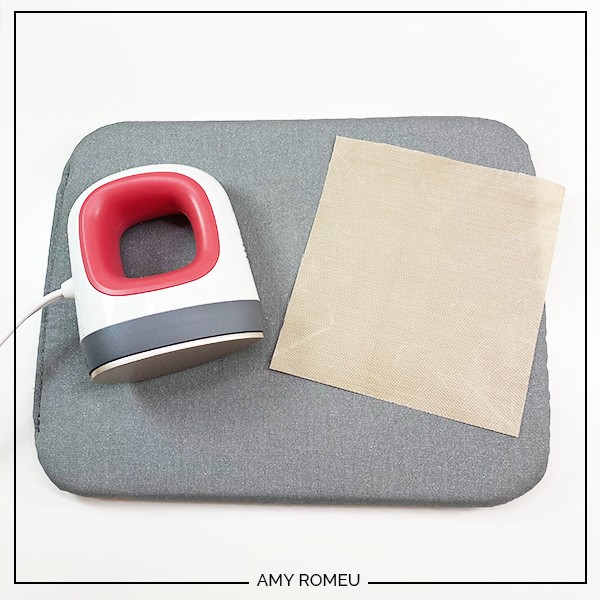
I recommend pressing one earring at a time. The cone cross hatch texture layer will be pressed first, and then the scoop layer will go on top.
After lining up the foil cone texture on the faux leather cone layer, cover the HTV with the teflon sheet or parchment paper.
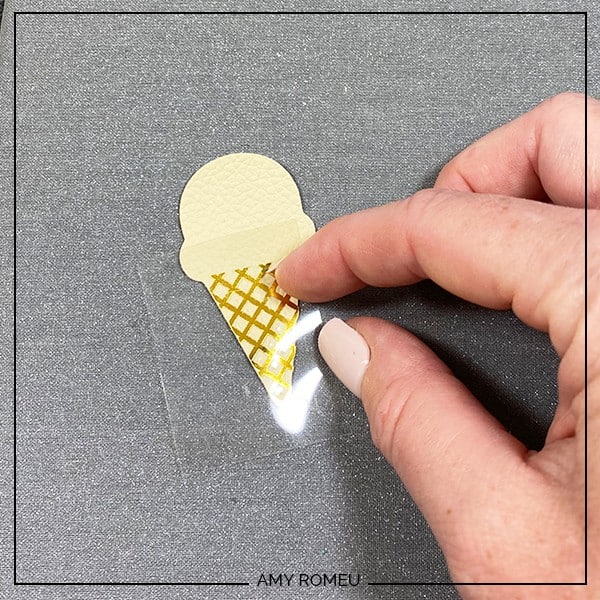
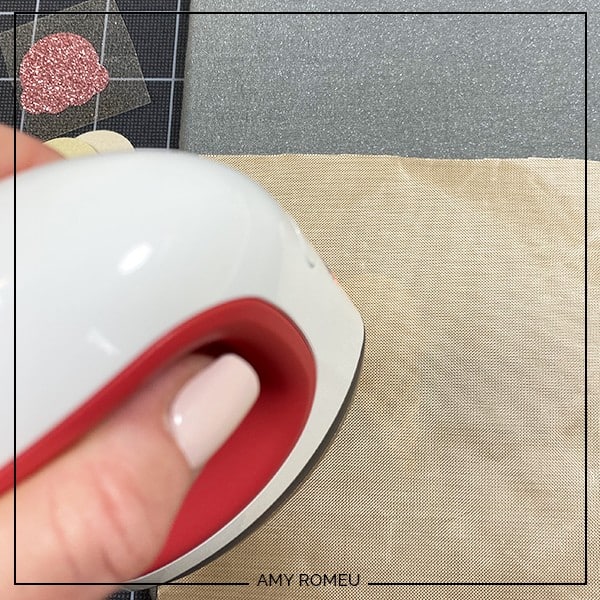
With the press on low heat, gently but firmly press the the vinyl through the cover sheet. You don’t want to press TOO hard or else you’ll flatten out the pebbled texture of the faux leather. Only press for a few seconds with heat.
After you press the foil long enough for it to stick, peel the carrier sheet away from the faux leather earring. Keeping the ice cream cone earring flat and curving the plastic sheet up and away helps the vinyl stay wrinkle free.
Repeat with the ice cream cone scoop. Then press the other earring.
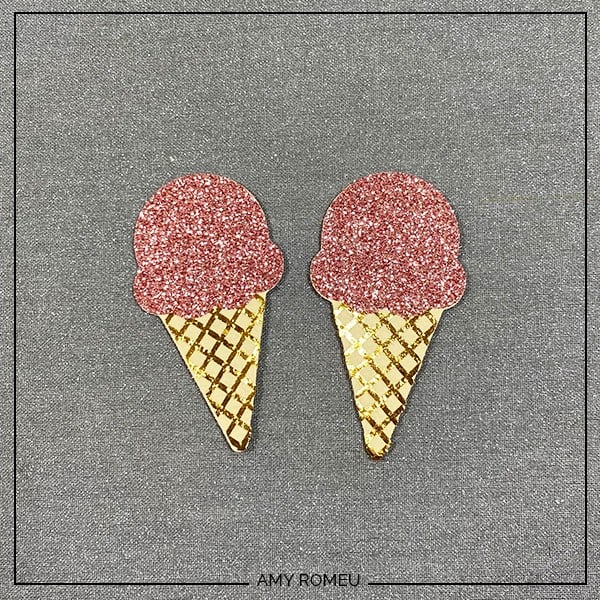
STEP 9 – Glue The Earring Backs On
If you are adding backs to these ice cream one earrings, you can do that now. I like to use Art Glitter Glue for gluing faux leather (it doesn’t have any glitter in it, and it dries clear). It glues fabric well (which is what the faux leather is, really) and the bottle comes with a fine tip attachment that is SO helpful! But you can use whatever craft or fabric glue you have for this step.
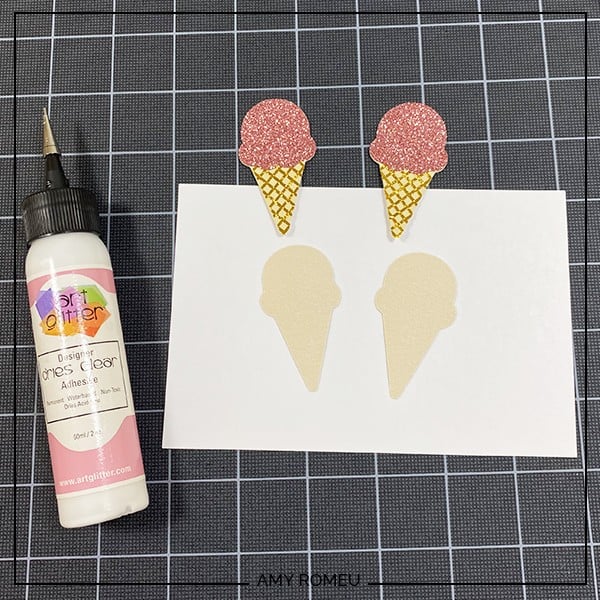
Spread the glue on the back of the first earring back, being careful not to get the glue too close to the edges.
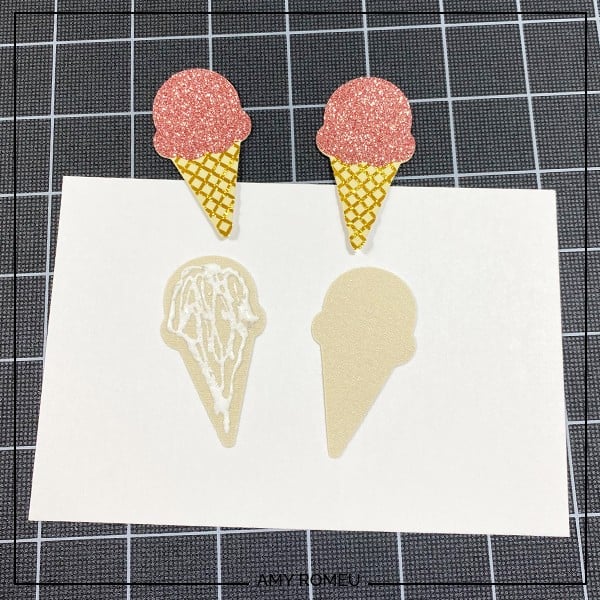
Place the ice cream cone top layer on top of the glue, and press down firmly with your fingers. Repeat with the other ice cream cone. Then place both glued cone shapes under something heavy like a book for at least a few hours to dry. Overnight is best.
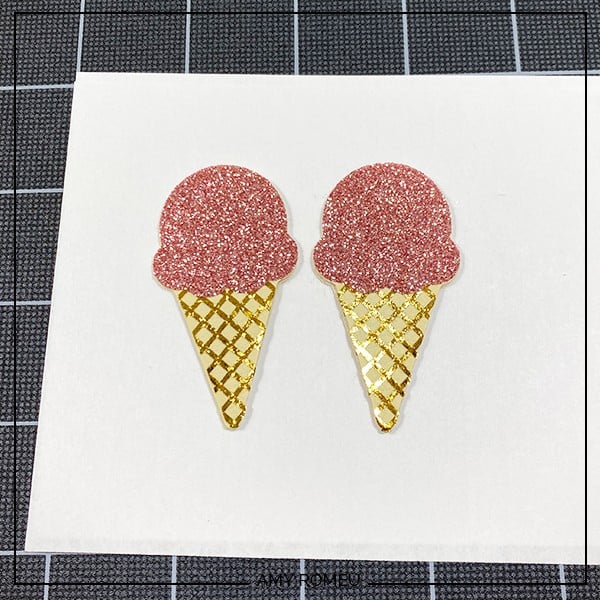
STEP 10 – Make The Earring Holes
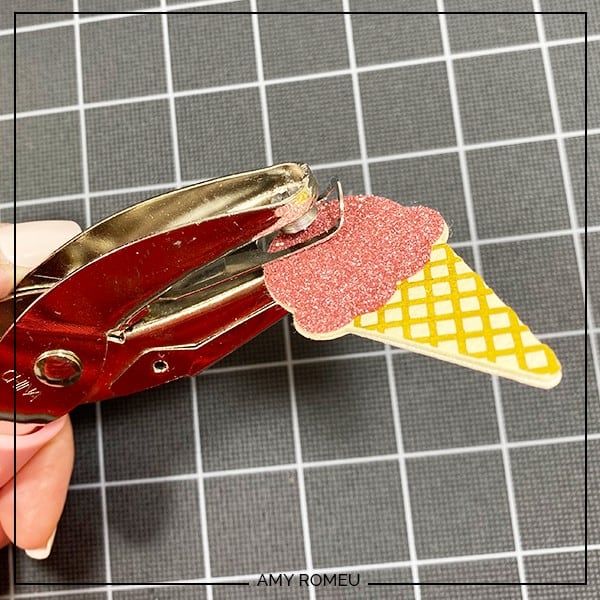
I made the earring holes in the ice cream cone shapes with my 1/16″ hole punch. This is the hole punch I use daily to make the perfect sized earring holes, available from Amazon here. It’s sold as a “paper punch” but I’ve successfully cut many different kinds of faux leather with it. I love it!
STEP 11 – Attach the Earring Hooks
Now it’s time to assemble your earrings!
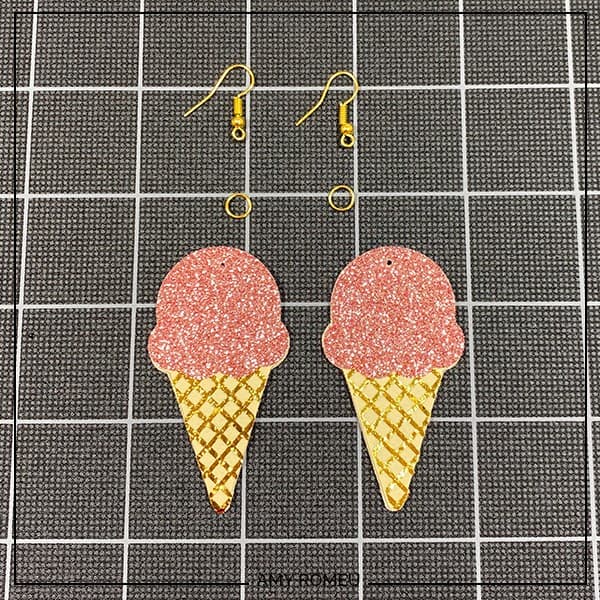
You’ll need small jump rings, earring hooks, and two pairs of flat nose pliers.
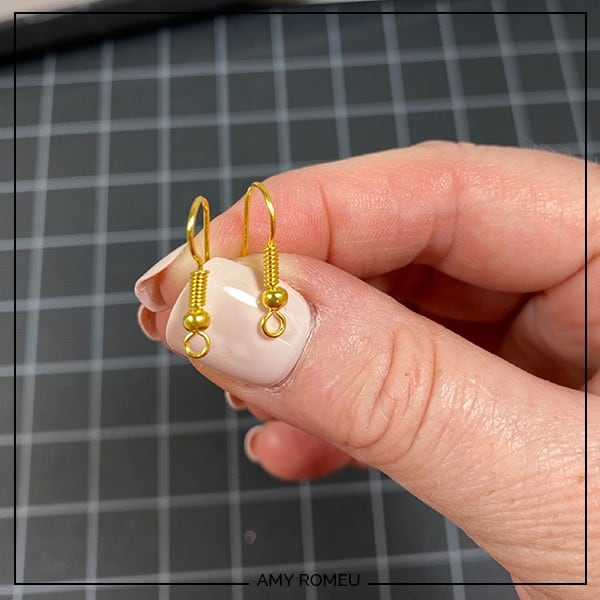
To connect the earring hooks to the ice cream cone earrings, you’ll first need to turn the bottom loop on the fishhook sideways so your earrings will hang correctly. See the example image below to see how the orientation of the earring hook has to change so your earrings will hang straight.
To see more about this, visit my post about how to make faux leather earrings hang straight here.
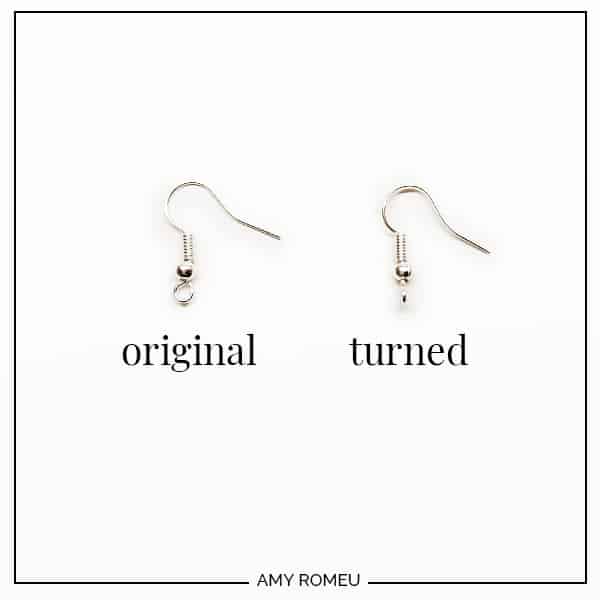
You’ll do this using one pair of flat nose pliers. While holding the hook firmly between two fingers, grip the entire earring loop between the pliers and twist your wrist until the loop is perpendicular to the earring post. Repeat with the second earring hook.
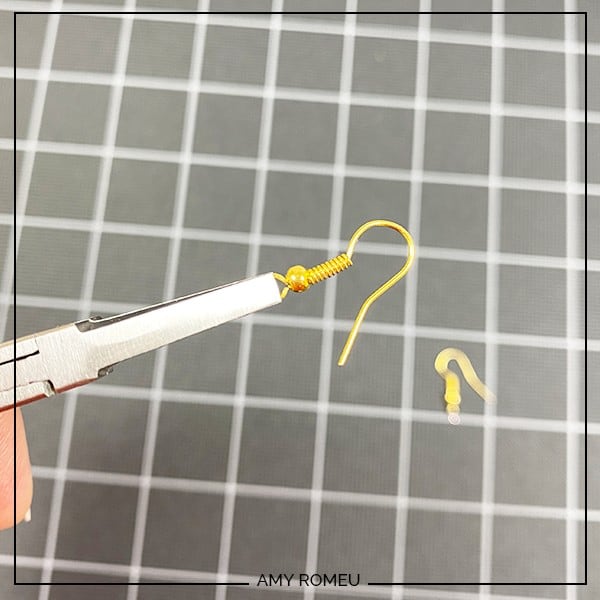
Once both of your hooks have been twisted, you’re ready to attach the ice cream cone shapes with jump rings.
Now you’ll need to open your small jump ring to slide the ice cream cone earring and the earring hook on. Using two pliers, grip each side of the jump ring, making sure the opening in the jump ring is facing up (the twelve o’clock position).
Rotate one wrist forwards or backwards, so the circle creates an opening but doesn’t bend out of it’s circle shape.
When the jump ring is open, slide the ice cream cone onto your jump ring, then slide your earring hook onto the jump ring.
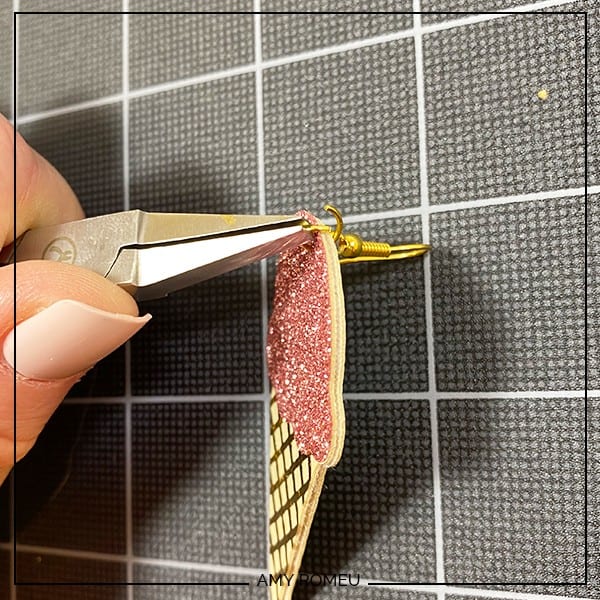
Pay attention to which side is the front of your earring as you do this to be sure your earring and hook are both facing the right direction.
Then use your two pliers to close the jump ring again, using a wrist twist in the opposite direction. This takes a little practice, but you’ll get it!
Repeat with the other earring. That’s it!
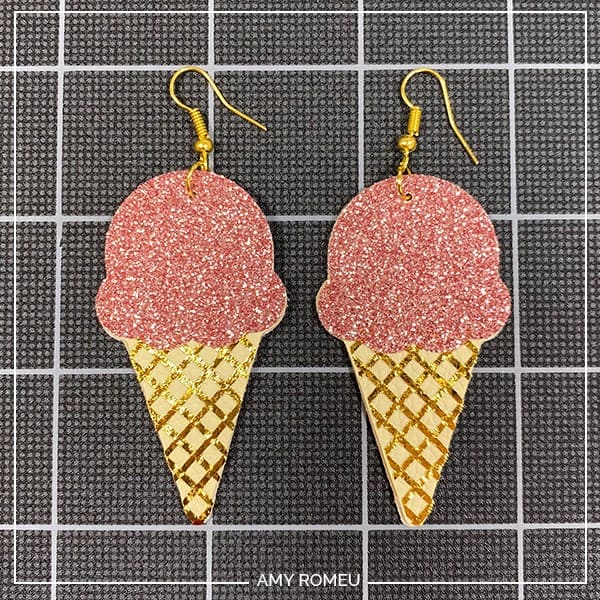
What do you think? Are you going to make these ice cream cone earrings? If you do, what flavor will your ice cream scoop be? Please post a comment and attach a photo of your ice cream cone earrings! I would love to see them!
Want to see all of my Cricut earring & jewelry tutorials? CLICK HERE
Until next time… and happy creating!

Want the FREE SVG file you so you make these DIY ICE CREAM CONE EARRINGS yourself?
Get it from our Resource Library! You’ll receive the password for the Resource Library instantly after filling out the form below!
Want to remember this? Post this DIY CRICUT ICE CREAM CONE EARRINGS project to your favorite Pinterest board!



Can I have the password to the free resource library?
Hi, Jenna!
Thanks for your comment! You can get the password here: https://amyromeu.com/get-a-password/
Thank you.
Amy
You are so helpful!! I’m loving this new hobby. Thank you for sharing your skills.