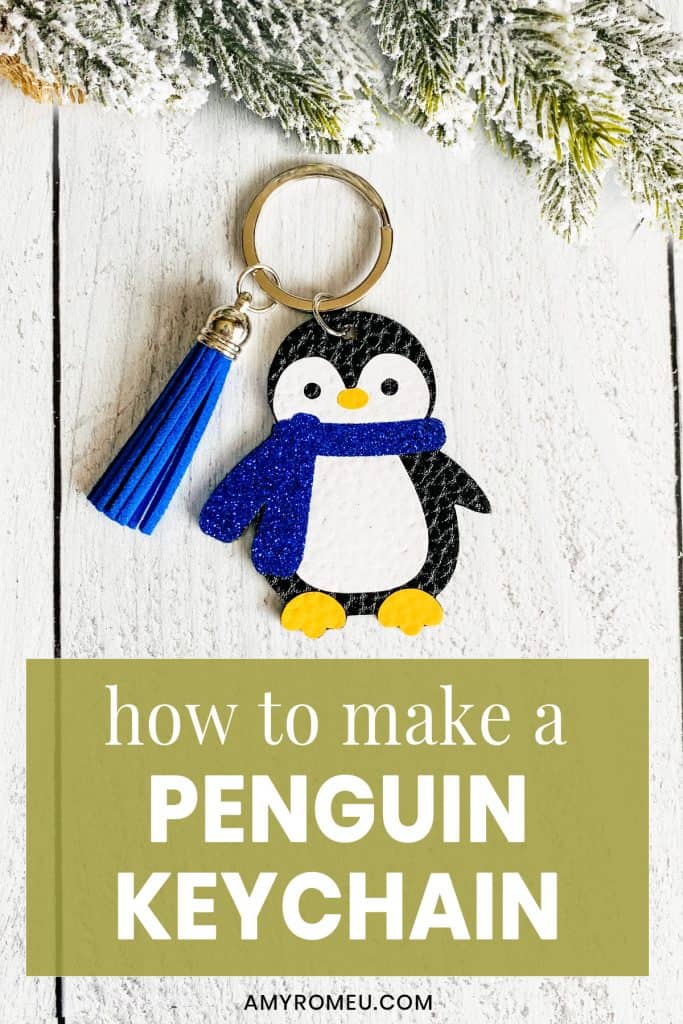
How to Make a Penguin Keychain
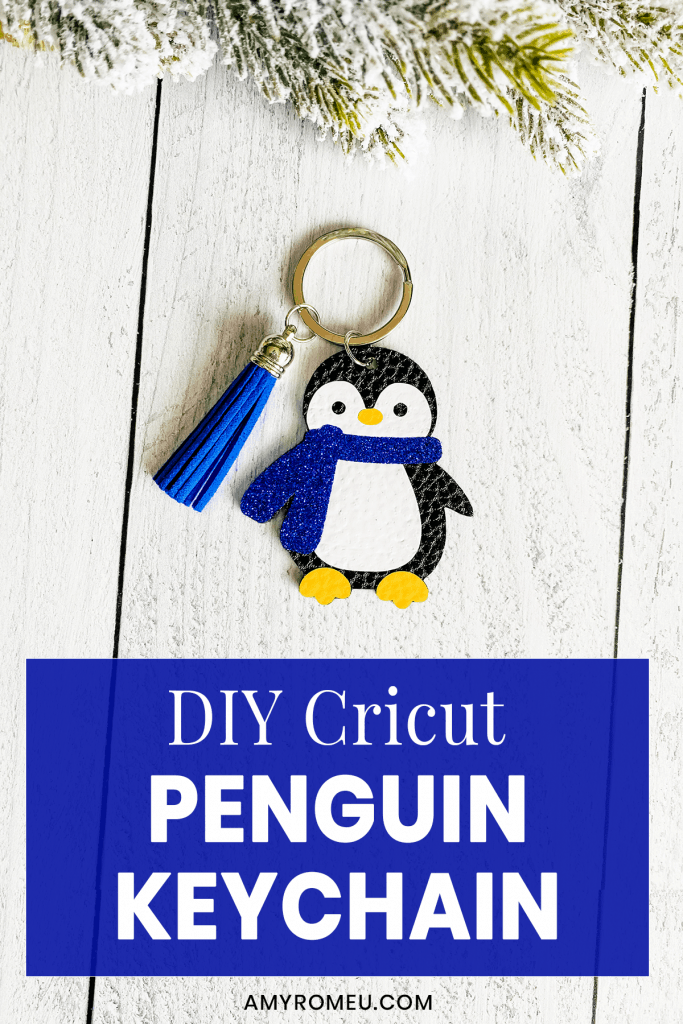
DIY Penguin Keychain
If you’ve purchased my Penguin Keychain template from my shop and want more information about how to put it together and what materials to use, you’re in the right place! Continue reading for all the details!
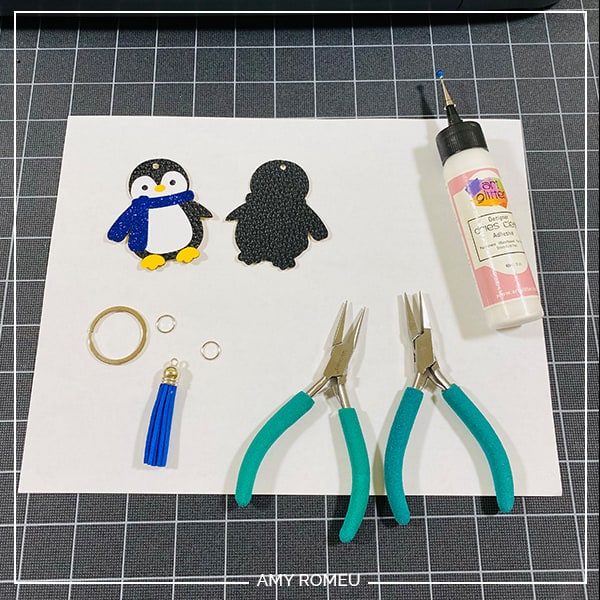
Penguin Keychain – Materials List
This page contains some affiliate links (which means if you make a purchase after clicking a link, I will earn a small commission at no additional cost to you). Read my full disclosure policy here.

- The Penguin Keychain SVG template from my shop here. (NOTE: This design is for PERSONAL USE ONLY. If you’d like to sell keychains made from my Penguin Keychain SVG template, you may purchase a Commercial Use License from my shop here.)
- A vinyl cutting machine, like the Cricut Maker, the Cricut Explore Air 2 or the Cricut Joy.
- Black Faux Leather. You can use either smooth or pebbled faux leather for this design. I recommend this smooth black faux leather and this pebbled black faux leather, both from Amazon.
- Heat Transfer Vinyl in assorted colors. I used Siser Easyweed in White for the body, Siser Easyweed in Yellow for the beak and feet, and Siser Glitter HTV in Blue for the scarf. If you want to make a lot of penguin keychains with different colors of glitter scarves, this is a great assortment pack of 12 different Siser Glitter colors you may want to check out.
- Cricut Strong Grip (Purple) Cutting Mat – From Amazon here.
- Cricut Standard Grip (Green) Cutting Mat – From Amazon here.
- Blue painter’s tape. This will help keep your faux leather in place on your mat. This is regular blue painter’s tape you can get from the hardware store, or Amazon has it here.
- A weeding tool. I use the weeding tool that came with my Cricut tool set from Amazon here.
- Cricut EasyPress Mat. I like the 8×10 size for making earrings.
- Small curved scissors – I use these curved scissors from Amazon for small projects like these.
- Glue. I recommend Art Glitter Glue with the precision tip. It doesn’t have glitter in it! You can get it on Amazon in a small bottle here or as a large and small bottle set here. Be sure to get the bottle with a screw on precision tip, which allows you to squeeze very small amounts of glue in very small spaces. You could also use E6000, Aleene’s Quick Dry Tacky Glue, or Quick Hold Glue.
- A keyring. I used 1.25 inch size key rings from Amazon here.
- Faux suede or faux leather tassels (optional) – I used silver-tone topped tassels from this tassel assortment package from Amazon.
- Large jump rings (optional) – for attaching the tassel to the key ring. I used these 10mm size jump rings from Amazon.
- Two pairs of flat nose pliers – My favorites are Wubbers brand in the “Baby” size. My everyday use pliers are the Baby Wubbers Chain Nose Pliers and the Baby Wubbers Flat Nose Pliers.
Penguin Keychain – Assembly Instructions

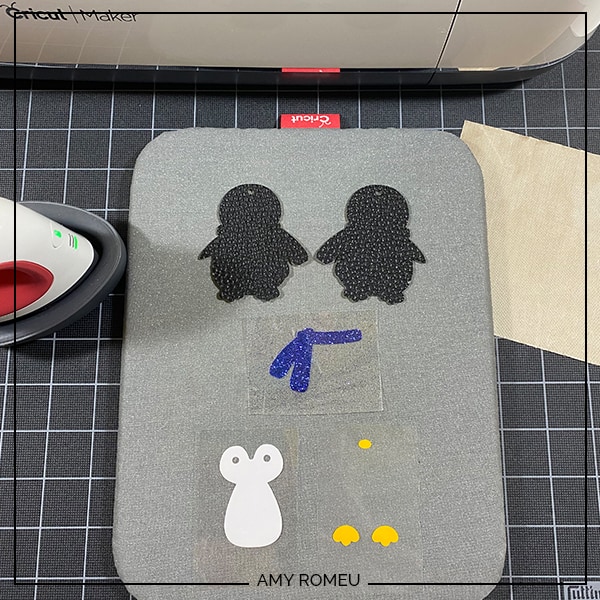
This penguin keychain design consists of 5 different layers to cut – 2 faux leather layers, and 3 heat transfer vinyl layers.
- Cut the black layers from faux leather.
- It is not necessary to mirror the mat.
- On a Cricut, I recommend cutting the faux leather to a size just slightly larger than the two shapes that will cut. Place the faux leather pretty side down on a sticky purple strong grip cutting mat.
- Tape the faux leather down to the mat on all sides with blue painter’s tape.
- I recommend using the Faux Leather (Paper Thin) cut setting with “More” pressure (on a Cricut Explore Air 2, turn your dial to Custom to access this setting).
- Check the cut before unloading the mat by lifting a corner of the cut shape with your weeding tool. If the cut is complete, unload the mat and remove the shapes. If not, press the C button to repeat the cut again as many times as necessary.
- Cut the heat transfer vinyl layers. Mirror each heat transfer vinyl mat before cutting. Use the recommended material setting for your specific material. My recommended settings are:
- I use the Washi Sheet setting with “Default” pressure for solid colored Heat Transfer Vinyl.
- The Foil Iron-On setting with “Default” pressure for Foil Iron-On.
- The Glitter Vinyl setting with “More” pressure when cutting Siser Glitter Vinyl.
- Weed all the heat transfer vinyl layers.
- Press the heat transfer vinyl layers one at a time onto the front of the penguin keychain.
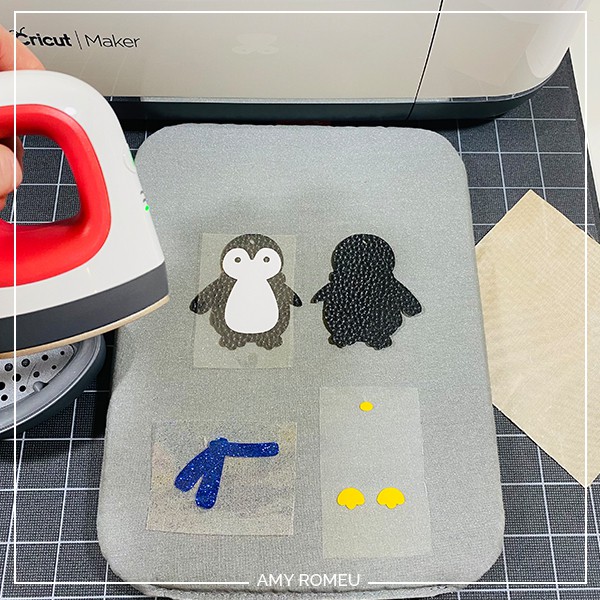
- Use a teflon sheet or parchment paper to press each layer. Press the white layer first, then the yellow, then the scarf. I use an Easy Press Mini and an EasyPress Pad (8×10 size).
- You can also use an EasyPress or even a home iron on a low setting with no steam. I don’t recommend using a traditional clamshell or swingaway heat press because it’s harder to control the pressure.
- Place your just pressed faux leather shape under something flat like a book so the keychain front will cool flat.
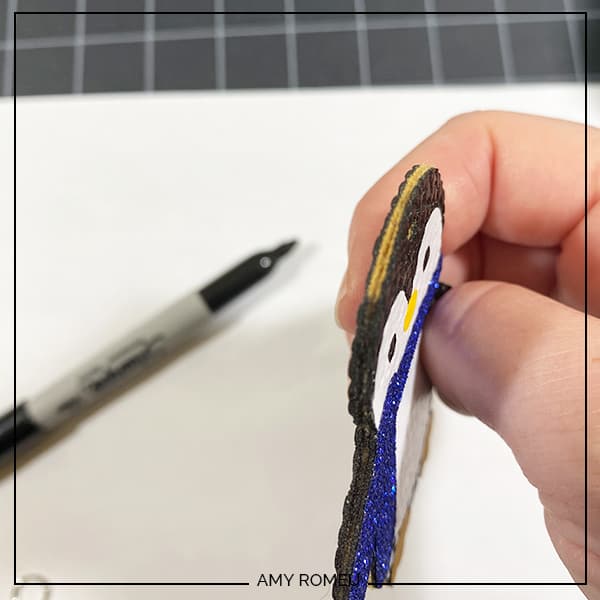
- Glue the front and back black faux leather shapes together.
- Place the glue close to the edges, but not at the edges. Clean up any glue that seeps out with a damp cloth.
- Place the glued keychain underneath something heavy to dry pressed and flat for at least a few hours. Overnight is best.
- If after gluing you want to color the edges of the faux leather because the backing of the faux leather is not black, use a Sharpie marker to color all around the border of the keychain.
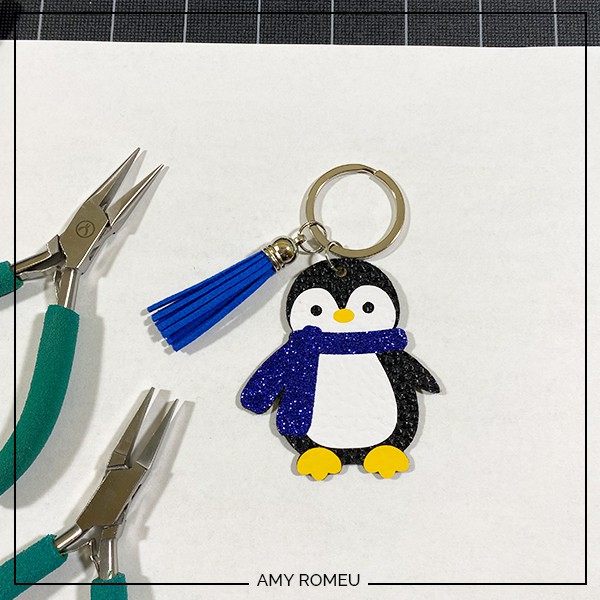
- Attach the keyring and optional tassel.
- Using two pair of flat nose pliers, open the jump ring without distorting the ring out of its circle shape. Slide on the penguin and the keyring. Then close the jump ring again. If you want to add a tassel, use another jump ring to add the tassel to the keyring.
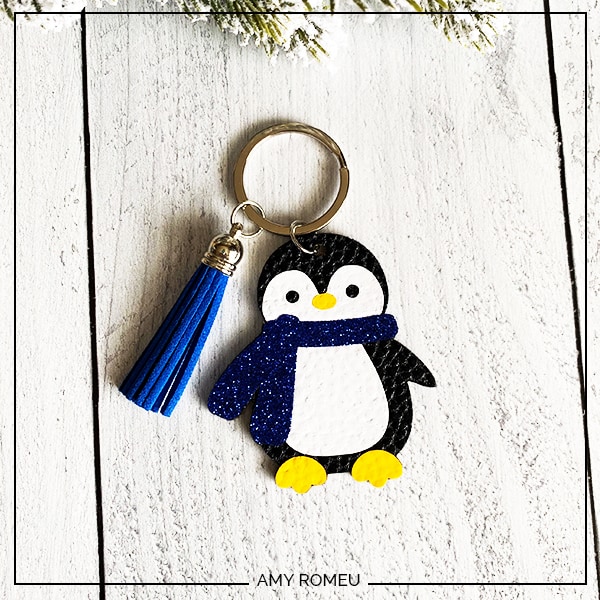
If you want to make this Penguin Keychain yourself, you can get the Penguin Keychain template from my shop here.
NOTE: This design is for PERSONAL USE ONLY. If you’d like to sell keychains made from my Penguin Keychain SVG template, you may purchase a Commercial Use License from my shop here.
WANT TO REMEMBER THIS? POST THIS DIY PENGUIN KEYCHAIN PROJECT TO YOUR FAVORITE PINTEREST BOARD!