
How to Make Faux Leather Bird’s Nest & Birdhouse Earrings with a Cricut
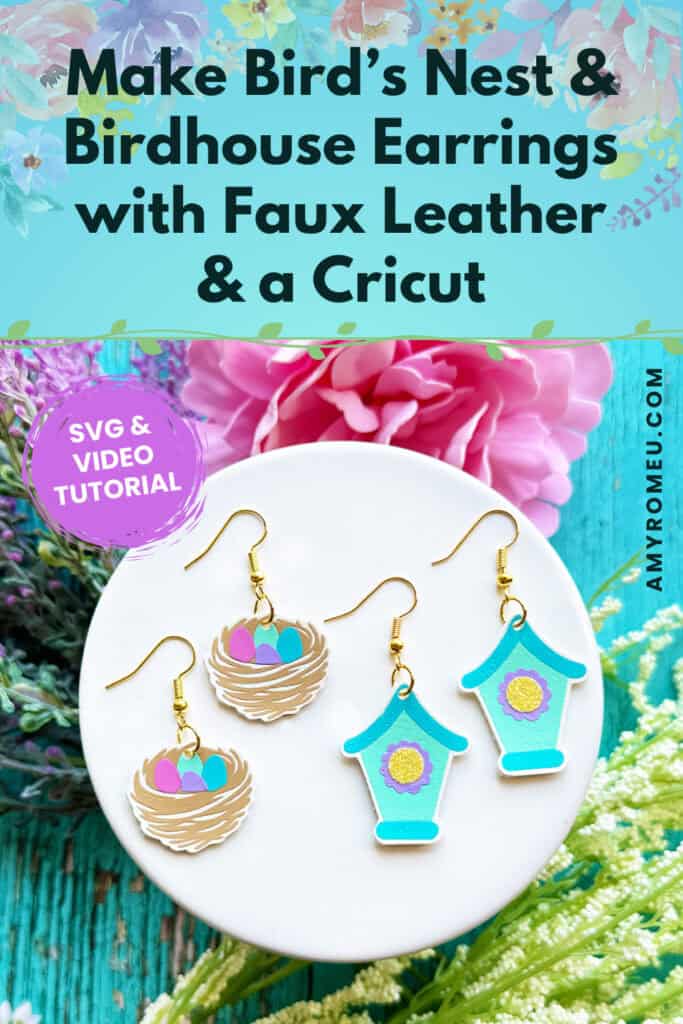
Learn how to make Faux Leather Bird’s Nest & Birdhouse Earrings with a Cricut
This project is Day 2 of The Spring Fling Crafting Event!
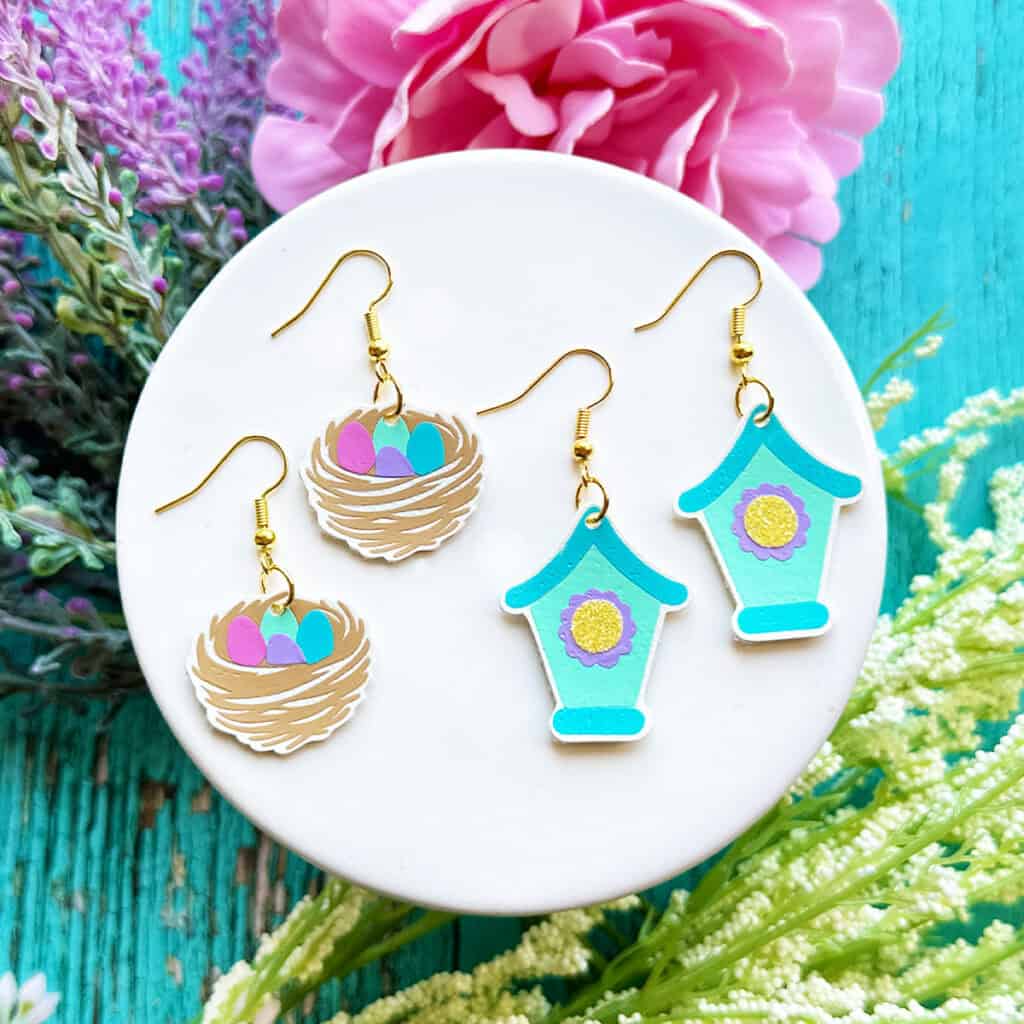
I’m Amy Romeu, and in this tutorial I’ll be showing you how to make Faux Leather Bird’s Nest & Birdhouse Earrings and a Cricut, perfect as a Spring accessory.
Follow along with this written tutorial including all the materials, SVG files, and tips you need.
Ready to get started with this beginner friendly Spring Cricut craft tutorial?
Get the SVG in my Shop
Personal or Small Commercial Use Available
Let’s dive into the materials and steps!
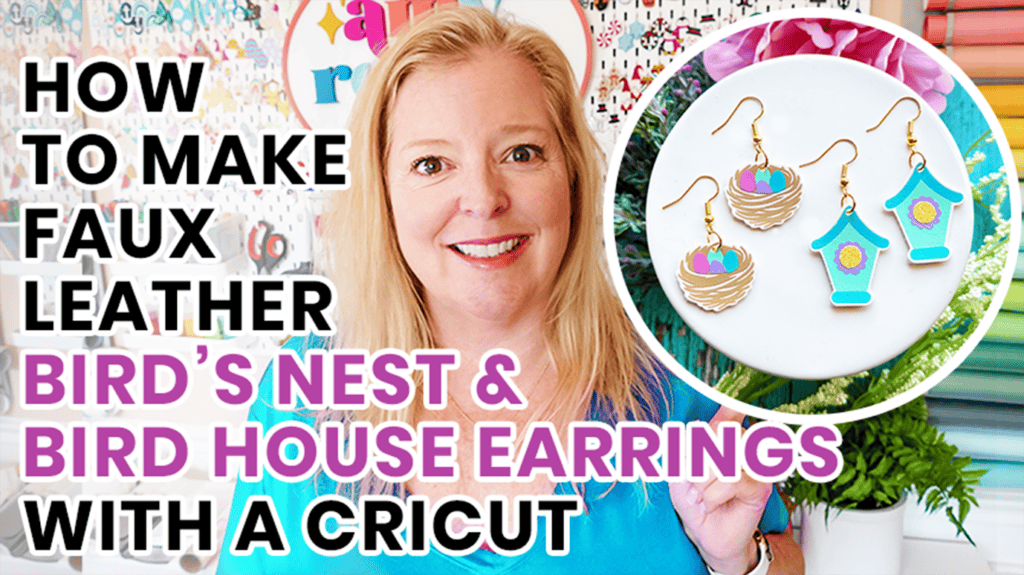
Want to watch a video tutorial instead? Check it out below!
See the full step by step video tutorial
Click the image below to watch the video on my YouTube channel, or click here.
How to make a Faux Leather Bird’s Nest & Birdhouse Earrings with a Cricut Step by Step
This page contains some affiliate links (which means if you make a purchase after clicking a link, I will earn a small commission at no additional cost to you). Read my full disclosure policy here.
Materials you’ll need to make Bird’s Nest & Birdhouse Earrings with a Cricut
🛒 To shop many of these supplies below in my Amazon storefront, click here. 🛒
Compatible Machines✅: Cricut Maker, Cricut Maker 3, Cricut Maker 4, Cricut Explore Air 2, Cricut Explore 3, Cricut Explore 4, Cricut Joy Xtra, Cricut Joy
Blade Used: Standard Fine Point Blade
Cut Setting Used✂️: Faux Leather (Paper Thin) with “More” pressure
- Faux Leather
- A light colored solid faux leather. I used this White, I also love this White faux leather from Amazon
- Heat Transfer Vinyl
- Bird’s Nest: Siser Easyweed in Tan, Sweet Mint, Bubble Gum Pink, Retro Mint, and Lilac.
- Birdhouse: Siser Easyweed in Sweet Mint, Retro Mint, Lilac and Siser Glitter HTV in Lemon Sugar.
- Other Project Supplies
- Earring Hooks
- 6mm Jump Rings
- Chain Nose Jewelry Pliers and Flat Nose Jewelry Pliers
- Cricut Easy Press Mini
- EasyPress Mat, 8×10
- Teflon Sheet
- 1/16″ Hole Punch
- Blue Painters Tape
- Small Curved Scissors
- Purple Strong Grip Mat
- Green Standard Grip Mat
- Weeding Tool like a Pin Pen or like the one in the Cricut Basic Tool Set
- The SVG template for this project is available in my shop here or inside the Spring Fling Crafting Event VIP Pass.
Get the SVG in my Shop
Personal or Small Commercial Use Available
Step by Step Instructions
Step 1: Starting with a blank canvas in Cricut Design Space, click on Upload, then Upload Image.
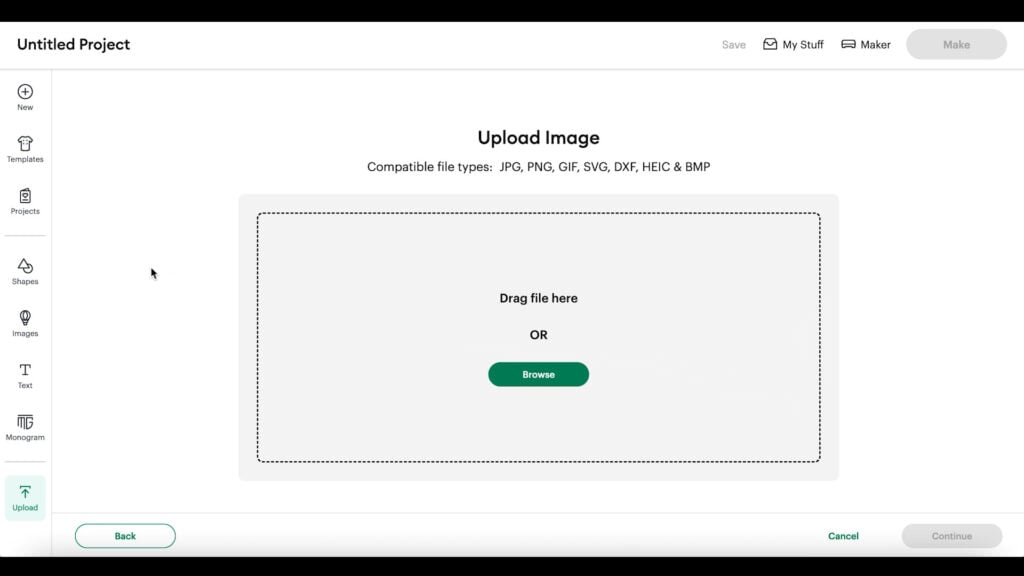
Browse to where the ALREADY UNZIPPED SVG file for this project is saved on your device.
Click on the SVG to select it and follow the prompts to upload it.
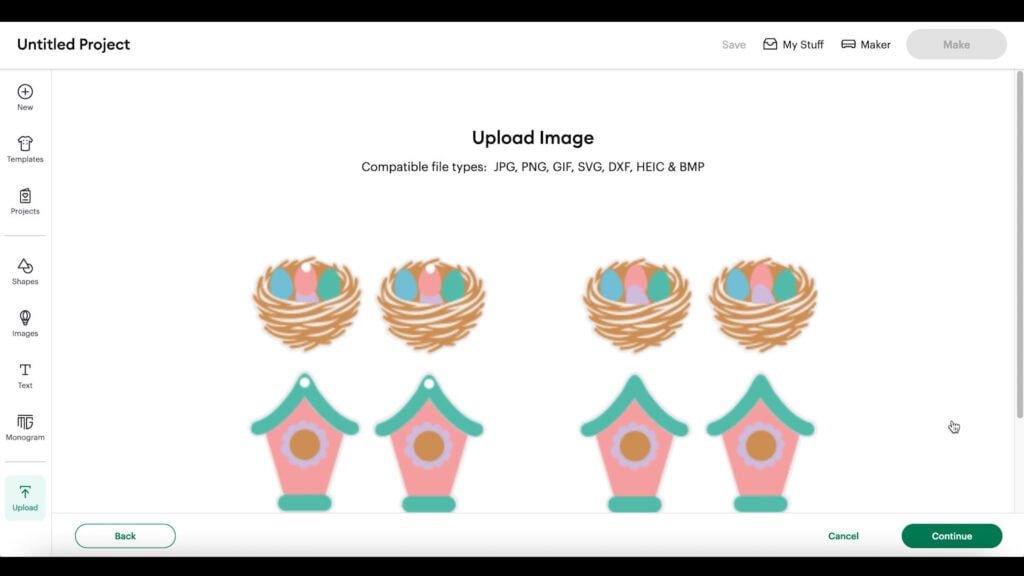
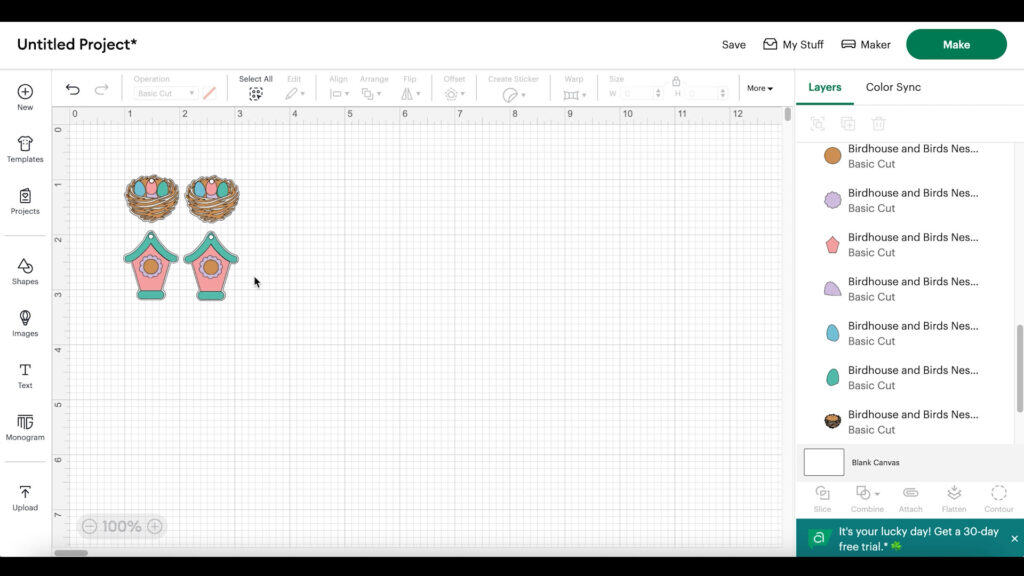
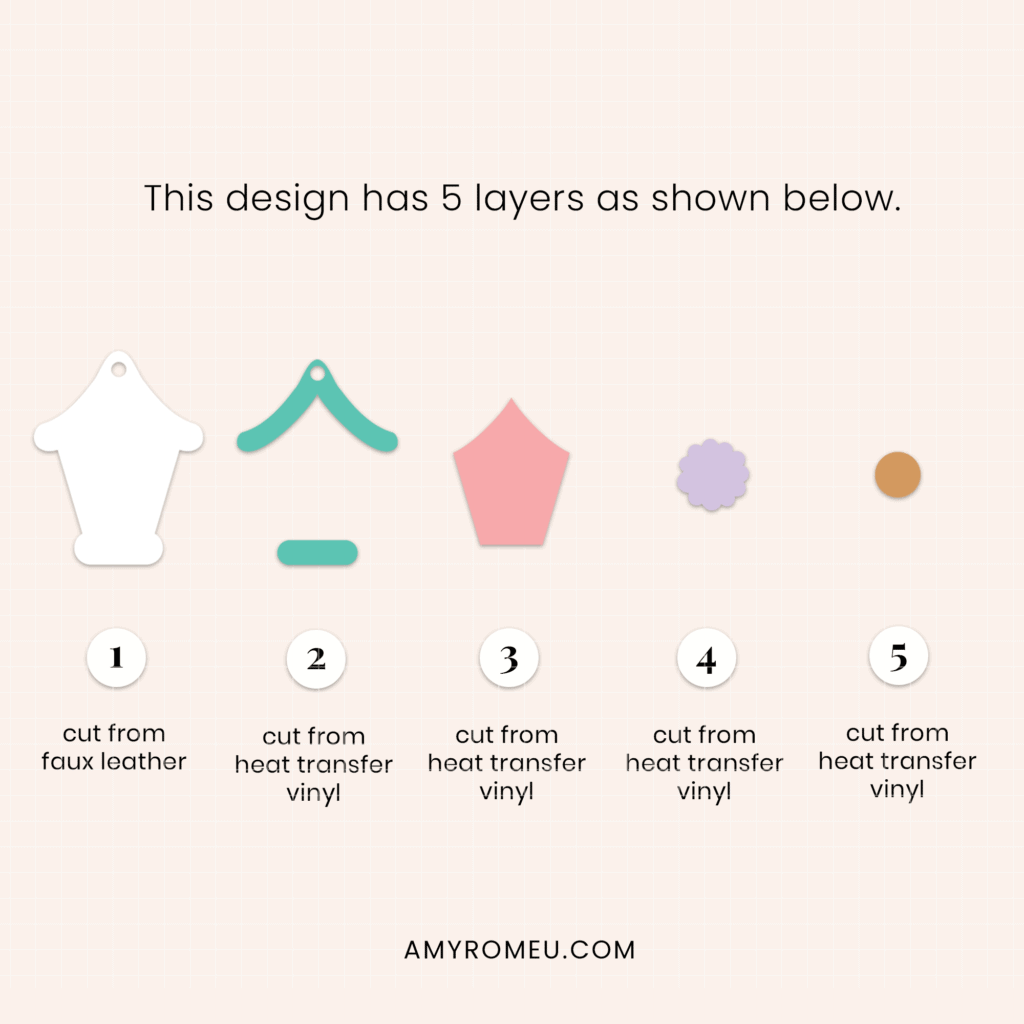
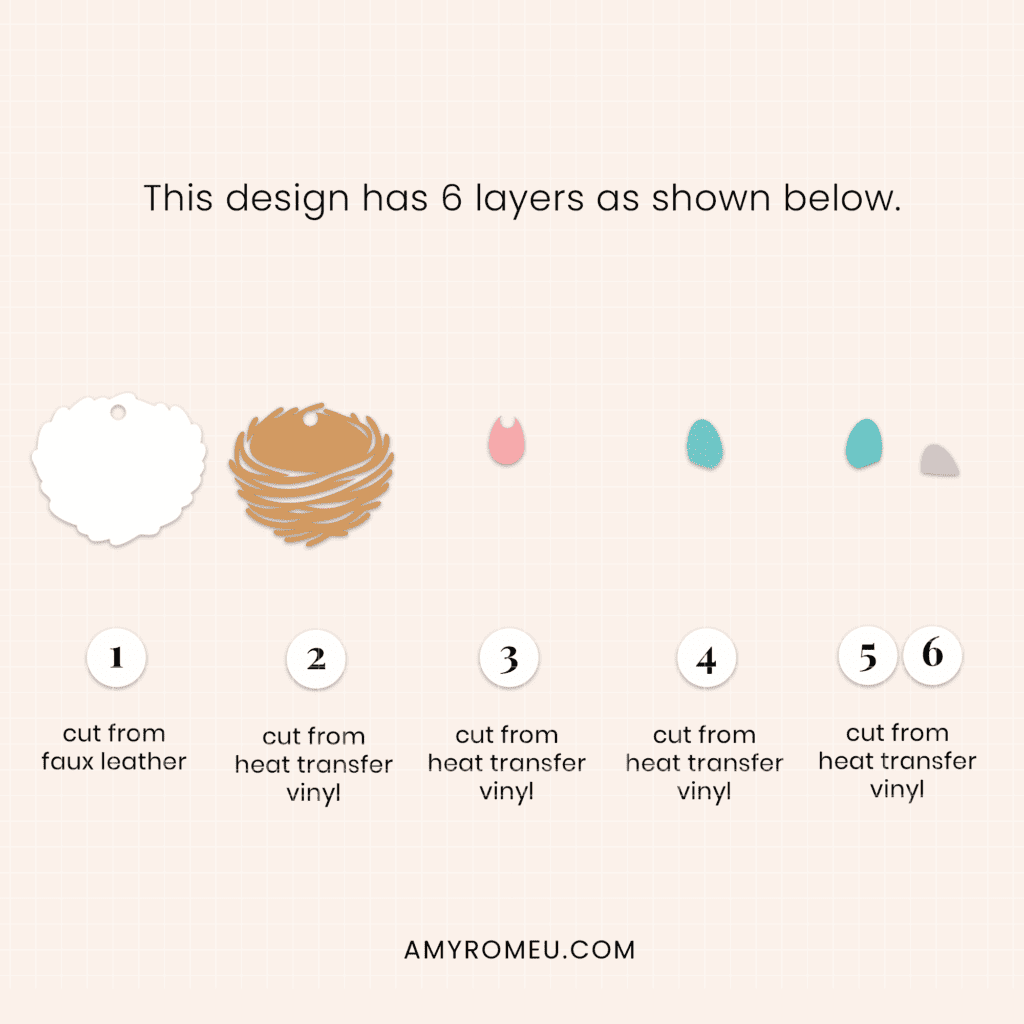
The design will load on the canvas. Ungroup the shapes by clicking on the Ungroup icon (firs one on the left at the top of the layers panel). Then delete the shapes you aren’t going to use (I deleted the without holes version).
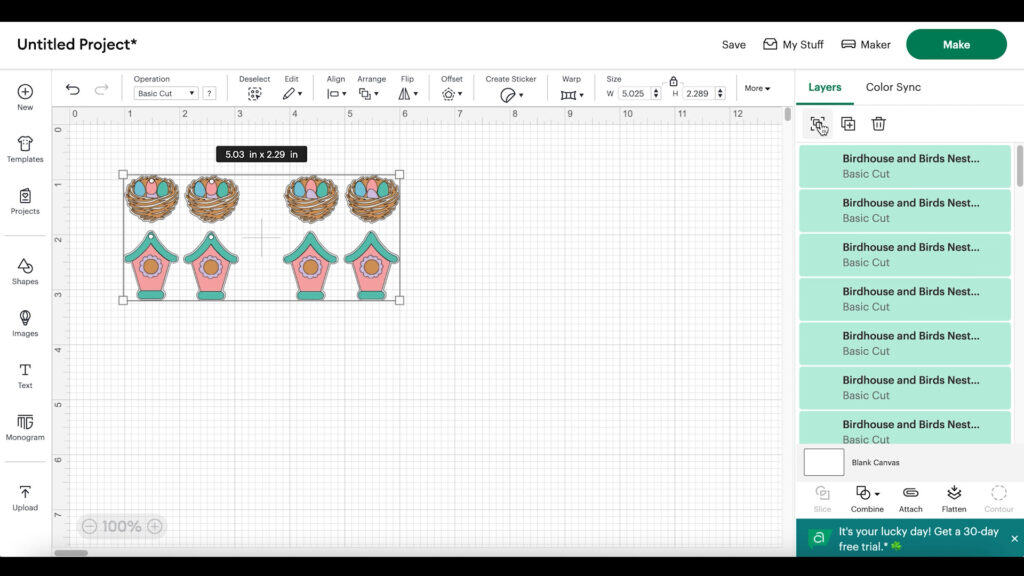
The bottom shapes will cut from faux leather. Then the top layers will cut from faux leather.
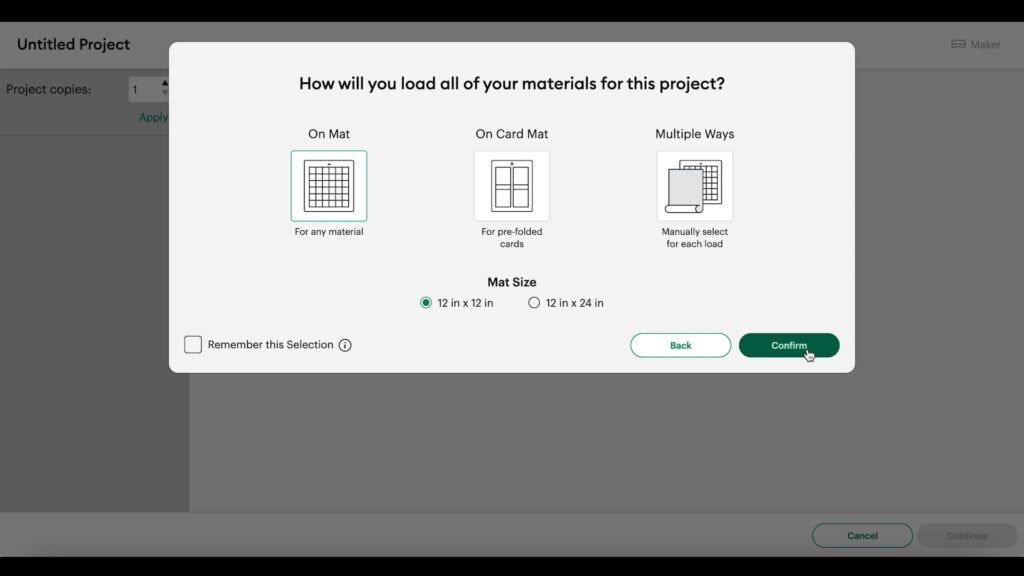
Click the MAKE IT button.
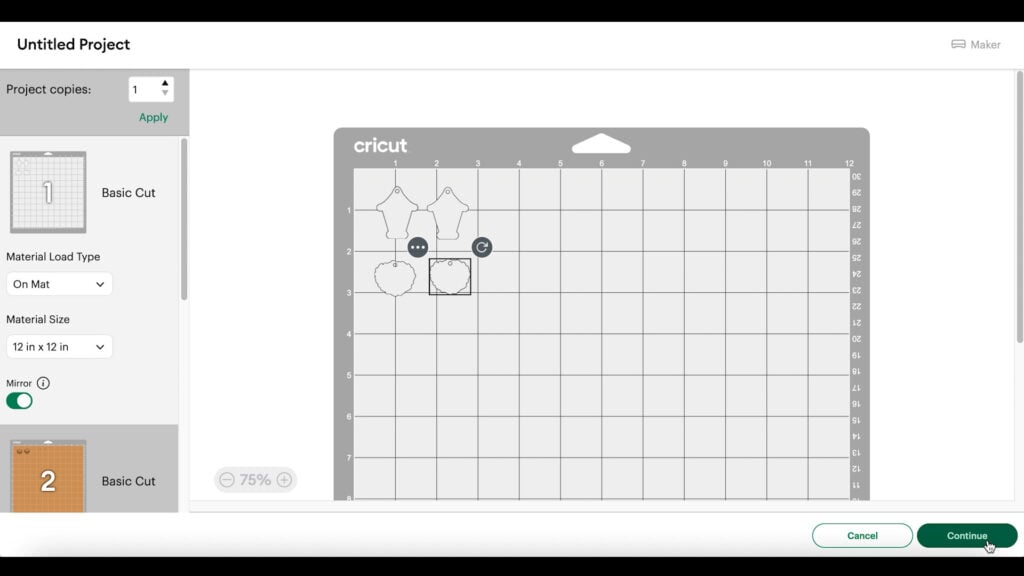
Select ON MAT for how you will load the materials for this project.
STEP 2: Click on each mat on the left hand side and toggle the Mirror toggle ON. That’s because faux leather and heat transfer vinyl always cuts in reverse.
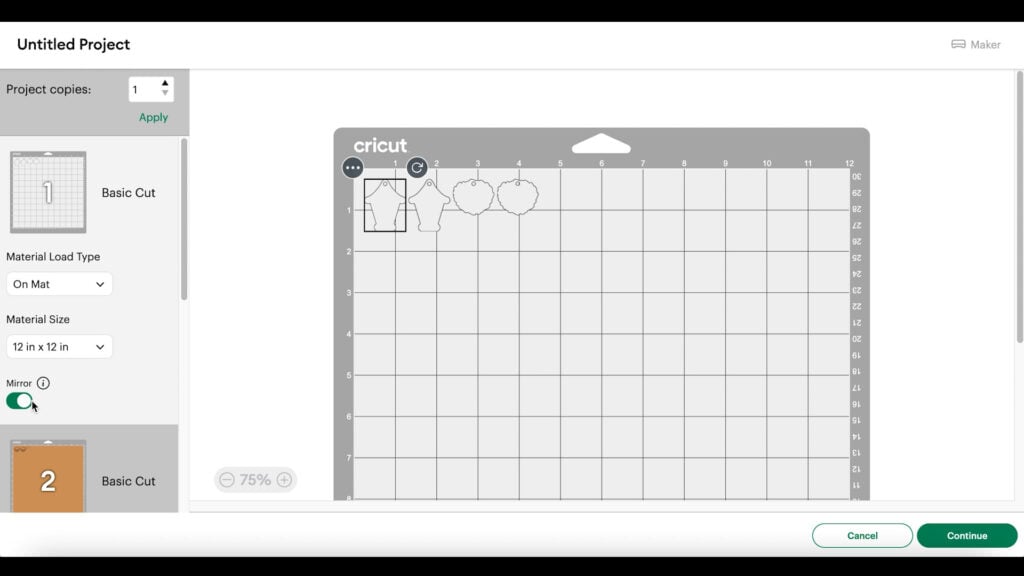
After all the mats are mirrored, drag the shapes apart from the edges a bit. Arrange them on your mat so the shapes will cut from your piece of faux leather.
Repeat for all of the heat transfer vinyl mats.
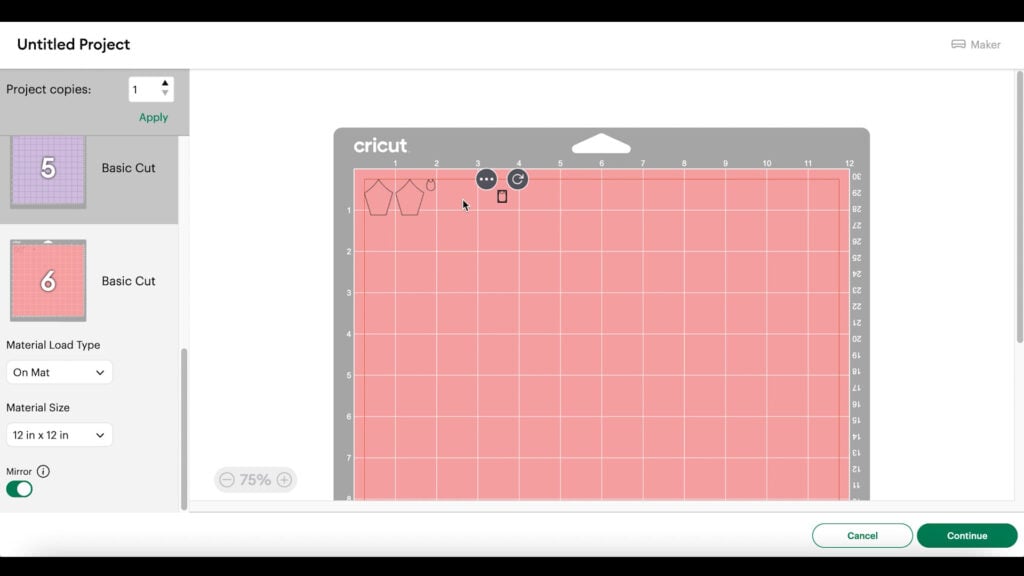
Click the CONTINUE button.
When the material selection screen loads, click on the faux leather mat and then select the Faux Leather (Paper Thin) setting.
If you don’t have that setting bookmarked as a favorite like I do, you can click on Browse All Materials and search for it. (If you are using the Explore Air 2, you’ll need to turn your dial to Custom before you can find that setting in search.)
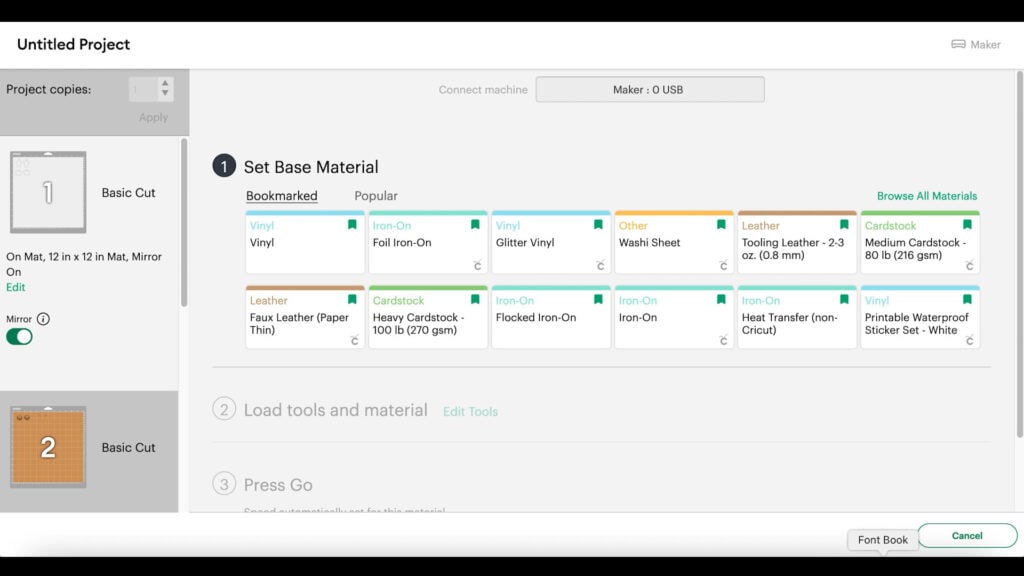
Then choose “More” from the dropdown Pressure menu.

You’ll cut the heat transfer vinyl layers from the manufacturer’s recommended cut settings for the type of heat transfer vinyl you are using.
💡TIP! Press heat transfer vinyl to the back of your faux leather before cutting if you want to have a pop of color and add structure to the back of your earrings.
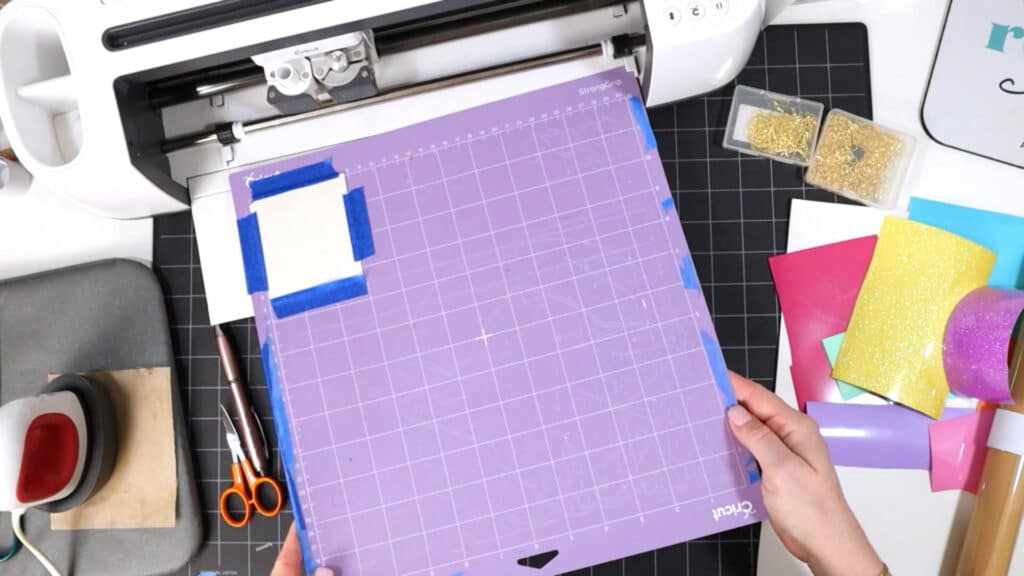
Step 3: Cut your faux leather mat first. To do that, place your faux leather pretty side down (heat transfer vinyl side up, if you did that step) on a sticky purple strong grip mat.
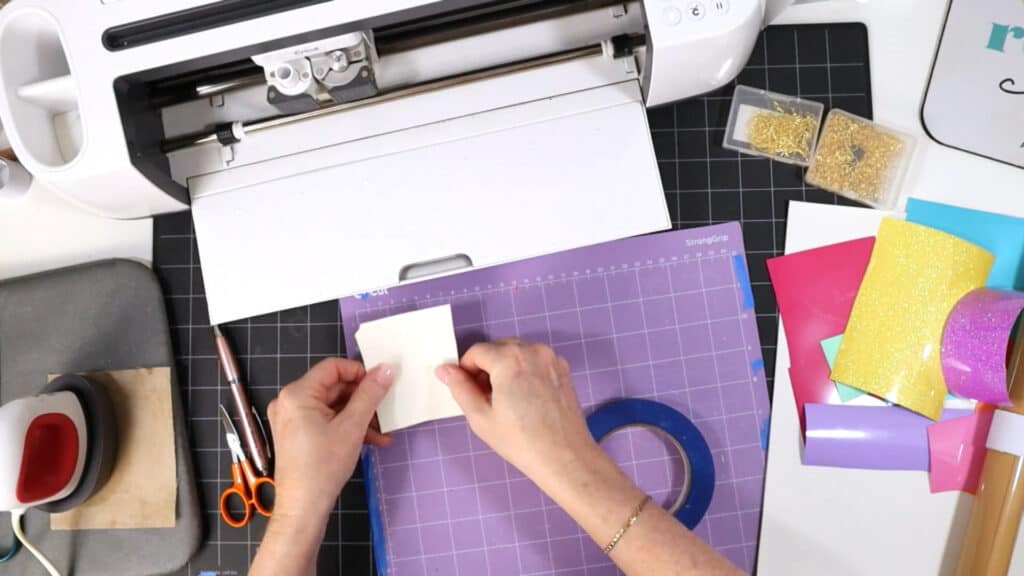
Place blue painter’s tape around all sides of the faux leather. Load the mat into the Cricut and begin the cut.
When the cut is complete, before unloading the mat, lift a small edge of the cut to ensure the cut went through. Repeat the cut if needed by pressing the cut button again.

Once the shapes are cut through, remove the shapes from the mat. Use a sharp weeding tool to poke through the holes in the earrings. If the holes don’t cut all the way through, you can use a 1/16″ hole punch if necessary.
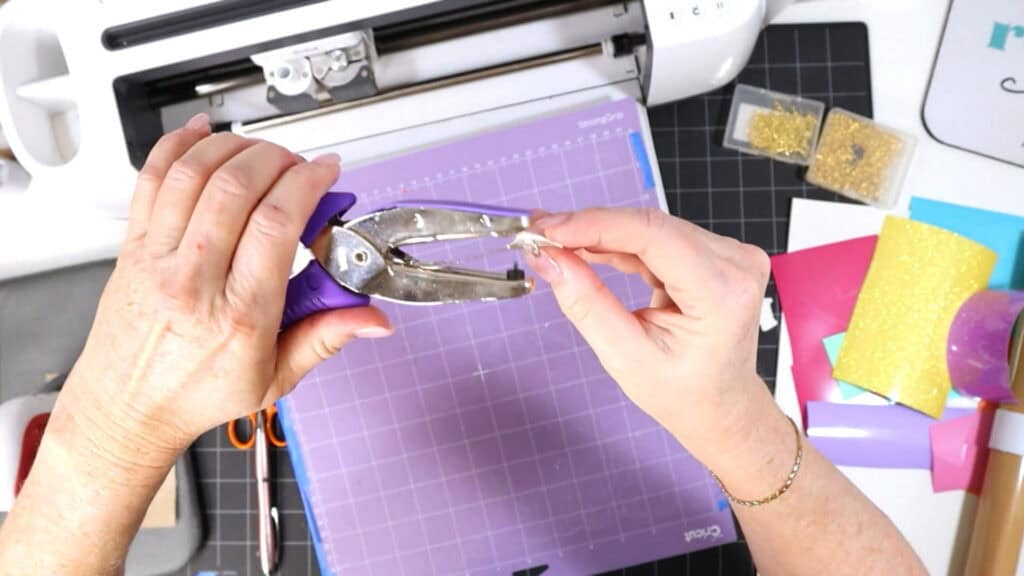
Use small curved scissors to trim any areas of the faux leather cut as needed.
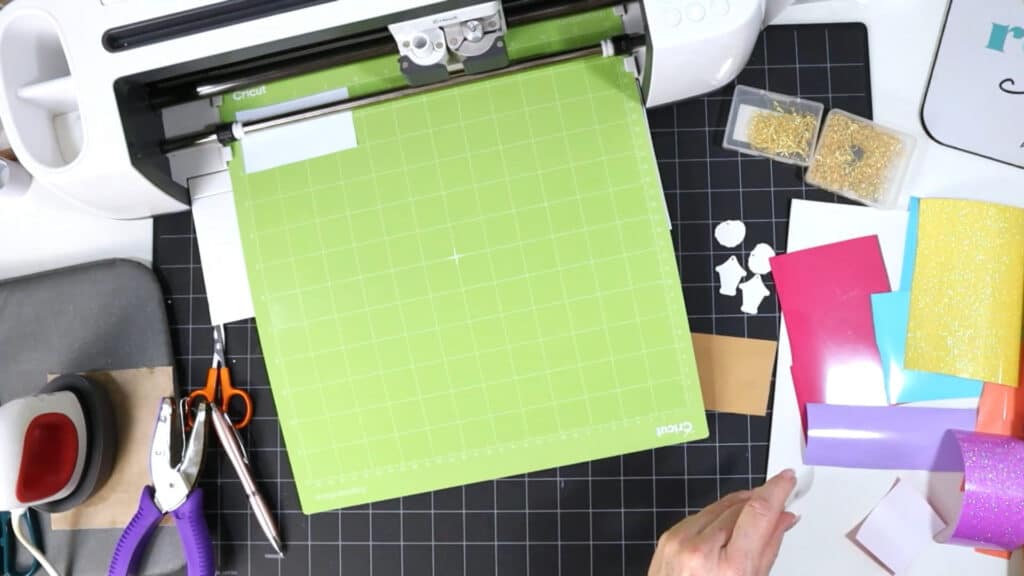
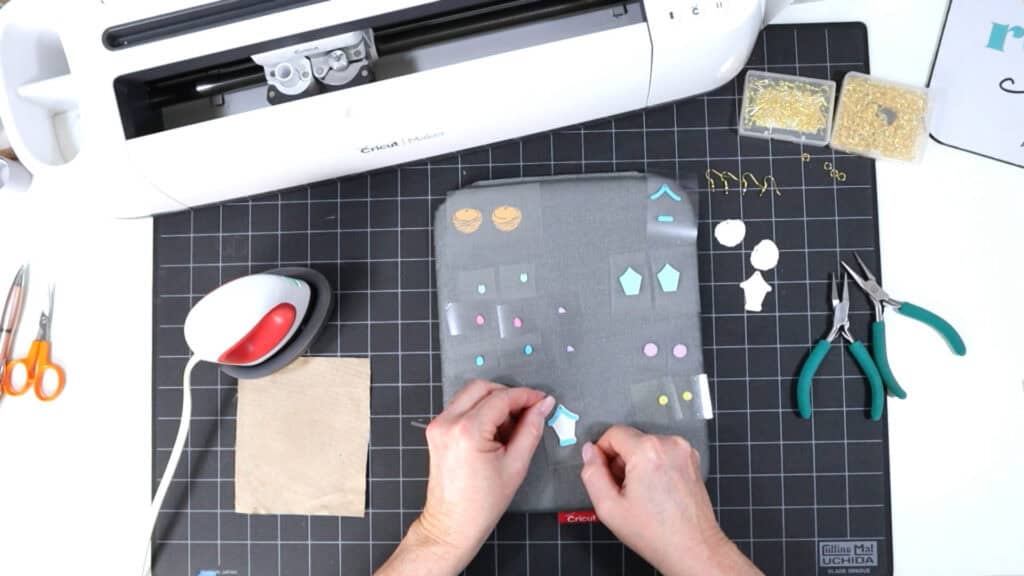
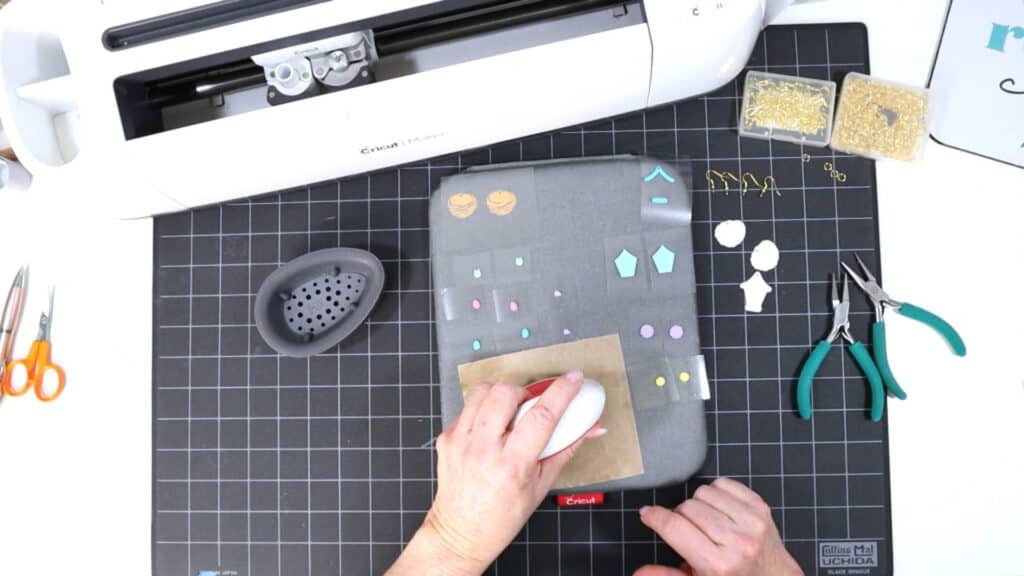
Return to Design Space and cut out all the heat transfer vinyl mats.
Weed away the excess vinyl and cut the shapes apart.
Step 4: Assemble the supplies you’ll need to press the earrings together.
You’ll need a heat press (I like the EasyPress Mini), a heat pressing pad and a cover sheet of some kind (I used a Teflon sheet trimmed to a smaller size).
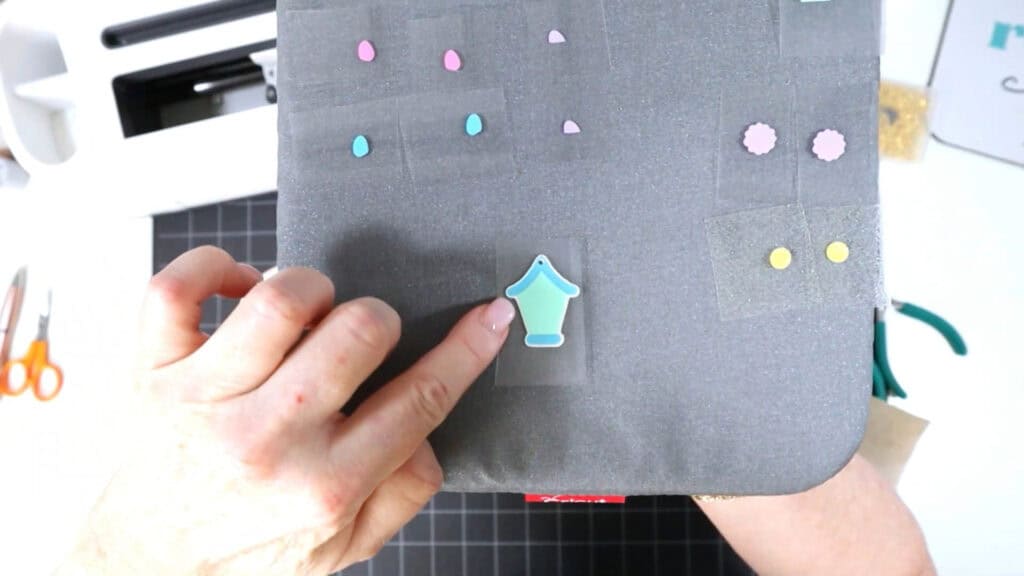
Time to press! Start by arranging all of the HTV layers on your heat pressing pad.
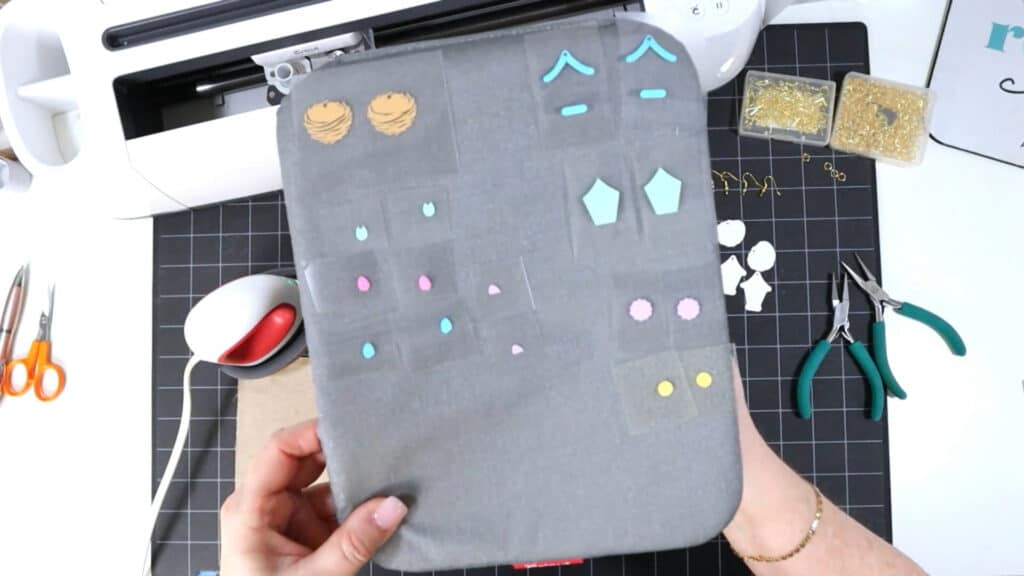
Refer to the Layering Guides for each design to see the order to press the layers in.
Start by placing a faux leather shape on your heat pressing pad. Then place the first heat transfer vinyl layer on top.
Cover with the Teflon sheet, butcher paper or parchment paper.
With an EasyPress Mini set to Low or a regular EasyPress set to 265 degrees, press the heat transfer vinyl onto the faux leather shape for about 7-10 seconds.
Slowly peel back the clear carrier sheet. If the vinyl lifts up, carefully place the carrier sheet back down and press again.
Repeat pressing the next layer and all of the other layers in order.
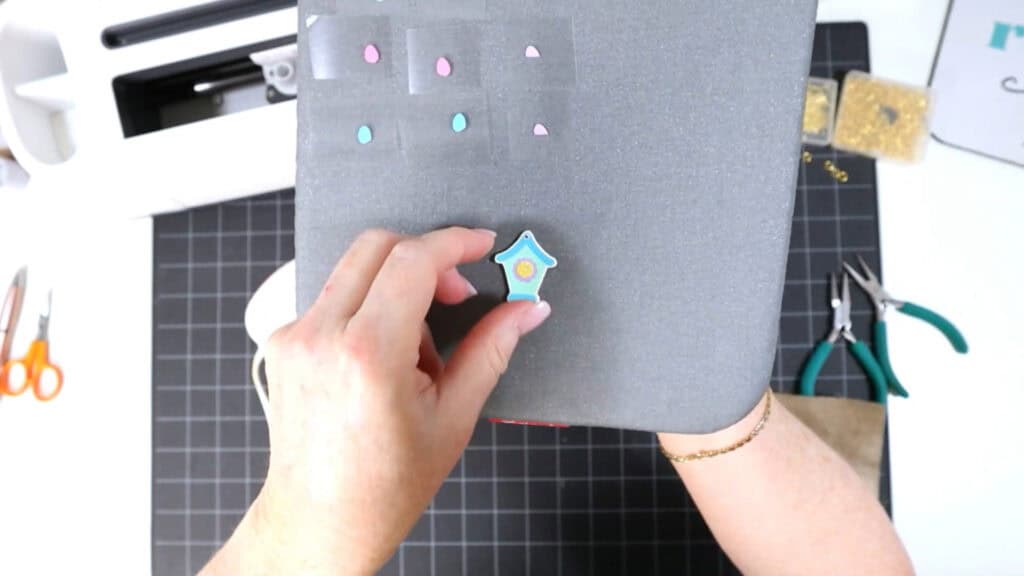
Repeat pressing the second earring, then the other earrings, if you are making them.
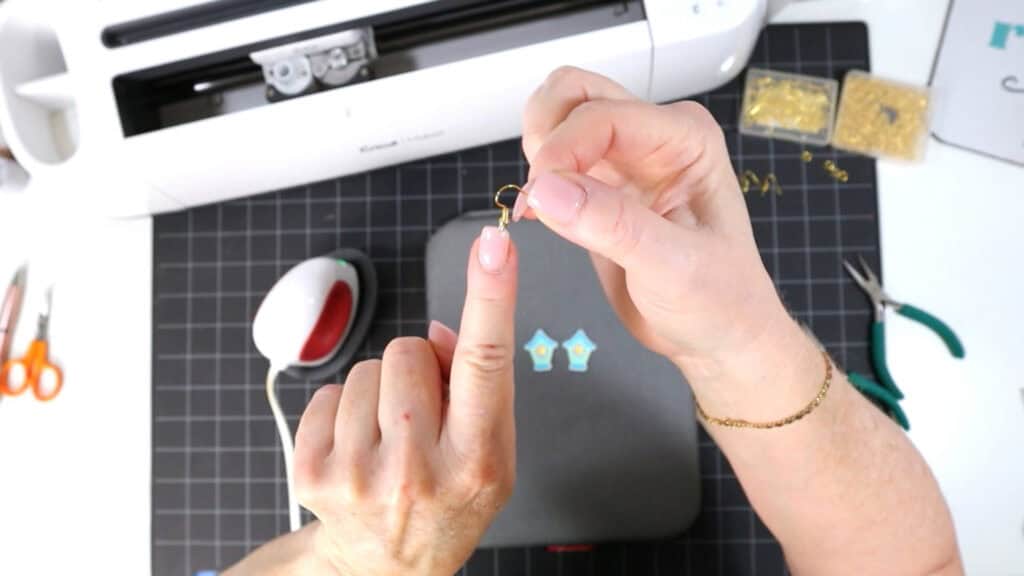
Step 5: Attach the earring hooks. Turn the bottom loop on the earring hooks sideways so they hang straight. The connect the hooks to the earring shapes with 6mm jump rings.
That’s it! Your Faux Leather Bird’s Nest & Birdhouse Earrings are complete. What design do you like better? Let me know in the comments!
Answers to your questions about making Bird’s Nest & Birdhouse Earrings with Faux Leather and a Cricut
Q: Which Cricut machines will cut faux leather?
A: You can cut faux leather with any of the current Cricut machines because they all cut faux leather with the standard fine point blade included with each machine. For this project you can use the Cricut Maker, Cricut Maker 3, Cricut Explore 3, Cricut Explore Air 2, or the Cricut Joy Xtra. This project is too large for the Cricut Joy.
Q: What do I need to press heat transfer vinyl onto faux leather?
A: To press heat transfer vinyl onto faux leather you’ll need a traditional heat press, Cricut EasyPress, or Cricut EasyPress Mini. An EasyPress Mini is best for pressing small HTV layers like the ones in this project.
Q: How do I get the SVG template for this project?
A: Get the SVG file from my SVG Shop here, or you can get it as part of 17 brand new Spring faux leather crafting projects in my Spring Fling Crafting Event VIP Pass.
Get the SVG in my Shop
Personal or Small Commercial Use Available
If you loved this project, you’ll love these projects too:
Will you make this project?
I would love to see what you have created! Please join my free faux leather crafting making Facebook group and share your creations with me and all of my crafting friends!
Until next time… and happy creating!

Want to remember this project? Save this tutorial to your favorite Pinterest board!

Want instant access to my Free Resource Library full of SVG files?
Just Enter your name and email Below!
By signing up, you’ll get instant access to my FREE SVG Library with hundreds of crafting SVG templates! You’ll also get my weekly newsletter full of crafting ideas, tutorials, and inspiration! Unsubscribe anytime.
These earrings are my favorite so far and I am looking forward to making them! I would definitely buy a kit for your earrings as you have offered in the past. Love all of your creations.
Love these events. These earrings are too cute. I can’t wait to make some.
These earrings are adorable!
These earrings are so cute!
Day 2 – Cute spring earrings. Thank you, Amy!
These are perfect to start spring.😍💙💚
Those nests are so cute–not a common design!
I Love these so much. Thanks for everything!
These would be so cute as a bracelet too!
These are so cute! Im totally making these. The birdhouses are my favorites. 😊❤️
These are so cute! I love to watch the birds year round. Cant wait until some of my favorites return to my area!
Both of these designs are adorable and perfect for Spring. If I HAD to pick one, it would be the bird’s nest. I love the little eggs and all the colors on the set. Thank you for hosting another great crafting event!
These earrings are sooooo cute!
These are adorable!
These earrings are adorable, Amy! I especially love the birdhouses. Thanks for these designs and instructions.
You always have such fun earing designs. I especially like the birds nest.
lovely
These earrings are adorable, I think I’ll start with the bird houses, so cute!
They are super cute! Could regular vinyl be used instead of iron on? (My stash of regular has more variety.)
So very cute love the nest! Great photos showing how to do on your Blog.
I love these bird nest and bird house earrings. Perfect way to welcome Spring.
OMG Love this project so much. the little birds nests are too cute
These earrings are so cute, I love them
So cute for Spring.
These earrings are so cute. They will make great gifts for Easter.
These are so cute!
Just so stinkin cute
The bird nests are the CUTEST!!!
So easy to follow along with you. Beautiful project
Love these! Making as gifts.
So cute and “Springy”!
Adorable!
I love the bird house design because it is not only for easter
Very cute Amy!
Love all your designs! These birdhouses are adorable
cute
So cute!!
The bird house could be turned into seasonal houses. The nest is so different.
Super cute earrings, perfect for Spring!!
The bird house and nest are so cute, I think you could use these patterns for other projects.
Great Spring project. Thank you.
Cute little earrings, and different from others that I have seen.
Another cute earring addition to your already long list!
These earrings are the cutest for spring.
These are so cute! I can’t wait to make them.
Super cute! Can’t wait to make some!
Perfect for Spring!
These earrings are just too cute!
I can’t wait to make these, So cute, Thank you!!
After all these years of following Amy, I’ve finally decided to try making earrings. Think I will start with a Kansas City Royals baseball theme since opening game day is Thursday.
Omg these earrings are so cute I have to make my niece and I matching ones
So adorable!
These are adorable! My MIL would love them!