How to Make Cricut New Year’s Eve Earrings
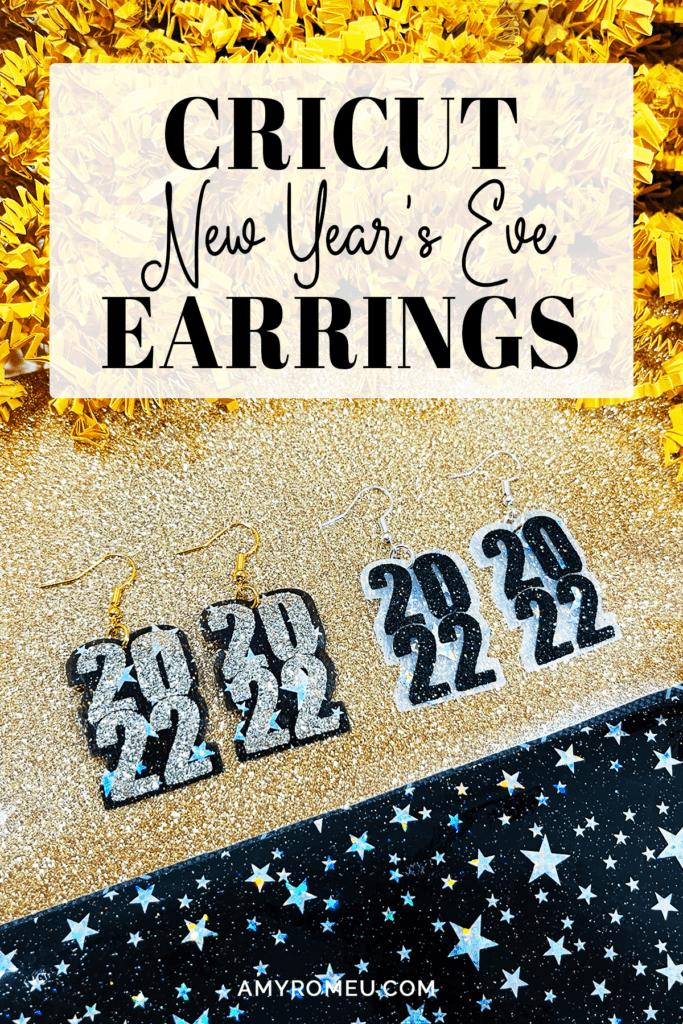
New Year’s Eve is almost here – and I can’t wait to ring in the new year with family and friends! I think only thing better than celebrating New Year’s Eve is wearing New Year earrings while you do it – don’t you agree?
I’ve designed these fun New Year’s Eve earrings, made with jelly sheets, glitter heat transfer vinyl, and my Cricut. You can also use the faux leather of your choice instead of the jelly sheets if you prefer. I’m so excited to share this project with you!
You can cut jelly sheets the same way as you cut faux leather – with a Cricut Maker or Maker 3, or Cricut Explore Air 2 or Explore 3, or even the Cricut Joy! I’ll walk you through how to make these Cricut New Year’s Eve earrings step by step.
I’ll be using heat transfer vinyl as the top layer of these earrings, but you can also use permanent vinyl instead of heat transfer vinyl. If you do, keep reading for two important steps you want take if you make this switch.
If you’re ready to try making these Cricut New Year’s Eve earrings with jelly sheets (or faux leather) and heat transfer vinyl, let’s get started!
This page contains some affiliate links (which means if you make a purchase after clicking a link, I will earn a small commission at no additional cost to you). Read my full disclosure policy here.
CRICUT NEW YEAR’S EVE EARRINGS MATERIALS LIST

- A Cricut cutting machine (or another cutting machine of your choice). I used the Cricut Maker, but you can use the Cricut Maker 3, the Explore Air 2 or Explore 3, or the Cricut Joy.
- The Cricut Maker 3 is available on Amazon here or the Cricut website here.
- The Cricut Maker is available on Amazon here or the Cricut website here.
- The Cricut Explore 3 is available on Amazon here or the Cricut website here.
- The Cricut Explore Air 2 is available on Amazon here or the Cricut website here.
- The Cricut Joy is available on Amazon here or the Cricut website here.
- Starry Jelly Sheets
- Glitter Heat Transfer Vinyl (I used Siser brand in the Champagne color – for the second pair I used Siser brand in Glitter Black)
- Purple Cutting Mat
- Green Cutting Mat
- Weeding Tools
- Cricut Easy Press Mini
- Cricut Easy Press Mat (8×10 size)
- Earring Hole Punch
- Earring Hooks, Gold finish
- 6mm Jump Rings, Gold plated
- Flat Nose Pliers
- Wide Flat Nose Pliers
- Teflon Cover Sheet or Parchment Paper.
- Design #195 from my free Resource Library. It’s been updated for 2023. You can get the password by filling out the form below or at the bottom of this post.
How to Make Cricut New Year’s Eve Earrings
STEP 1 – Get the Free New Year’s Eve Earrings SVG Template
Download the free New Year’s Eve earrings template (Design #195) from my Free Resource Library. It’s been updated for 2023. Click here to visit the Library page. You can get the Library password by filling out the form above.
STEP 2 – Upload The New Year’s Eve Earrings Template to Cricut Design Space
Save the zipped folder that downloads to your computer. You’ll need to unzip or extract the files FIRST so you can upload them to Cricut Design Space.
Upload the Cricut New Year’s Eve Earrings SVG to Cricut Design Space. Select the design from your Recent Uploads row to bring it onto your canvas.
NOTE: Decide if you will be cutting the earring design with or without precut holes.
Delete or hide the design you won’t be using. To hide – click on the eye icon for each layer you want to hide. To delete, UNGROUP the layers first. Then select the layers you want to delete, and click the delete button on your keyboard or at the bottom of the layers panel.
Once the New Year’s Eve earrings SVG is on your canvas, you will see in the Layers panel that this design has two different layers.
The black layer will cut from the black starry patterned jelly sheet. You could also cut this layer from the faux leather of your choice, using the same technique and settings I’ll show you for cutting jelly sheets below.
The gold layer will cut from Champagne colored glitter heat transfer vinyl (or solid or foil or holographic heat transfer vinyl, or permanent vinyl if you prefer).
Of course you can use whatever colors you want!
It isn’t necessary to resize the earrings, so go ahead and click on the green “Make It” button.
STEP 3 – Prepare Mats for Cutting
The mat preview screen will show all the cutting mats separated by color on the left hand side.
Click on each mat in the mat preview screen toggle the MIRROR button to ON. These earrings have text so the vinyl and jelly sheets mats will need to be mirrored before cutting.
NOTE: If are using permanent vinyl instead of heat transfer vinyl, then do not mirror the gold mat. Only mirror the black mat.
Make a note of the size material the shapes will need to cut from for both mats. Look at the grid lines to get the estimated size.
Click the “Continue” button.
STEP 4 – Cut Jelly Sheet Mat
I’ll cut the jelly sheet mat first. If you are using faux leather instead, you will follow the same process.
Click on the black mat on the left hand side of the screen to select it.
Cut a piece of jelly sheet just slightly bigger than the size you noted in the mat preview screen. The jelly sheets often have a protective thin plastic cover sheet on them. Remove this cover and discard it.

Place the cut piece of jelly sheet (or faux leather) face down on a purple mat. My jelly sheet has stars on one side and is plain on the other, so I put the side I want to be the front of the earrings face down.
If you are using faux leather, place it “pretty side” down on the mat.
Press the taped jelly sheet or faux leather down all over with your fingers. Then tape the jelly sheet down on all sides with blue painter’s tape.
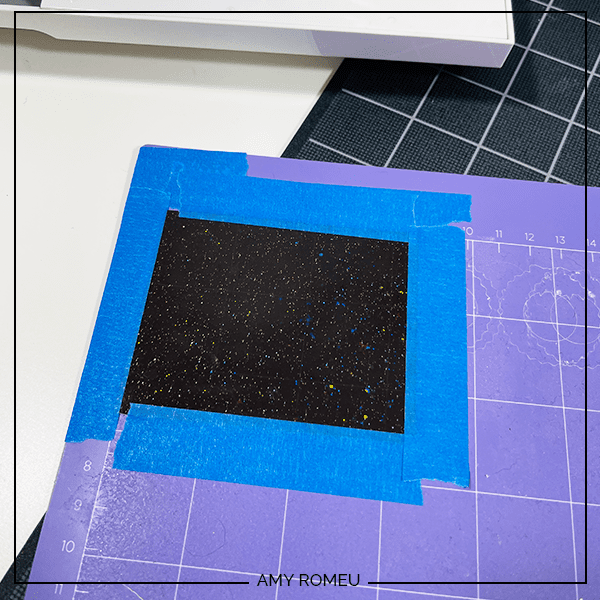
On the Material Selection screen, choose Faux Leather (Paper Thin) as the material setting. This is the setting I use for both cutting jelly sheets and faux leather.
NOTE: Cricut Explore Air 2 users will need to turn the dial to “Custom” before choosing Faux Leather (Paper Thin).
NOTE: Cricut Joy users can visit my tutorial on How to Make Earrings with the Cricut Joy with more specific instructions for Joy users.
If you don’t have this material setting as a favorite, click “Browse All Materials” to search for it and select it. Then select “More” from the Pressure dropdown menu.
Load the mat into the Cricut by lining up the mat with the guides and pressing the double arrows button. The machine will pull the mat into the machine.
NOTE: Make sure the Cricut’s star wheels are off to the side before starting the cut so they don’t leave indentations in the jelly sheet or faux leather.
Press the C button to begin the cut.
After the cut is complete and before unloading the mat, use a weeding tool to carefully lift the edge of the jelly sheet layer to see if the cut was complete.
If not, press the C button again to repeat the cut.
Unload the mat and remove the jelly sheet earring shapes.
STEP 5 – Cut the Glitter Heat Transfer Vinyl Mat
Return to Cricut Design Space to cut the heat transfer vinyl mats.
I will cut the gold layer from Siser brand Champagne color Glitter Heat Transfer Vinyl, but you can use any color or brand of glitter heat transfer vinyl or regular vinyl.
NOTE: You can also use permanent vinyl instead of heat transfer vinyl to make these earrings. If you do, don’t mirror the gold mat before you cut it, and skip the heat pressing step).
I like to use the Glitter Vinyl setting with “Default” pressure and then repeat the cut once if necessary.
If you are using permanent vinyl, I like the Vinyl setting with “Default” pressure. You will not need to repeat the cut for permanent vinyl.
Place the glitter heat transfer vinyl for the first mat shiny side down on a green standard grip cutting mat.


Load the green mat into the Cricut and press the C button to begin the cut. When the cut is complete, unload the mat and remove the cut glitter vinyl.
Weed away the excess heat transfer vinyl and cut apart the glitter vinyl shapes.
NOTE: Remember, if you are using permanent vinyl instead, apply a small piece of transfer tape to the top of each of the permanent vinyl earring layers. Then place the permanent vinyl shape onto the bottom layer, press the vinyl down with a scraper, and carefully peel away the transfer sheet. Then move on to Step 7.
STEP 6 – Press The HTV to the Jelly Sheet Earrings
Once the heat transfer vinyl shapes are weeded, it’s time to press them into place.
Protect your surface with a heat pressing pad. Preheat an EasyPress Mini on the LOW setting, or a regular EasyPress to 265 degrees.
Place the jelly sheet or faux leather earring shapes on the heat pressing pad.
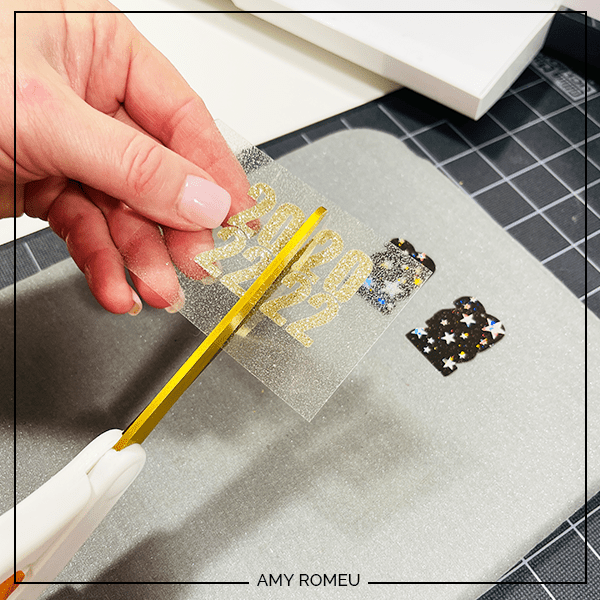
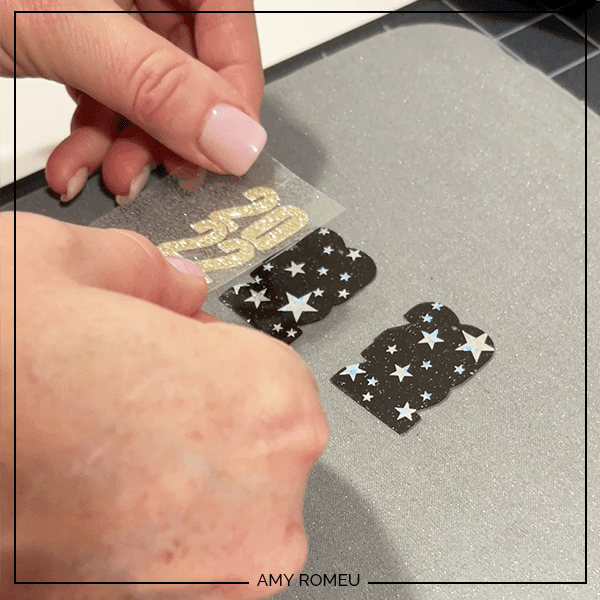
Carefully line up the vinyl layer on top of the jelly sheet earring shapes. Cover with a Teflon sheet or cover sheet.
Press for 7-10 seconds, allowing the HTV to adhere properly to the jelly sheet back layers. Then carefully peel away the vinyl cover sheet.
If the vinyl hasn’t adhered well to the jelly sheet, replace the cover sheet and press again.
The jelly sheets will curl from the heat – just place them under something heavy and flat for a few minutes to cool.

Repeat with the other earring.
STEP 7 – Assemble the Earrings
NOTE: If you cut the version without pre-cut holes, or the Cricut didn’t cut the earring holes all the way through, use a 1/16″ hole punch or a sharp object to punch the earring holes now.
To assemble the New Year’s Eve earrings, you’ll need two 5mm or 6mm jump rings, earring hooks, and two pairs of flat nose pliers.
To connect the earring hooks to the New Year’s Eve earrings, you’ll first need to turn the bottom loop on the fishhook sideways so your earrings will hang correctly.
You’ll do this using one pair of flat nose pliers. While holding the hook firmly between two fingers, grip the entire earring loop between the pliers and twist your wrist 90 degrees. Repeat with the second earring hook.
NOTE: For more step by step directions on attaching earring hooks, be sure to visit my post on how to make faux leather earrings hang straight.
Now use flat nose pliers to open the jump ring. I like to use two pliers, one in each hand. Grip each side of the jump ring with a pair of pliers, making sure the opening in the jump ring is facing up (the twelve o’clock position).
Rotate one wrist forwards or backwards, so the jump ring creates an opening but doesn’t bend out of it’s circle shape.
When the jump ring is open, slide the New Year’s Eve earring onto the jump ring. Then slide the earring hook onto the jump ring and close the jump ring again.
Pay attention to which side is the front of your earring as you do this to be sure your earring and hook are both facing the right direction.
Repeat for the second earring.
That’s it! The New Year’s Eve earrings are finished!


Aren’t these Cricut New Year’s Eve earrings cute? If you do make this project, I would love to see your finished earrings. Please share a photo of them in the comments, or tag me on Instagram: @amyromeucrafts
Want to see all of my Cricut earring & jewelry tutorials? CLICK HERE

WANT THE SVG FILE SO YOU MAKE THESE CRICUT NEW YEAR’S EVE EARRINGS YOURSELF?
It’s Design #195 in my FREE Resource Library. Get instant access by filling out the form below!
Want to remember this? Post this CRICUT NEW YEARS EVE EARRINGS project to your favorite Pinterest board!



the way you have this set would be one side the 2 of 2020 is facing to the front and the other side the 2 of 2020 is facing to the back of your head when you put them on, is that correct? I did the cut as you have it layed out.
Hi, Penny! These earrings will be assembled exactly as shown in the photo. I’m not sure if I understand your question – would you please send a photo to me at [email protected] so I can assist you further? Thank you!