
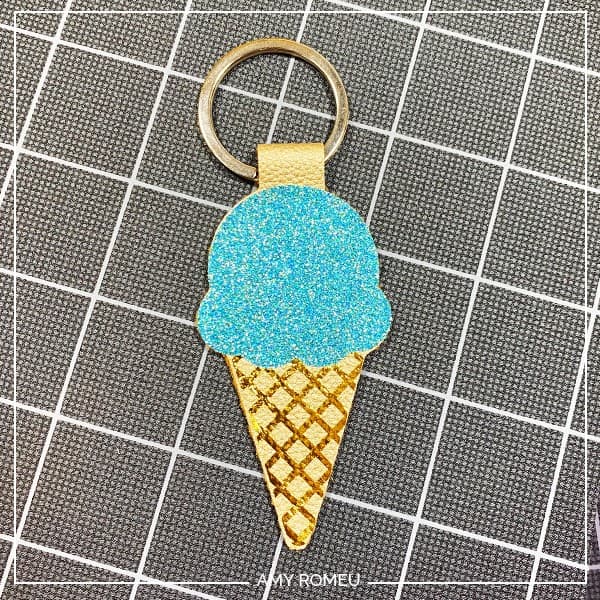
DIY Cricut Ice Cream Cone Keychains

How to Make Cricut Ice Cream Cone Keychains with a Cricut Explore Air 2
Do you love ice cream on a hot summer day? I know I do! Ice cream crafts are a fun sign of summer, too. I recently wrote a tutorial on how to make faux leather ice cream cone earrings with a Cricut Maker (which you can see here) and wow, were they popular! So many of my readers asked if I could create a related Cricut ice cream cone keychain tutorial, and I was all too happy to agree. So here it is – a step by step tutorial on how to make Cricut ice cream cone keychains – this time with a Cricut Explore Air 2.
If you want to make these fun Cricut ice cream cone keychains yourself, you totally can. I’m sharing my original SVG cut file with you, and it’s free. You’ll find out how to download my free SVG file for this project at the bottom of this post.
I also have a video tutorial for this project. You can see it here:
Ready? Let’s get started!
Want to see all of my Cricut earring & jewelry tutorials? CLICK HERE
This page contains some affiliate links (which means if you make a purchase after clicking a link, I will earn a small commission at no additional cost to you). Read my full disclosure policy here.
DIY Cricut Ice Cream Cone Keychains- Materials List
- A Cricut. I have the Cricut Maker, available at Amazon here. You can also use the Cricut Explore Air 2 or even the new Cricut Joy, on Amazon here. You can see all of these machines available on Cricut.com here.
- Cricut Strong Grip (Purple) Cutting Mat. You can buy these on Amazon here, or at Michael’s here. They are also available at Hobby Lobby, Joann’s, and Walmart.
- Cricut Standard Grip (Green) Cutting Mat, available on Amazon here. They are also available at Michael’s, Hobby Lobby, Joann’s, and Walmart.
- Tan faux leather, light gold, light brown, or any similar color. For this project, I used two metallic faux leather colors from this assortment pack from Amazon here.
- Heat transfer vinyl in the color of your choice. You can use Cricut Glitter Iron On Vinyl (from Amazon here), Cricut Every Day Iron On from here or Siser EasyWeed from Amazon here.
- For the “cone” texture – heat transfer foil iron on in the color of your choice. I used Cricut Foil Iron On, available on the Cricut website here.
- Blue painter’s tape. This will help keep your faux leather firmly in place on your cutting mat, without damaging your mat or your material. You may already have some in the garage, or you can get it at any hardware store and most big box or grocery stores. Amazon also has it here.
- A Cricut Easy Press or a Cricut Easy Press Mini (what is what I use for pressing small items like keychains and earrings). I bought my Easy Press Mini from Amazon here. Be sure to check pricing on the official Cricut website for pricing on the Easy Press Mini here – they have really good sales sometimes!
- If you will be using the Easy Press Mini like I do, you’ll need an EasyPress Mat to safely press your items on. I use the 8×10 size, which you can see on Amazon here.
- A weeding tool or a sharp pointed tool. I use the weeding tool from my Cricut tool set here.
- Keyrings. I used 1.25 inch size key rings from Amazon here. You could use 1 inch key rings, too, but I wouldn’t go much smaller than that.
- Glue. I’ve made a lot of keychains and there are so many good glues that will work: E6000, Art Glitter Glue, and Aleene’s Quick Dry Tacky Glue. I used Quick Hold quick drying glue, available on Amazon here, but you can use your favorite crafting/fabric glue.
- Faux suede or faux leather tassels (optional) – Amazon has several faux suede tassel assortment packages. Many of them are sold with assorted colors, like this one from Amazon.
- Large jump rings (optional) – for attaching the tassel to the key ring. I used these 9mm size jump rings from Amazon.
PROJECT INSTRUCTIONS
STEP 1 – Download Free SVG
Download the free SVG cutting file for the ice cream cone keychain shape from my free Resource Library. You can fill out the form at the bottom of this post to get the password to my Resource Library.
Save the zipped folder that downloads to your computer.
You’ll need to unzip or extract the folder FIRST before you can upload the cutting file to Cricut Design Space. Make a note of the file location after you unzip it so you can find it in the next step.
STEP 2 – Upload SVG to Cricut Design Space
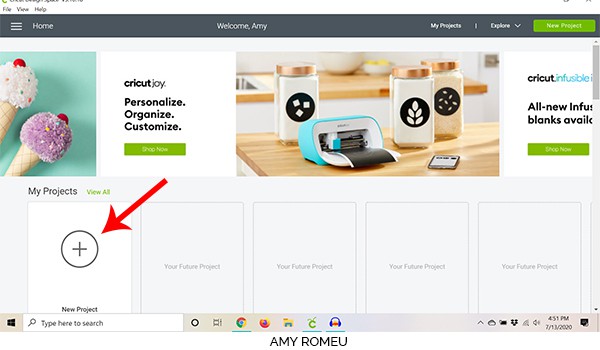
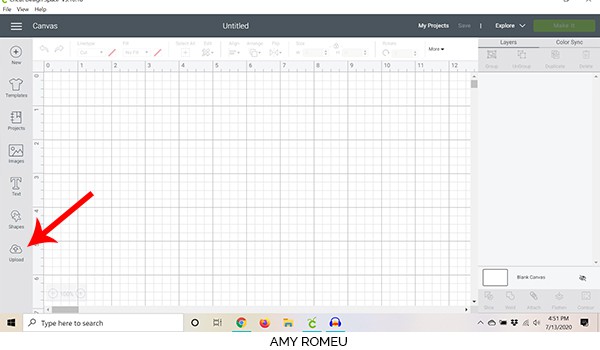
When you open Cricut Design Space, click on NEW PROJECT to get started. Then click on UPLOAD from the left hand side menu.
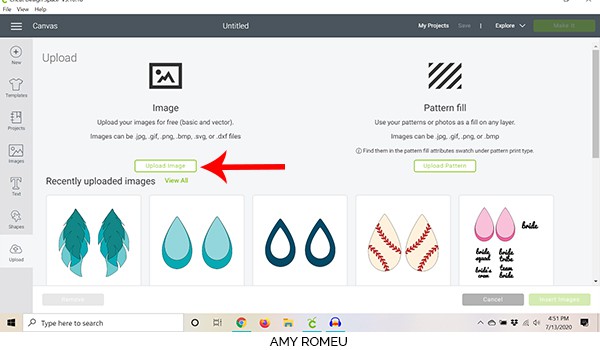
Click on the UPLOAD IMAGE button, then click BROWSE to locate where your downloaded folder is saved.
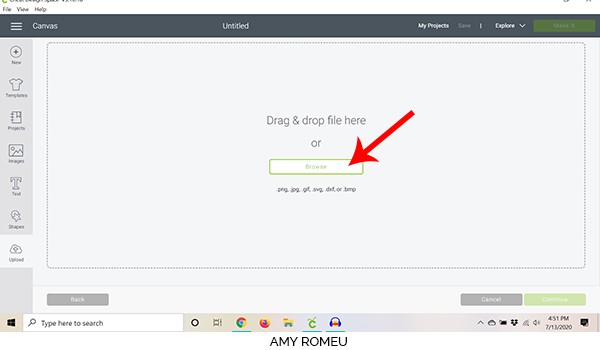
Navigate to where you’ve saved the already unzipped SVG file for this project. Double click on the SVG file for the ice cream cone keychain to bring it into the upload screen in Design Space. If you get an error saying “file type not supported,” that usually means your folder that contains the SVG file is not unzipped, or you are trying to upload the wrong file.
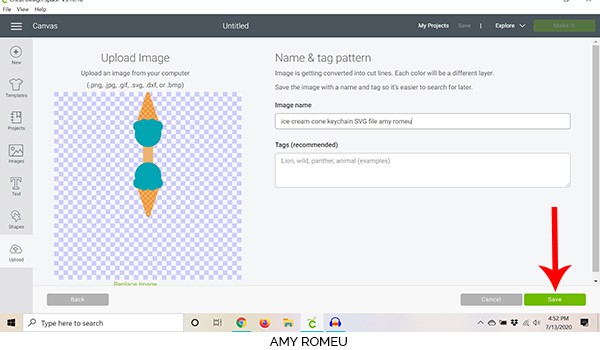
You’ll see a preview of the ice cream cone keychain shapes for this project. Hit the green SAVE button.
After you’ve selected your file to upload, you’ll see it as the first item in your “recently uploaded designs” row.
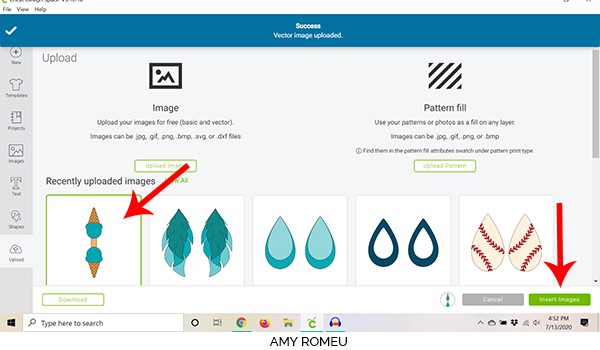
Click on it so it is outlined in green. Then click on the green INSERT IMAGES button in the bottom right corner.
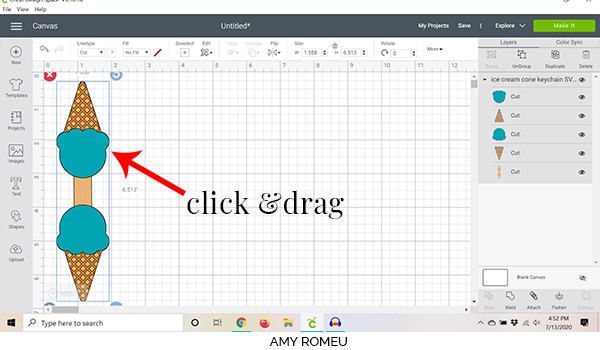
This brings the keychain cut shapes into Cricut Design Space. Drag the ice cream cone shapes up to the top left corner of your canvas.
The ice cream cone keychain will cut from three different materials, on three mats.
- The blue ice cream scoop will cut from heat transfer vinyl (you could also cut it from permanent vinyl)
- The gold colored criss cross pattern will cut from heat transfer foil iron-on (you could cut it from permanent vinyl intead if desired)
- The light tan that forms the keychain base will cut from faux leather
This keychain is already sized appropriately (the ice cream cone will be about 3 inches tall (but if you want to resize it, you can do that now.
When you are ready to move on, click the green MAKE IT button.
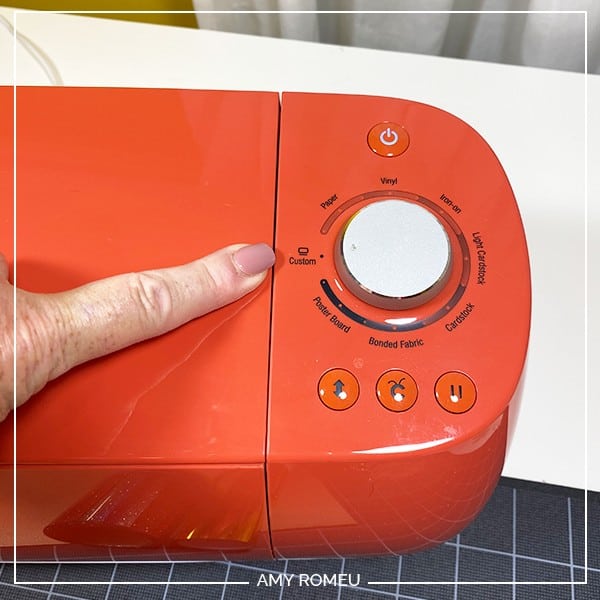
STEP 3 – Set Dial to Custom
If you are making this project with the Cricut Explore Air 2 like I am, turn your material dial to custom now. (If you are using a Cricut Maker, just skip ahead to the next step).
STEP 4 – Set Up the Cutting Mats
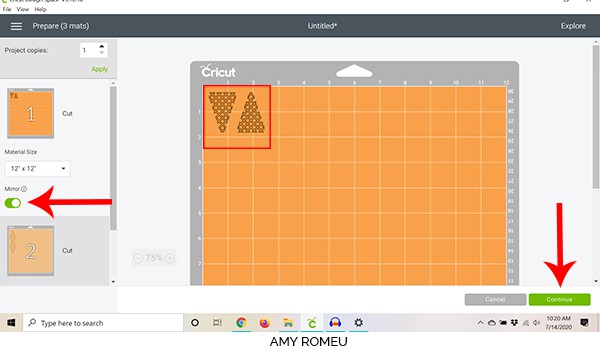
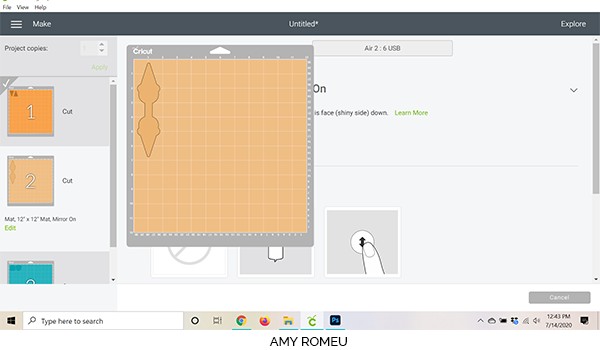
The next screen in Cricut Design Space is the mat preview screen. You’ll see Design Space has separated the three different materials onto three separate cutting mats.
The first thing I do on the mat preview screen is MIRROR each cutting mat. These materials will cut face down, so the designs need to be mirrored. Just slide the green MIRROR toggle on for the first mat, then click on each of the other two mats and slide the MIRROR toggle to ON also. That way you won’t forget later.
Make a note of the size material you’ll need to cut so these foil iron on shapes will cut completely (about 2.5″ square). Then click CONTINUE.
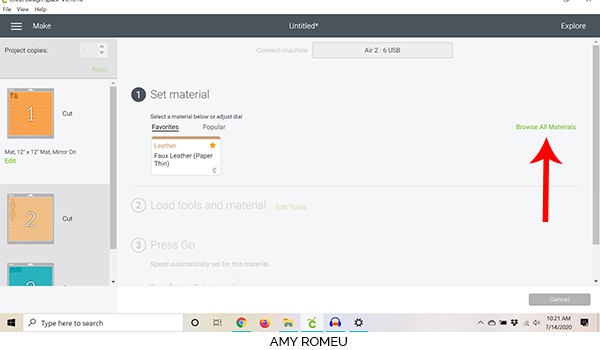
STEP 5 – Material Selection
The next screen is the mat preview screen. The material setting we want to use is Foil Iron-On. If you don’t have this material setting already set as a favorite, click on Browse All Materials to search for it.
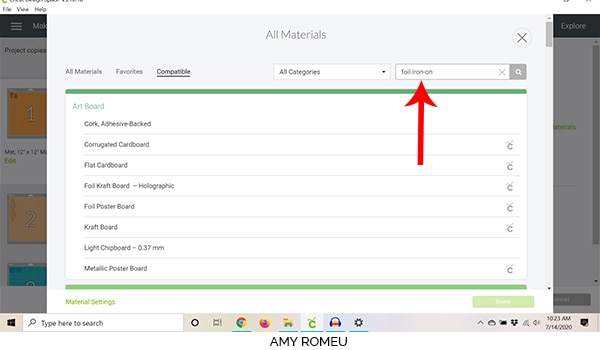
Type “Foil Iron-On” in the search box. Make sure you type the hyphen, or else you won’t find it.
When it pops up, click on it to select it. Click the yellow star if you want to add this setting to your Favorites. Click DONE.
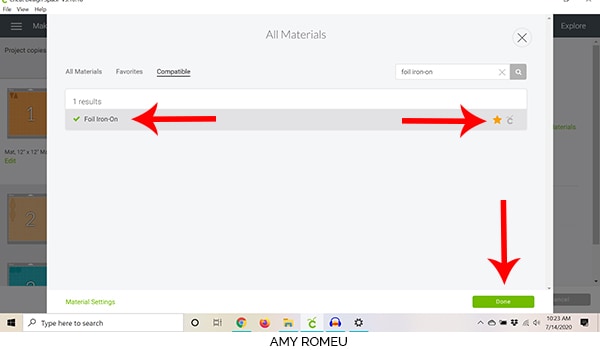
Leave the pressure setting at Default.

Now it’s time to prepare the first cutting mat.
STEP 6 – Cut the First Mat
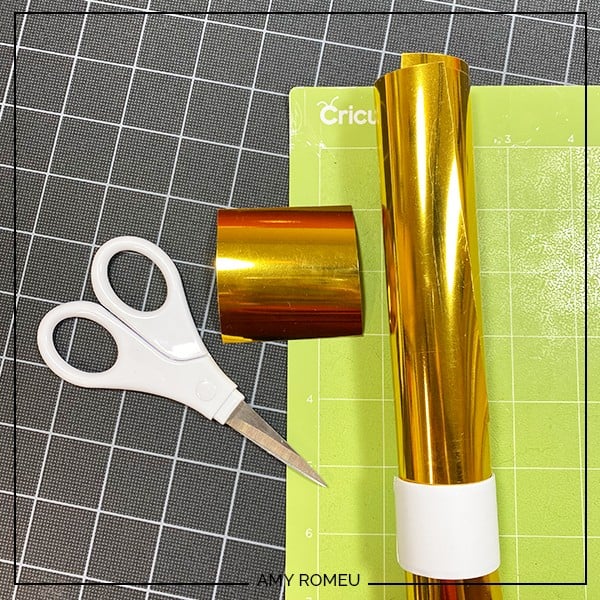
Gather your faux leather, and heat transfer vinyl, and foil iron on materials for the next step.
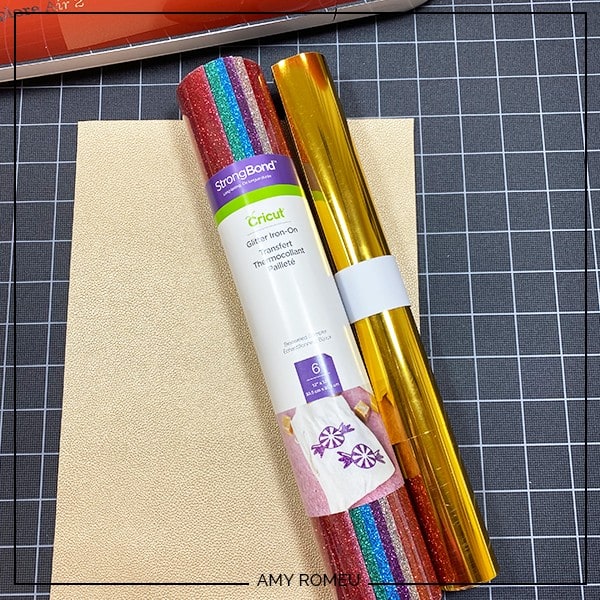
Note: You may be wondering what the white band around my foil iron on tube is. Believe it or not, it’s a white slap bracelet! They are great for keeping my vinyl rolls neatly wound. You can get slap bracelets in lots of colors, but I like the all white slap bracelets from Amazon here.
Cut a piece of foil iron-on to the size you noted from the mat preview screen earlier. Place the foil iron-on shiny side down on a green cutting mat. Load the mat into your Cricut by pressing the double arrows button.
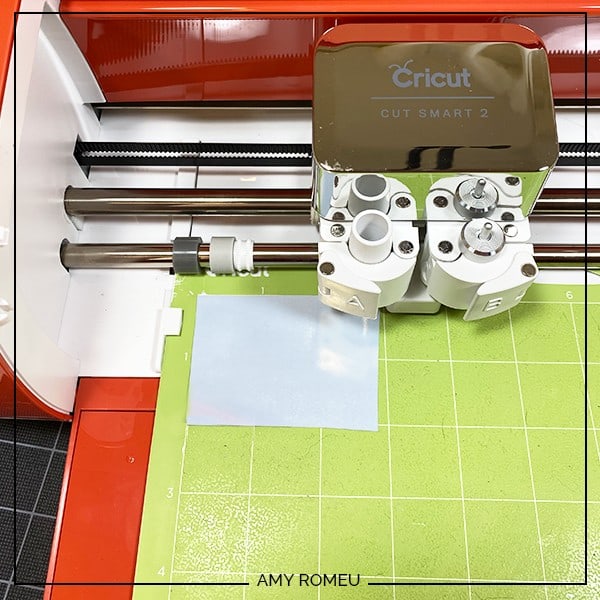
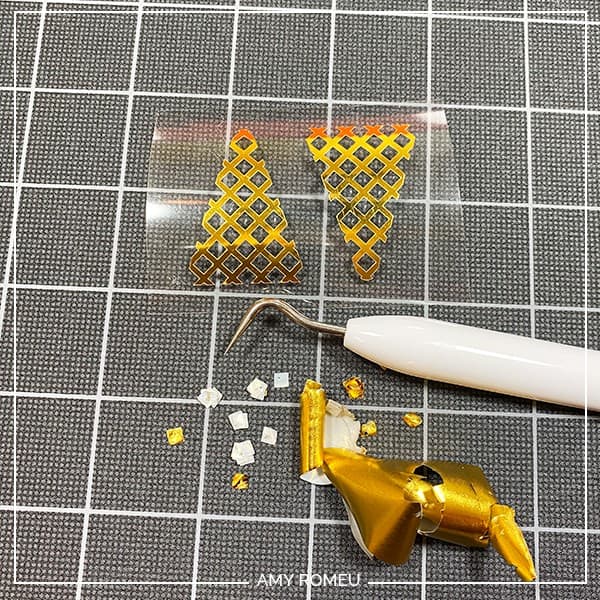
Press the C button to start cutting. When the cutting is complete, unload the mat by pressing the double arrow again and remove the foil iron on from the cutting mat.
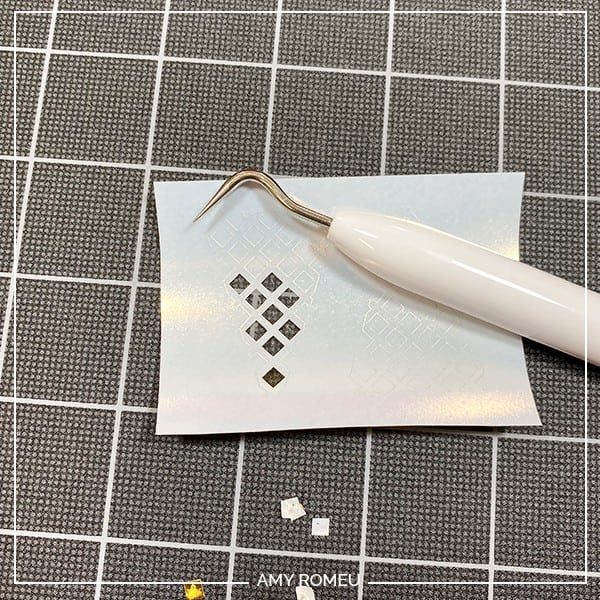
Using the weeding tool, remove the excess foil from the shapes and set the piece aside.
STEP 7 – Prepare Second Mat to Cut (Faux Leather)
Back in Cricut Design Space, you’ll make your material setting choice for the second mat, the faux leather base of the keychain.
When you get to the faux leather layer, you’ll need to select a different material setting. Before you do that, hover over the faux leather mat in the mat preview to see what size material you need to cut. Be sure your mat is mirrored! If not, click the green EDIT option under the mat preview screen to mirror the mat before cutting.
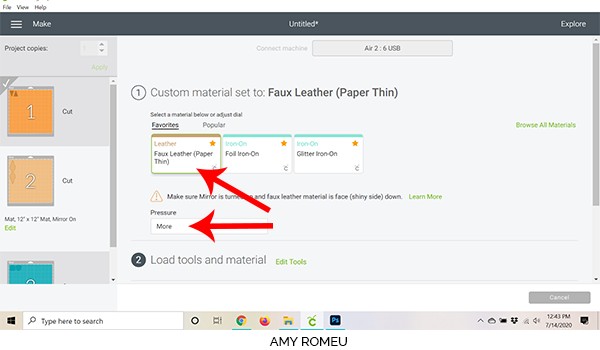
This mat will cut using the Faux Leather (Paper Thin) setting, which also cuts with the Explore Air 2 dial set to Custom. Click on Browse All Materials to find this setting and select it.
Note: Even though this faux leather isn’t paper thin, this cut setting is what I use 99% of the time I cut faux leather because it works well. It’s also an automatic double cut setting.
I set the pressure option to “MORE” when I cut faux leather.
STEP 8 – Prepare and Cut Faux Leather Mat
Cut the faux leather to the size you noted in the mat preview screen. Leave a little excess around the edges, about a half inch.
Press the faux leather “pretty side” down to a purple mat in the same location as shown in the mat preview screen.
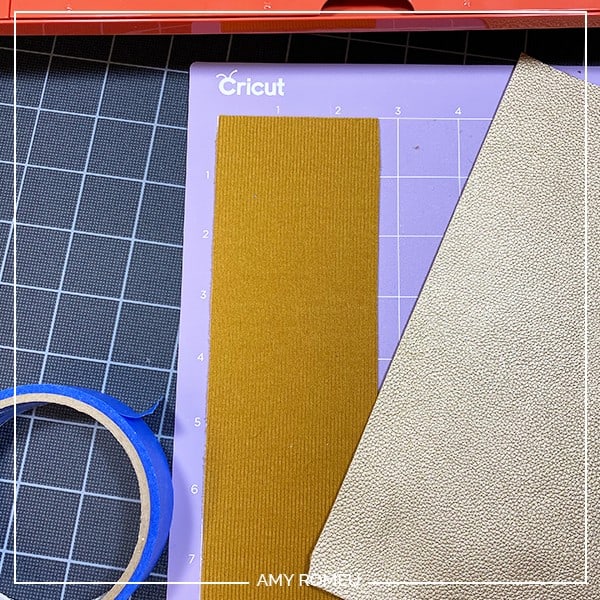
Then tape the faux leather down to the mat on all sides with blue painter’s tape.
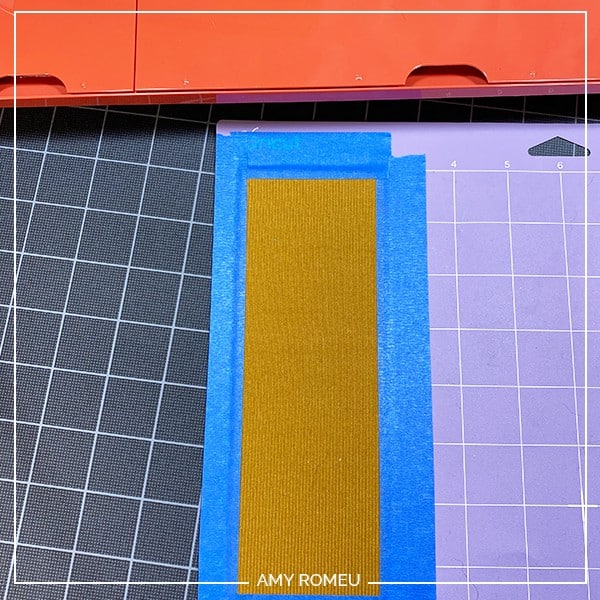
Feed the mat into the Cricut and press the C button. After the mat cuts, and BEFORE you unload the mat, check the cut to see if it is complete. If not, hit the C button again to repeat the cut.
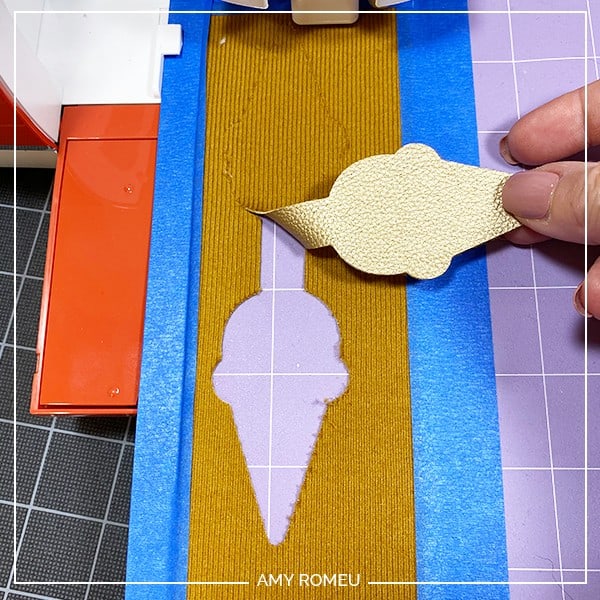
For this project, I repeated the cut one more time before I unloaded the mat.
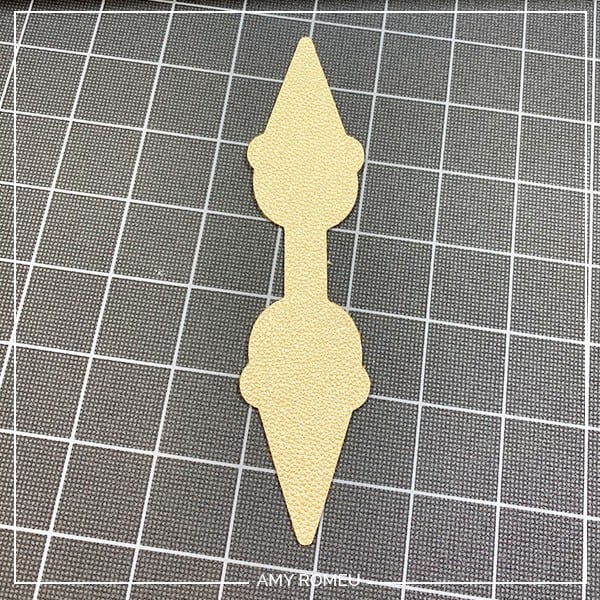
Remove the faux leather ice cream cone keychain shape and trim any small fuzzies as necessary. I love to use my 4 inch Fiskars curved scissors for this.
STEP 9 – Prepare & Cut The Glitter Vinyl Mat
The last mat, the ice cream cone scoops, will cut from Glitter Iron-On. That’s another custom setting, so leave your Explore Air 2 dial set to custom.
Click on “Browse All Materials” and search for Glitter Iron-On. Don’t forget the hyphen! Click on it to select it.
Trim your glitter vinyl to size and place it shiny side down on your green cutting mat. Press the C button to start the cut and remove the glitter vinyl when the cut is complete. Weed the scoops with your weeding tool.
STEP 10 – Heat Press The Ice Cream Cone Keychain Layers Together
Gather your cut and weeded shapes, an Easy Press Mini or Cricut Easy Press, a heat pressing pad, and a Teflon sheet or piece of parchment paper.
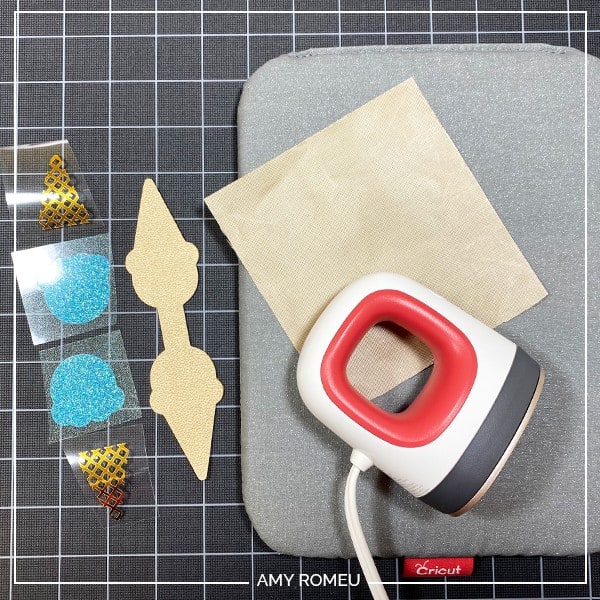
I recommend pressing one side of the keychain at a time. The cone cross hatch texture layer will be pressed first, and then the scoop layer will go on top.
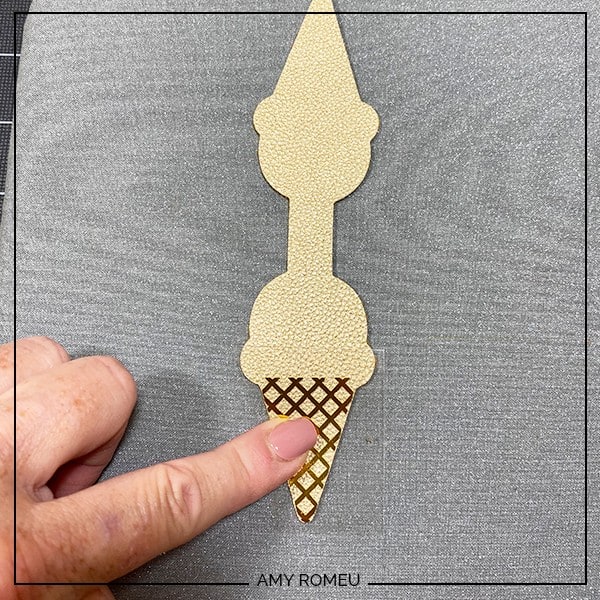
After lining up the foil cone texture on the faux leather cone layer, cover the HTV with the teflon sheet or parchment paper.
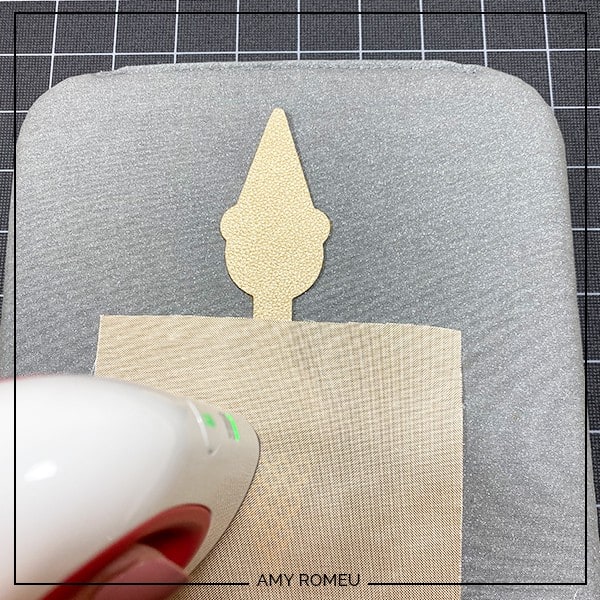
With the press on low heat, gently but firmly press the the vinyl through the cover sheet. You don’t want to press TOO hard or else you’ll flatten out the texture of the faux leather. Only press for a few seconds with heat.
After you press the foil long enough for it to stick, peel the carrier sheet away from the faux leather keychain base. Keep the ice cream cone keychain flat and curve the plastic sheet up and away to help keep the vinyl wrinkle free.
Repeat with the ice cream cone scoop. Then press the other side of the keychain.

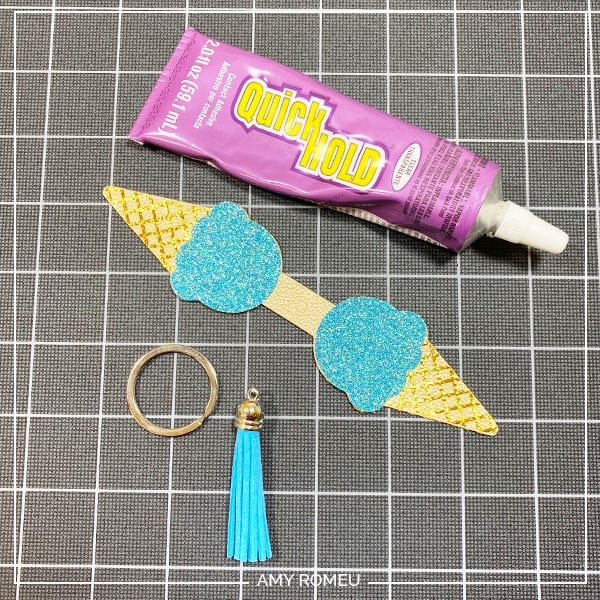
STEP 11 – Glue The Keychain and Add a Key Ring
Now it’s time to glue the front and back of the keychain together. I used Quick Hold glue, but you can use E6000 or whatever fabric glue you have at home.
I don’t recommend using a very liquidy glue, like Super Glue, because it will seep into the fabric backing of the faux leather before you have a chance to press the top and bottom together.
If you didn’t put your key ring on your keychain before, now is the time to do it!
Carefully apply small dabs of glue on the back of one side of the keychain. Apply the glue close to the edges but allow some room for the glue to spread.
Be sure to put something down to protect your work surface from any glue globs!
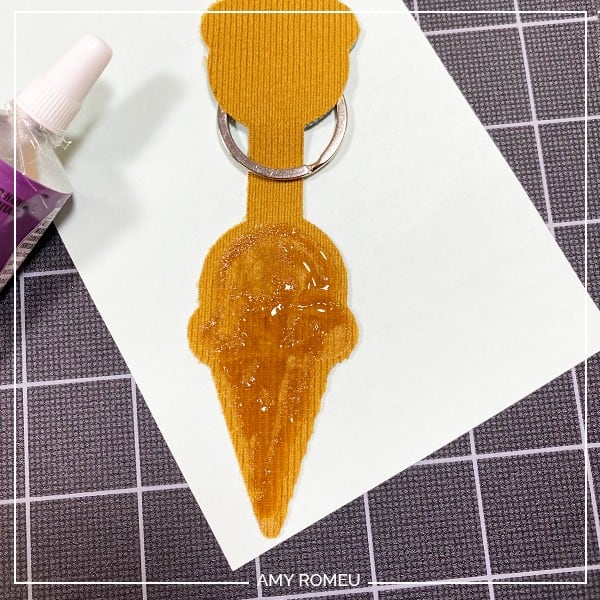
Fold the top over the bottom and line up the edges. Wipe away any glue that seeps out of the edges.
Place the glued ice cream cone shapes under something heavy like a book for at least a few hours to dry. Overnight is best.
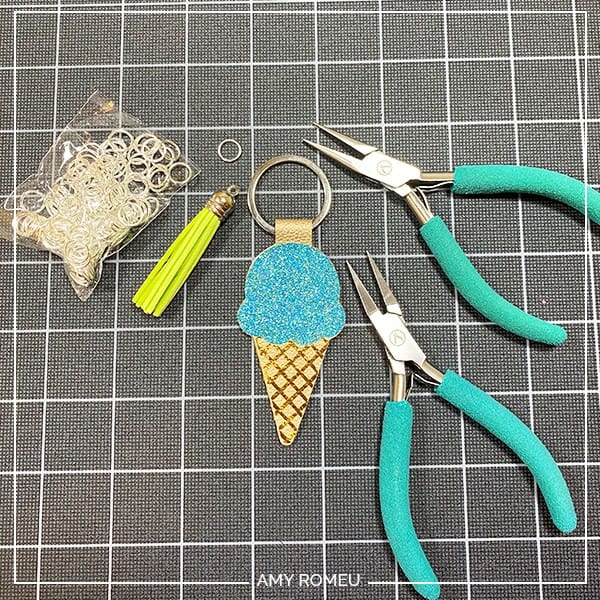
If you want to add a tassel, use flat nosed pliers to open a large jump ring to attach the tassel to the keyring.
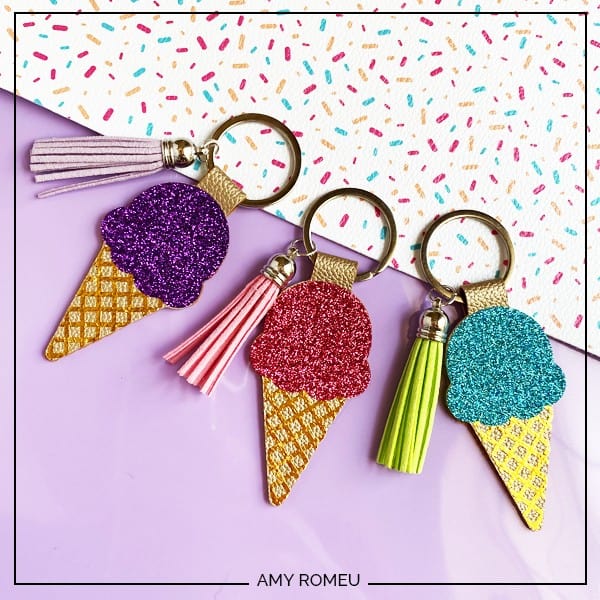
Aren’t they so cute? I hope you like this project! If you make your own ice cream cone faux leather keychains with a Cricut, please tag me on Instagram @amyromeucreates.
If you liked this project, you’ll want to check out my DIY Cricut Ice Cream Cone Earrings video:
I would love to see the faux leather Cricut ice cream cone keychains or ice cream cone earrings you make with the Cricut Explore Air 2, or the Cricut Maker, so be sure to share them with me!
Want to see all of my Cricut earring & jewelry tutorials? CLICK HERE
Until next time… and happy creating!

Want the FREE SVG file you so you make these DIY CRICUT ICE CREAM CONE KEYCHAINS yourself?
Get it from my Resource Library! You’ll receive the password for the Resource Library instantly after filling out the form below!
Want to remember this? Post this DIY CRICUT ICE CREAM CONE KEYCHAIN project to your favorite Pinterest board!

Love the ice cream cone keychain, cant wait to try it
I’m so glad you like this project, Alvina!