How to Make Wood Earrings with Glowforge
How to Make Laser Cut Wood Earrings with a Glowforge
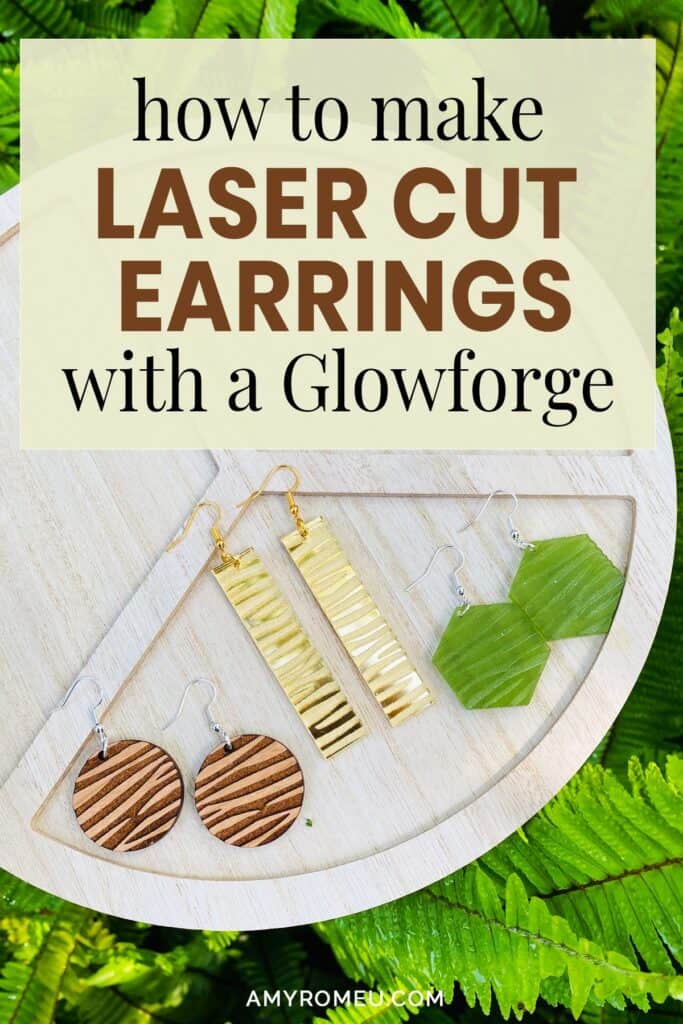
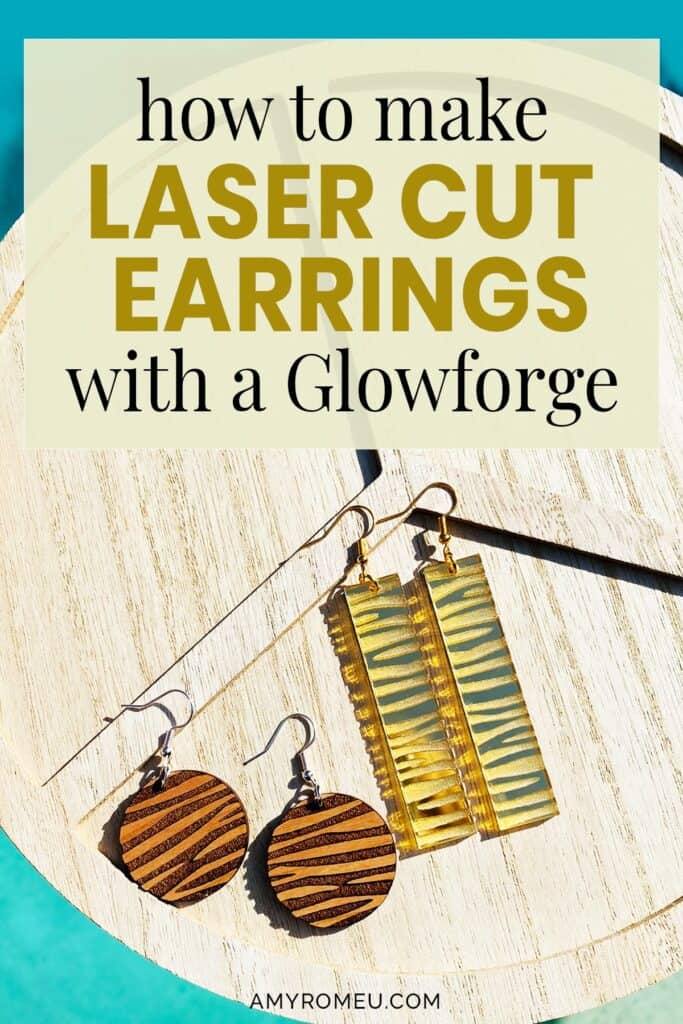
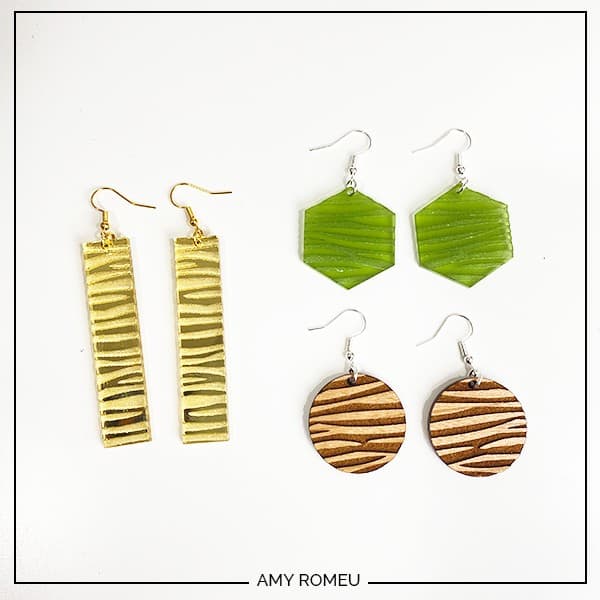
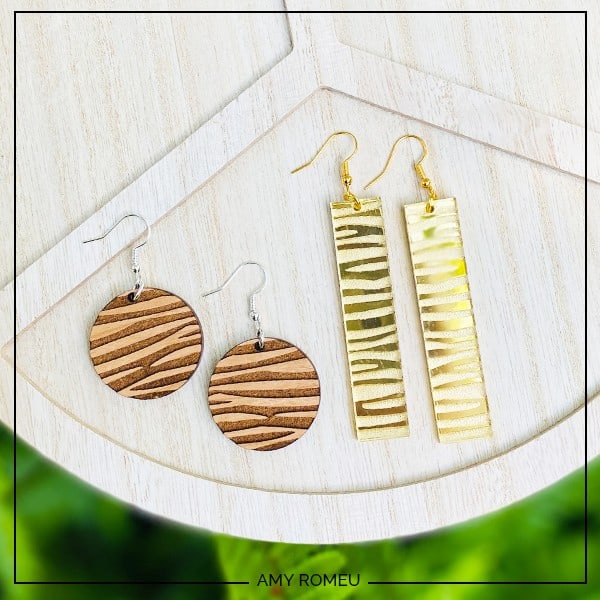
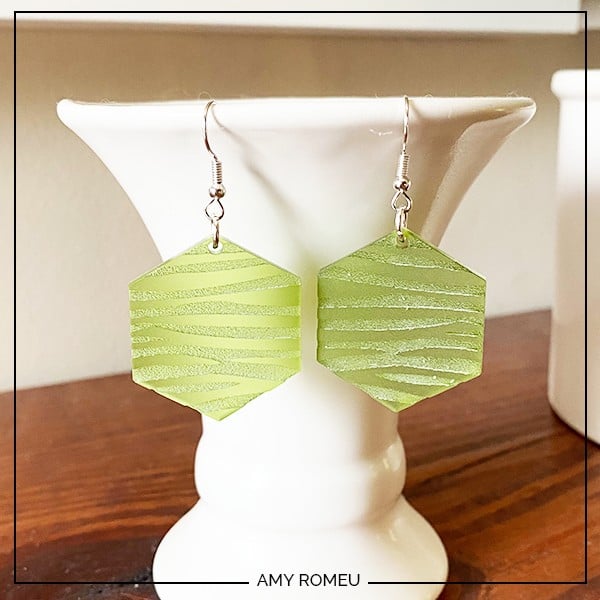
Have you ever wondered how do you make earrings in a Glowforge, or if you can make jewelry with a Glowforge? I know I have! Once I got my hands on a laser cutter so I could start making laser cut wood earrings with a Glowforge myself, I haven’t stopped! First I designed a zebra print wood earring design for laser cutting and gave laser cutting wood earrings a try. I also cut some Glowforge earrings with mirrored acrylic and frosted acrylic.
In this tutorial, I’ll give you my step by step instructions and tell you exactly what materials I used to laser cut acrylic and wood Glowforge earrings. I’ll share all of the steps with you, and give you my original zebra print circle earring SVG file free so you can try making laser cut wood earrings or acrylic earrings with a Glowforge yourself. You can get the file from my Free Resource Library – I’ll have a link for you in the Materials section below.
Ready? Let’s get started!
This post contains some affiliate links (which means if you make a purchase after clicking a link, I will earn a small commission at no additional cost to you). Read my full disclosure policy here.
DIY Glowforge Laser Cut Wood Earrings – Materials List
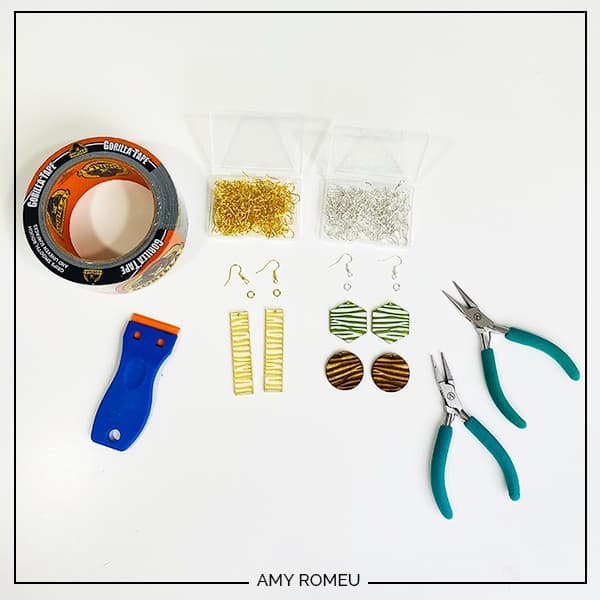
- A laser cutter like a Glowforge. I have the Glowforge Plus but any laser cutter that accepts SVG files will do for this project.
- Laser compatible wood. I used this Glowforge Proofgrade Medium Cherry Plywood. For the other two versions, I used this frosted acrylic in Moss Green and this yellow gold acrylic mirror.
- Paper Masking Tape like this one from Amazon, or blue painter’s tape. Get the widest one you can find, like this one from Amazon.
- Gorilla Tape or a Rubber Tipped Scraper. These are both used to remove masking from the material.
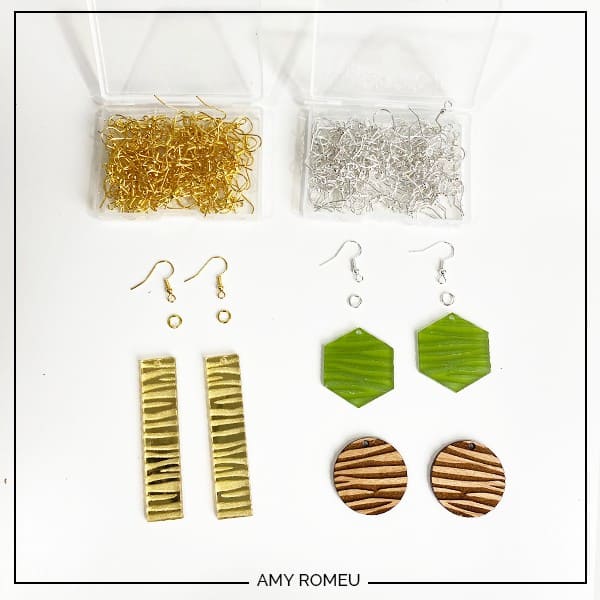
- Earring hooks – I used these gold toned shepherd’s earring hooks from Amazon.
- Small jump rings – I used these 6mm size gold toned jump rings from Amazon.
- Two pairs of flat nose pliers – My favorites are Wubbers brand in the “Baby” size. My everyday use pliers are the Baby Wubbers Chain Nose Pliers and the Baby Wubbers Flat Nose Pliers.
- The SVG file template for the Zebra Print Circle Earrings. It’s Design #179 in my Free Resource Library. You can get the password to my library instantly by filling out the form below, or at the bottom of this post.
Laser Cut Wood Earrings with Glowforge – PROJECT INSTRUCTIONS
STEP 1 – Download the SVG File and Upload it to the Glowforge App
Download my Laser Cut Zebra Circle Earrings SVG file (#179) from my free Resource Library. (If you don’t have a password to the library, fill out the form above and it will be emailed to you instantly.)
Save the zipped folder that downloads to your computer. Then unzip the folder to access the folder’s contents. You’ll need to unzip or extract the files FIRST so you can upload the SVG file to to the Glowforge app.
On the Glowforge application screen, click CREATE and then UPLOAD FROM FILE. Browse for the unzipped SVG file and click on it to upload it.
STEP 2 – Prepare the Material for Cutting
Your wood should be masked before cutting to protect the material from burn marks or charring. Many materials already come masked, but if not, you can apply some paper masking or blue painter’s tape to the front and back of the material in the area you are going to cut.
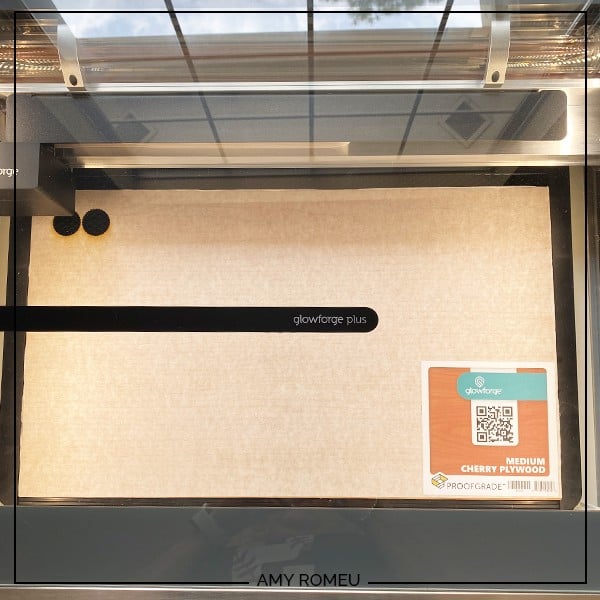
The Proofgrade Medium Cherry Plywood is already masked so if you are using the same material, you can skip that step.
The QR code on Proofgrade materials will be automatically read by the Glowforge camera and the proper settings applied. If you are using a non-Proofgrade material, refer to the vendor’s instructions for their suggested material settings and cut settings. In some cases you’ll need to measure the material thickness with calipers and enter that information into the Glowforge app interface before proceeding with the cut.
Place your masked material in the Glowforge bed.
IMPORTANT! Always be sure your Glowforge is properly ventilated before beginning any project!
STEP 3 – Prepare the Designs for Cutting
You will see the laser cut zebra print earring pair superimposed over an image of your Glowforge bed. Click on the arrow icon in the top menu bar and then draw a box around the earring shapes to select them. Drag them to the desired location on your material as shown in the bed preview.
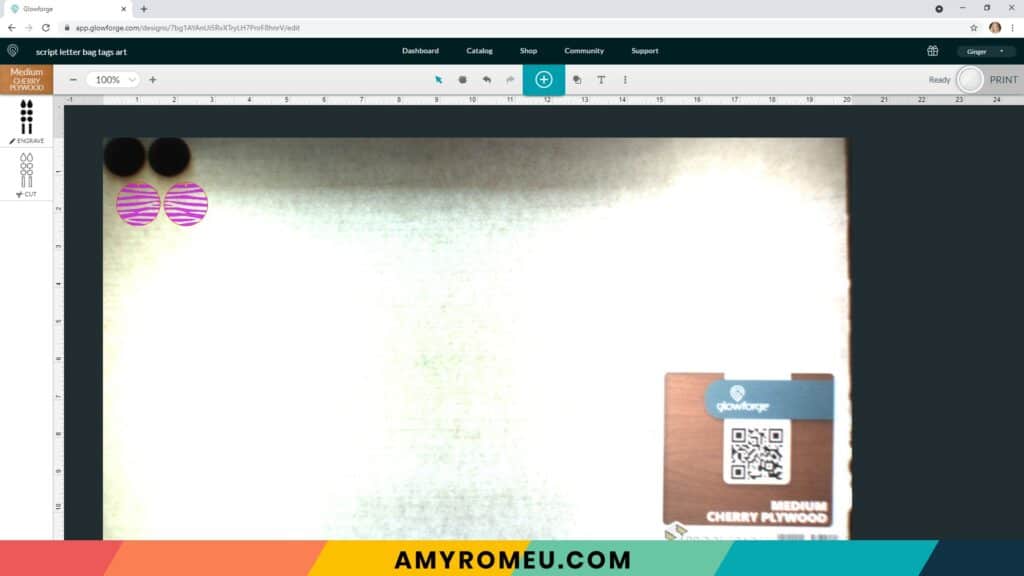
If you’re using Proofgrade material like this Medium Cherry Plywood, your Glowforge should scan the material code automatically and make your material selection for you in the upper left hand corner. If not, choose the material selection that most closely matches your particular material.
About Engraving & Cutting
Once the material selection is made, you’ll see the two actions on the left hand side of the screen automatically update to ENGRAVE and CUT. The Glowforge recognizes the filled in areas of this design as something to engrave, and the outlines as something to cut.
If for some reason the Glowforge doesn’t automatically update the actions for you, you can click on each little preview square on the left hand side and choose Engrave for the first one and Cut for the second. You can drag each box into the order you want.
I always ENGRAVE (or SCORE) first and CUT second. That way the material isn’t loose and moving around while it’s being engraved or scored.
I used the default settings suggested by the Glowforge for ENGRAVE and CUT on this proofgrade material. Your material may require different material settings.
The earrings are already perfectly sized, so just press the PRINT button.
The Glowforge app will show you the estimated time to complete to project.
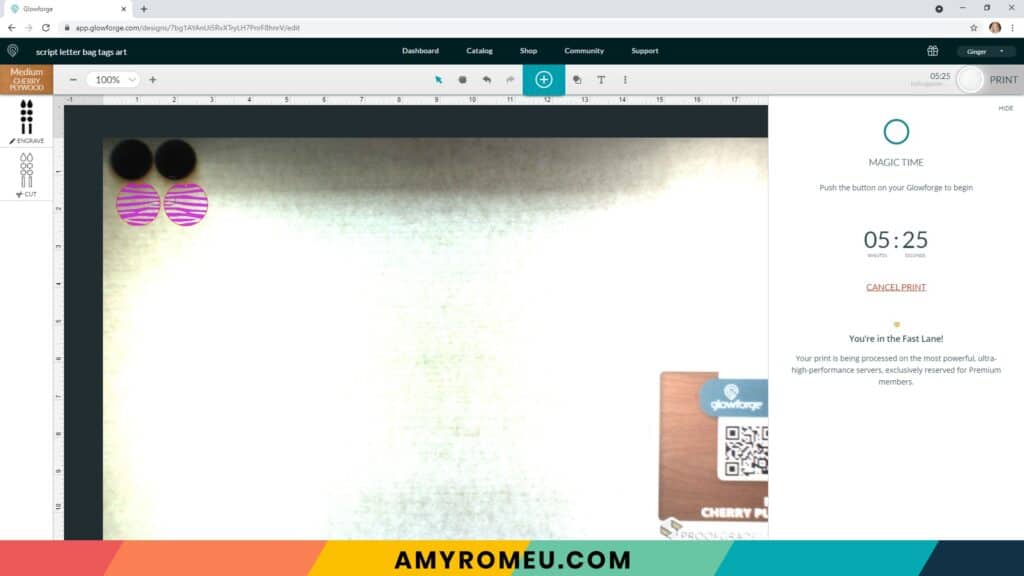
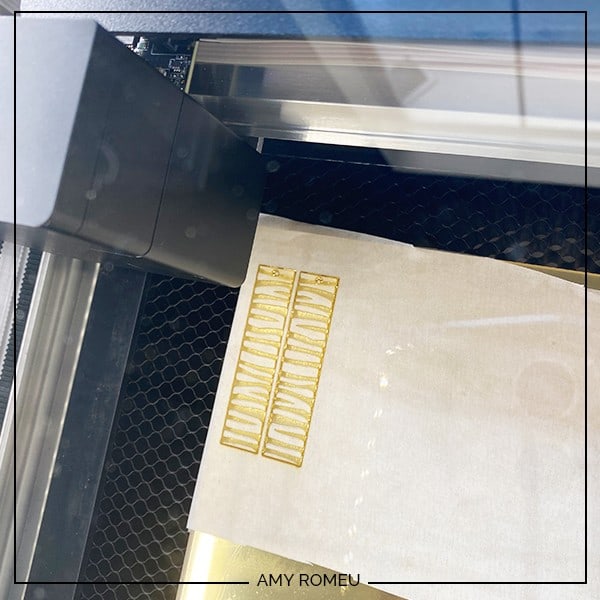
Now it’s time press the big blue button and watch the magic happen (without looking directly at the laser, of course!).

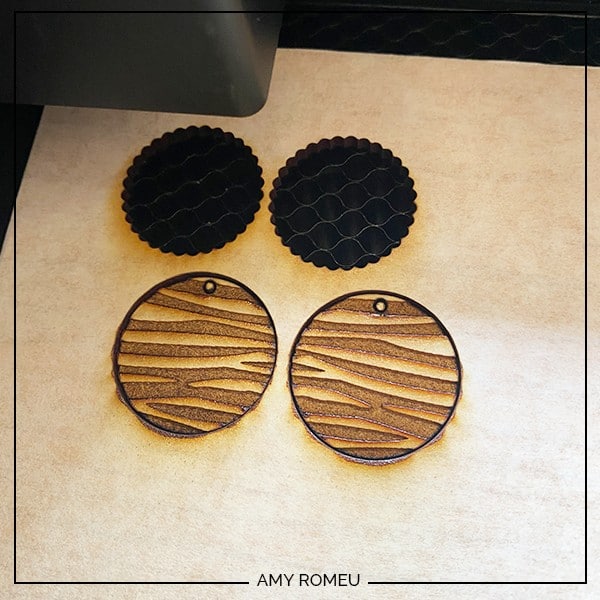
When the Glowforge has finished engraving and cutting and has cooled down, remove your cut earrings from the bed.
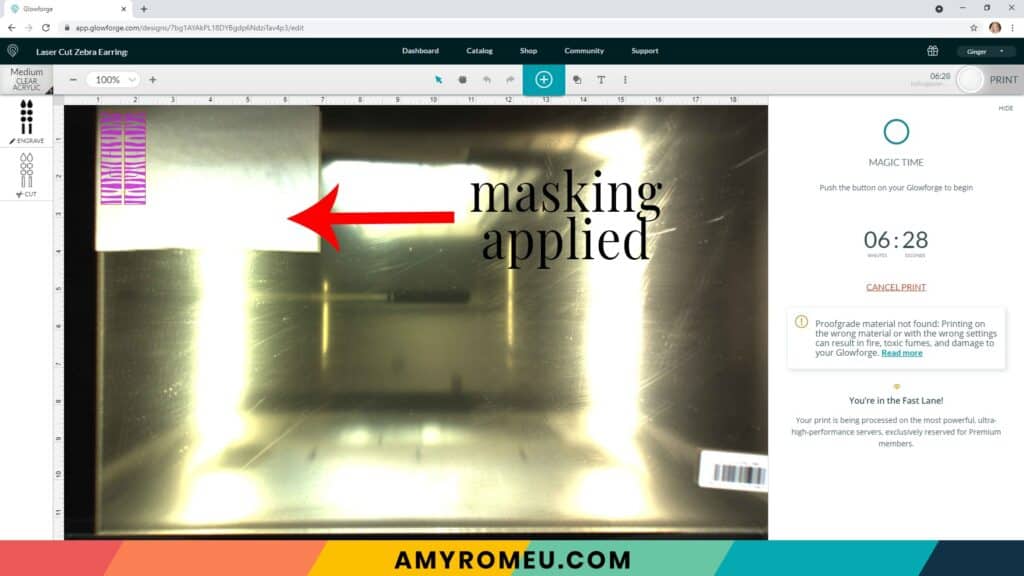
Cutting Mirrored Acrylic
I also cut another zebra print earring pattern from this bundle in my shop using gold mirrored acrylic.
I first applied masking to the front and back of the acrylic mirror. This particular sheet already had a clear plastic masking applied, but the seller of this acrylic recommends removing the plastic masking and re-masking, or masking over the plastic. I opted for masking over the plastic.

I selected Medium Clear Acrylic as my material. Keep in mind for non-Proofgrade materials, you may have to do some experimentation with the settings to get the right cut.
Again I went with the default speed and power settings recommended for this material.
I pressed the blue button to begin the cut.
For this design and material, the cut took a little over 6 minutes.
I used the same process and settings to cut another shape from my zebra print laser cut earrings bundle from green frosted acrylic. The zebra print on the frosted acrylic is very subtle, but pretty in the light.
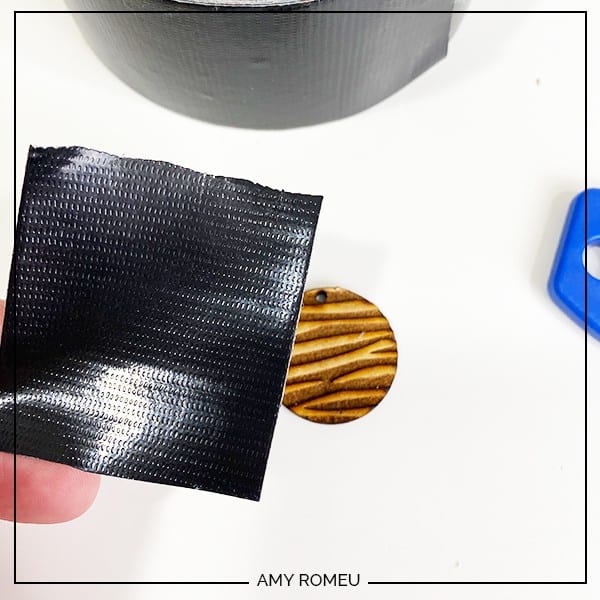
STEP 4 – Remove the Masking
You can remove the masking from the cut earrings with your fingernails, but that’s a little tedious. I suggest two other methods.
The first is you can use Gorilla Tape to press firmly onto the masked earring and then peel it off. The masking bits should peel up with the tape. You may need to reapply the tape a few times to get all the masking off.
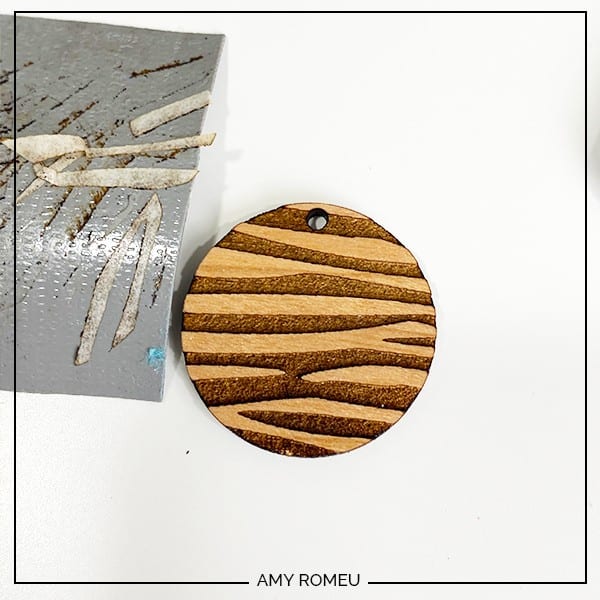
The second (my preference) is using a rubber scraper. I use these from Amazon.

STEP 5 – Assemble the Earrings
To attach the earring hooks, I used small jump rings, earring hooks, and two pairs of flat nose pliers.
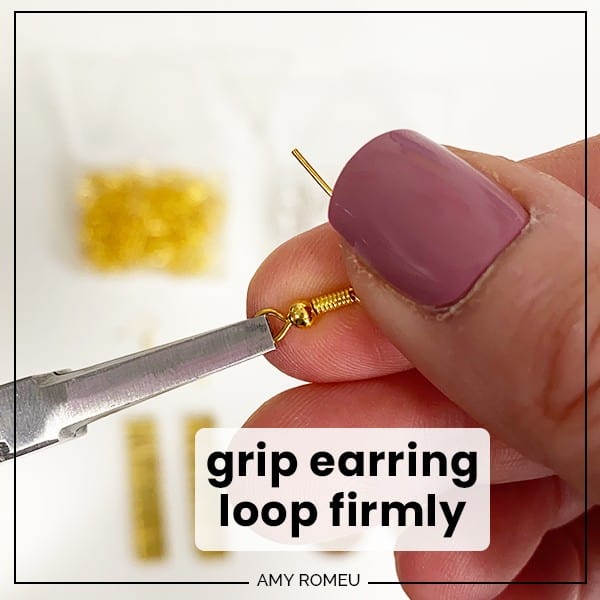
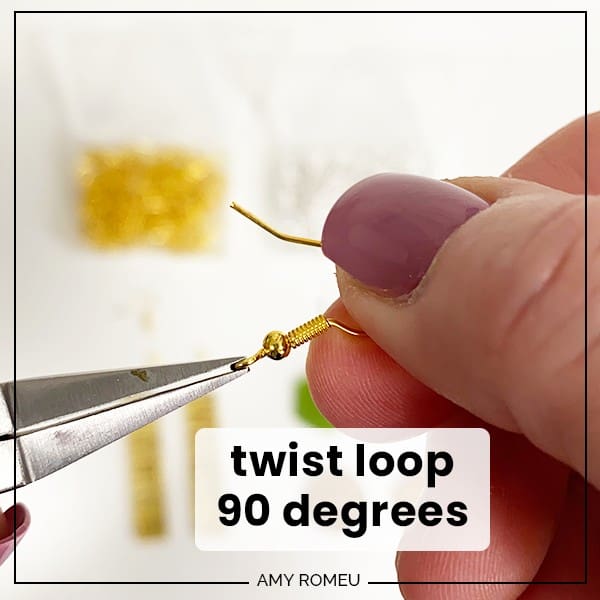
I turned the bottom loops on the fishhook earring 90 degrees so the earrings would hang correctly. To do this, I gripped the loop firmly with flat nose pliers while holding the hook firmly between my thumb and forefinger.
Then twist the pliers until the loop is turned 90 degrees.
For more details on how to do this, visit my post about how to make earrings hang straight here.
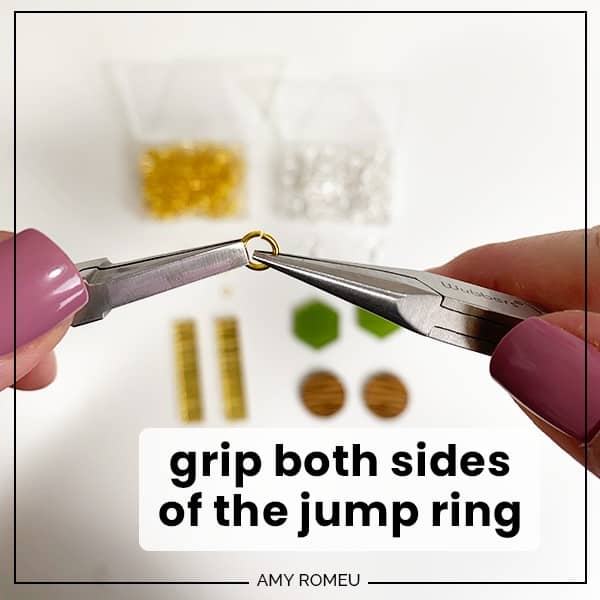
Open a 6mm size jump ring with two pair of pliers by gripping each size of the jump ring with the opening facing up at the 12:00 position. Twist one wrist forward or backward to open the jump ring.

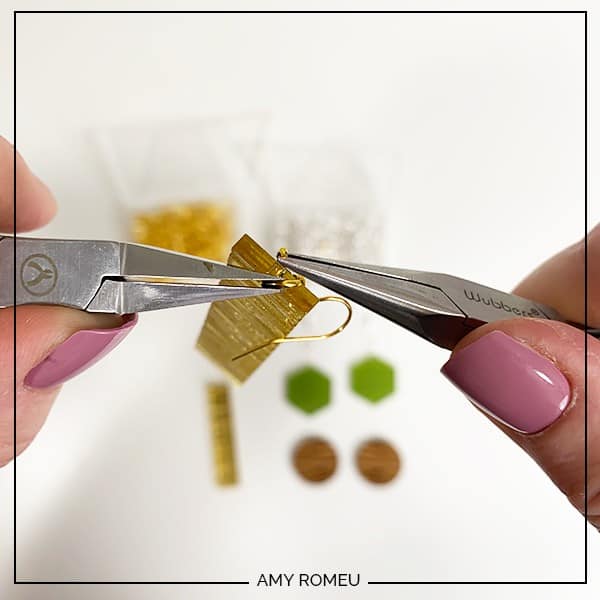
Slide on the laser cut earring, then the earring hook. Make sure the earring hook is facing the right way before closing the jump ring.
That’s it! Aren’t these laser cut Glowforge earrings awesome?
Are you going to make these laser cut wood earrings with a Glowforge? If so, I’d love to see them!
Please share a photo of your Glowforge earrings in the comments, or tag me on Instagram: @amyromeucrafts

WANT THE SVG FILE SO YOU MAKE THESE GLOWFORGE EARRINGS FROM MY CIRCLE ZEBRA PRINT EARRINGS YOURSELF?
You can get it from my FREE Resource Library by filling out the form below!
Want to remember this? Post this GLOWFORGE LASER CUT WOOD EARRINGS project to your favorite Pinterest board!