
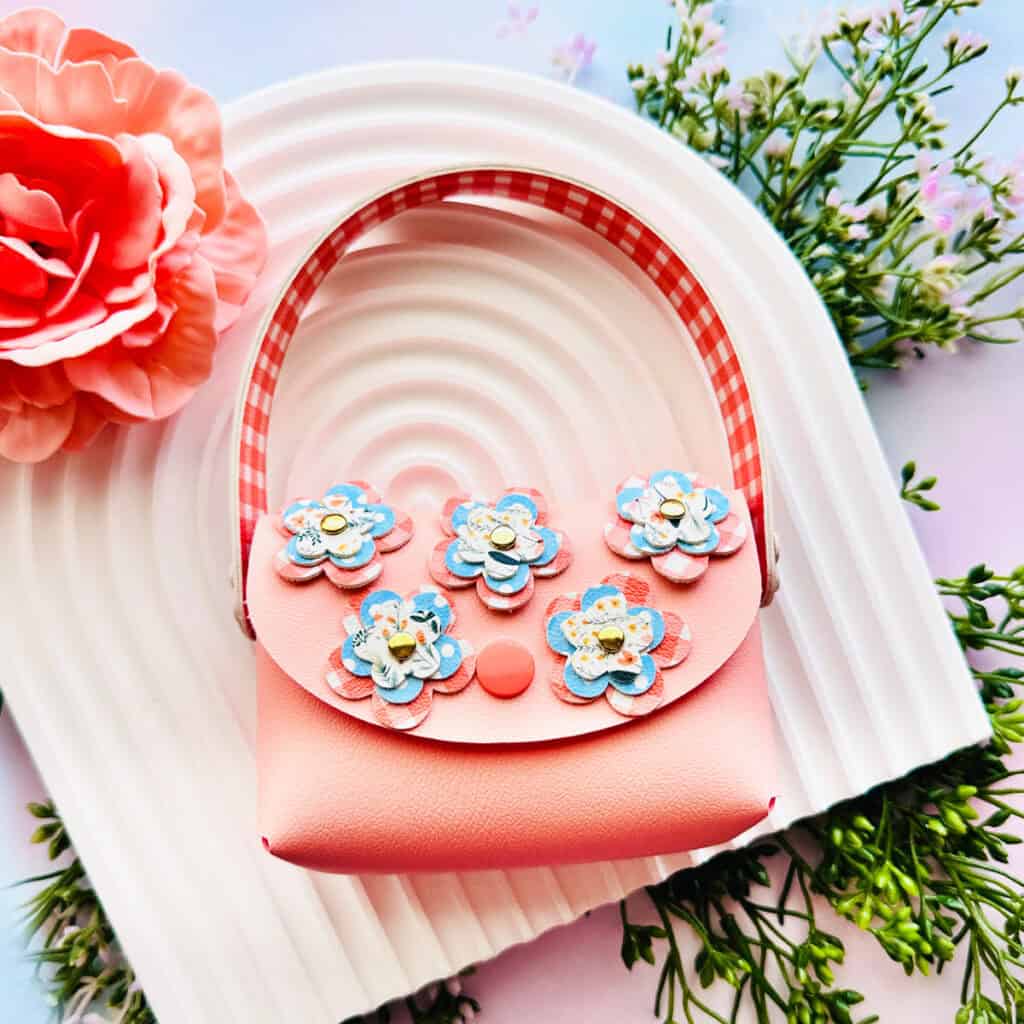
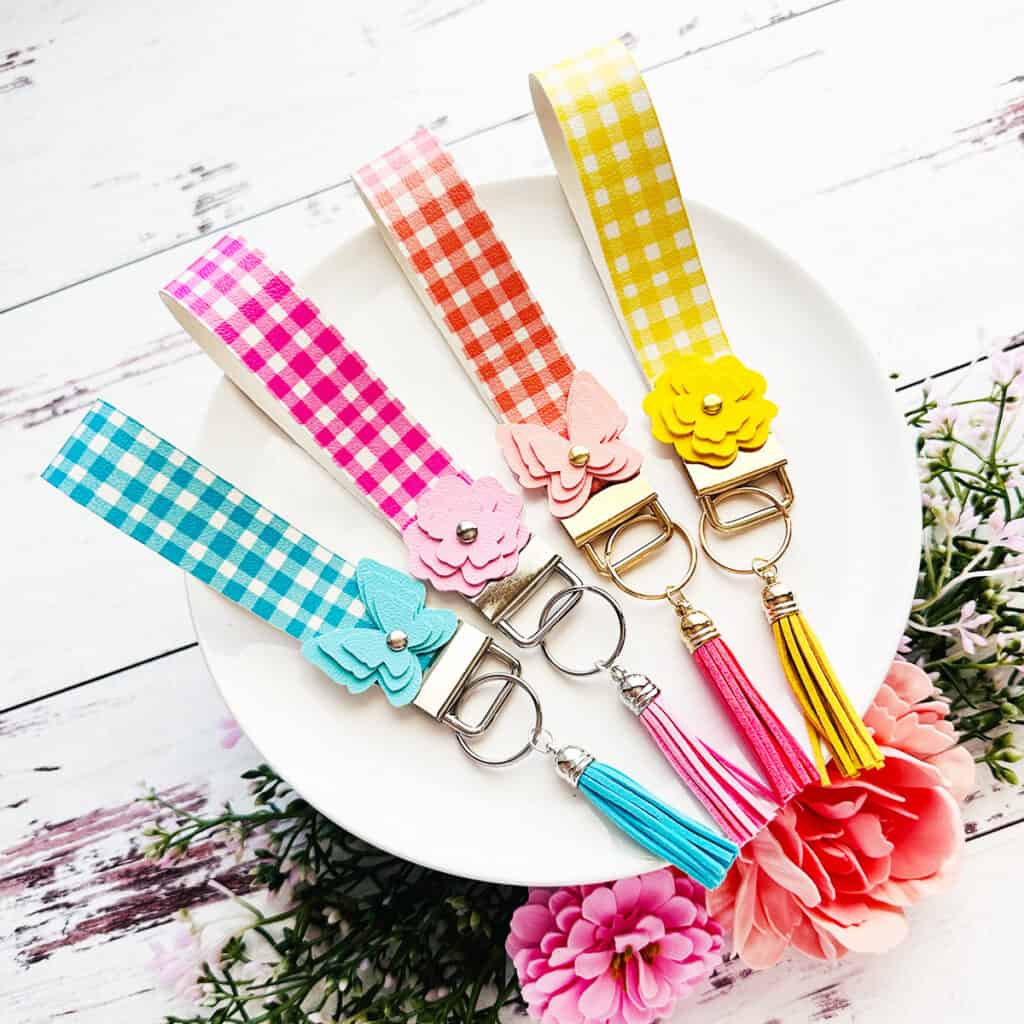
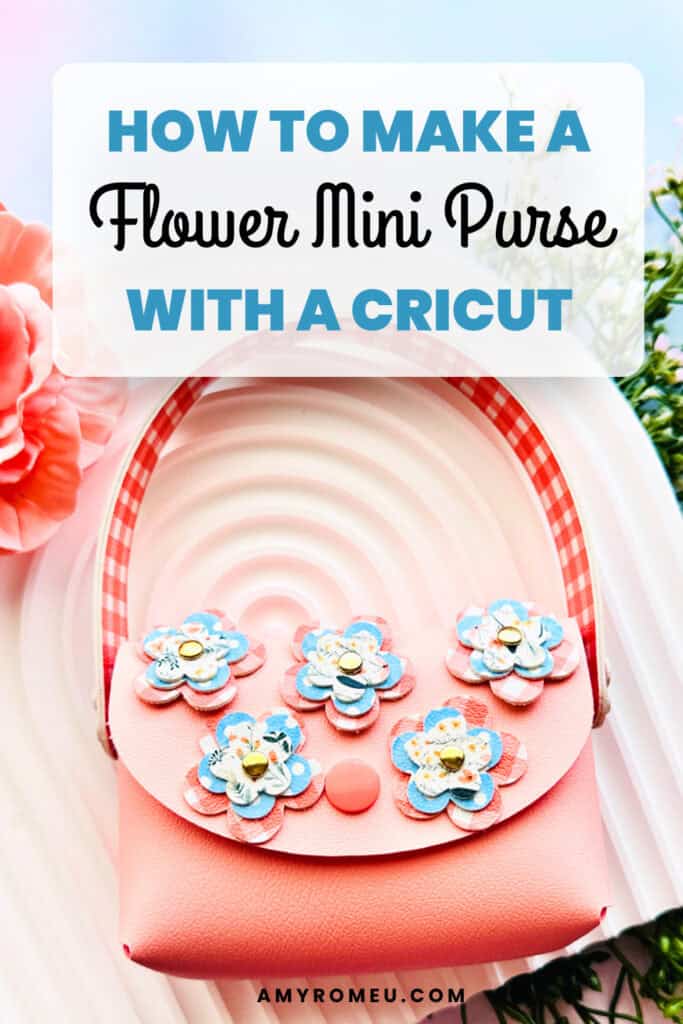
How to Make a Faux Leather Flower Mini Purse with a Cricut
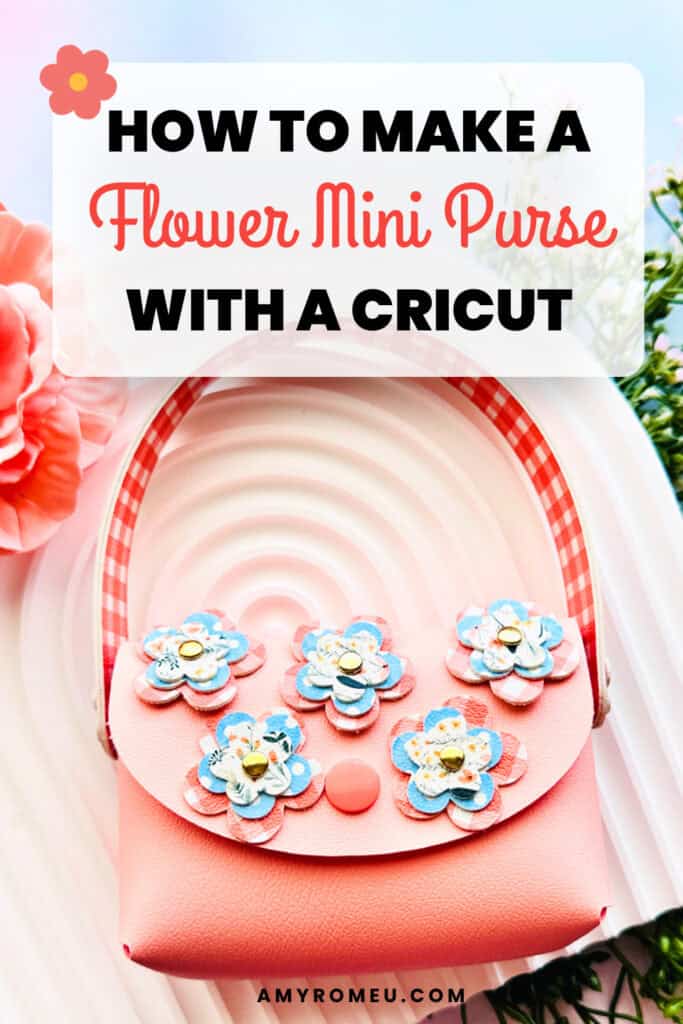
Learn how to make a Faux Leather Flower Mini Purse with a Cricut
This project is Day 7 of The Spring Fling Crafting Event!
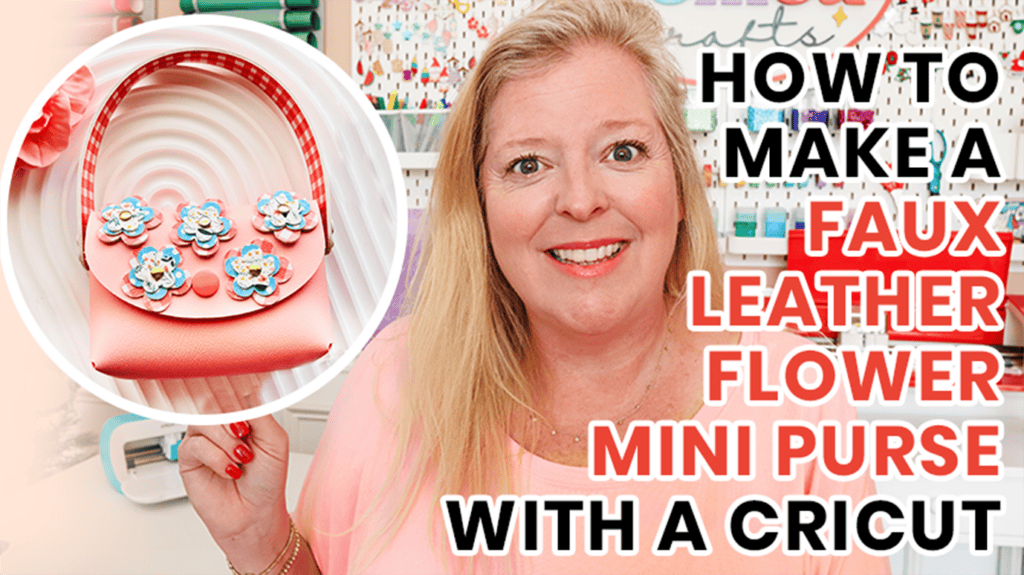
I’m Amy Romeu, and in this tutorial I’ll be showing you how to make a faux leather flower mini purse with a Cricut. This little purse has cute layered flowers on the front flap and a double layered faux leather handle for extra durability. I’ll show you how to use Kam Snaps and rivets to assemble this project.
Follow along with this written tutorial including all the materials, SVG files, and tips you need.
Ready to get started with this beginner friendly Spring Cricut craft tutorial?
Get the SVG in my Shop
Personal or Small Commercial Use Available
Let’s dive into the materials and steps!
Want to watch a video tutorial instead? Check it out below!
See the full step by step video tutorial
Click the image below to watch the video on my YouTube channel, or click here.
How to make a Faux Leather Flower Mini Purse with a Cricut Step by Step
This page contains some affiliate links (which means if you make a purchase after clicking a link, I will earn a small commission at no additional cost to you). Read my full disclosure policy here.
Materials you’ll need to make a Faux Leather Flower Mini Purse with a Cricut
🛒 To shop many of these supplies below in my Amazon storefront, click here. 🛒
Compatible Machines✅: Cricut Maker, Cricut Maker 3, Cricut Maker 4, Cricut Explore Air 2, Cricut Explore 3, Cricut Explore 4, Cricut Joy Xtra (size the pattern down slightly)
Not Compatible Machines❌: Cricut Joy
Blade Used: Standard Fine Point Blade
Cut Setting Used✂️: Faux Leather (Paper Thin) with “More” pressure
- Faux Leather
- I used Peach solid faux leather from this collection of solid faux leathers.
- Watercolor Dots print in Blue (available in assorted colors here)
- This Wildflower print
- Polka Dotted Peach Gingham print faux leather in Georgia (Orange). Also available in Carnation (Pink), Sunshine (Yellow) (also available in Lilac (Purple), Ocean (Blue), and Lime (Green) or a collection of them here: Gingham print faux leathers
- The Gingham prints have matching solids, which you can see here.
- I buy 9×12 inch size, Portrait Orientation, Regular Scaling but you can choose whatever options you’d like!
- Heat Transfer Vinyl
- Optional as a liner inside, if desired.
- Other Project Supplies
- Kam Snaps, Size 20, with Kam Snap Pliers
- 6mm Rivets with tools and a hammer or 6mm Rivets in Gold or Silver
- Teflon Sheets
- Blue Painters Tape
- Small Curved Scissors
- Other Cricut Supplies
- Purple Strong Grip Mat
- Weeding Tool like a Pin Pen or like the one in the Cricut Basic Tool Set
- The SVG template for this project is available in my shop here or inside the Spring Fling Crafting Event VIP Pass.
Get the SVG in my Shop
Personal or Small Commercial Use Available
Step by Step Instructions
Step 1
Starting with a blank canvas in Cricut Design Space, click on Upload, then Upload Image.
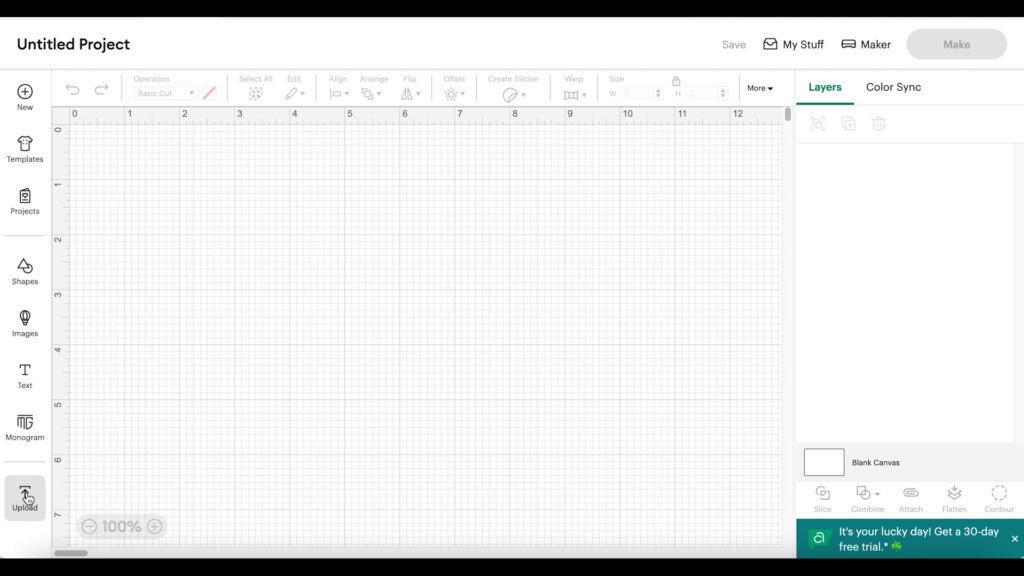
Browse to where the ALREADY UNZIPPED SVG file for this project is saved on your device.
Click on the SVG to select it and follow the prompts to upload it.

The design will load on the canvas. If you need to size the pattern down a little so the purse will fit on the Cricut Joy Xtra mat or if you just want the purse to be smaller, do that now while the shapes are all connected and will size down proportionately.
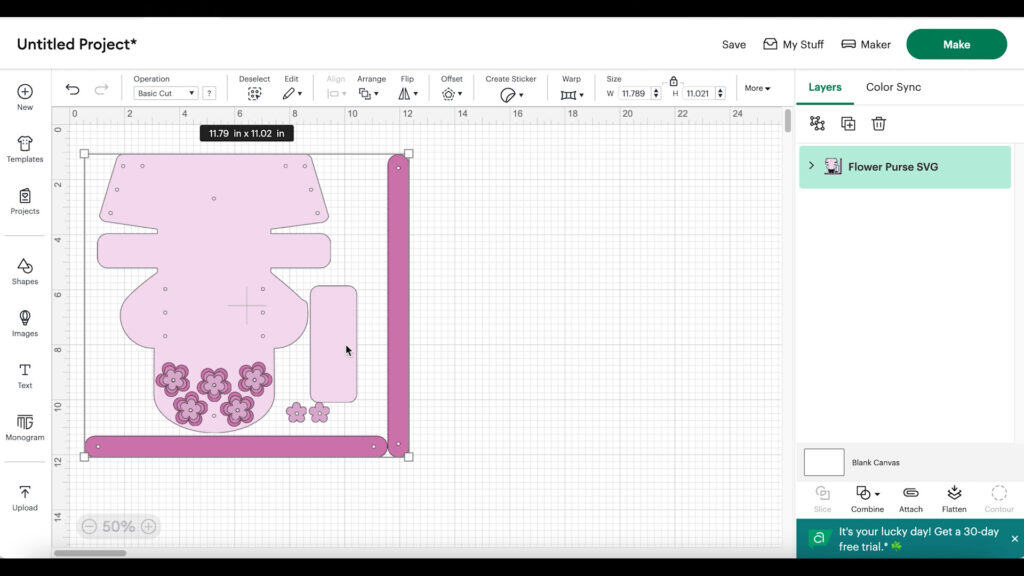
Once you’ve made any size adjustments, it’s time to decide if what faux leathers you want to cut each of the shapes from.
I suggest choosing one of two general design directions for the mini purse:
- #1 – cut the large purse shape from a solid color and then cut the flower and handle shapes from prints/patterns
- #2 – cut the large purse shape from a print and then cut the flower and handle shapes from solids
Once you’ve selected a direction, you’ll want to color the shapes on the canvas in Design Space so the shapes that you want to cut from the same faux leather will be placed on the same mat.
To do that, first ungroup all the shapes in the pattern by clicking the UNGROUP button (first icon on the left at the top of the layers panel).
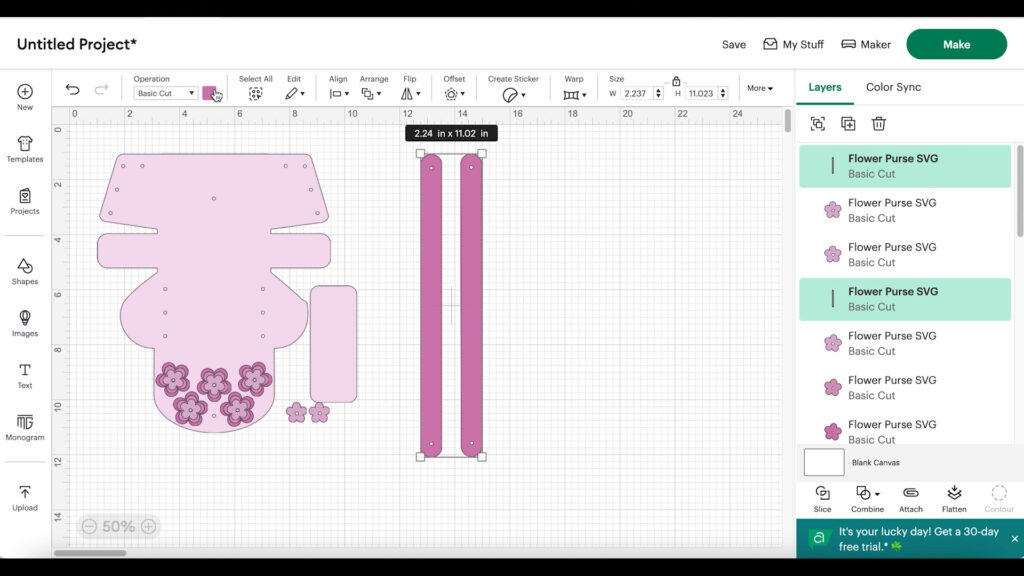
Then select shapes as desired and recolor them. It doesn’t matter what the colors are.
So in the photo below, I’ve colored the purse body and inside bottom piece one color (dark green), the handles another color (medium green) and I’m coloring the flowers all light green.
This will allow me to cut those shape groups from three different mats.

Once you have your shapes recolored as desired, click the MAKE IT button.
Step 2
Click on the mats on the left hand side and toggle the Mirror toggle ON because faux leather always cut in reverse.
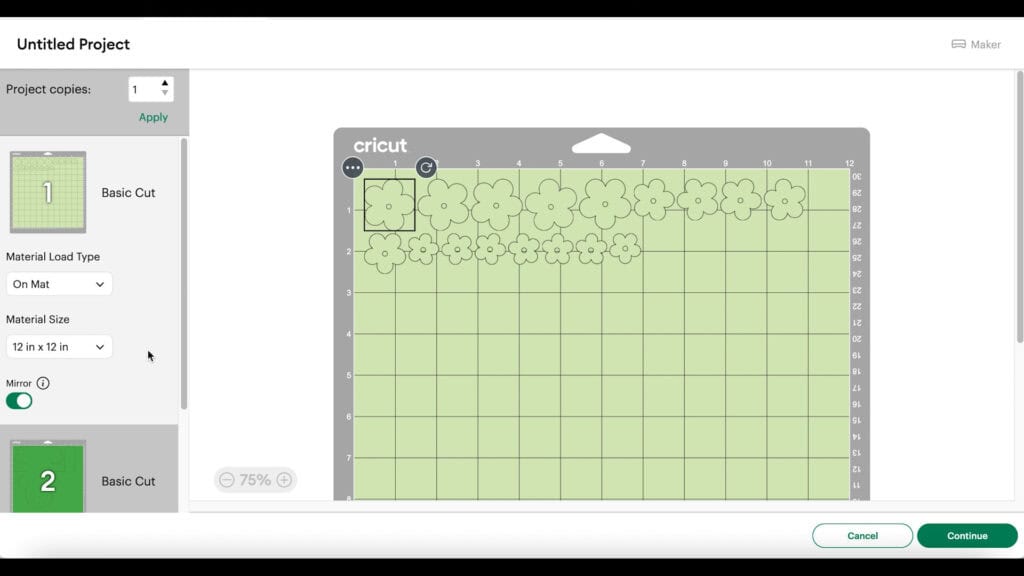
After all the mats are mirrored, click back on each mat and drag the shapes apart from the edges a bit. For the flowers, create some space between each flower.
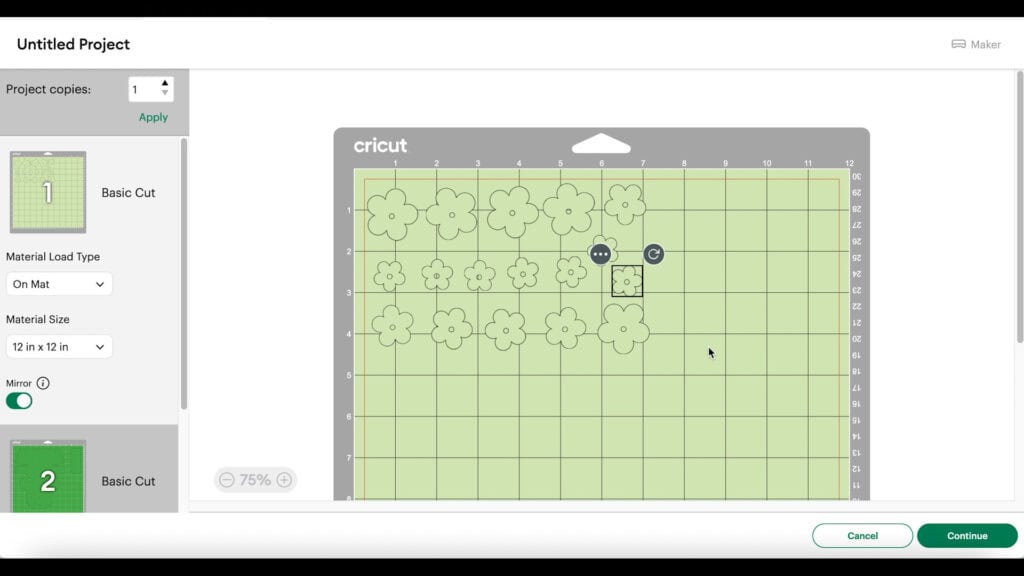

For the purse body mat, check to be sure your shape will fit within the border of the size faux leather you are using so the shape will cut completely.
💡Remember, this project is a little more complex, but I have a step by step video tutorial that will help.
For the purse base shape, you can drag it closer to the purse body shape and tuck it into a blank areas so it will cut on the same piece of faux leather. Or you can drag it away from the purse body and cut it from a separate piece of faux leather on the same mat.
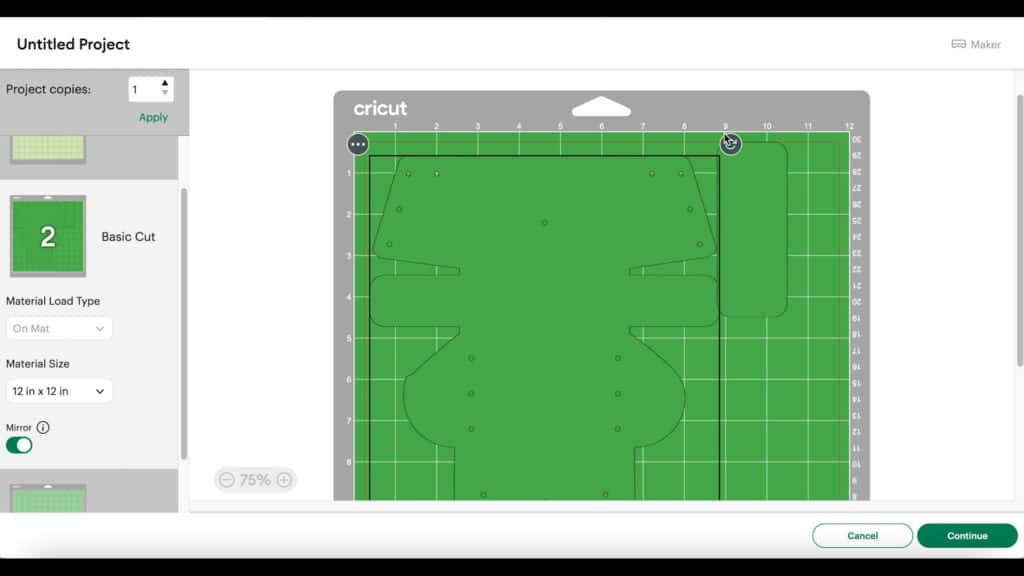
Click the CONTINUE button.
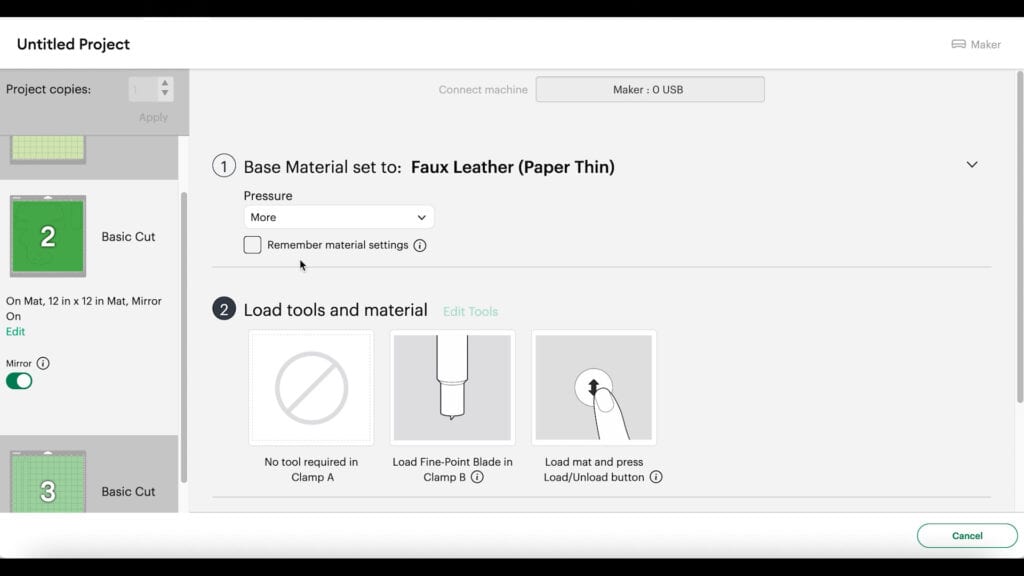
When the material selection screen loads, click on the faux leather mat and then select the Faux Leather (Paper Thin) setting.
If you don’t have that setting bookmarked as a favorite like I do, you can click on Browse All Materials and search for it. (If you are using the Explore Air 2, you’ll need to turn your dial to Custom before you can find that setting in search.)
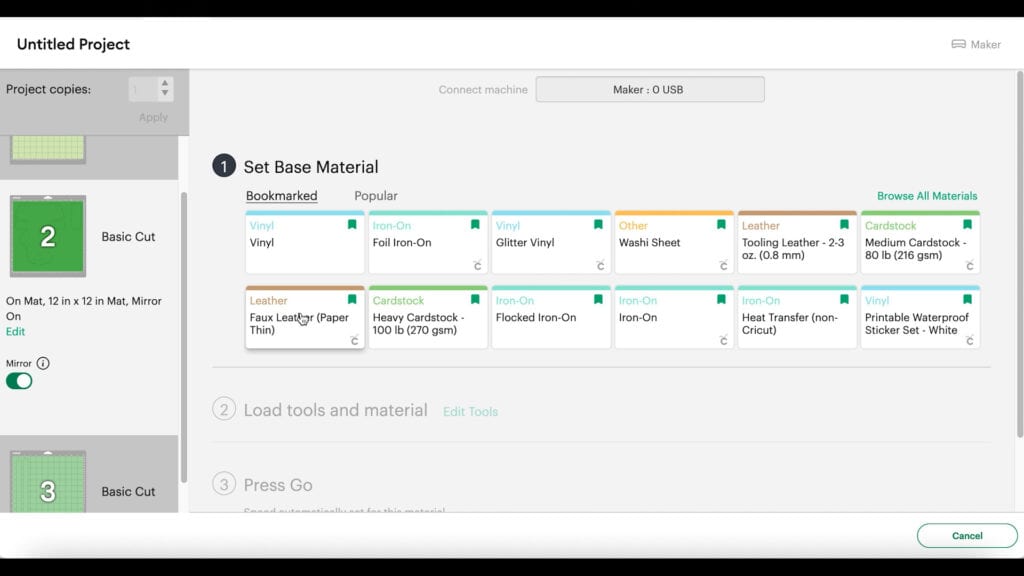
Then choose “More” from the dropdown Pressure menu.
Step 3 (optional)
Press heat transfer vinyl to the back of your faux leather before cutting if you want to have a pop of color inside the purse.
To press heat transfer vinyl onto the back of the faux leather you are using for the purse body, cut a piece of heat transfer vinyl the same size as the faux leather. Place them back to back on a heat pressing pad.
Then cover with a Teflon sheet, butcher paper or parchment paper.
Set a large EasyPress to 265 degrees for 15 seconds. Press the heat transfer vinyl all over and let it cool for about a minute.
Then carefully peel the clear carrier sheet. Let the warm sheet cool flat under something like your heat pressing pad for a few minutes before you cut it.
Step 4
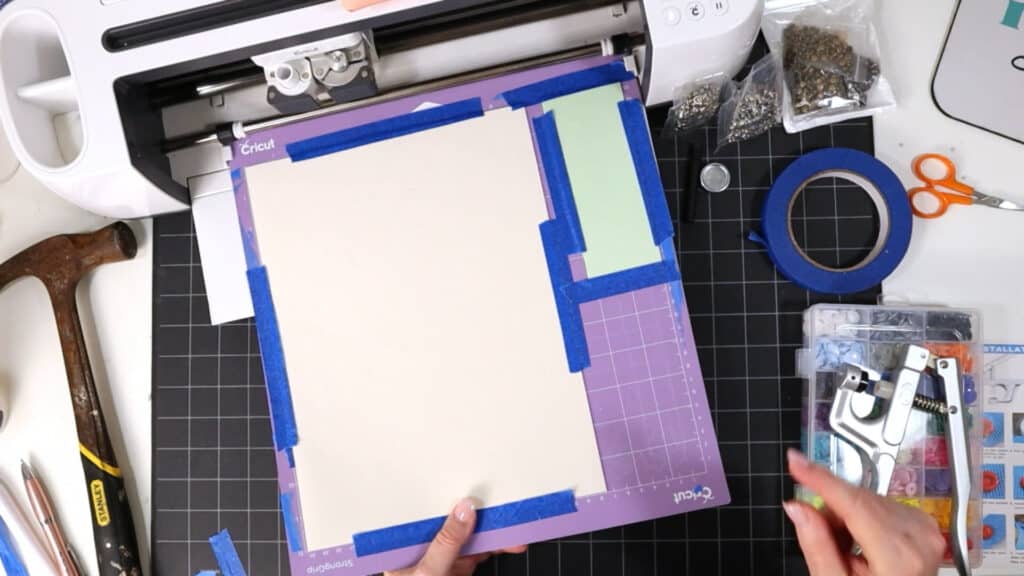
Now start to cut your faux leather mats. To do that, place your faux leather pretty side down (heat transfer vinyl side up, if you did that step) on the area of the mat the shapes will cut from.
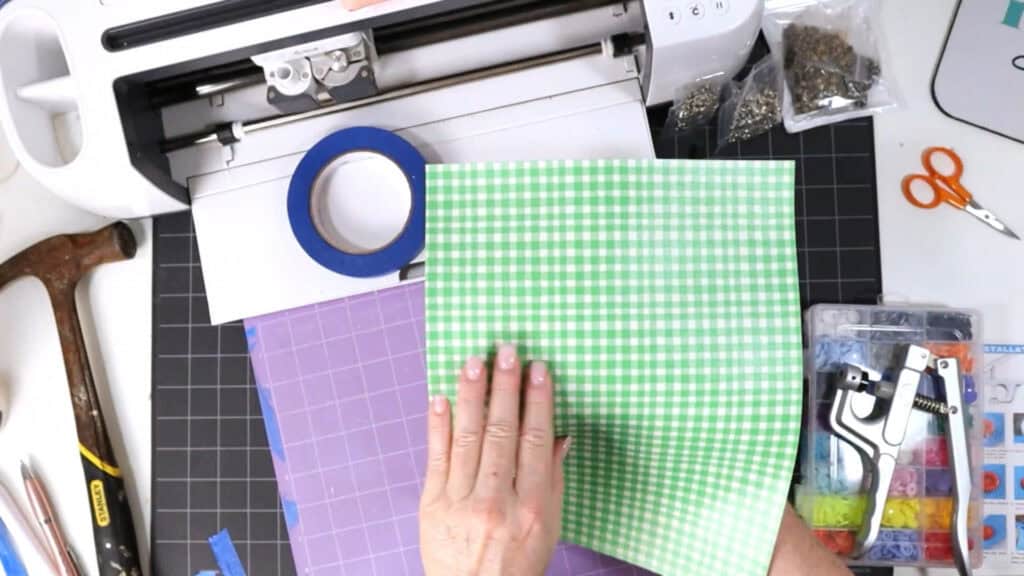
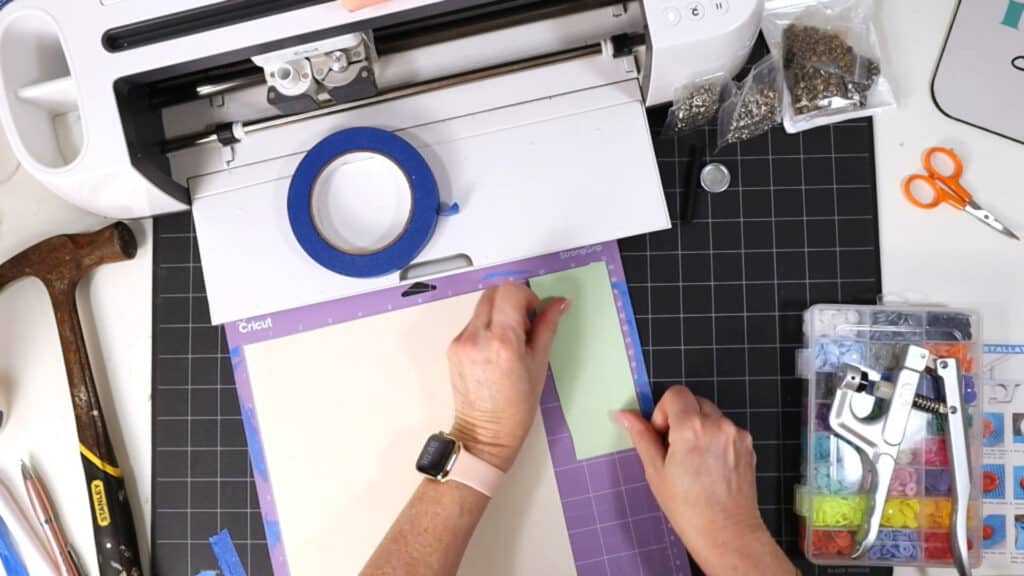
Place blue painter’s tape around all sides of the faux leather. Load the mat into the Cricut and begin the cut.
When the cut is complete, before unloading the mat, lift a small edge of the cut to ensure the cut went through. Repeat the cut if needed by pressing the cut button again.
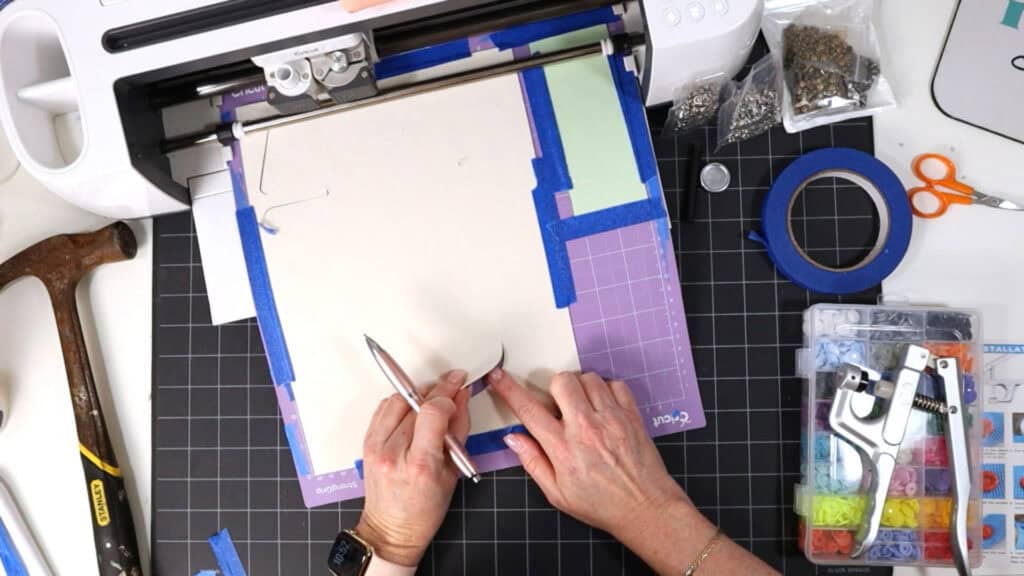
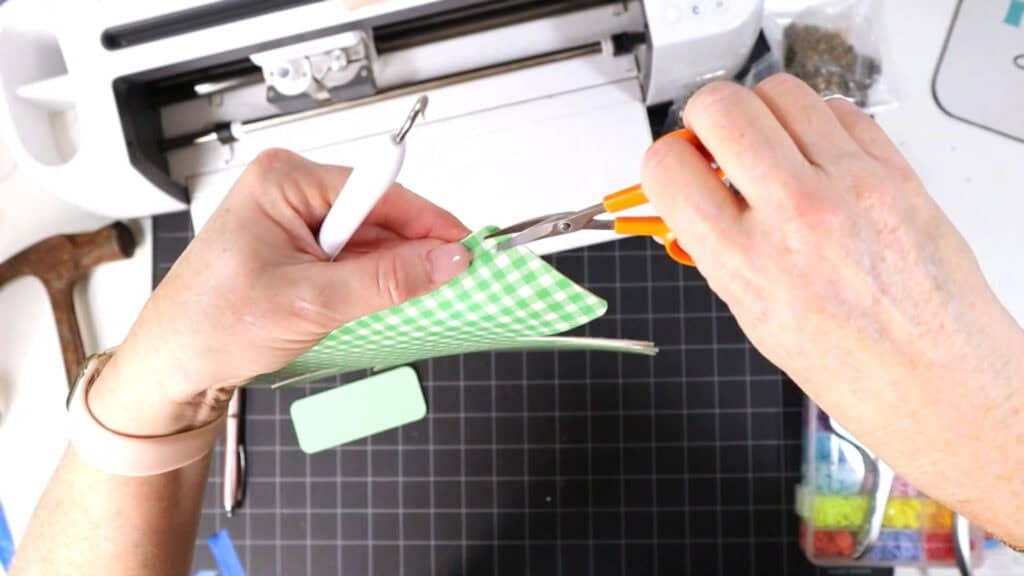
Once the shapes are cut through, remove the shapes from the mat. Use a sharp weeding tool to poke through the holes in the purse.
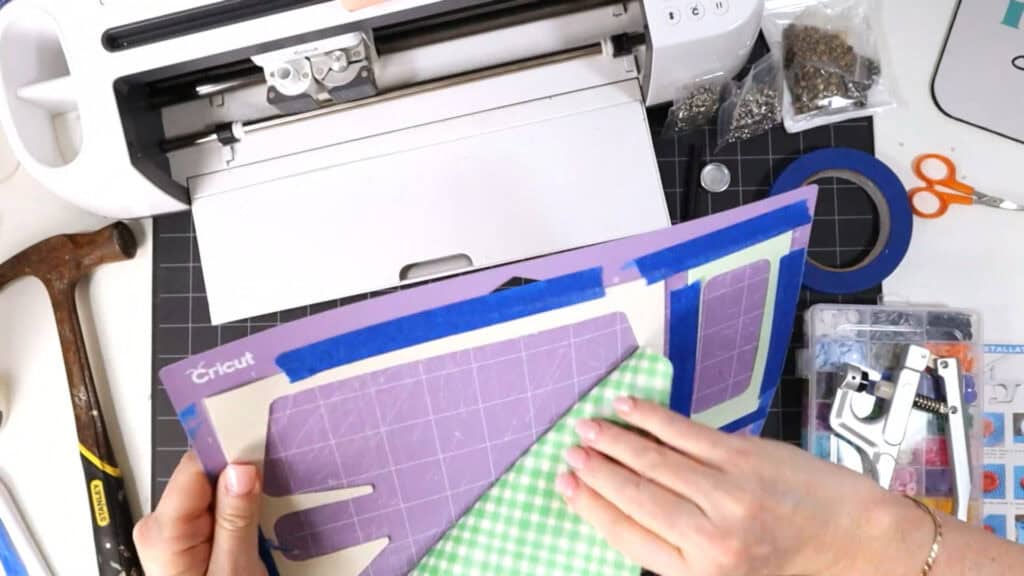
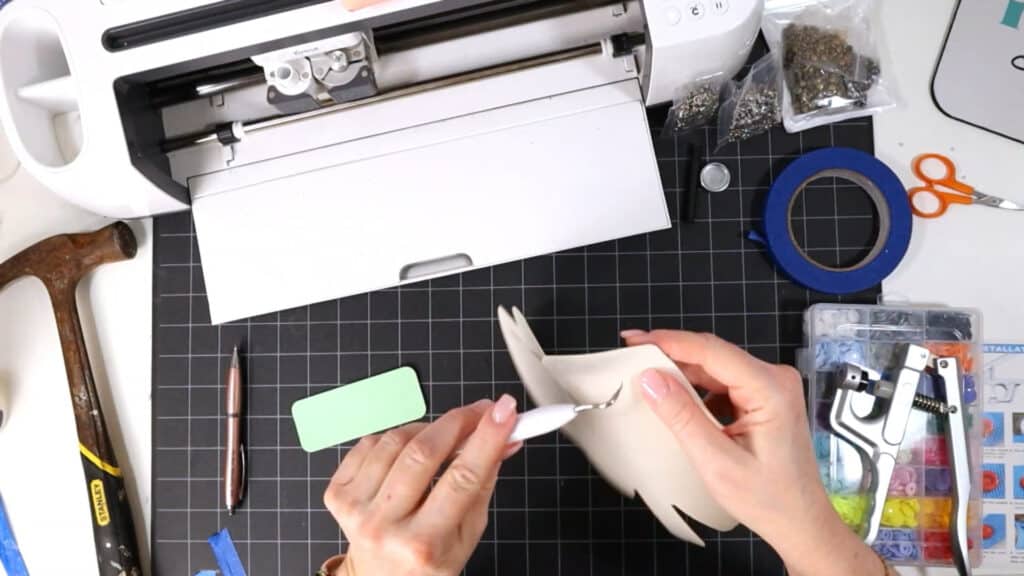
Use small curved scissors to trim any areas of the faux leather cut as needed.
Return to Design Space and cut other faux leather mats. Trim and poke holes as needed.
Step 5
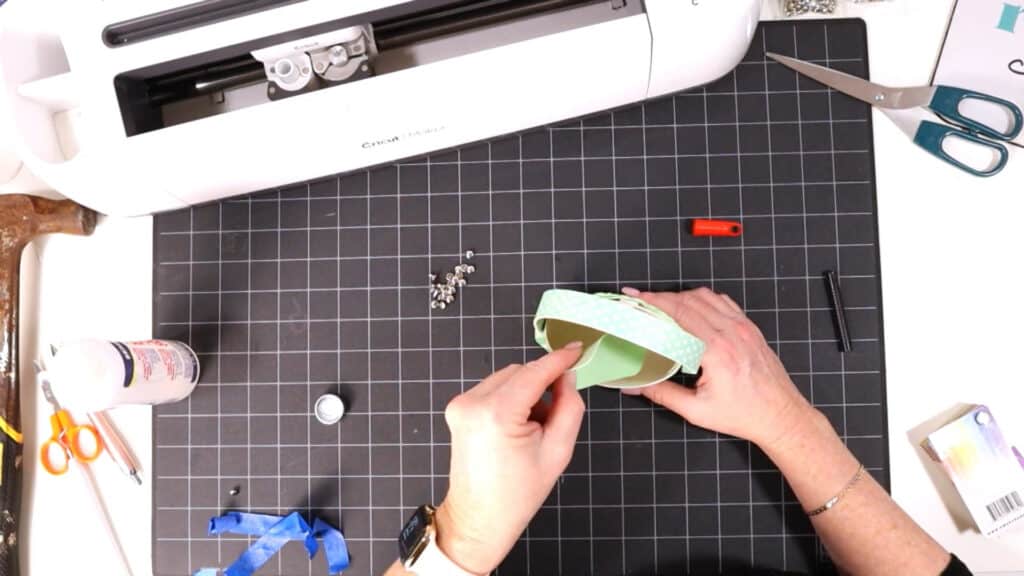
First glue the two handle shapes together so they can start drying.
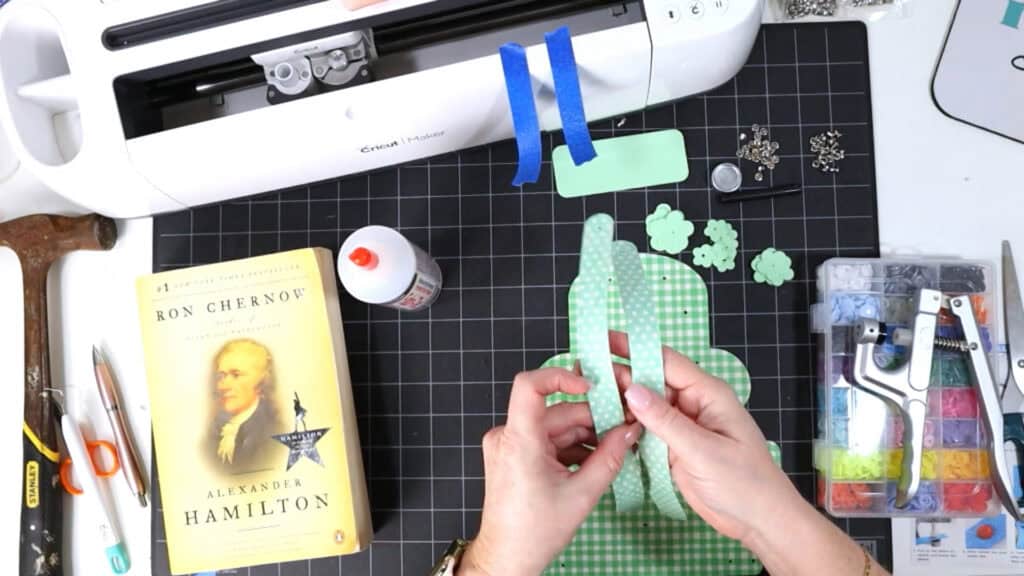
Apply fabric glue (I like Beacon Fabri-Tac) to the back of one of the handle shapes. Then place the other handle shape on top.
Place the glued handle shapes under a heavy book for about an hour to dry nice and flat.
Step 6
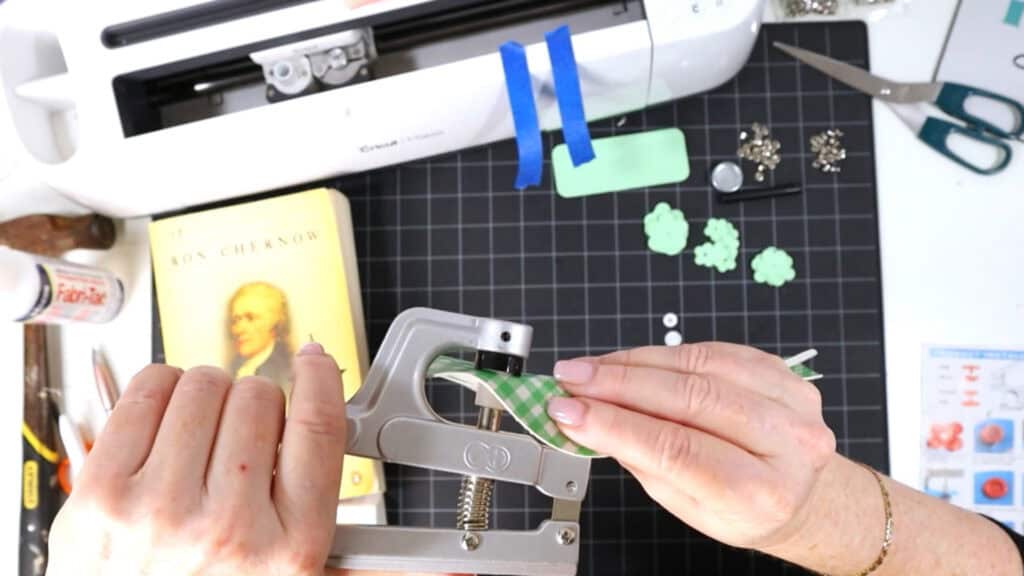
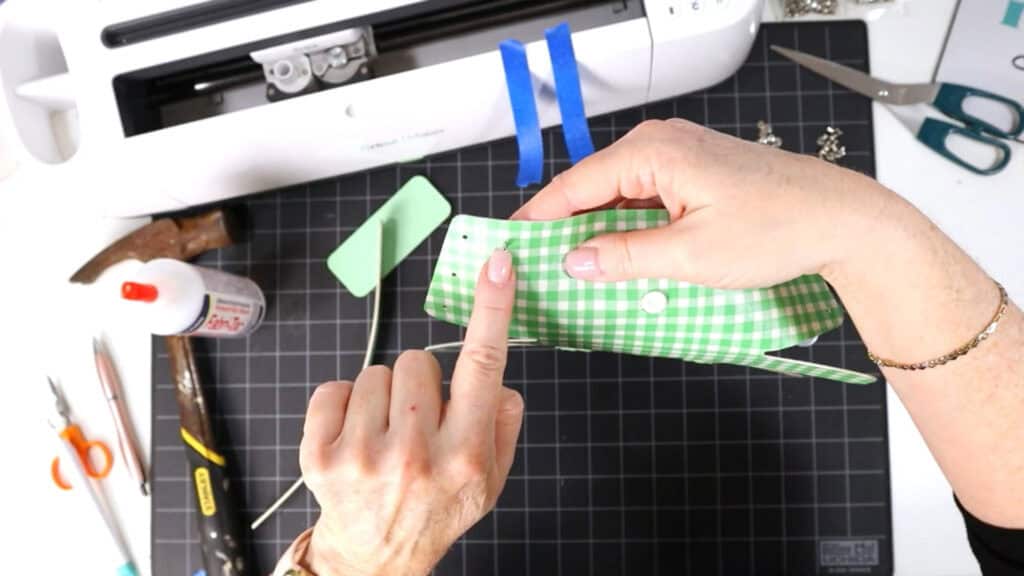
Now it’s time to attach the KamSnaps to the mini purse. This project will use Size 20 KamSnaps (regular length). You do not need “Extra Long” snaps for this project.
Refer to the Kam Snap directions guide included with your Kam Snap set. I’ve also included a copy in your download folder.
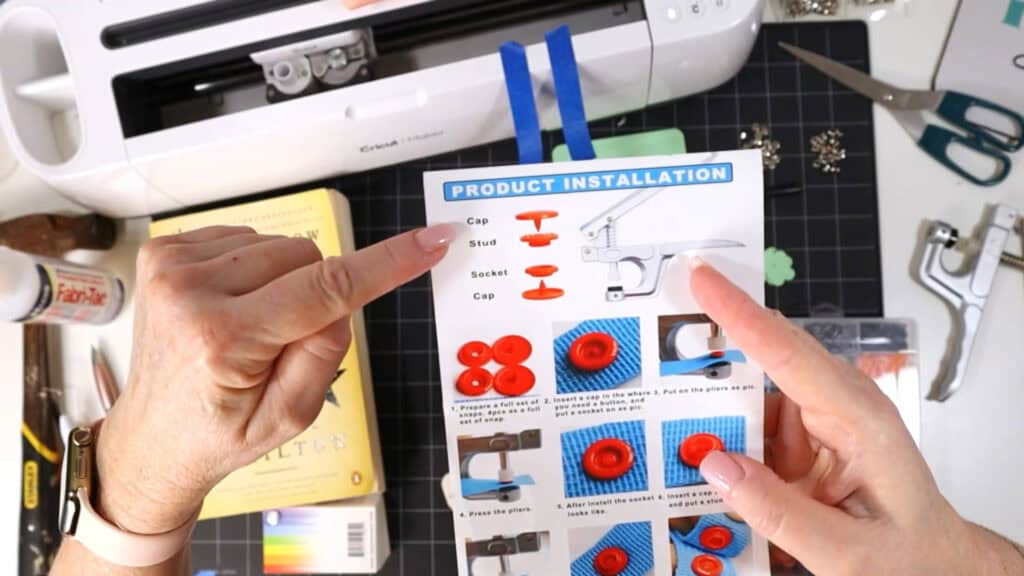
Look for the four elements you need and take them out of the Kam Snap box. Lay them on your work surface in the order shown on the guide: 1 Cap, 1 Stud, 1 Socket, 1 Cap.
The flap of the purse will have a CAP on the outside and a STUD on the inside.
The base of the purse will have a CAP on the inside and a SOCKET on the outside.
Use Kam snap pliers to press down and secure the snap. Watch the video tutorial for this project to see this process in action.
Step 7
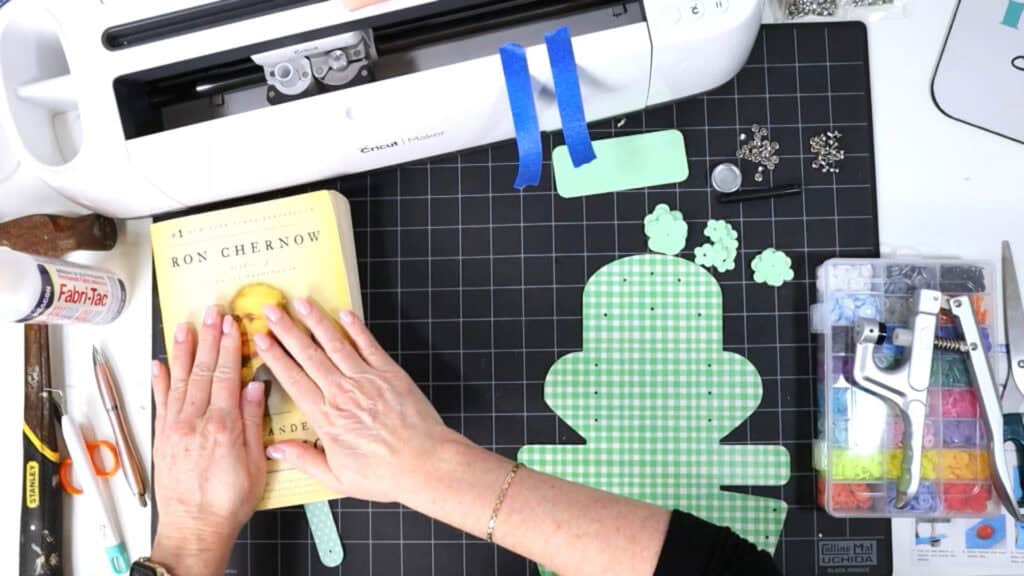
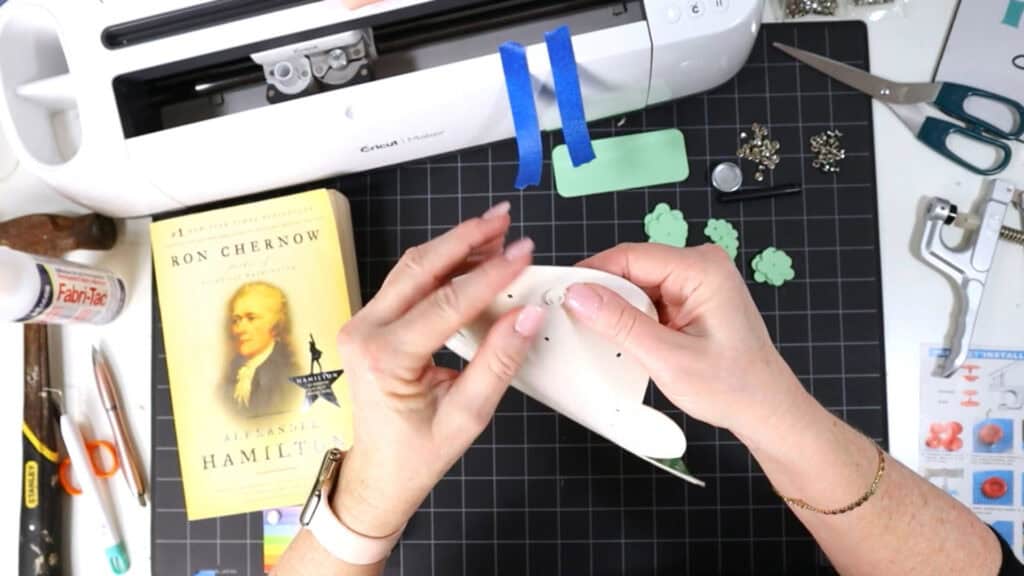
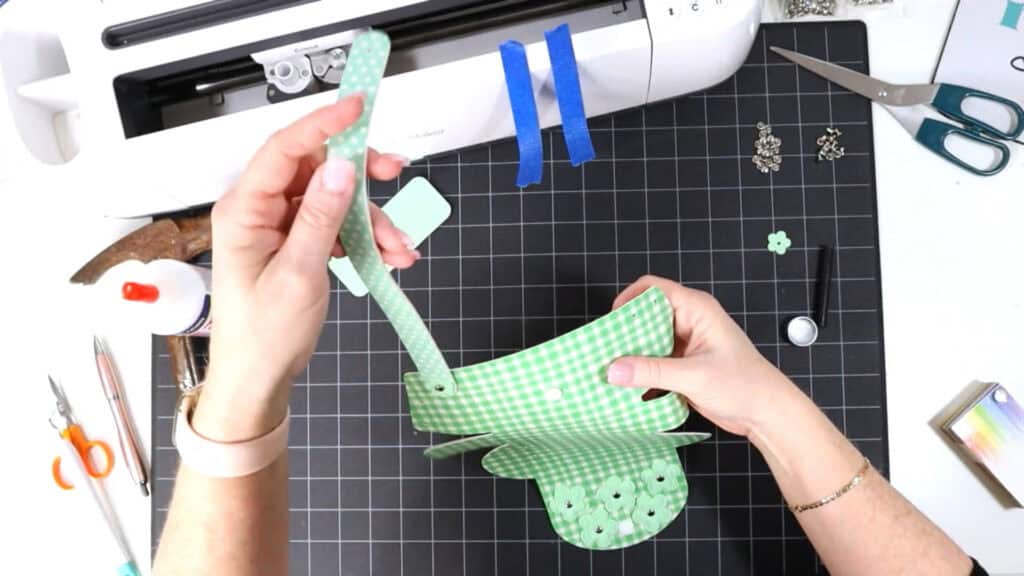
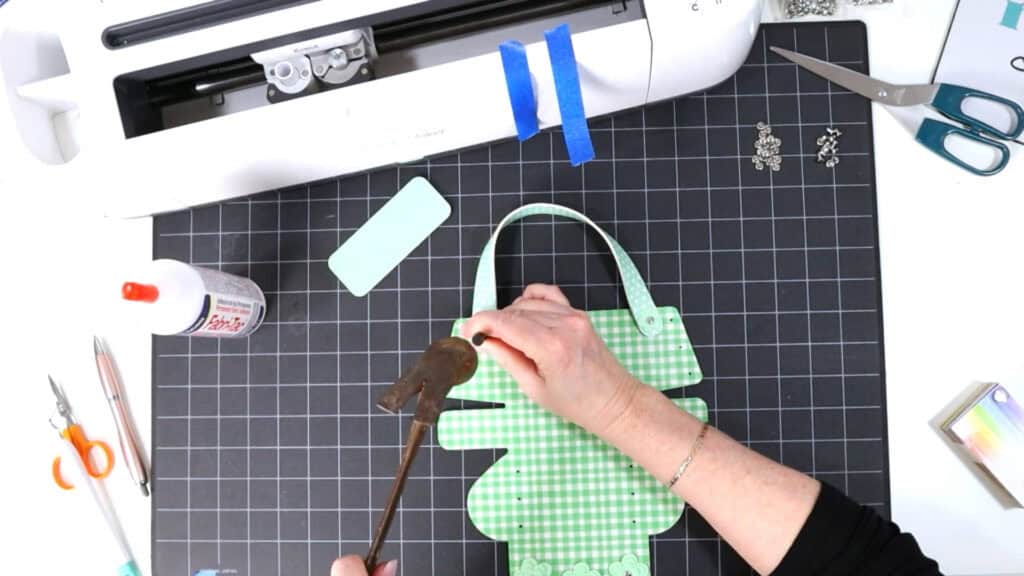
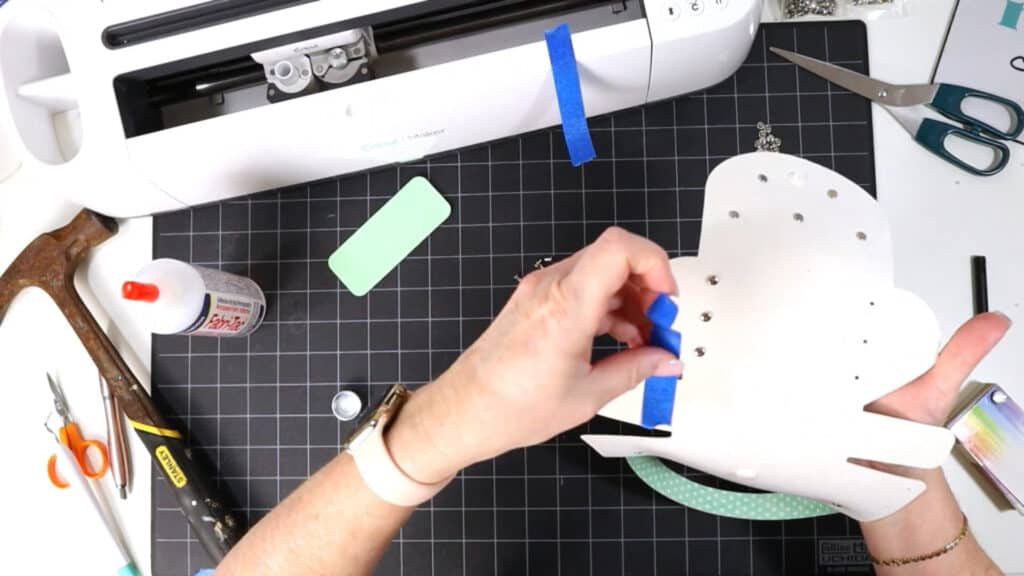
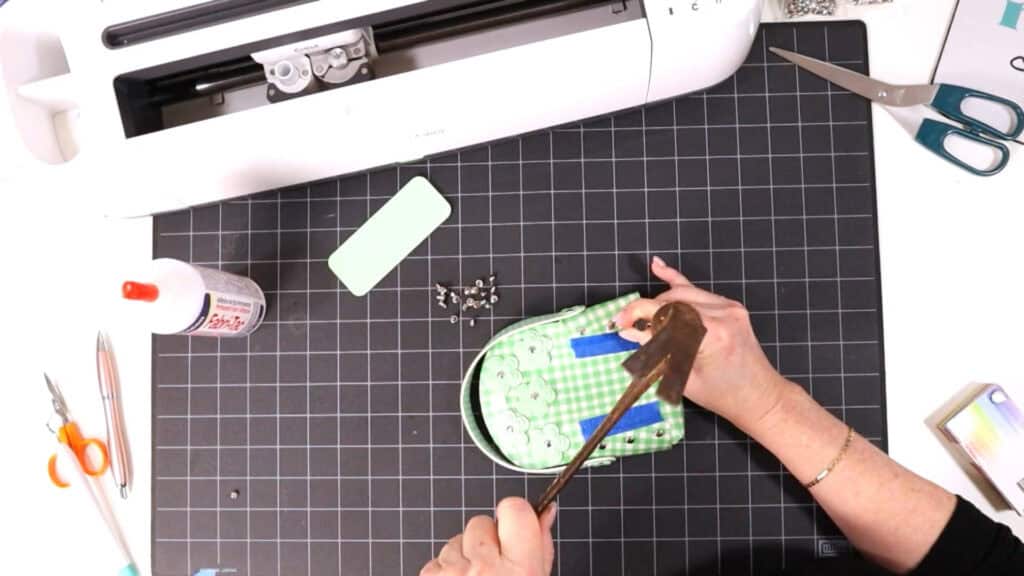
Now it’s time to attach the flowers to the purse flap using rivets. Gather a hammer and the rivet hardware in the package.
Push the rivet post through the a hole from the underside of the flap, then layer on three flowers, from largest to smallest.
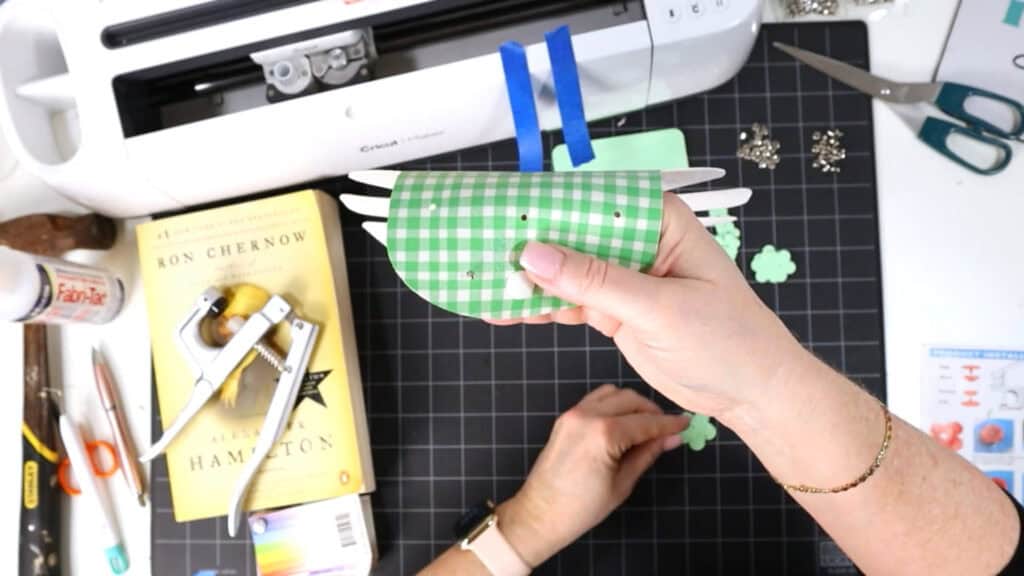
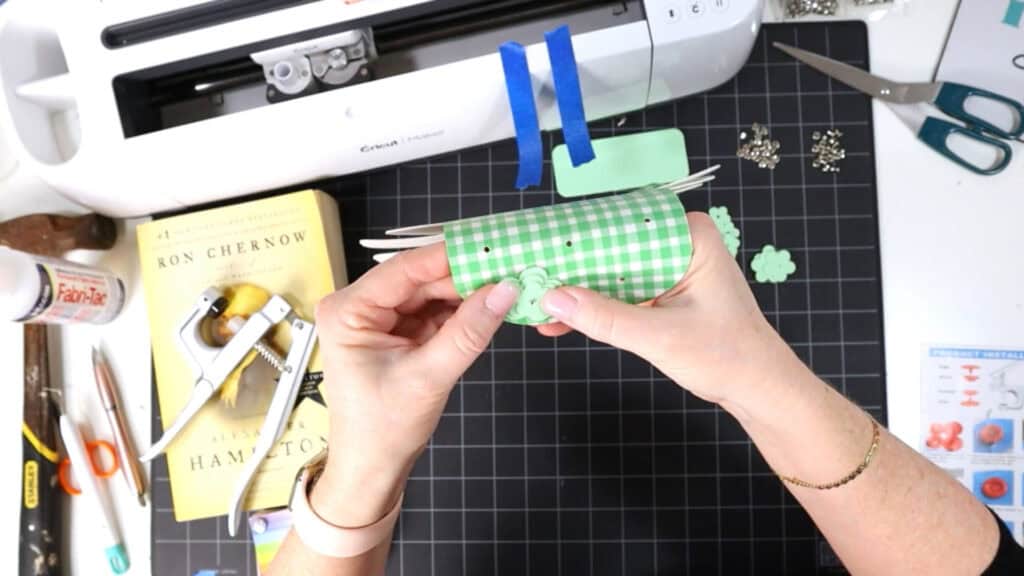

Add the cap but don’t hammer the rivet down yet. Instead place all of the flowers on the flap. Spend a moment arranging all the petals and flowers in a pleasing arrangement. Once you hammer down the rivets, you won’t be able to move the flowers.
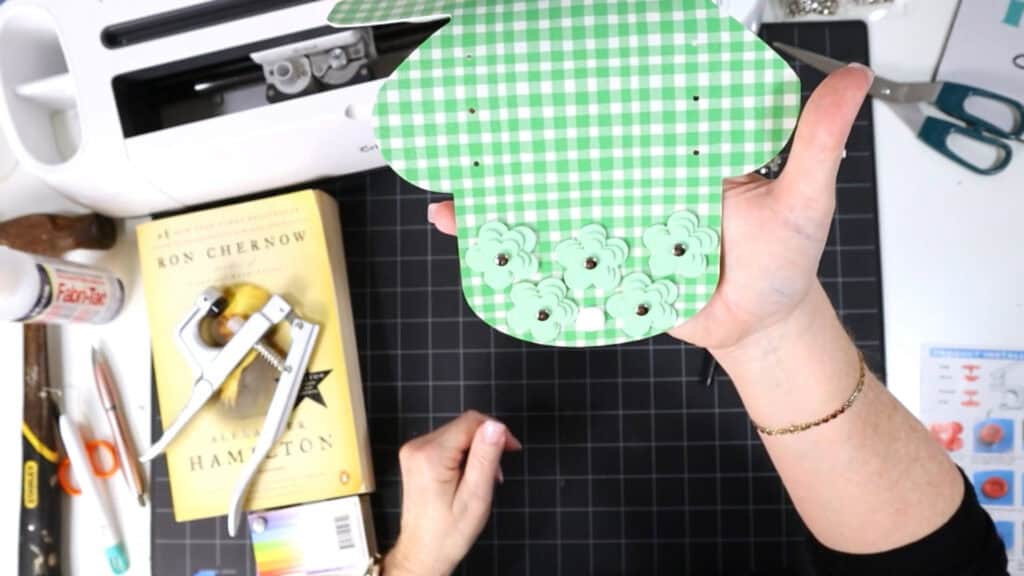
Then use your rivet tools and hammer to secure each flower rivet in place.
Step 8
Next attach the purse handle using rivets, your glued handle (make sure it’s completely dry first), and the two smallest flowers. Watching the tutorial video will be best for this part.
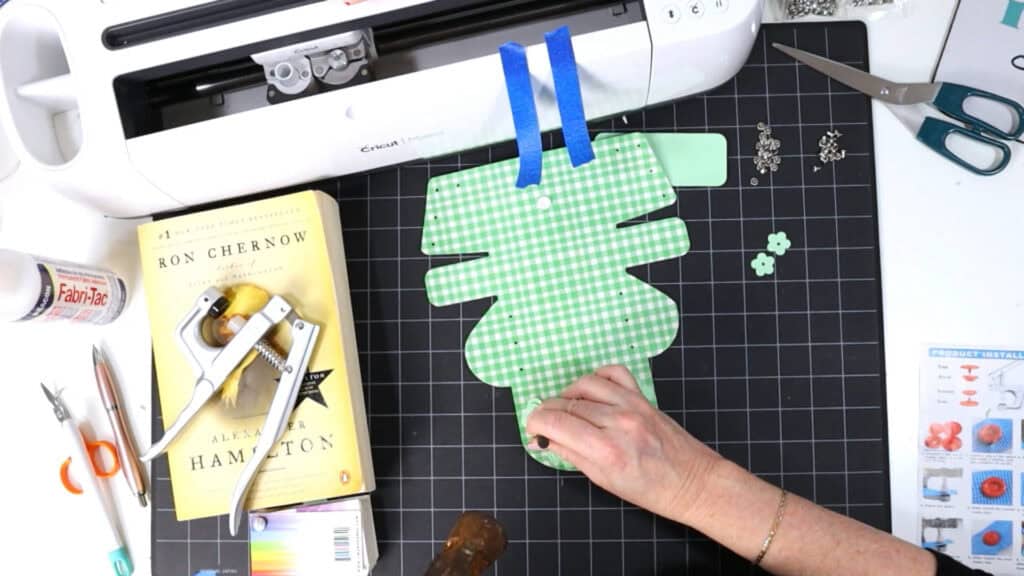
Step 9
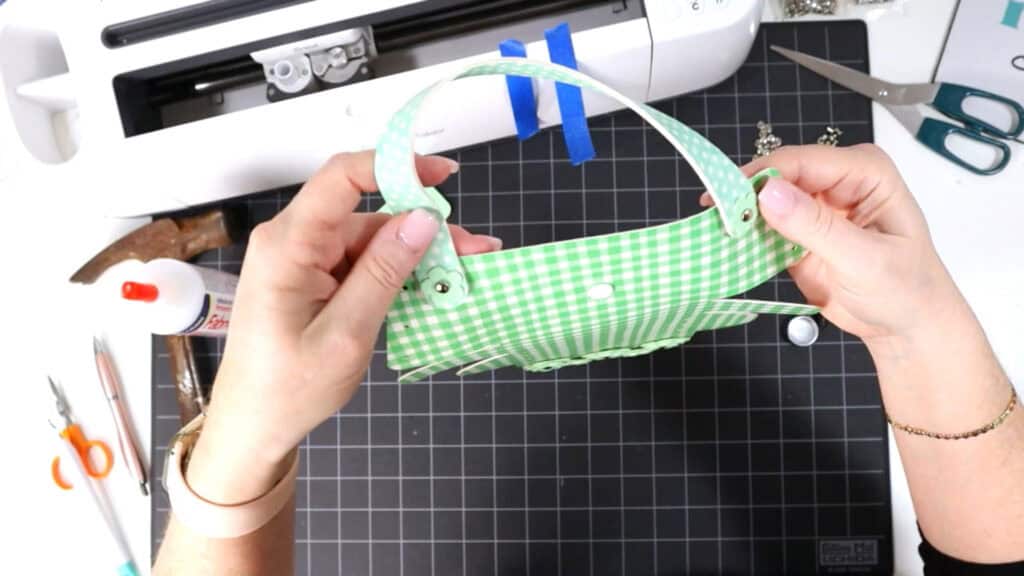
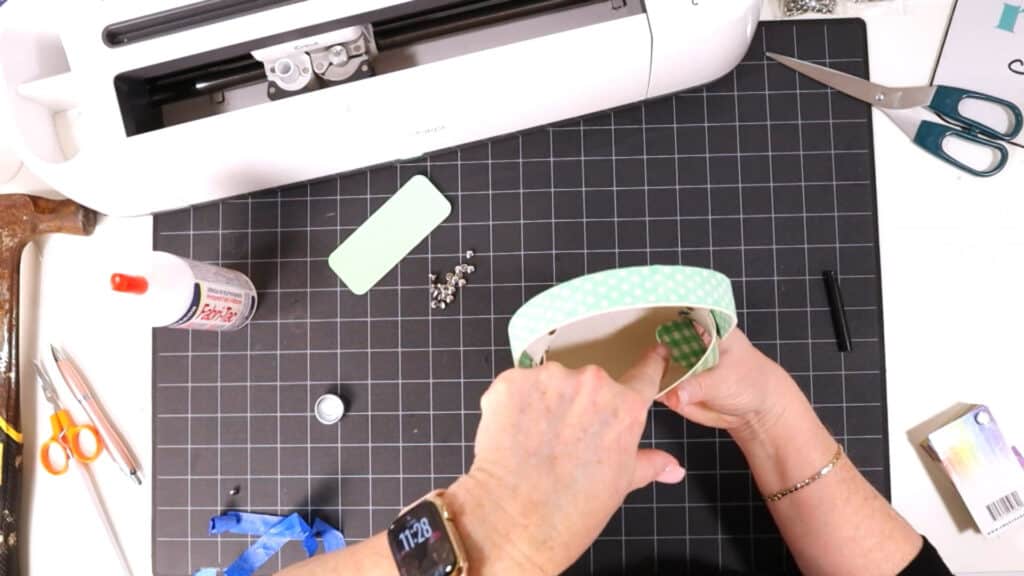
Now it’s time to assemble the purse using more rivets. Watching the tutorial video will be best for this part.
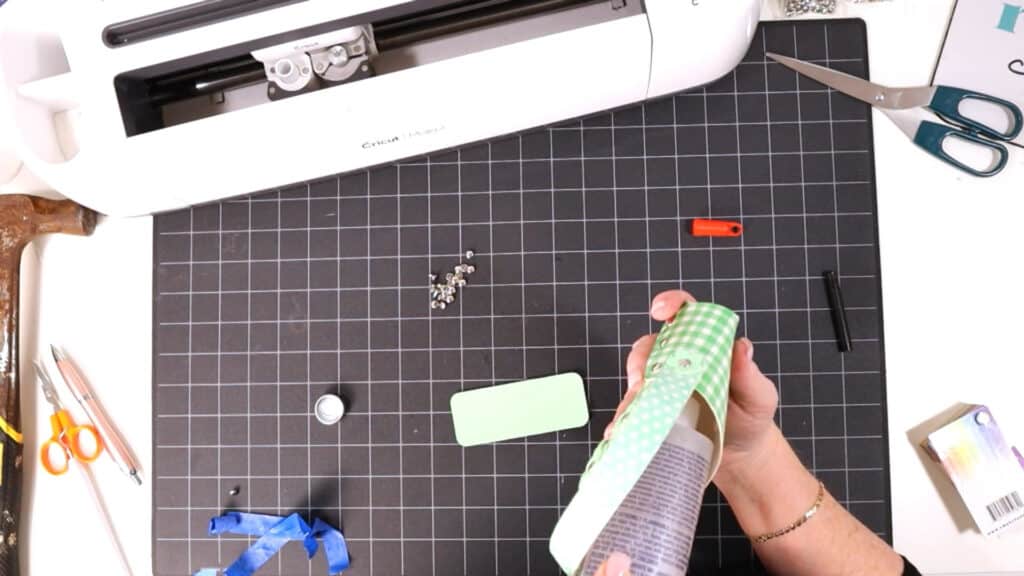
Start by inserting 6 rivet posts from the back of the faux leather on the backside of the purse. Apply some blue painters tape to the rivets to keep them in place.
Don’t place the tape too close to the posts or the tape will be stuck under the rivets after you hammer then in place.
Flip the purse over and fold the front of the purse up. Then fold the small bottom flap up.
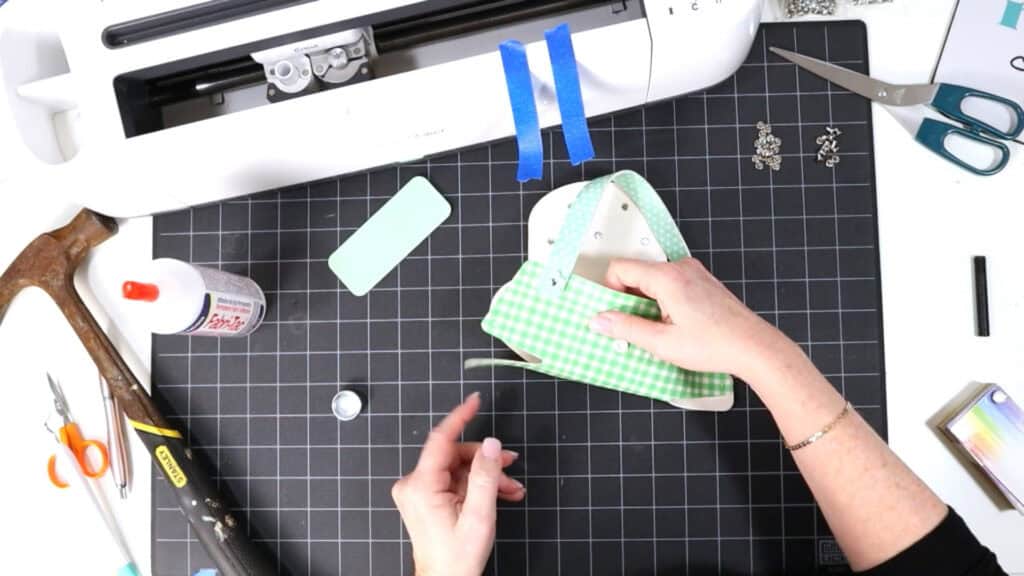
Bring the rounded flap forward so it wraps around the side flap you pushed up.
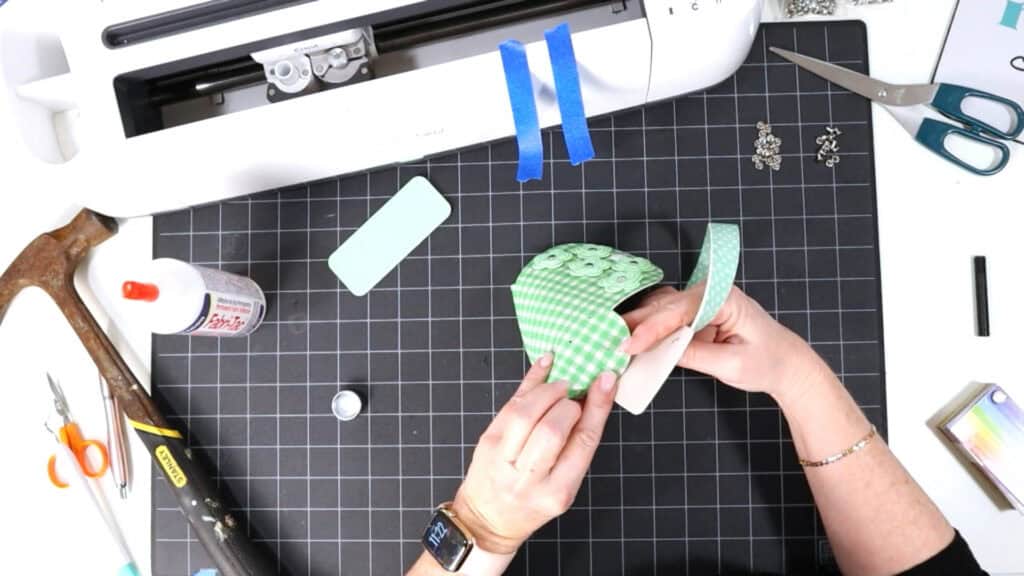
Then wrap the front flap with the holes around to the back and put the holes on the rivet posts.
Add the rivet caps. Push them down until they snap. Then repeat on the other side of the purse.
Push the strikeplate inside the purse and place it underneath a rivet. Use your hammer to tap the rivet closed. Repeat for the other 5 rivets.
Remove the blue painters tape.
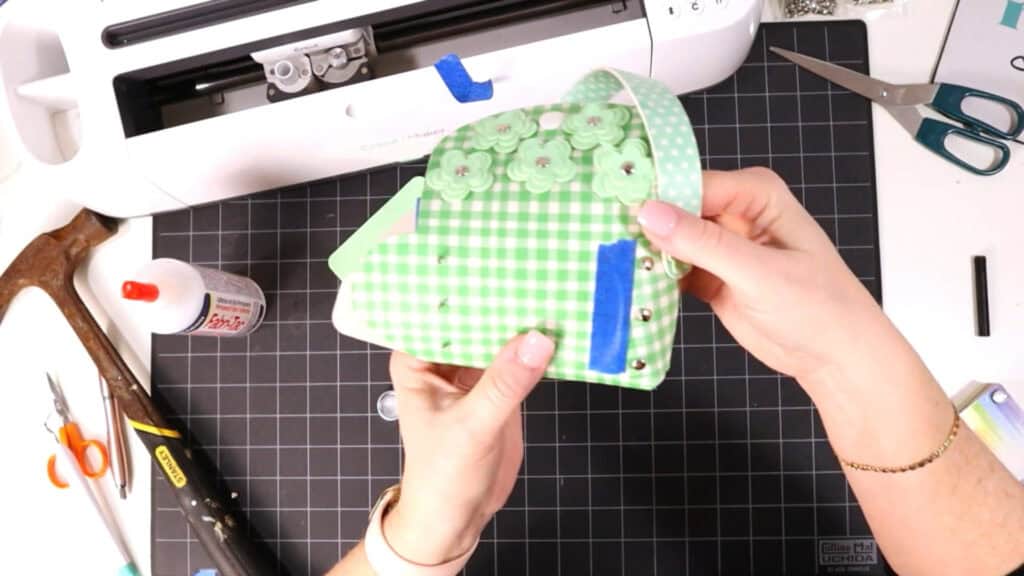
Step 10
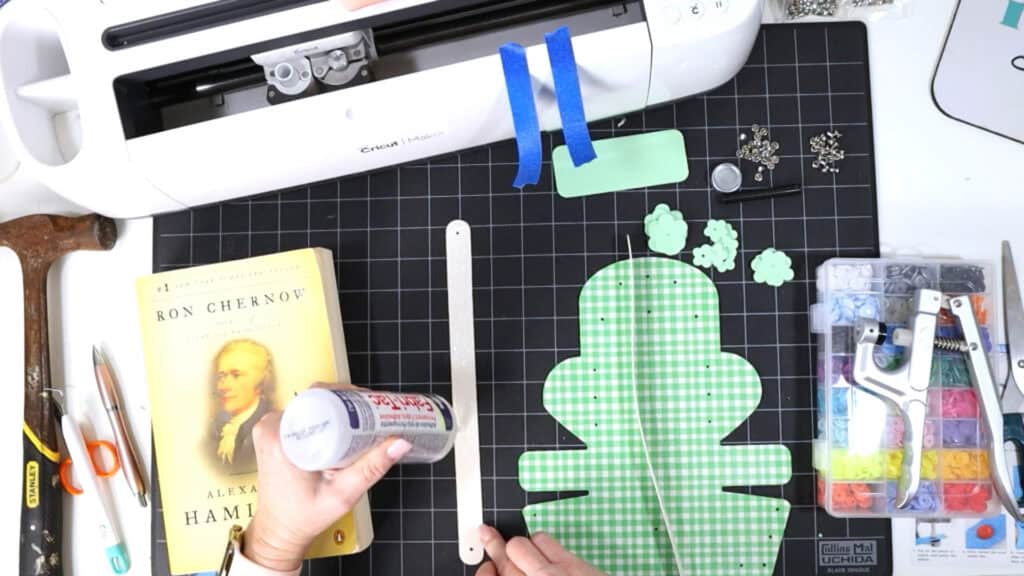
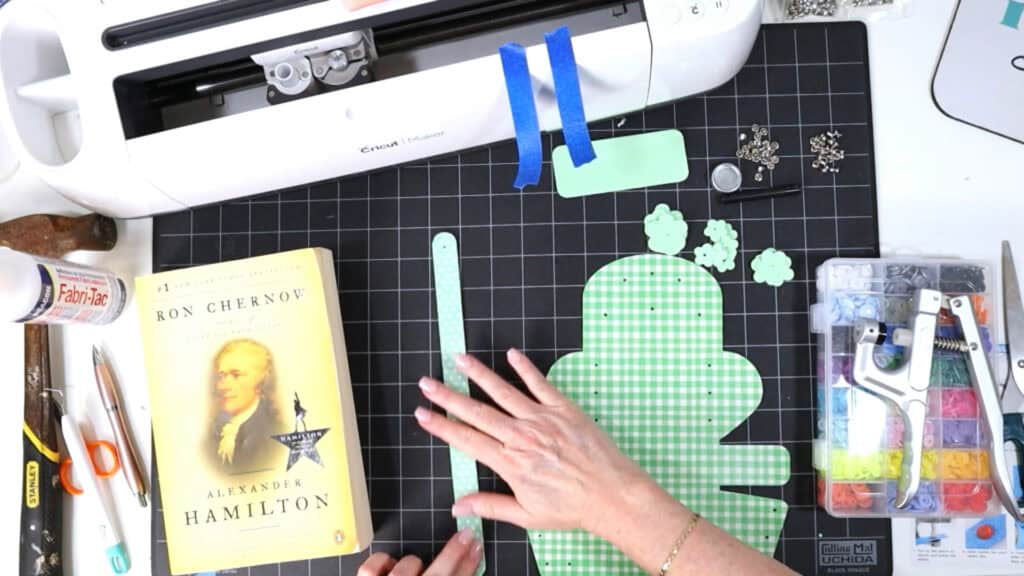
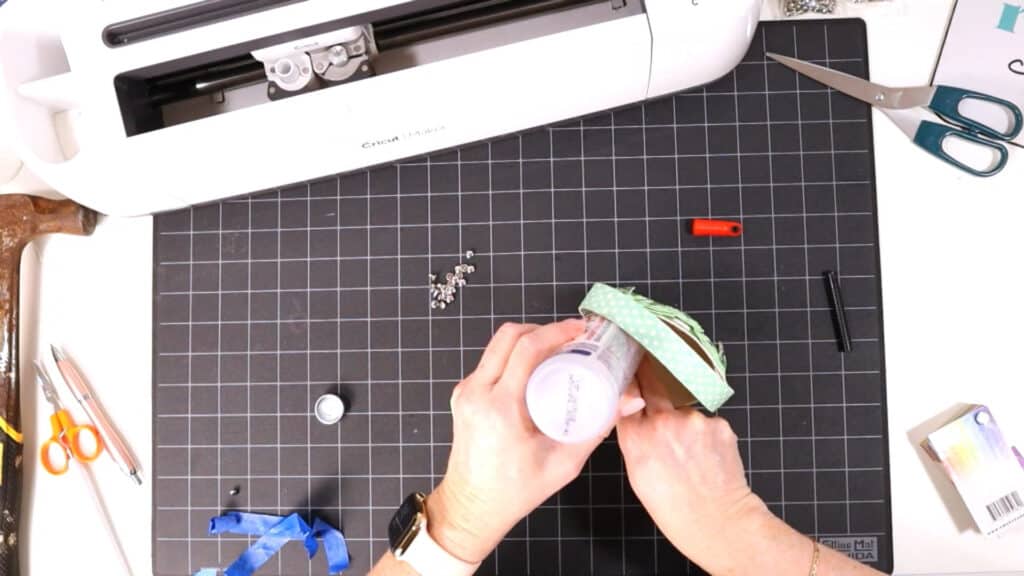
Time to glue two last parts.
First, use fabric glue to glue to two small flaps inside to the side walls of the purse.
Then glue the purse base shape to the bottom of the purse. This adds a finished look and creates structure for the purse.
That’s it! Your Faux Leather Flower Mini Purse is complete!
Here you can see the two different design variations – one with a solid base and one with a patterned base.
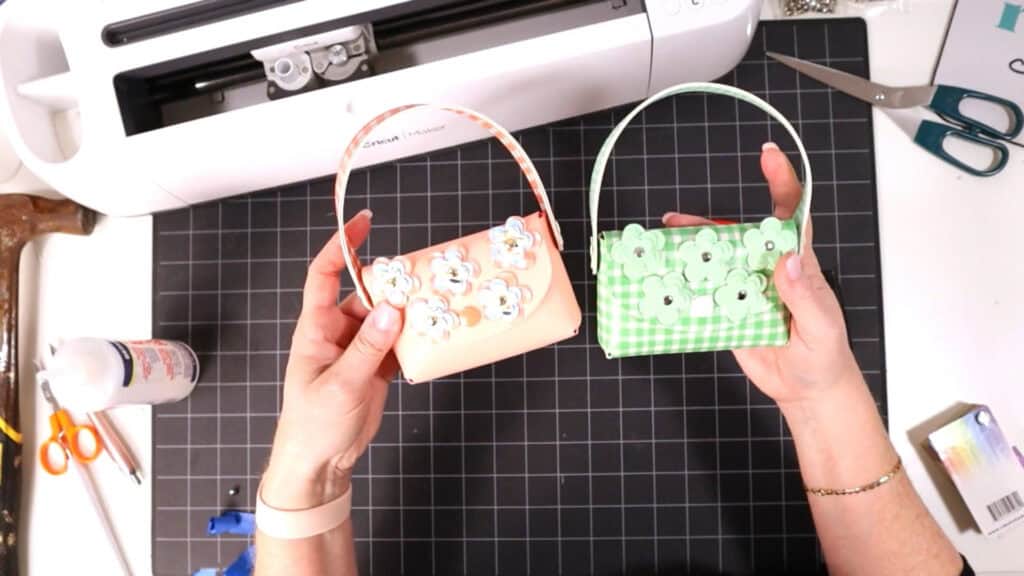
Which version do you like better? Let me know in the comments below!
Answers to your questions about making a Faux Leather Flower Mini Purse with a Cricut
Q: Which Cricut machines will cut faux leather?
A: You can cut faux leather with any of the current Cricut machines because they all cut faux leather with the standard fine point blade included with each machine. For this project you can use the Cricut Maker, Cricut Maker 3, Cricut Explore 3, Cricut Explore Air 2, or the Cricut Joy Xtra. This project is too large for the Cricut Joy.
Q: What do I need to press heat transfer vinyl onto faux leather?
A: To press heat transfer vinyl onto faux leather you’ll need a traditional heat press, Cricut EasyPress, or Cricut EasyPress Mini. I used a Cricut EasyPress Mini for this project because it’s great with pressing small projects like earrings, keychains, and accessories.
Q: How do I get the SVG template for this project?
A: Get the SVG file from my SVG Shop here, or you can get it as part of 17 brand new Spring faux leather crafting projects in my Spring Fling Crafting Event VIP Pass.
Get the SVG in my Shop
Personal or Small Commercial Use Available
If you loved this project, you’ll love these projects too:
Will you make this project?
I would love to see what you have created! Please join my free faux leather crafting making Facebook group and share your creations with me and all of my crafting friends!
Until next time… and happy creating!

Want to remember this project? Save this tutorial to your favorite Pinterest board!
Want instant access to my Free Resource Library full of SVG files?
Just Enter your name and email Below!
By signing up, you’ll get instant access to my FREE SVG Library with hundreds of crafting SVG templates! You’ll also get my weekly newsletter full of crafting ideas, tutorials, and inspiration! Unsubscribe anytime.
Oh how sweet! My little niece is going to love this!
This is adorable. My granddaughter is going to love it.
This is so cute, and easy too!
Love the green version.
lovely
Super cute! ☺️
I think any little girl would love to have this little purse. Again Amy, the instructions are so easy and clear to understand. Thank you for sharing!
I love the plain purse with the pattern flowers, but the other way is just as nice. Any little girl would love to have this little purse for all their treasures. Thank you Amy!
Boy, Amy! I’m going to need to buy more faux leather because I want to make all of these cute things. Thank you, Amy!
Hard to decide which I like best, depends on what you accessorize the purse with. The solid might be more versatile but the pattern shows the off spring/summer funk! Thank you Amy!
Beautiful mini purse! My niece would love this. Thank you for sharing!
Now I need a granddaughter to make this for! 😁
this is so adorable now I need a mini purse!
Another sweet project using faux leather!!!
My granddaughter just thinks I’m the best oumie (granny) ever and it’s all thanks to all your designs xx
I love the flower detail on these mini purses!
This is so cute!! I love the flowers 🤩
My niece is going to love this, so cute!!
They’re both adorable but I like the solid with the patterned flowers more.
These step-by-step instruction video made making this purse so easy. I love watching you.
The purses are absolutely adorable! I really like the solid leather with the pattern flowers, but yet the pattern leather in green is super cute! Its a great design to make for little girls. Thanks for the excellent set of directions, I always learn so much from you.
My niece is going to love her own little Easter purse!
So cute. Can wait to make few
Adorable little purse. I don’t have granddaughters, yet, but my friend has. I think I will make some with my friend for her little grand girls!!
This would make a great “gift bag” for money, lip balm, gift card, etc. So cute!
Can’t wait to make this
adorable, my granddaughters will love it. thank you
Another adorable project and so easy….
This is sooo cute. I plan to make one for my Granddaughter. Thanks
This is so cute. Every little girl needs one.
I absolutely love this little purse!
Another wonderful project. What little girl wouldn’t be excited to be gifted this!!! 👜
My daughter can’t wait for me to make her one of these!
This is adorable!
I can’t wait to make one for my granddaughter!
Simply adorable. Hardest part for me was figuring out what color/pattern combination to use.
Cute little purse . Love the flower additions !
These mini purses are adorable. I can think of several little girls who would love them!
Love this mini purse and I have the perfect mini me to make it for. Thank you Amy!!
I love the versatility of this project.
What a cute purse for a little girl!
Looking forward to making this project.
That purse is super cute with the little flowers on it. I’m so anxious to make it. I think it will be a fun little project to make this afternoon. Thanks Amy
Very cute! Would make a cute gift for a little girl. Thank you!
Oh my goodness! So adorable! It would make a cute addition to a little girl’s Easter outfit. Love it!
So spring! Looking forward to spring in Chicagoland!
cute mini purse
My great niece is going to love getting several of these. One for Easter and a summery print for her Birthday!
I will need to try this! Thank you, Amy!
Thank you Amy…this is adorable!
It’s a sweet little purse….I may have to make one. I’m in between purses right now. I carry my purse in my arms like I would carry a kid because the strap broke. hahahahha. I could also make these for the girls in my church class. There’s only 3 of them right now.
This would be so cute to coordinate with an Easter outfit.
loving this design. Perfect for little ladies.
So very cute any little girl or big girl would Love this!
This mini purse is so adorable! It’s perfect for what I’ve been wanting! Thank you for this amazing design ❤️
Wow! My daughter and niece would love one! It looks so complicated to make but your instructions are so simple to follow. Thanks Amy!
Never made anything like this. I have to give it a try!
I am excited to get to use some faux leather scraps to cut the flowers for the project?
So Cute!
OMG this purse is soooo cute. be great for a little kids dolls
Such a beautiful little purse. I’m so sad I missed it…freezing rain and we lost power for 2 days.