
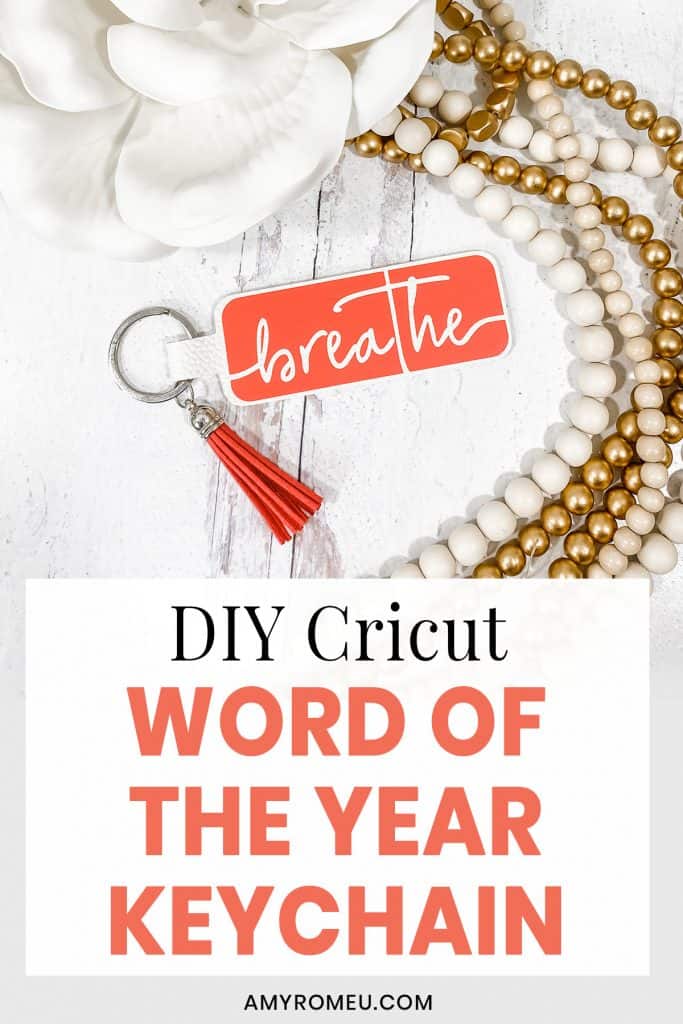
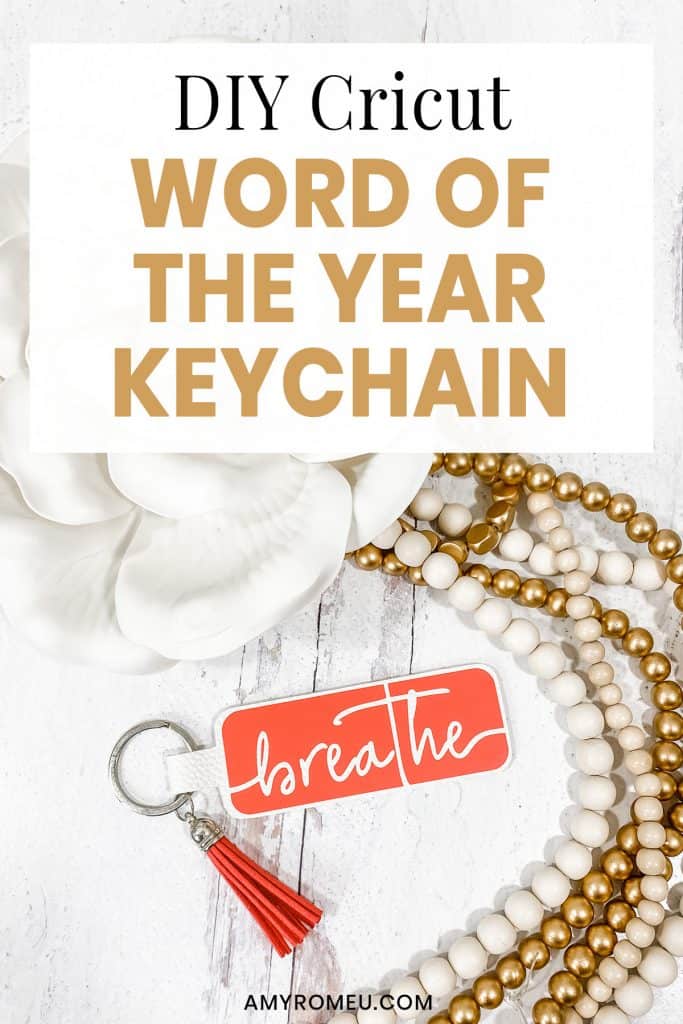
DIY Cricut Word of the Year Keychain
How To Make a DIY Cricut Word of the Year Keychain
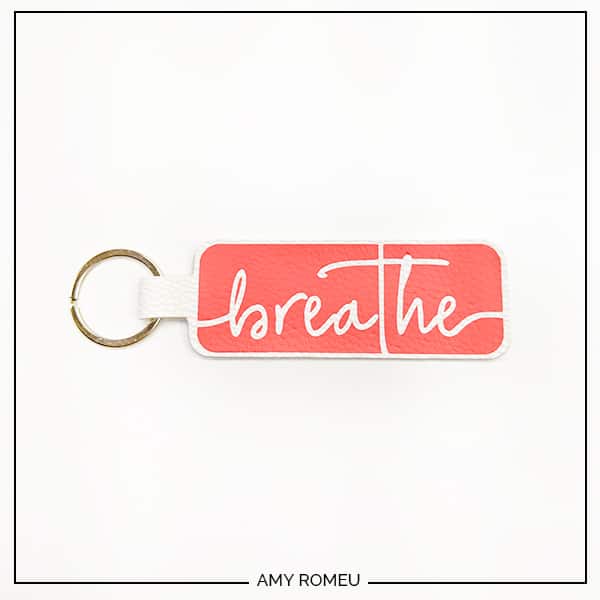
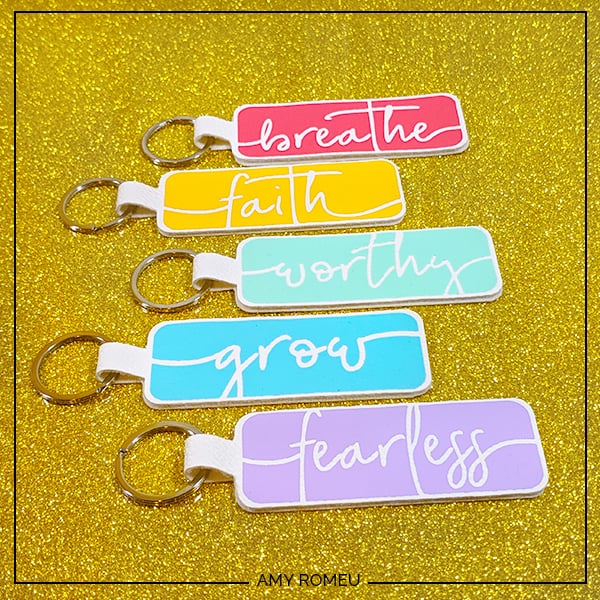
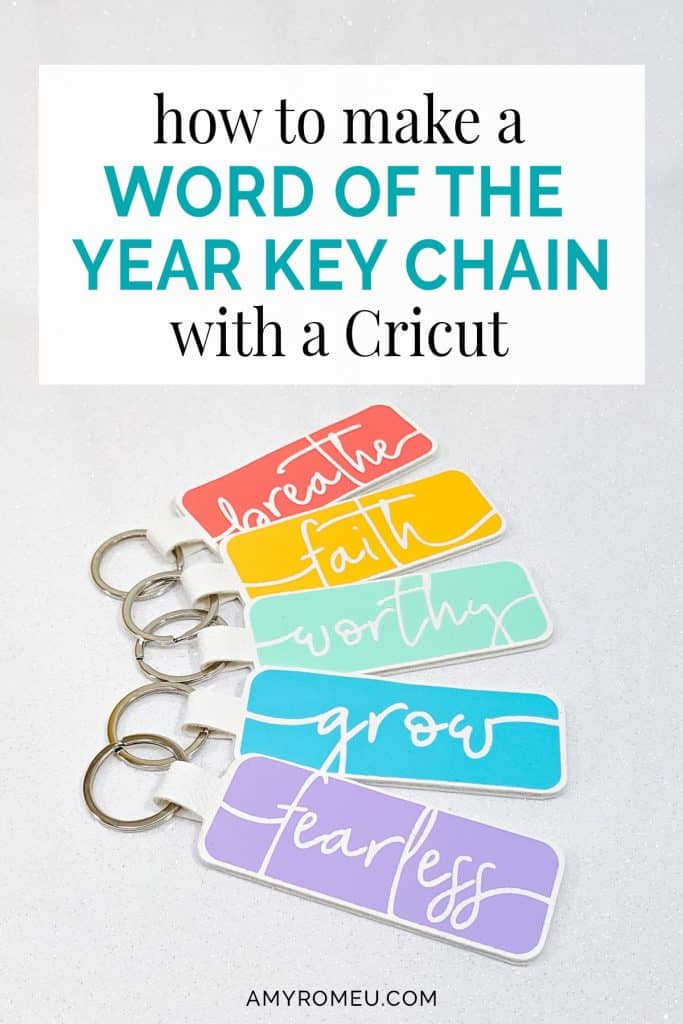
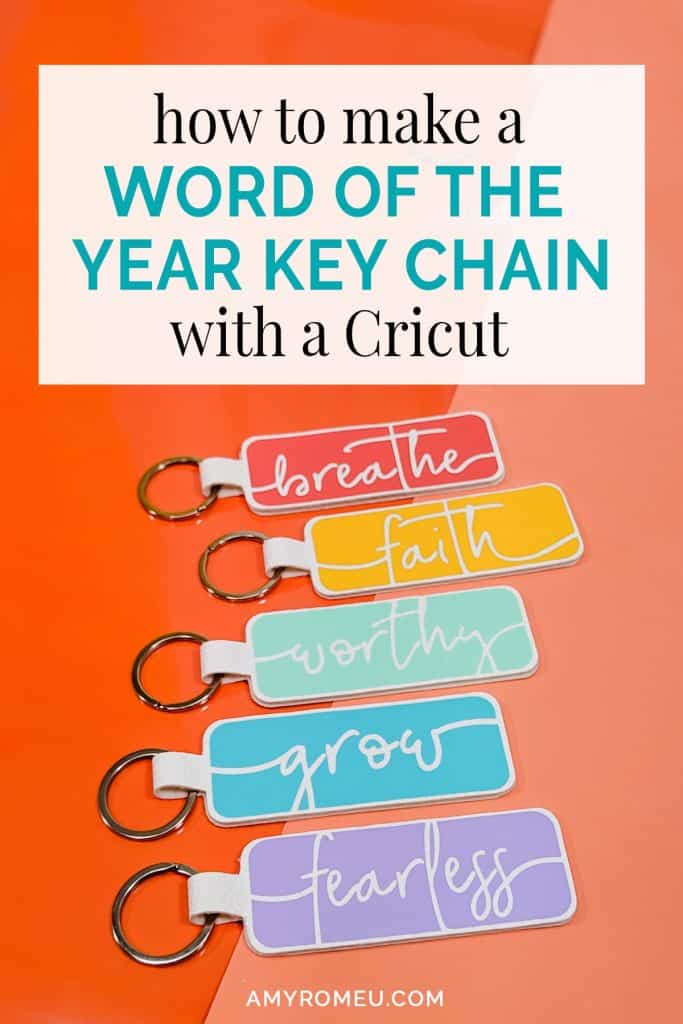
Did you make any New Year’s resolutions? Besides my resolution to use more of the craft supplies I already have (instead of buying more “stuff”), I really didn’t. I DID decide, however, to embrace the “word of the year” concept, and find a word that really captures my intentions for the year. I chose the word BREATHE. It’s a reminder to myself to slow down, and take everything challenging that comes my way slowly and with trust that I can get through it. Since I want to be reminded of my word all year long, I decided to make an inspirational and motivational word of the year keychain with my Cricut. This project was actually pretty easy and very fun!
I wanted to keep my word of the year keychain light and bright, so I used white faux leather for the keychain background and brightly colored HTV for the word part. You could use any color faux leather though, and any color HTV. I thought a dark color HTV and then gold foil iron on would be super pretty, too. The only limit is your imagination!
If you’re worried you’ll need a Cricut Maker to make a word of the year keychain, don’t! I cut all the shapes for the keychain with just the Cricut Fine Point Blade, which means it can be made with either the Maker or the Explore Air 2!
In case you wanted to make this project yourself, I’m sharing the SVG cut file for the word “Breathe”as a freebie in my resource library. You can get access to the file via a free download from a link at the bottom of this post.
If you’d rather a video, you can watch my Word of the Year Keychain YouTube video here:
Want to see all of my Cricut earring & jewelry tutorials? CLICK HERE
Ready to make this fun word of the year keychain? Let’s get started!
This page contains some affiliate links (which means if you make a purchase after clicking a link, I will earn a small commission at no additional cost to you). Read my full disclosure policy here.
DIY Cricut Word of the Year Keychain – Materials List
- A vinyl cutting machine. I have the Cricut Maker, available at Amazon here. You can also use the Cricut Explore Air 2 or any cutting machine you have that will cut a thicker material like faux leather.
- Cricut Strong Grip (Purple) Cutting Mat. You’ll use the purple mat to cut the faux leather. You can buy these on Amazon here, or at Michael’s here. They are also available at Hobby Lobby, Joann’s, and Walmart – or anywhere Cricut machines are sold.
- Cricut Standard Grip (Green) Cutting Mat. You’ll use the green mat for cutting the HTV. You probably already have one from when you bought your Cricut machine, but if you need a new one, they are available on Amazon here or at any craft store.
- A Cricut Easy Press or a Cricut Easy Press Mini (what I use). I bought my Easy Press Mini from Amazon here. You may already have an Easy Press, but if you don’t and want to get one, I recommend the 9×9 size. It’s a great size for making jewelry, keychains, and other small craft items like baby onesies and more. It’s available on Amazon here. (For this project, I don’t recommend using a traditional heat press unless you are experienced at controlling the pressure. Too much pressure on these keychains can flatten out the pebbled texture of the faux leather.)
- If you will be using the Easy Press Mini like I do, you’ll need an EasyPress Mat to safely press your items on. I use the 8×10 size, which you can see on Amazon here.
- White Faux Leather. For this project, I used this white faux leather sold on Amazon here. There are 5 sheets that come in this pack, so you can make a lot of keychains!
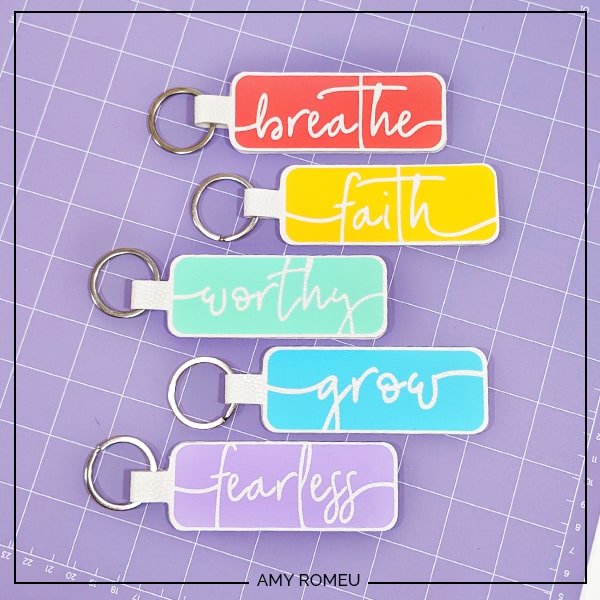
- HTV Vinyl in the color of your choice. I used Siser Easyweed Heat Transfer Vinyl in the following colors (available on Amazon): Hibiscus Red, Yellow, Lilac, Seaglass, and Sweet Mint Green. You can also use Cricut Iron-On Foil or Glitter HTV, whatever you prefer!
- Keyrings. I used 1.25 inch size key rings from Amazon here. You could use 1 inch key rings, too, but I wouldn’t go much smaller than that.
- Blue painters tape. This will help keep your faux leather in place on your mat. I bought this one on Amazon here but you can get it at any hardware store or even some grocery stores!
- Weeding tools. I have all the tools I need in my Cricut tool set from Amazon here. You can get also get the basic Cricut tool set at Michael’s here, or from Hobby Lobby, Joann’s, or Walmart.
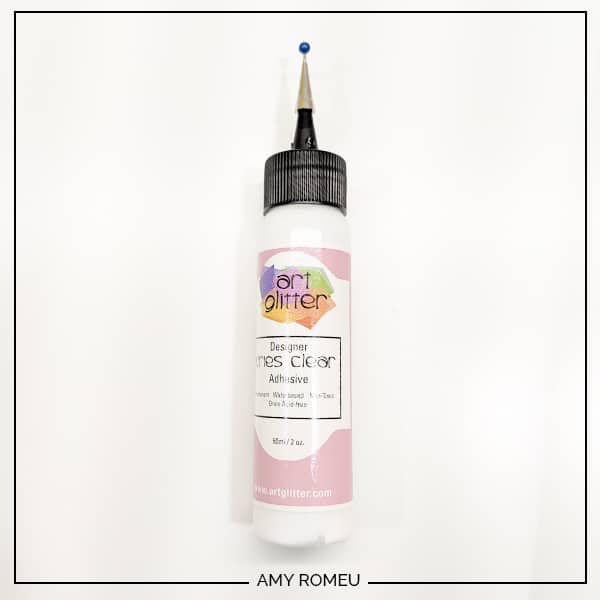
- A good fabric glue. I made samples of these keychains to test three different kinds of glue: E6000, Art Glitter Glue, and Aleene’s Quick Dry Tacky Glue. I’m happy to say they all worked really well, so use your favorite fabric glue (or whatever fabric glue you have on hand) for this project.
- My free Word of the Year Keychain SVG file from my Resource Library. It’s Design #120 in the library. You can get the password to my library by filling out the form below, or the form at the bottom of this page.
PROJECT INSTRUCTIONS
STEP 1 – Download Free SVG
Download the free SVG cutting file for the keychain shape from my free Resource Library. The link to get the password is at the bottom of this post.
Save the zipped folder that downloads to your computer. You’ll need to locate your zipped file after you save it so remember where you are downloading it to! You’ll have to unzip or extract the files FIRST before you can upload the cutting file to Cricut Design Space. Make a note of the file location after you unzip it so you can find it in the next step.
I have loads more SVG files with Word of the Year keychain designs in my shop. You can see them all here.
STEP 2 – Upload SVG to Cricut Design Space
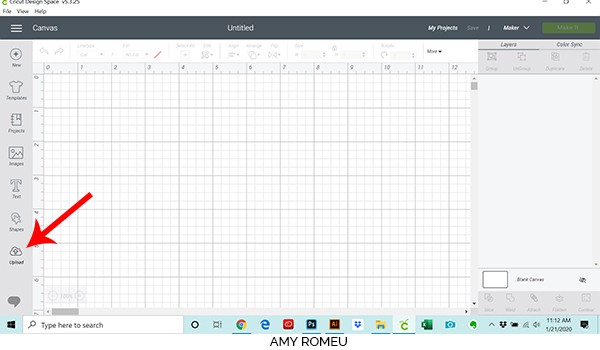
When you open Cricut Design Space, click on NEW PROJECT to get started. Then click on UPLOAD from the left hand side menu.
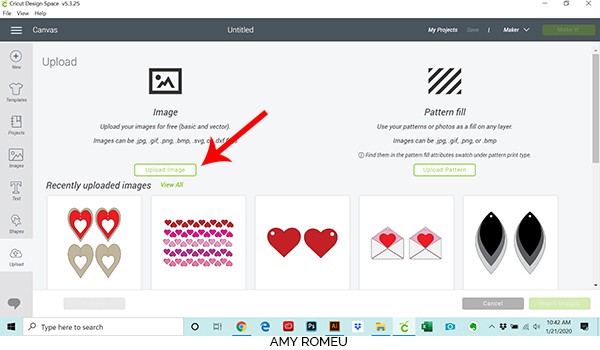
Click on the UPLOAD IMAGE button, then click BROWSE to locate where your unzipped SVG files are saved on your computer.
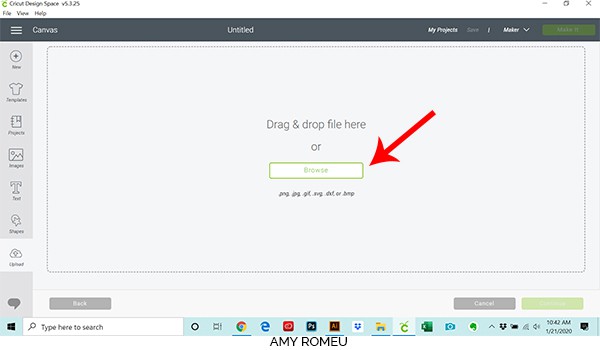
Double click on the SVG file to bring it into the upload screen in Design Space. If you get an error message that says “unsupported file type,” you may have clicked on the wrong file, or your SVG file is still zipped.
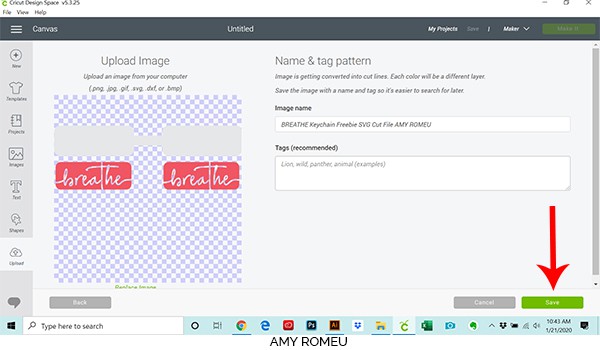
You’ll see a preview of the keychain shapes for this project. Hit the green SAVE button.
After you’ve selected your file to upload, you’ll see it as the first item in your “recently uploaded designs” row.

Click on it so it is outlined in green. Then click on the green INSERT IMAGES button in the bottom right corner.
STEP 3 – Prepare SVG for Cutting
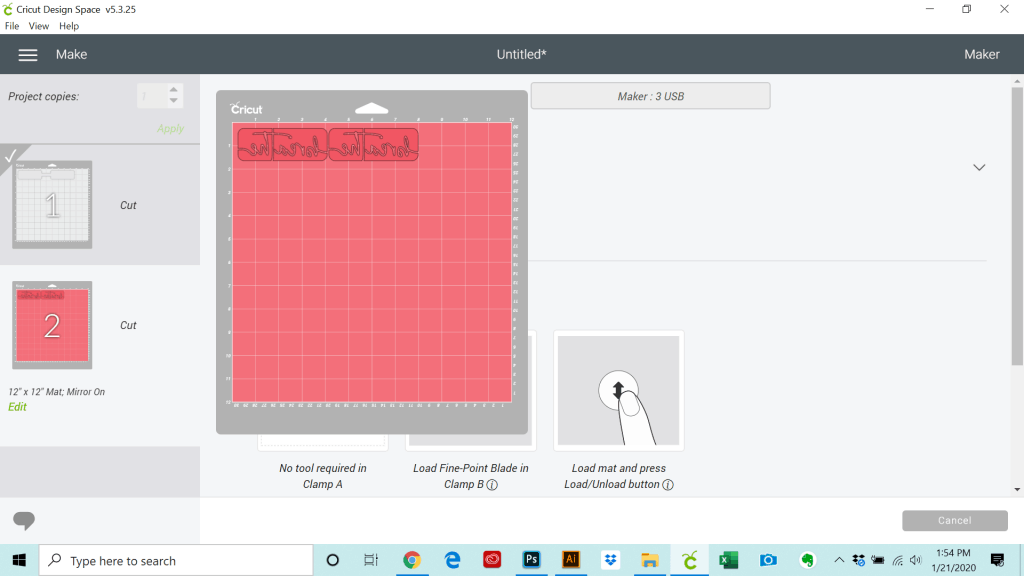
This brings the shapes you’ll cut for the keychain into Cricut Design Space. Your canvas should look like this:
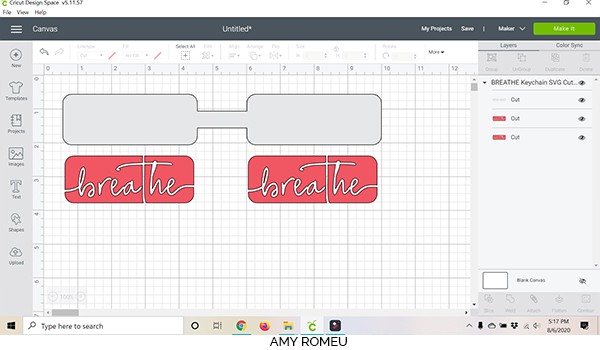
IMPORTANT! You don’t want to resize your shapes in Cricut Design Space, because they are already sized so the word fits perfectly on the keychain backing.
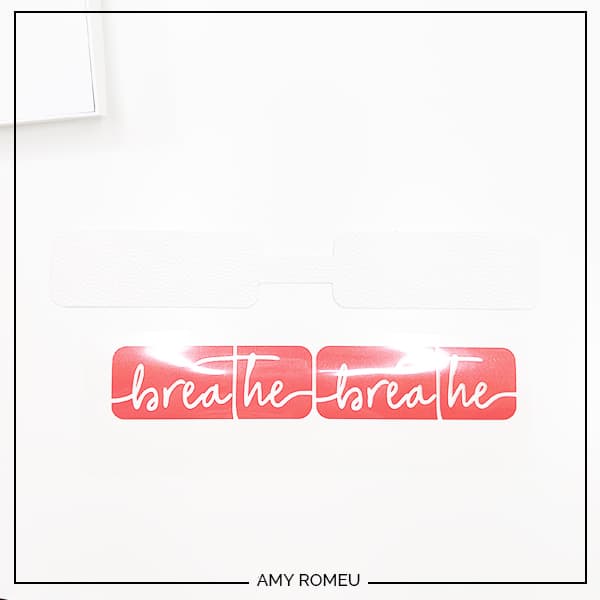
You can see there are three elements to this keychain cut file. The first is the faux leather keychain backing, shaded in light grey. That will cut out of white faux leather. The second and third elements are the coral colored rectangles, which are the front and back of the keychain text. I cut these shapes out from HTV.
Click on the green MAKE IT button in the top right hand corner.
STEP 4 – Prepare Faux Leather Mat for Cutting
This keychain project will cut the two different materials (faux leather and HTV) on two separate mats. Cricut does all the hard work and separates them for you. You can see the two separate mats in a preview on the left.
The first mat that will cut is the white faux leather keychain backing.
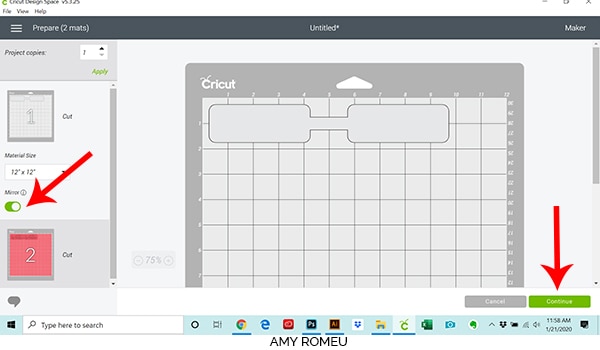
We can see the size of white faux leather we need on our mat is approximately 2 inches tall and 10 inches wide. Make a note of this size.
Set your MIRROR toggle (on the left hand size preview screen) set for this first mat to ON. Then click on the green CONTINUE button.
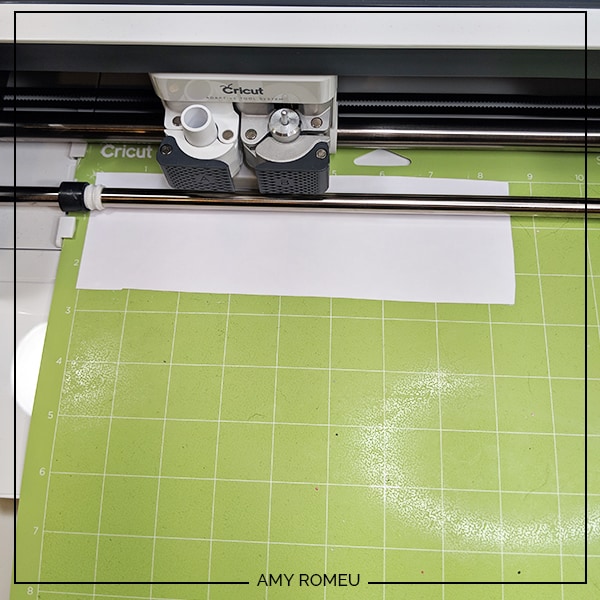
I like to cut a slightly larger piece of faux leather so there’s room to tape it down without getting in the way of the blade. For this cut, I cut a piece that was about 2.5 inches tall and 10.5 inches wide.
(I love my Fiskars Rotary Cutter to cut my faux leather material to the exact size right on my mat – it’s are available on Amazon here. Just be sure not to press down too hard so you don’t damage your mat! )
Place your faux leather face down (pretty side down) on your purple strong grip cutting mat.
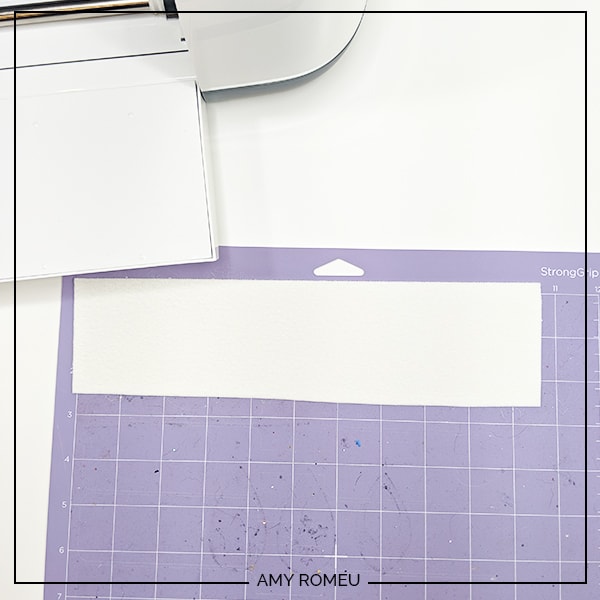
Then tape down the faux leather to the mat on all sides, like this:
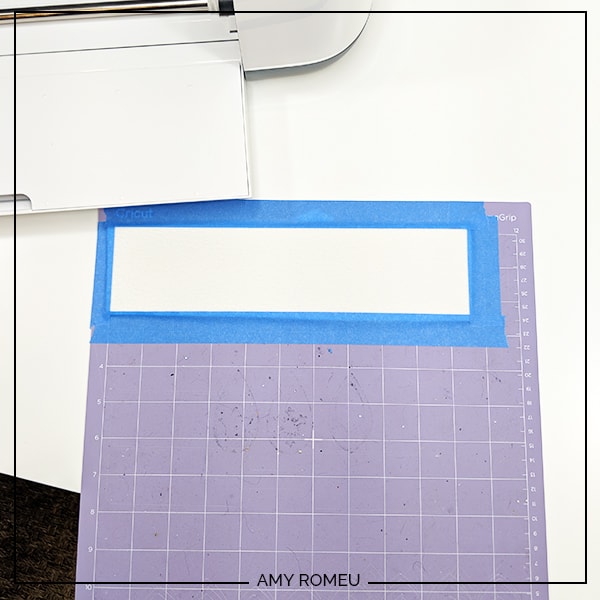
Load your mat into your Cricut by pressing the load button with the arrows.
STEP 5 – Choose Your Materials
Next we need to choose our material. I always cut faux leather on the Faux Leather (Paper Thin) setting. Even though this faux leather isn’t paper thin, this setting is an automatic double cut. I find that the double cut cuts most faux leathers perfectly.
Cricut Explore users can turn the Smart Set Dial to Custom and then select Faux Leather (Paper Thin) as the material setting (same as the Maker). You’ll also use the Fine Point Blade.

If you don’t have Faux Leather (Paper Thin) set as a favorite already like I do, click on the green Browse All Materials link and search for the words “faux leather.” Click on Faux Leather (Paper Thin) to select it.
I left the pressure setting at DEFAULT.
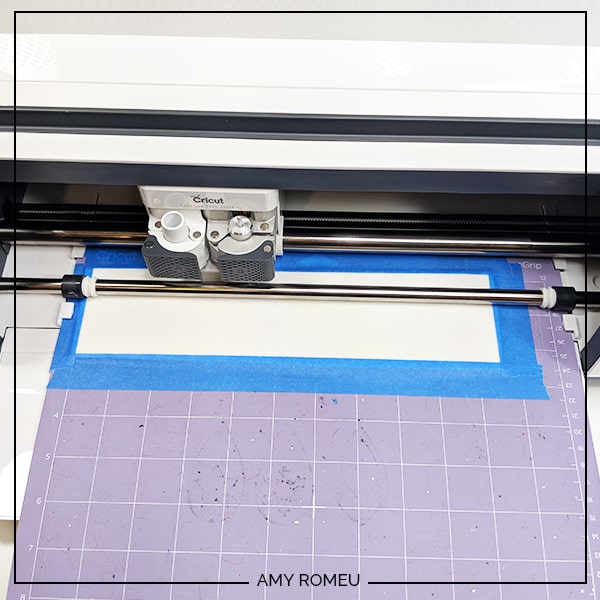
Press the C button on your Cricut machine and it will start cutting.
I like to cut this material a few times. The easiest way to do that is to wait until your Cricut finishes it’s first cut and stops. Then, without unloading the mat, press the C button again for a second cut.
I usually like to press the C button one more time for a third cut just to be sure. For this project, I ended up cutting the faux leather three times.
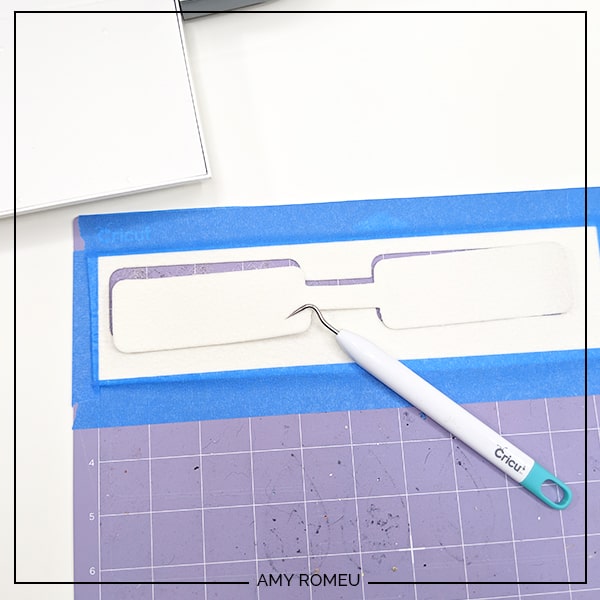
Unload your mat by pressing the double arrows button again.
Use your weeding tool to release your keychain shape from your mat. It should come right out. If not, you can use small scissors to make any necessary snips. I love my 4 inch curved tip Fiskar scissors that I got on Amazon for tiny jobs like this!
STEP 6 – Prepare HTV Mat For Cutting
Now it’s time to cut our HTV for our keychain. Go back to Cricut Design Space and look at the second mat preview. Click EDIT and then toggle the Mirror button to ON (green). Scroll down and click DONE.
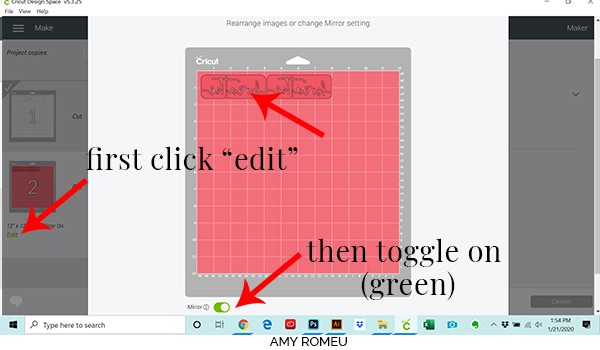
Hover your mouse over the second mat again and see what size piece of HTV we need to cut. This preview shows we need a piece a about 2 inches tall and 8 inches wide.
Oh, and hey: This is a great time to make sure your text is mirrored!
Cut a piece of HTV that’s about a half inch larger than the size you noted from the mat preview. Press it firmly SHINY SIDE DOWN on your standard green cutting mat, in the top left hand corner. Load your mat into your Cricut.
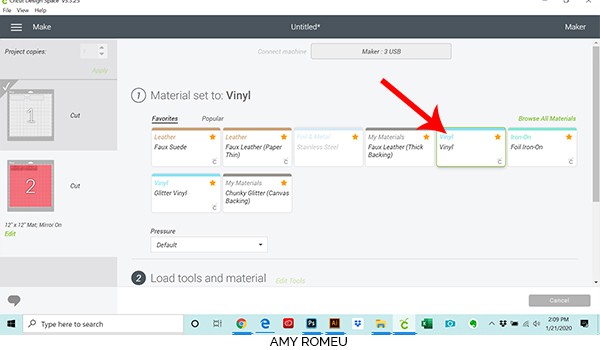
In Cricut Design Space, choose Vinyl as your material. I leave the cut pressure setting at Default, but you can adjust your setting if you know your machine needs an adjustment.
Press the C button to begin the cut.
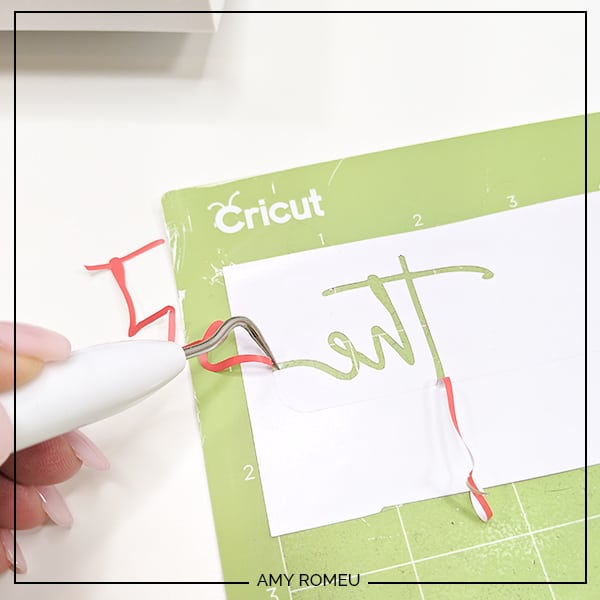
Unload your mat by hitting the double arrows button again. Use your weeding tool to remove the excess vinyl. Remember in this design, the box remains and the letters are weeded away.
Now we’re ready to assemble the keychain!
STEP 7 – Assemble the Keychain
Cut the two HTV shapes apart so you can press them one at a time. Thread your key ring onto your white faux leather before pressing. This way you don’t have to bend the faux leather and vinyl to get it through the key ring after.
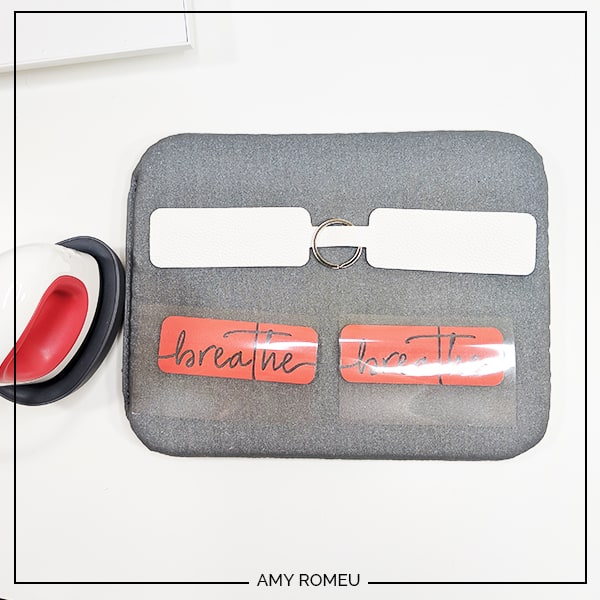
I used the lowest heat setting on the Easy Press Mini for this project. Using your Easy Press Pressing Pad or a towel, lay the HTV on top of the faux leather and then cover with a teflon sheet or parchment paper (not wax paper). I always use a teflon cover sheet, but not for this demonstration so you could see what was happening in the photo!
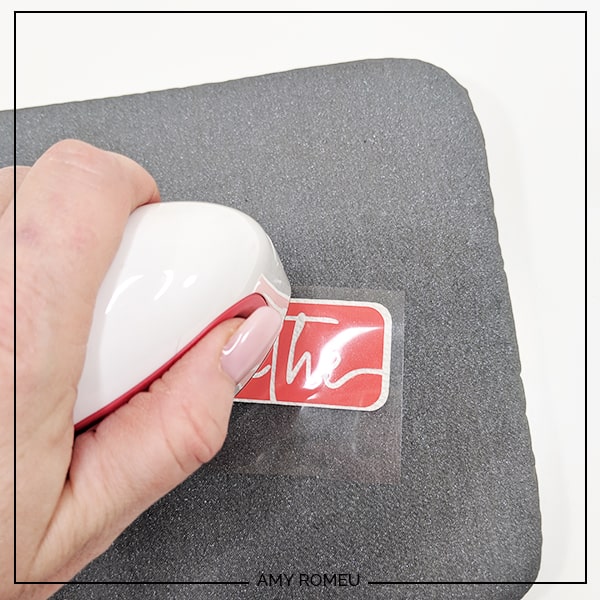
Gently press while moving the heat around all over the HTV for 10-15 seconds. If you aren’t using a cover sheet, be sure not to press the Easy Press Mini on the faux leather directly, only on the clear transfer tape.
Repeat pressing for the other HTV piece, and then carefully peel the protective layer off both sides of the key ring. If any parts didn’t stick down, just press them a little more.
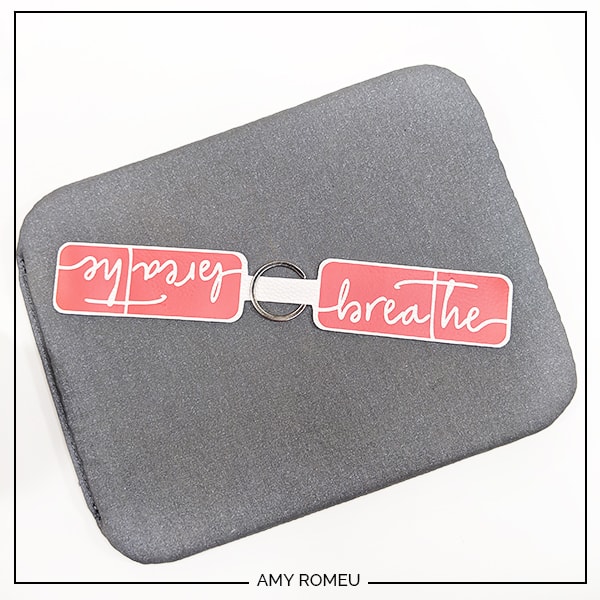
You’ll notice below that I pressed one word upside down – this is so when I fold the two halves of the keychain backing together, both words will start on the same end, where the key ring is.
Now it’s time to glue the front and back of the keychain together. I like to use Art Glitter Glue for this step (it doesn’t have any glitter in it, it dries clear, it glues fabric well, and the bottle comes with a fine tip attachment which is perfect for applying glue precisely in small areas!
If you didn’t put your key ring on your keychain before, now is the time to do it!
Carefully apply small dabs of glue on the back of one side of the keychain. Apply the glue close to the edges but allow some room for the glue to spread.
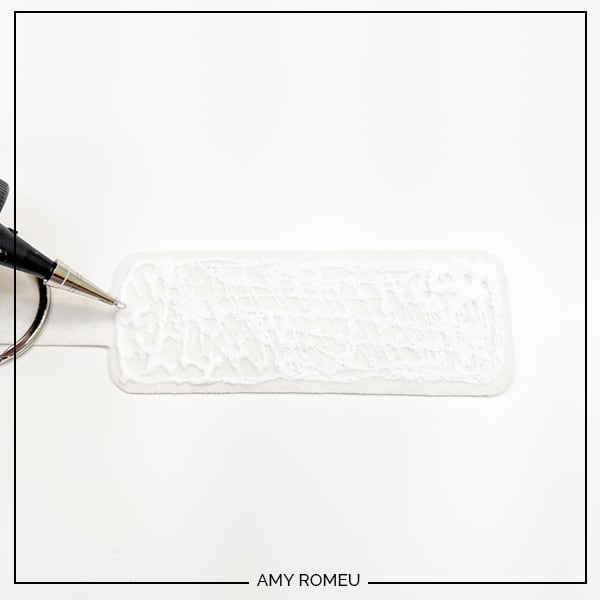
Fold the glued and unglued halves together, line up the edges so they match perfectly, and press down.
That’s it! Place the newly glued keychain under something heavy like a book for a few hours to dry, overnight is best. Check the seams between the two halves the next day and see if there are any places that need additional glue, especially near the key ring.
Are you going to try this project? If you do, please post a comment and attach a photo of your finished word of the year keychain! I would love to see what word of the year you chose!
Want More Words?
Do you want to make this project, but want to use a different word? Chances are it’s in my shop here. These word SVG files are perfectly sized to fit with the faux leather keychain backing shown in this tutorial – just choose your desired word file, open the SVG in Cricut Design Space, and continue the tutorial!
By the way, if you want to make these yourself, I got the font from Creative Market. It’s called Glorious Script. You can get it here.
Want to see all of my Cricut earring & jewelry tutorials? CLICK HERE
Until next time… and happy creating!

Want the FREE SVG file you so you make this DIY Cricut Word of the Year Keychain yourself?
Get it from our Resource Library! You’ll receive the password for the Resource Library instantly after filling out the form below!
Want to remember this? Post this DIY CRICUT WORD OF THE YEAR KEYCHAIN project to your favorite Pinterest board!

This is so awesome! I love your clear easy directions. Thank you so much for sharing this!
Thank you so much, Brinda! I’m so glad you like this project. Thank you for letting me know. Amy
I was looking for inexpensive items for our family reunion goodie bags and think this would be perfect! Thanks
What a great idea, Kennetha! I’m so glad you like this project. Thank you. Amy
I love this so much. My word isn’t on there. Could you explain to me how to make it with a different word? My word is strong this year. Thanks for being willing to share stuff.
Hi, Tori! I’m so glad you like this project! I actually have “stong” as a word in my mega bundle digital file that goes with this keychain project:
https://shop.amyromeu.com/collections/svg-files/products/25-word-mega-bundle-for-word-of-the-year-keychain-svg-files
You could also get creative in Cricut Design Space and create your own word file. If you want to grab the same font I used, you can get it from Creative market here
Create a rectangle shape that is 3.833″ wide and 1.392″ tall. Then type your own word, and size and center the text to fit your new rectangle box. Select both your box and the text and hit “slice.” You’ll have your own custom word art to use with this keychain project!
Amy
Love these key chains. I have sent my names several times but I am not getting an email that gives me the password.
Hi, Wendy! I see the confirmation email has been sent to you three times. Perhaps it’s in your spam box? If you check there and you still don’t see it, please email me at [email protected] so I can give you the information you need. Thank you! Amy
I love these so much! Been waiting to make them for ages and finally the leather arrived! But I really struggled with the Htv and weeding it. It’s the tiny bits in the middle of letters like the “e” and “b” that just come up and I lose them. Any tips? I’m using Cricut iron on x
Hi, Sarah! I love how Siser Easyweed weeds and I used it for this project. If you continue to find weeding small things challenging, I would suggest giving another brand a try. 🙂
Hi, I would like to try and make this keyring but I can’t find how to download the file?
Thank you.
Hello, thank you for your comment.
Did you fill out the box in the tutorial to get the password to my resource library? After filling out the box, you’ll receive an email instantly with the password and the library link. The free SVG is available for download inside my library.
Please tell me exactly what you are having trouble with so I can assist your further. Thank you.
Any
Hi Amy, I am having trouble getting access to this free svg in your Resource Library. When I enter the #120, I am re-directed to the project itself, not the file. Thank you for your help. I am also trying to access the Valentines Onesie svg without any luck.
Hi, Noreen.
Once you are inside the library, please click on the blue text underneath the #120 – the words that say Cricut Word of the Year Keychain SVG File. That blue line is the link to the file, and clicking there will download the file instantly to your device.
The same is true for the Candy Heart Onesies, and every project in my library. Please let me know if that doesn’t work for you. Thank you!
Amy
I absolutely love this project. My mom passed away suddenly last year and “breathe” has been my word. Your directions were perfect and made this so easy to make. This was my first attempt at cutting faux leather on my Cameo 4 – thanks for giving me the reason to finally try it!
Hi, Jen. Thank you so much for your comment. I’m sorry for your loss. I’m glad you were able to make this project and it is meaningful to you. 🙂 Amy