How to Make Leather Earrings with a Cricut Maker
How to Make Leather Earrings with a Cricut Maker
If you’ve followed my blog for a while, you know I love to share earring tutorials using faux leather. In my own jewelry making, I also make a lot leather earrings from recycled leather, but I haven’t really shared a lot of my own creations on the blog yet – until today! So many of my readers have asked for me to show them how to make genuine leather earrings with their Cricut Maker, I’ve decided to show you how I cut tooled leather for my own earring creations in this post.
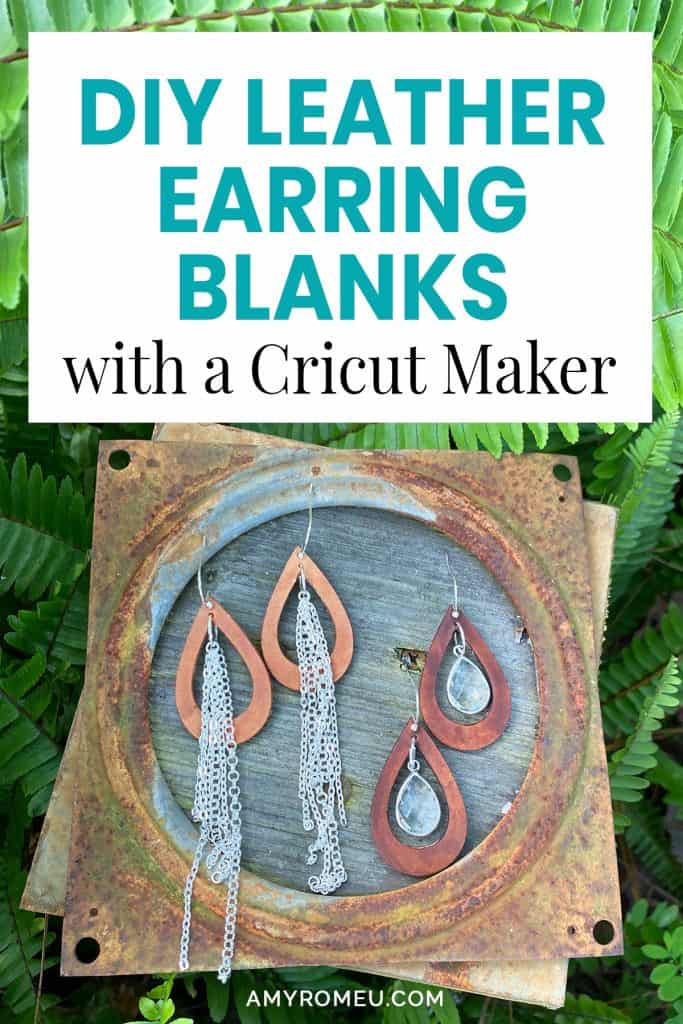
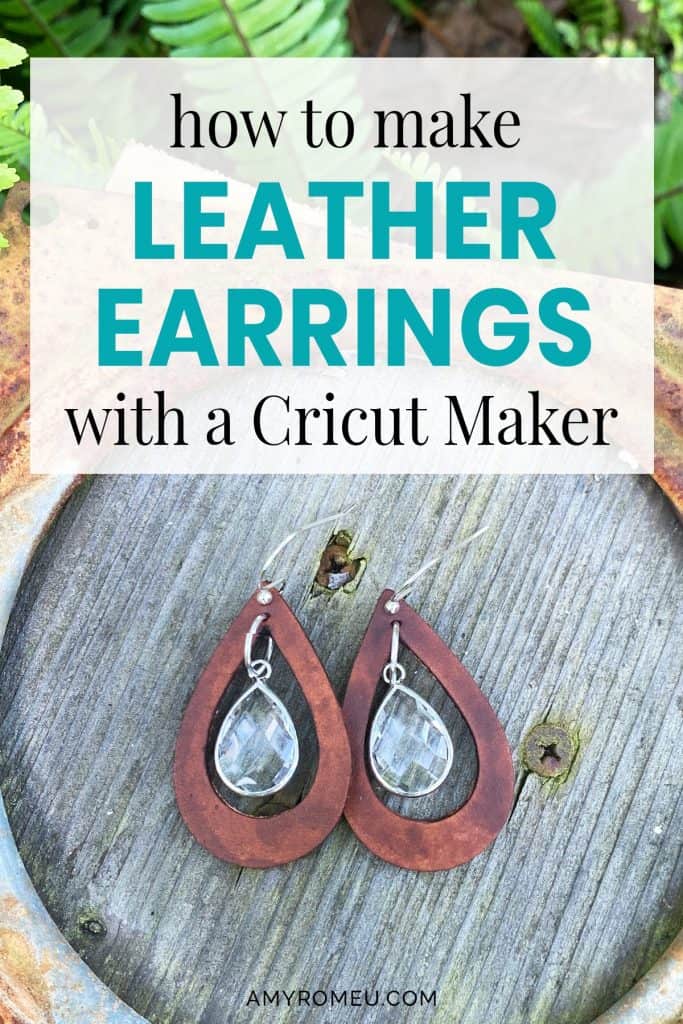
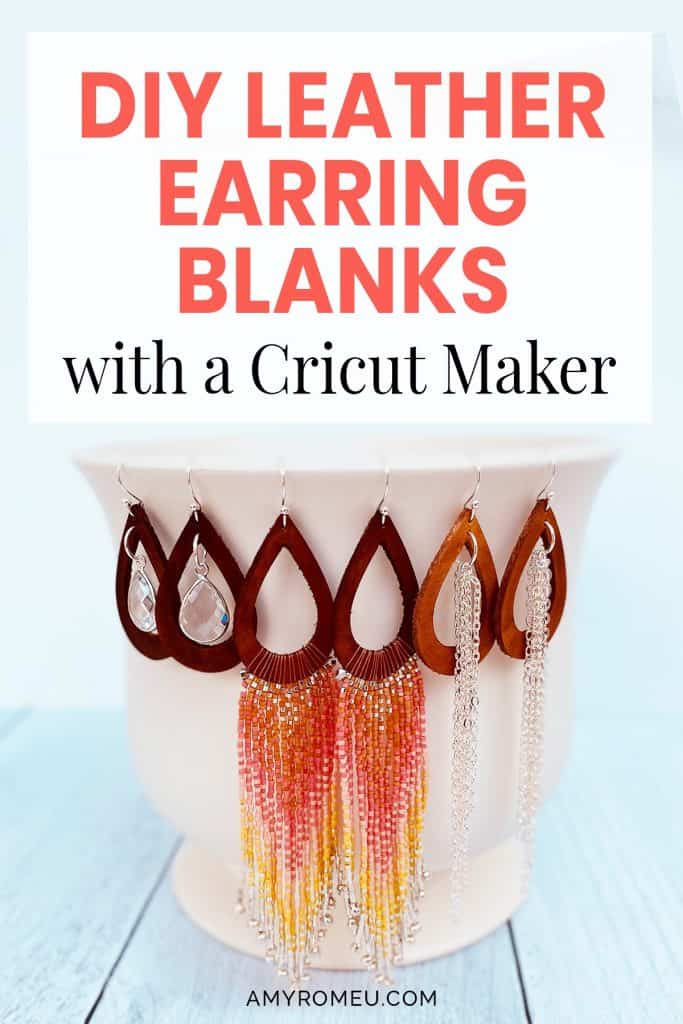
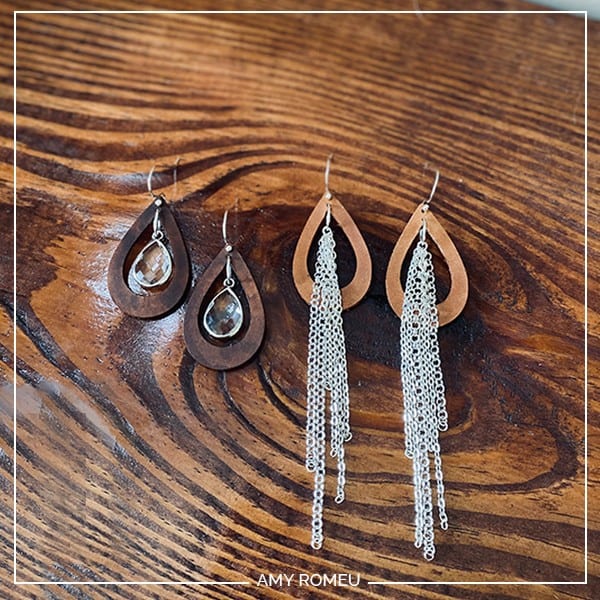
This project will be made with a Cricut Maker cutting machine, which is the only Cricut that has a knife blade attachment. These cutout teardrops shapes are so versatile, and can be worn as is or embellished several different ways. In the photo above, I’ve added beaded fringe, chain accents, and crystal charms to the leather earring shapes I cut with the Maker. The possibilities are endless. I hope this demonstration of how I use the Cricut Maker to cut leather earring shapes will inspire you to experiment with your own jewelry making!
Ready? Let’s get started!
Want to see all of my Cricut earring & jewelry tutorials? CLICK HERE
This post contains some affiliate links (which means if you make a purchase after clicking a link, I will earn a small commission at no additional cost to you). Read my full disclosure policy here.
Tools & Materials List
- A Cricut Maker cutting machine. You can get the Cricut Maker, on Amazon here or at Cricut.com. For this project, you won’t be able to use any other Cricut machine other than the Maker. This is because I’ll be using the knife blade and the knife blade housing, which are only compatible with the Cricut Maker.
- The Cricut Knife Blade and the drive housing (if you don’t have the drive housing already). You can get it from Amazon here, or the Cricut website here.
It’s important to note that the Cricut Design Space mobile app cannot be used with the knife blade at this time. The reason given by Cricut is: “Due to longer cut times requiring Bluetooth™ connection, Knife Blade projects are not compatible with iOS and Android devices.“
For more information about the knife blade, check out Cricut’s help page for the knife blade here.
- A desktop computer running Cricut Design Space.
- Cricut Strong Grip (Purple) Cutting Mat. You can buy these on Amazon here, or at Michael’s here. They are also available at Hobby Lobby, Joann’s, and Walmart.
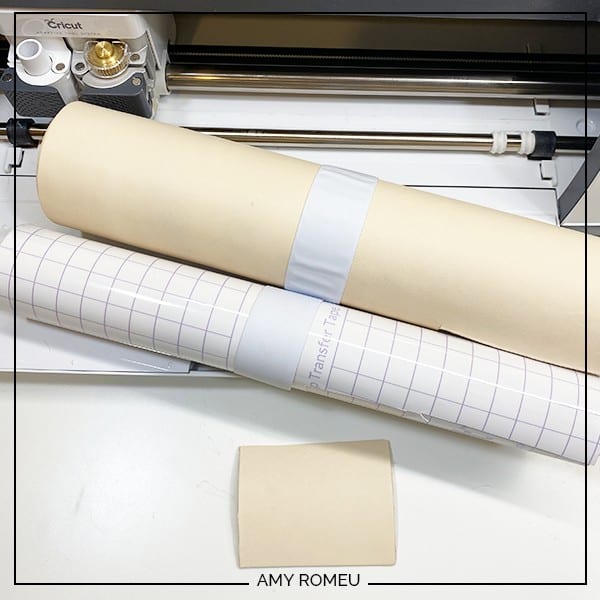
- Tooling leather (genuine leather), 2-3mm in thickness. I like to use scrap leather to make my earring blanks from, but you can also buy great tooling leather on Etsy, on Amazon, from eBay, or Tandy Leather. For this tutorial, I’ll be using this tooling leather from Amazon here for this project because it’s uniform in thickness, the surface is free of flaws or marks, and the back is smooth. This leather is 1.9-2.3mm thick, which is a great thickness for earrings in my opinion.
- Bickmore Neatsfoot Oil – for conditioning the leather earring shapes after cutting and before staining. I bought an 8 oz bottle from Amazon here.
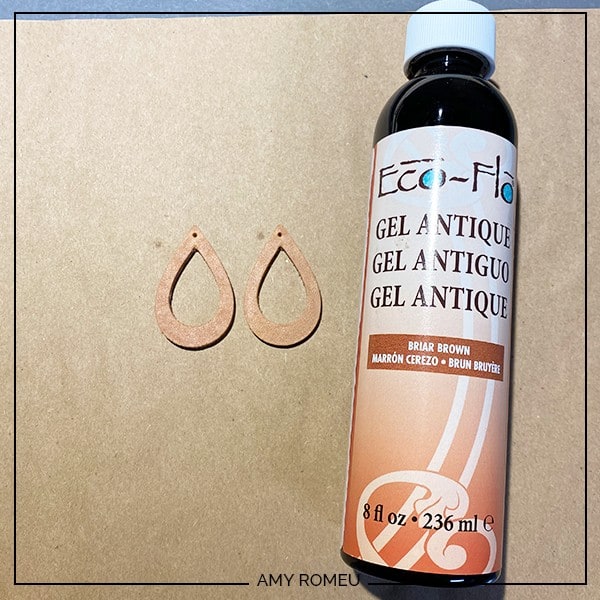
- Eco-Flo Gel Antique Leather Dye (water based) – I used the color Briar Brown from Tandy Leather here.
- Fiebing’s Acrylic Resolene Leather Finish Protectant – used to brush over leather stain to protect the color and finish. I bought a 4 ounce bottle in the color “Neutral” from Amazon here.
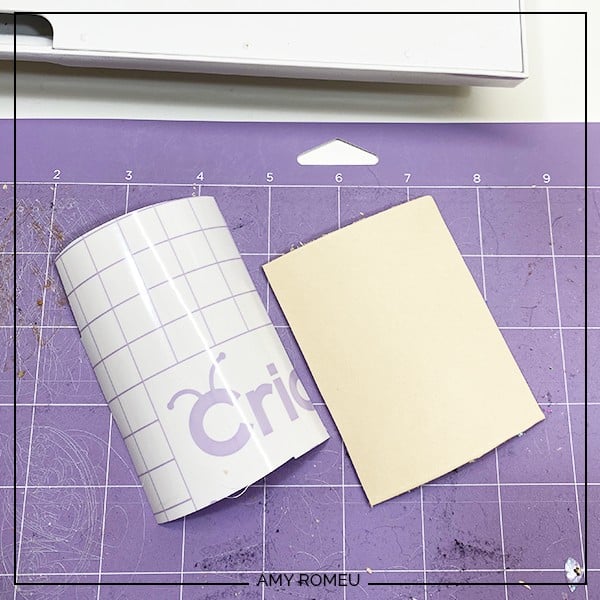
- Cricut Strong Grip Transfer Tape. This is to protect your mat from the chunky glitter residue as well as hold your chunky glitter sheet firmly to your cutting mat. I like the Cricut brand – make sure it is the Strong Grip version – because it’s super sticky. I bought mine from Amazon here.
- Blue painters tape. This will help keep your faux leather and glitter sheets in place on your mat. You can get it at any hardware store and most big box or grocery stores. Amazon also has it here.
- Leather Punch in .5mm size – I have a 10 piece leather punch set, from Amazon here. It includes the .5mm size I used for the holes in these earrings.
- Rubber Mallet – I used one from my garage toolbox, similar to this one from Amazon here. You don’t want to use a metal tipped hammer because it can damage the ends of your leather punches.
- Earring hooks – I used ball ear wire hooks from Hobby Lobby here. The leather earring shapes just slide on and you don’t need to use jump rings or pliers.

- You can also use regular shepherd’s hooks, like the ones in this assortment of earring hooks in different finishes these from Amazon here. Hobby Lobby, Michael’s, and other craft stores, as well as your local bead store, will have lots of earring hooks as well.
- Small jump rings – If you are using shepherd’s hook earring hooks, you’ll also need to use jump rings to connect the leather earring shape to the earring hook. I have this assortment of 6mm size jump rings in different metal finishes from Amazon here. Again, your local craft store or bead store will have plenty of jump rings to choose from if you want to pick some up in person. I recommend using 6mm or 5mm jump rings for earrings this size.
- Large jump rings for charms or dangles, as shown in my earring examples. I used 10mm size jump rings from Amazon, but you can get them at any bead shop or craft store, too.
- Two pairs of flat nose pliers (for putting on jump rings and shepherd’s hook earring hooks) – My favorites are Wubbers brand in the “Baby” size. You can see the Baby Wubbers Chain Nose Piers on the left on Amazon here, and the Baby Wubbers Flat Nose Pliers on the right on Amazon here.
Note: Be sure to check out my post Beginner’s Guide To Jewelry Making Tools for all the information you need to know about buying and using jewelry making tools.
PROJECT INSTRUCTIONS
STEP 1 – DOWNLOAD THE SVG CUT FILE
Download the SVG cut file for these leather earring shapes from my Resource Library. You can get the password to my library via a link at the bottom of this post.
Save the zipped folder that downloads to your computer. Then unzip the folder to access the folder’s contents. You’ll need to unzip or extract the files FIRST so you can upload the cutting file to Cricut Design Space.
STEP 2 – UPLOAD THE SVG FILE TO CRICUT DESIGN SPACE
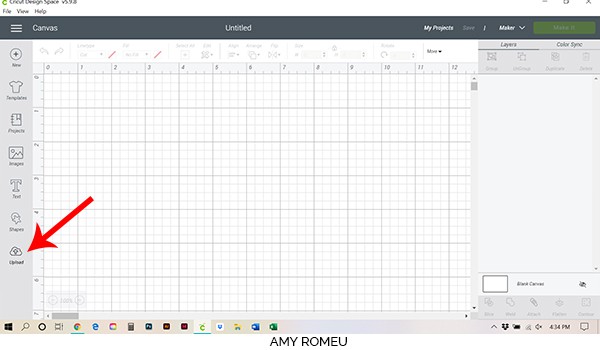
When you open Cricut Design Space, click on NEW PROJECT to get started. Then click on UPLOAD from the left hand side menu.
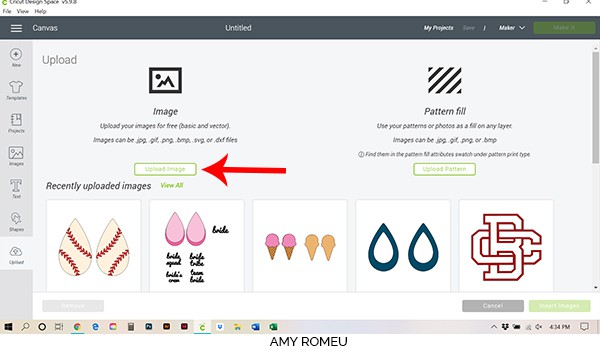
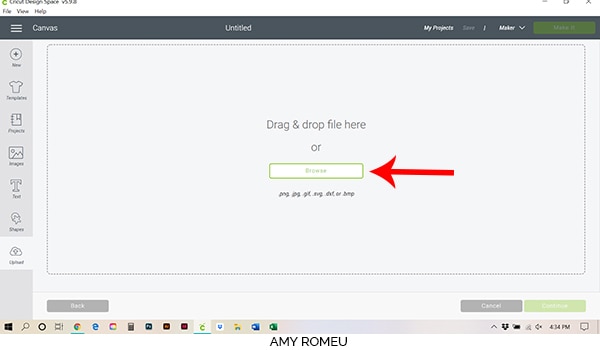
Click on the UPLOAD IMAGE button, then click BROWSE to locate where your unzipped SVG files are saved on your computer.
Click on it to select it. You’ll see this preview of your upload below.
Double click on the SVG file to bring it into the upload screen in Design Space. If you get an error message that says “unsupported file type,” you may have clicked on the wrong file, or your SVG file is still zipped.

You’ll see a preview of the earring shapes for this project.
Hit the green SAVE button.
After you’ve selected your file to upload, you’ll see it as the first item in your “recently uploaded images” row.
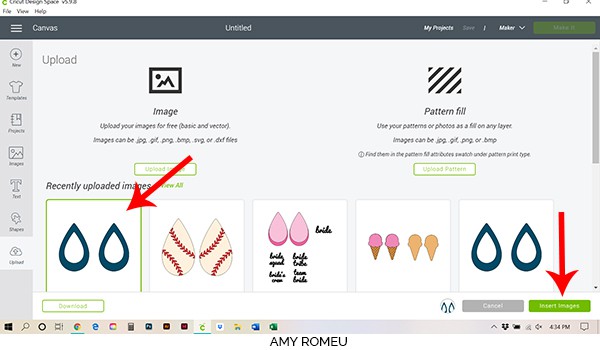
Click on the earring shapes so they are surrounded by a green box. Then click the green INSERT IMAGES button.
This will bring your earring shapes into the canvas in Cricut Design Space.
STEP 3 – PREPARE THE EARRING SHAPES FOR CUTTING
Click and drag the earring shapes to the top left corner of your canvas. These earrings are sized at 1.75″ tall to allow for beaded fringe, dangles, or charms. If you want to make them larger, you can do that by dragging the box that surrounds them to a larger size. Or you can adjust the height in the SIZE box at the top of the canvas.
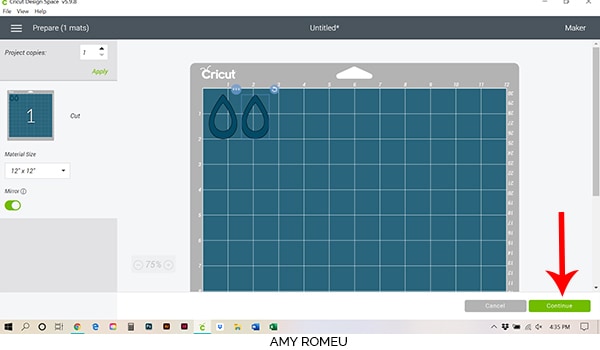
Once you are happy with the size your earrings will be, click the green MAKE IT button.

The next screen is the mat preview screen. It shows you where you will place your leather on the mat for the shapes to cut from. Hover over the mat preview on the left with your mouse to see what size leather your earring shapes will need to cut from, and make a note of it. In the image below, we can see the earrings will cut from a shape of leather about 3 inches wide and just over 2 inches tall.
Press the green CONTINUE button.
Note: if you are using a well used purple cutting mat like I do, the top left corner of your mat may not be very sticky any more. In that case, I dragged the earring shapes to another location of my mat that was stickier, like this:
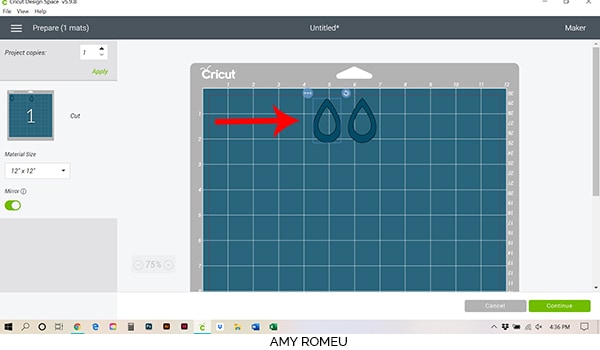
Once you’re sure your designs will cut from the stickiest part of your purple cutting mat, you can click the green CONTINUE button.
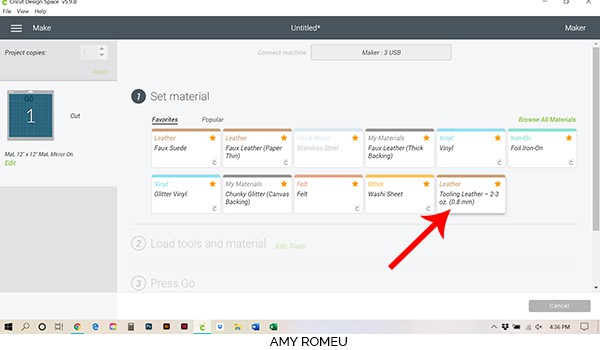
STEP 4 – MAKE THE MATERIAL SELECTION
Now you’re ready to choose your material settings.
For this project, I chose the material setting called TOOLING LEATHER 2-3 oz. I already have that material set as a favorite on my Material Settings screen, but if you need to add it, click on the green text that says “Browse All Materials.”
Then type “tooling leather” in the search box:
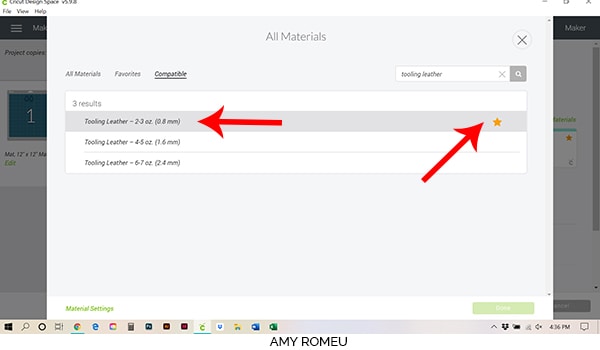
You’ll see the available tooling leather choices. Click on the correct material to select it. Be sure to choose a weight that corresponds to the leather you’ll be using. If you don’t know the weight in ounces, you can measure the thickness of the leather and use that measurement to help you decide.
I recommend also clicking the gold star icon to set this material as a favorite so it will be easy to select from your material settings screen in the future.
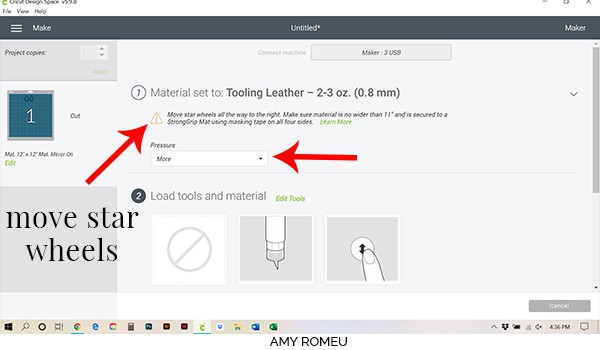
After you’ve chosen your material setting, there are a few important things Cricut Design Space wants to call to our attention on this screen before proceeding.
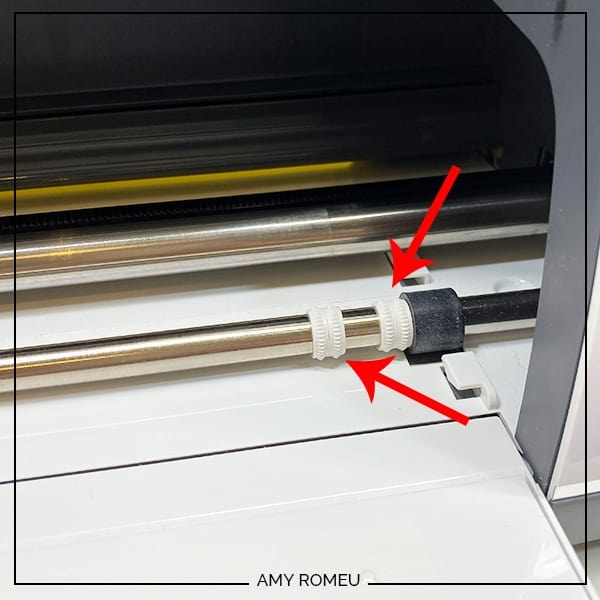
The first is a reminder to move the star wheels off to the side so they don’t roll over the leather when cutting and damage the surface. Here is what the star wheels look like when they are moved over and out of the way:
The second important thing to do on this screen is to set the cut pressure setting from “Default” to “More.” This helps ensure your leather cuts will be complete.
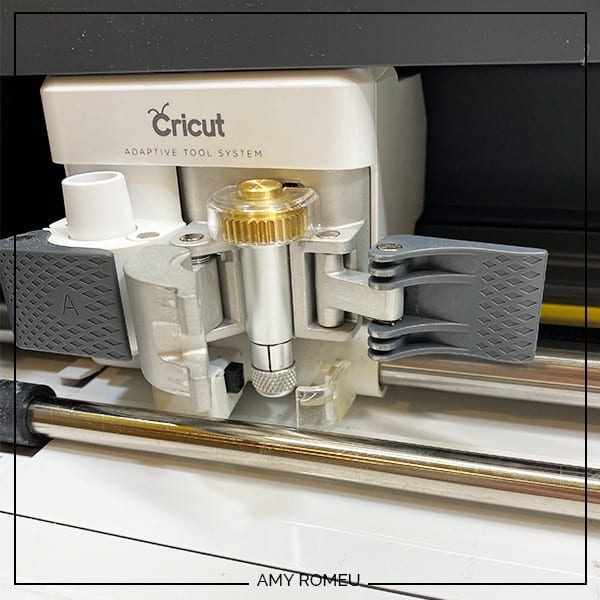
The third reminder on this screen is to be sure to insert the knife blade into housing B and close the clamp securely.
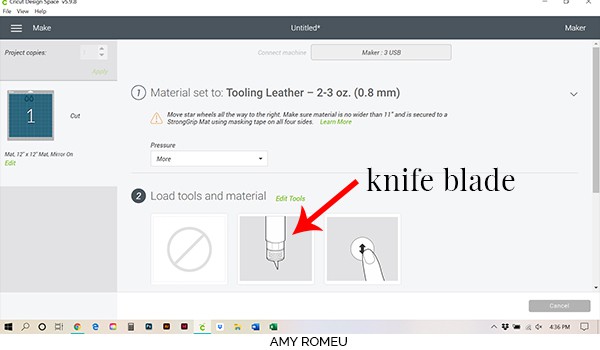
Be sure to remove the bubble cap over the blade before installing!
Now you’re ready to prepare your mat for cutting.
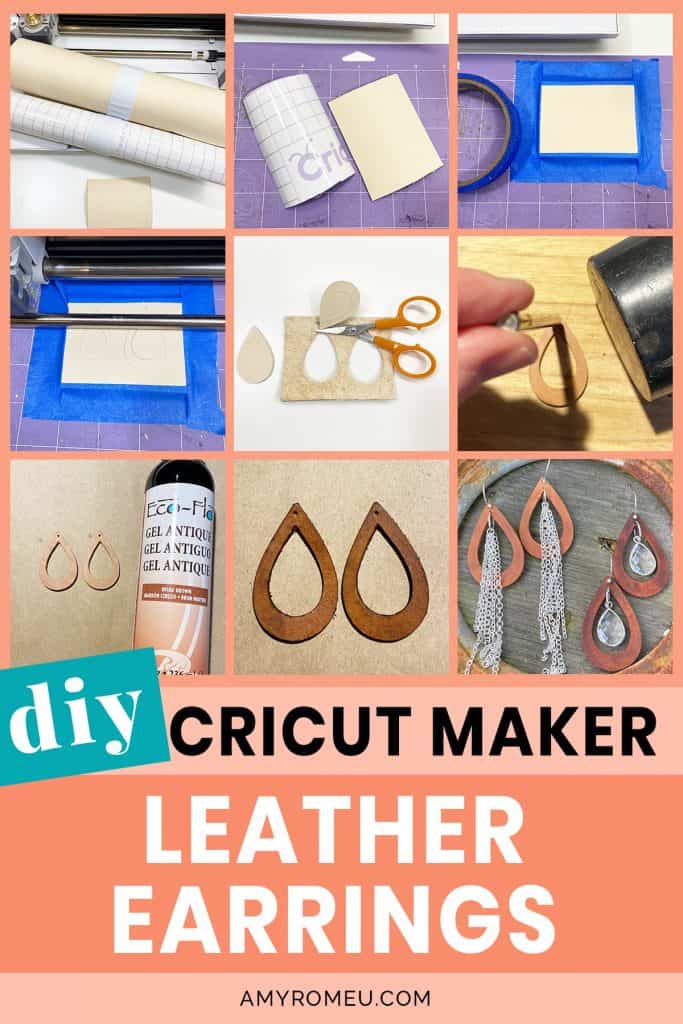
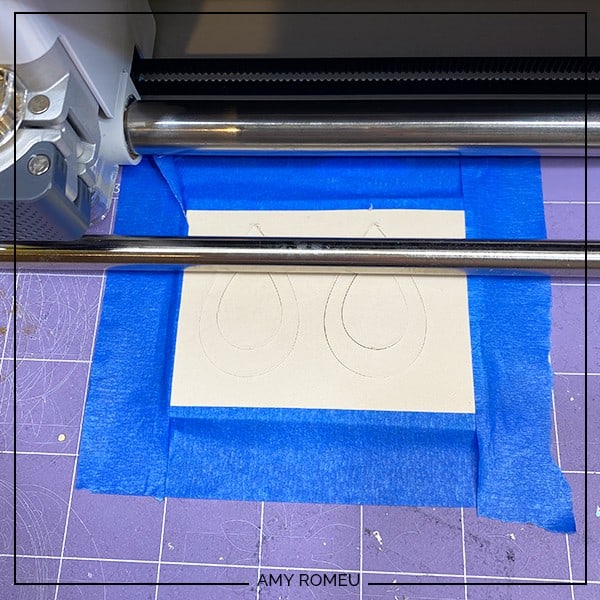
STEP 5 – PREPARE THE CUTTING MAT
Now you’ll be using the Cricut purple strong grip cutting mat, Cricut brand strong grip transfer tape (or another kind of strong transfer tape), and blue painter’s tape.
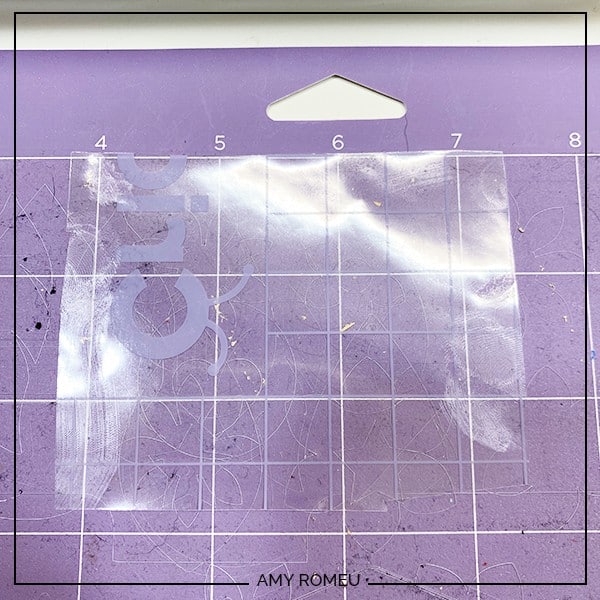
Trim your leather material to the size you noted in the mat preview screen. Allow at least an extra half and inch when you cut the material so you have room for error and for the tape at the edges. Then cut a piece of transfer tape a little larger than the leather.
Place the transfer tape STICKY SIDE UP on your mat in the location indicated on the mat preview.
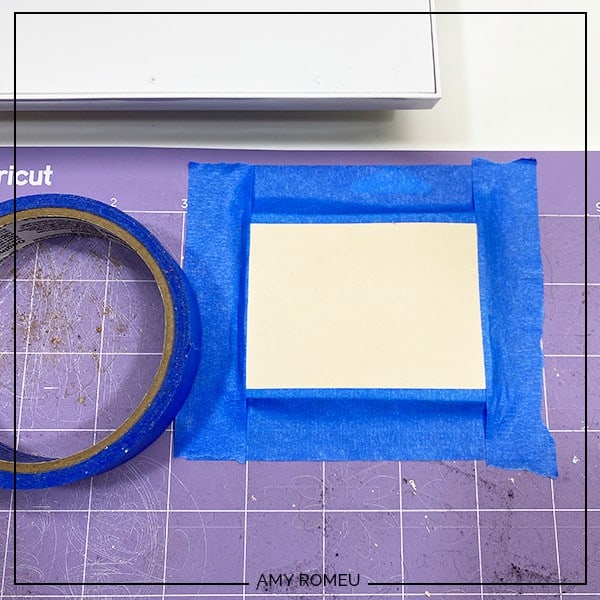
Then place the leather PRETTY SIDE UP on the transfer tape, like this:

Note: You may be wondering why I recommend putting transfer tape down on the mat. The first reason is, it helps the leather stick better to the mat. But the second, most important reason, is it keeps all of the leather fuzzies from the back of the leather from getting stuck to the mat. Those leather fuzzies are almost impossible to remove and can ruin your mat! This extra step is worth it, I promise!
Now tape down the leather on all sides with blue painter’s tape, like this:
Load the mat into the Cricut Maker by pressing the double arrow button. Then press the C button to start the cut.
More complex leather shapes would take several minutes to cut, but these earrings take just two or three minutes to complete.
When the cuts are complete, DON’T UNLOAD THE MAT. Press the C button again to repeat the cuts.
When the second set of cuts are finished, again, don’t unload the mat yet. Use your fingernail or a weeding tool to check the shapes to see if they are popping up cleanly from the leather piece. If so, you can go ahead and unload the mat. If not, hit the C button again to repeat the cuts and then check again. You can repeat the cuts as many times as necessary as long as you don’t unload the mat.
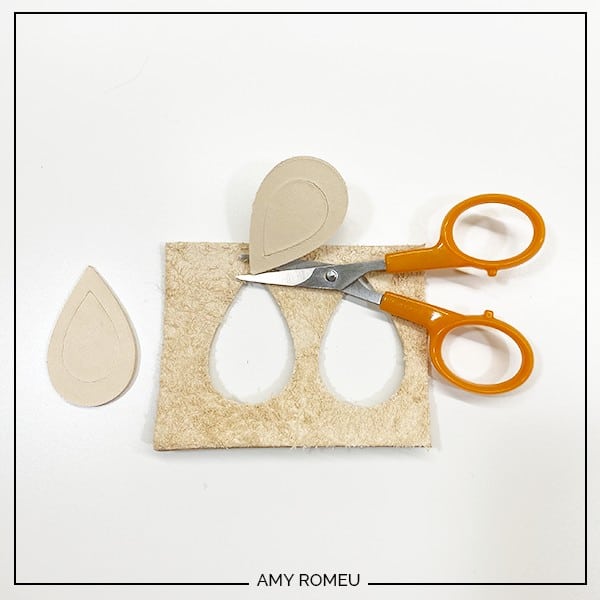
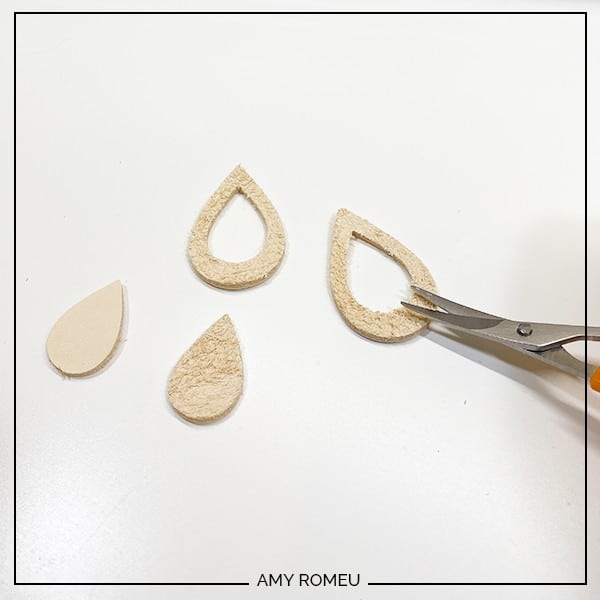
When your cuts are complete and you’ve unloaded the mat, remove the leather from the mat. The transfer tape will stick to the back.
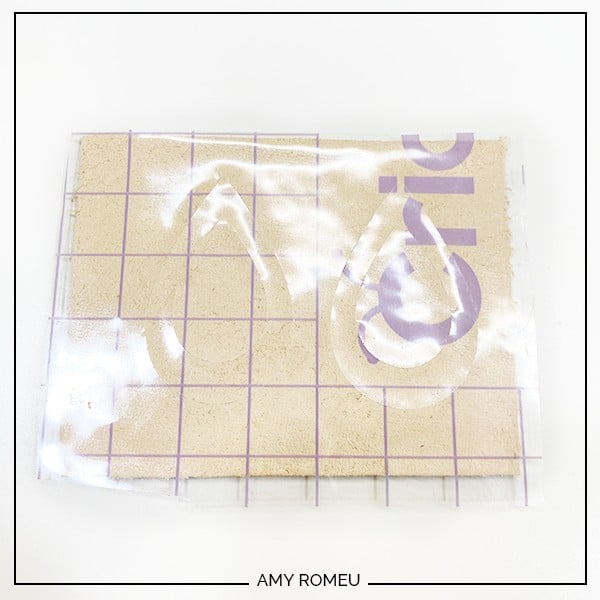
Carefully peel the transfer tape from the back of the leather shapes. Then use small scissors to trim any areas that are stuck and the back of the leather earring shapes.
STEP 6 – STAINING THE LEATHER EARRINGS
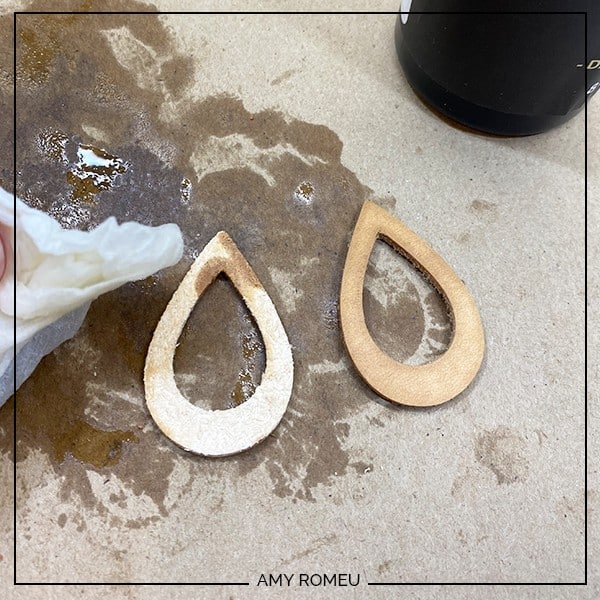
To stain or dye the leather earring shapes, I used a water based gel stain called Eco-Flo available from Tandy Leather. Before applying the stain, it’s important to condition the leather with Neatsfoot Oil. This helps keep the leather from getting stiff and it helps the color application be more even.
I used a paper towel and a quarter sized amount of oil. I dabbed it all over the front, back, and inside and outside edges of the earring shapes. Then I let them dry.
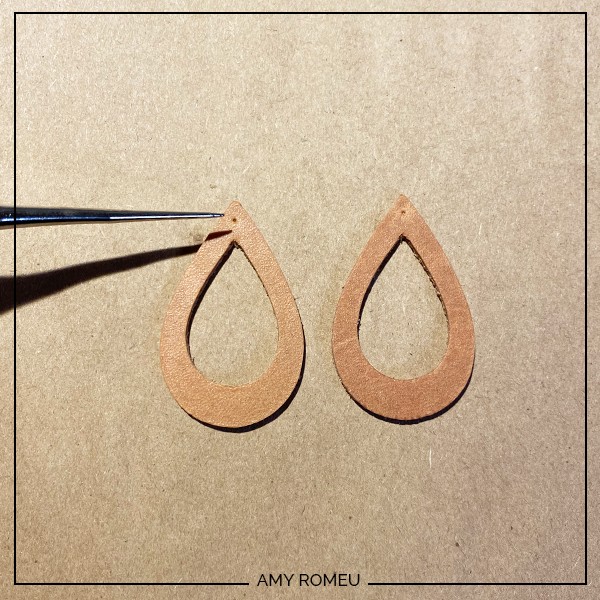
Then I used a sharp tool to mark where the earring holes will go. If you want to add charms or dangles to your leather earring shapes, mark those holes now as well.
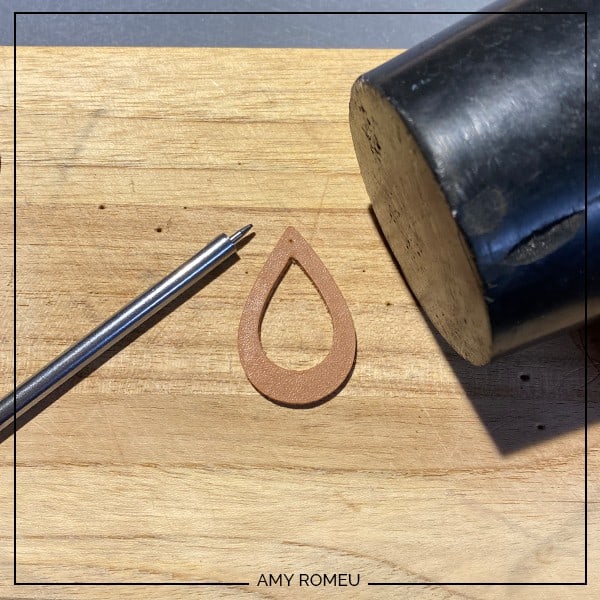
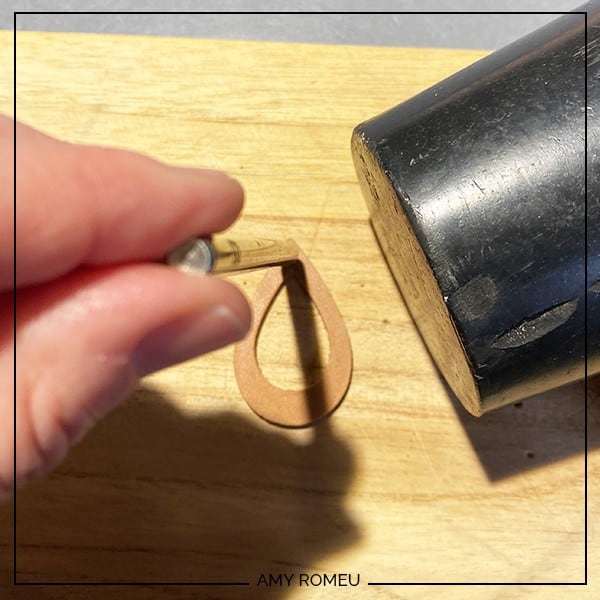
Using the .5mm leather hole punch and a rubber mallet, punch a hole in the earrings by hitting the back end of the punch with the mallet. Repeat for the other earring.
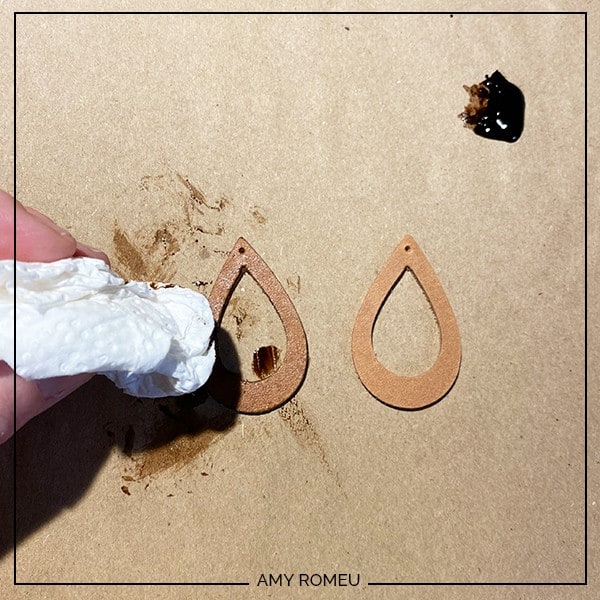
Once the holes are punched in your earrings, you can stain or dye the leather earring shapes. I used a paper towel with a dab of gel antique stain. Again I dabbed all over the earring shapes, including the front, back, outside and inside edges, and inside the earring holes. You want a nice, even application of stain.
Note: For a lighter color, you can mix water in with a few drops of this water-based gel stain for a lighter color.
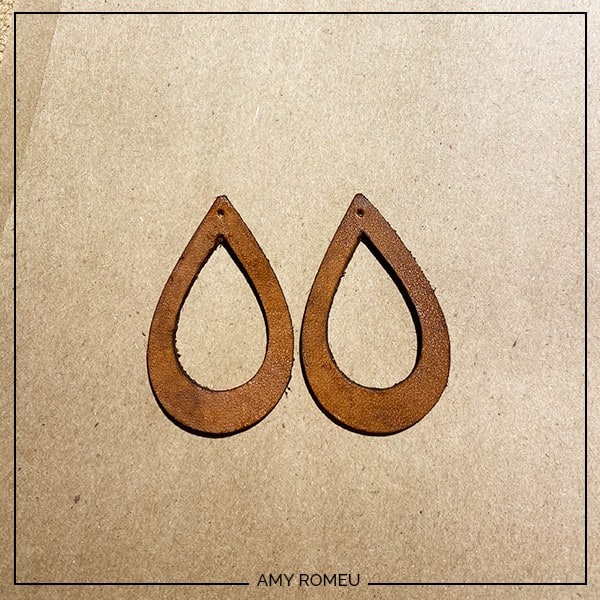
Allow the earring shapes to dry, and apply more stain as desired. When the stain is completely dry, apply a thin coat of the Resolene Leather Protectant to finish and protect the stain. Your leather earring shapes are ready to just add hooks, or embellish with chain, charms, beads, and more!
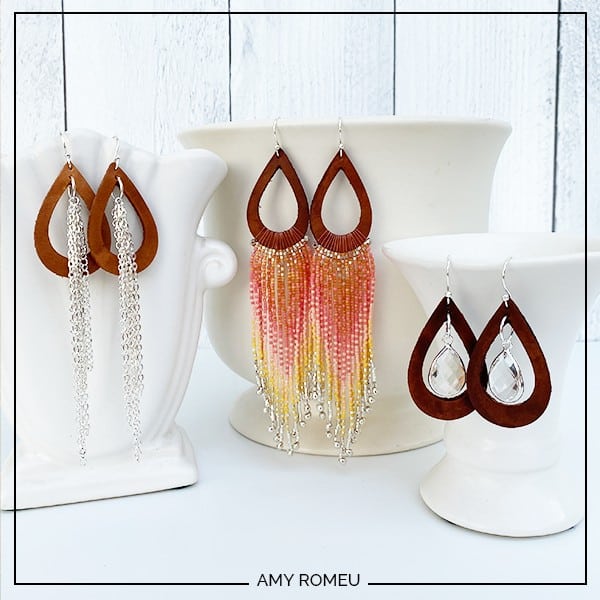
I’ve received a lot of messages about how I embellished these leather earring blanks to make the three earrings above. So here is more information about those, from left to right –
1. Silver chain dangles – I used 10mm jump rings to connect random sized lengths of bulk chain I cut myself. The chain I used is from Yadana Beads on Etsy and can be seen here.
2. Beaded fringe – These are made using my own pattern and Delica seed beads in 11/0 size and Delica silver finish drop beads on the ends. I buy my Delica beads from Fire Mountain Gems.
3. Crystal charm drops – I used 10mm jump rings to connect crystal teardrop charms from Yadana Beads on Etsy. The exact charms I bought can be seen here.
Do you plan to give this project a try? If so, I’d love to see how you embellish your leather earring shapes and make them your own! Please post a comment with a photo of your creations, or tag me on Instagram: @amyromeucreates
Want to see all of my Cricut earring & jewelry tutorials? CLICK HERE
WANT THE FREE SVG FILE SO YOU MAKE THESE CRICUT MAKER LEATHER EARRINGS YOURSELF?
GET IT FROM OUR RESOURCE LIBRARY! YOU’LL RECEIVE THE PASSWORD FOR THE RESOURCE LIBRARY INSTANTLY AFTER FILLING OUT THE FORM BELOW!
We won’t send you spam, promise! We hate spam, too! Unsubscribe at any time.
WANT TO REMEMBER THIS? POST THIS DIY CRICUT MAKER LEATHER EARRINGS PROJECT TO YOUR FAVORITE PINTEREST BOARD!