
DIY Cricut Hello Fall Fireplace Banner Project

It’s one of my favorite times of year for seasonal crafting… it’s almost Fall, y’all! I can’t tell you how much I look forward to fall crafting every year, and this year is no exception. Even though I already have loads of fall crafts on my blog, I love dreaming up new Fall Cricut crafts to create and share. This year my fireplace decor needed a glow up, so I got to work on designing a new Fall Fireplace Banner to create with my Cricut Maker 3.
This Fall Fireplace Cricut project is so fun and easy to make. It’s a great Fall fireplace Cricut project for beginners. If you’re looking for Fall fireplace craft ideas, Cricut Fall ideas, Cricut Fall projects, or Fall fireplace decor projects, then keep reading. This Fall decor Cricut project is for you!
I’ll be using the Cricut Maker 3 to make this Fall Fireplace Banner , but you can absolutely make this project with the Cricut Explore Air 2, the Cricut Maker, or the Cricut Explore 3. You can even use the Cricut Joy (although you’ll have a lot more mats to cut, I’ve designed the banner letters so they will fit on a standard Joy sized mat).
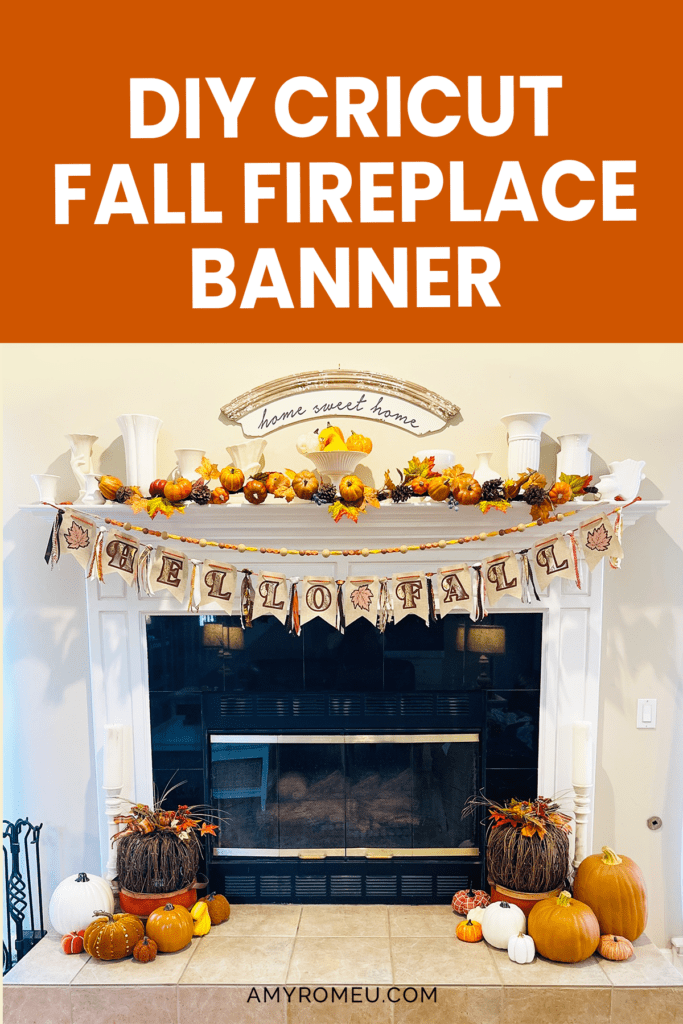
This “Hello Fall” Fireplace Banner is made from a burlap banner flags, heat transfer vinyl, ribbon, and trim bundles. I can’t wait to show you how easy this DIY Cricut Fall Fireplace Banner is to make! I have all the supplies and materials I used linked in the Materials section below.
So if you’re ready to learn how to create this fall fireplace banner project with a Cricut, let’s get started! If you’d rather watch a video tutorial, which has ALL the step by step clicks and additional tutorial content about recoloring and resizing this project, click here or on the video below.
This page contains some affiliate links (which means if you make a purchase after clicking a link, I will earn a small commission at no additional cost to you). Read my full disclosure policy here.
FALL FIREPLACE BANNER MATERIALS
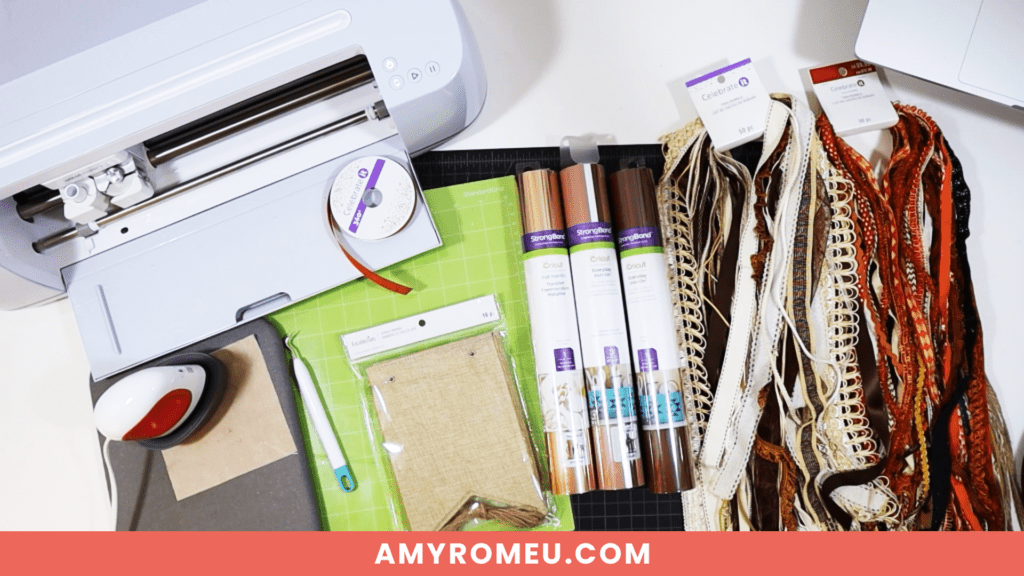
- A Cricut cutting machine (or the cutting machine of your choice). I’m using the Cricut Maker 3 for this project, but you can use the Cricut Explore Air 2, the Cricut Explore 3 or the Cricut Maker. You can even use the Cricut Joy (the project will cut on 8 of the 12 inch long Joy mats instead of 4 mats on a larger machine.)
- Cricut EasyPress Mini
- Cricut EasyPress Mat, 8×10 size
- Cricut Weeding Tool
- Burlap Flag Banner
- Cricut Everyday Iron-On Heat Transfer Vinyl in Brown
- Cricut Everyday Iron-On Heat Transfer Vinyl in Beige (part of the Neutrals Sampler pack)
- Cricut Foil Iron-On in Rose Gold
- Teflon Sheet (I trimmed down to size)
- Celebrate it! 3/8″ wide Ribbon
- Celebrate It! Trim Bundles in the Natural and Fall packs
- The “Hello Fall” Fireplace Banner SVG – Design #200 in my blog’s free resource library. Get the library link and password emailed to you instantly after filling out the form below.
How to Make a Hello Fall Fireplace Banner with a Cricut
STEP 1 – Download the Free SVG
To get started on this project, you’ll need to download the free SVG from my blog’s resource library.
Fill out the form above with your name and email address to have the library link and password emailed to you. Click on the link to log in to the library and look for Design #200.
Click on the Download button to download the zipped SVG file to your device. You’ll need to unzip the folder before you can upload the SVG to Cricut Design Space.
STEP 2 – Upload the SVG to Cricut Design Space
Start a new project in Cricut Design Space.
Click on UPLOAD from the toolbar. Then browse to the location on your device where you unzipped SVG file is located. Click on it to upload it.
You’ll see a preview of the file in Design Space. Click the green UPLOAD button.
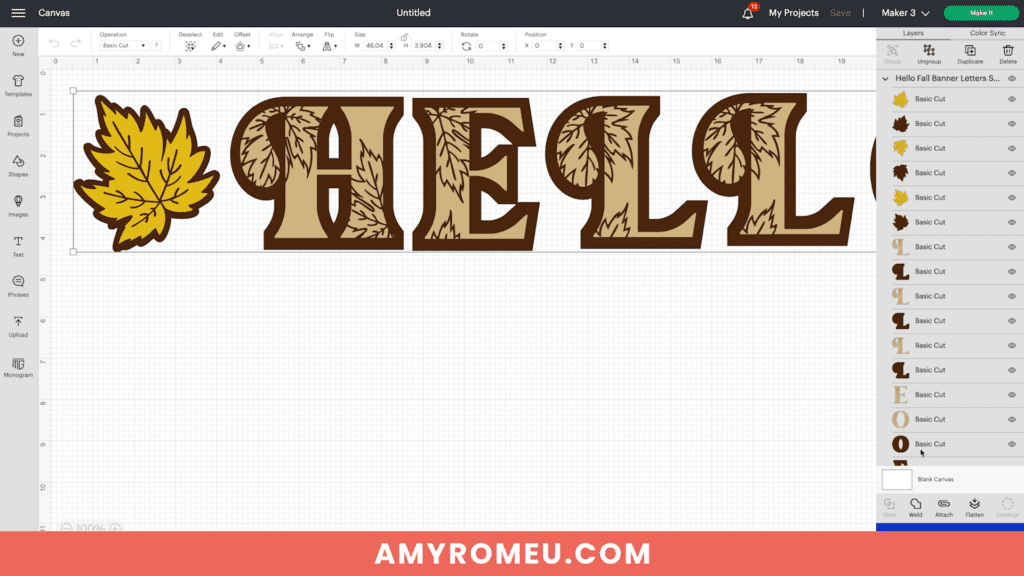
This will bring the SVG onto your canvas in Cricut Design Space.
The SVG is already perfectly sized for banner flags I used from Michaels so adjusting the size isn’t necessary.
If you are using a different size or kind of banners, you may need to resize the letters in Design Space before cutting.
To resize the design correctly, be sure all of the layers are selected before you adjust the size. This will keep all the letters in proportion to their backing layer, and each other.
Check out my YouTube video for this project for more information.
This project uses three colors of heat transfer vinyl. Brown for the back, Rose Gold Foil-Iron On for the front, and Beige for the leaves.
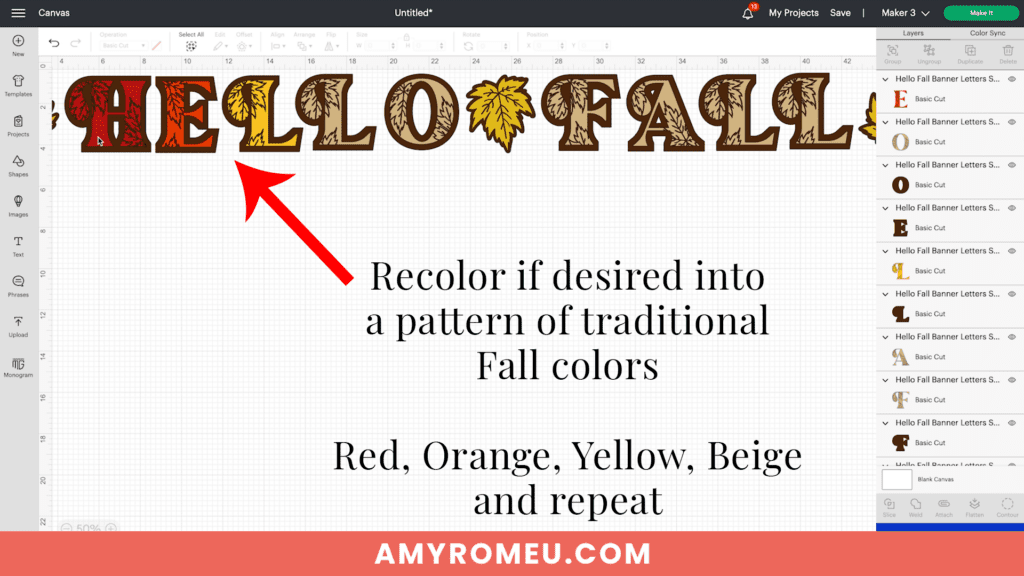
NOTE: If you want a more traditional fall colors banner, you can recolor select letters here on the canvas before moving on. I would try a repeating Red/Orange/Yellow/Beige color scheme.
Click on the top layer of the letter and then choose another color from the color picker.
If you want the text to cut as is, or once you have finished changing the letter colors, click on the green MAKE IT button.
Choose “On Mat” for how you will load your materials and change your mat size if necessary.
STEP 3 – Cut the Vinyl Letter Layers
Now it’s time to start cutting the vinyl layers for this Cricut Fall Fireplace Banner project.
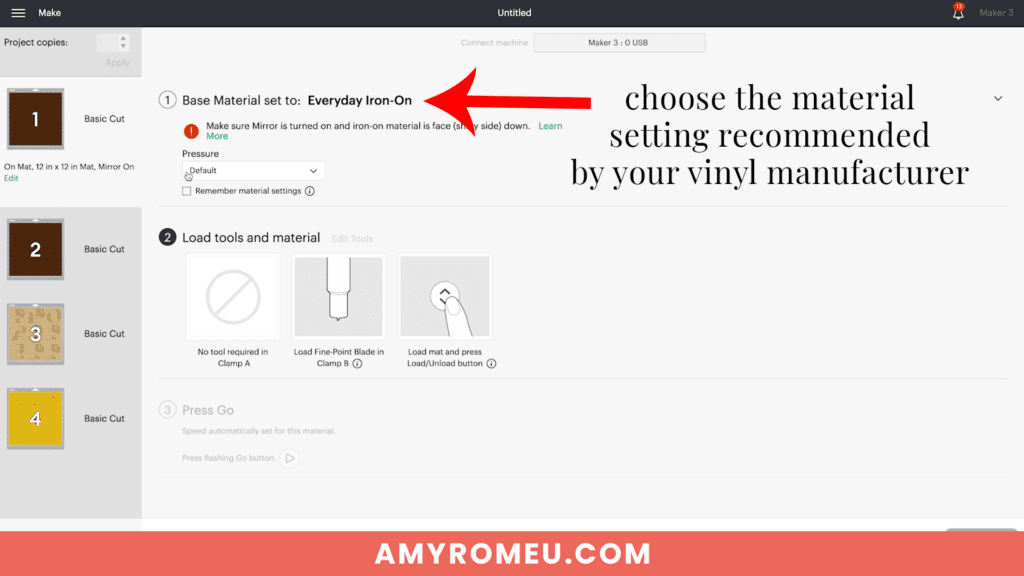
Since these designs are letters, the first VERY IMPORTANT step is to scroll through each mat in the mat preview and toggle on the green MIRROR button. Do this now for EACH mat so you don’t forget. 🙂
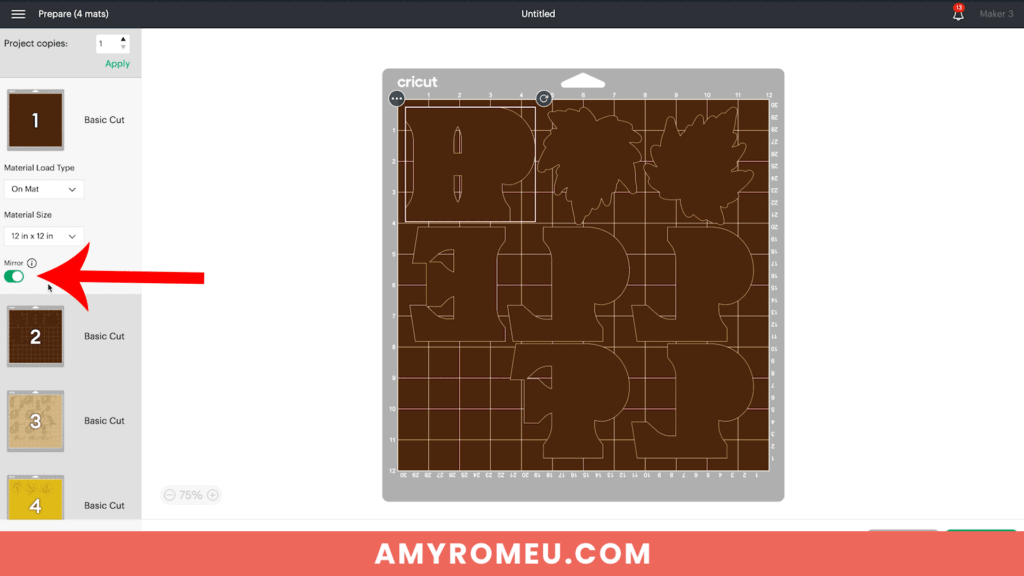
You’ll see Design Space has filled two mats with the brown letters. Click on each letter and drag them apart from each other as much as you can. (You’ll be able to do this more with the foil and beige mats.)
I cut the Brown vinyl mats first.
Choose the material setting that corresponds to your vinyl manufacturer. I chose Everyday Iron-On with Default Pressure.
It’s time to start cutting the vinyl mats one by one.
STEP 4 – Cut the Vinyl Mats
Cut the brown vinyl to size (the first mat will take a full 12×12 piece of vinyl) and place it shiny side down on a green cutting mat.
Roll over the mat with a brayer if you have one.
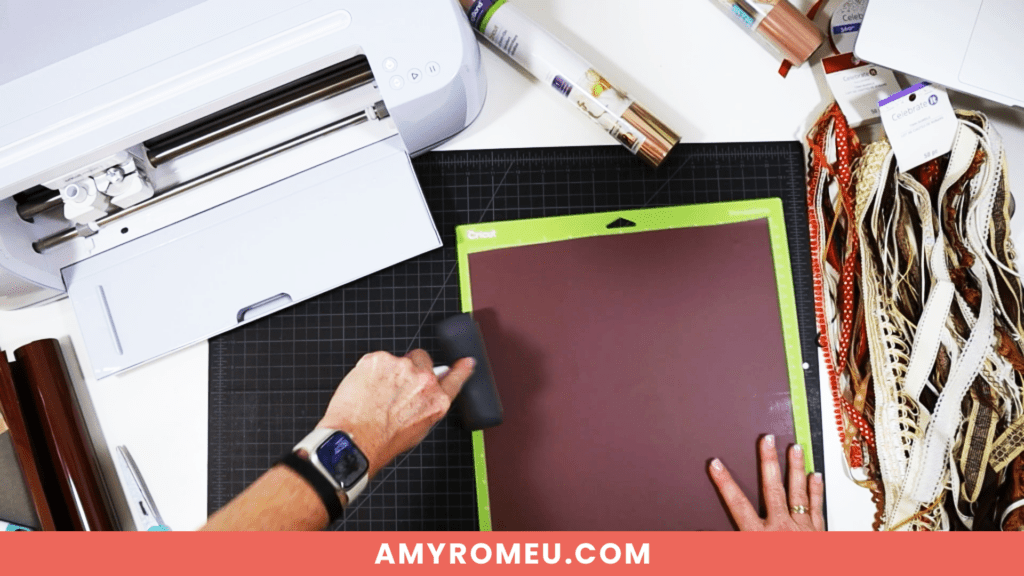
Load the mat into the Cricut and press the Go button to begin the cut.
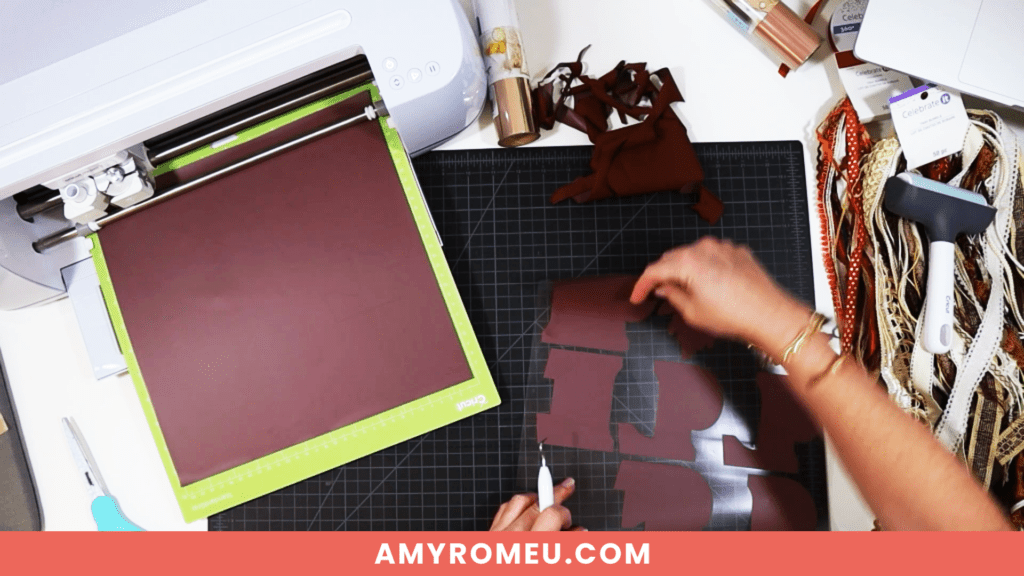
When the cut is complete, flip the mat over on your work surface and peel the mat away from the vinyl. This keeps the vinyl as flat as possible.
Load up the second brown vinyl mat and begin cutting it. You can start weeding the first brown mat at the same time.
Use your weeding tool to remove the excess vinyl around the letter backgrounds. Don’t forget to weed away any insides of the letters, too.
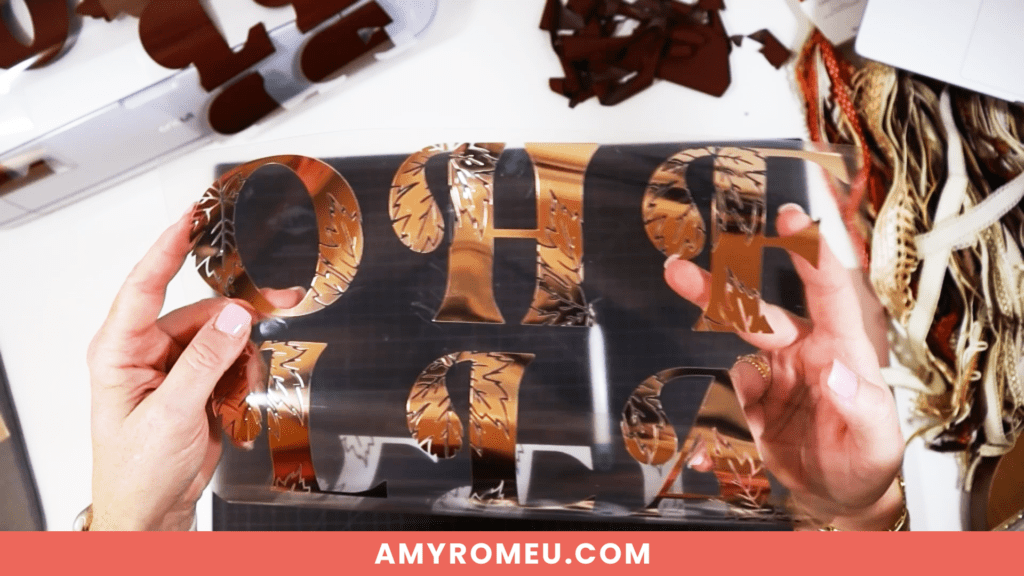
When the second brown mat has cut, cut the foil iron-on mat next.
Foil Iron-On has its own material setting. I use default pressure. If you aren’t using foil iron-on, use the setting recommended by your vinyl’s manufacturer.
Place the vinyl shiny side down on the green mat and begin the cut.
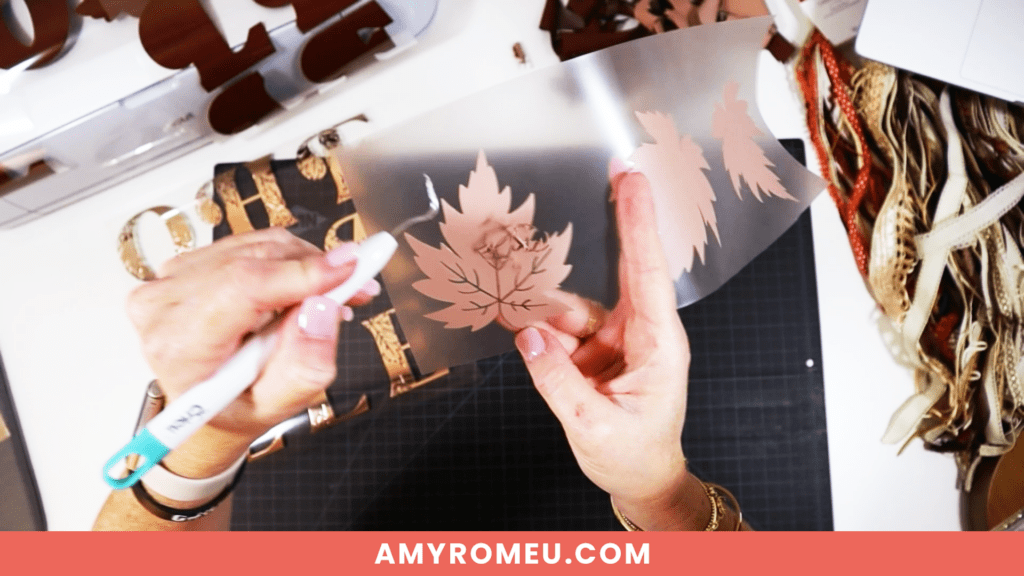
When the cut is complete, carefully weed away the excess vinyl. Then weed the leaf veins inside the letters. If you lose a tiny vinyl spot here and there, don’t worry about it. 🙂
Return to Design Space and cut the final mat, the leaves. Weed the leaf vinyl layer.
Cut each shape apart from its layer and sort all the letter fronts and backs together.
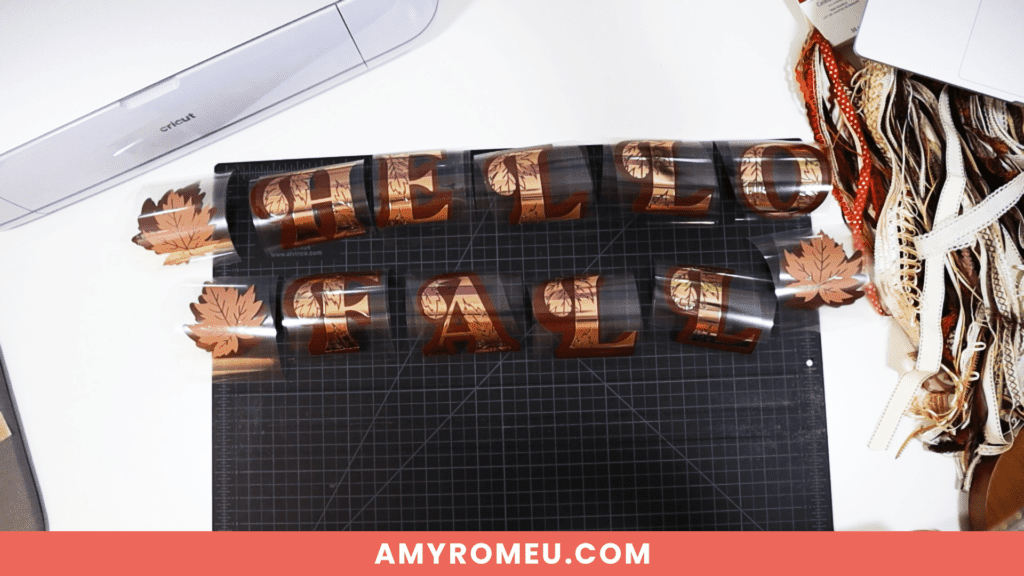
Now it’s time to start pressing the letter layers on to the banner flags.
STEP 5 – Pressing the Letters Onto the Banners
Set an EasyPress Mini to the low setting, or a traditional EasyPress to the temperature recommended by the vinyl manufacturer.
You can see the Cricut Heat Guide here.
Cover your work surface with a EasyPress Mat or other firm, heat resistant pressing pad.
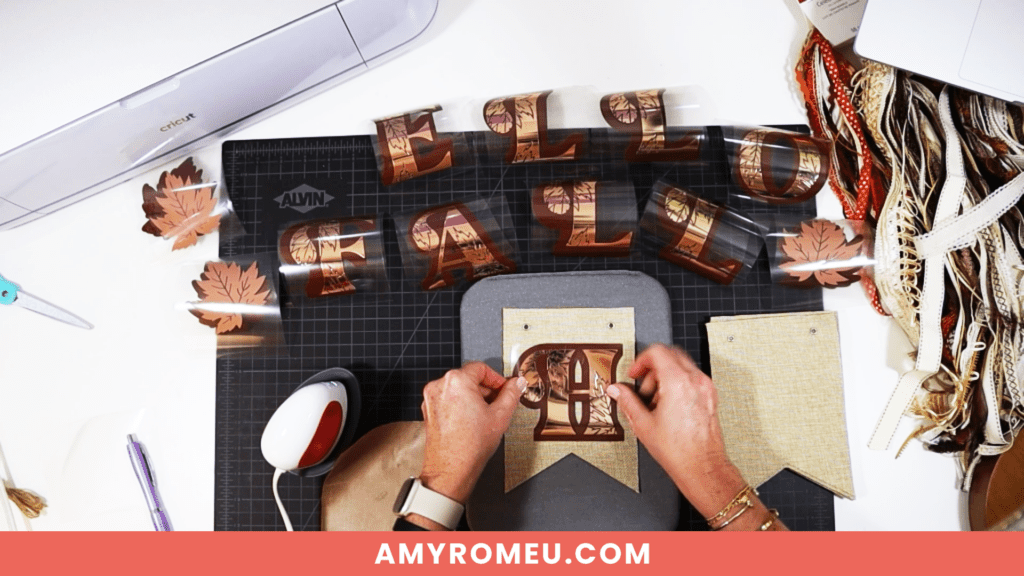
Center the first brown letter layer both vertically and horizontally on the flag banner.
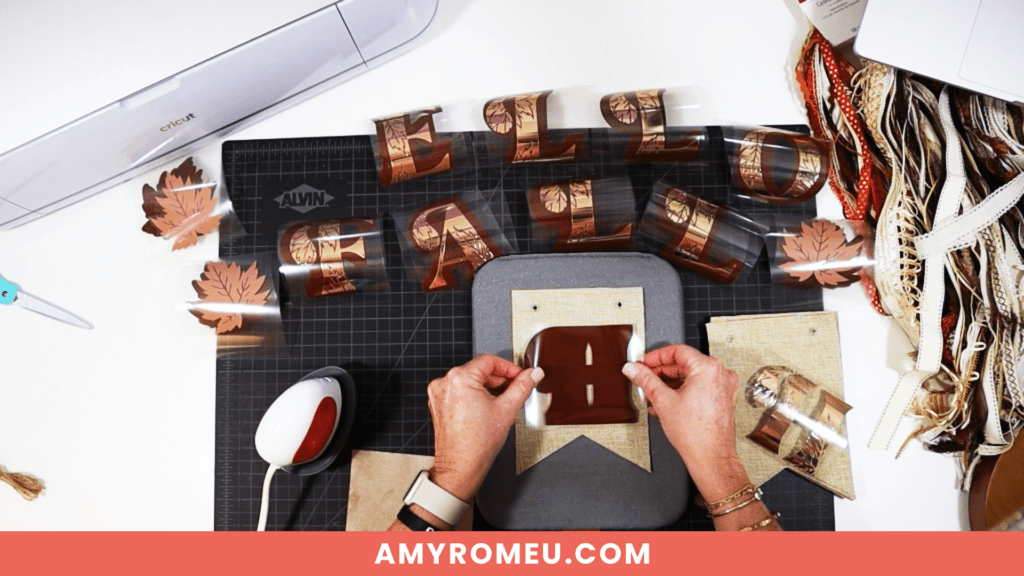
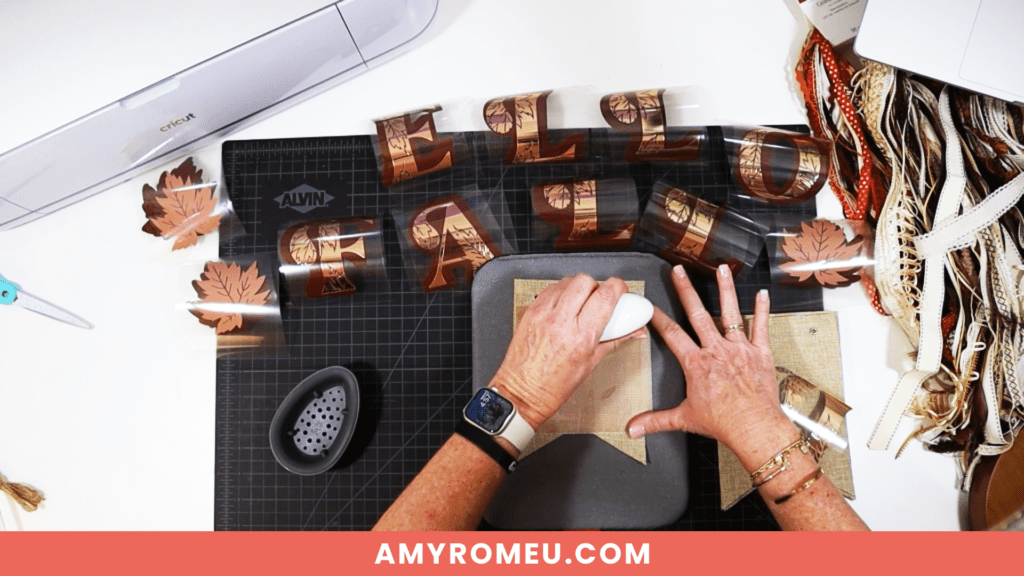
Then cover with a piece of teflon sheet or parchment paper and press. Move the EasyPress Mini around, like you are ironing, for about 20-30 seconds.
NOTE: If you are using a regular Easy Press, be sure you are placing the platen of the EasyPress below the metal grommets on the banner flag. This will keep the grommets from heating up and it will keep even pressure on the flag without the grommets getting in the way.
Remove the teflon cover sheet or parchment paper and use one hand to hold the flag flat on the worksurface. This will keep the vinyl flat and help it resist wrinkling or bubbling.
While holding the banner flat, carefully try to peel the clear vinyl cover sheet away from the vinyl.

If the vinyl peels up or pulls up with the clear cover sheet, place the cover sheet back down and repeat pressing for another 15-20 seconds.
When the clear vinyl layer lifts up cleanly, set the pressed banner with the brown vinyl aside and repeat with the other flag banners.
Then return to the first letter and layer the leafy, foil iron-on letter on top. Center the foil layer on top of the brown layer, cover with a cover sheet, and press.
When the foil layer remains pressed down to the bottom vinyl layer, peel away the clear cover sheet.
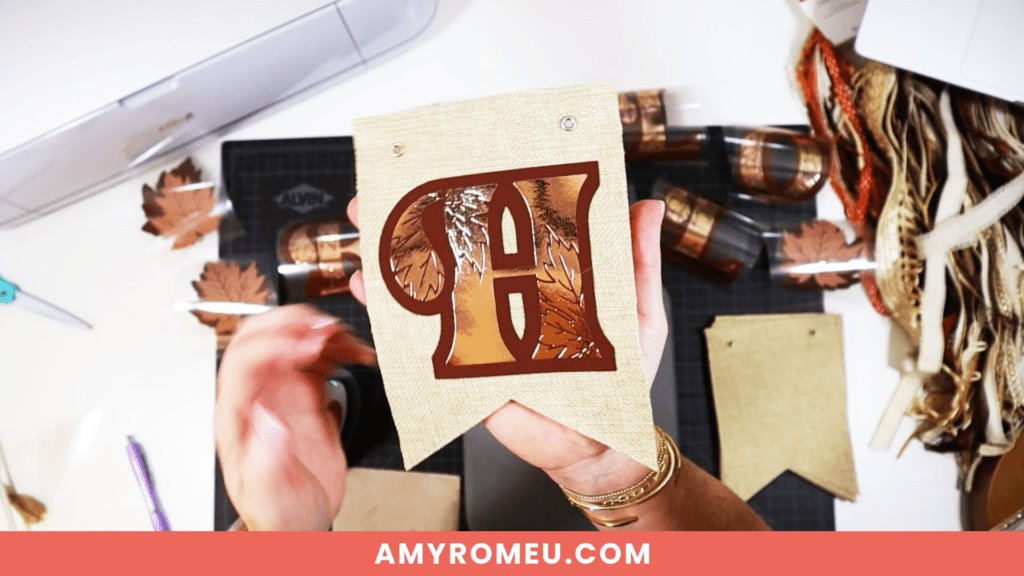
Repeat for rest of the letters, and then the leaf banner flags.
Step 6 – Assembling the Fall Fireplace Banner
Once the banner flags are all pressed, it’s time to put together the fireplace banner.
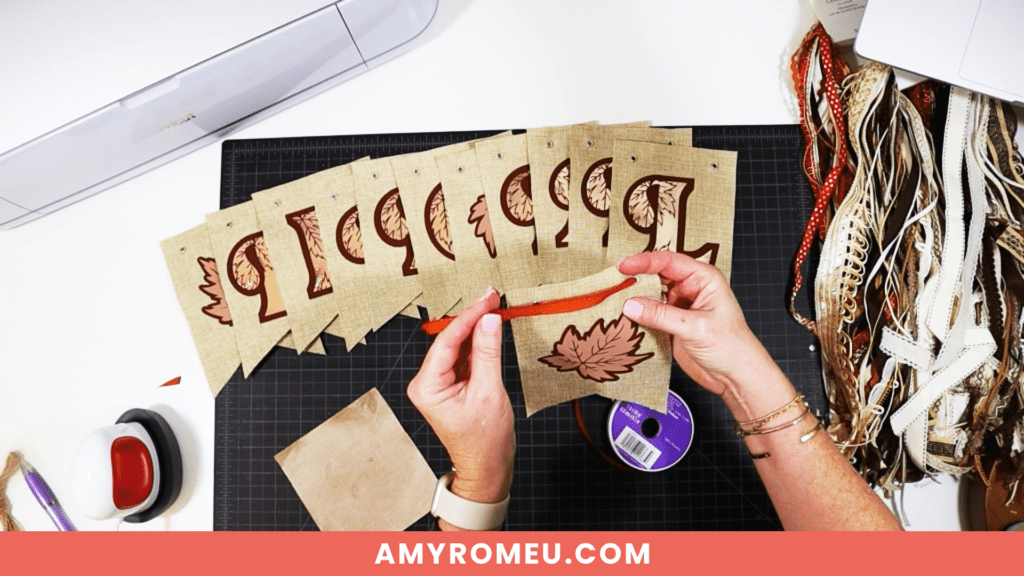
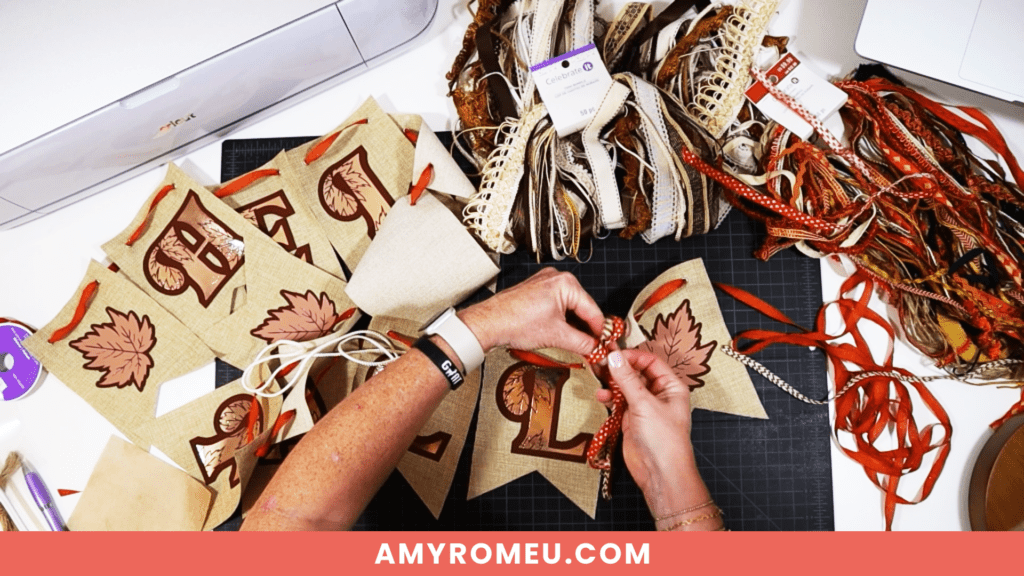
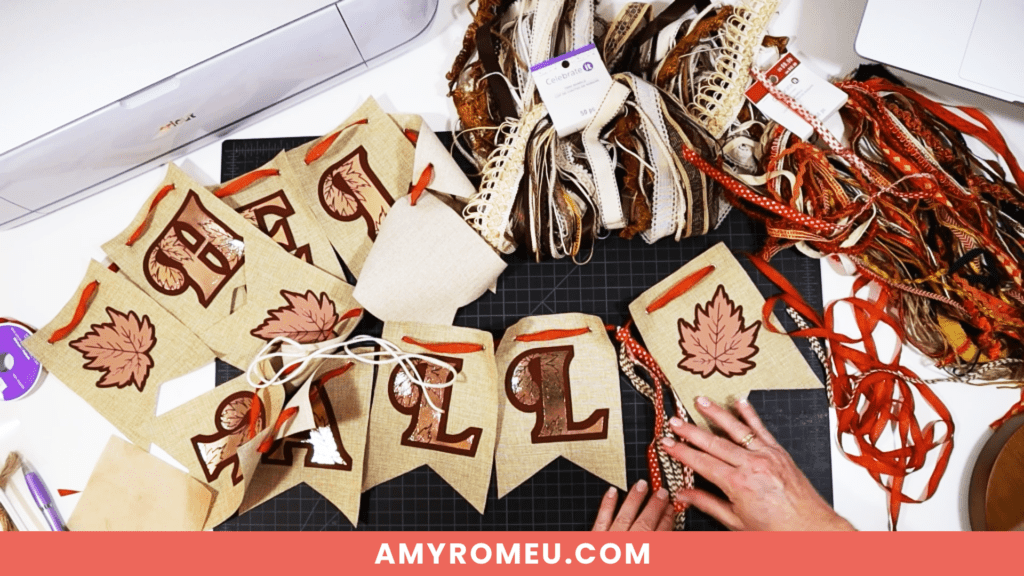
Using 3/8″ ribbon or thin twine, begin lacing the banner flags onto the ribbon.
I started with a Leaf, then the word HELLO, then a Leaf, then the word FALL, and then another Leaf.
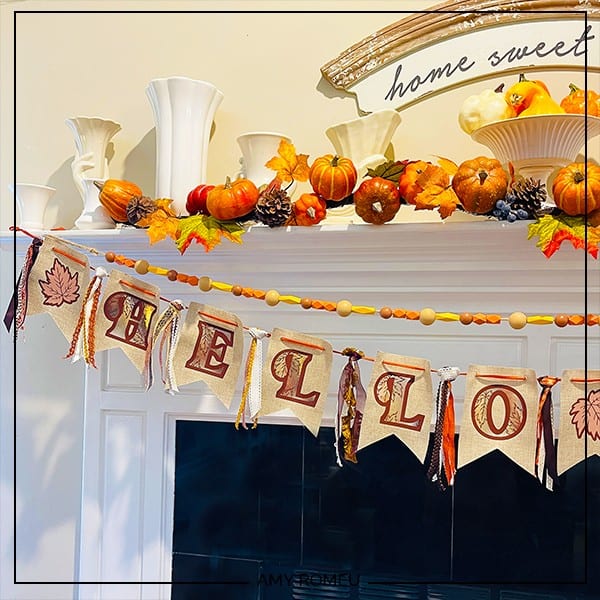
When all the banners are on the ribbon, the project is complete. However, I wanted to dress up the banner even more by adding some ribbon and trim scraps.
Use trim bundles from Michaels or trim from your sewing stash. At first I used two ribbons in pretty patterns, but ended up using three ribbons between each flag.
I cut each ribbon/trim piece about 14-15 inches long.
Then I gathered the ribbons together in the center and looped the center loop over the ribbon between the banner flags.
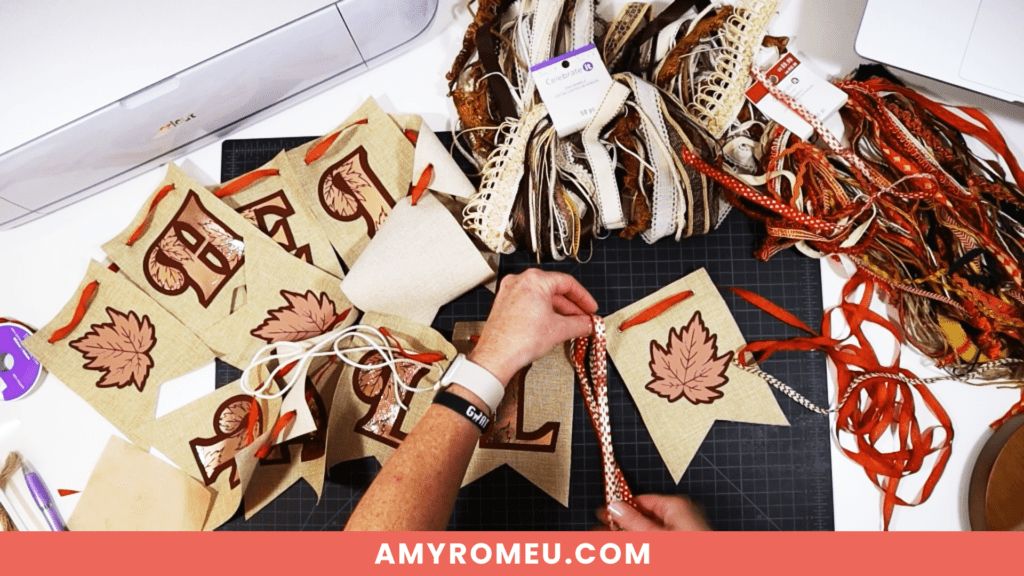
Then I pulled the ribbon tails up through the loop behind and pulled down to create a large, flowy tassel of sorts.
Continue tying these ribbon tassels in between each two banner flags. Pay attention to the ribbon and trim colors and patterns to keep the tassels visually interesting.
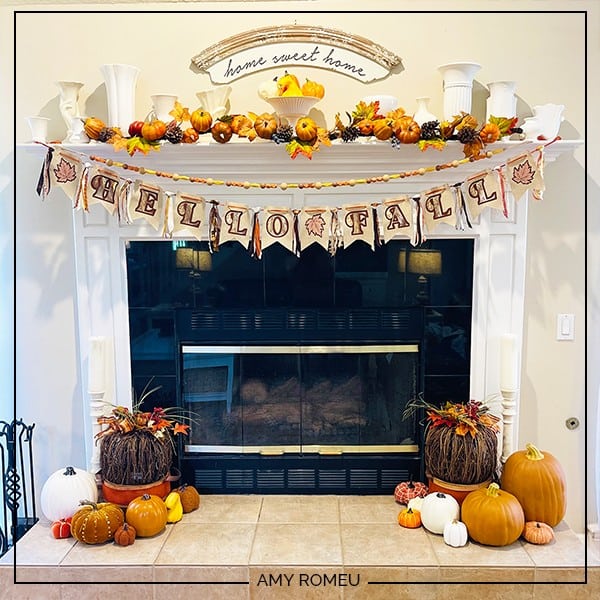
That’s it! The Cricut Fall Fireplace Banner is complete!

Remember, for click-by-click instructions on this project, as well as additional bonus instructions for resizing and recoloring the SVG, be sure to check out my YouTube video here.
I would love to see your finished Fall Fireplace Banner! If you do make this project, please share a photo in my free crafting Facebook Group, or tag me on Instagram: @amyromeucrafts
Did you like this project? Do you want to see more Cricut home decor projects like this one? If so, let me know in the comments!

Want to make this project yourself? Get the SVG from my free Resource Library by filling out the form below:
Want to remember this? Post this DIY CRICUT FALL FIREPLACE BANNER project to your favorite Pinterest board!
Amy, This is a wonderful project! I’m looking forward to seeing more like this. I would love to see a Halloween banner and ever a Christmas banner.
Thank you for sharing your wonderful talent with us.