
Make New Year’s Eve Champagne Glass Earrings with a Cricut

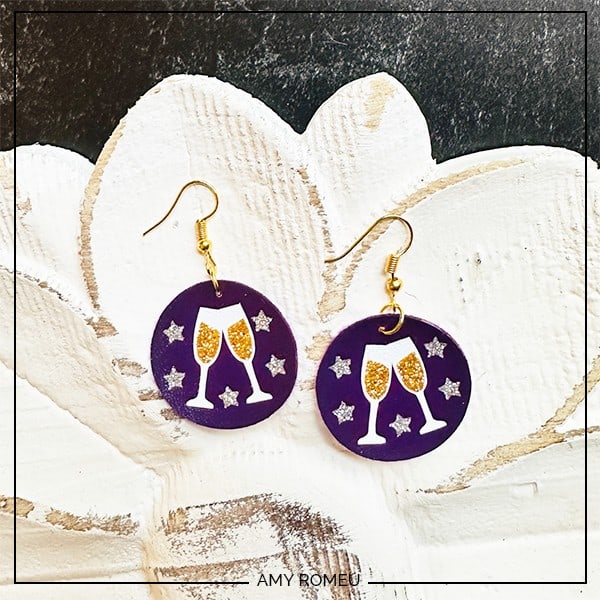
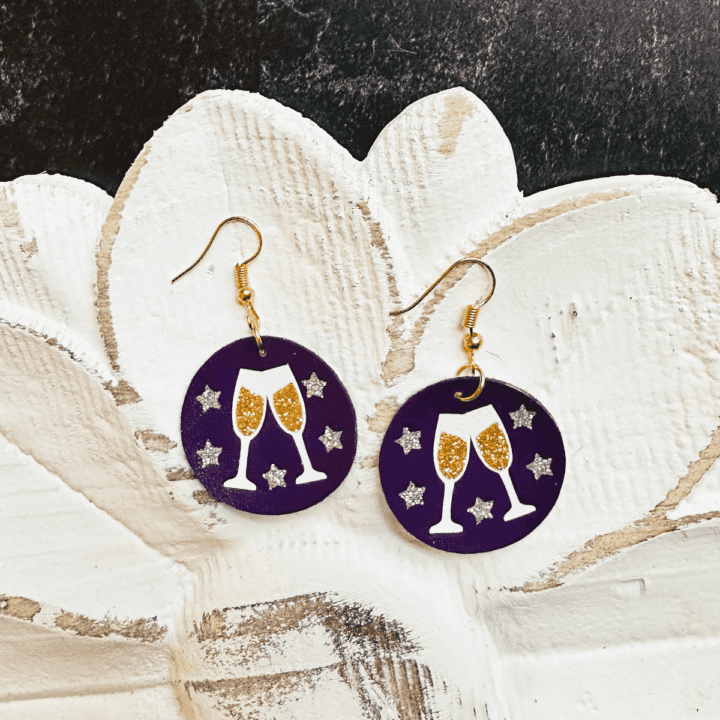
I love making faux leather earrings to celebrate special holidays, and New Year’s Eve is no exception! I created these cute toasting champagne glass earrings, perfect for New Year’s Eve, or anytime that calls for a celebration. You can make them with a Cricut Maker, Maker 3, Explore Air 2 or Explore 3, or even the Cricut Joy. To see all of the steps I took to make this project, I have a full tutorial for you!
This SVG is inside of my blog’s Free SVG Library. It’s Design #201. You can get the password to the library and the library link emailed to you instantly by filling out this form.
So if you’re ready to try making these Faux Leather New Year’s Eve Champagne Glass Earrings with a Cricut, let’s get started!
This page contains some affiliate links (which means if you make a purchase after clicking a link, I will earn a small commission at no additional cost to you). Read my full disclosure policy here.
FAUX LEATHER CHAMPAGNE GLASS EARRINGS MATERIALS LIST
- Smooth Faux Leather in the color of your choice – I used Purple
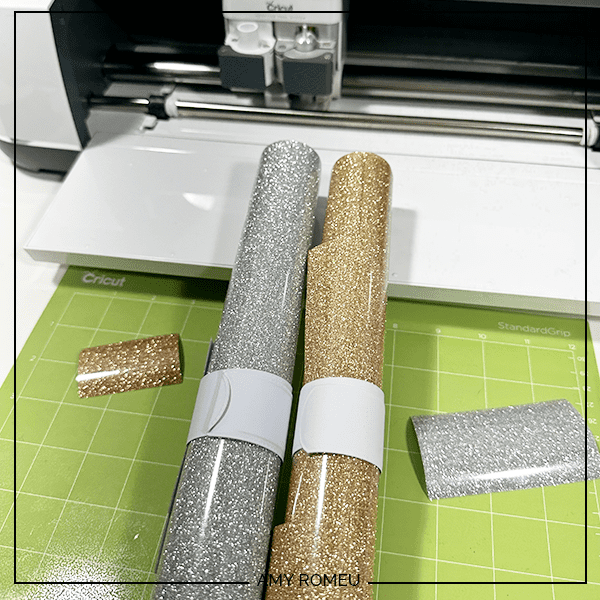
- Heat Transfer Vinyl in Glitter Gold and Glitter Silver (I used Siser brand)
- Heat Transfer Vinyl in White (I used Siser Easyweed)
- Cricut machine of your choice: Cricut Maker 3, Cricut Maker, Cricut Explore 3, Cricut Explore Air 2, or the Cricut Joy
- Purple “Strong Grip” cutting mat
- Green “Standard Grip” cutting mat
- Blue Painter’s Tape
- Cricut EasyPress Mini
- Cricut EasyPress Mat, 8×10 size
- Teflon Sheets (I trim mine down to a smaller size)
- Cricut Weeding Tool (I use the one from this basic tool set)
- 1/16″ Hole Punch
- Jewelry Pliers – Needle Nose and Wide Flat Nose
- Earring hooks in Silver finish and Gold finish
- 6mm Jump Rings in Silver finish and Gold finish
How to Make Faux Leather Champagne Glass Earrings with a Cricut
For a printable version of the text portion of project instructions, click here.
STEP 1 – Get the Earrings SVG Template
You can get the Champagne Glass Earrings SVG template from my blog’s free library. It’s Design #201. Get the password and library link emailed to you instantly by filling out the form below.
Save the zipped folder that downloads to your computer. You’ll need to unzip or extract the folder FIRST so you can upload the SVG file to Cricut Design Space.
STEP 2 – Upload The Earrings SVG Template to Cricut Design Space
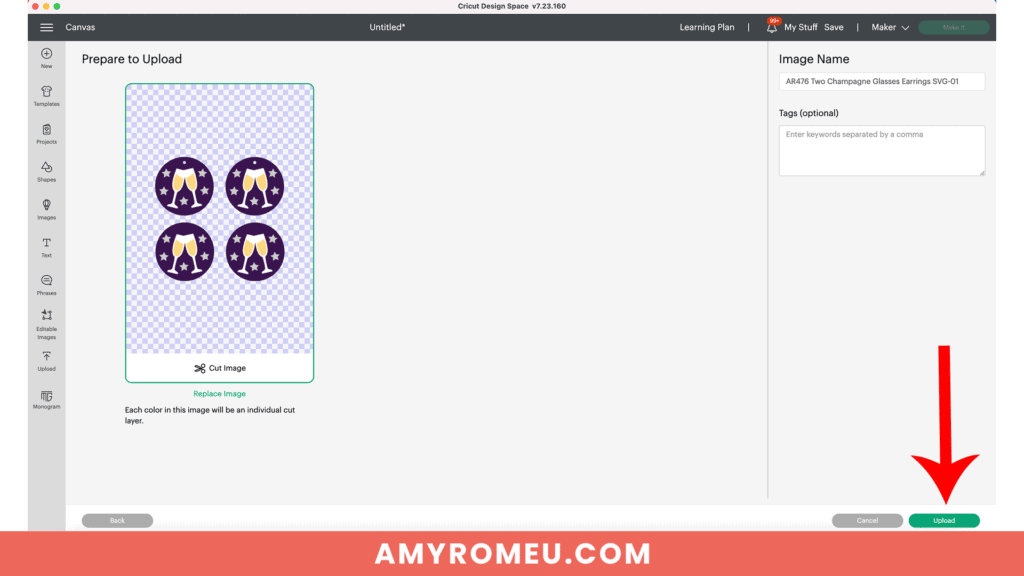
Click on Upload Image, then browse to where your unzipped Champagne Glasses Earring SVG is located on your device.
Click on the SVG file it to upload it to Design Space. You’ll see a preview of the SVG on the screen. Click the UPLOAD button.
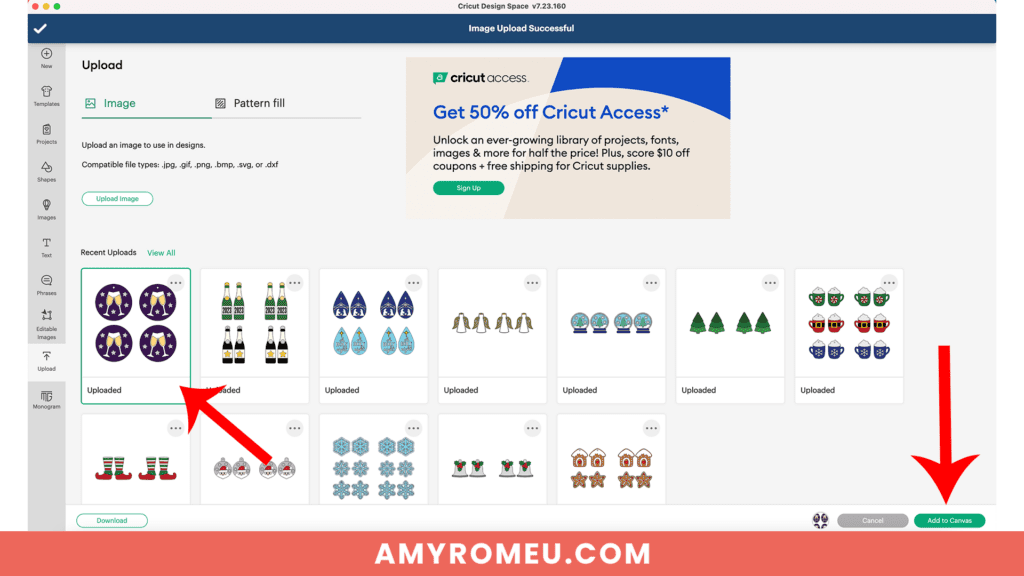
Then select the Champagne Glass Earrings SVG from your Recent Uploads row and click Add to Canvas.
There will be two versions of the earring SVG – one with pre-cut holes and one without. Decide which version you want to use and delete the other one. You will need to ungroup both versions from each other first before you can delete.
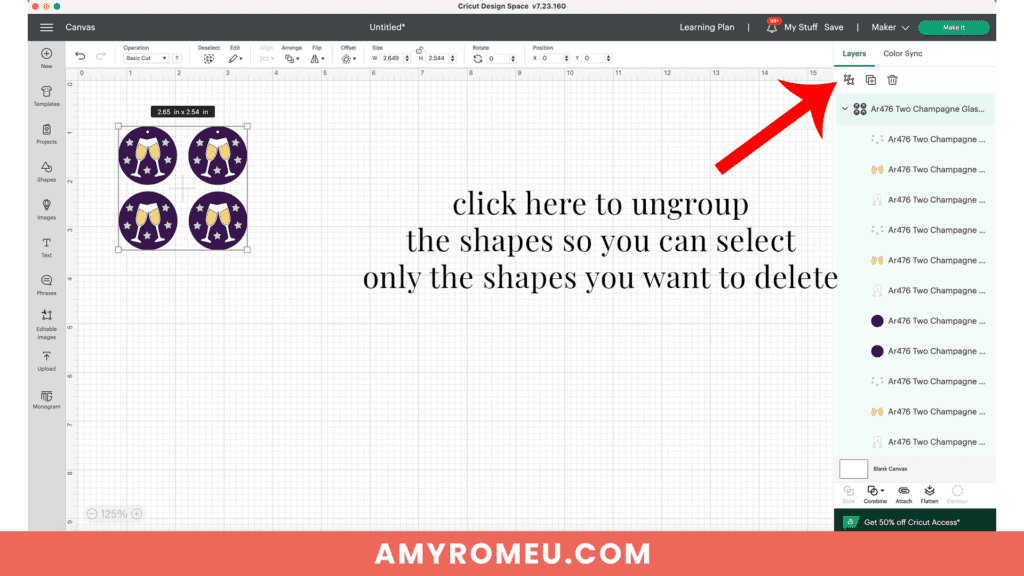
I suggest using the “no-holes” version if you want to change the size of the earrings or if you prefer making the holes manually using a hole punch. If you use the “with holes” version, you can always finish making the earring hole with a hole punch if the Cricut doesn’t cut the hole completely.
I have a YouTube video all about earring holes if you want more information about faux leather earring holes or you need help deciding which version you want to use.
Once you’ve deleted the shapes you aren’t going to cut, you can save time by grouping layers that will cut from the same material using the same material settings onto the same mat. I use the Color Sync feature for this.
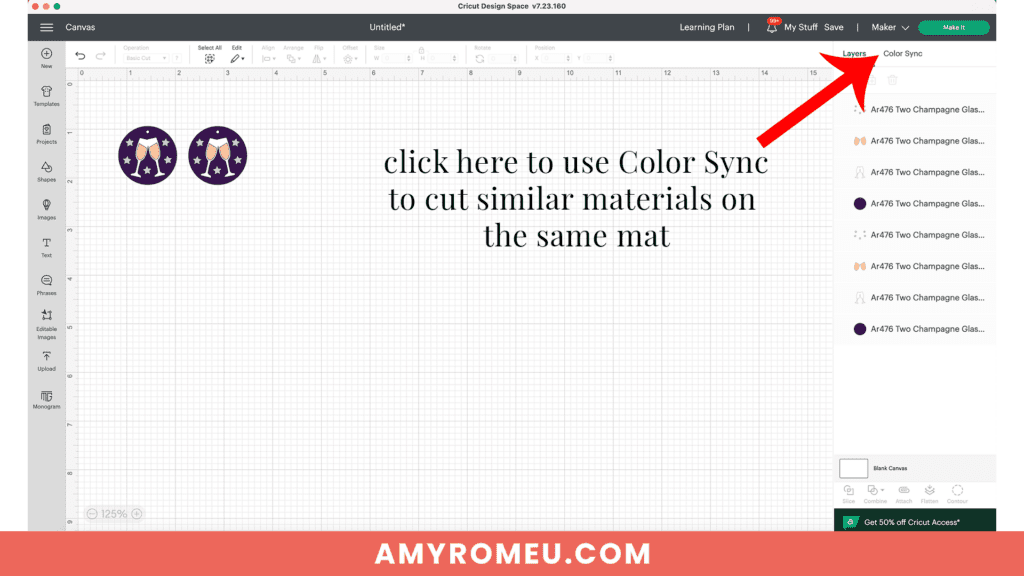
Click on Color Sync on top of the layers panel. You’ll see all of the layers in this design sorted by color. I’m cutting the gold and silver layers from glitter heat transfer vinyl, so I’ll color sync those two mats onto one mat instead.
Click on one layer that will cut from a certain material (like glitter heat transfer vinyl) and drag it up to another layer cutting with the same material.
In this project, I dragged the silver layers up to the gold layers so they will cut on the same mat.
When I was finished color syncing, my canvas looked like this:
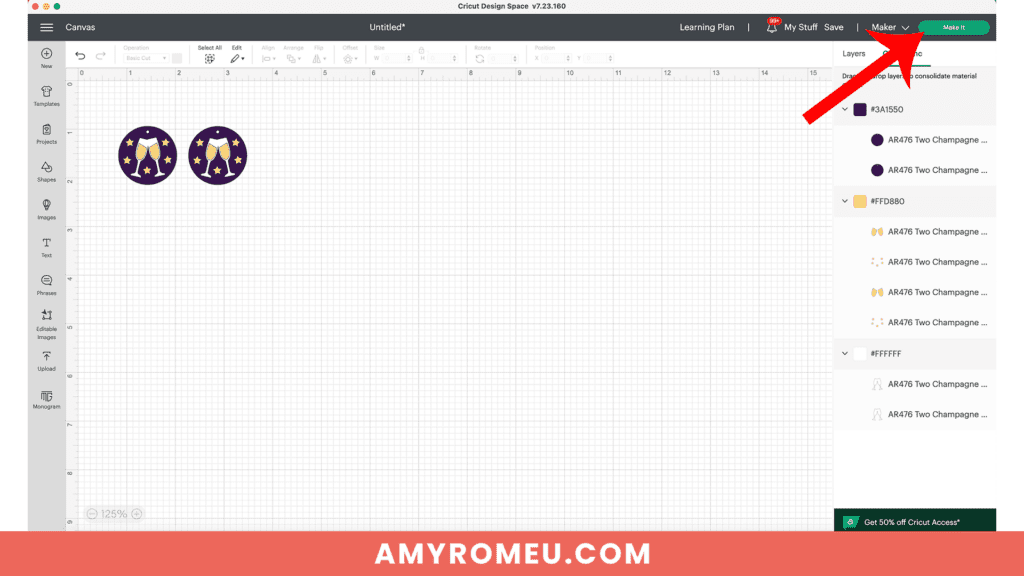
It doesn’t matter which color you choose to drag the other layers to, and don’t be alarmed that your design on the canvas has changed colors. You’ll still choose which colors of vinyl to cut for each layer.
It isn’t necessary to resize the earrings. Click the green “Make It” button.
STEP 3 – Prepare to Cut Earring Shapes in Cricut Design Space
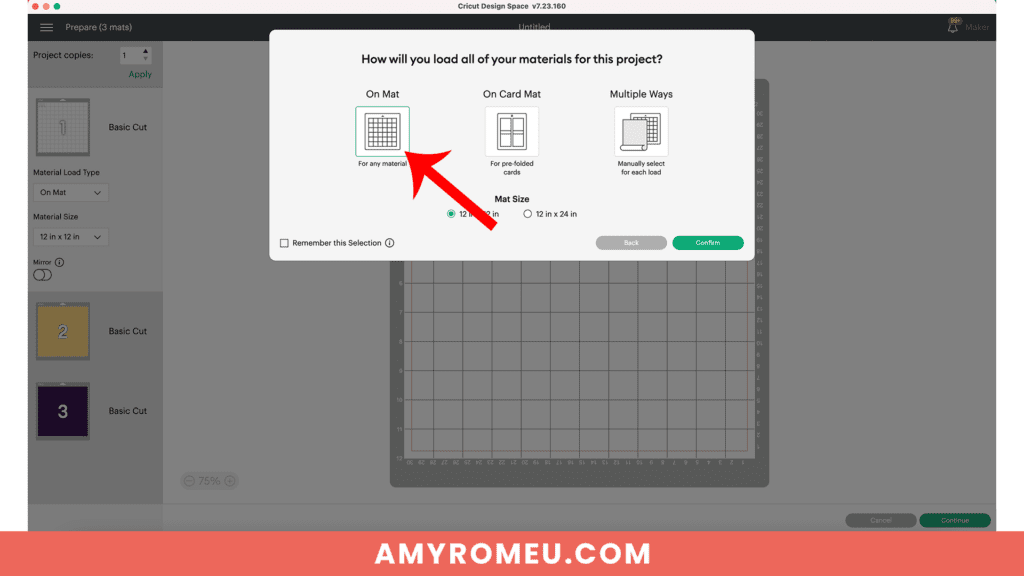
You’ll be prompted to choose how you will load your materials for this project. Choose ON MAT. Then click CONTINUE.
The mat preview screen will show all of the mats for this faux leather earrings project, separated by color on the left hand side.
For this project, I used dark purple faux leather for the bottom layer. I used white heat transfer vinyl for the champagne glass layer. The I used gold glitter heat transfer vinyl for the champagne inside the glasses and silver glitter heat transfer vinyl for the stars.
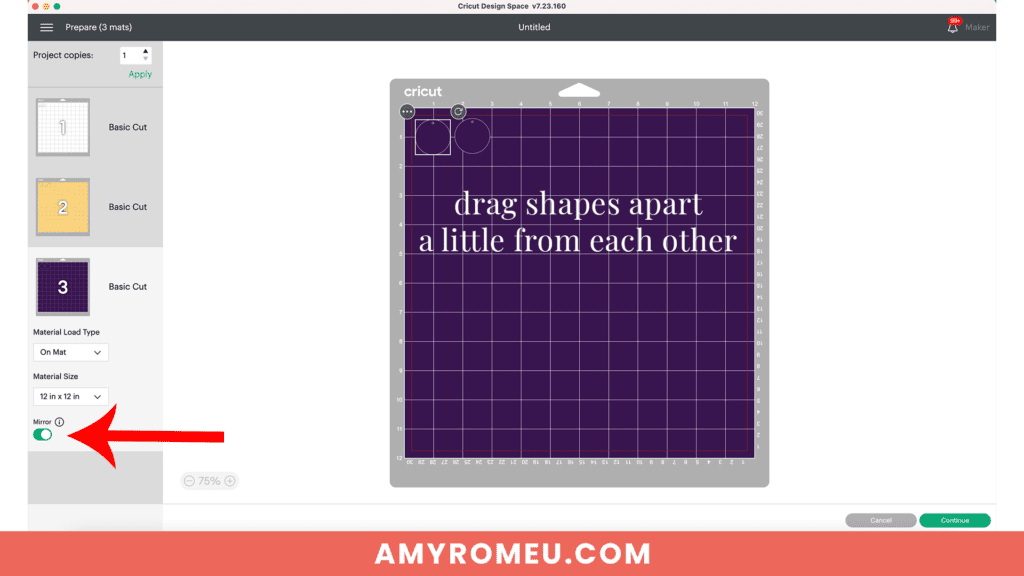
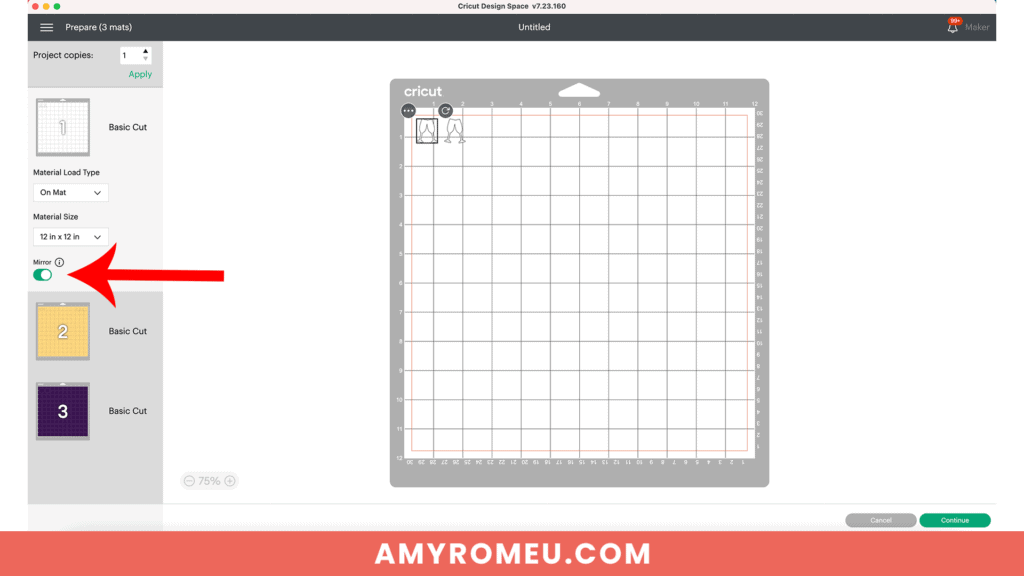
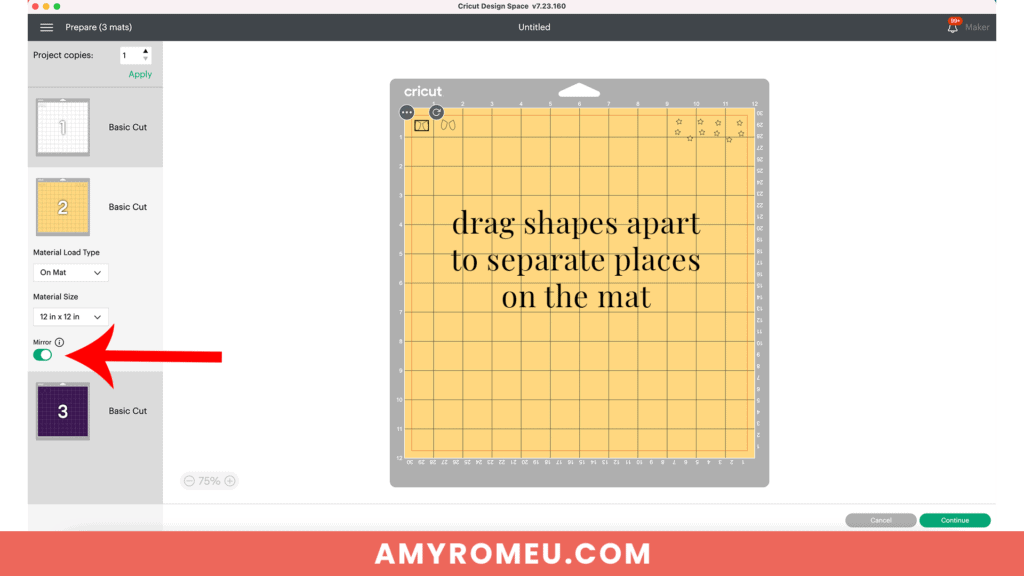
First, toggle the MIRROR button to ON for all the mats in the project. This is because faux leather and heat transfer vinyl cut face down. (If you are using permanent vinyl instead of heat transfer vinyl, don’t mirror the mats you plan to cut from permanent vinyl).
On each mat preview, click and drag the shapes apart from each other just slightly.
If you used Color Sync to put different colored layers on the same mat, drag those shapes to different areas of your mat preview so you can cut them easily from different materials. I’ll have some photos of what that looks like below when I cut the vinyl mats.
After you mirror and separate all the shapes on their mats, click back on the faux leather mat to select it. Click the green CONTINUE button to make the first material selection.
STEP 4 – Make Material Selections
Note for Explore Air 2 users: Cricut Explore Air 2 users will need to turn the dial to “Custom” before choosing Faux Leather (Paper Thin).
Note for Cricut Joy users: Cricut Joy users should check out my tutorial on How to Make Earrings with the Cricut Joy with more specific instructions for Joy users.
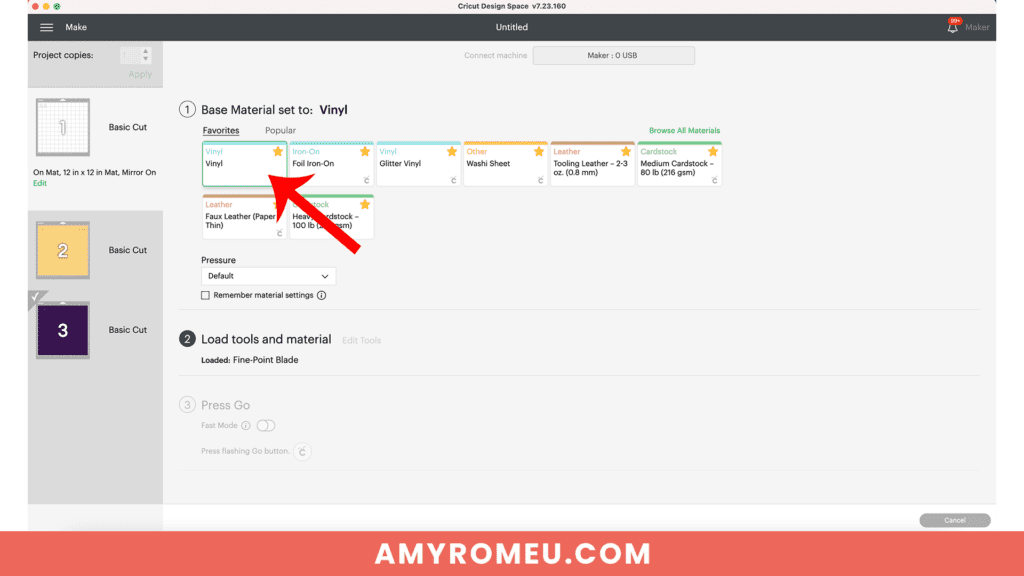
I always cut the faux leather mat first. Click on the faux leather mat to select it.
On the Material Selection screen, choose Faux Leather (Paper Thin) as the material setting. If you don’t have this material setting as a favorite, click “Browse All Materials” to search for it and select it.
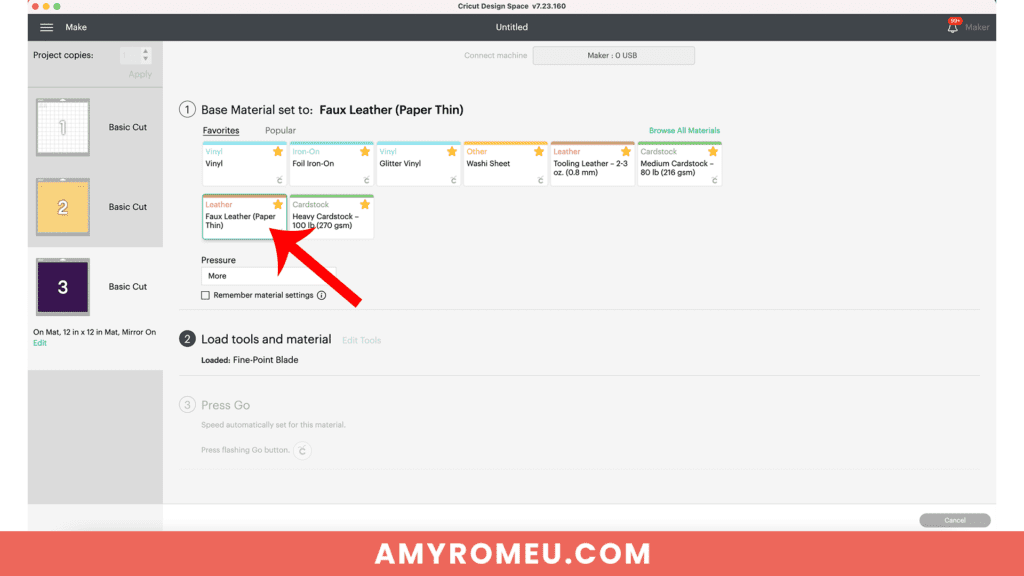
Then select “More” from the Pressure dropdown menu.
Now it’s time to prepare the faux leather mat to cut.
STEP 5 – Cut the Faux Leather Mat
NOTE: I didn’t put a backing on these faux leather earrings in this tutorial to keep it as short as possible. But I do have a post here and a YouTube video here that demonstrate four ways to put a back on faux leather earrings if you want to learn more.
Cut a piece of faux leather just slightly larger than the size shown in the mat preview screen.
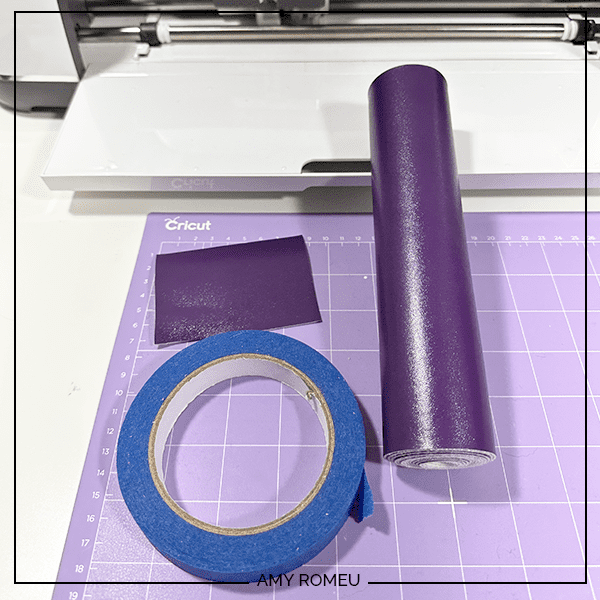
Place it pretty side down on a sticky purple cutting mat in the same location shown in the mat preview screen.
Tape the faux leather down on all sides with blue painter’s tape.
Make sure the white “star wheels” on the roller bar are pushed off to the side so the wheels don’t make indentations in your material.
Load the mat into the Cricut by lining up the mat with the guides and pressing the double arrows button. The machine will pull the mat into the machine.
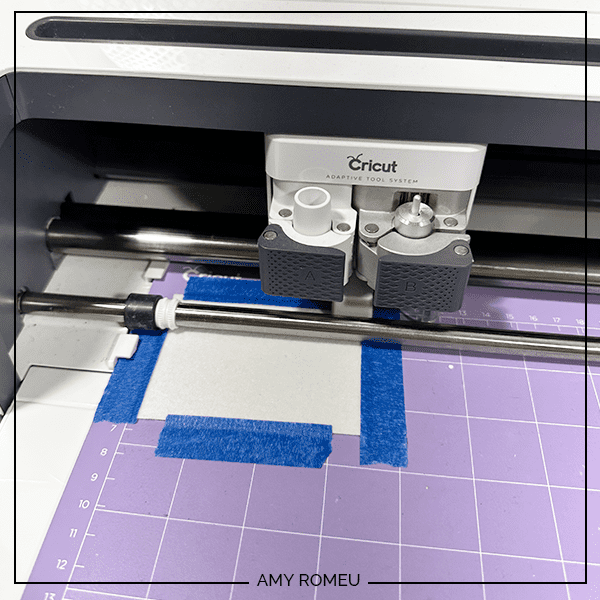
Press the C button to begin the cut.
After the cut is complete and before unloading the mat, use a weeding tool to carefully lift the edge of the faux leather shape to see if the cut was complete.
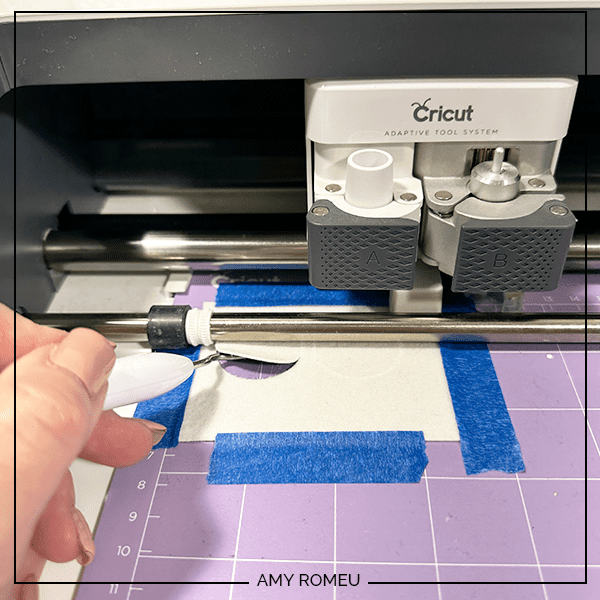
If not, press the C button again to repeat the cut.
Unload the mat and remove the earring shapes. You can trim any stray fuzz with small curved scissors.
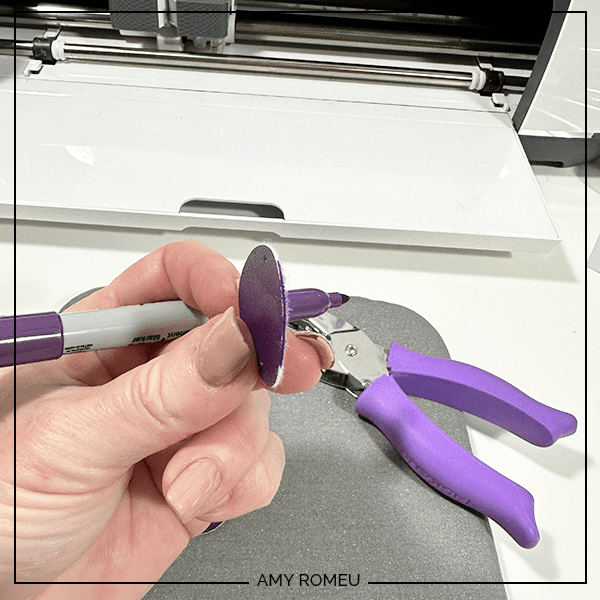
Use a sharp weeding tool to poke through the earring holes. If they didn’t cut completely, use a 1/16″ hole punch to punch the earring holes.
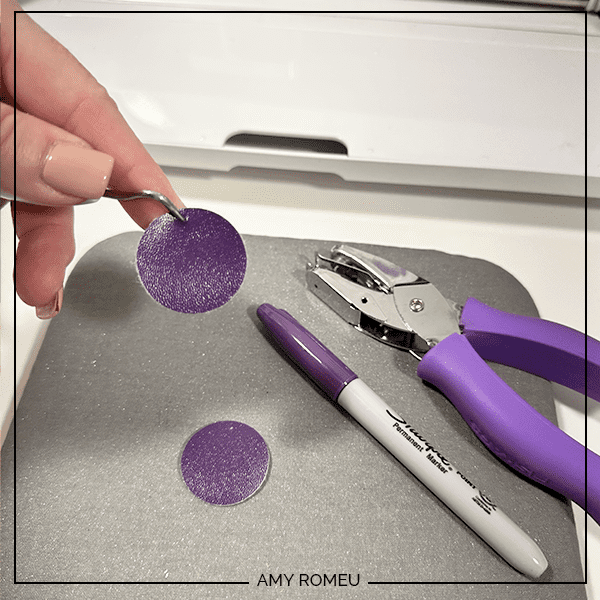
If you don’t like seeing the white edges on the faux leather, you can color them with a color coordinated Sharpie marker.
STEP 6 – Cut the Vinyl Mats
In Cricut Design Space, on the left hand mat preview, click on one of the vinyl mats. The white mat is the first vinyl layer that will be pressed to the earrings, so I’ll cut regular heat transfer vinyl mat first.
When the shapes load onto the mat preview screen, first toggle the MIRROR setting to ON. (This is for using heat transfer vinyl. If you are using permanent vinyl, leave the mirror toggle OFF).
Then use your cursor to drag the shapes to different places on the mat.
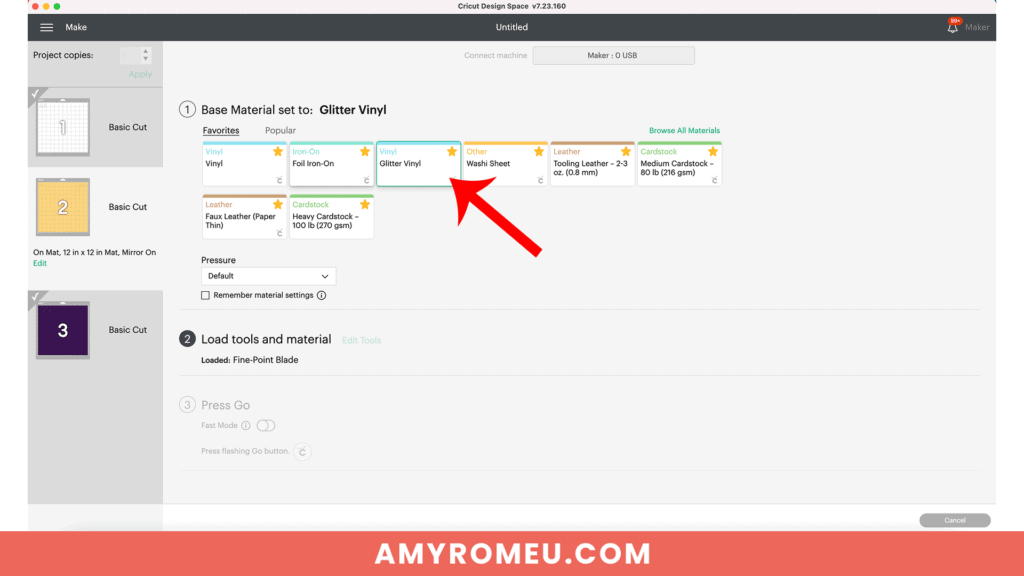
Choose your material setting according to the vinyl type you are using. I use the “Vinyl” setting or the “Washi Sheet” setting for regular HTV with “default” pressure.
I use the “Glitter Vinyl” setting with “default” pressure for glitter heat transfer vinyl (and repeat the cut one time if the glitter is thick).
Place the heat transfer vinyl shiny side down on a green standard grip cutting mat in the location shown on the mat preview screen.
Load the green mat into the Cricut and press the C button to begin the cut.
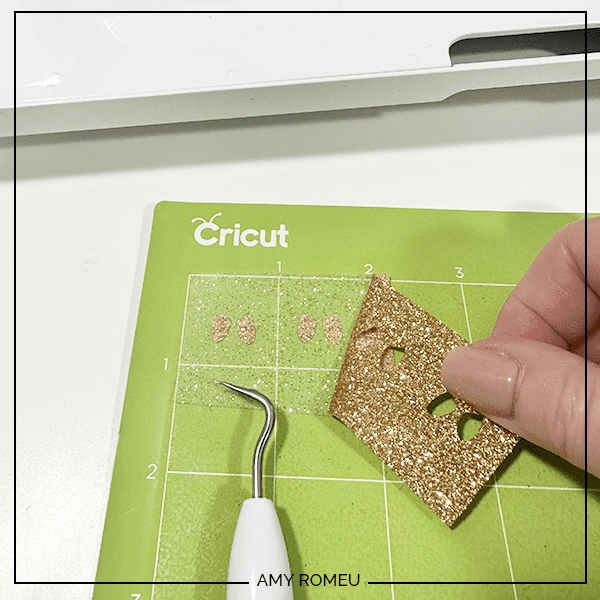
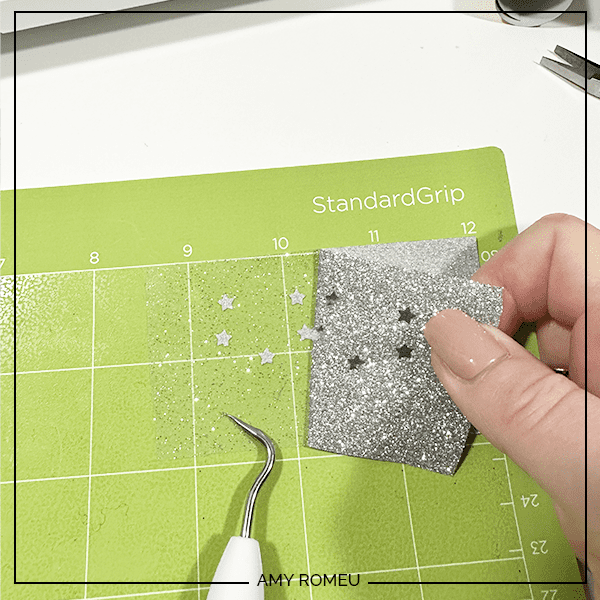
When the cut is complete, unload the mat and weed away the excess vinyl using a weeding tool.
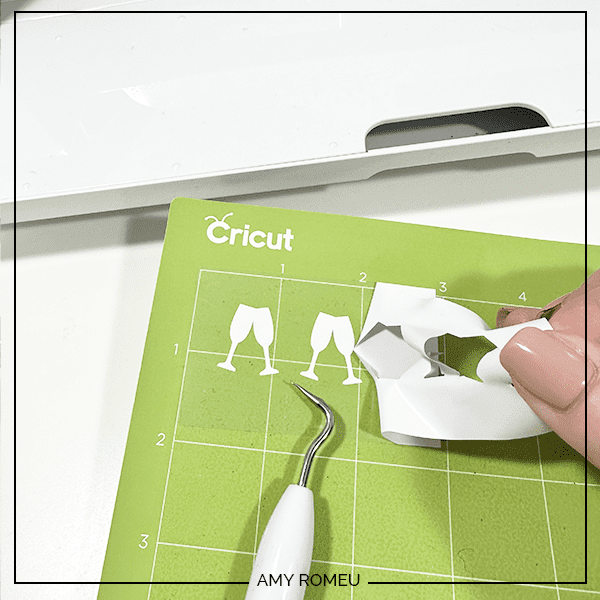
Repeat cutting the rest of the vinyl mats, weed the excess vinyl, and trim the shapes apart with scissors.
NOTE: If you are using Siser Glitter heat transfer vinyl for any of your layers, I recommend repeating the cut once by pressing the C button again before unloading the mat.
Remember you can hover over the mat in the mat preview on the left hand side and see where to place your different colored vinyls (if you used Color Sync).

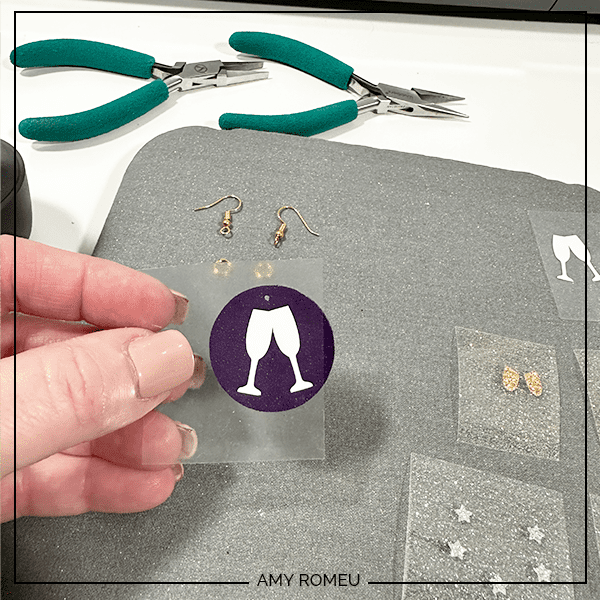
STEP 7 – Press the Vinyl to the Faux Leather Earring Shapes
Place all of your cut vinyl layers and the faux leather earring shapes together. Trim both layers apart from each other.
It’s important to have a heat pressing pad to protect your surface, as well as a cover sheet of some kind to put between the heat and your materials. You can use a piece of parchment paper, butcher paper, or a Teflon sheet.
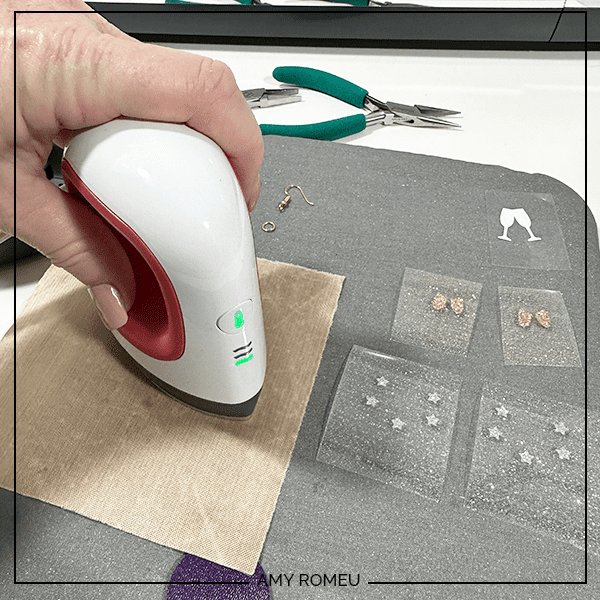
I press vinyl to faux leather using a Cricut EasyPress Mini on the “low” setting (one green bar). You can also use a traditional EasyPress set to 255-265 degrees.
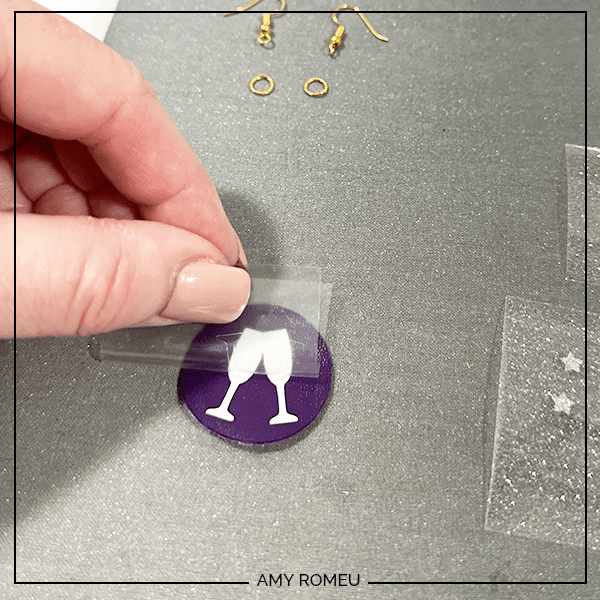
Place the faux leather shape on the pressing pad and layer the vinyl on top.
Cover with a cover sheet and press for 7-10 seconds. You can move the EasyPress Mini around like an iron if you’d like to.
After 10 seconds, remove the cover sheet and carefully try to peel up the clear vinyl cover sheet. If it peels up easily, remove it. If the vinyl is pulling up, place the clear vinyl cover layer back down and repeat pressing for 5-7 seconds. Repeat this process until the vinyl adheres to the faux leather well.
Layer the next vinyl layer onto the earring shape.
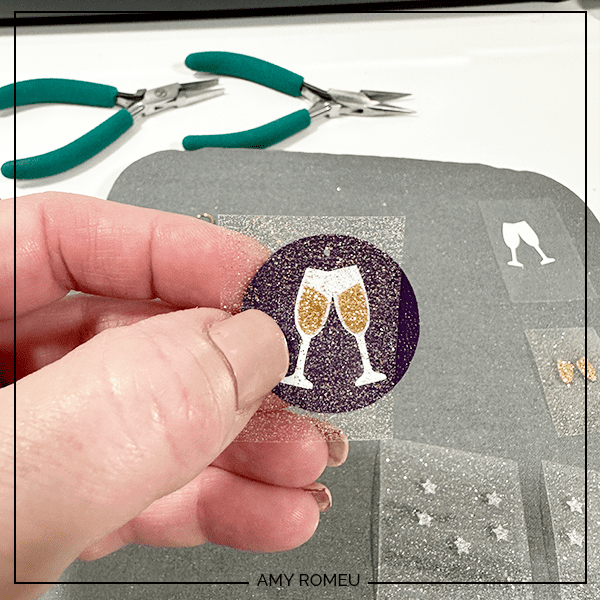
Repeat covering and pressing each layer until the last layer on vinyl is complete.
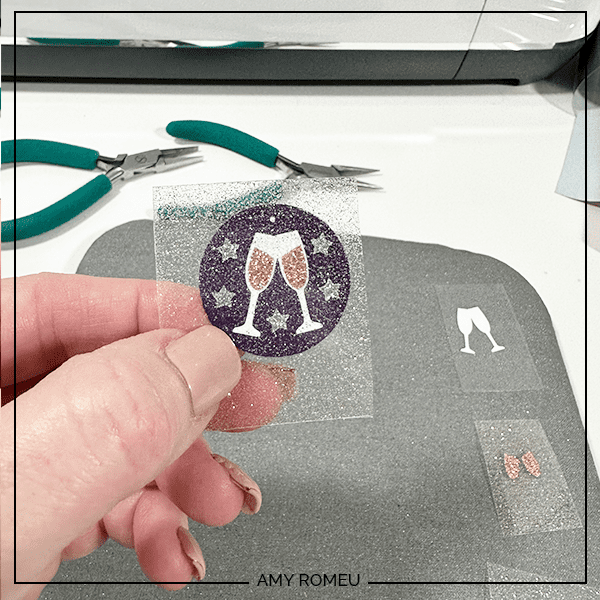
Then cover the earrings with your Teflon cover sheet or parchment paper and press one more time, for about 5 seconds.
Repeat the process with the second earrring.
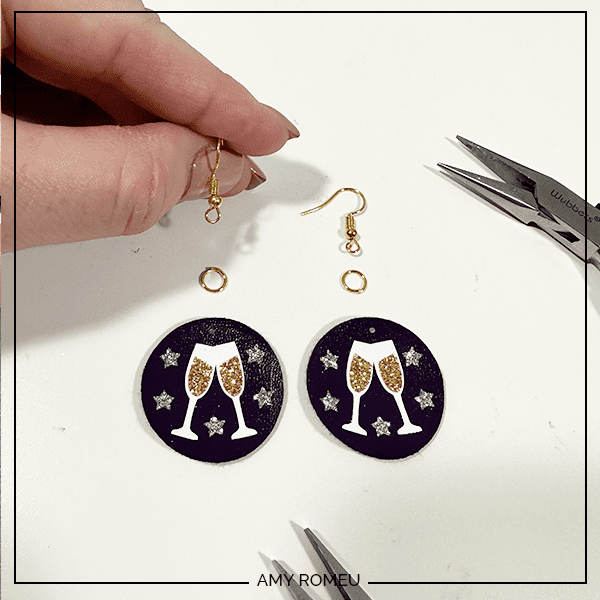
STEP 8 – Attach the Jump Rings and Earring Hooks
Now it’s time to attach the earrings hooks.
You’ll need two jump rings, earring hooks, and two pairs of flat nose pliers. I use 6mm jump rings.
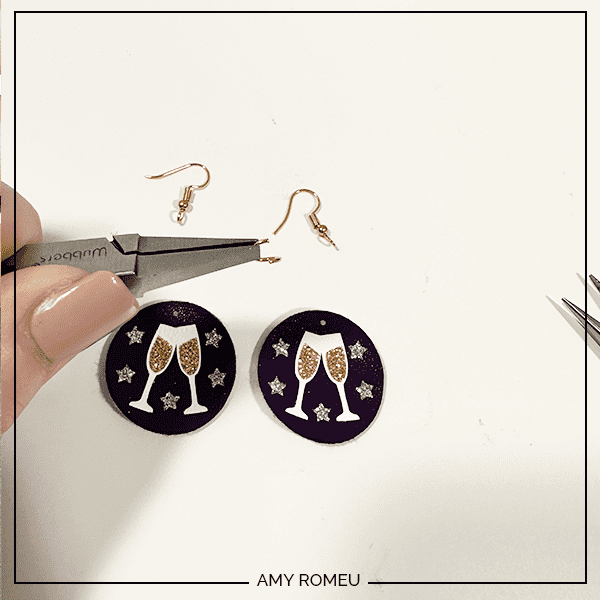
I like to twist the bottom loop of the earring hook 90 degrees first so the faux leather earrings hang straight.
For more details and step by step instructions on how to do that, you can watch my YouTube video here.
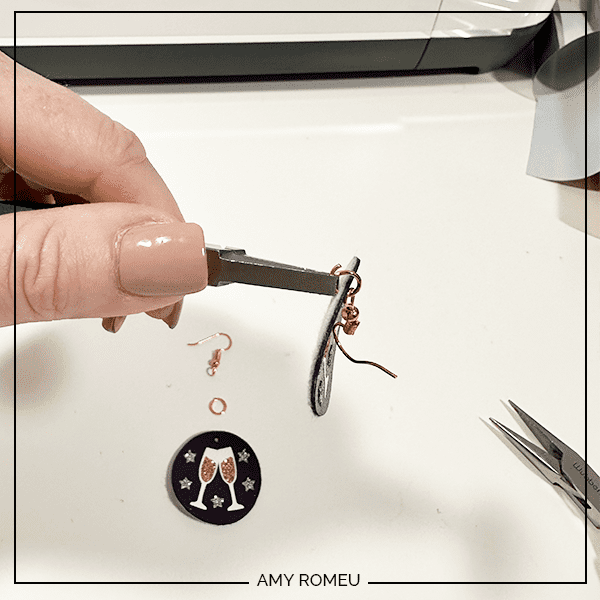
Then use the two pliers to open the jump rings and connect the faux leather earring shapes to the earring hooks. Close the jump rings tightly to keep the earrings secure.
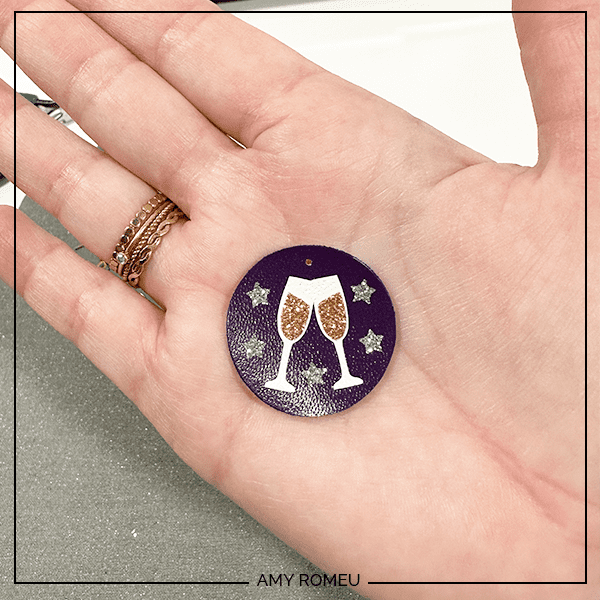
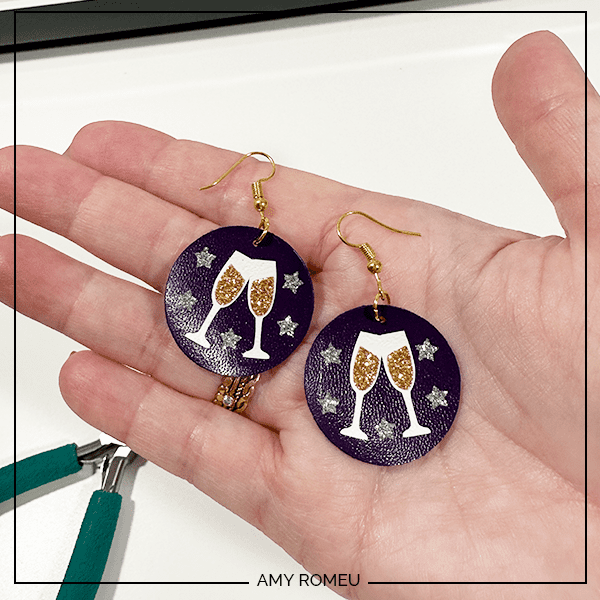
That’s it! Your Faux Leather Champagne Glass Earrings made with faux leather and a Cricut are complete!
If you made these earrings, I would love to see them! Please share them in my Free Cricut Crafting Facebook group, Get Crafty with Amy Romeu. You can request to join here.
Printable Instructions
Cricut Faux Leather Champagne Glasses New Year's Eve Earrings
Materials
- See blog post for materials & links.
Tools
- See blog post for tools & links.
Instructions
- Download and unzip the earring SVG folder. Upload the SVG file to Cricut Design Space.
- On the canvas you will see two versions of the earring SVG - one with pre-cut earring holes and one without. Decide which version you will cut and delete the other version. You will need to UNGROUP the shapes before you can delete individual shapes or layers.
- It isn't necessary to resize the earrings. Click the MAKE IT button.
- When Design Space asks how you will load the materials for this project, select ON MAT.
- In the mat preview screens, click on every mat and toggle the mirror button to ON. (This is for when you are cutting faux leather and heat transfer vinyl for the project. If you are using faux leather and permanent vinyl instead, only mirror the faux leather mat.)
- Now return to each mat and drag the shapes apart from the edges and each other slightly. Make a note of what size material you'll need to cut to place on the mat and cut the shape completely.
- When you've done this for each mat, click back on the faux leather mat. Click CONTINUE.
- I like to cut the faux leather mat first. Choose Faux Leather (Paper Thin) as the material setting. If you don't have this setting selected, click "Browse All Materials" and search for it. (On the Explore Air 2, turn your dial to Custom so you can see the Faux Leather material choice.) Then choose "more" from the Pressure drop down menu.
- Trim a piece of faux leather to the size you noted in the mat preview screen. Place it "pretty" side down on a sticky purple strong grip mat. Tape the faux leather down on all sides with blue painter's tape.
- Load the mat into the Cricut and press the C button to begin the cut. When the cut is complete, BEFORE unloading the mat, use a sharp object like a weeding tool to lift up the corner of a cut to see if it went all the way through. If it did, unload the mat. If not, repeat the cut by pressing the C button again. On a Joy, you'll repeat the cut by clicking on "Rerun" on the screen in Design Space.
- Remove the cut shapes from the mat. Trim away any fuzz with small sharp scissors. Color the edges of the faux leather if desired with a color coordinated Sharpie marker.
- Return to Design Space and cut any vinyl mats using a green standard grip cutting mat. Place heat transfer vinyl shiny side down. I use the Vinyl setting or the Washi Sheet setting with "default" pressure for regular heat transfer vinyl. I use the Glitter Vinyl setting with "default" pressure for glitter heat transfer vinyl and I repeat the cut once if the glitter is thick (Siser brand). For permanent vinyl, I use the Vinyl setting with "default" pressure (make sure mats are NOT mirrored).
- Weed away the excess vinyl and cut the vinyl shapes apart.
- Using a Cricut EasyPress Mini set on the "low" setting or an EasyPress set to 265 degrees, press the heat transfer vinyl layers onto the faux leather base one at a time. Refer to the Layers Guide in the tutorial for the pressing order. Place the first vinyl layer onto the faux leather and cover with a cover sheet - Teflon sheet, butcher paper or parchment paper. Then press for 5-10 seconds. Remove the cover sheet and try to peel away the clear vinyl carrier sheet. If the vinyl lifts up, replace the clear carrier sheet and cover sheet and press again for 5-7 seconds.
- After the first vinyl layer is pressed, press each additional layer following the directions above. Once all layers are pressed, cover the earrings with the cover sheet and press once more for 3-5 seconds.
- If you are using traditional shepherds earring hooks, turn the earring hooks 90 degrees with pliers first so the earrings hang straight. Then connect the earring and the earring hook using a 6mm jump ring.
You can get the Champagne Glass Earrings SVG template from my blog’s free library. It’s Design #201. Get the password and library link emailed to you instantly by filling out the form below.
Want to remember this? Post this CRICUT FAUX LEATHER CHAMPAGNE GLASSES EARRINGS project to your favorite Pinterest board!