
How to Make a Faux Leather Bow Purse Charm with a Cricut
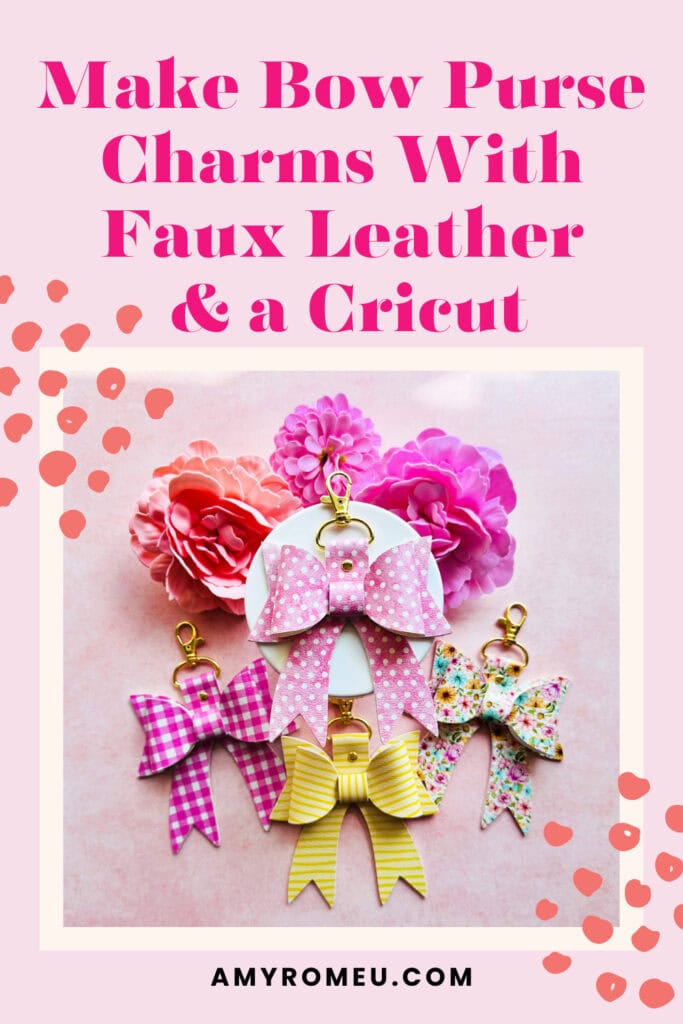
Learn how to make a Faux Leather Bow Purse Charm with a Cricut
This project is Day 10 of The Spring Fling Crafting Event!
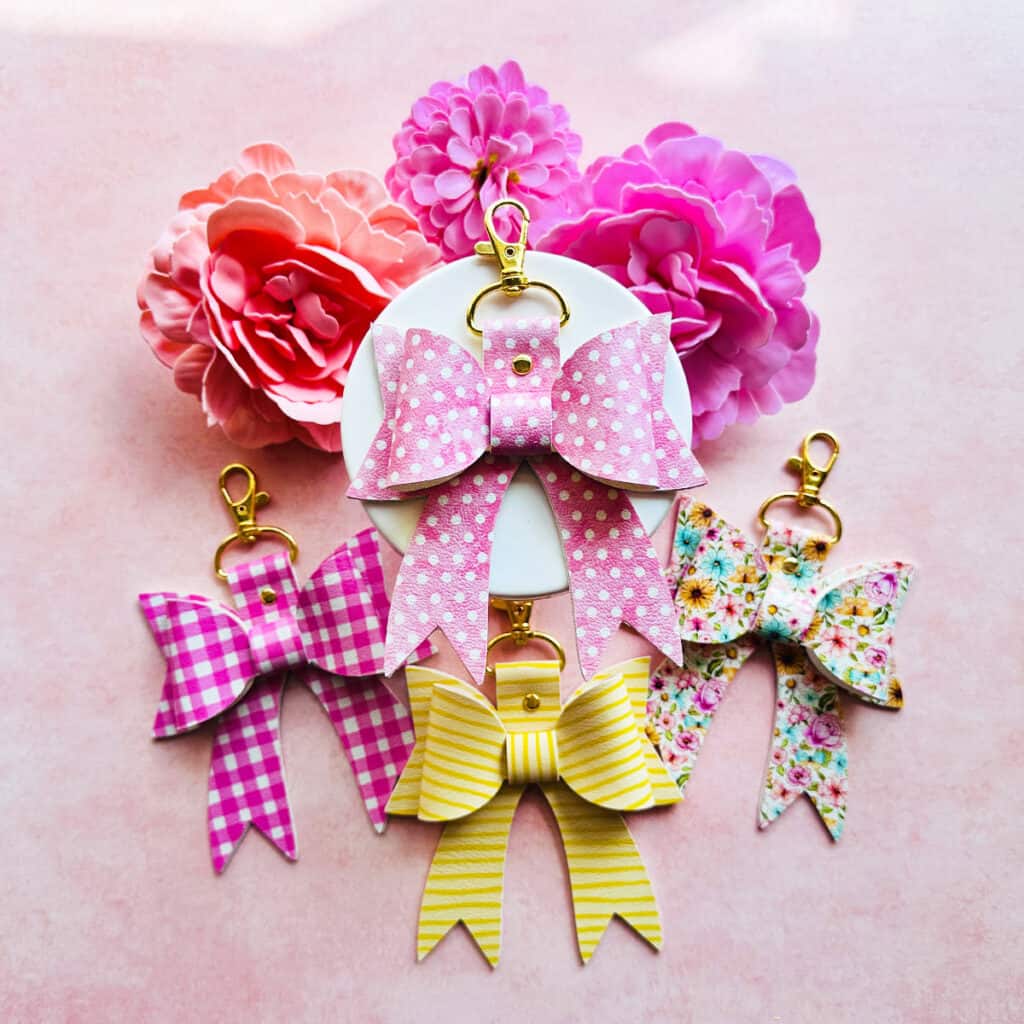
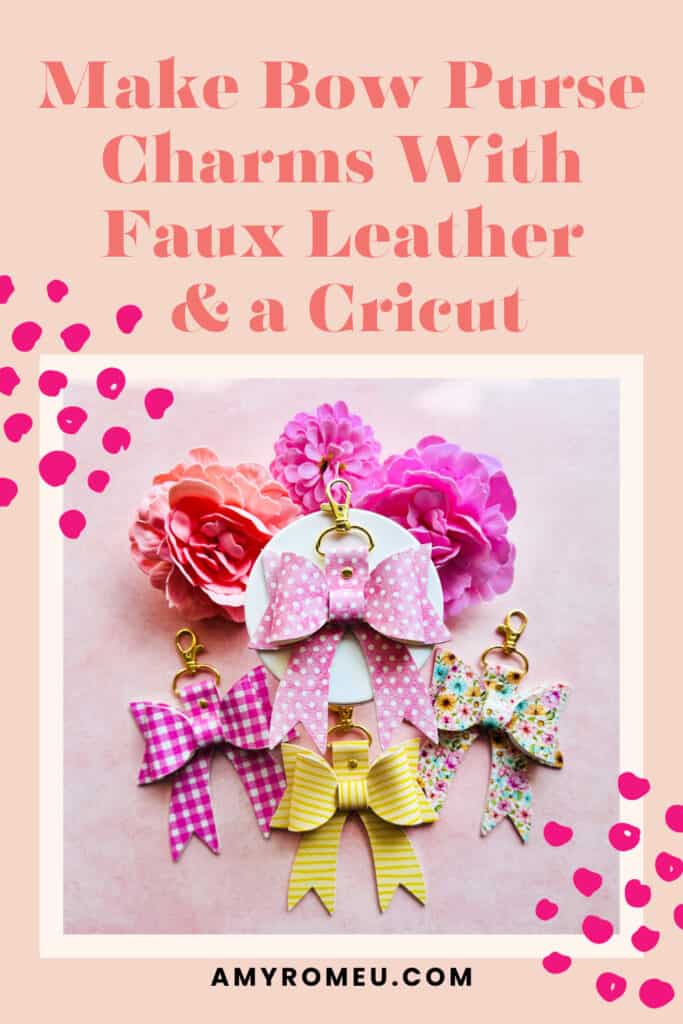
I’m Amy Romeu, and in this tutorial I’ll be showing you how to make these pretty faux leather bow purse charms with a Cricut. Bows are so popular right now in fashion and accessories, so this will be the perfect accessory for your purse, backpack or keys this Spring.
Follow along with this written tutorial including all the materials, SVG files, and tips you need.
Ready to get started with this beginner friendly Spring Cricut craft tutorial?
Get the SVG in my Shop
Personal or Small Commercial Use Available
Let’s dive into the materials and steps!
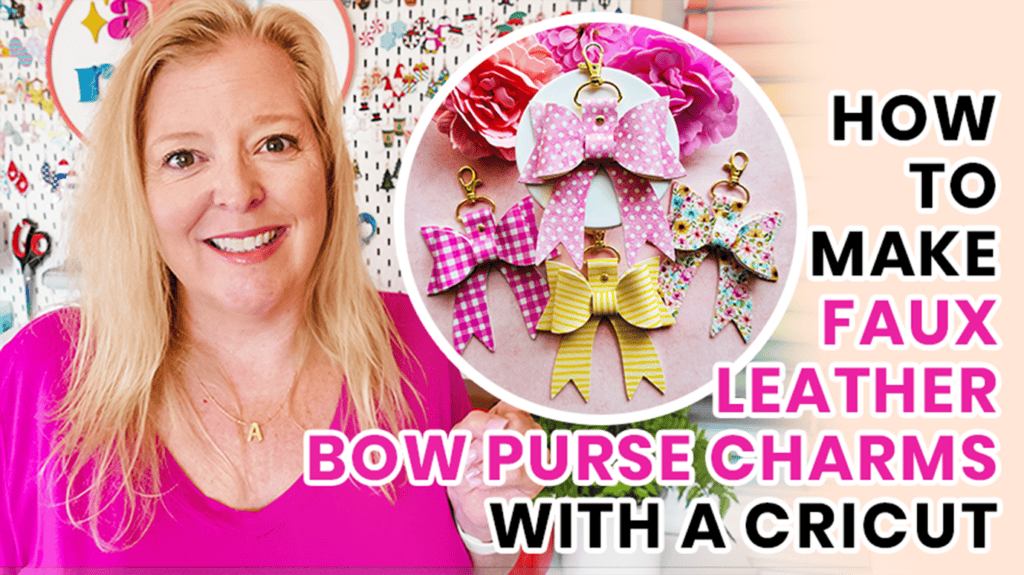
Want to watch a video tutorial instead? Check it out below!
See the full step by step video tutorial
Click the image below to watch the video on my YouTube channel, or click here.
How to make a Faux Leather Bow Purse Charm with a Cricut Step by Step
This page contains some affiliate links (which means if you make a purchase after clicking a link, I will earn a small commission at no additional cost to you). Read my full disclosure policy here.
Materials you’ll need to make a Faux Leather Bow Purse Charm with a Cricut
🛒 To shop many of these supplies below in my Amazon storefront, click here. 🛒
Compatible Machines✅: Cricut Maker, Cricut Maker 3, Cricut Maker 4, Cricut Explore Air 2, Cricut Explore 3, Cricut Explore 4, Cricut Joy Xtra, Cricut Joy (with the 12 inch long mat)
Blade Used: Standard Fine Point Blade
Cut Setting Used✂️: Faux Leather (Paper Thin) with “More” pressure
- Faux Leather
- Use any faux leather you’d like! I used these fun prints and patterns: Gingham in Carnation Pink, Watercolor Dots, HoneyBee Stripes, and this Butterfly Floral.
- I buy 9×12 inch size, Portrait Orientation, Regular Scaling but you can choose whatever options you’d like!
- Other Project Supplies
- 1 inch wide Swivel Lobster Clasps with D-Rings in Gold or Silver
- 6mm Rivets with tools and a hammer
- 6mm Rivets in Gold or Silver
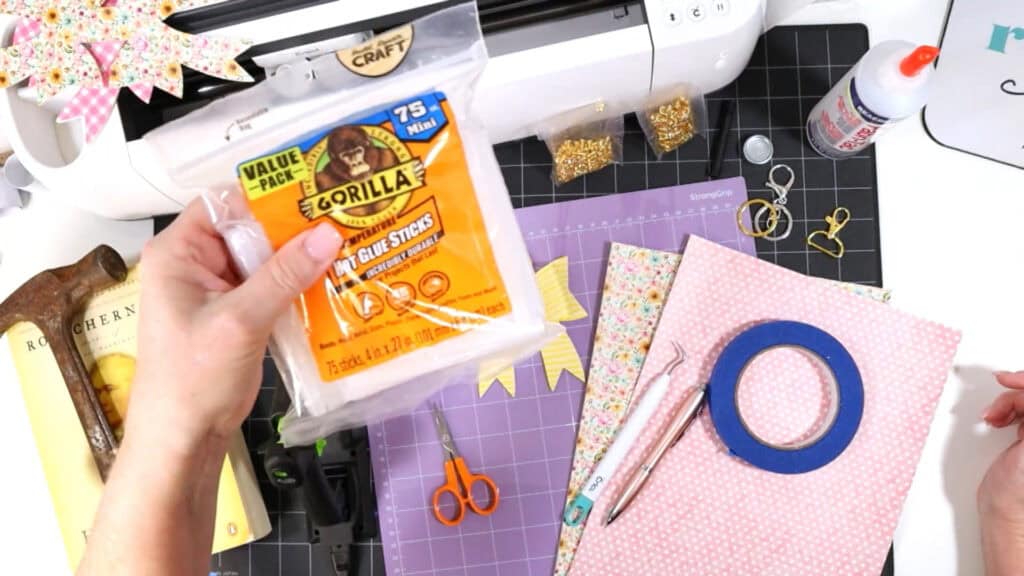
- Beacon Fabri-Tac Glue
- Cordless Mini Glue Gun
- Gorilla Glue Mini Glue Sticks
- Teflon Sheets
- Blue Painters Tape
- Small Curved Scissors
- 10mm Jump Rings
- Other Cricut Supplies
- Purple Strong Grip Mat
- Weeding Tool like a Pin Pen or like the one in the Cricut Basic Tool Set
- The SVG template for this project is available in my shop here or inside the Spring Fling Crafting Event VIP Pass.
Get the SVG in my Shop
Personal or Small Commercial Use Available
Step by Step Instructions
Step 1
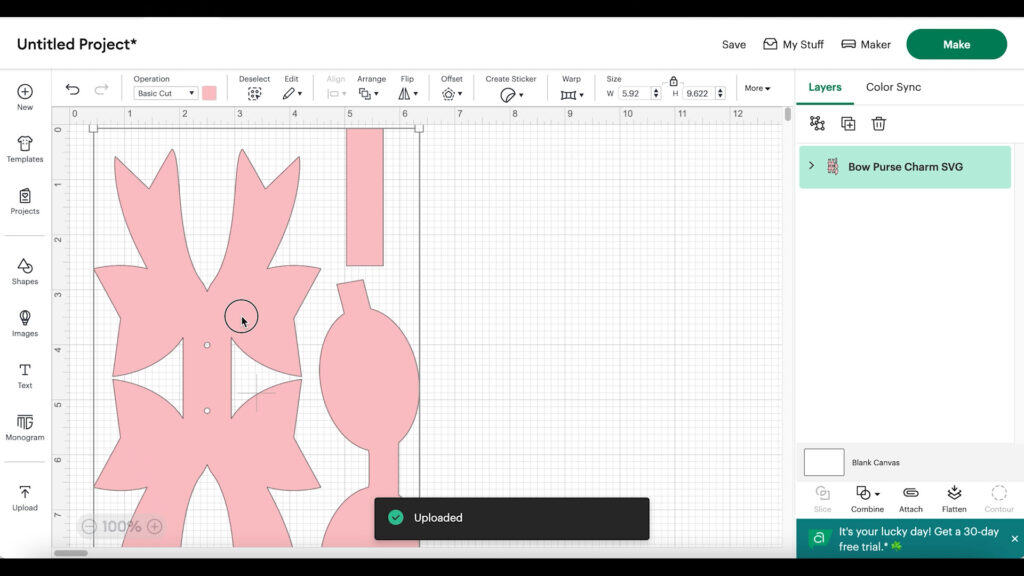
Starting with a blank canvas in Cricut Design Space, click on Upload, then Upload Image.
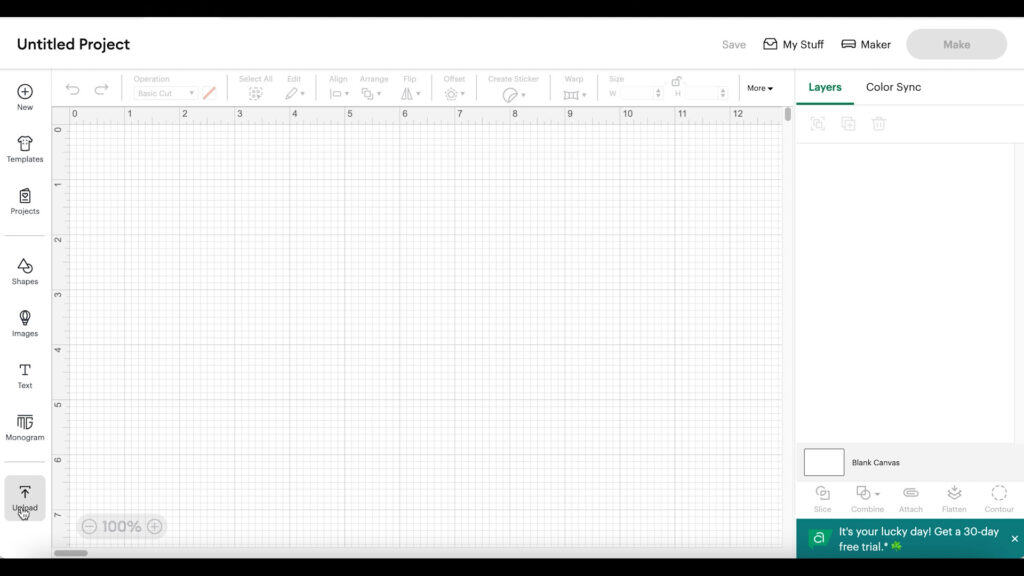
Browse to where the ALREADY UNZIPPED SVG file for this project is saved on your device.

Click on the SVG to select it and follow the prompts to upload it.
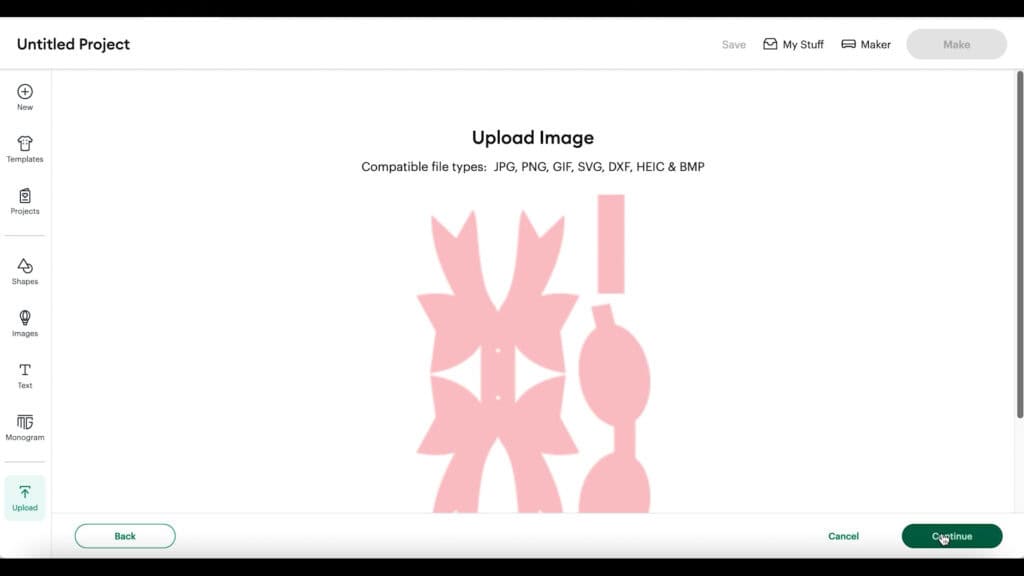
The bow will load on the canvas.
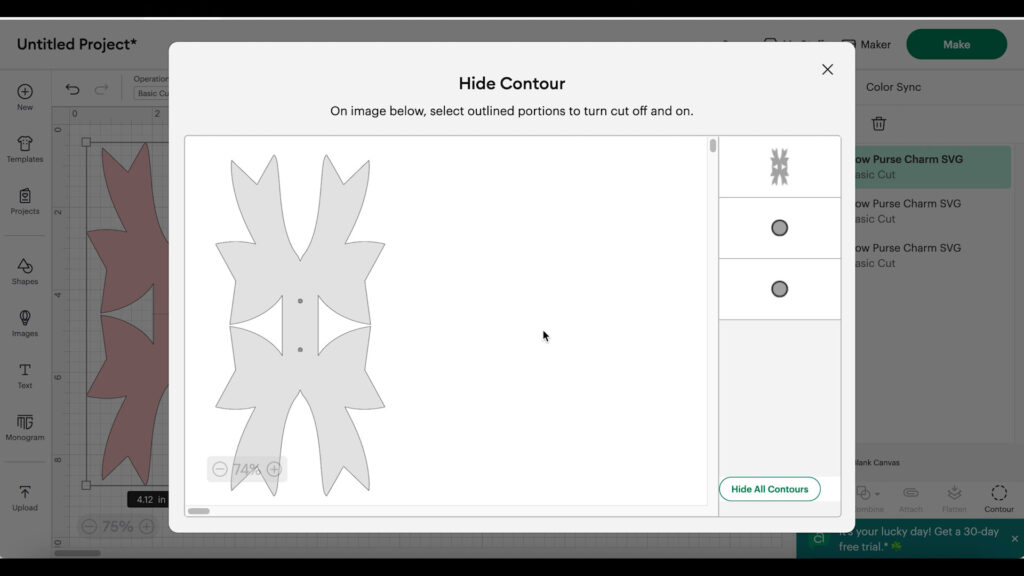
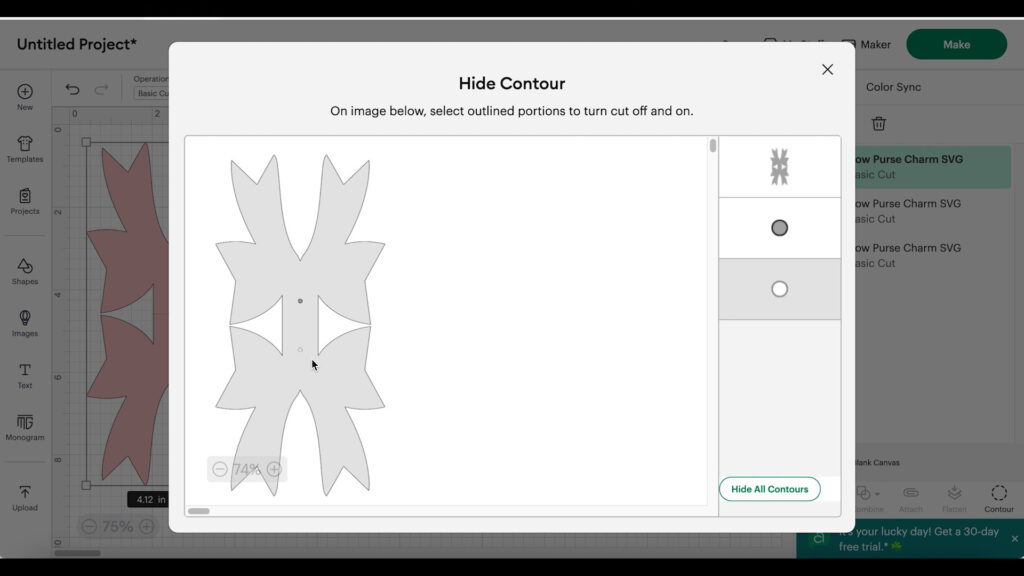
The two small holes are pre-cut for a 6mm rivet. If you don’t want to make this project with a rivet, you can use glue instead, but you’ll want to hide those holes so they don’t cut.
First click on the Contour icon (far right in the options row at the bottom of the layers panel).
When the Contour box opens, click on the two dark cut circles. This will turn them light grey and will hide them from cutting when you close out the Contour panel.
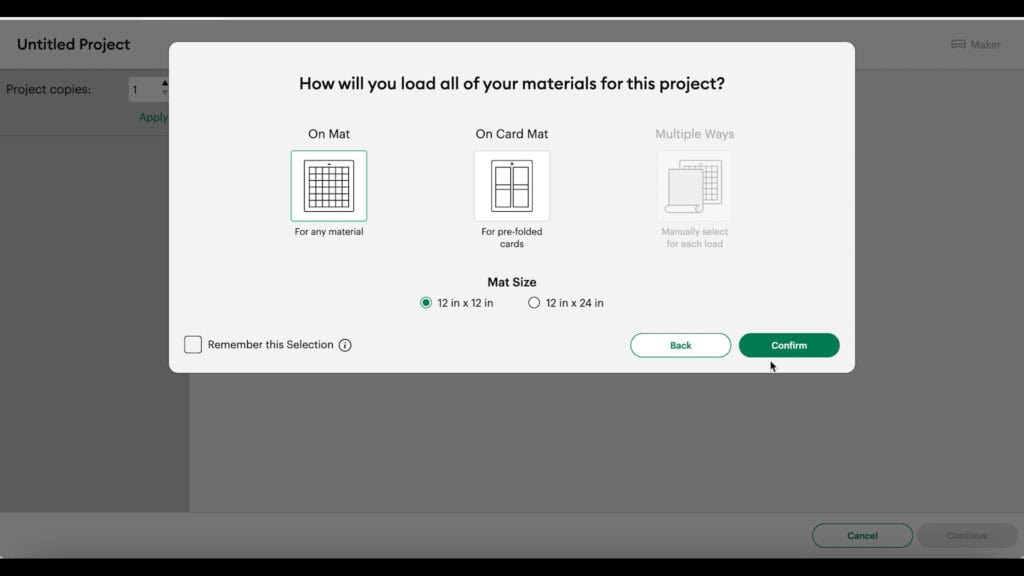
Click the MAKE IT button. Choose “on a mat” for how you’ll cut the material.
STEP 2
Click on the mat on the left hand side and toggle the Mirror toggle ON. That’s because faux leather always cuts in reverse.
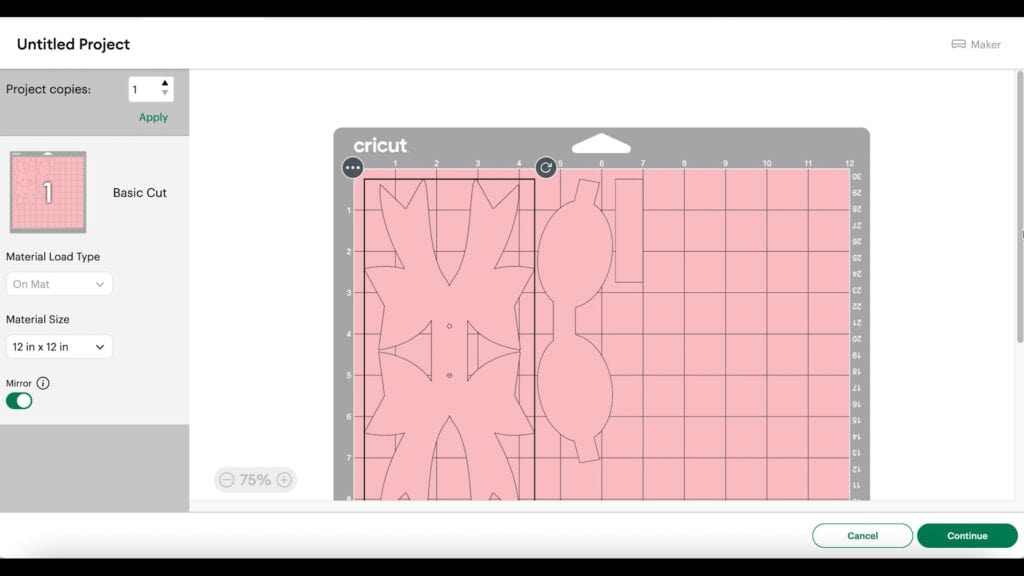
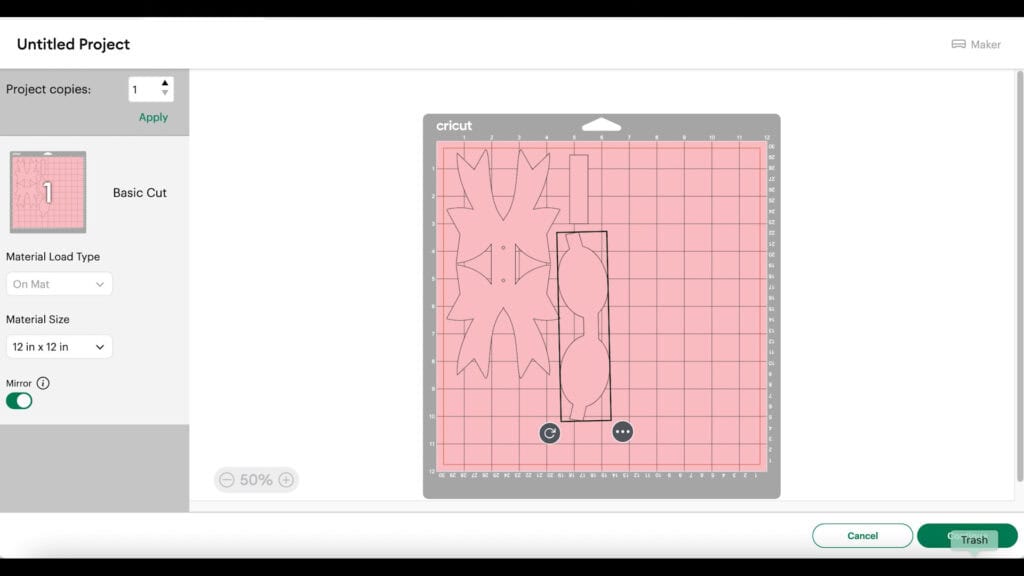
After all the mat is mirrored, drag the shape apart from the edges a bit. You can also drag the shapes around to fit better inside the confines of the shape of your piece of faux leather.
Click the Continue button.
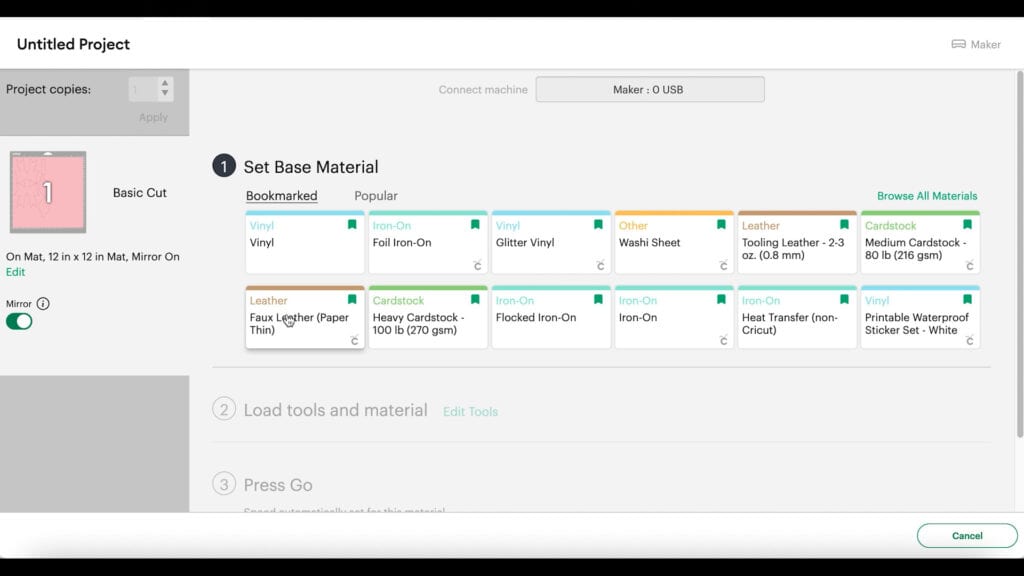
When the material selection screen loads, click on the faux leather mat and then select the Faux Leather (Paper Thin) setting.
If you don’t have that setting bookmarked as a favorite like I do, you can click on Browse All Materials and search for it. (If you are using the Explore Air 2, you’ll need to turn your dial to Custom before you can find that setting in search.)
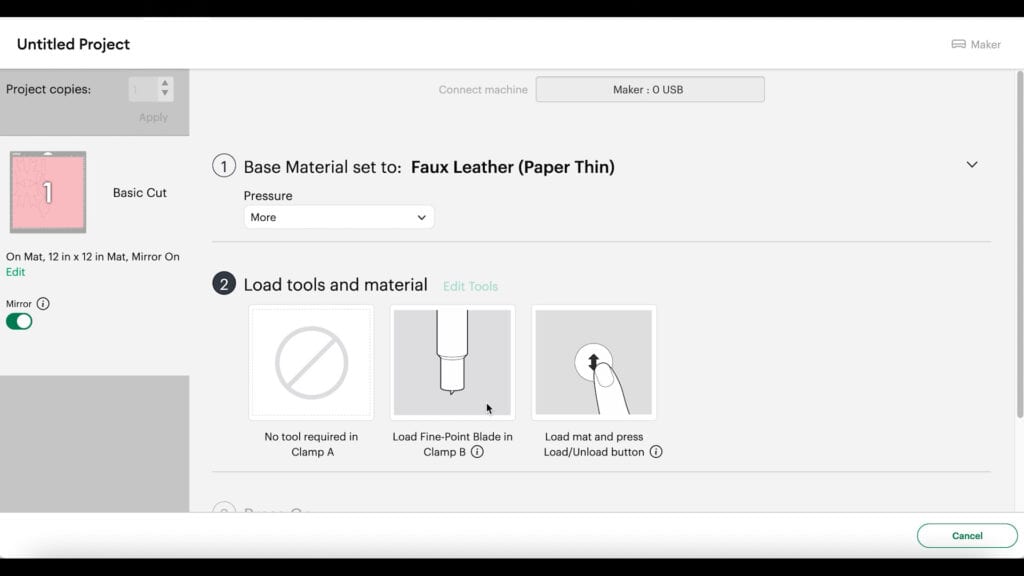
Then choose “More” from the dropdown Pressure menu.
Step 3
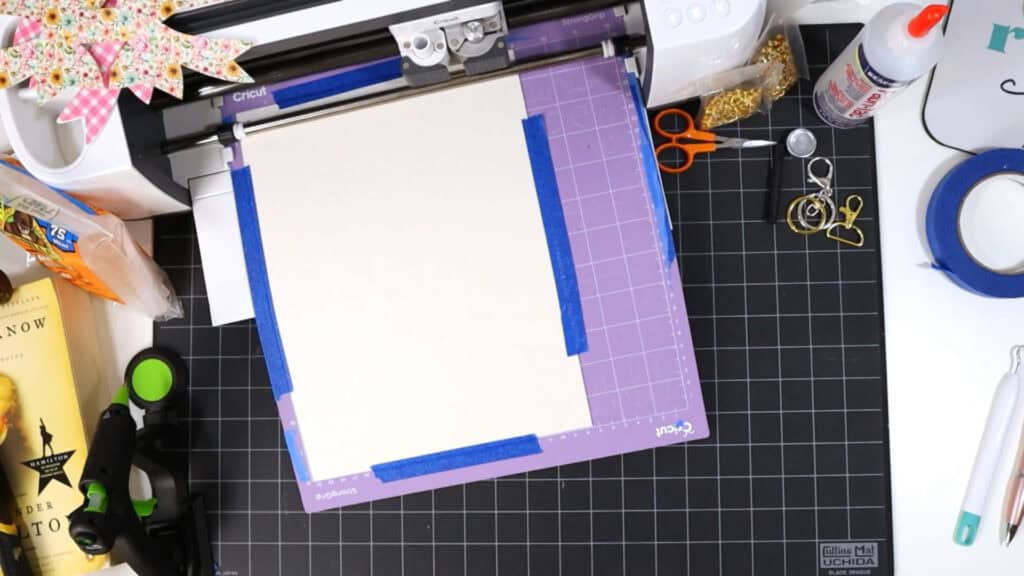
Cut your faux leather mat. To do that, place your faux leathers pretty side down on the areas of the mat you saw the bow shapes will cut from the mat preview screen.
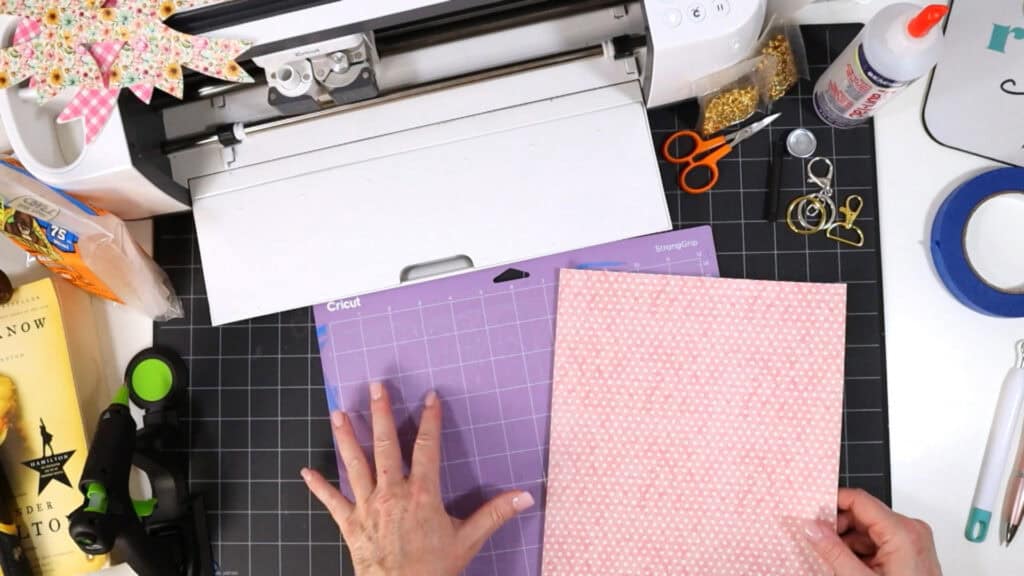
Place blue painter’s tape around all sides of the faux leather. Load the mat into the Cricut and begin the cut.
When the cut is complete, before unloading the mat, lift a small edge of the cut to ensure the cut went through. Repeat the cut if needed by pressing the cut button again.
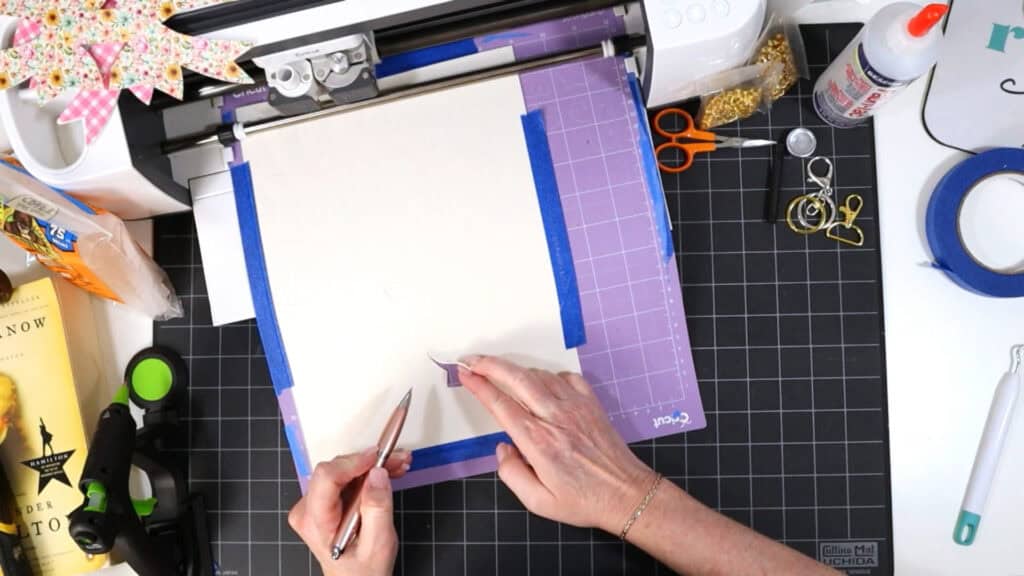
Once the bow shapes are cut through, remove the shapes from the mat.
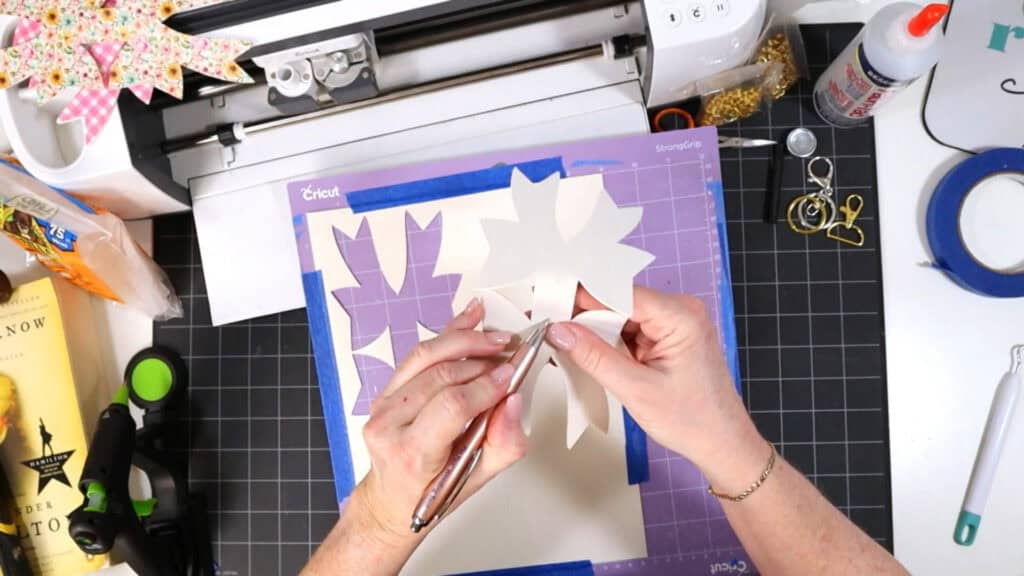
Use a sharp weeding tool to poke through the rivet holes (if you are making this project with a rivet.)
Use small curved scissors to trim any areas of the faux leather cut as needed.
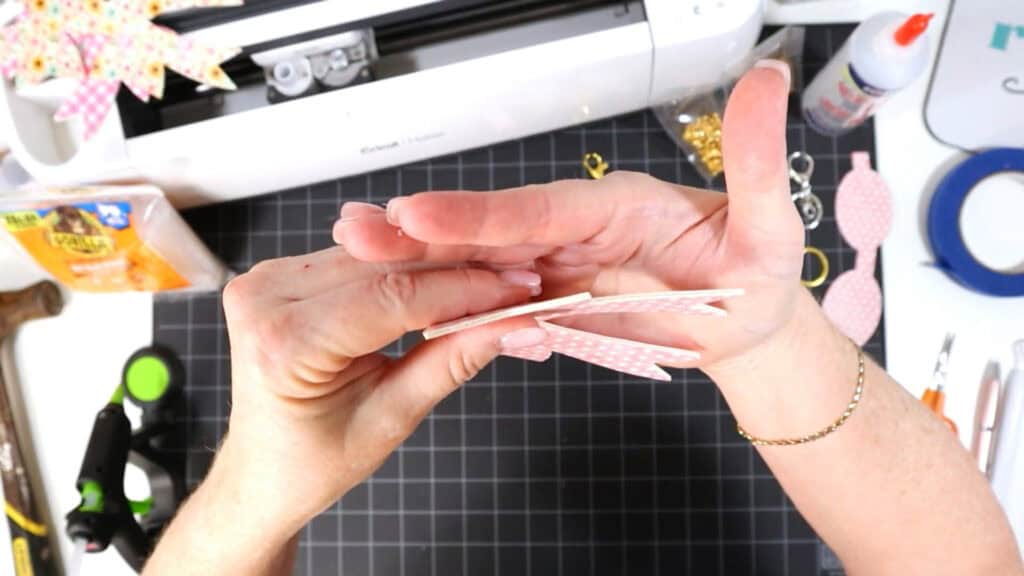
Step 4
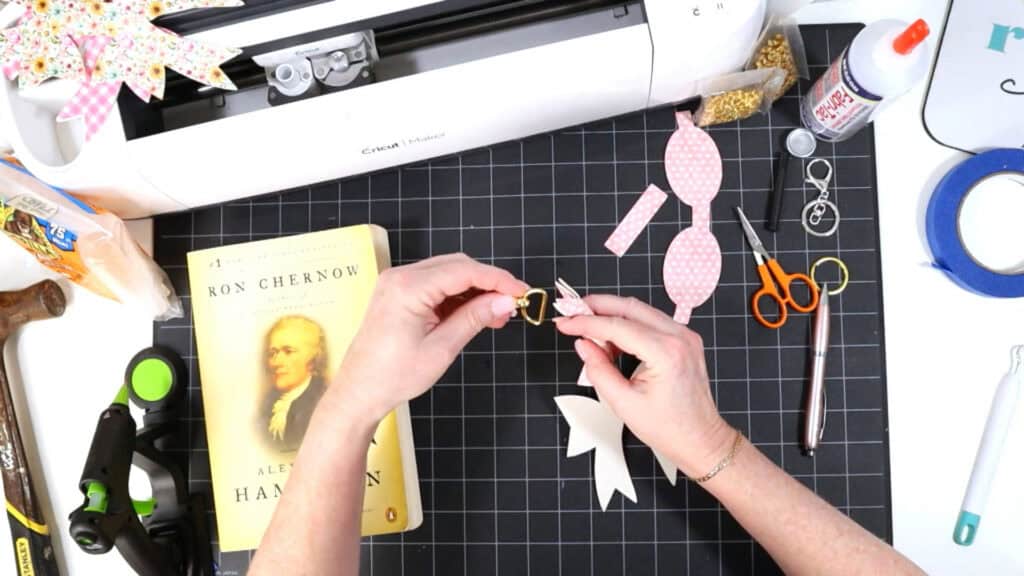
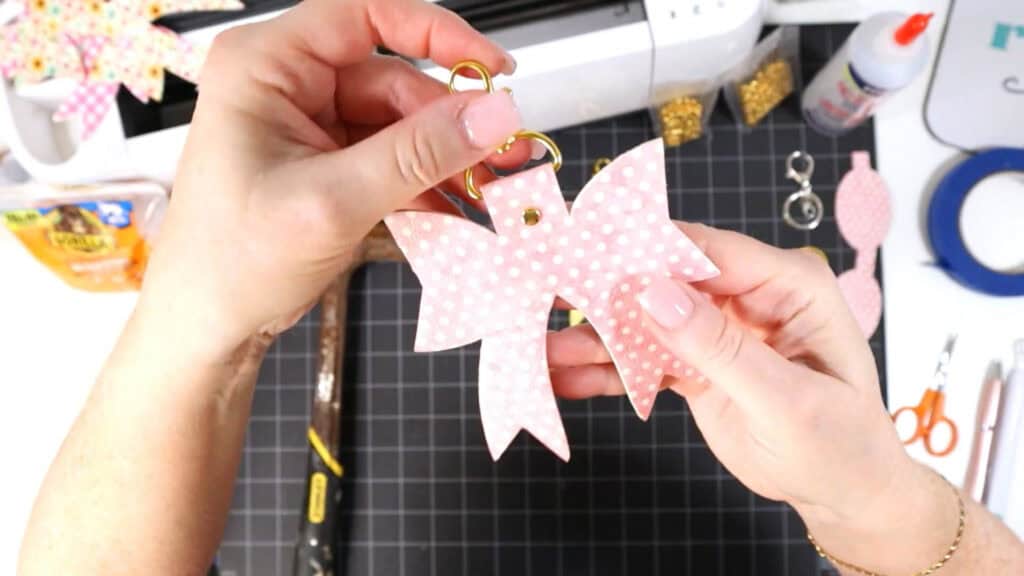
First, thread the keyring hardware onto the center of the faux leather bow shape.
I used a 1 inch D-ring swivel clasp but you can use a regular large keyring if you’d like.
Using fabric glue, apply glue all over the back side of one of the bow shapes.
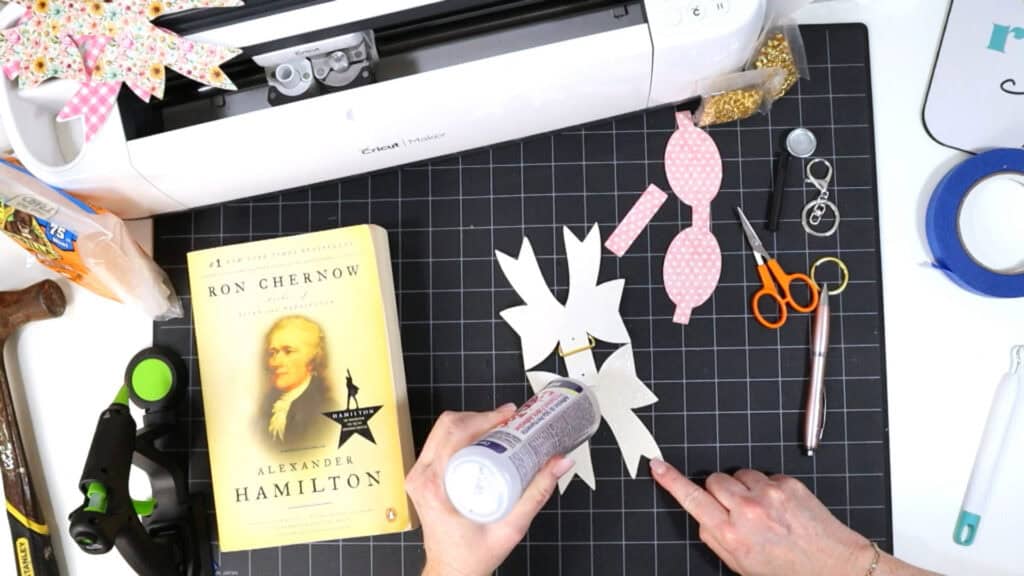
Then fold the top bow over onto the bottom and press allover with your fingers.
Then place the glued bow shape underneath a heavy book for at least an hour to dry.
This will help you achieve a tight and almost seamless edge.
Step 5
When the base of the bow is dry, attach the 6mm rivet.
Gather a hammer, one rivet (post and cap) and the rivet tools that came with your rivets.
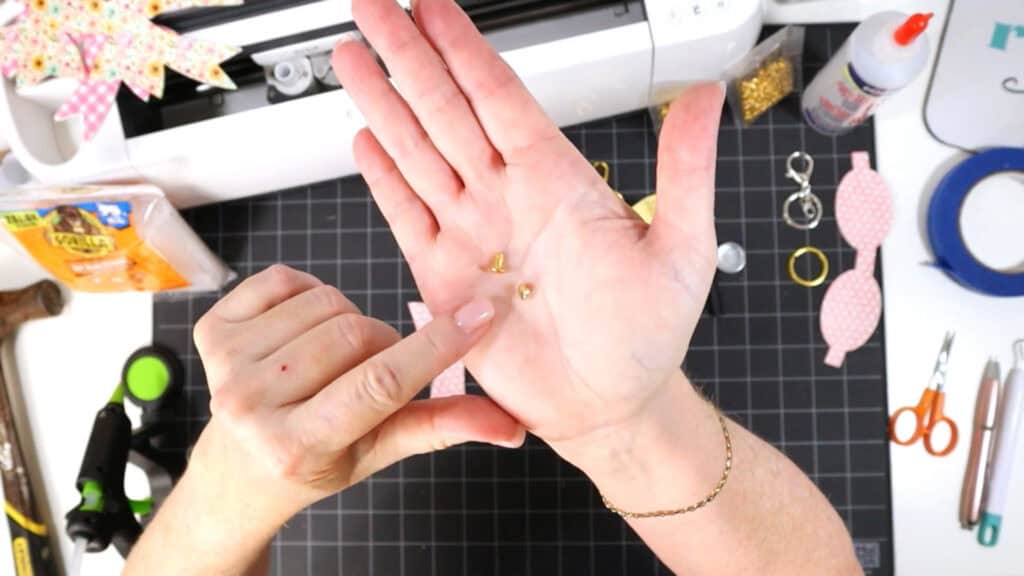
Push the rivet post through the rivet hole. Then add the rivet cap and push down until it snaps.
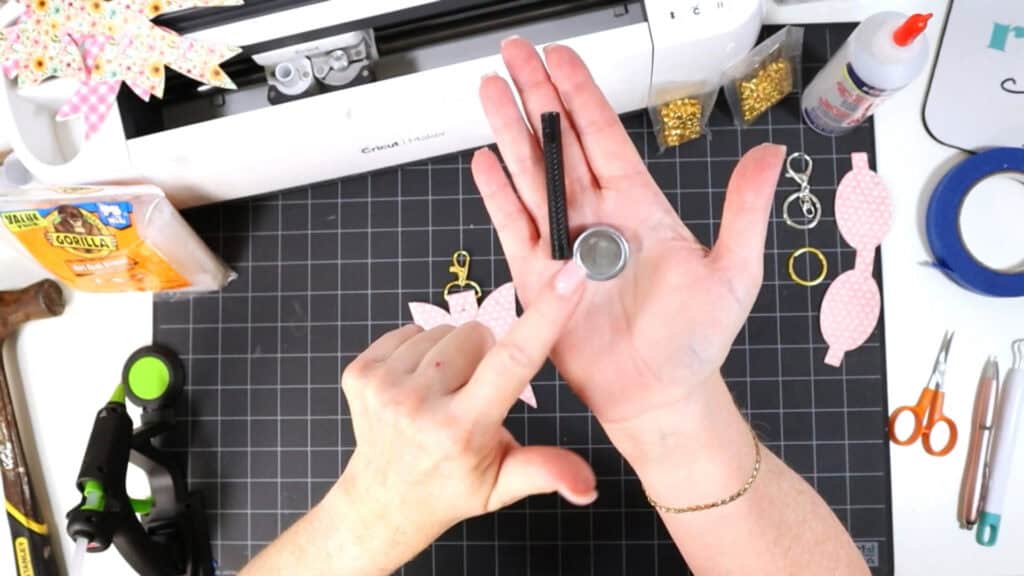
Place the rivet on top of the strike plate on your worksurface. Then use the rounded end of the rivet tool to place over the rivet and hammer the flat side.
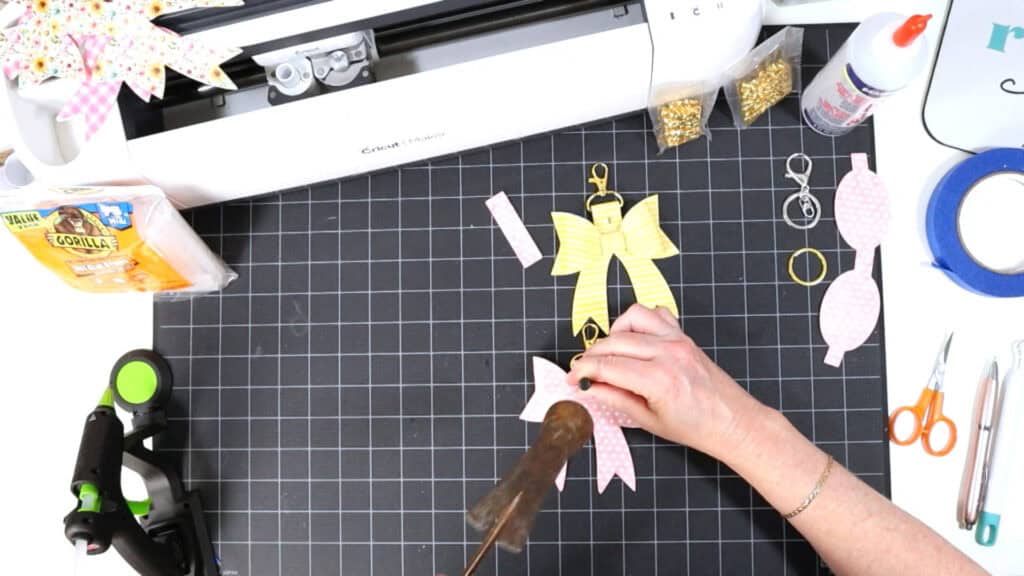
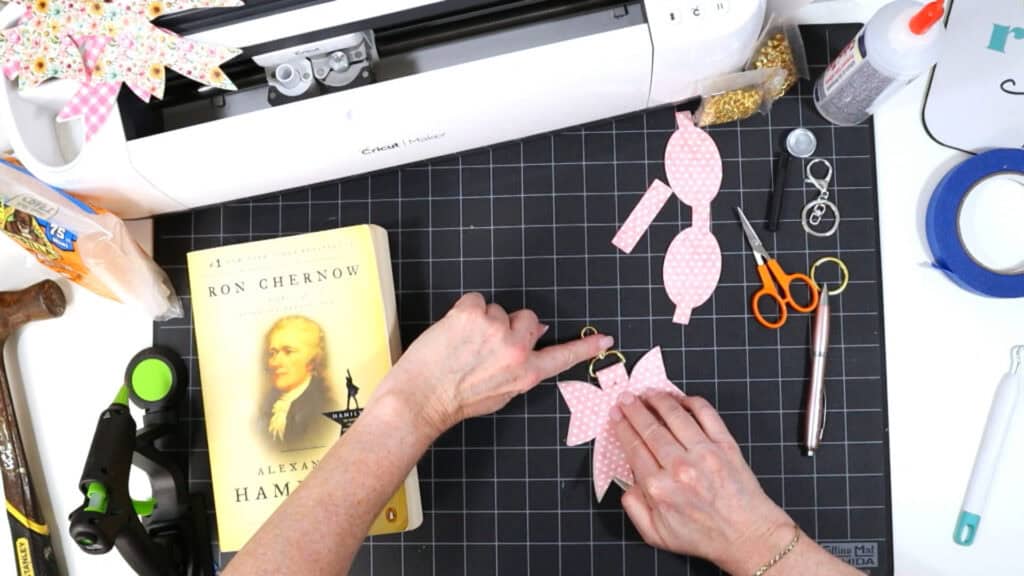
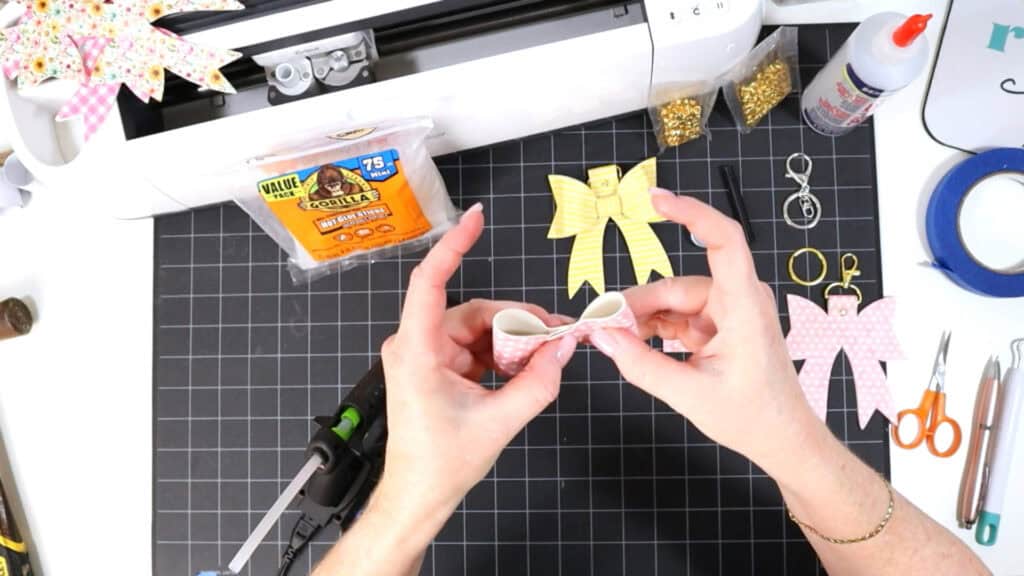
Step 6
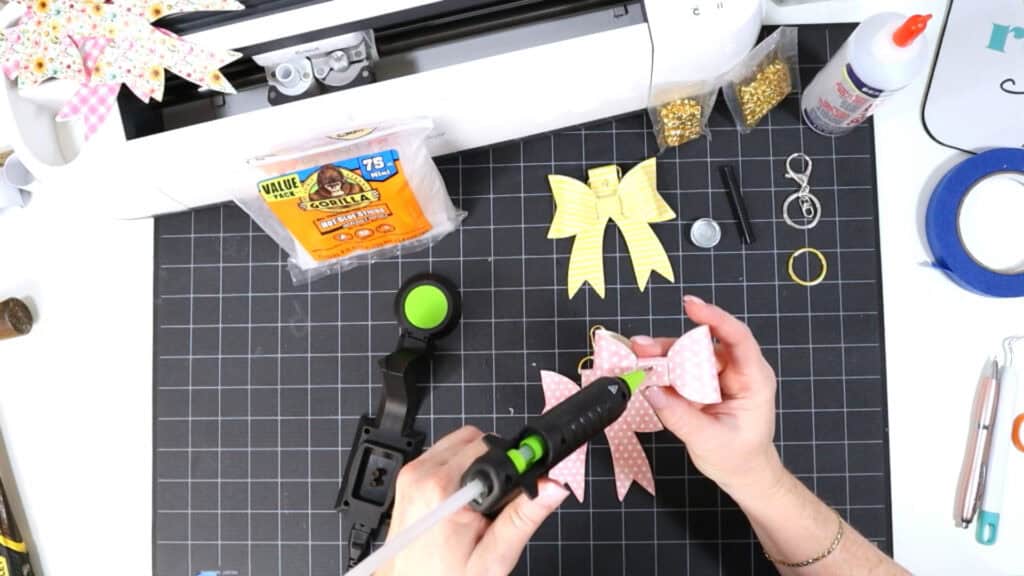
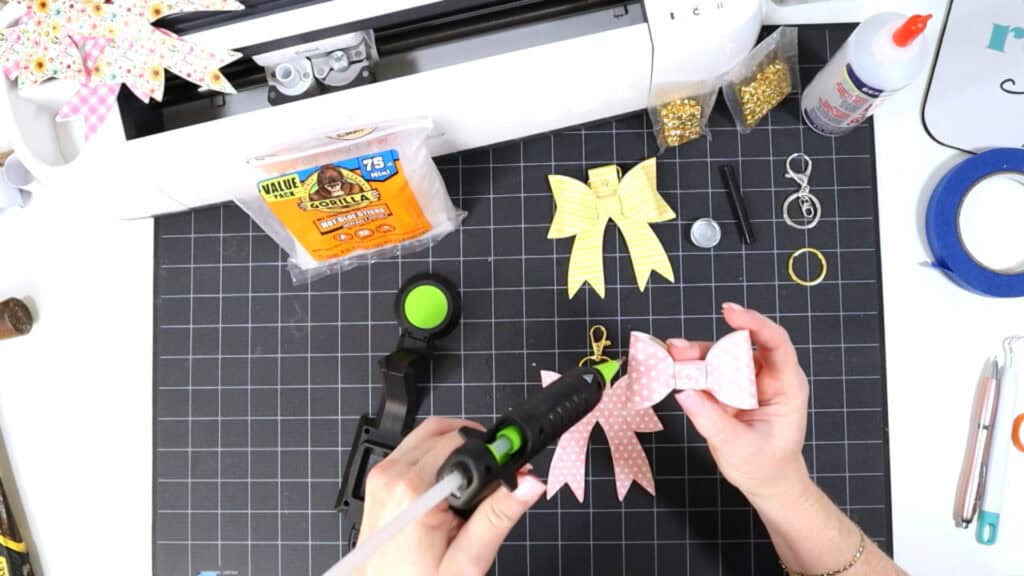
It’s time to glue the top bow onto the base. I like to use a Surebonder Cordless Glue Gun and Gorilla Glue Mini Glue Sticks for this step, but you can use whatever you prefer or have on hand.
First turn the bow center over so the back is facing you and the two end shapes are facing upwards.
Begin by placing a dot of hot glue on one side of the bow center.
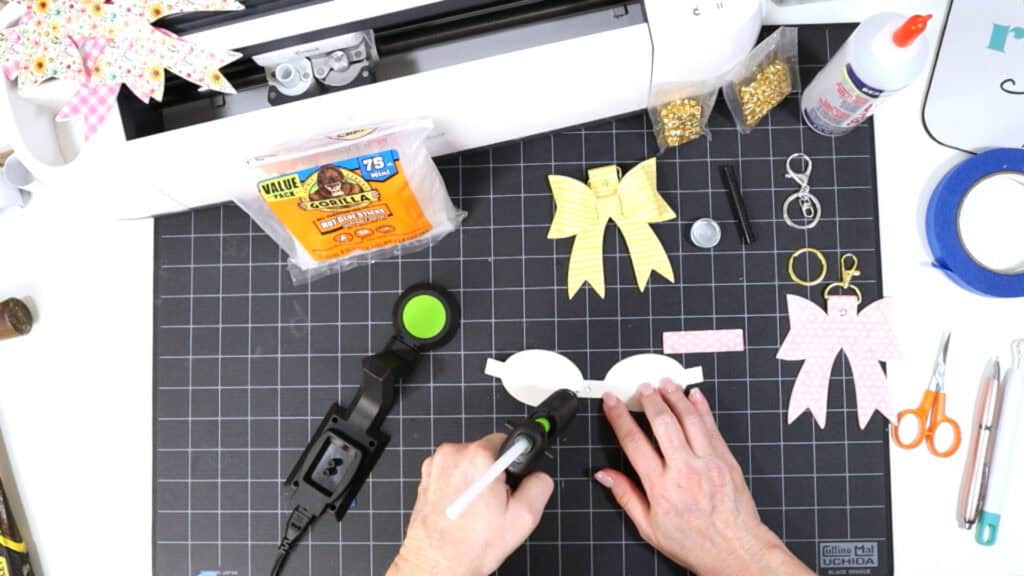
Then fold that side’s bow shape over and press the end piece on the glue dot. Hold carefully with your fingers until the glue dries.
Repeat on the other bow loop.
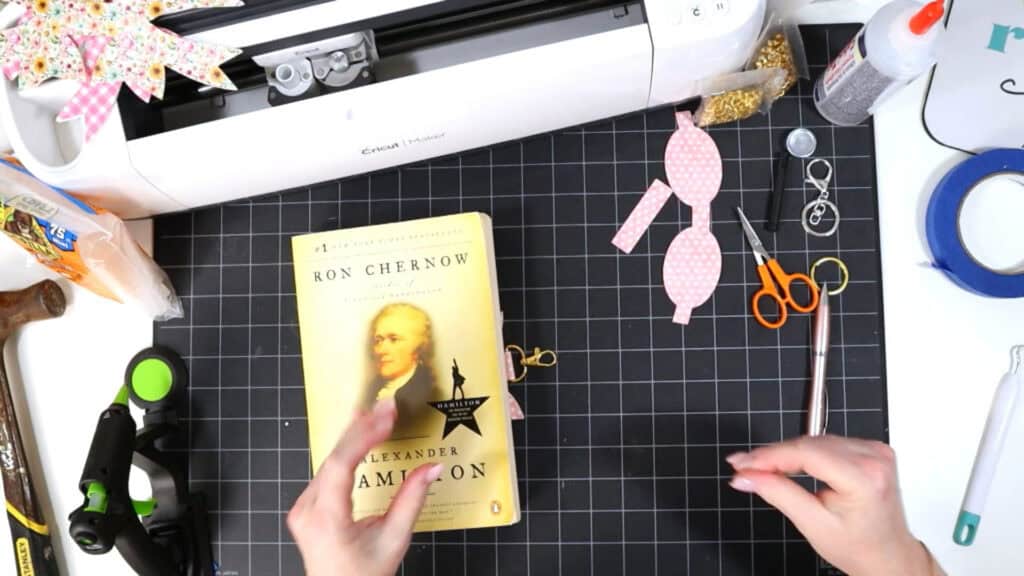
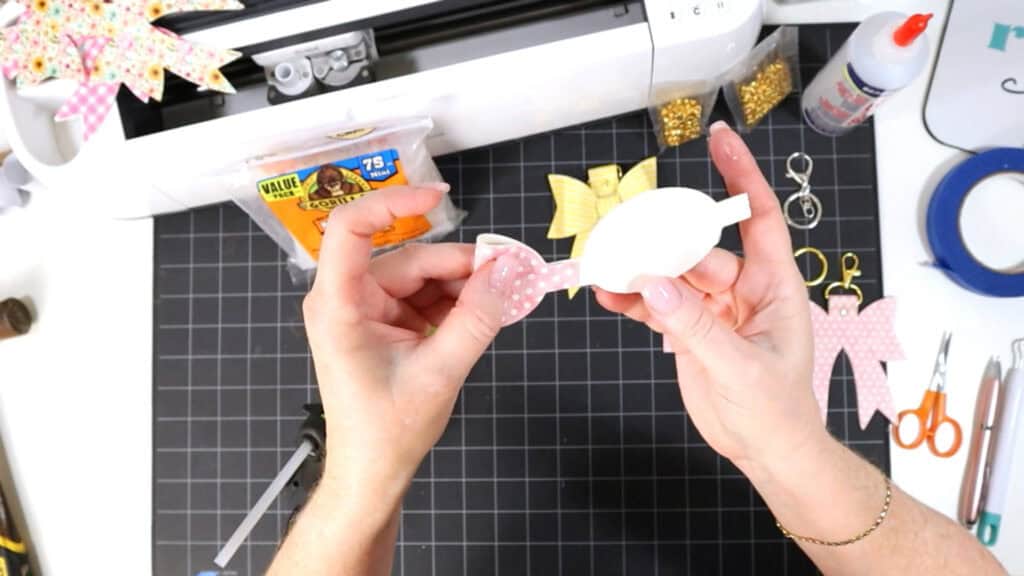
Take one end of the bow center shape (skinny rectangle) and apply a dot of glue to secure it to the backside of the glued bow loop.
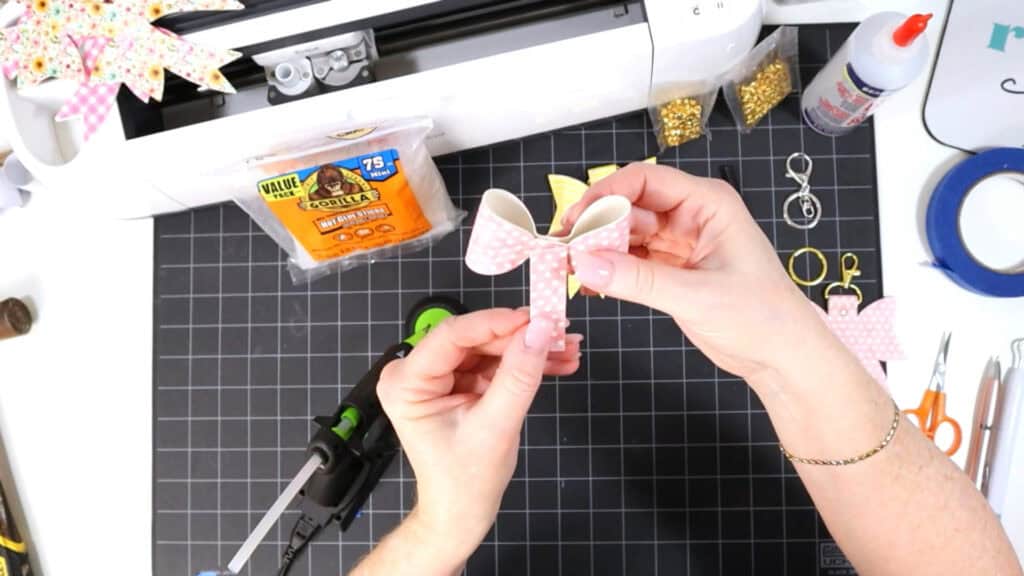
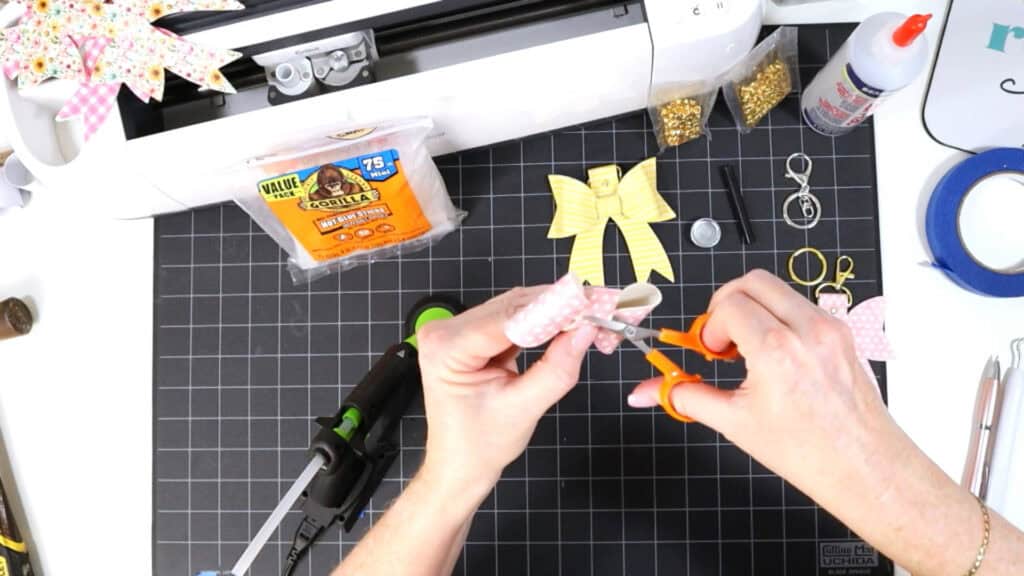
Let dry, then wrap the bow center around the front and glue again. Trim off any excess faux leather.
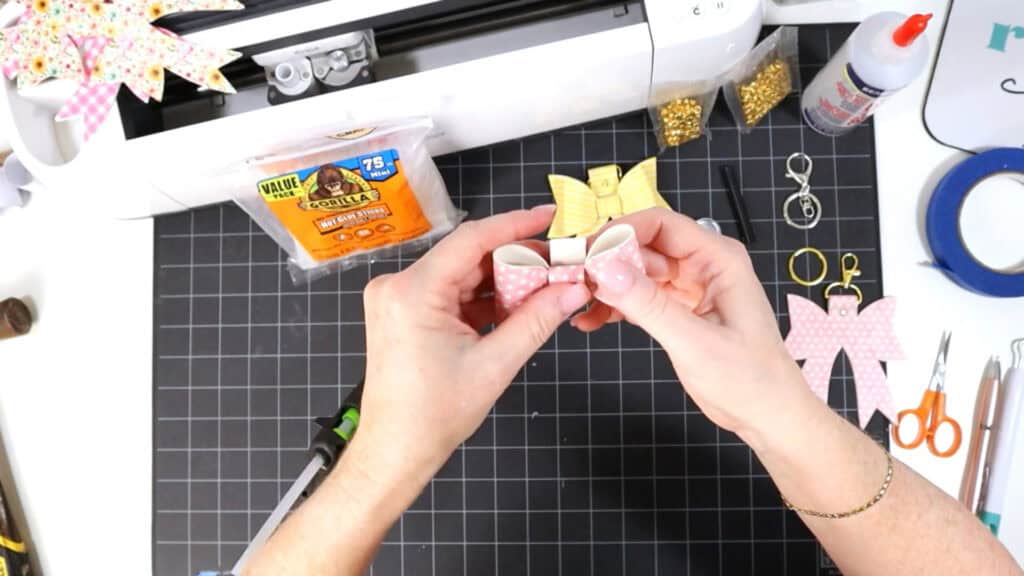
Next glue the bow loops to the bow base with more hot glue. I like to put glue on the back of the bow in both the center and on the bow loops.
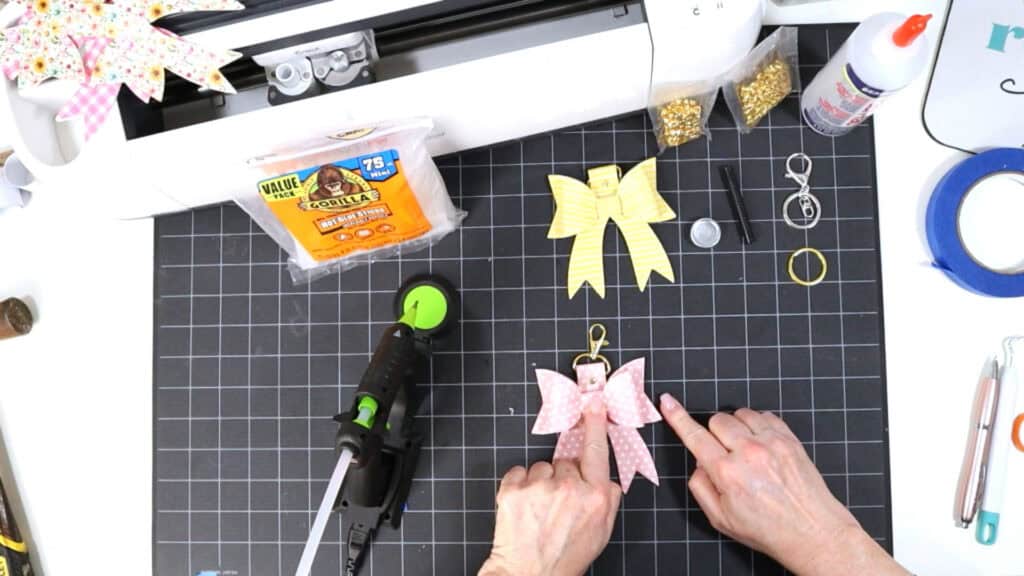
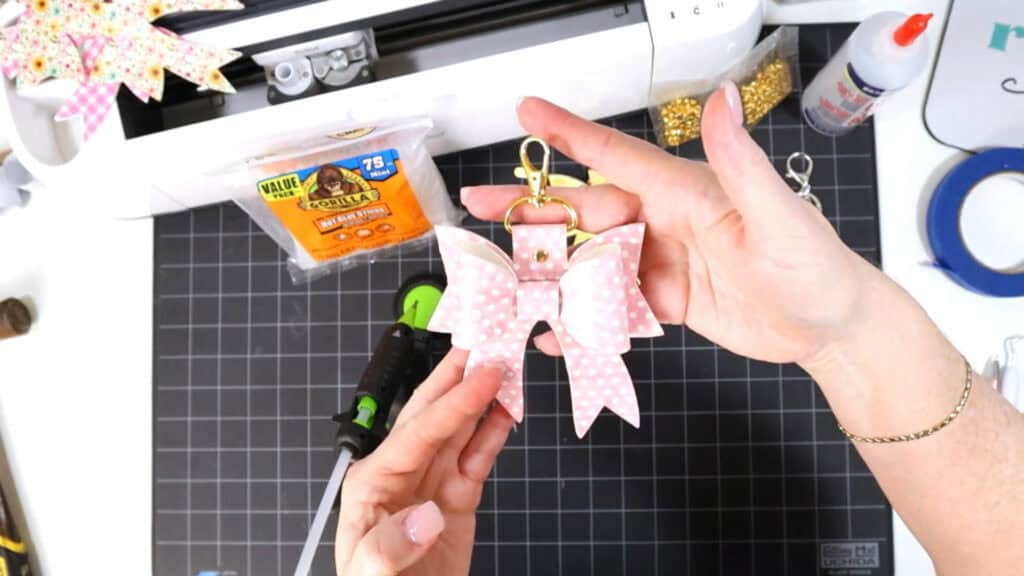
That’s it! Your Faux Leather Bow Purse Charm is complete. Here’s another look at four different faux leather bow purse charms all made with this SVG template.
Which one do you like best? Let me know in the comments!
Answers to your questions about making a Faux Leather Bow Purse Charm with a Cricut
Q: Which Cricut machines will cut faux leather?
A: You can cut faux leather with any of the current Cricut machines because they all cut faux leather with the standard fine point blade included with each machine. For this project you can use the Cricut Maker, Cricut Maker 3, Cricut Explore 3, Cricut Explore Air 2, the Cricut Joy Xtra, or the Cricut Joy with the 12 inch long Joy sized mat.
Q: What do I need to press heat transfer vinyl onto faux leather?
A: To press heat transfer vinyl onto faux leather you’ll need a traditional heat press, Cricut EasyPress, or Cricut EasyPress Mini. I prefer to use a Cricut EasyPress Mini for small projects like earrings and keychains.
Q: How do I get the SVG template for this project?
A: Get the SVG file from my SVG Shop here, or you can get it as part of 17 brand new Spring faux leather crafting projects in my Spring Fling Crafting Event VIP Pass.
Get the SVG in my Shop
Personal or Small Commercial Use Available
If you loved this project, you’ll love these projects too:
Will you make this project?
I would love to see what you have created! Please join my free faux leather crafting making Facebook group and share your creations with me and all of my crafting friends!
Until next time… and happy creating!

Want to remember this project? Save this tutorial to your favorite Pinterest board!
Want instant access to my Free Resource Library full of SVG files?
Just Enter your name and email Below!
By signing up, you’ll get instant access to my FREE SVG Library with hundreds of crafting SVG templates! You’ll also get my weekly newsletter full of crafting ideas, tutorials, and inspiration! Unsubscribe anytime.
Adorable! This crafting event was filled with easy, cute, projects. You hit it out of the park with your selections and I can’t wait to see what you do next!
The bows are so pretty
What a great purse charm!! Thank you for another fantastic design Amy!!
Thank you Amy for a beautiful event. 🎉💐🎈
These are adorable!!
Hello Amy! Such adorable bows. If I had to pick just one, I would say it would be the flower pattern. The gingham plaid comes in a close second.
I have enjoyed this series and can’t wait to get to making the bird nest and bird house earrings, along with the necklace I talked about, for my sister.
Thank you for all you do for the crafting community. You ROCK!
lovely bows
These are so cute!
I think this is my favorite of the 10! Thank you so much for the SVG and fantastic tutorial!
These will make cute gifts for Easter for my Nieces to hang on their backpacks!
This project is the best. can so use in my scrapbooking
Super cute and can’t wait to make are teacher and Mother’s Day gifts!
Amy such a great idea to decorate your purses 👜.
I was just searching for a detailed video on making these yesterday. I am so happy that I didn’t use the project I found Design Space because this one is a lot better (in my honest opinion)! I cannot wait to make these once my rivets come in. Many thanks Amy♥♥♥
very cute, I bet it could be scaled down too.
This is so cute for Mother’s Day or Easter–thank you for all of these creative ideas throughout the workshop!
Love the purse charm and I will add it to the small purse project. Thank you Amy!
love this!
gonna make this to hang off the handle of a Easter basket
These bows are so pretty and can be used for many different things. I can’t wait to make them!
I love the bow purse charms! They are so cute!
This is so cute Amy. It would also be a very cute barrette for any little girl as well.
Too cute! So many uses for this bow. Add it to a purse or travel bag, even your keys.
This little bow is so cute. This can be used for so many things. I’m sad that it is day 10 of this event. Thank you so much for sharing 10 wonderful craft projects.
These are so super cute! ☺️❤️
These are lovely
They would make cute gift bows too
I have some girly girls who would love these! So fun!
Oh my goodness, Amy! These are the cutest little purse charms. Thank you!
I know a few littles that would Love this bow dangling from their bookbags! Thanks Amy!
These are so cute! Great for backpacks as other bags as well.
This has to be my favorite design. The are so easy to make and there are so many varieties that you can make. AND you can coordinate your purse to match your outfit!
I’m obsessed with bows lately! Thank you for this cute project!!!
The purse charms are so cute. I would make one for each season.
I’m beyond excited to do these crafts. Life is super crazy at the moment, but I’m hoping to do a couple before Easter ♥️🥰
I love these super cute faux leather bow purse charms, thank you for sharing
Purse charms are such a neat idea. Thank you for sharing.
Adorable bows! ❤️
Thanks so much for the awesome ten day event. You do such a good job of giving us new and beautiful things to try.
Thanks for sharing all of these beautiful projects!
So cute and I can’t wait to make one.
These are so cute. My granddaughter wants some for her backpack and purses. Can’t wait to make these.
I love the bow project!
Thank you for these 10 days with fun and beautiful designs👍
Love the flowered leather! So cute!
What an adorable project, so cute! I really appreciate the excellent step by step directions, they are so helpful. Thank you, Amy.
I LOVE this!! I want to make one for my backpack for work 🤩
You make it look so simple!
These are so cute!!!
The bow purse charms are so cute. Love the Spring colors. Will definitely try to make some.
I love these! Can not wait to make one…or ten!
So cute and just the perfect size for a great purse charms. I even purchased rivets with assorted colored gems. They add some additional bling to your fabulous designs.
All of these tutorials have been great. Easy to follow and love your designs.
These purse charms are so cute!
These Bows are so cute … My Grand-Daughters will love them. Thank you for The Spting Fling it has been fun.
Love this bow charm. Thank you for showing us how to cut and assemble it.
These are so cute and easy what a great projects will need to make several for my Granddaughters
I love this
lovely tutorial
Cute! Would look cute on outside of present for anyone as a bonus gift!
These bows are so sweet.
The bow purse charms are adorable!!
LOVE these purse charms! They are so adorable.
These are as cute as the purse charms I saw advertised on the Today show today!
Very cute – thanks.
All so very pretty! Thank you for the 10 days of FUN!
Cute bow charm. Might look nice on a barrette or head band too. Thanks for sharing.
So pretty! I can’t wait to give it a try! Thanks, Amy!
Another super cute project! Love it!
These are so cute! Can’t wait to try them out!
Can’t wait to make bunches of these! That extra little bling is so much fun!
These are so cute! I cannot wait to make some for teachers gifts and maybe for Mother’s day.