
DIY Cricut Angel Ornament & Gift Tag
How to Make a DIY Angel Ornament & Gift Tag with a Cricut
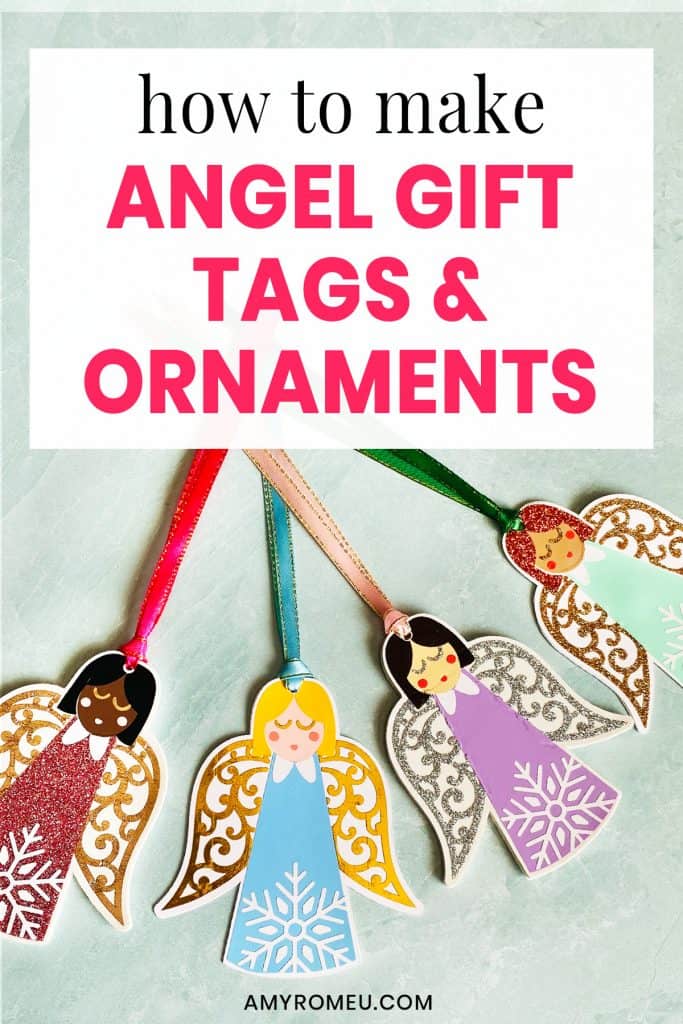
It’s almost the holidays, and this year more than ever, I am finding the joy in creating handcrafted holiday gifts. Nothing makes me more excited than decorating our family Christmas tree, and this year I want to add a special angel ornament – an angel! So I designed these Snowflake Angel Ornaments and I wanted to share them with you.
These Snowflake Angel Ornaments are made from faux leather and heat transfer vinyl. The best part is they can be customized with any colors you want to really personalize your Christmas angel. I’ll also show you how to make them into Angel Gift Tags, too, using cardstock and heat transfer vinyl. I’ll be using a Cricut Maker to demonstrate this project, but you can also make these Angel Ornaments and Gift Tags with an Explore Air 2 or the Cricut Joy.
In this tutorial, I’ll give you my step by step instructions and tell you exactly what materials I used to make this project. A link to download my original SVG file for this project is in the Materials list below.
If you’d rather watch a video tutorial, click on my Snowflake Angel Ornaments and Gift Tags YouTube below:
Ready? Let’s get started!
This post contains some affiliate links (which means if you make a purchase after clicking a link, I will earn a small commission at no additional cost to you). Read my full disclosure policy here.
Snowflake Angel Ornaments and Gift Tags – Materials List
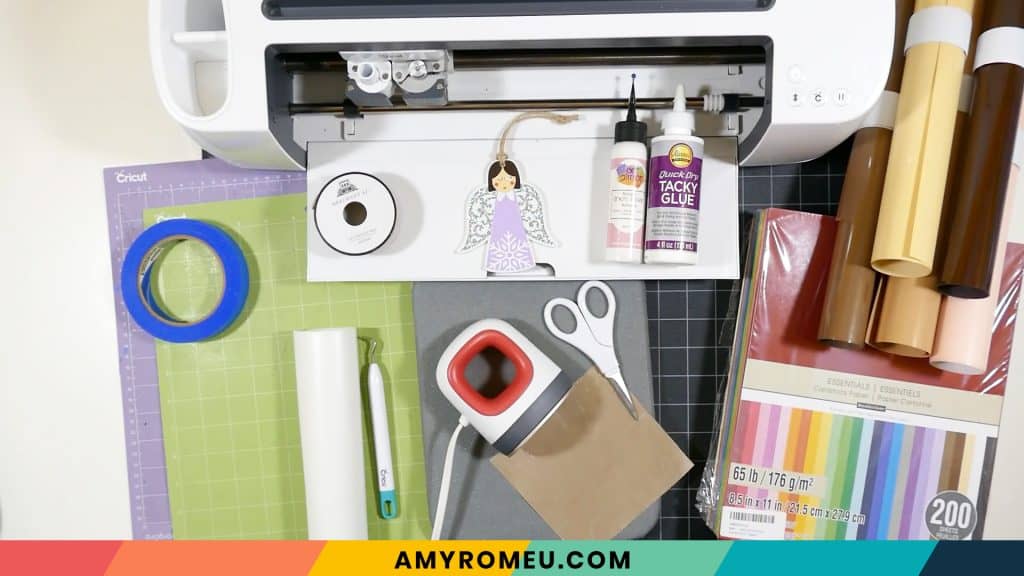
- A vinyl cutting machine. I have the Cricut Maker, which you can get at Amazon here or at Cricut.com. You can also use the Cricut Explore Air 2 or even the new Cricut Joy!
- FOR ORNAMENTS – faux leather in the color of your choice. I used this smooth white faux leather from Amazon but you can use pebbled leather like this white pebbled faux leather from Amazon, too. The smaller the pebbling, the better.
- FOR GIFT TAGS – Cardstock. I used white 65 lb. cardstock from this Recollections cardstock pack from Amazon. This 80 lb cardstock is good, too, but you can use any color cardstock you want!
- Heat Transfer Vinyl in assorted colors. I used Siser EasyWeed in solid colors, Glitter, and Cricut Brand Foil Iron-On.
- Cricut Strong Grip (Purple) Cutting Mat. You can buy these on Amazon here.
- A weeding tool. I use the weeding tool that came with my Cricut tool set from Amazon here. For small or intricate designs, I also love my Pin Pen Weeding Tool from 143Vinyl.com.
- Cricut EasyPress Mat. I have the 8×10 size, which I use a lot for making small things like earrings and keychains.
- Ribbon. 3/8 inch width or smaller is best. I used this assortment pack of ribbon from Amazon.
- The SVG file template for these Angel Ornaments & Gift Tags. It’s Design #159 in my free resource library. You can get the password to my library instantly by filling out the form below, or at the bottom of this post.
Angel Ornaments & Gift Tags – PROJECT INSTRUCTIONS
STEP 1 – Download the SVG Cut Files
Download my free Angel Ornaments & Gift Tags SVG file (#159) from my Resource Library. If you don’t already have the password, fill out the form below and the password will be sent to you right away.
Save the zipped folder that downloads to your computer. Then unzip the folder to access the folder’s contents. You’ll need to unzip or extract the files FIRST so you can upload the cutting file to Cricut Design Space.
STEP 2 – Upload the SVG File to Cricut Design Space
Upload the unzipped SVG file to Cricut Design Space. If you need help uploading a file to Cricut Design Space, click here.
NOTE: You can use the same file whether you are making ornaments or gift tags – the only thing that will change is the material you cut the base layers with.
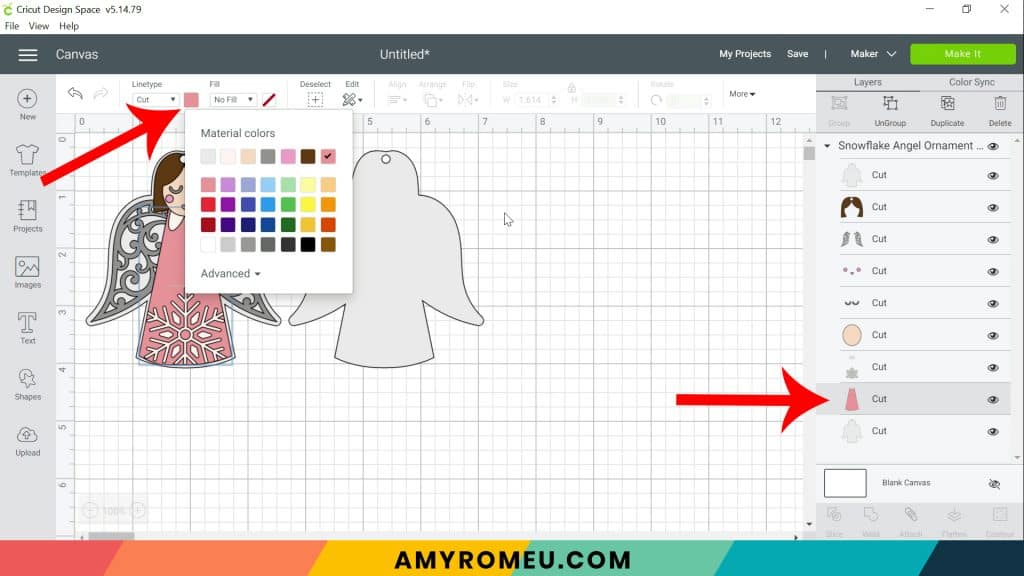
If you want to change the colors of any parts of the design before sending the design to cut, you can do that now. Click the layer you want to recolor and then click on the desired color.
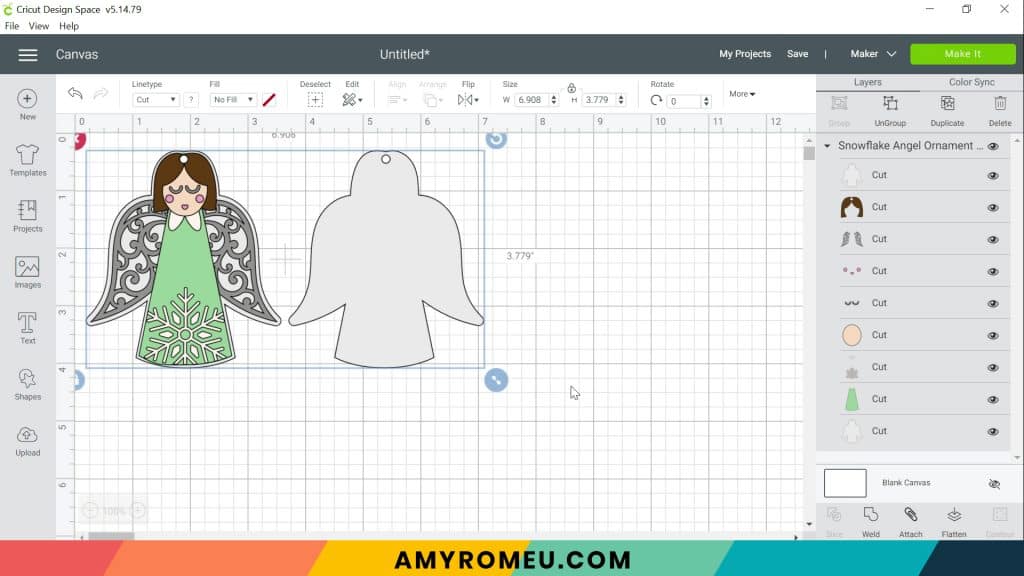
Click the green MAKE IT button.
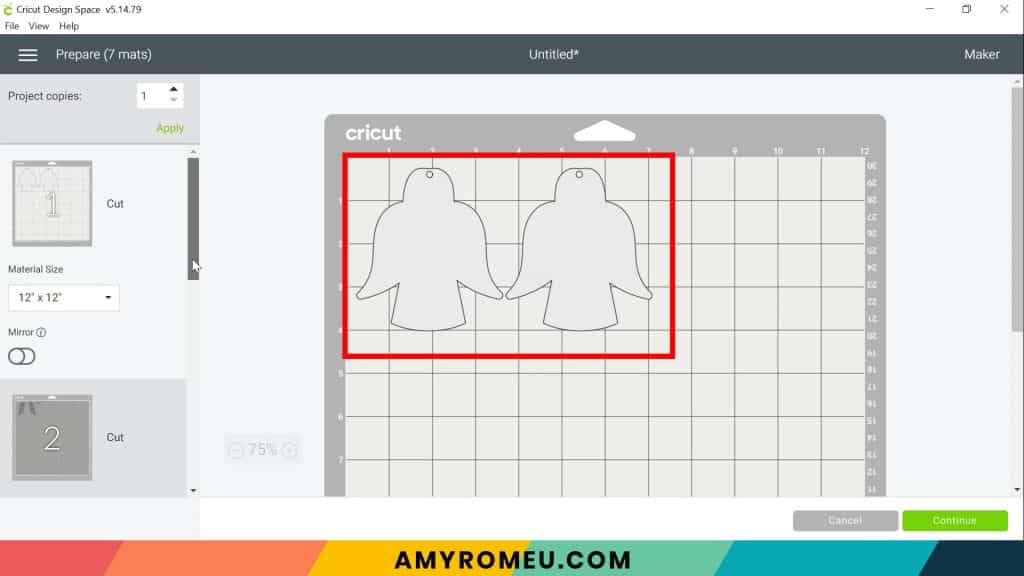
STEP 3 – Preview the Mats
The mat preview screens will load. The mat with the angel shapes can be cut from faux leather or cardstock. You do not need to mirror the angel shapes mat.
I suggest cutting the angel shapes mat first.
If you are cutting the angels from faux leather, make a note of what size faux leather you need to cut from the mat preview screen. Cut a piece of faux leather to size.
If you are cutting from cardstock, you don’t need to cut it down to size.
The cardstock mat will not be mirrored, but ALL of the heat transfer vinyl mats will. So go through each mat now in the mat previews and toggle the green MIRROR button on for the vinyl mats so you don’t forget.
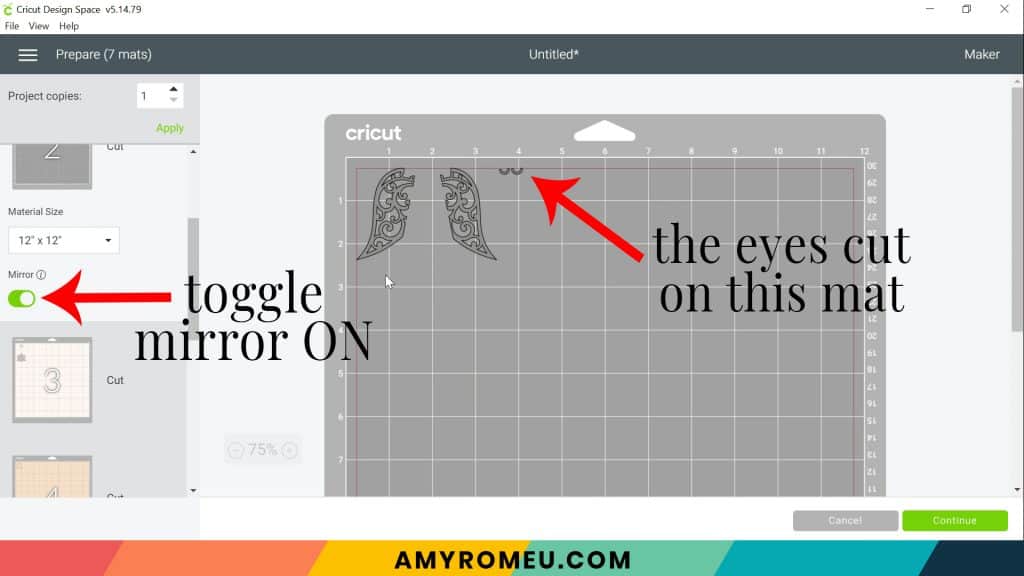
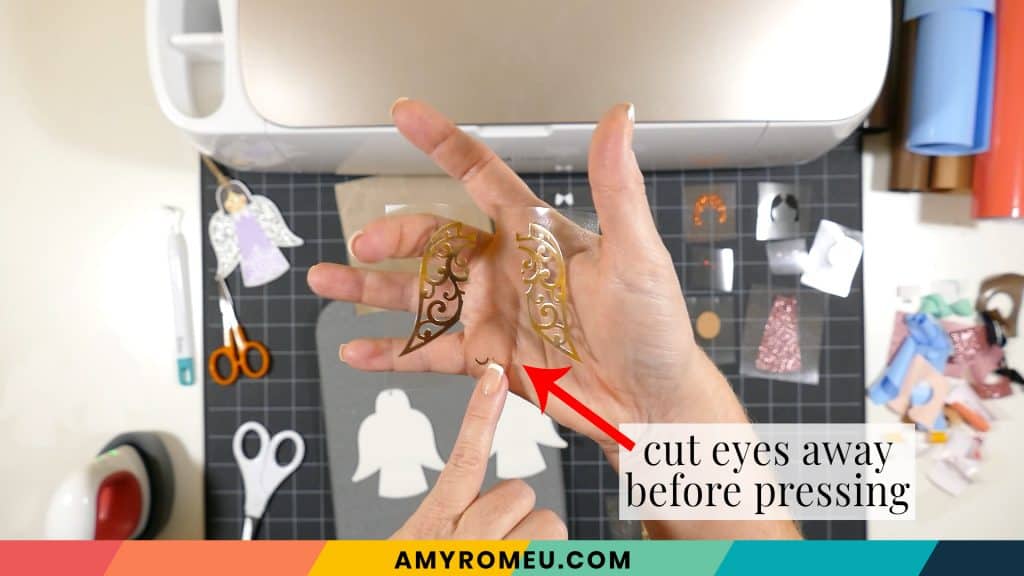
NOTE: The eyes will cut on the same mat as the wings! You’ll cut them away from the wings before you press them.
After you’ve toggled every heat transfer mat’s mirror setting to ON, press the green CONTINUE button.
STEP 4 – Make Material Selections
If you’re cutting faux leather, select Faux Leather (Paper Thin) as the material setting.
To cut the cardstock mat, I recommend using the Medium Cardstock setting.
If you don’t have either of these set as a favorite setting already, you can click on “Browse All Materials” to search for them.
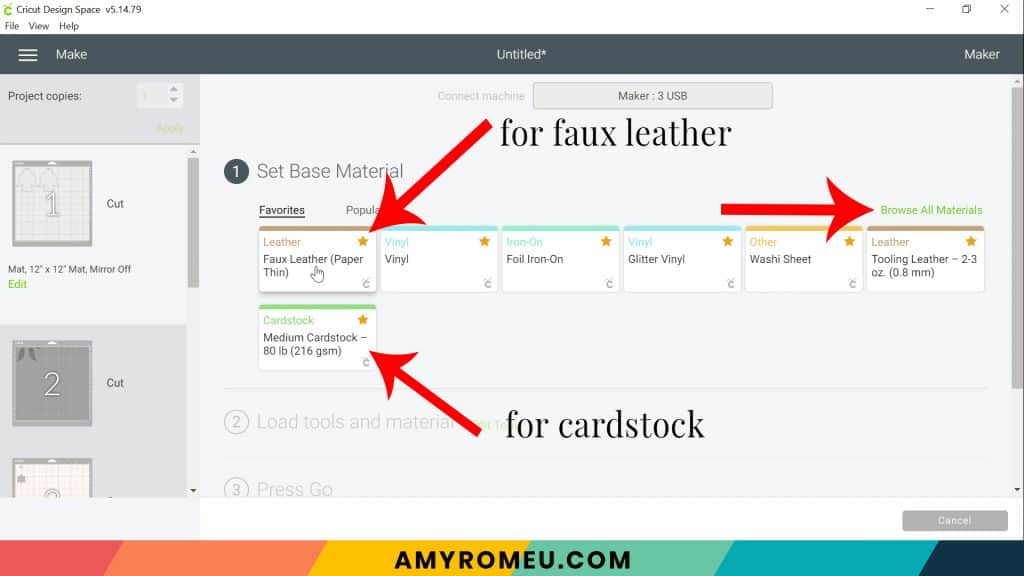
Then click DONE.
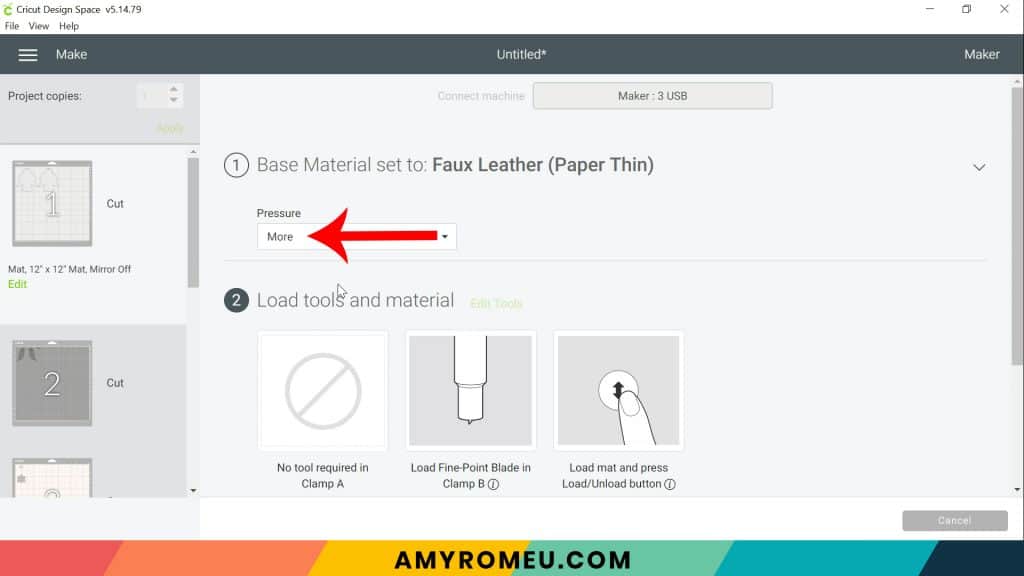
For the Pressure setting in the dropdown menu – choose MORE for faux leather, and leave it at DEFAULT for cardstock.
STEP 5 – Cut All The Layers
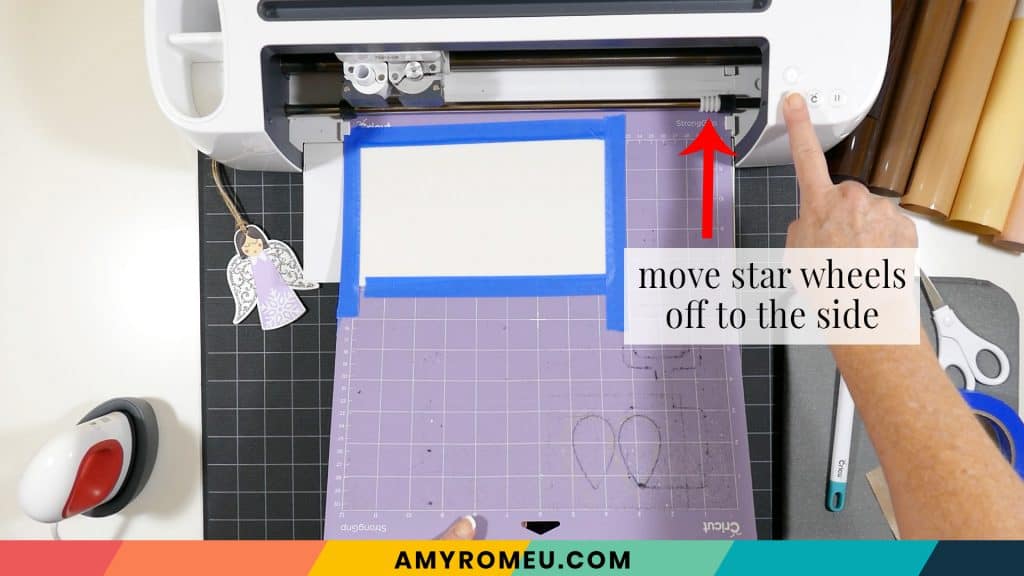
If you’re using faux leather, place the cut piece of material pretty side down on a purple cutting mat. Tape it down all over with blue painter’s tape. Make sure the star wheels are moved off to the side out of the way.
If you’re using cardstock, place the cardstock on a green or blue cutting mat.
Load the prepared mat into the Cricut by lining the mat between the mat guides and then pressing the double arrows button.
The “C” Cricut button will start to flash, indicating the machine is ready to cut. Press the C button to begin the cut.
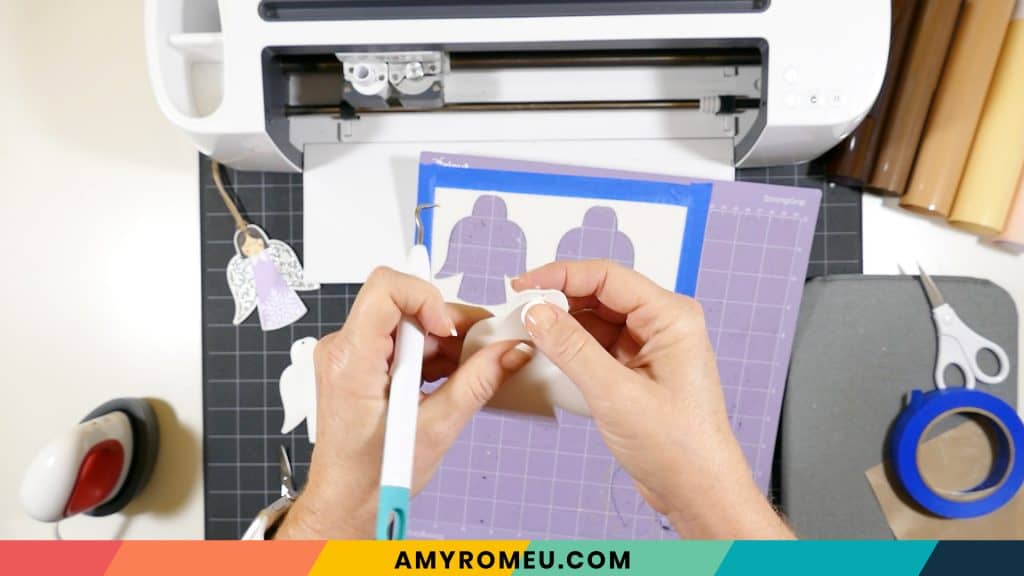
If you’re cutting faux leather, check the cut for completeness BEFORE you unload the mat. Use a sharp tool like a weeding tool to lift up the edge. If the faux leather needs another cut, press the C button to repeat.
If you’re cutting cardstock, one cut should be sufficient. Remove the cut cardstock shapes and set them aside.
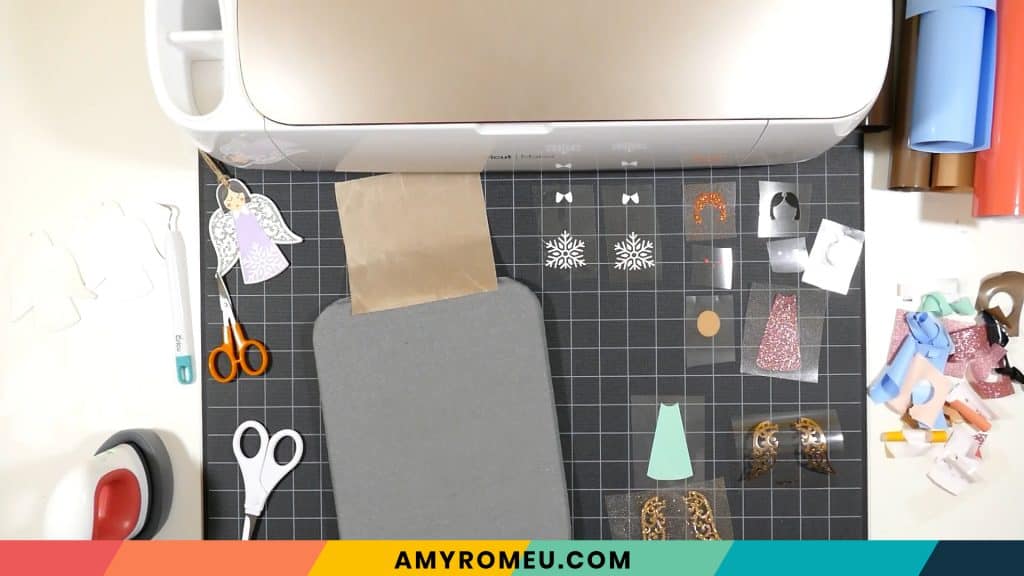
Return to Cricut Design Space to start cutting the heat transfer vinyl mats in the order shown on the mat preview screen. Place the vinyl shiny side down on a green or blue cutting mat. I use the Vinyl or Washi Sheet setting to cut regular heat transfer vinyl. I use Glitter Vinyl to cut glitter HTV, and Foil Iron On to cut foil. I use the Default pressure for all vinyl cuts (I usually repeat the cut for glitter vinyl, however).
Cut each vinyl mat using the appropriate cut setting and weed to remove the excess vinyl.
Here you can see the eyes that cut on the wings mat (I moved them in Cricut Design Space before cutting to save vinyl). Use scissors to trim them away, leaving just the wings.
STEP 6 – Press the Vinyl onto the Angel Shapes
For the next step, use an Easy Press Mini (on the lowest temperature setting) or an Easy Press (set to about 275 degrees), to press the vinyl layers one at a time onto the faux leather or cardstock angel shapes.
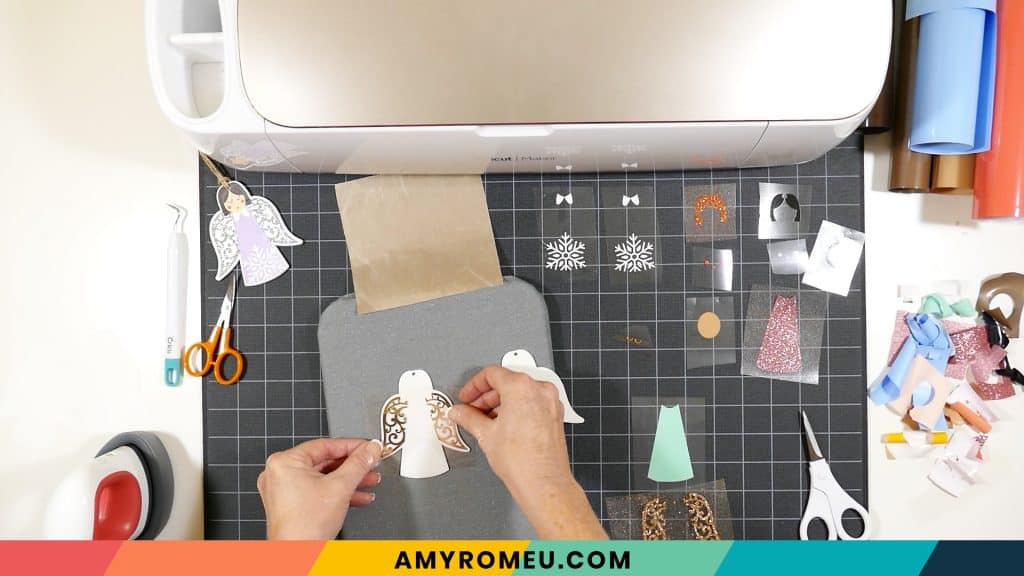
Start with the wings layer. Line it up on the angel shape. Then cover with a cover sheet (teflon sheet or parchment paper) before pressing. Press the wings for 5-7 seconds, just long enough for them to adhere to the layer below.
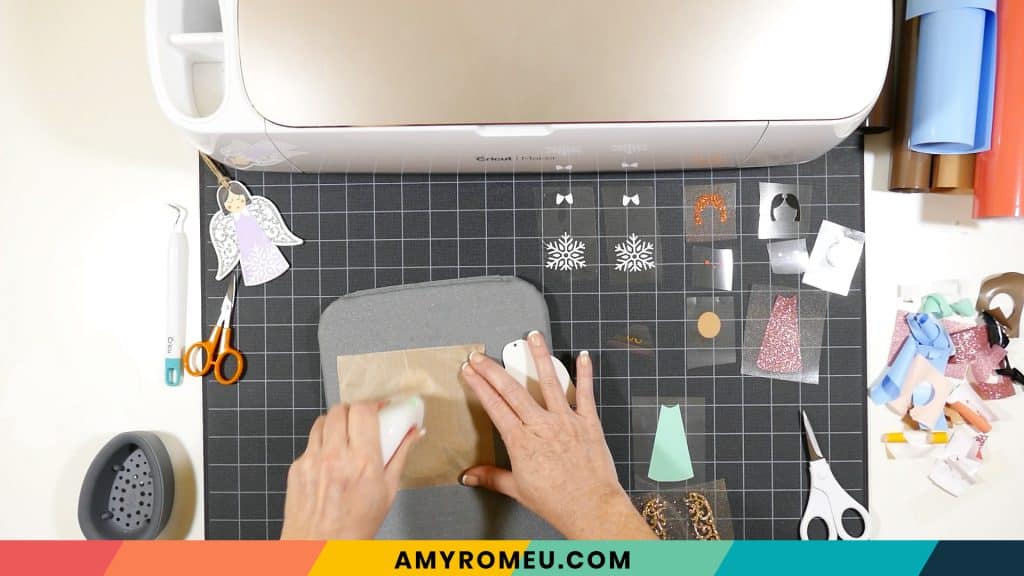
Peel away the vinyl carrier sheet carefully. It’s best to keep the angle shape flat on the heat pressing pad and curl and peel the carrier sheet up and away, instead of the other way around. This keeps the angel from wrinkling.
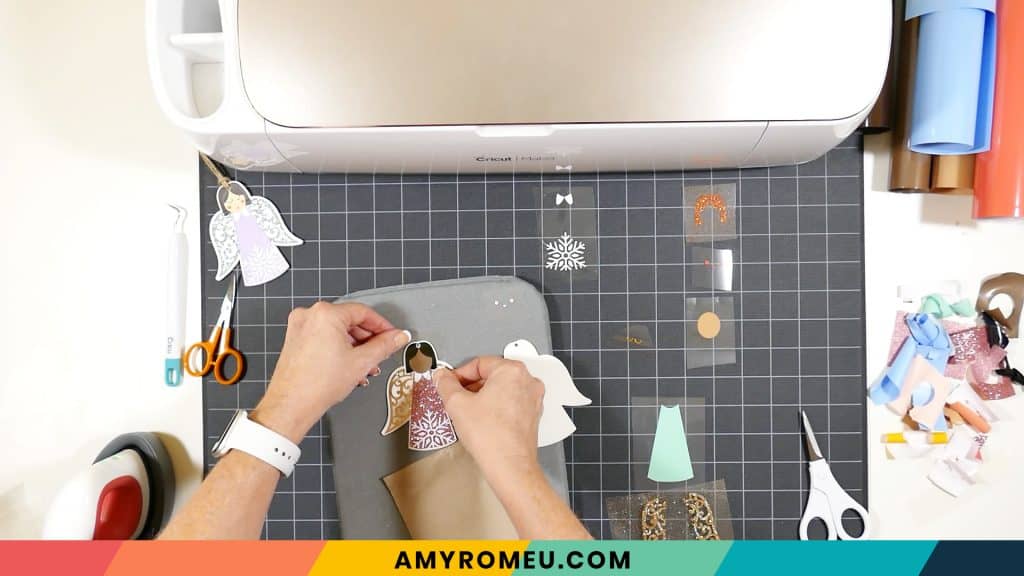
Next press the dress shape layer, then the snowflake dress detail. Then the face, the hair, the cheeks, and lastly, the eyes.
Place the cover sheet over the finished angel one more time and press for a few more seconds. Then immediately place the pressed angel under something flat and heavy so it will cool down flat.
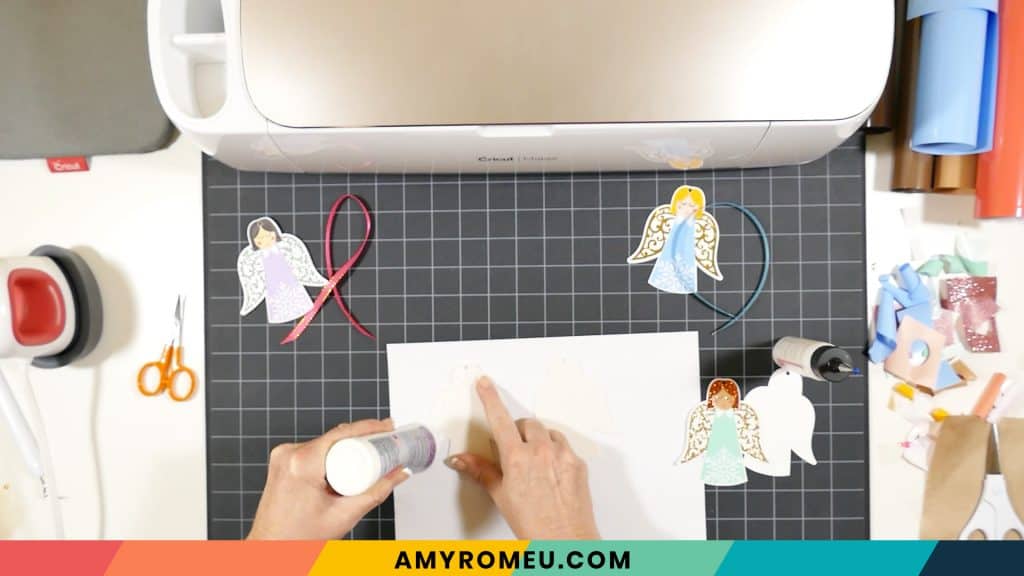
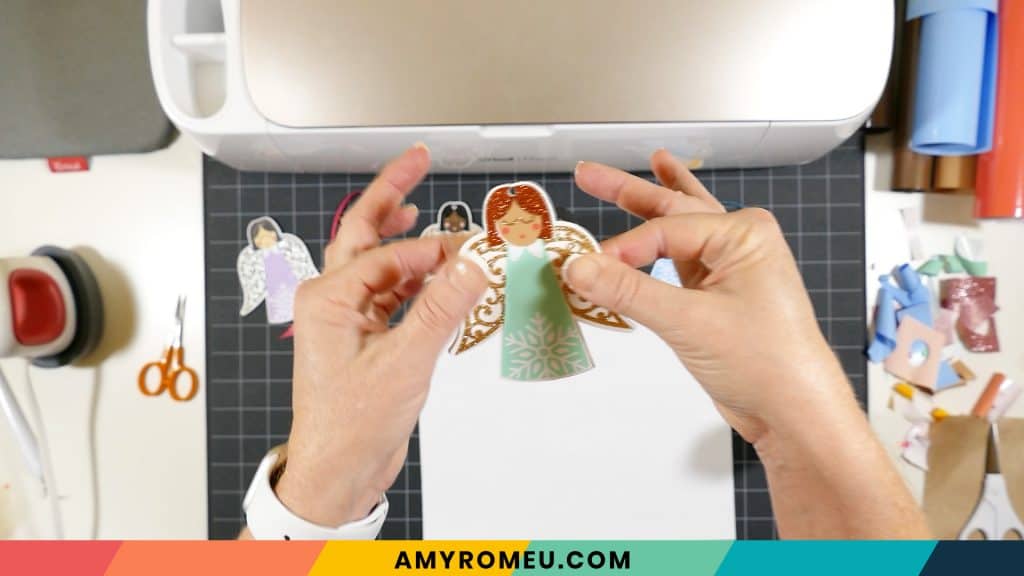
STEP 7 – Glue the Ornament or Gift Tag Together
For the faux leather ornament, I recommend using a glue like Aleene’s Quick Dry Tacky Glue or Art Glitter Glue. For the cardstock tag, you can use a thin glue like Art Glitter Glue, or a tape runner, or glue dots.
Spread a thin layer all over the inside of the bottom angel shape. You want to get close to the edge but not right up to the edge because you don’t want a lot of glue seeping out.
Place the decorated angel shape onto the bottom shape and carefully press all over. Immediately place the glued ornament or gift tag under something heavy and flat while it dries, for about an hour.
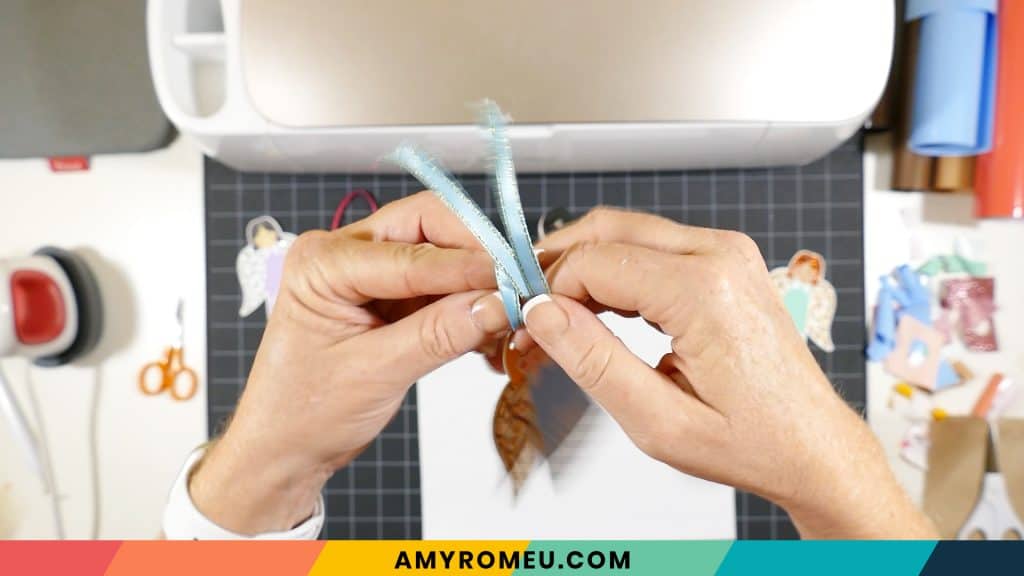
STEP 8 – Attach the Ribbon
Cut a 10 inch piece of ribbon or twine. Fold it in half and thread the ends through the hole. Then thread the ends through the ribbon loop at the other side and pull.

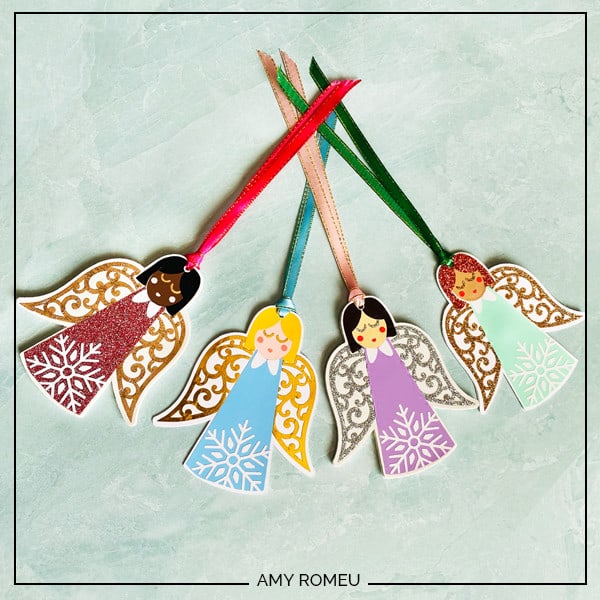
Aren’t these angels precious? Are you going to make an angel ornament, or an angel gift tag?
If you do make this project, I would love to see your angels! Please share a photo of them in the comments, or tag me on Instagram: @amyromeucreative

WANT THE SVG FILES SO YOU MAKE THESE ANGEL GIFT TAGS & ORNAMENTS YOURSELF?
You can get it from my FREE Resource Library by filling out the form below!
Want to remember this? Post this ANGEL ORNAMENTS & GIFT TAGS project to your favorite Pinterest board!

Your instructions are very easy to follow. Thank you!
OMG the angels are absolutely adorable. Perfect for any color scheme. Thanks so much for sharing.
Thank you, Sandy!
These are adorable. Thank you so much for sharing
Can I just say that these angels are just darling, love love them.
Thank you so much, Toni! I’m glad you like this project. 🙂
From Richmond tX
Loving all the projects
Thanks, Kim! I’m so glad to hear that. 🙂