
How To Turn A Small Space Into A Jewelry Making Studio
How to transform a small space into a jewelry making studio (on a budget!)
Where do you create your beaded jewelry? Not many of us are lucky enough to have a dedicated craft room for DIY jewelry making. Some beaders work at their kitchen table, or their favorite armchair. Others use beading trays to make beaded jewelry and move them from room to room, or take them in the car.
That’s what I’ve been doing, for years really.
Ever since I had kids (and pets), it’s been a struggle to have a place in my home for my beading and jewelry making. Before having kids, I could leave out a beading tray with a half finished project on the living room coffee table and come back to it when I was ready.
But with kids? NO WAY. The first time I inadvertently left a project out, it wasn’t five minutes before one of my kids had knocked the tray and all of my beads on the floor!
After that experience, I began storing all of my bead boxes away in a cabinet. But when I make jewelry, I need to have beads everywhere so I can SEE everything before starting a beaded jewelry project. Putting all of of my beads away for safety and tidiness just made it harder for me to work on a pair of earrings or a bracelet when I was ready to make DIY beaded jewelry.
It sounds silly to say as an adult living in a 3,000 square foot house that I didn’t have room to bead, but it’s true. I certainly have my own areas within the house, but nothing that would easily fit an entire beading work table.
So, I started thinking about my surroundings, my needs for a jewelry making work space, and got creative! Let me show you how I transformed a small space into a bead studio!
I also created a FREE list of the top 5 super cheap items you need to set up your own bead studio. You can get it at the bottom of this post!
This page contains some affiliate links (which means if you make a purchase after clicking a link, I will earn a small commission at no additional cost to you). Read my full disclosure policy here.
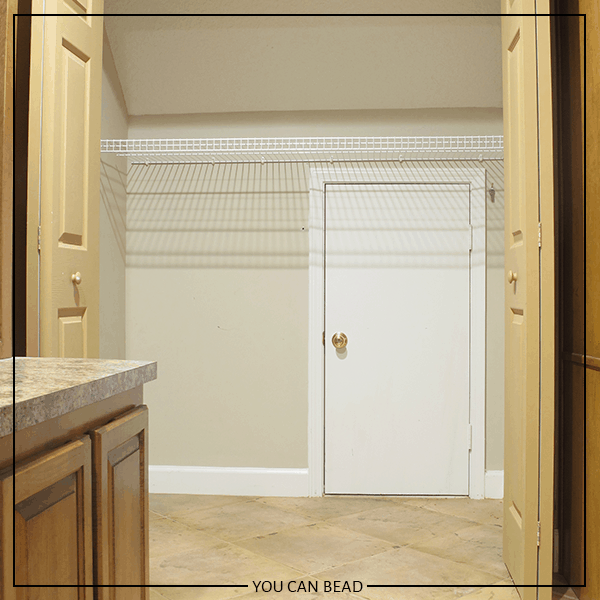
Our office has a spare closet that was crammed with boxes of craft supplies and other stuff. I started thinking, what if I could set up a bead studio in here? I emptied it out and measured it to see if I could fit a table in there, and I could!
TIP: If you set up your workspace in a closet, you can leave your beaded jewelry projects out on the table and just close the doors!
Side note: you may be wondering WHY there is a creepy troll sized door inside the closet. It is an attic access door of some sort. Here’s a view inside:
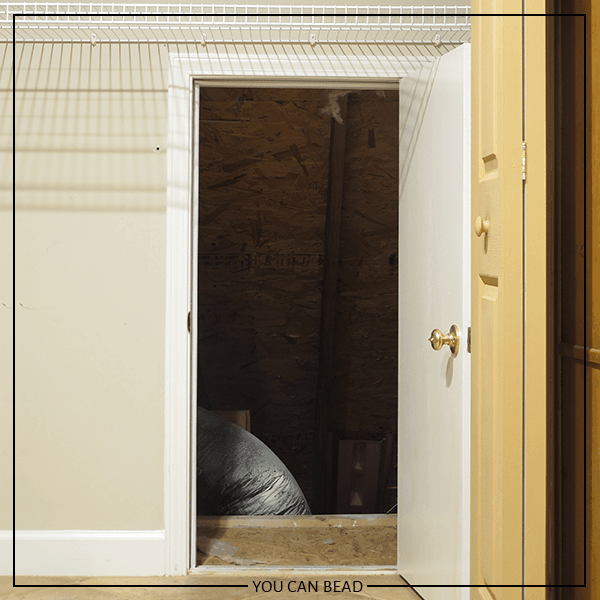
My kids have always been horrified and fascinated by it. The door knob locks and for years we had to hide the keys so the kids wouldn’t try to go inside!
Plan Your Bead Storage
Think about storage when you are planning your bead studio. Where will you put your beads so you can access them easily when making beaded jewelry?
Initially, I planned to use the shelf to store my bead boxes. You may find that’s a great, ready-made solution for you, too. However, in this closet set up with the wide shelf and the low, angled ceiling, I decided against it. Instead I planned to stack my bead boxes on a corner of the table, like this:
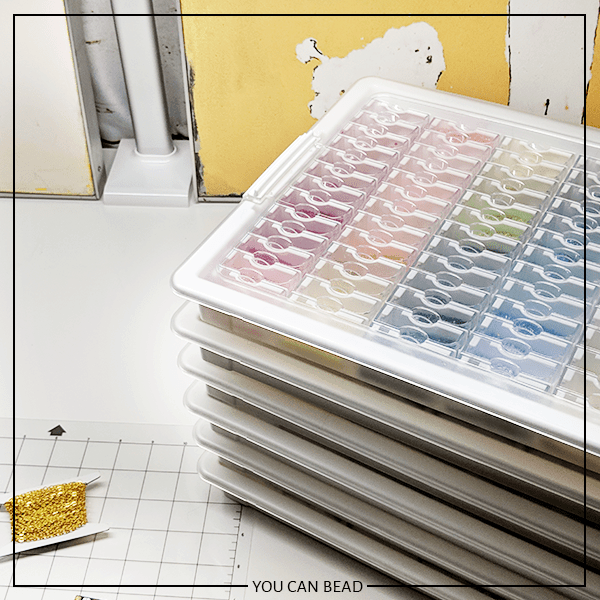
TIP: These are boxes from the Elizabeth Ward Bead Storage system. I am OBSESSED with these boxes and how they’ve organized my bead stash! You can read more about them in this post.
If your table surface is smaller, you may opt for a nearby bookshelf, or shelving or drawers under the table. You can also put up shelving on the walls behind your bead table.
Whatever you decide, be sure to think through your bead storage before you settle on a bead studio set up.
Preparing The Area
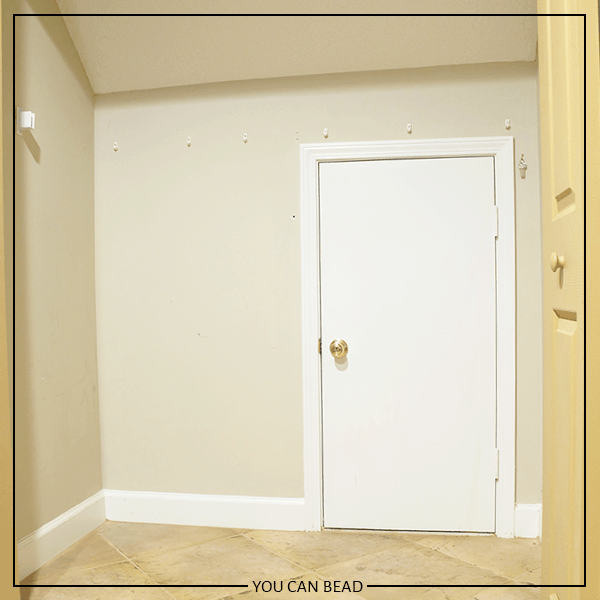
I removed the shelf and stored it away behind the creepy troll door. I’m certain I won’t remember where I put it when I need to put the closet back together in the future, but #oldagememoryproblems.
This is also a great time to clean your closet area! Dust the corners, wipe the baseboards, and vaccuum the carpet if you have it. You want your bead studio to be clean before you start setting up your work area.
Make The Space Your Own
If you are setting up a beading space in a closet or another small area in your home, now is the time to think about painting or decorating the walls. You’ll want to do all of that before you put the table in place.
You could paint the walls in your future bead studio area if you wanted to. This visually makes the space stand out as a special area within your home and tells people, hey, there’s some DIY jewelry making about to happen here!
If you don’t want to paint, you could hang framed artwork or inspirational quotes above your beading table. You’ll be spending a lot of time in your new space and you want it to spark your creativity!
TIP: If your small bead studio will do double duty as both a work table AND a place to photograph your work, you may want a background that will also make a nice photography backdrop.
Since I wanted to cover up the troll door, I decided not to paint. I hung some fabric on the back wall instead. This fabric is just a simple photo backdrop from Amazon. I bought the 5×6.5 foot size. I used very small nails to tack it to the walls at the top and sides.

Deciding on a Work Surface
Next your area will need a work table. Look around your home and see if you have something that will work. It may be a folding table or a small desk. My goal was to fit the largest work surface I could into the closet. That way I could make lots of beaded jewelry!
I didn’t already have a table that would fit, and I didn’t want to spend a lot of money on this project (who would?), so I looked to the good folks at IKEA for a cheap desk solution. I was not dissapointed.
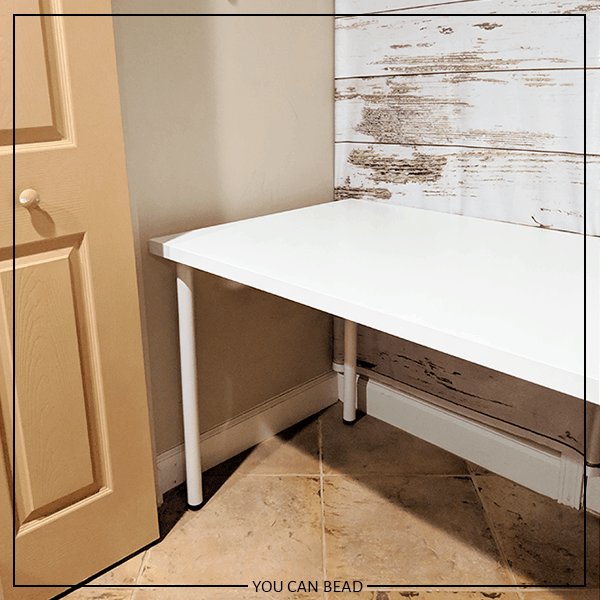
Their LINNMON table top comes in a variety of colors and sizes, and is super inexpensive! I paid $29.99 for it. I decided on the table top first (the size I chose was 59 inches wide x 29.5 inches deep).
(Your closet may be as deep as this one, but the LINNMON table top is also available in other sizes. The 24 inch deep version may be a better fit in a traditional sized closet.
Then I clicked on “customize this combination” from the product page and added simple screw in table legs to my cart. They are called ADILS on the IKEA website and are $4 each!
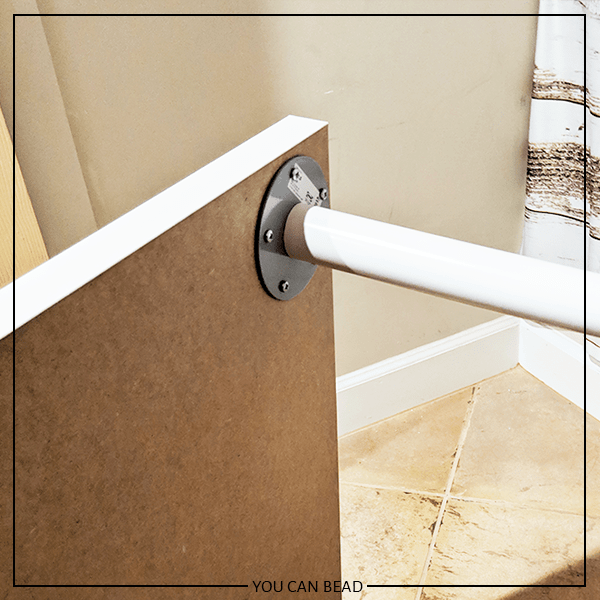
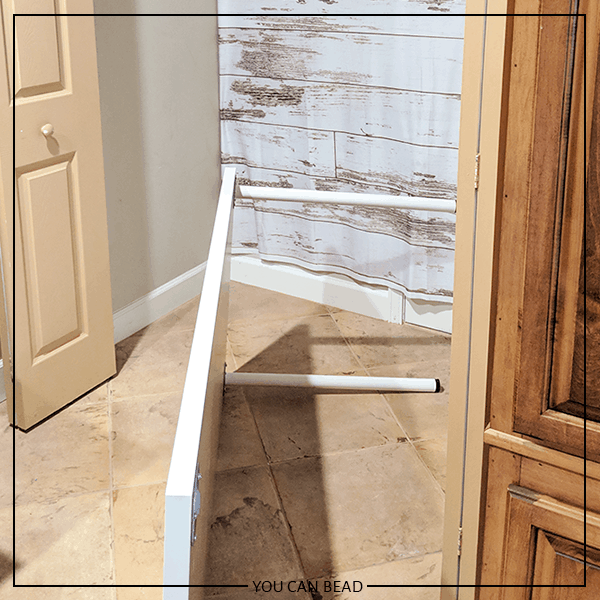
Once I screwed the legs into my IKEA table top, I realized I couldn’t fit the table into the closet! I laid the table down on the floor, unscrewed two of the legs, and then was able to lift the top up and over into the closet. I replaced the two legs, and voila! My beaded jewelry work area was almost complete!
Other Work Surface Alternatives
I’ll admit, I should have customized my IKEA table top to include two very cool drawers as the base instead of just table legs. But that would have increased the cost of the desk and it would have added to my set up time with lots of assembly! However if storage is a big issue for you, check out the IKEA website’s Design Your Own Desk feature for lots of ways to customize your beading table set up.
If you can’t fit a large desk into your new bead studio area, get creative! What about putting a piece of wood on top of two plastic storage drawers, or small bookshelves? Space the drawers or bookshelves apart enough to be able to fit yourself seated between them, then place the wood on top.
Or, depending on the size of your closet or beading workspace area, you may be able to hang a wide shelf as your work surface. Be sure to use as many shelf supports as possible since you’ll be working on this surface a lot.
Whatever you decide for a work surface, the most important thing is to have a dedicated area for your beadwork. That way, you can created beaded jewelry whenever the mood strikes!
Don’t forget to check out my FREE list of the top 5 super cheap items you need to set up your own bead studio. You can get it at the bottom of this post!
Lighting for Jewelry Making
Once the table is in place, you’ll need to decide on how you will light your work surface. If your bead studio will be located near a large window or a well lit room, you may not need to worry about lighting. However, if your bead table will be a closet like mine, lighting is a HUGE consideration.
At first I struggled to come up with a lighting solution. I thought about placing a floor lamp behind me or a small desk lamp on the table. Neither solution will provide even, bright light over the whole bead table, though.
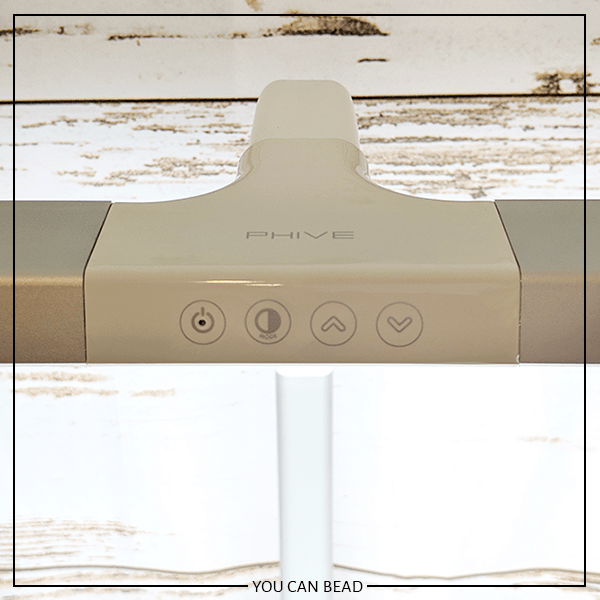
So I started looking around on Amazon and I was so excited when I found this amazing desk lamp! I wasn’t sure if it would solve my lighting problem, but I got it anyway to try it out. I’m so glad I did!
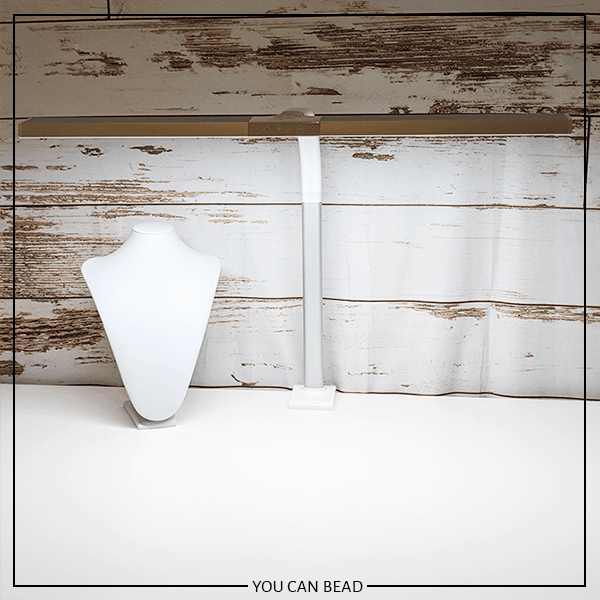
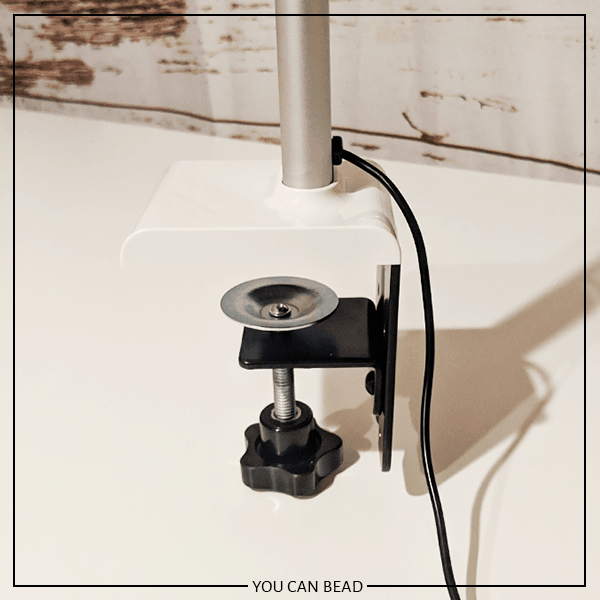
The 15 watt bulb is super bright, and features 4 color temperature modes and 5 brightness levels. The 31.5″ wide bulb is wide enough to light up almost the entire work table! The lamp clamps on to the back of the table and the gooseneck is flexible so you can adjust it to different heights.
I paid less than $75 for the lamp, making it the most expensive part of my bead studio in a closet transformation. However, it is so worth it! Good lighting is key when making beaded jewelry. This lamp was an investment, but it’s a great solution to the problem of lighting a bead table in a small area.
Get To Jewelry Making!
Just like that, my bead studio was ready to go!
Now that your bead studio is all set up, it’s time to get beading! Pour yourself a cup of coffee or tea and settle in. Be sure to have a comfortable chair to sit in in your new workspace. Let your creativity flow without fear of having to put your work in progress away mid stream. In my case, when I need to stop beading (but WHY?), I just shut the closet doors!
I hope this project idea has helped you! Where do you bead now? Did you create a bead studio of your own from an area you hadn’t thought of before? Tell me about it in the comments below! I’d love to hear about it.
Don’t forget to grab a copy of my list of 5 super cheap items you need to set up your own bead studio. It’s available in my free Resource Library. Get the password below!
Until next time… and happy creating!

Want to remember this? Post this How To Transform A Small Space Into A Jewelry Making Studio to your favorite Pinterest board!


Thank you!!! I am a wood / semiprecious carver, recycled wood, plastic & metal artist that does one of a kind jewelry. I moved from a 690 sq ft workshop to a 180 sq ft guest house with a wet bar and bathroom. I will have a 5 ft woodworkers bench that will also hold my desk top jewelers bench. I am also a visual individual who needs to see my materials. I didn’t know what I was going to do about seeing my inventory. Your use of a closet gave me a low cost idea to setup my closet to showcase my beads but not have them covered in sawdust when I’m cleaning and carving. I’ll just slide the doors shut and problem solved. I will also take your advice about IKEA and design a desk that can facilitate all my needs but not cost me a fortune. Your ideas are great!!! I will be getting the bead boxes so I have a place for findings/seed beads. And yes…… I did sign up for your newsletter. Again, thank you so very much!
Raven, I’m so glad my article was helpful! I’m still very much enjoying my creative-studio-in-a-closet. I hope you do, too!
Best regards,
Amy
Thank you for these tips!! Where is your desk chair from? 🙂
Hi, Rachel! I’m glad you liked this post. The chair is from Amazon, but I just checked and it’s not longer available. 🙁
Hi! Great post.
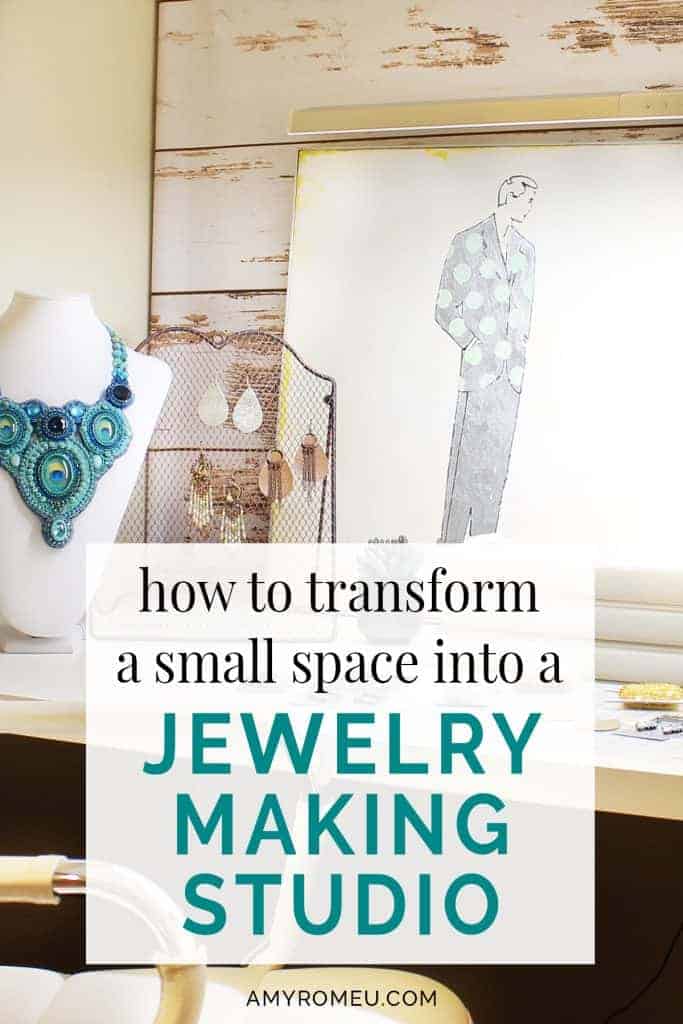
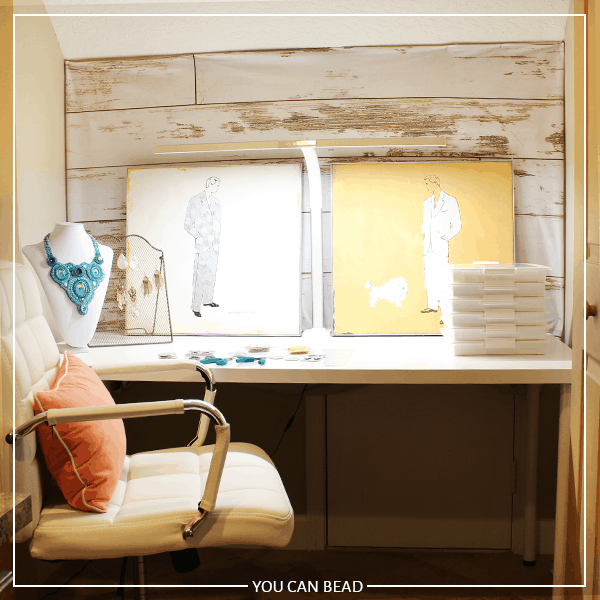
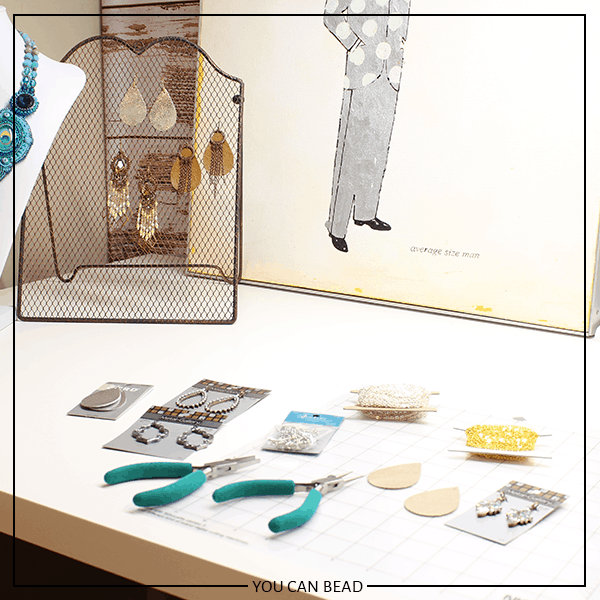
Where did you get that stand that has earrings on it in the photo? It’s just what I’m looking for. Happy to buy it though an affiliate link!
Hi, Kay! Thanks for your comment. I bought it at Fire Mountain Gems a few years ago. 🙂
I like your workspace. I’m curious as to where your other jewelry supplies are stored? I did see a few pliers on the desk but I’m sure you have a lot more tools, wire, as well as other jewelry making tools. I didn’t see a cart/storage cabinet under the desk either. I’m working on redoing my jewelry making area too.
Hi, Kathy! Thanks for your comment. I have a large built in double bookshelf area on the wall next to my desk. I have several stacking storage boxes on the shelves that are labeled.