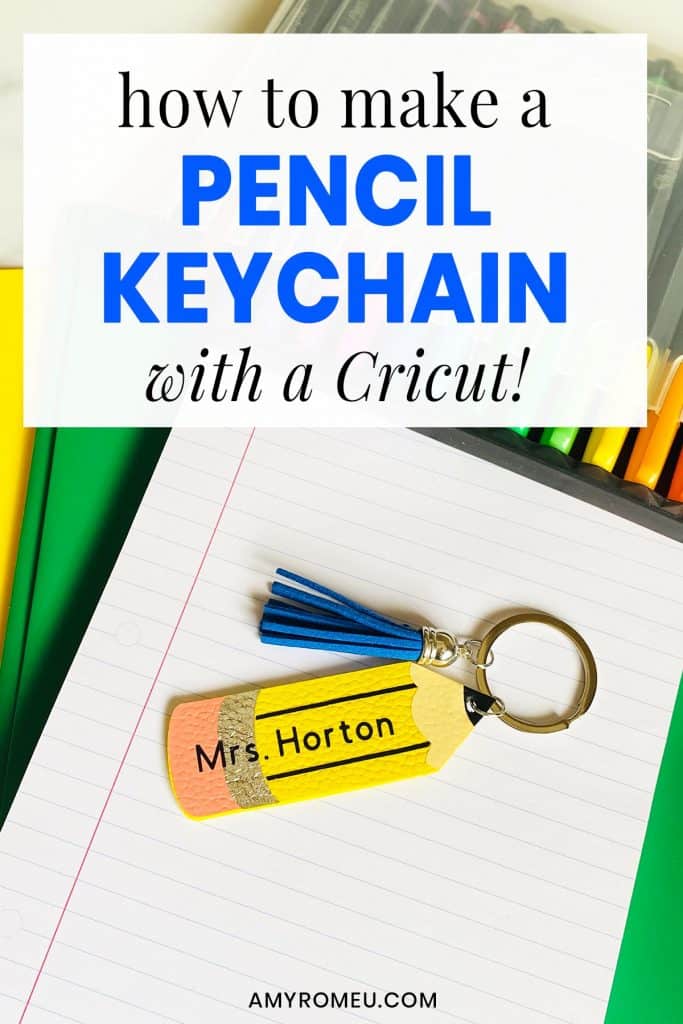
How to Make a Pencil Keychain with a Cricut
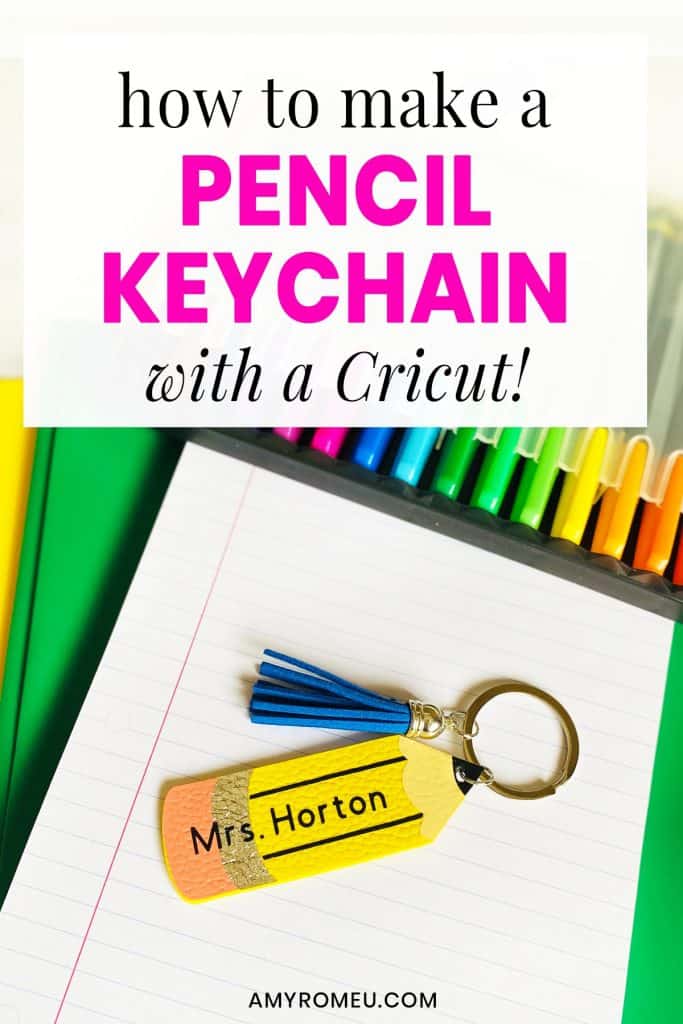
Back to school is here! I have four kids, so back to school time is an event around our house. Our family is so grateful for the amazing teachers we have, and teachers everywhere! I love to use my powers for crafting to make our teachers little reminders of how much we love them, so I made this pencil keychain from faux leather and heat transfer vinyl using my Cricut. If you want to learn how to make your own pencil keychain, keep reading and I’ll show you how!
I made this pencil keychain with my Cricut Maker, but you can also make it with the Explore Air 2, or even the Cricut Joy (check out this post for info on exactly how to cut faux leather with the Cricut Joy here.)
I used yellow faux leather to make this pencil keychain, but if you don’t have yellow faux leather, you can use any color faux leather you have on hand for the base, and then layer on the yellow in heat transfer vinyl before adding the other vinyl layers. Easy, peasy!
Feel free to add whatever text you want to personalize this pencil keychain for your favorite teacher! I’ll show you how to do that in Cricut Design Space.
If you want to make this fun and easy pencil keychain for your favorite teacher, or yourself, I’ll give you my original SVG cut file free! You’ll find out how to download my pencil keychain SVG template for this project at the bottom of this post.
Want to see all of my Cricut earring & jewelry tutorials? CLICK HERE
Ready? Let’s get started!
This page contains some affiliate links (which means if you make a purchase after clicking a link, I will earn a small commission at no additional cost to you). Read my full disclosure policy here.
DIY Cricut Pencil Keychain – Materials List
- A Cricut. I have the Cricut Maker, available at Amazon here. You can also use the Cricut Explore Air 2 or even the Cricut Joy, on Amazon here. You can see all of these machines available on Cricut.com here.
- Cricut Strong Grip (Purple) Cutting Mat. Get a purple mat on Amazon here, or at any craft store. (If you are using the Cricut Joy, you’ll use the green cutting mat instead.)
- Cricut Standard Grip (Green) Cutting Mat, available on Amazon here. This is the mat that comes with the Cricut.
- Yellow Faux Leather, or any color faux leather you have on hand. For this project, I used this yellow faux leather from Amazon here.
- HTV Vinyl in black, light pink, yellow (if you aren’t using yellow faux leather for the base), and cream/beige/tan. You can use Cricut Every Day Iron On from here or Siser EasyWeed from Amazon here. This is a great project to make to use up those vinyl scraps you’ve been saving up.
- Cricut Foil Iron On in Chrome. Available on Amazon here.
- Blue painter’s tape. This will help keep your faux leather firmly in place on your cutting mat, without damaging your mat or your material. You may have some in the garage, or you can get it on Amazon here.
- A Cricut Easy Press or a Cricut Easy Press Mini (what is what I use for pressing earrings). I bought my Easy Press Mini from Amazon here. It’s always good to check Cricut.com for pricing on the Easy Press Mini here – they have really good sales sometimes!
- If you will be using the Easy Press Mini, you’ll need an EasyPress Mat to safely press your items on. I use the 8×10 size, available on Amazon here.
- A weeding tool or a sharp pointed tool. I use the weeding tool from my Cricut tool set here.
- Glue. My favorite is Art Glitter Glue with the precision tip. It doesn’t have glitter in it! You can get it on Amazon in a small bottle here or as a large and small bottle set here. The screw on precision tip allows you to squeeze very small amounts of glue in very small spaces. You could also use E6000, Aleene’s Quick Dry Tacky Glue, or Quick Hold .
- A small hole punch for punching the keychain hole in the faux leather. I used this hole punch from Amazon here.
- Mod Podge or Triple Thick Gloss Glaze, to seal the keychain (optional, but recommended).
- A keyring. I used 1.25 inch size key rings from Amazon here.
- Faux suede or faux leather tassels (optional) – I used tassels from this tassel assortment package on Amazon here.
- Large jump rings (optional) – for attaching the tassel to the key ring. I used these 9mm size jump rings from Amazon.
- Two pairs of flat nose pliers – I’m using one pair of wide nose pliers and one pair of needle nose pliers here, but you can use any two flat nose pliers you have in your jewelry making tool box. My favorites are Wubbers brand in the “Baby” size – I have the Baby Wubbers Chain Nose Piers from Amazon here and the Baby Wubbers Flat Nose Pliers from Amazon here. These are very high quality pliers that will last you a long time!
Note: Be sure to check out my post Beginner’s Guide To Jewelry Making Tools for all the information you need to know about buying and using jewelry making tools.
PROJECT INSTRUCTIONS
STEP 1 – Download Keychain SVG File
Download the SVG cutting file for this pencil keychain shape from my Resource Library. It’s Design #146 in the library. You can fill out the form at the bottom of this post to get the library password emailed to you instantly.
Save the zipped folder that downloads to your computer.
You’ll need to unzip or extract the files FIRST before you can upload the cutting file to Cricut Design Space. Make a note of the file location after you unzip it so you can find it in the next step.
STEP 2 – Upload SVG to Cricut Design Space
For step by step directions on how to upload the SVG file to Cricut Design Space, click here.
Once the keychain shape has been uploaded into Cricut Design Space, drag the pencil shapes up to the top left corner of your canvas.
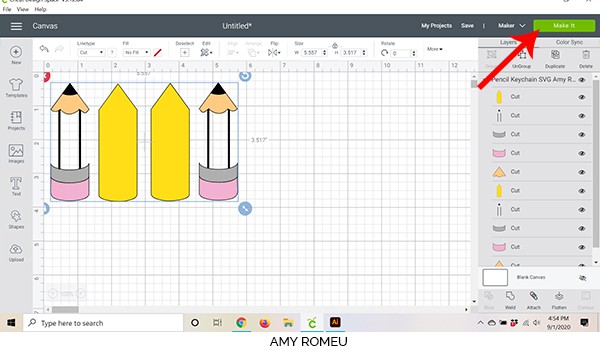
This design uses yellow faux leather as the base. If you don’t have yellow faux leather, you can cut the yellow from heat transfer vinyl instead and press it to any color leather as a base for creating the pencil.
To do that, first ungroup all the layers by clicking UNGROUP at the top of the layers panel. Select the two yellow pencil shapes on the canvas, then click DUPLICATE at the top of the layers panel. Recolor the new yellow shapes to whatever color faux leather you have on hand.
When it’s time to cut the layers, you will cut the yellow shapes from yellow heat transfer vinyl (instead of faux leather) and cut the duplicated shapes from faux leather.
Click the MAKE IT button.
STEP 3 – Cut the Faux Leather Mat
Gather your materials for the next step. You’ll also need your Purple and Green cutting mats.
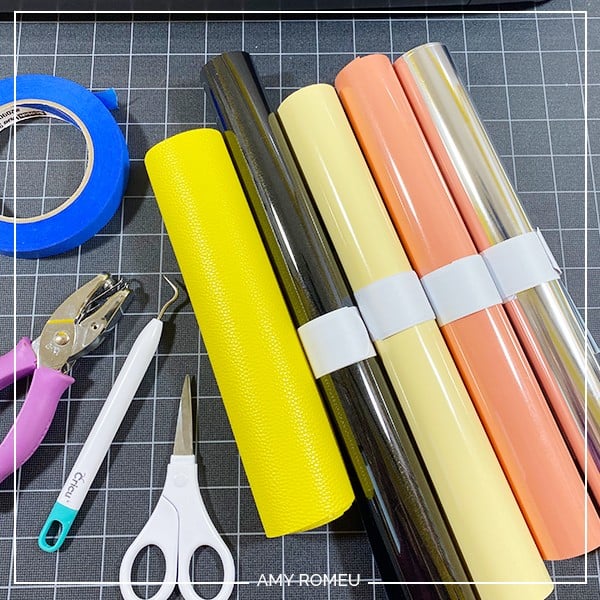
Note: If you’re wondering what the white bands around my HTV tubes are, they are white slap bracelets! I love them and I use them in my studio to keep my vinyl rolls neatly wound. You can get slap bracelets in lots of colors, but I prefer the all white slap bracelets from Amazon here.
In the mat preview screen in Cricut Design Space, you’ll see the mats separated out by color on the left hand side. Scroll down and click on the yellow mat so we can cut that mat first (if you are using another faux leather color, click on that mat instead).
It isn’t necessary to mirror any mats for this project, so just make a note of what size material you’ll need to cut the faux leather shapes completely (about 4 inches tall and 3 inches wide).
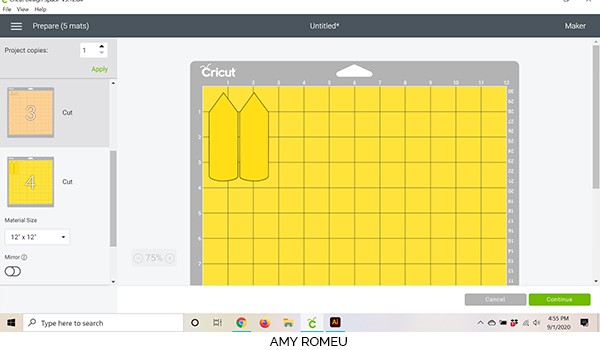
Click the CONTINUE button.
STEP 4 – Choose Material Settings
If you are using the Cricut Explore Air 2, turn your dial to CUSTOM. If you are using the Cricut Maker, continue on. For the Cricut Joy, follow the material selection steps for faux leather in this post.
On the next screen in Cricut Design Space, choose Faux Leather (Paper Thin) as the material setting. If you don’t already have the Faux Leather (Paper Thin) material setting in your Favorites, click on Browse All Materials, search for Faux Leather (Paper Thin), and then click on it to select it.
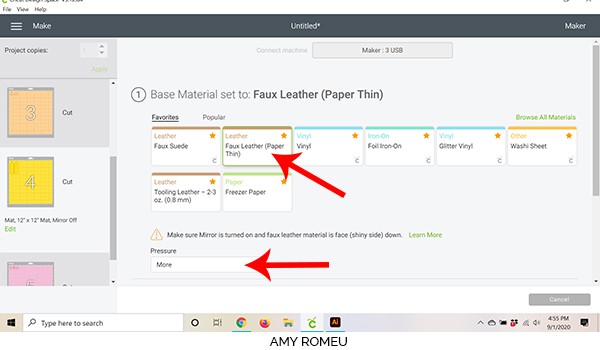
Change the Pressure setting to MORE in the dropdown menu.
Once the material settings are selected, it’s time to prepare the faux leather mat for cutting.
STEP 5 – Prepare & Cut The Faux Leather Mat
Cut a piece of faux leather to the size you noted in the mat preview screen. Place it pretty side down on the purple Cricut cutting mat in the same location on the mat as shown in the mat preview (top left corner here).
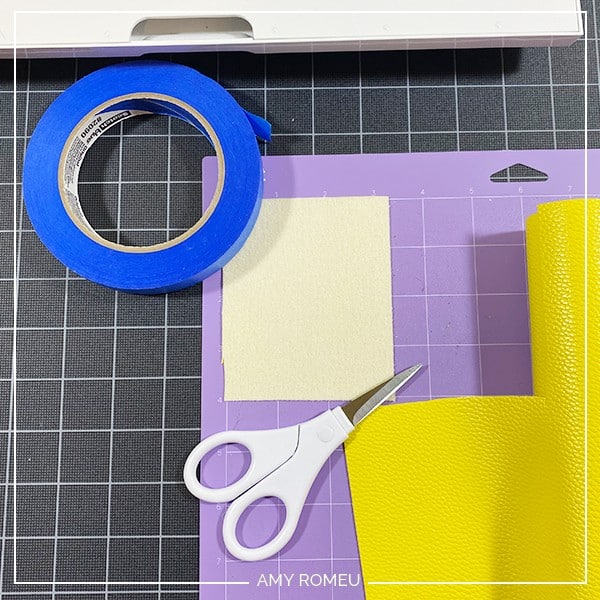
Then tape the faux leather down to the mat on all sides using the blue painter’s tape.

Load your mat into the Cricut by lining up the cutting mat under the mat guides. Press the double arrow button to feed the mat into the machine.
When your mat is loaded correctly, press the flashing C button to start the cut.
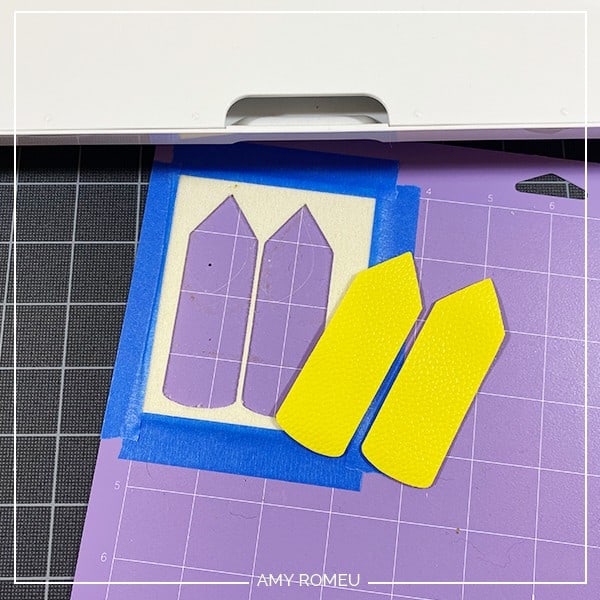
When the cut is complete, and before you unload the mat, use your weeding tool to check one corner of the pencil shape to make sure it cut completely. If it didn’t, you can rerun the cut again by pressing the C button.
Unload the mat by pressing the double arrows button and remove the faux leather shapes. Set them aside and return to Cricut Design Space.
STEP 6 – Cut All the Vinyl Shapes
In Cricut Design Space, scroll down through each vinyl mat and cut the material to size.
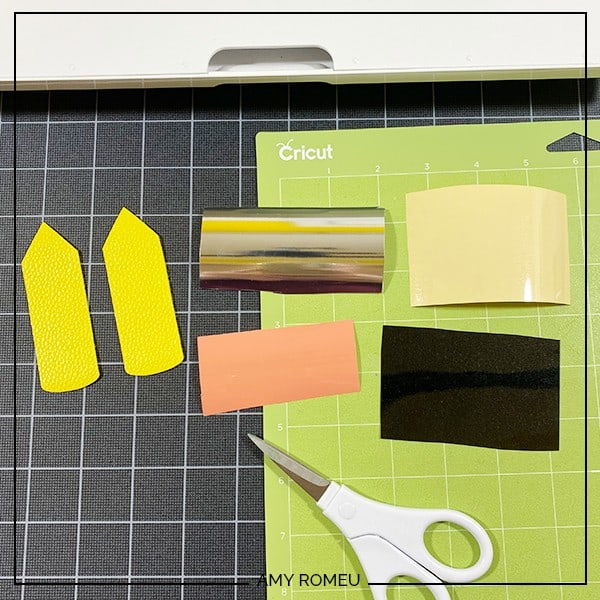
Then start cutting each mat, one at a time.
For the foil iron-on piece, I used the Foil Iron-On setting with Default pressure (Foil Iron-On is a Custom setting on the Explore Air 2). For the heat transfer vinyl layers, I selected Vinyl as the material with Default pressure.
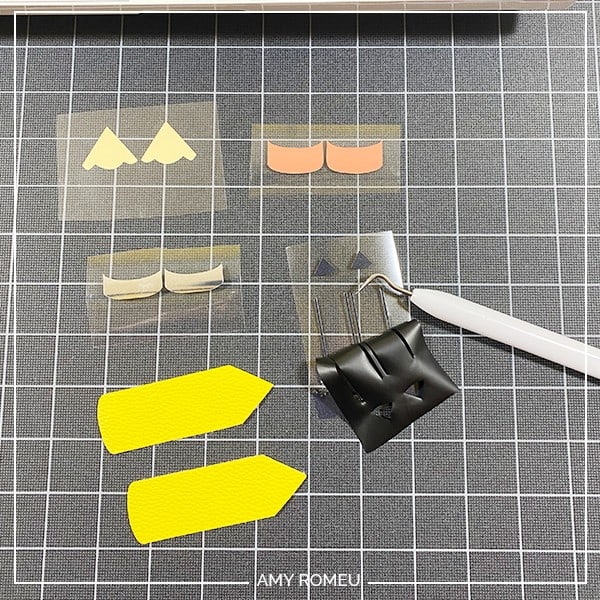
Remove each layer after the cut and weed away the excess vinyl. Repeat until all the vinyl layers are cut and weeded.
OPTIONAL – Add Text to the Pencil Design
If you want to add text to your pencil (front or back) you can easily do that using the text tool in Cricut Design Space. Choose a font that will be easy to weed (wide, block letters, nothing with thin lines) and type out your desired text. I used Cricut Sans, a free Cricut font.
I like to adjust the letter spacing to 2.0 so the letters are easier to weed. Then size your text box as large as it can be without going bigger than 2″ wide and .4″ tall. Be sure to MIRROR the text from the mat preview screen before you cut! Also, make a second copy of your text if you want the same text on the front and back.
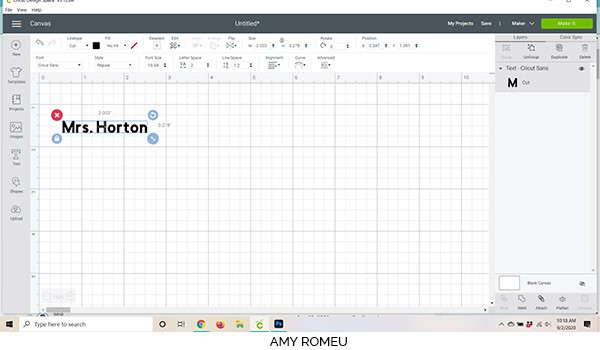
For tiny text like this, I like to use the WASHI SHEET material setting. Carefully weed your text and set it aside.
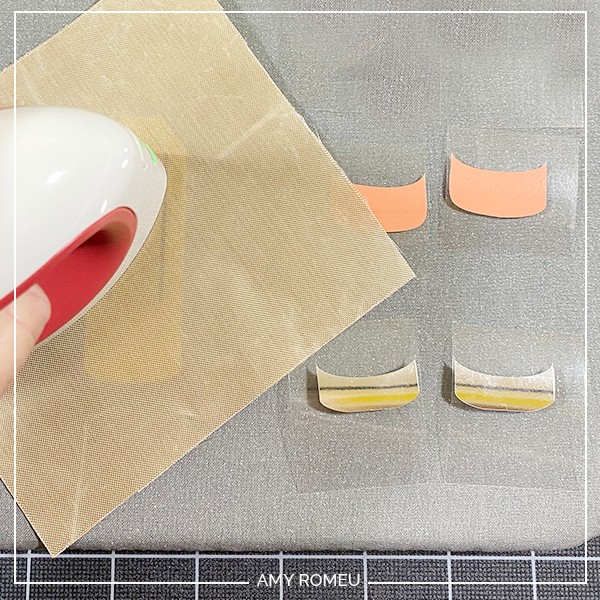
STEP 7 – Heat Press the Layers
To press the vinyl layers onto the faux leather backing, gather your Easy Press Mini or Cricut Easy Press, a heat pressing pad, and a Teflon sheet or piece of parchment paper.

I recommend pressing one side of the pencil keychain from start to finish.
I set the Easy Press Mini on the lowest temperature setting. For the Easy Press, check the recommended temperature guidelines for the specific vinyl you are using here.
If you are using another color faux leather as the base and then yellow vinyl for the pencil, press the yellow vinyl layer first. If not start by pressing the cream colored wooden pencil part at the top. Line up the vinyl on the faux leather pencil, then cover with a cover sheet and press firmly, but not too hard, or else you’ll flatten the texture of the faux leather. Press for 5-6 seconds.
NOTE: Because we are layering vinyl, you don’t want to press every layer for the full recommended time. I like to press each layer just long enough for it to stick well.
Carefully try to remove the clear cover sheet. If necessary, press again for a few more seconds before peeling the cover sheet off.
TIP: Keep the faux leather pencil flat on your work surface and peel away each of the clear cover sheets. This will keep your vinyl wrinkle free.
Next press the black layer, the pencil lead and the lines. Then press the pink eraser, then the foil metal band. Finally, press the text layer (if you have one).
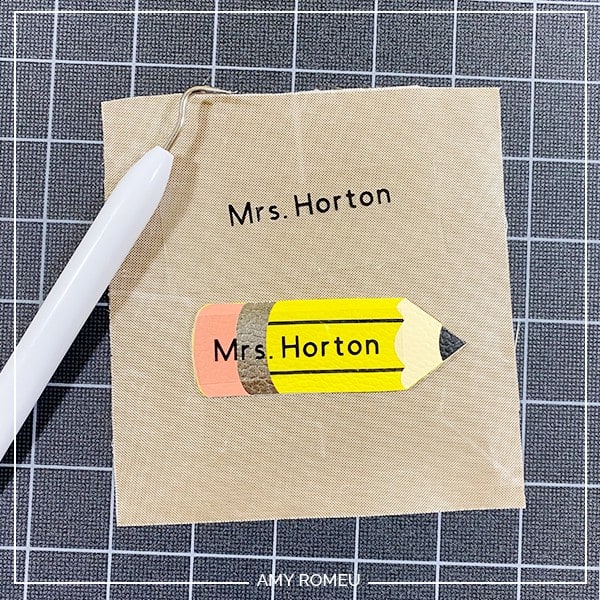
Repeat with the other side of the pencil keychain.
STEP 8 – Glue the Pencil Keychain Together
It’s time to glue the keychain together. The reason I recommend pressing first and then gluing is if you try to heat press on top of faux leather with glue underneath that hasn’t dried completely, the faux leather can bubble. You don’t want that!
I like to use Art Glitter Glue for gluing faux leather (it doesn’t have any glitter in it, and it dries clear). It glues fabric well (which is what the faux leather is, basically) and the bottle comes with a fine tip attachment that is SO helpful! But you can use whatever craft or fabric glue you have for this step.
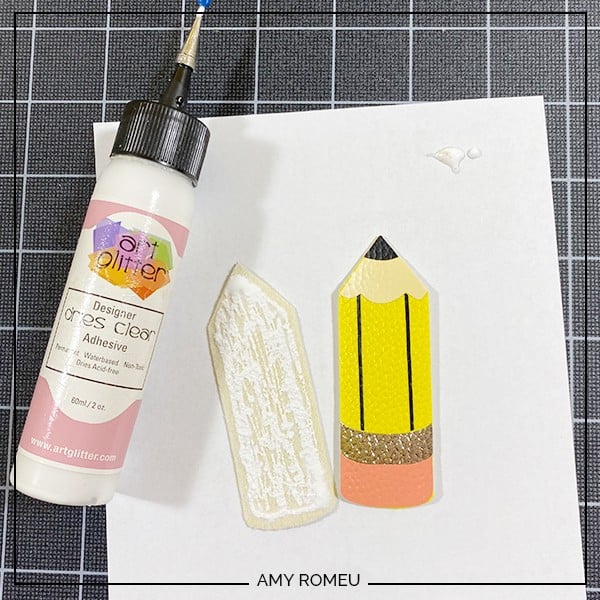
Spread the glue on the back of two of the pencil shapes. Try to get close to the edges but not all the way to the edge.
Place one pencil on top of the other and press down firmly with your fingers. Then place both glued pencils shapes under something heavy like a book for at least a few hours to dry. Overnight is best.
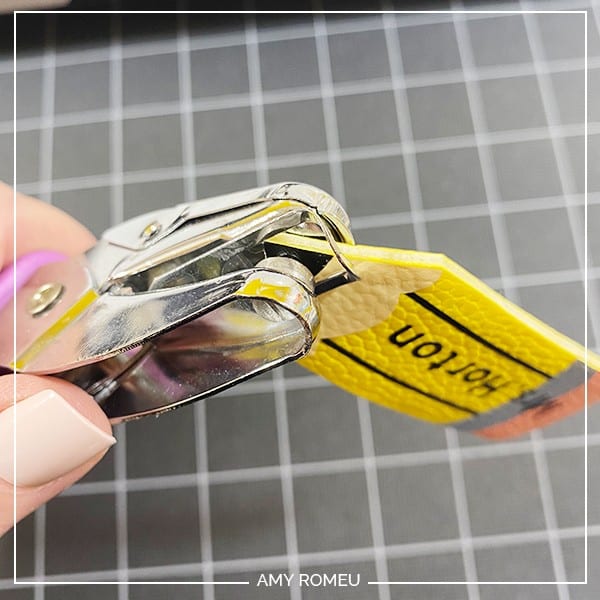
STEP 9 – Make The Keychain Hole
Make sure your pencil keychain is completely dry before punching the hole. I use a 1/8″ hole punch to make the hole. The hole punch I use is on Amazon here.
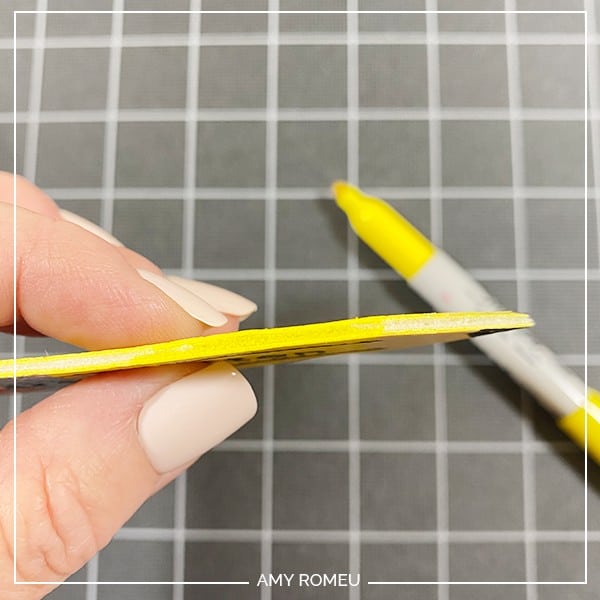
STEP 10 – Color The Edges
This part is totally optional, but it adds a nice, finished look to the pencil keychain edges. I used a yellow Sharpie marker to color the edges of the pencil, and a black Sharpie marker to blacken both sides of the hole.
STEP 11 – Seal Keychain
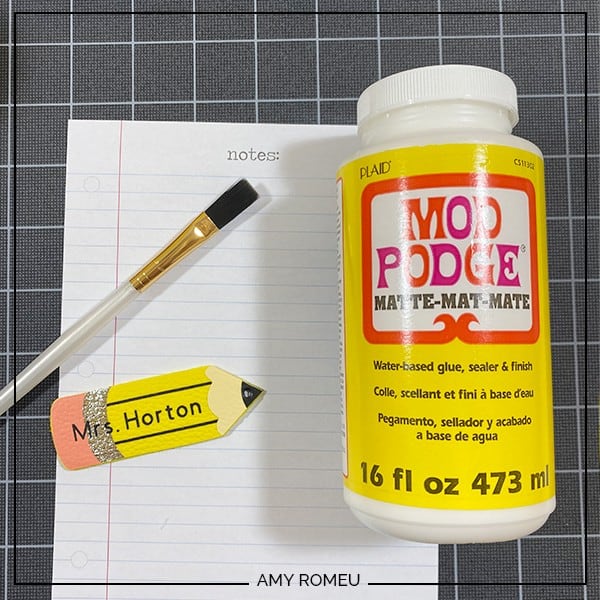
This is another optional step, but I like to seal faux leather keychains to protect the vinyl layers and to add a little more structure. I prefer Mod Podge (either Gloss or Matte) or Triple Thick.
Use a narrow paintbrush and coat one side. Let it dry completely. Then carefully coat the edges and the back. Repeat at least one more time on both sides and let the pencil keychain dry.
STEP 12 – Attach the Keyring and Tassel
First you will attach the pencil to the keyring. Then you can add optional tassels if desired.
Open the jumpring with flat nose pliers. I use two pliers and grip each side of the jump ring, making sure the opening in the jump ring is facing up (the twelve o’clock position).
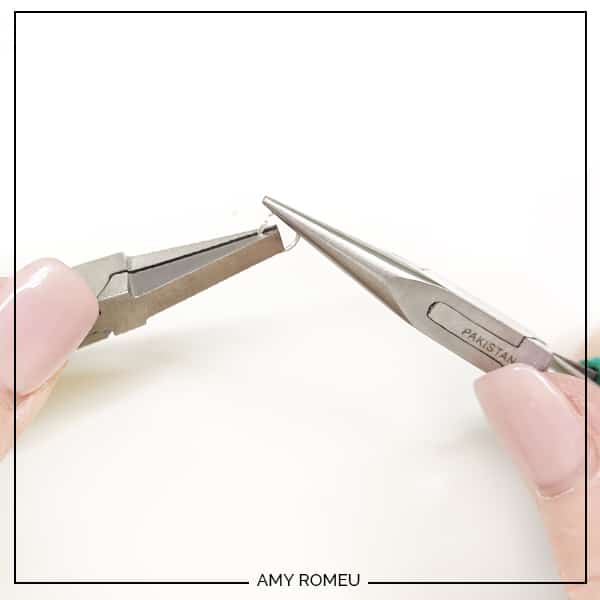
Then I rotate one wrist forwards or backwards, so the circle creates an opening but doesn’t bend out of it’s circle shape.
I like to hold on to one side of the jump ring with pliers to stability. Then I added the pencil and the keyring.
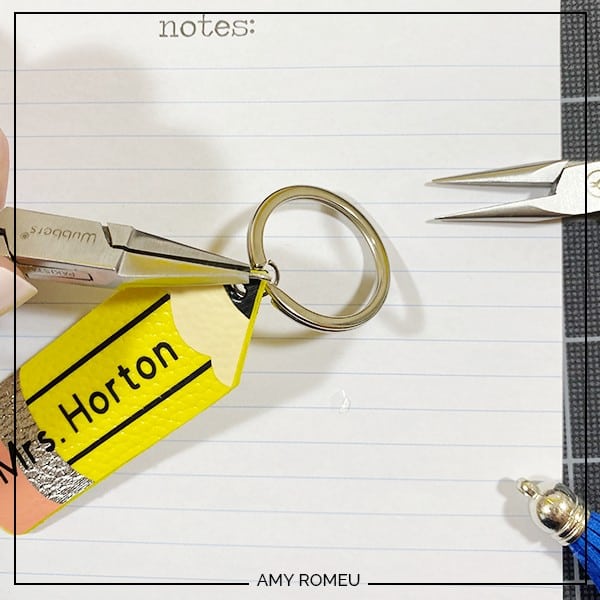
Use your two pliers to close the jump ring again, using a wrist twist in the opposite direction. This takes a little practice, but you’ll get it!
Repeat with a tassel, if desired. That’s it! Your pencil keychain is complete!
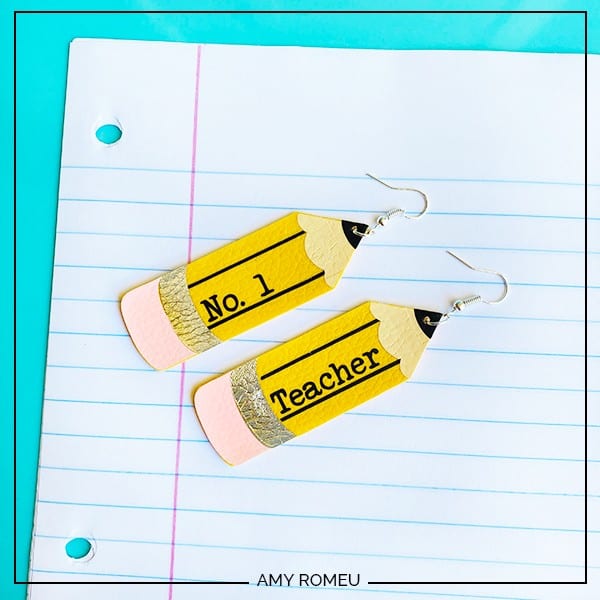
If you liked this project and you want to make matching pencil earrings, click here to see my DIY Pencil Earrings post.
What do you think? Are you going to make a pencil keychain for your favorite teacher, or yourself? If you do, please post a comment and attach a photo of your pencil keychain! I would love to see it, and see what text you chose!
Want to see all of my Cricut earring & jewelry tutorials? CLICK HERE
Until next time… and happy creating!

Want the FREE SVG file you so you make this PENCIL KEYCHAIN yourself?
It’s Design #146 in my Resource Library! You’ll receive the password for the Resource Library instantly after filling out the form below!
Want to remember this? Post this PENCIL KEYCHAIN CRICUT DIY project to your favorite Pinterest board!