
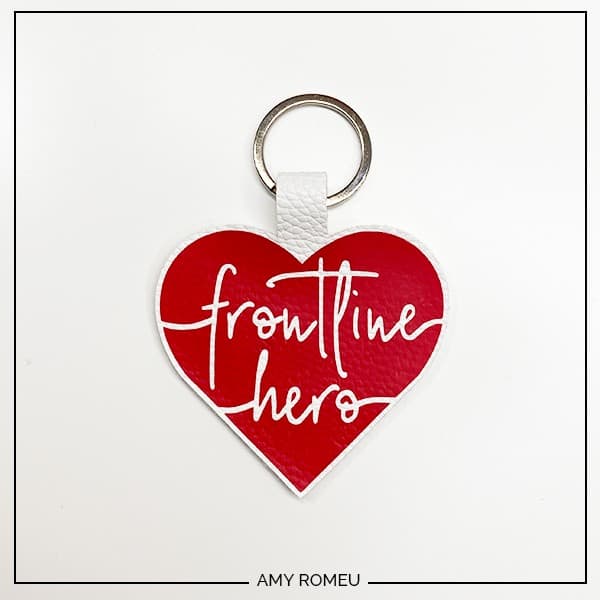
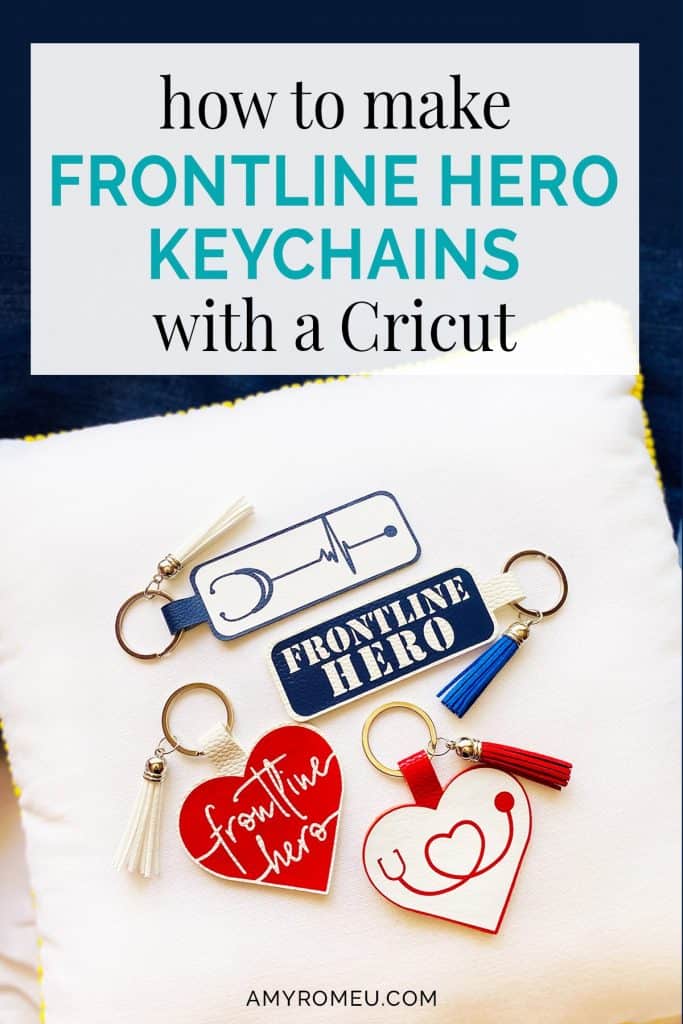
Make a Frontline Hero Keychain with a Cricut
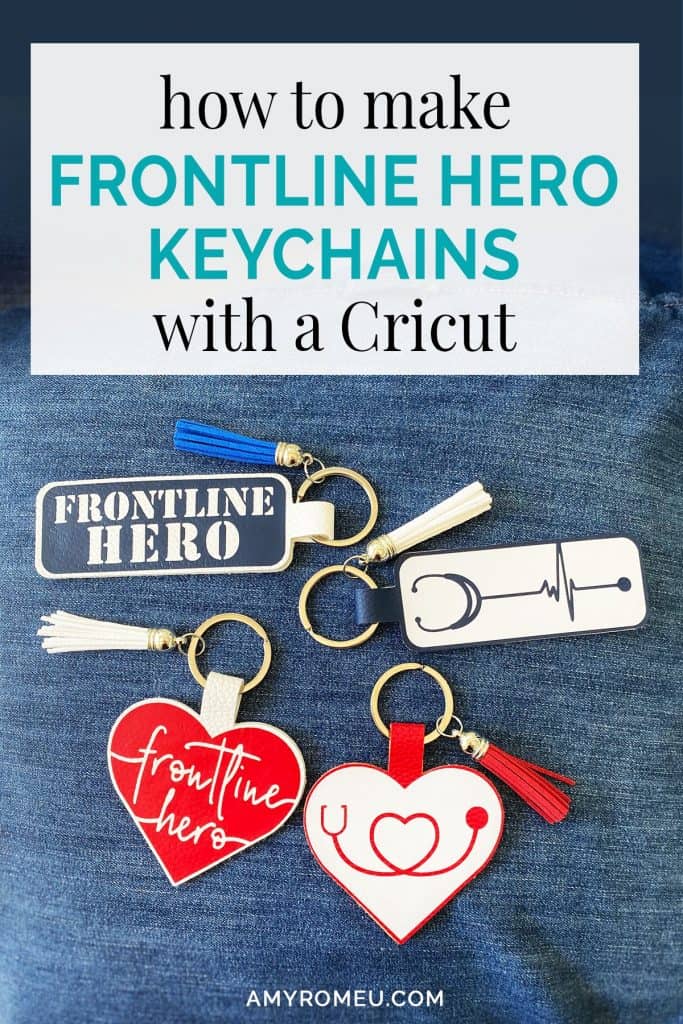
Make a Frontline Hero Keychain with a Cricut
It’s Spring 2020, and there are some real challenges our world is facing. Do you ever feel like there’s nothing you can do about what’s happening around you? I know I do sometimes. However, yesterday, my perspective changed on that a little bit, when one of my readers reached out to me and asked for my help with a special project. She said she loved my Word of the Year Keychain project and wanted some tips on how to design a similar keychain for the Frontline Hero medical professionals in her community. I jumped at the chance to help her, and I designed two “Frontline Hero” keychain designs for her within an hour of receiving her message. She suggested I share them with my audience so everyone can share their support and gratitude for the Frontline Heroes in their own communities. So join me as I show you how to make these Frontline Hero Keychains with a Cricut.
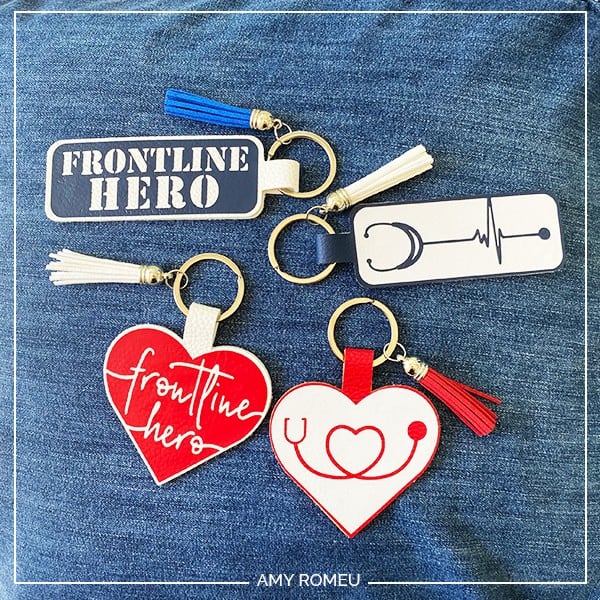
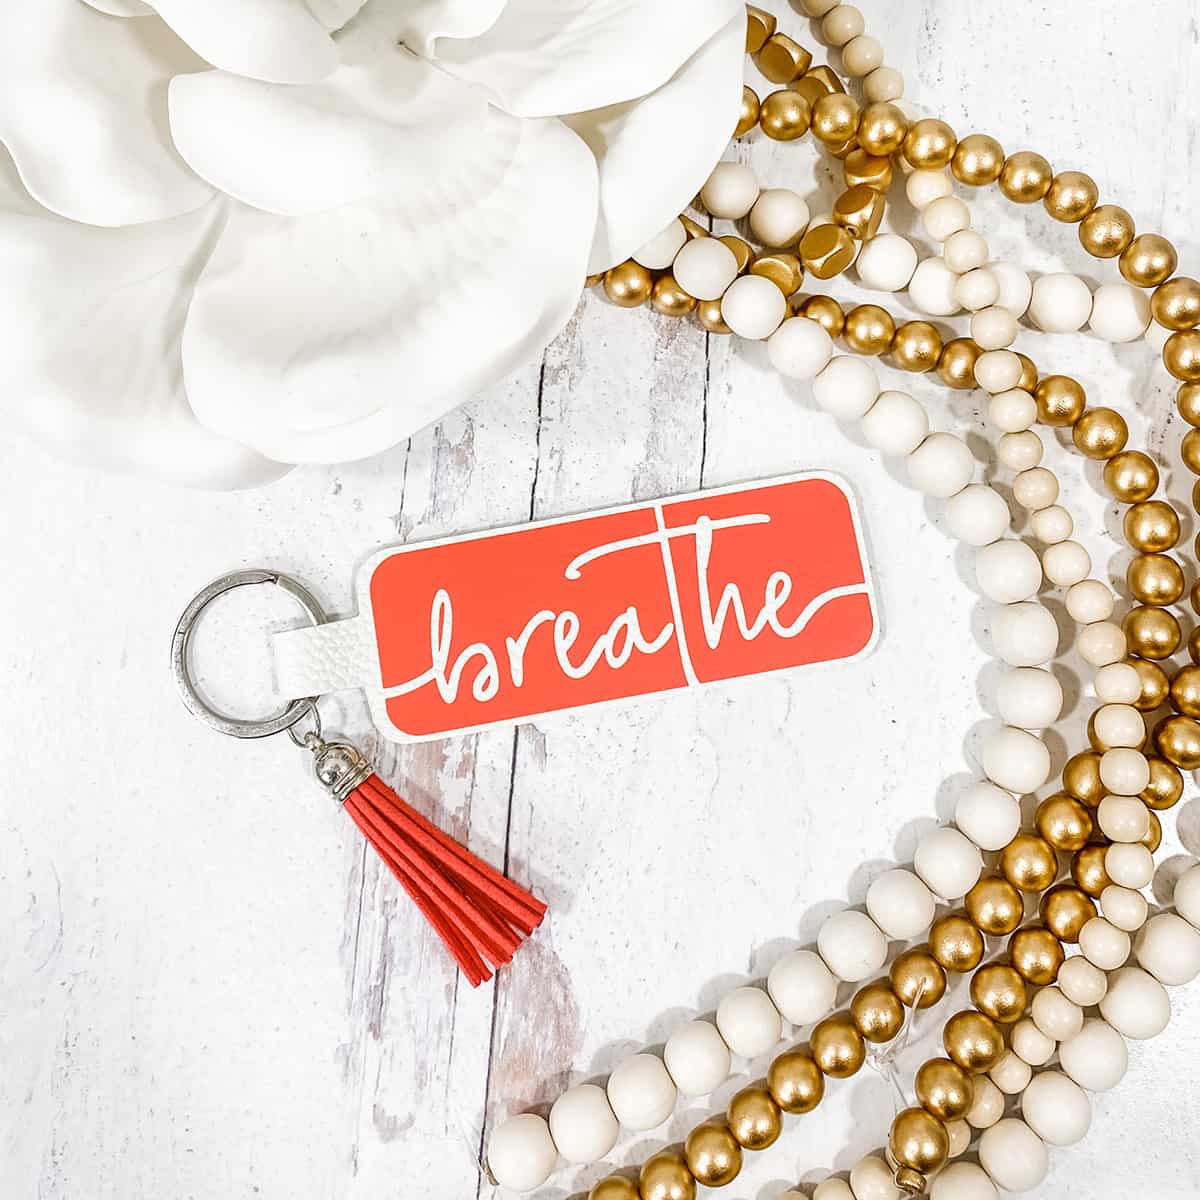
The two main materials the keychains are made from are faux leather and heat transfer vinyl. The design is such that you can use any color faux leather and vinyl you want. I went with red, white, and blue, but these would be great in any color combination you choose.
If you’re worried you’ll need a Cricut Maker to make a Frontline Hero keychain, don’t! I cut all the shapes for the keychain with just the Cricut Fine Point Blade, which means it can be made with the Maker, the Explore Air 2, or even the Cricut Joy! To learn more about how to cut faux leather with your Cricut Joy, see this post.
I hope you’ll want to make this project yourself for Frontline Heroes in your community. I’m sharing the SVG cut files for these Frontline Hero keychain project. You can get access to the files via a free download from a link at the bottom of this post.
Want to see all of my Cricut earring & jewelry tutorials? CLICK HERE
Ready to make this Frontline Hero keychains with a Cricut? Let’s get started!
This page contains some affiliate links (which means if you make a purchase after clicking a link, I will earn a small commission at no additional cost to you). Read my full disclosure policy here.
DIY Cricut Frontline Hero Keychain – Materials List
- A vinyl cutting machine. I have the Cricut Maker, available at Amazon here. You can also use the Cricut Explore Air 2 or any cutting machine you have that will cut a thicker material like faux leather.
- Cricut Strong Grip (Purple) Cutting Mat. You’ll use the purple mat to cut the faux leather. You can buy these on Amazon here, or at Michael’s here. They are also available at Hobby Lobby, Joann’s, and Walmart – or anywhere Cricut machines are sold.
- Cricut Standard Grip (Green) Cutting Mat. You’ll use the green mat for cutting the HTV. You probably already have one from when you bought your Cricut machine, but if you need a new one, they are available on Amazon here or at any craft store.
- A Cricut Easy Press or a Cricut Easy Press Mini (what I use). I bought my Easy Press Mini from Amazon here. (For this project, I don’t recommend using a traditional heat press unless you are very experienced at controlling the pressure. Too much pressure on these keychains can damage the faux leather pebbled texture.)
- If you will be using the Easy Press Mini like I do, you’ll need an EasyPress Mat to safely press your items on. I use the 8×10 size, which you can see on Amazon here.
- Faux Leather in your choice of colors. For this project, I used this white faux leather sold on Amazon here. There are 5 sheets that come in this pack, so you can make a lot of keychains! I also used this assorted pack of bright colors of faux leather from Amazon here.
- HTV Vinyl in the color of your choice. I used Siser Easyweed Heat Transfer Vinyl in the following colors (available on Amazon): White, Red, and Navy Blue. But you can use any vinyl colors you want, or Cricut Iron-On Foil or Glitter HTV!
- Keyrings. I used 1.25 inch size key rings from Amazon here. You could use 1 inch key rings, too, but I wouldn’t go much smaller than that.
- Blue painters tape (as needed). This will help keep your faux leather in place on your mat. (If your mat is new and very sticky, you may not need to use it.) I bought this one on Amazon here but you can get it at any hardware store or even some grocery stores!
- Weeding tools. I have all the tools I need in my Cricut tool set from Amazon here. You can get also get the basic Cricut tool set at Michael’s here, or from Hobby Lobby, Joann’s, or Walmart.
- Glue. I’ve made a lot of keychains and there are so many good glues that will work: E6000, Art Glitter Glue, and Aleene’s Quick Dry Tacky Glue. I used Quick Hold quick drying glue, available on Amazon here, but use whatever you have around the house.
OPTIONAL, IF YOU WANT TO ADD TASSELS
- Faux leather tassels (optional) – I got these faux leather tassels from Amazon here.
- Large jump rings – I used this assortment of 10mm size jump rings in different metal finishes from Amazon here. Your local craft store or bead store will have plenty of jump rings if you want to shop in person. Or you may buy a keyring that already has a smaller jump ring attached.
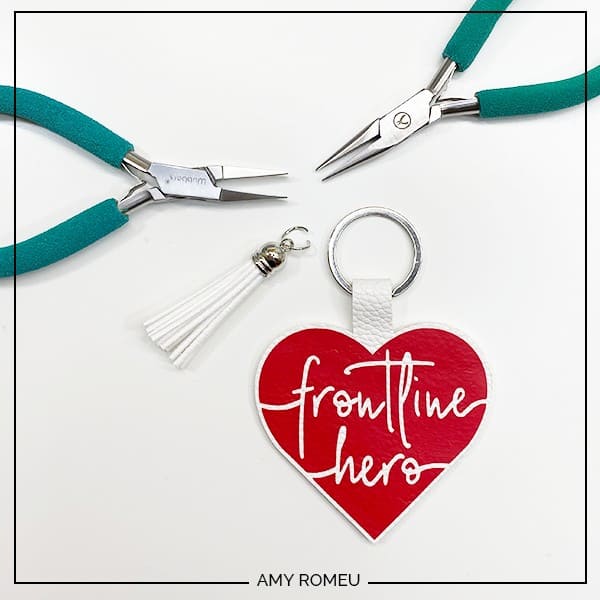
- Two pairs of flat nose pliers – These are to open and close the jump ring so you can attach the tassel to the keyring.
NOTE: If you don’t have pliers, but you end up buying the 10mm jump ring assortment I linked above, you can use the included “jump ring open/close tool” instead. If you want to use pliers, you can use any two flat nose pliers you have in your jewelry making tool box, or in your household tool box. You can also use two pair of very strong tweezers in a pinch!
If you love making Cricut jewelry like I do, though, you’ll want to invest in some quality jewelry making pliers. They will last for many years to come, I promise! My favorites flat nose jewelry making pliers are Wubbers brand in the “Baby” size. You can see the Baby Wubbers Chain Nose Piers on Amazon here, and the Baby Wubbers Flat Nose Pliers on Amazon here.
PROJECT INSTRUCTIONS
STEP 1 – Download Free SVG
Download the free SVG cutting file for the keychain shapes from my free Resource Library. The link to get the password is at the bottom of this post.
Save the zipped folder that downloads to your computer. You’ll need to locate your zipped file after you save it so remember where you are downloading it to! You’ll have to unzip or extract the files FIRST before you can upload the cutting file to Cricut Design Space. Make a note of the file location after you unzip it so you can find it in the next step.
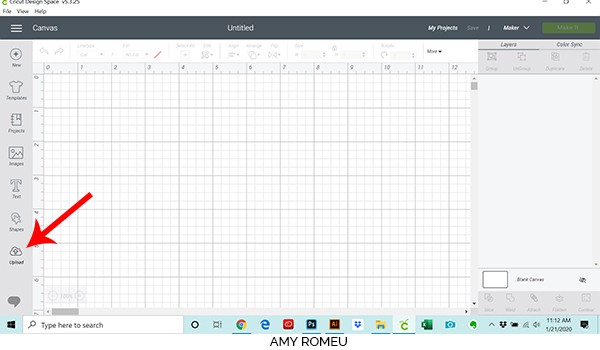
STEP 2 – Upload SVG to Cricut Design Space
When you open Cricut Design Space, click on NEW PROJECT to get started. Then click on UPLOAD from the left hand side menu.
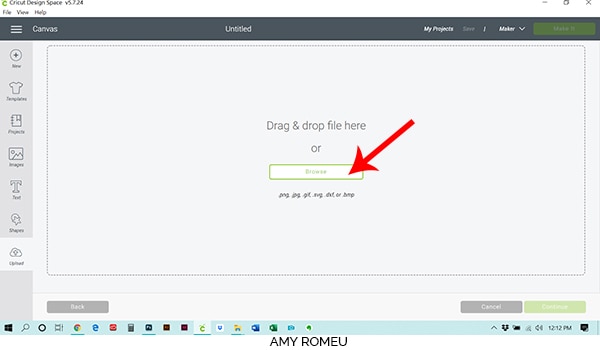
Click on the UPLOAD IMAGE button, then click BROWSE to locate where your unzipped SVG files are saved on your computer.
The rectangle design and the heart design are separate files. I highly recommend you only open one design at a time. That way you won’t be confused during the “welding” step.
First I’ll show you how to open the heart design.
Double click on the heart SVG file to bring it into the upload screen in Design Space. If you get an error message that says “unsupported file type,” you may have clicked on the wrong file, or your SVG file is still zipped.
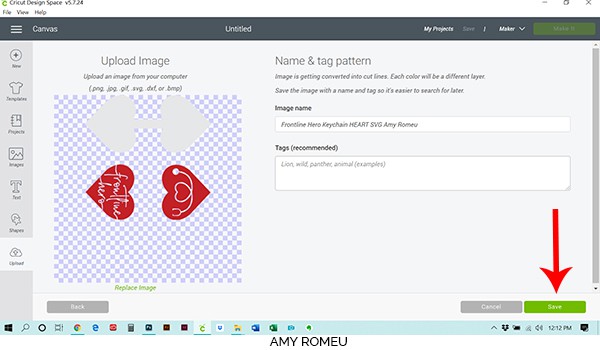
You’ll see a preview of the keychain shapes for this project. Hit the green SAVE button.
After you’ve selected your file to upload, you’ll see it as the first item in your “recently uploaded designs” row.
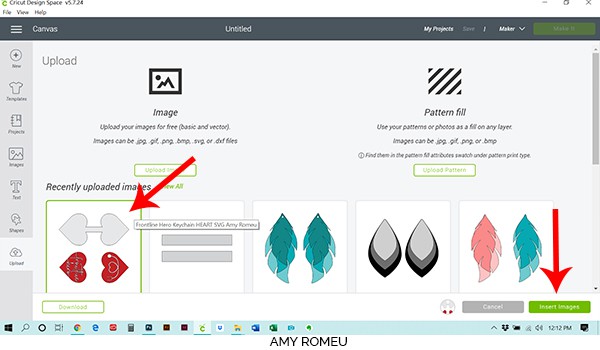
Click on it so it is outlined in green. Then click on the green INSERT IMAGES button in the bottom right corner.
STEP 3 – Prepare SVG for Cutting
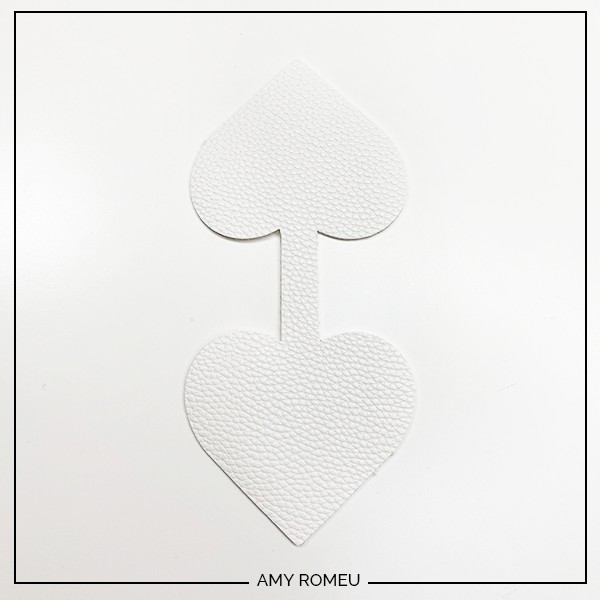
This brings the shapes you’ll cut for the keychain into Cricut Design Space. Drag them up to the top left corner of your canvas. Your canvas should look like this:

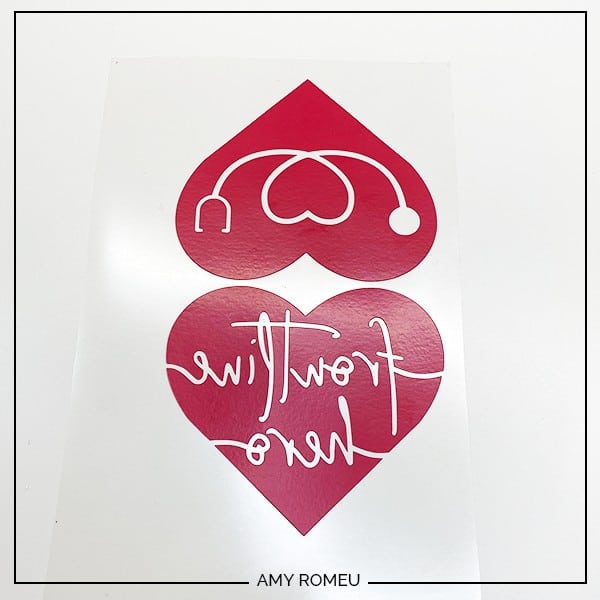
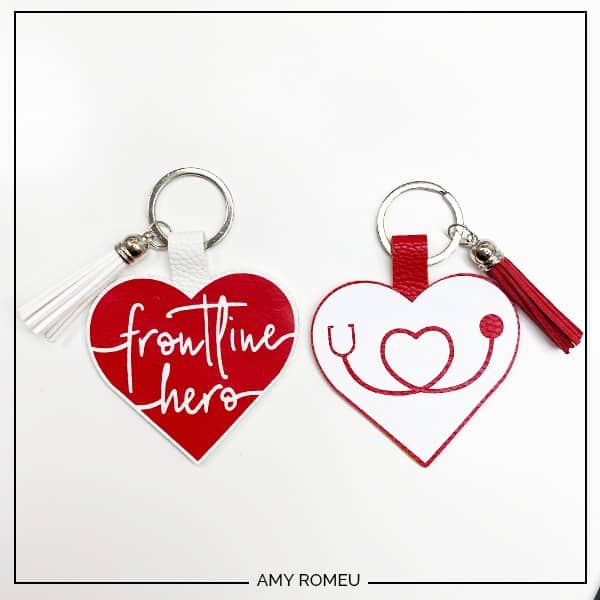
You can see there are three elements to this keychain cut file. The first is the faux leather keychain backing, shaded in light grey. That will cut out of white faux leather. The second and third elements are the red hearts, which are the front and back designs. I cut these shapes out from HTV.
IMPORTANT! You don’t want to resize your shapes in Cricut Design Space, because they are already sized so the word fits perfectly on the keychain backing.
STEP 4 – Weld SVG Art
However, we do have to make a few adjustments to the files in Cricut Design Space before moving forward. If not, our word shapes won’t cut right.
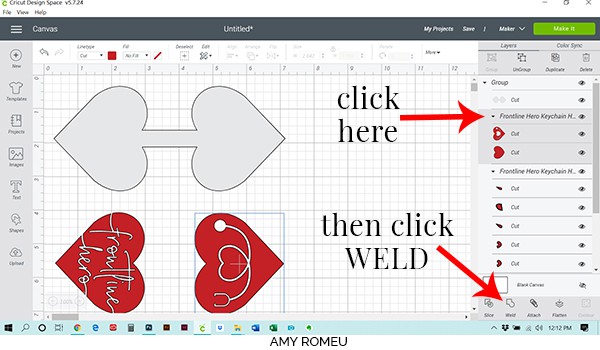
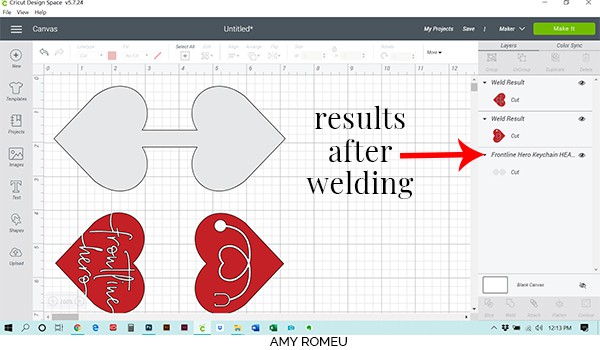
You can see in the preview of the the heart shape with the words Frontline Hero on the right hand side that Cricut Design Space has broken up this word shape into several small parts. We need to connect them permanently so they will cut together.
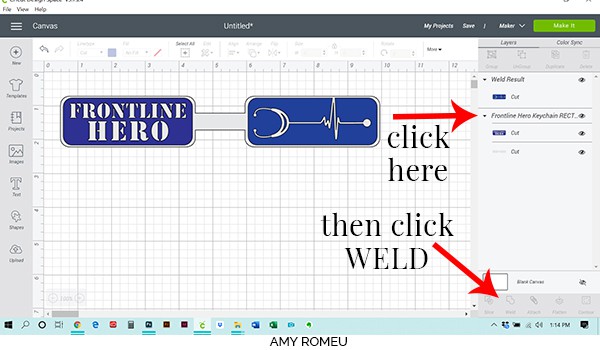
To do this, click on the heading for the first red word shape as shown in the image below. You’ll see the blue box that was selecting all three elements on your canvas is gone, and now only one of the red hearts is highlighted with a blue outline. Then click WELD in the bottom hand side. This will permanently connect all of the shapes in this rectangle together.
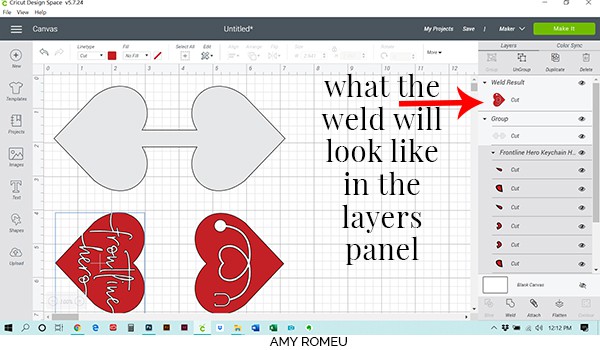
The first red heart will look like this now in the layers panel on the right hand side, and you can see all those small cut shapes are now unified and create the complete word shape.
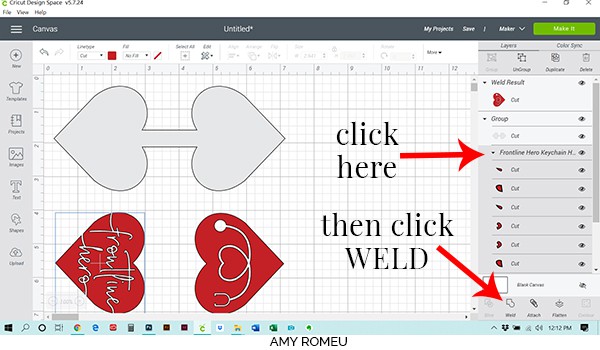
We need to repeat this process for the other heart. Repeat the steps for the first word box – click on the second grouped heading for the second red heart and click WELD.
Your canvas should look like this. Now your shapes are ready to cut!
NOTE: If you want to make this keychain for a Frontline Hero who isn’t a medical professional, simply delete the heart layer with the stethoscope and duplicate the heart layer that has the Frontline Hero text. Your keychain will read Frontline Hero on both sides!
If you are making the rectangle keychain instead, the steps are the same as above, but you only have to weld one side of the design. See below.
Click on the green MAKE IT button in the top right hand corner.
STEP 5 – Prepare Faux Leather Mat for Cutting
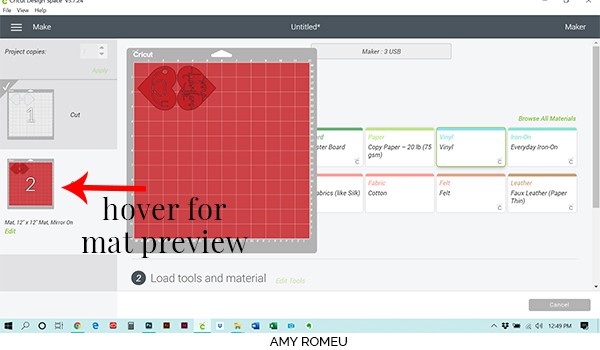
This keychain project will cut the two different materials (faux leather and HTV) on two separate mats. Cricut does all the hard work and separates them for you. You can see the two separate mats in a preview on the left.
The first mat that will cut is the white faux leather keychain backing.
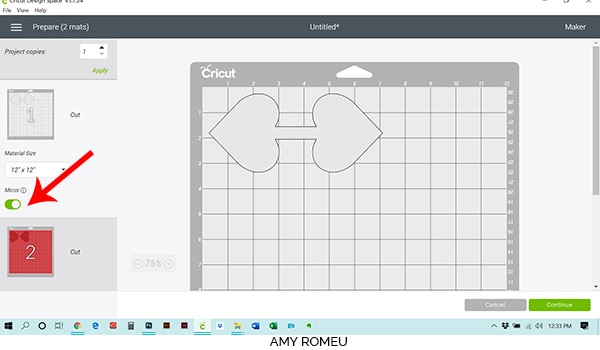
We can see the size of white faux leather we need on our mat is approximately 7.5 inches wide and 3.5 inches wide. Make a note of this size.
Set your MIRROR toggle (on the left hand size preview screen) set for this first mat to ON. Then click on the green CONTINUE button.
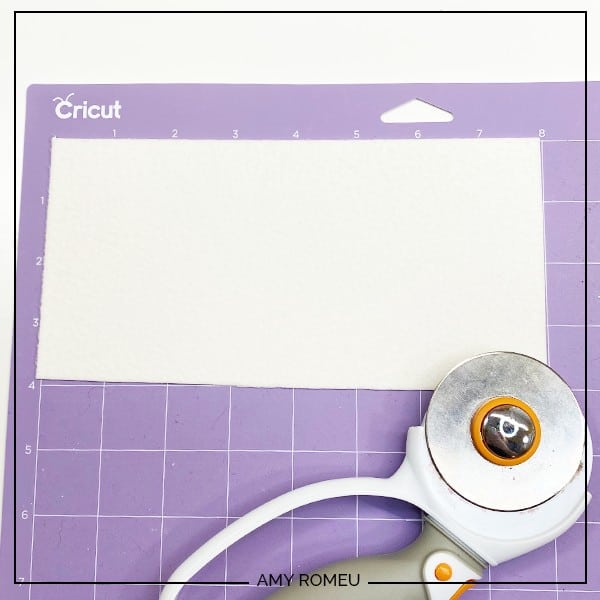
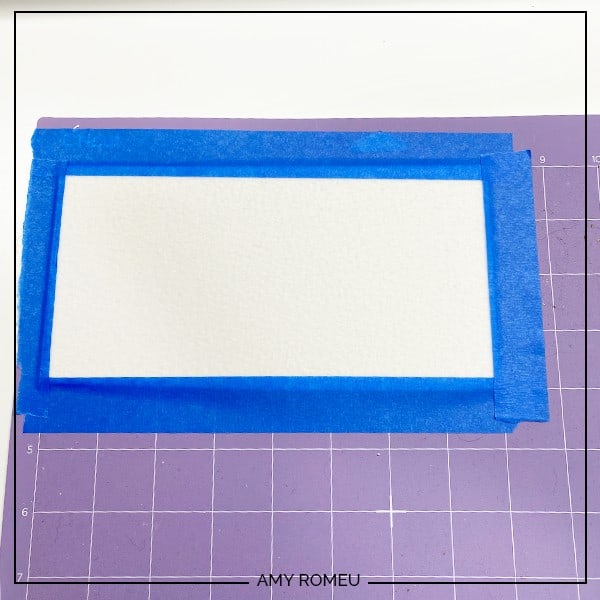
I like to cut a slightly larger piece of faux leather so there’s room to tape it down without getting in the way of the blade. For this cut, I cut a piece that was about 8 inches wide and 4 inches tall.
(I love my Fiskars Rotary Cutter to cut my faux leather material to the exact size right on my mat – it’s are available on Amazon here. Just be sure not to press down too hard so you don’t damage your mat! )
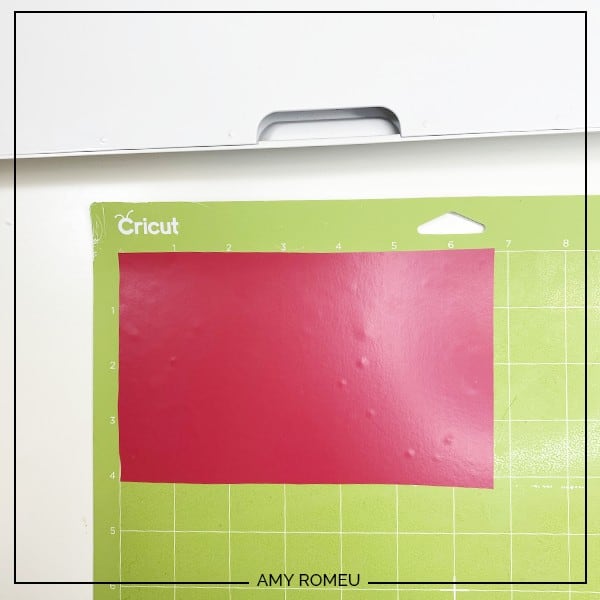
Place your faux leather face down (pretty side down) on your purple strong grip cutting mat.
Then tape down the faux leather to the mat on all sides, like this:
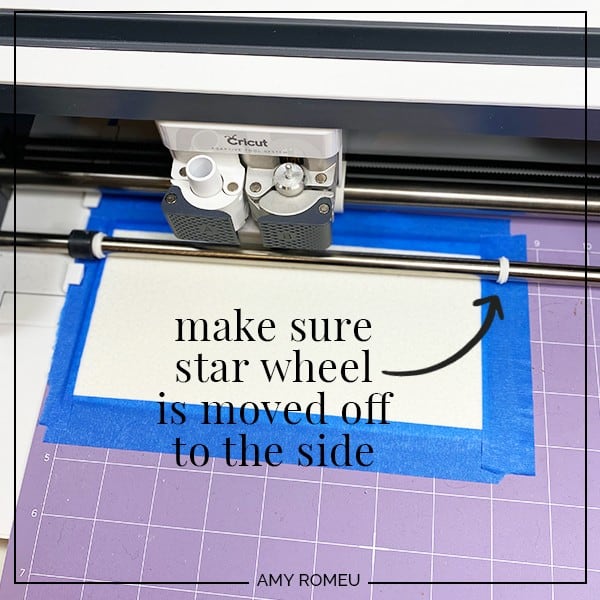
Load your mat into your Cricut by pressing the load button with the arrows. Make sure the white star wheels are moved off to the side of the faux leather so they don’t drag cross your cutting area and lift the material.
STEP 6 – Choose Your Materials
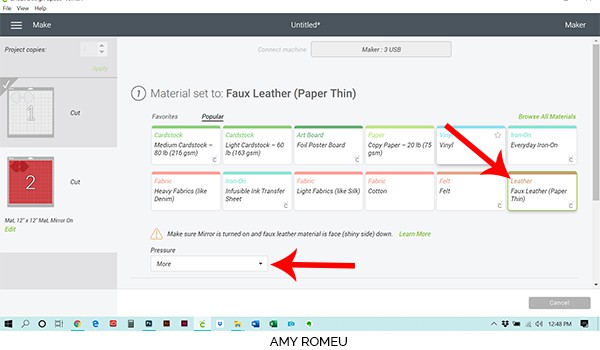
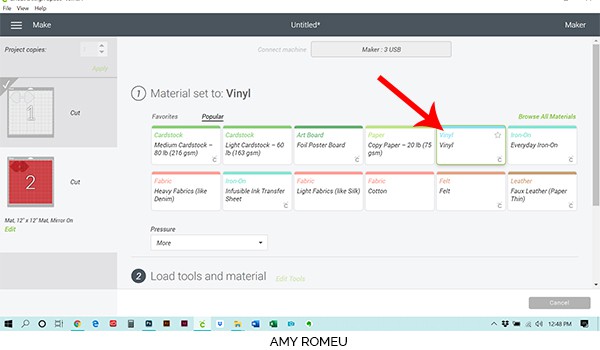
Next we need to choose our material. I’ve cut faux leather using a variety of settings, and I’ve found there are so many different settings that work. For this project, I’m going to select Faux Leather (Paper Thin) as my material on my Maker. Even though this material isn’t paper thin, this material setting is an automatic double cut, and that seems to do the trick.
If you don’t have Faux Leather visible as a material option as shown below, you can find it by clicking on “Browse All Materials” and searching for Faux Leather (Paper Thin).
I changed the pressure setting to MORE. You may not need to adjust the pressure, depending on how your machine cuts.
Cricut Explore Air 2 users can turn the Smart Set Dial to Custom and select Faux Leather (Paper Thin) as the material. You’ll also use the Fine Point Blade.
Press the C button on your Cricut machine and it will start cutting.
Unload your mat by pressing the double arrows button again.
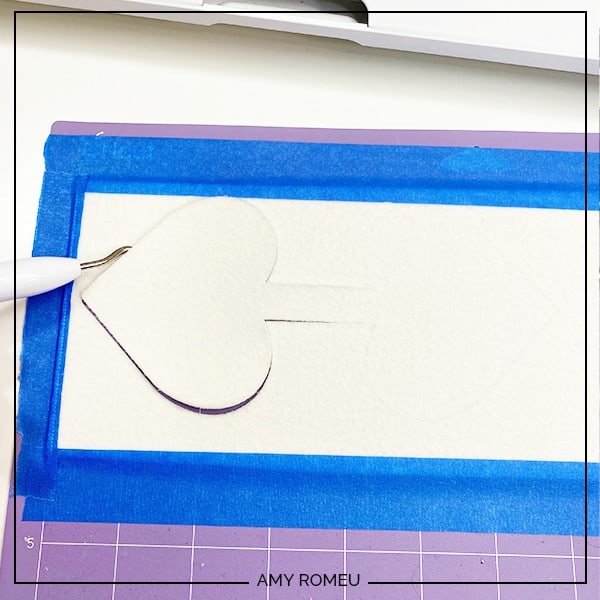
Use your weeding tool to release your keychain shape from your mat. It should come right out. If not, you can use small scissors to make any necessary snips. I use my 4 inch curved tip Fiskar scissors when I need to trim very small areas of faux leather.
STEP 7 – Prepare HTV Mat For Cutting
Now it’s time to cut our HTV for our keychain. Go back to Cricut Design Space and look at the second mat preview. Click EDIT and then toggle the Mirror button to ON (green). Scroll down and click DONE.
Hover your mouse over the second mat again and see what size piece of HTV we need to cut. This preview shows we need a piece a about 6 inches wide and 4 inches wide.
Double check now that your text is mirrored!
Cut a piece of HTV that’s about a half inch larger than the size you noted from the mat preview. Press it firmly SHINY SIDE DOWN on your standard green cutting mat, in the top left hand corner. Load your mat into your Cricut.
In Cricut Design Space, choose Vinyl as your material. I leave the cut pressure setting at Default, but you can adjust your setting if you know your machine needs an adjustment.
Press the C button to begin the cut.

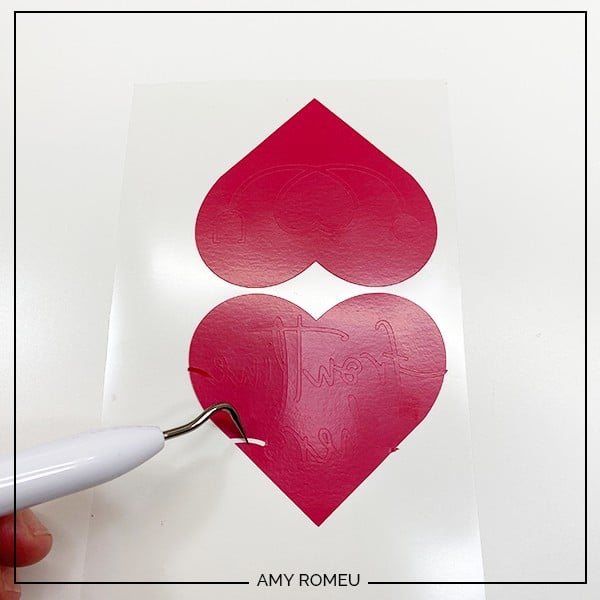
Unload your mat by hitting the double arrows button again. Use your weeding tool to remove the excess vinyl. Remember in this design, the heart remains and the letters are weeded away.
Now we’re ready to assemble the keychain!
STEP 8 – Assemble the Keychain
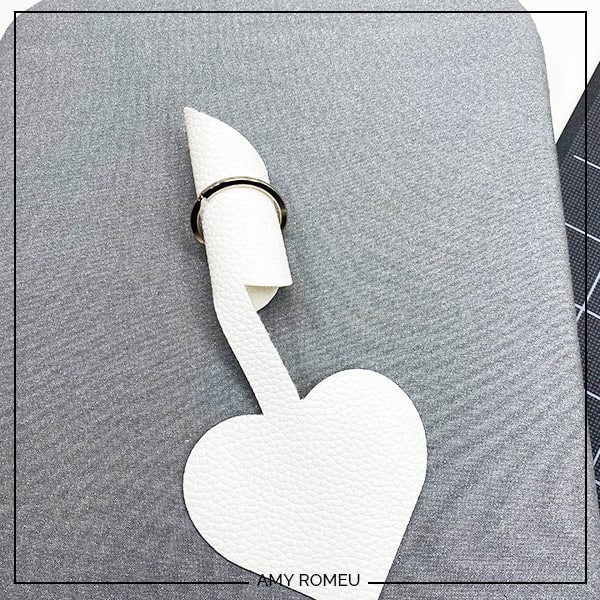
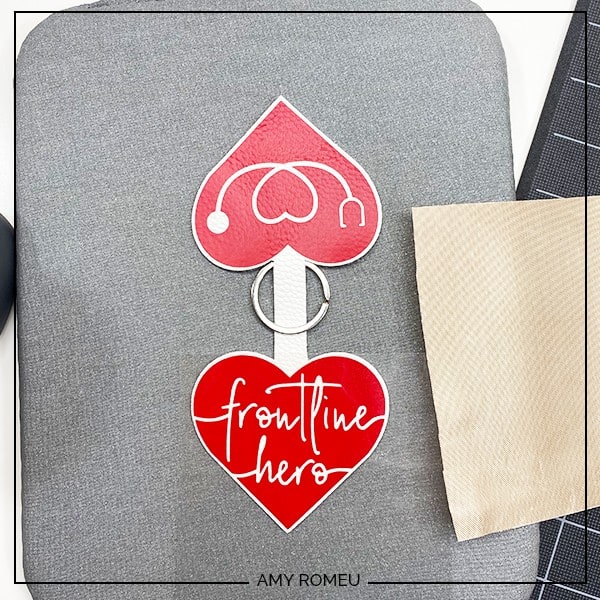
Cut the two vinyl heart shapes apart so you can press them one at a time. Thread your key ring onto your white faux leather before pressing. This way you don’t have to bend the faux leather and vinyl to get it through the key ring after.
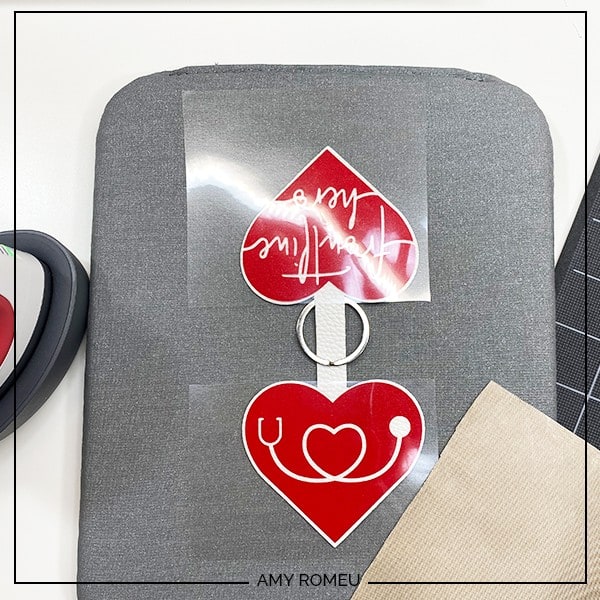
I used the lowest heat setting on the Easy Press Mini for this project. Using your Easy Press Pressing Pad or a towel, lay the HTV on top of the faux leather and then cover with a teflon sheet or parchment paper (not wax paper).
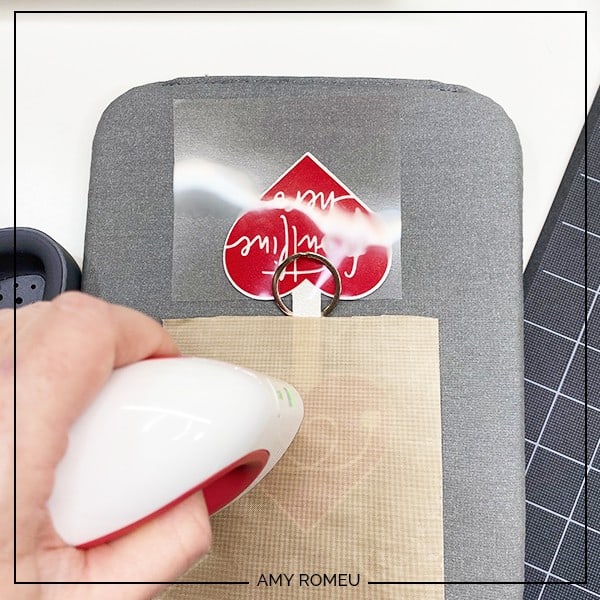
Gently press while moving the heat around all over the HTV for 10-15 seconds. If you aren’t using a cover sheet, be sure not to press the Easy Press Mini on the faux leather directly, only on the clear transfer tape.
Repeat pressing for the other HTV piece, and then carefully peel the protective layer off both sides of the key ring. If any parts didn’t stick down, just press them a little more.
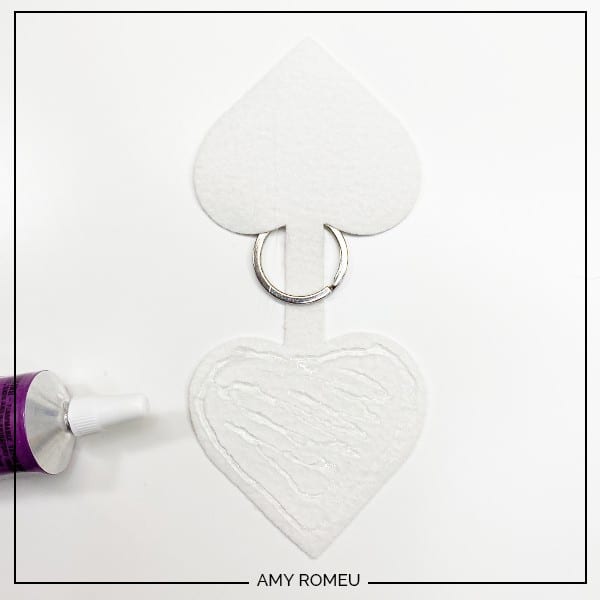
Now it’s time to glue the front and back of the keychain together. I used Quick Hold glue, but you can use E6000 or whatever fabric glue you have at home.
If you didn’t put your key ring on your keychain before, now is the time to do it!
Carefully apply small dabs of glue on the back of one side of the keychain. Apply the glue close to the edges but allow some room for the glue to spread.
Fold the glued and unglued halves together, line up the edges so they match perfectly, and press down.
Now place the newly glued keychain under something heavy like a book for a few hours to dry. If you used fabric glue, allowing your keychain to dry overnight is best. Check the seams between the two halves the next day and see if there are any places that need additional glue, especially near the key ring. If you used a faux leather with different colored backing than the front, you can color the edges of your keychain with a Sharpie if you’d like.
STEP 9 – Add a Tassel (Optional)
If you want to add a tassel, use your two pliers to open your 10mm jump ring.
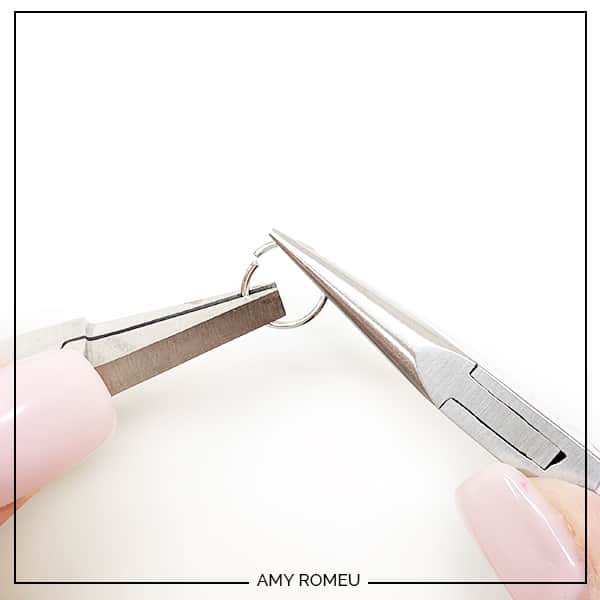
Slide the tassel onto the jump ring. Then slide the jump ring onto the key ring, and use the two pliers to close the jump ring. That’s it!
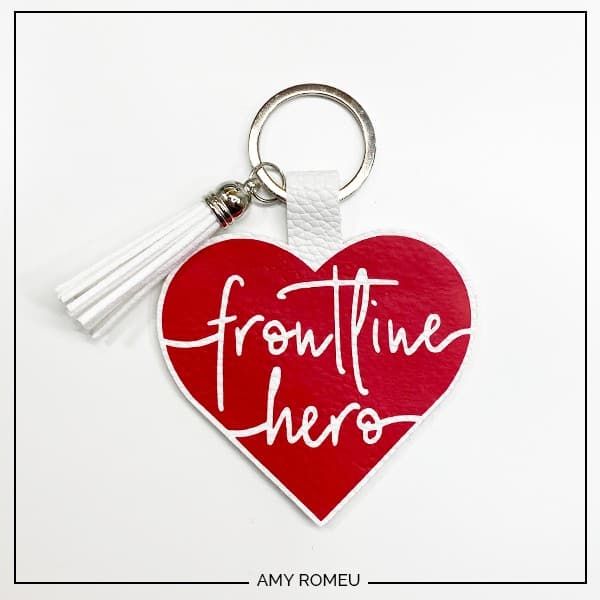
Are you going to try this project? If you do, please post a comment and attach a photo of your finished Frontline Hero keychain. Be sure to let me know who you made it for, and why they are a Frontline Hero!
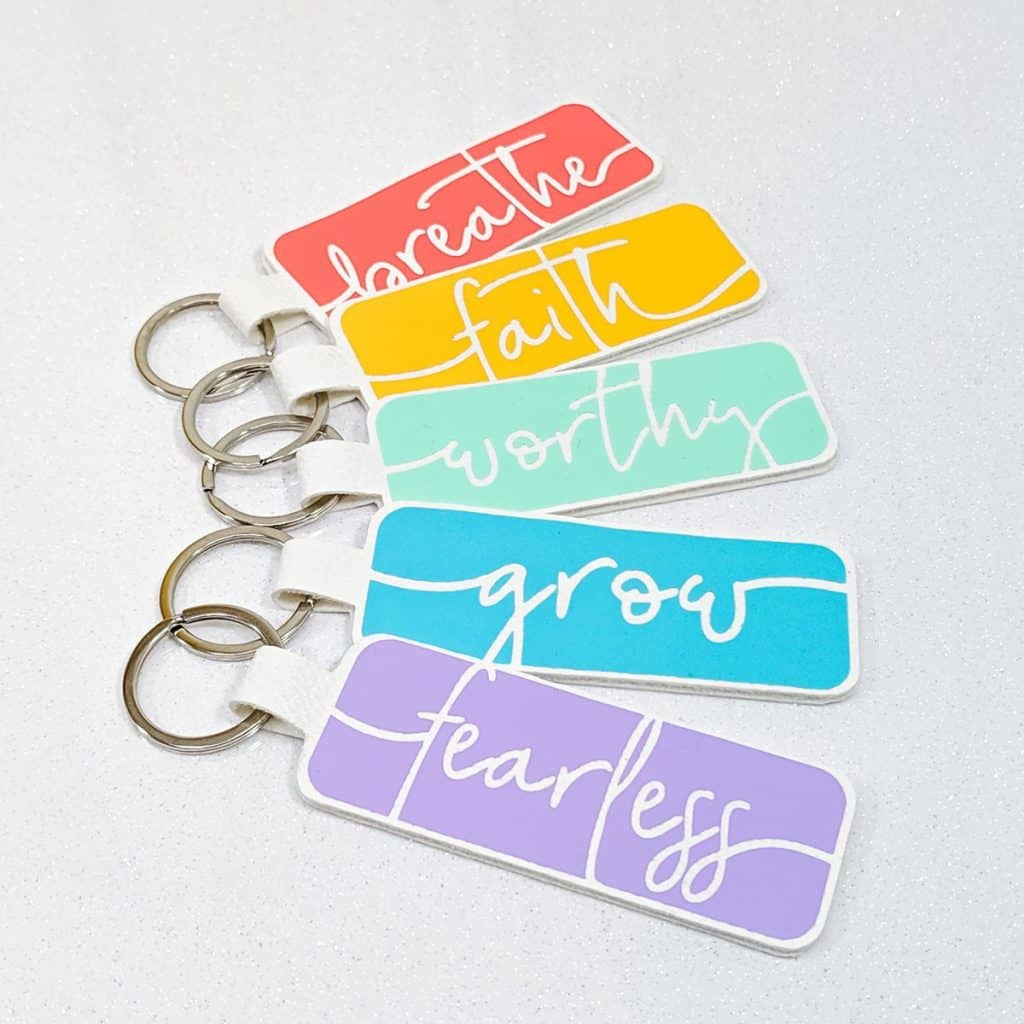
p.s. If you liked this project, you may also like my very popular “Word of the Year” Key Chain project. Check it out by clicking here.
Want to see all of my Cricut earring & jewelry tutorials? CLICK HERE
Until next time… and happy creating!

Want the FREE SVG files so you make these Frontline Hero Keychains yourself?
Get it from our Resource Library! You’ll receive the password for the Resource Library instantly after filling out the form below!
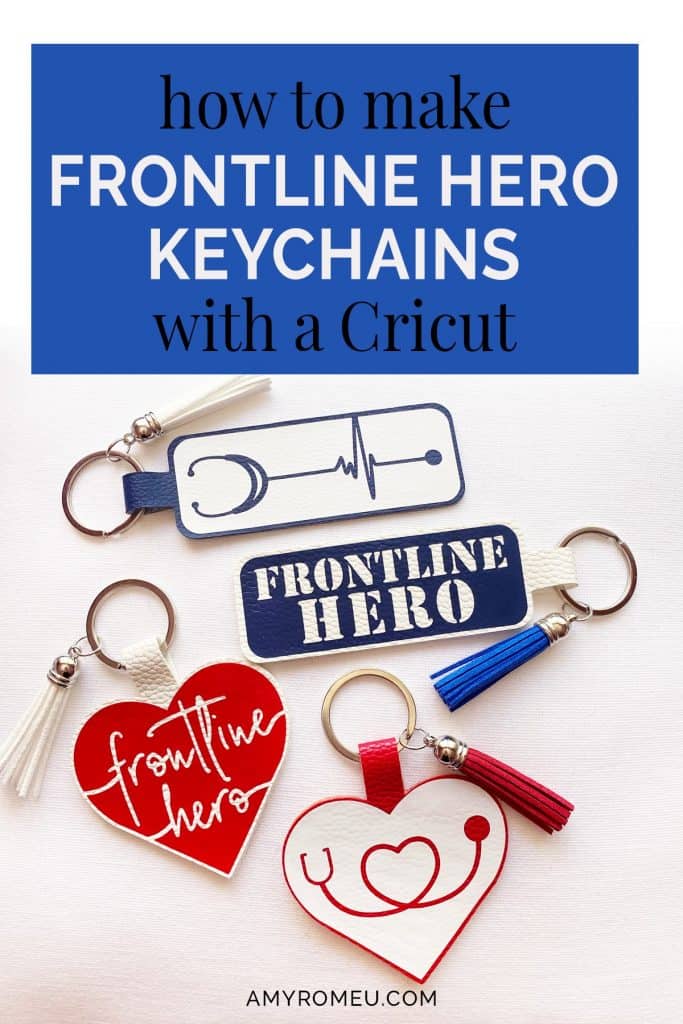
Want to remember this? Post this DIY CRICUT FRONTLINE HERO KEYCHAIN project to your favorite Pinterest board!

These are great! Thank you!
Thank you so much, Jamie Rose! I’m glad you like them.
I think these are absolutely wonderful. Am going to start making some tomorrow. My question is, can the wording on both sides be changed to anything different?
Hi, Cathy! I’m glad you like them. The text on the design can’t be customized, but you can definitely create your own text in Cricut Design Space. Download and open my freebie designs for this project. Then use the measurement for the text box shape to create a new rectangle shape with the same size. Finally, write out the word you want, layer it over your new box, and slice. I hope that helps!
Also, the script font is called Glorious. I bought it on Creative Market. It’s one of my favorite fonts! The link to Glorious is here: https://crmrkt.com/aBXGKo